Sherry’s Sweet Strawberry Quilt
Excited to share this darling strawberry quilt that Sherry made for her granddaughter. I have oodles and oodles of pictures and links to everything I used.
The pattern is called Sweet Strawberry by Heather at My Sew Quilty Life. You can find a link to the PDF pattern here: https://www.mysewquiltylife.com/product-page/sweet-strawberry-pdf-pattern

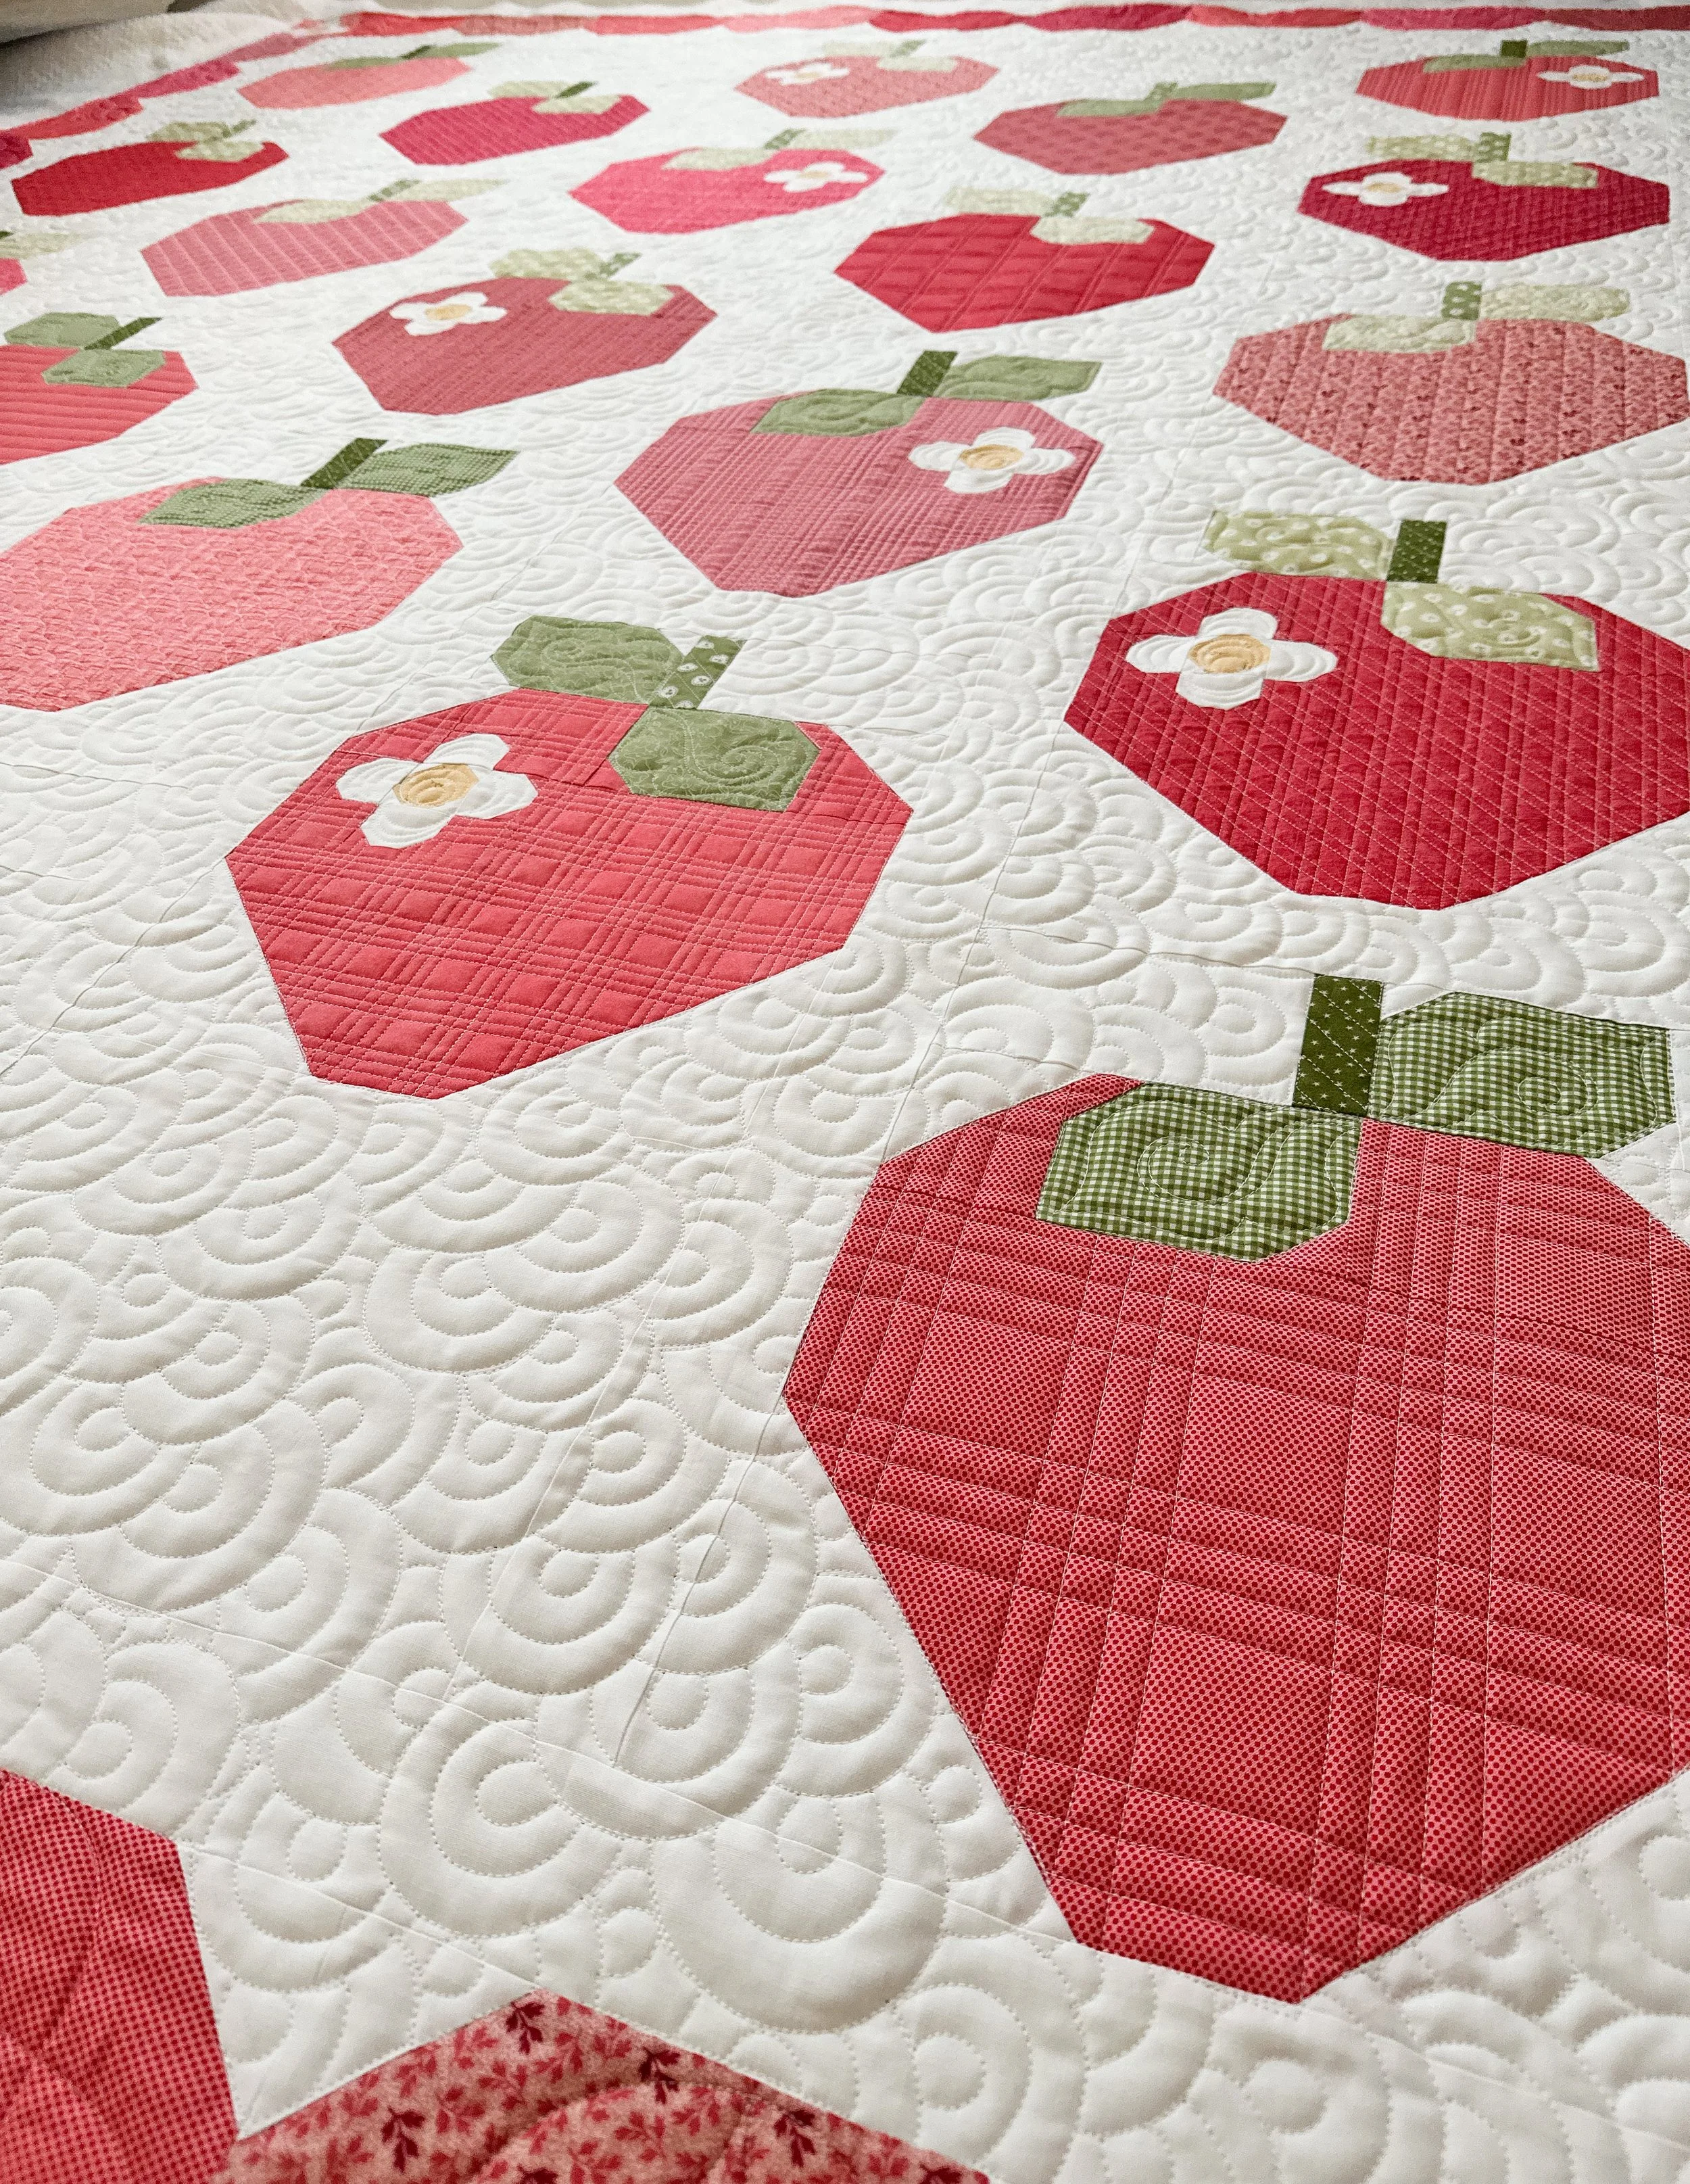
When I first saw this quilt and Sherry really wanted it custom quilted, I knew that I wanted to quilt my Overlapping Circles in the background. It’s a fun design to quilt and it allows me to stop and quilt the strawberries as I come to each one. Continuous custom quilting is so much more efficient. Plus that quilty texture is soooo good. Check out the short video clip I made on my YouTube: https://youtube.com/shorts/Vij14RLCKAs?si=rdYlCehqihfv1av1
If you’re interested in learning how to quilt Overlapping Circles or a variety of other designs, check out my Quilting It Freemotion video course. You can pick and choose whichever design you’d like to learn or get the bundle of all 10 videos. Go to: https://www.quiltingit.com/quilting-it-freemotion-course

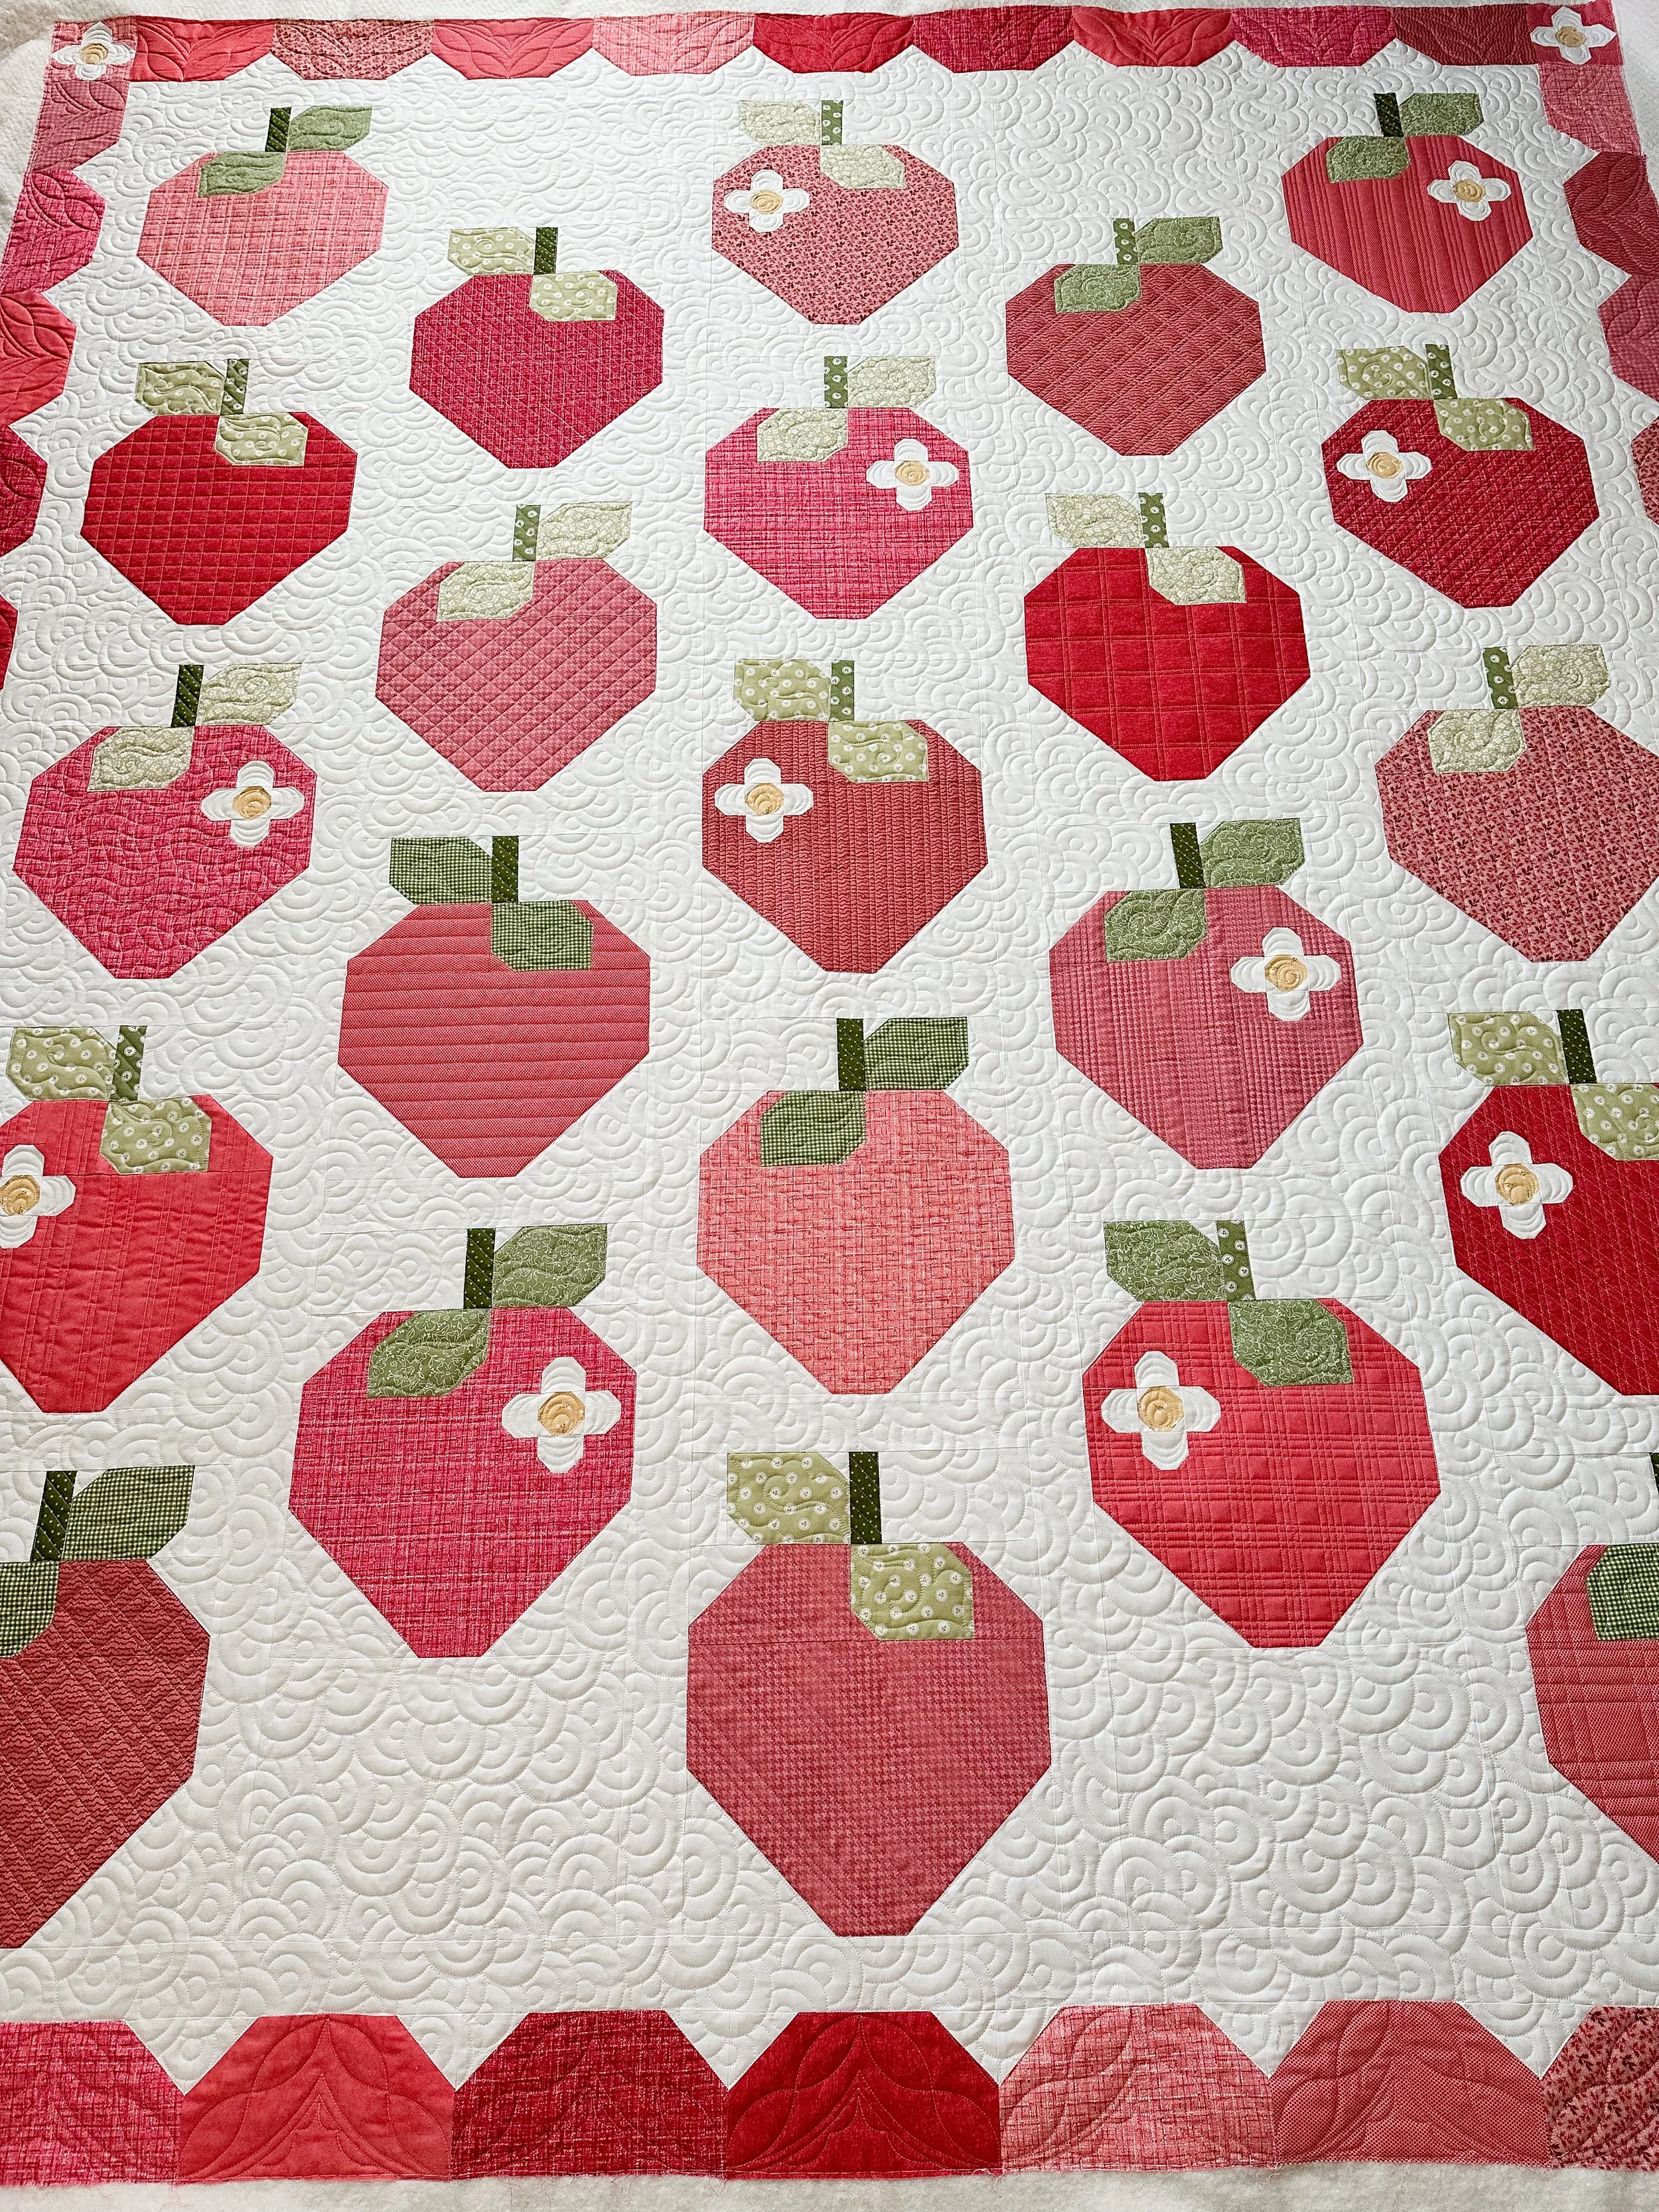
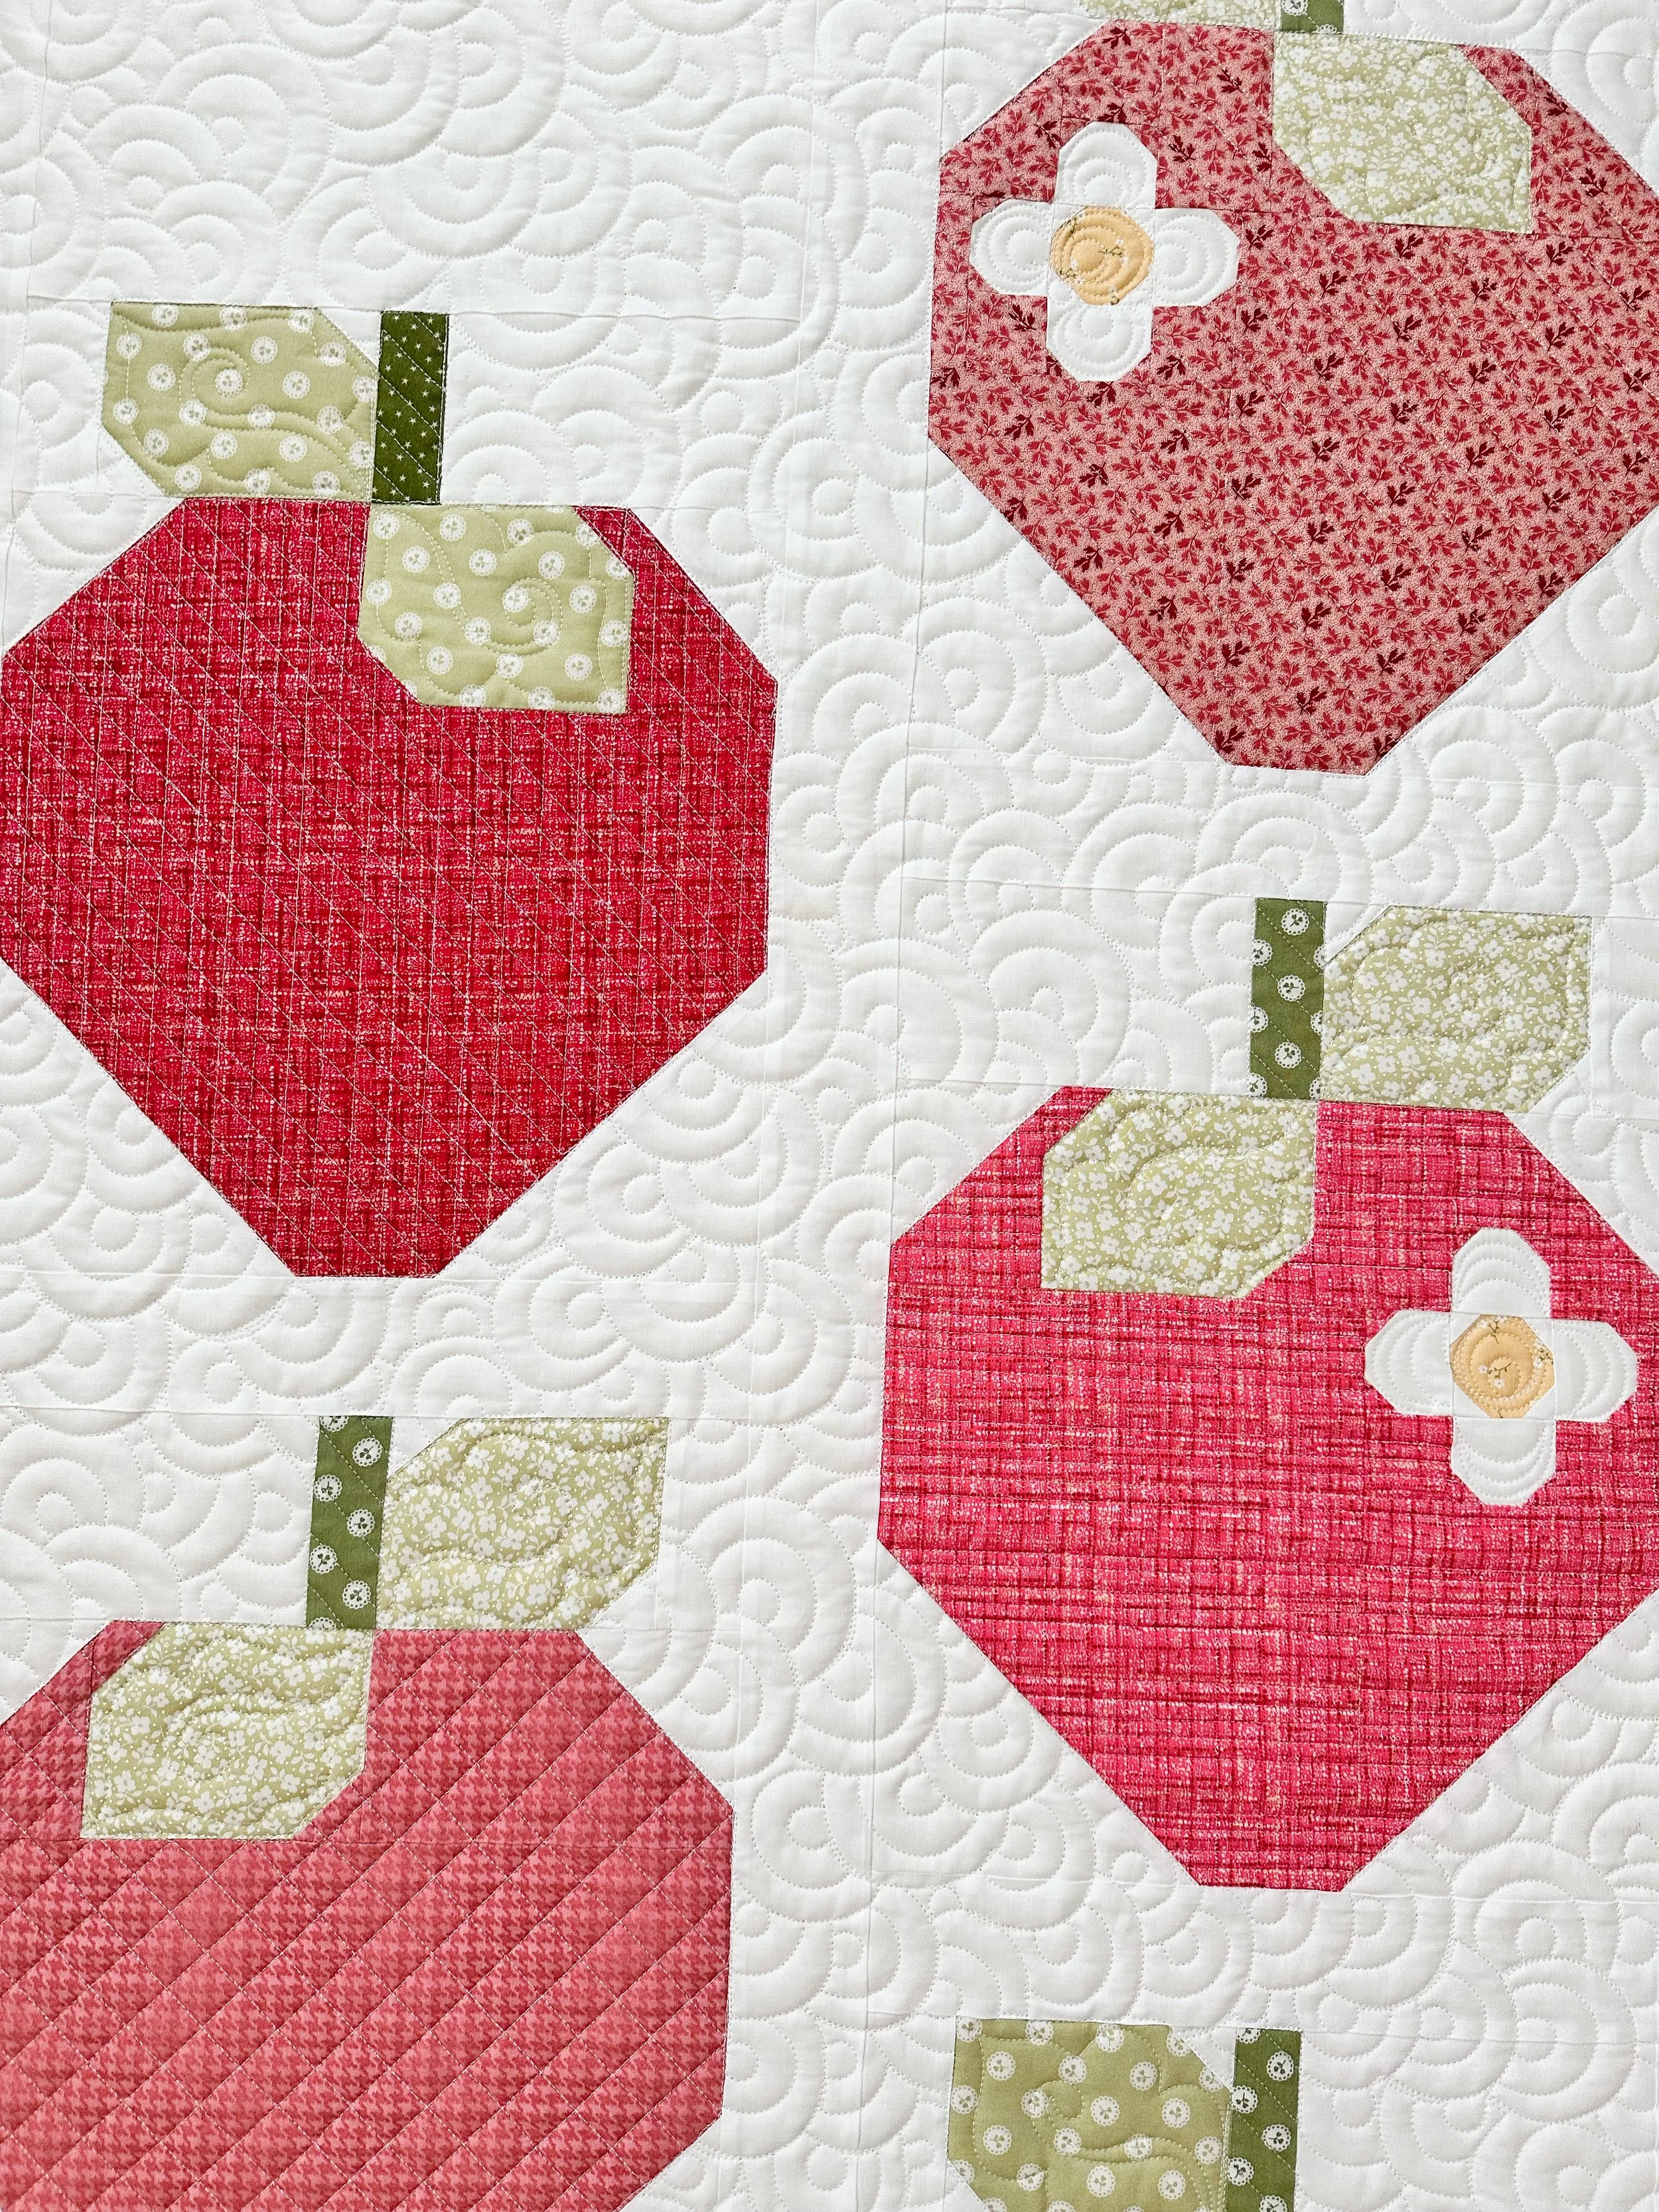
In the strawberries I quilted a variety of different variations of lines, so no two strawberries are the same. I’ve done this on other quilts and it turns out beautifully because the overall design is cohesive. For all the lines I used my favorite Edge rulers from Linda at The Quilted Pineapple. Go to: https://www.thequiltedpineapple.com/shop/
Diagonal lines with different spacing or a grid with varying lines. Some are simple, while others took me a little longer to quilt.

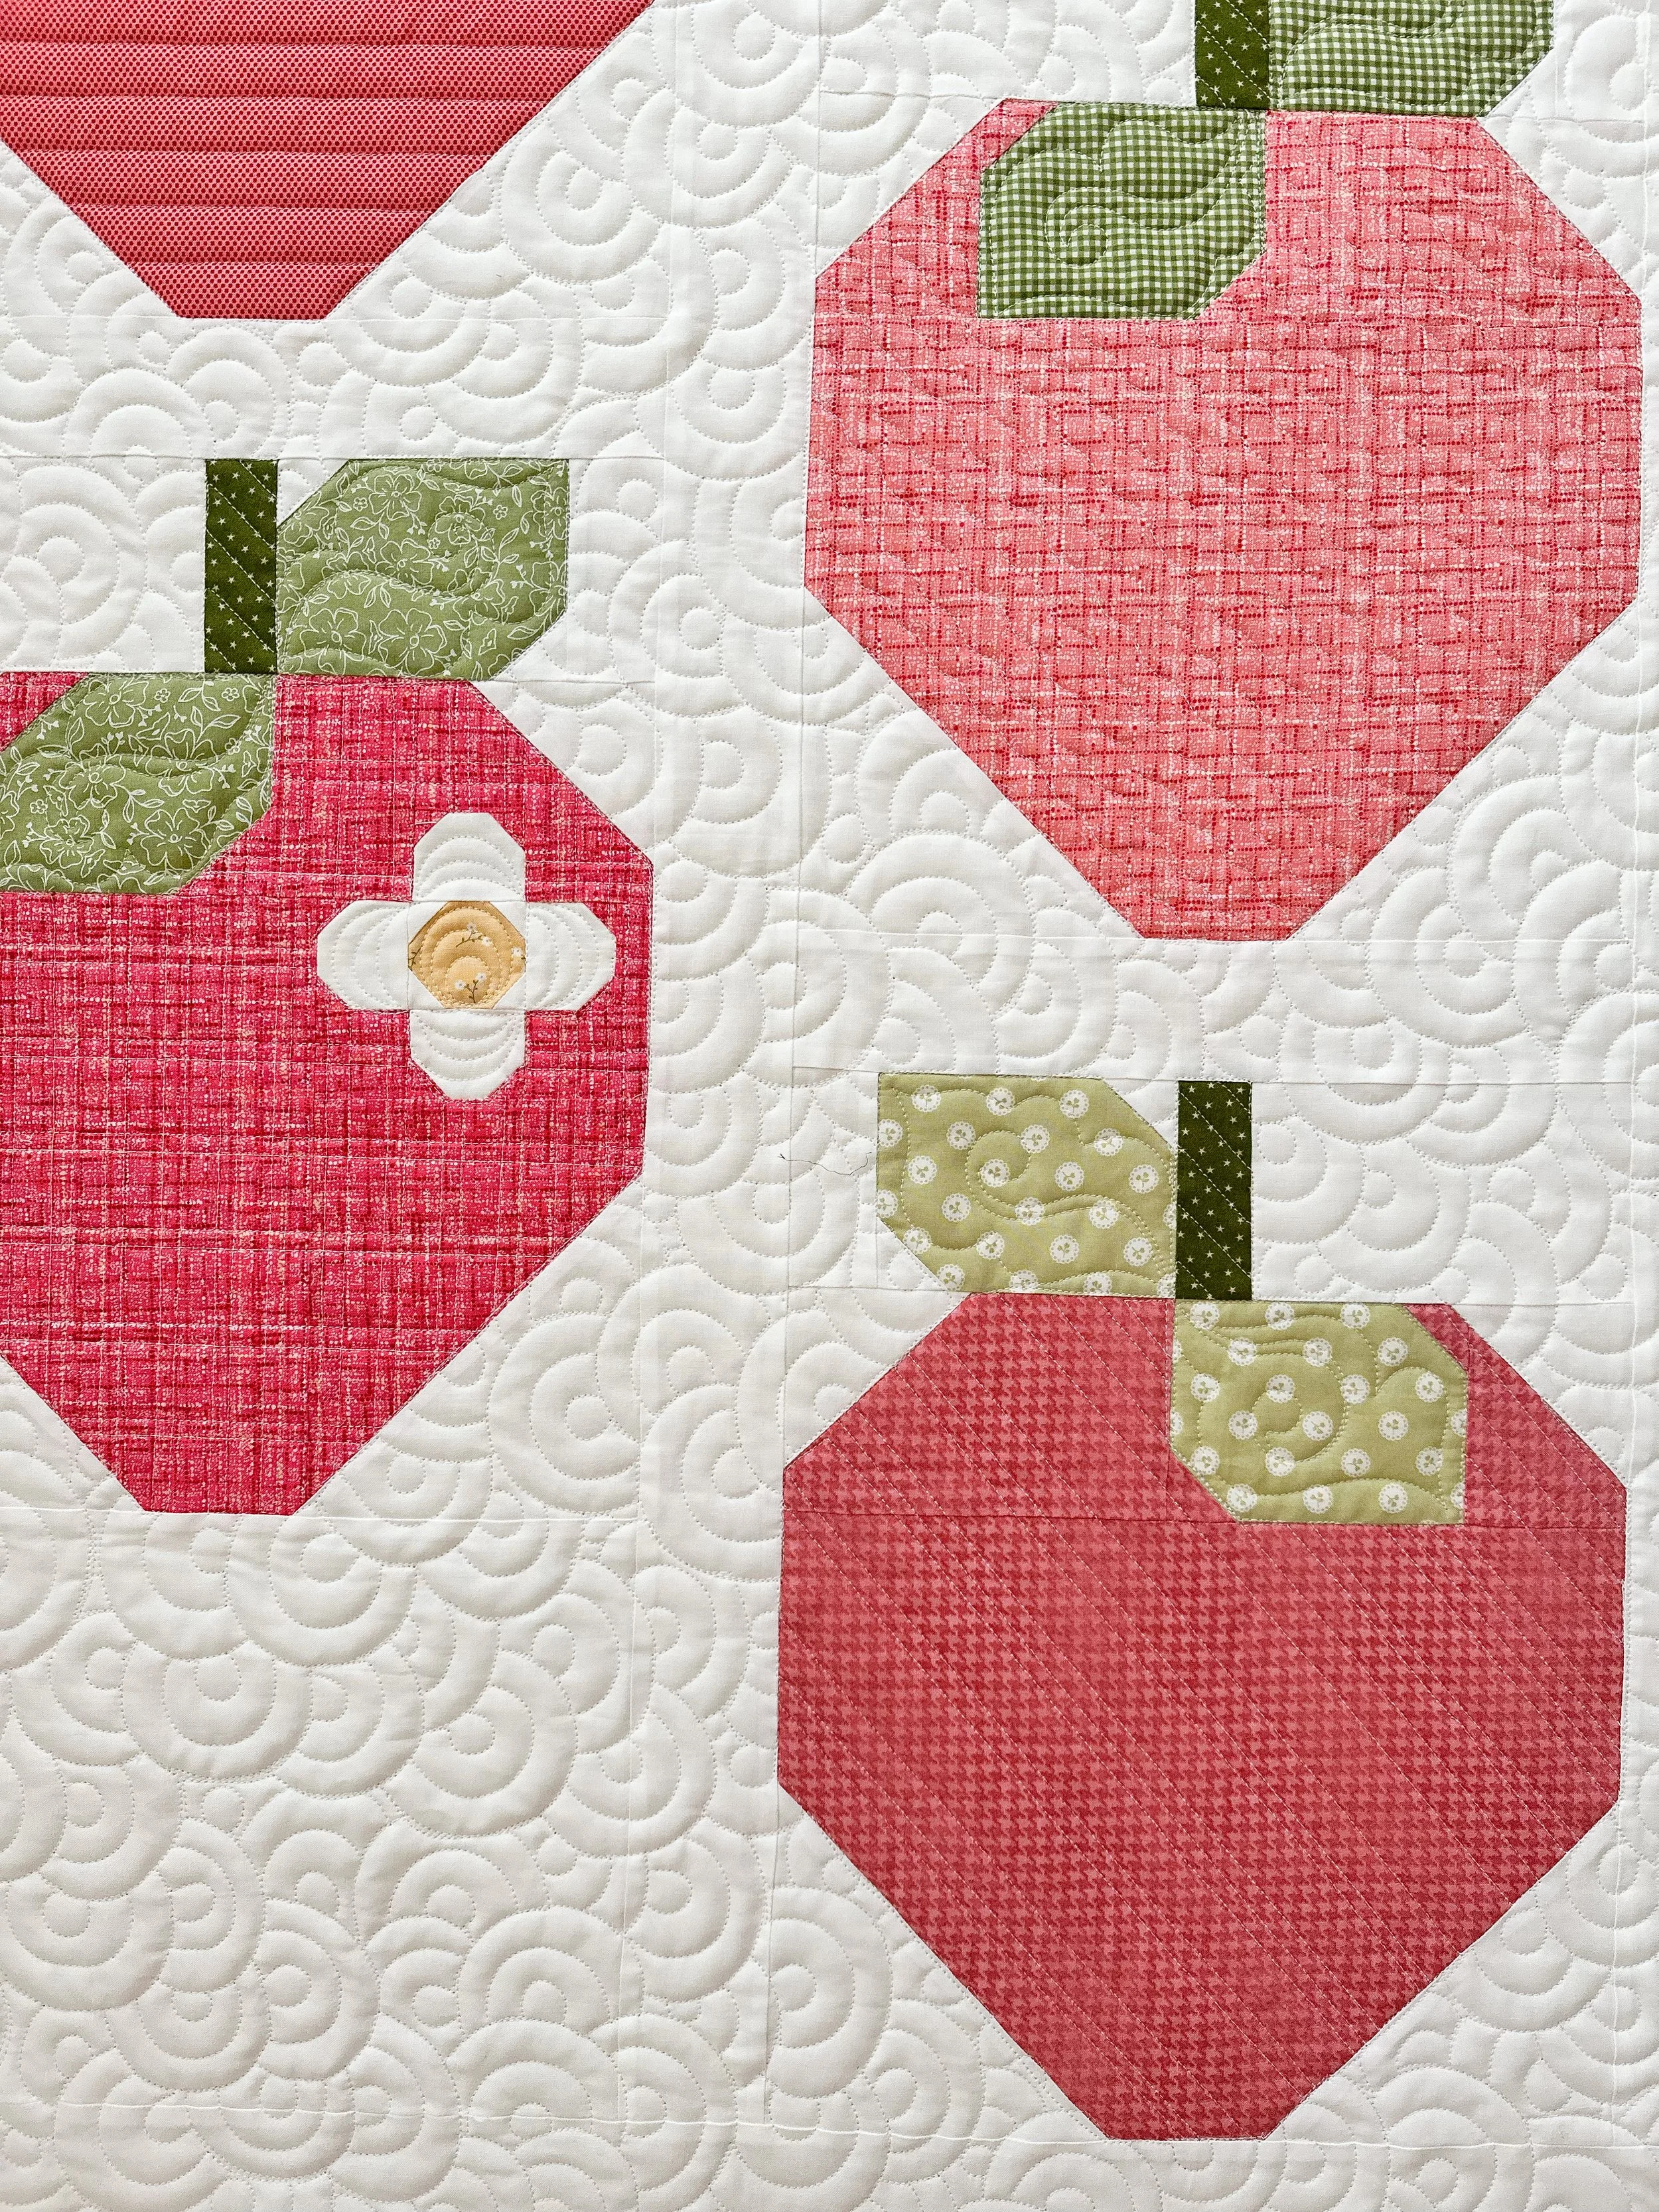
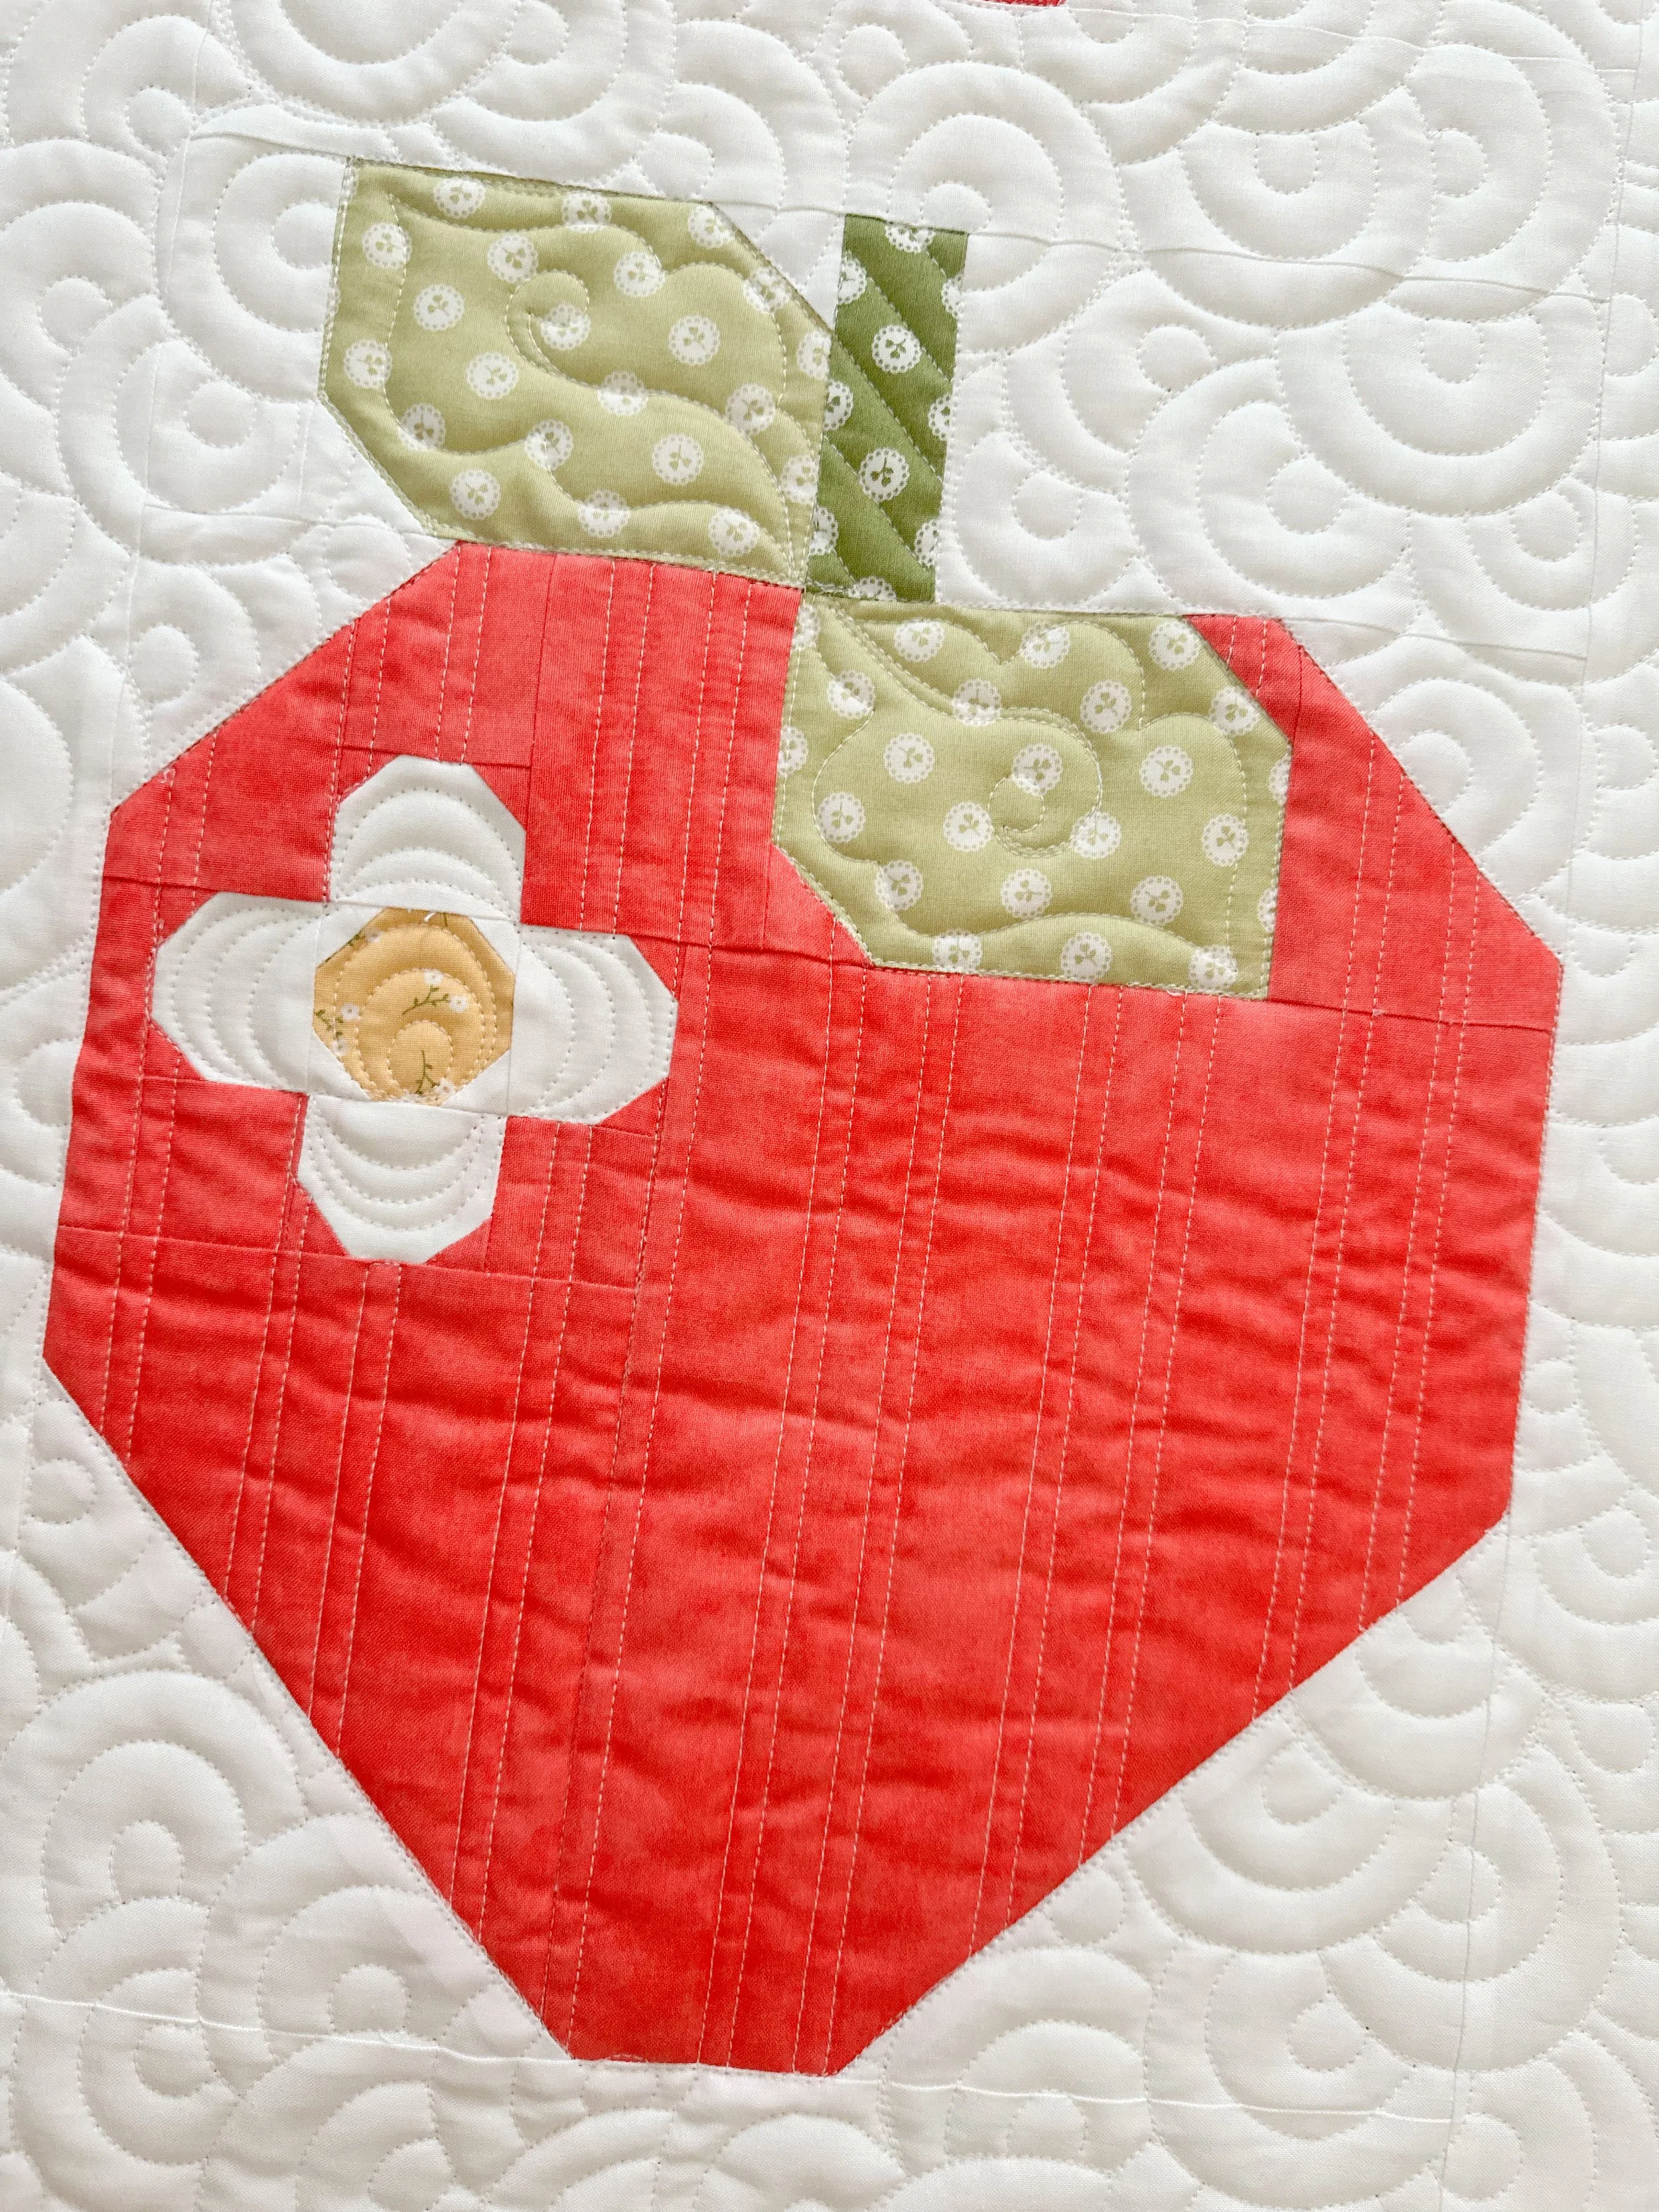
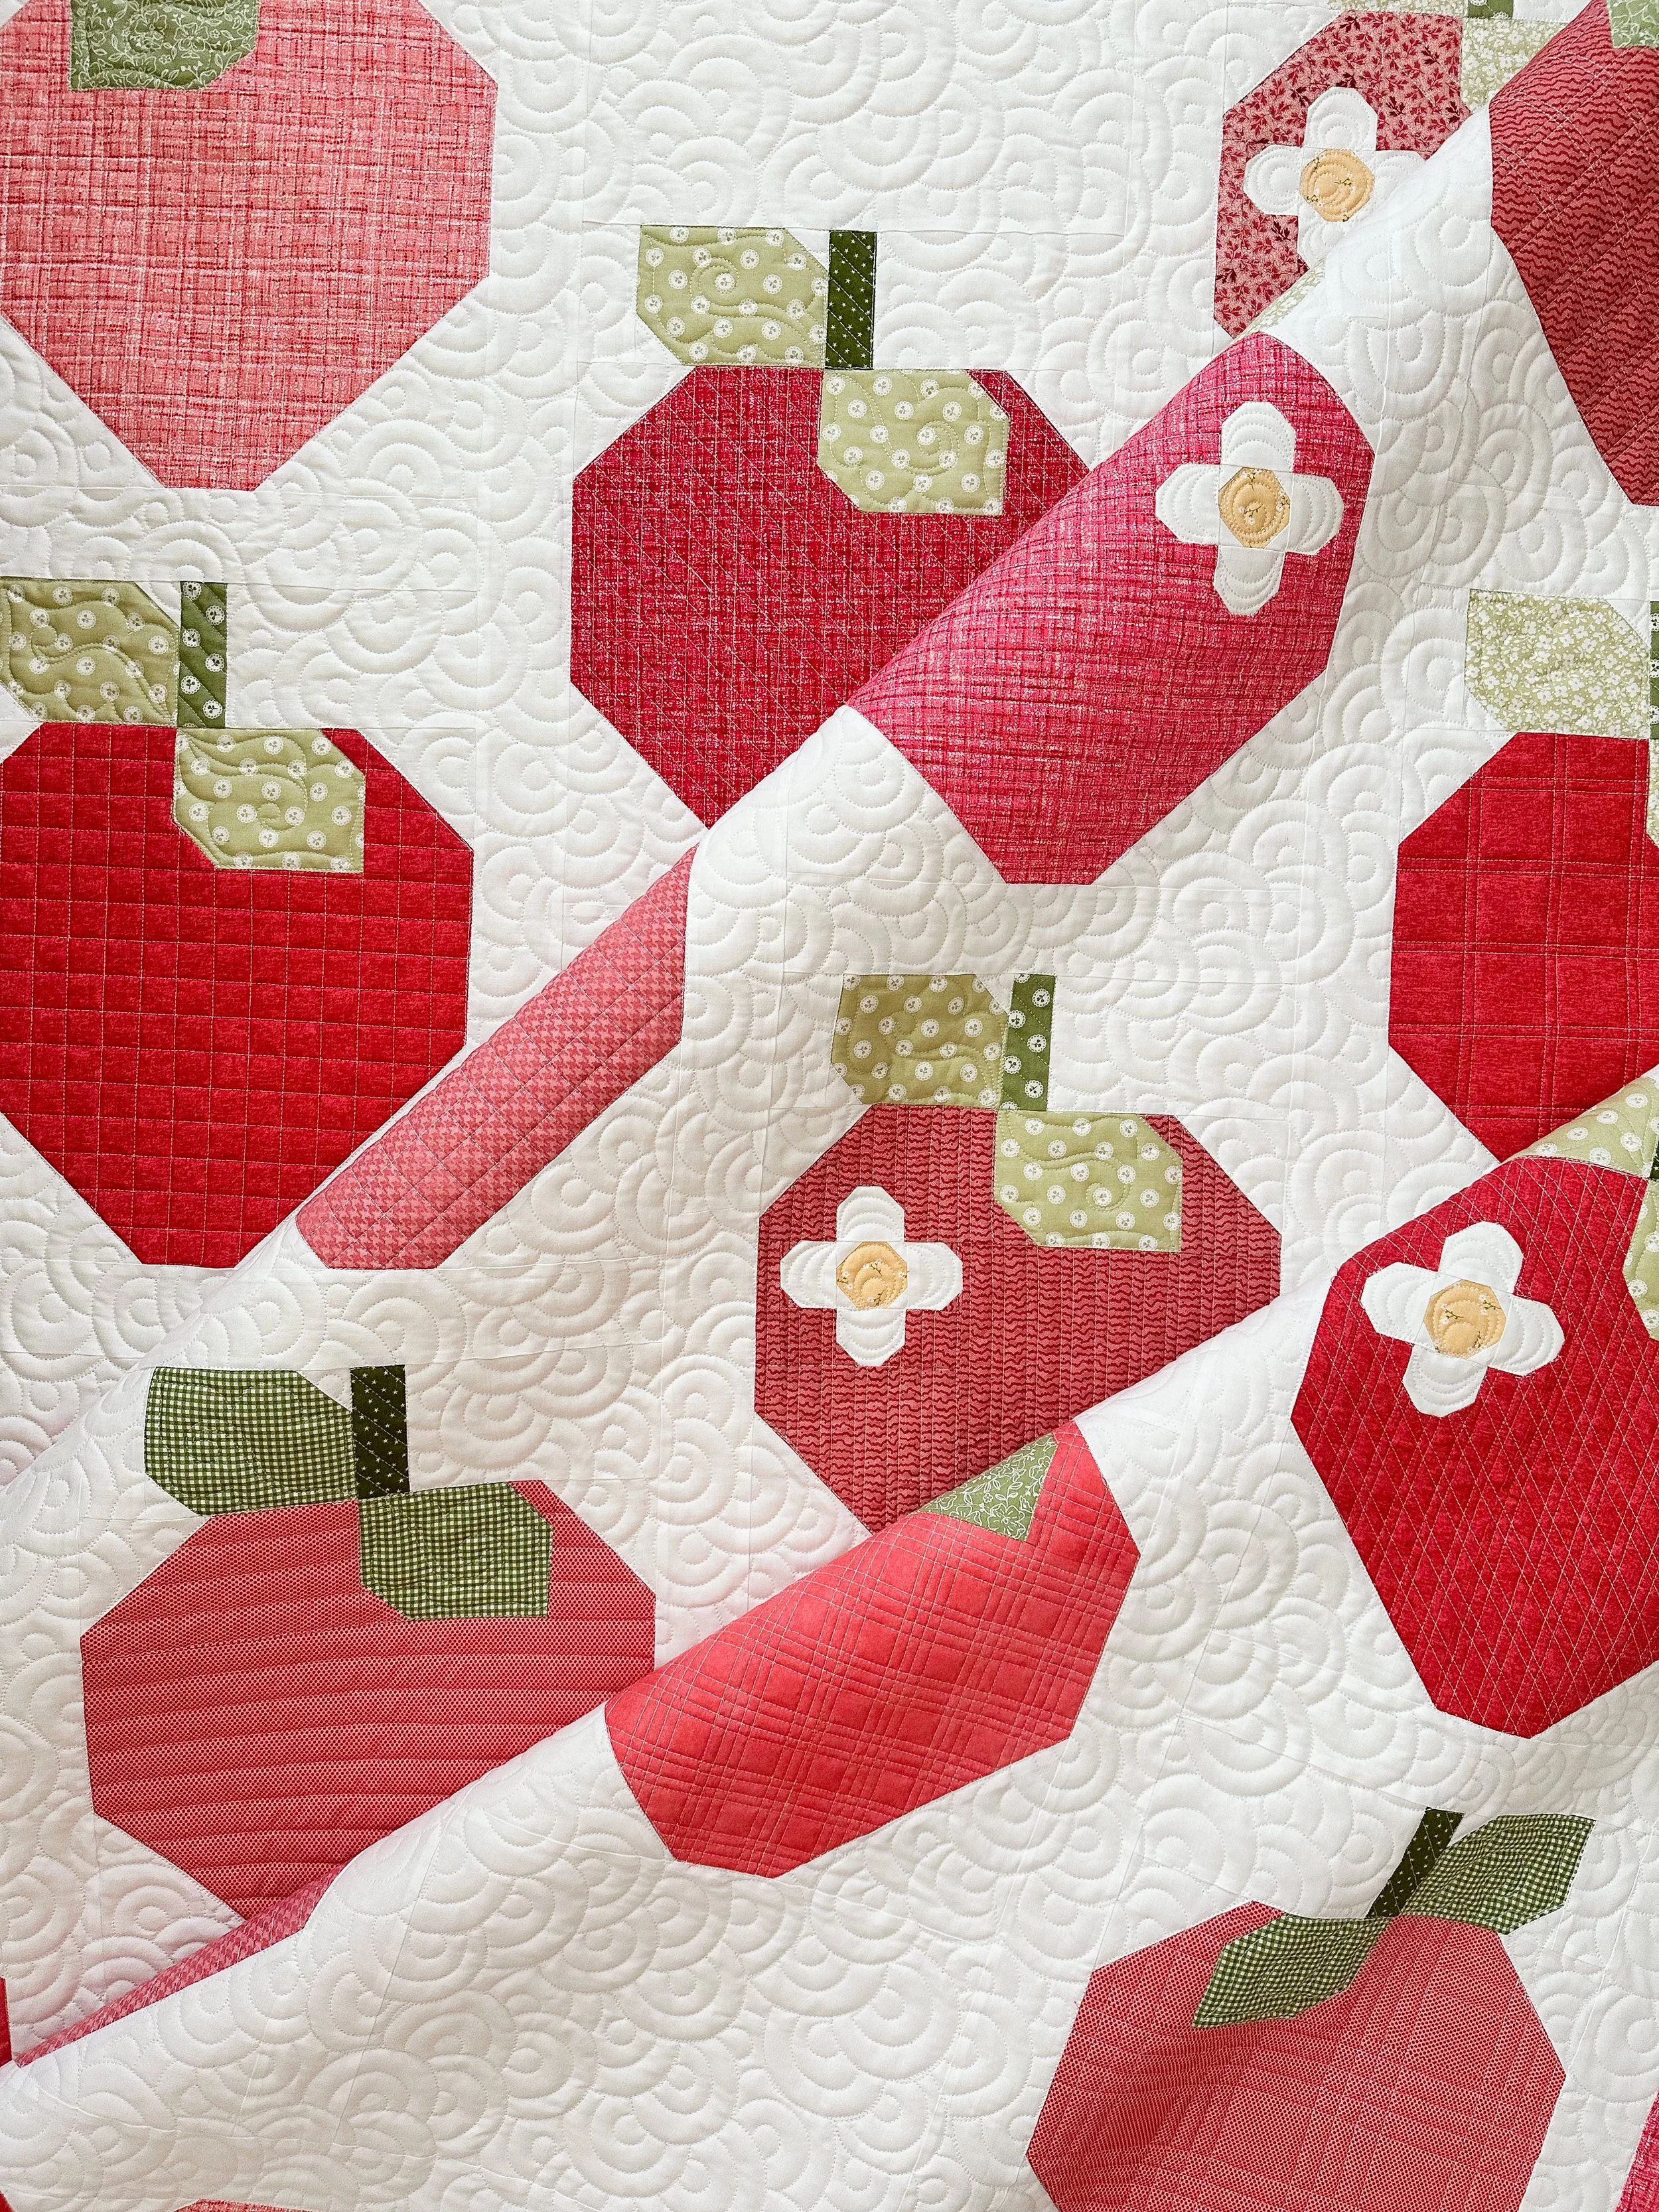
It’s fun to see how the 8020 batting from Winline Textiles amplifies the quilted texture. Like the strawberry in the bottom left of the picture below. I quilted seven 1/4” lines together and then left a 3/4” space between the next set of lines. That 3/4” stripe pops because of the density of the group of seven 1/4” lines.
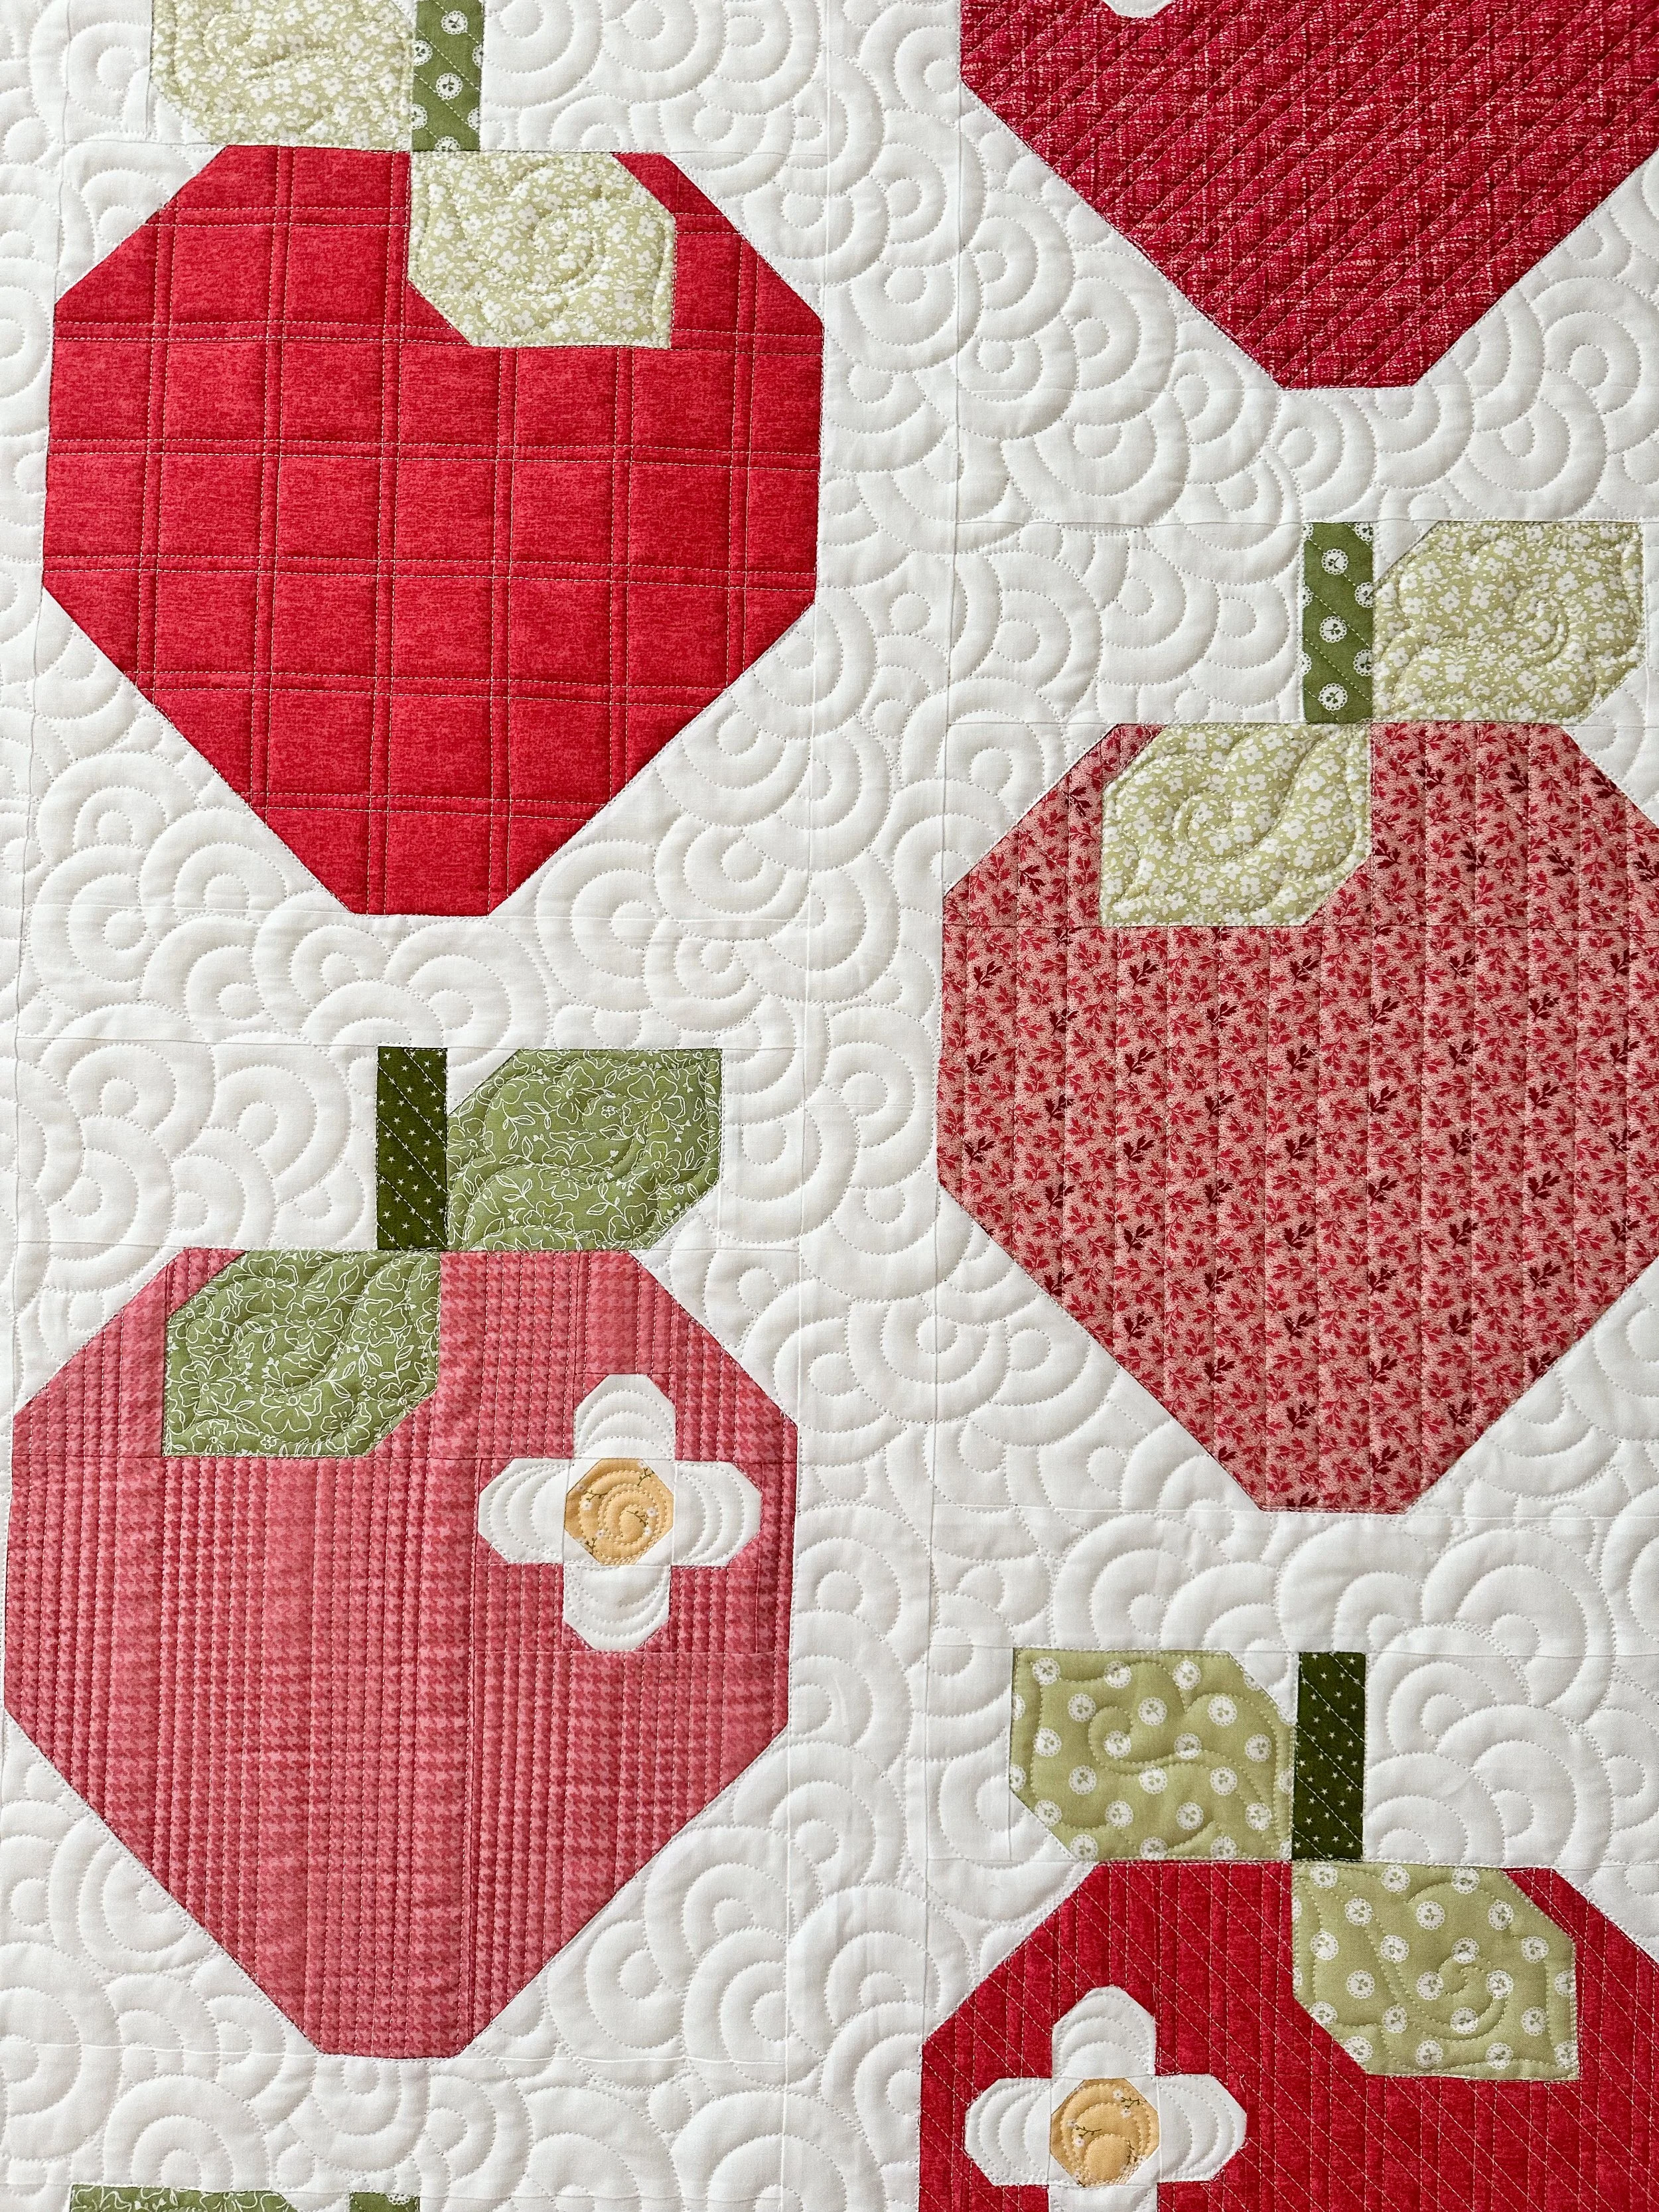
I even added a couple of wavy lined strawberries, because why not!
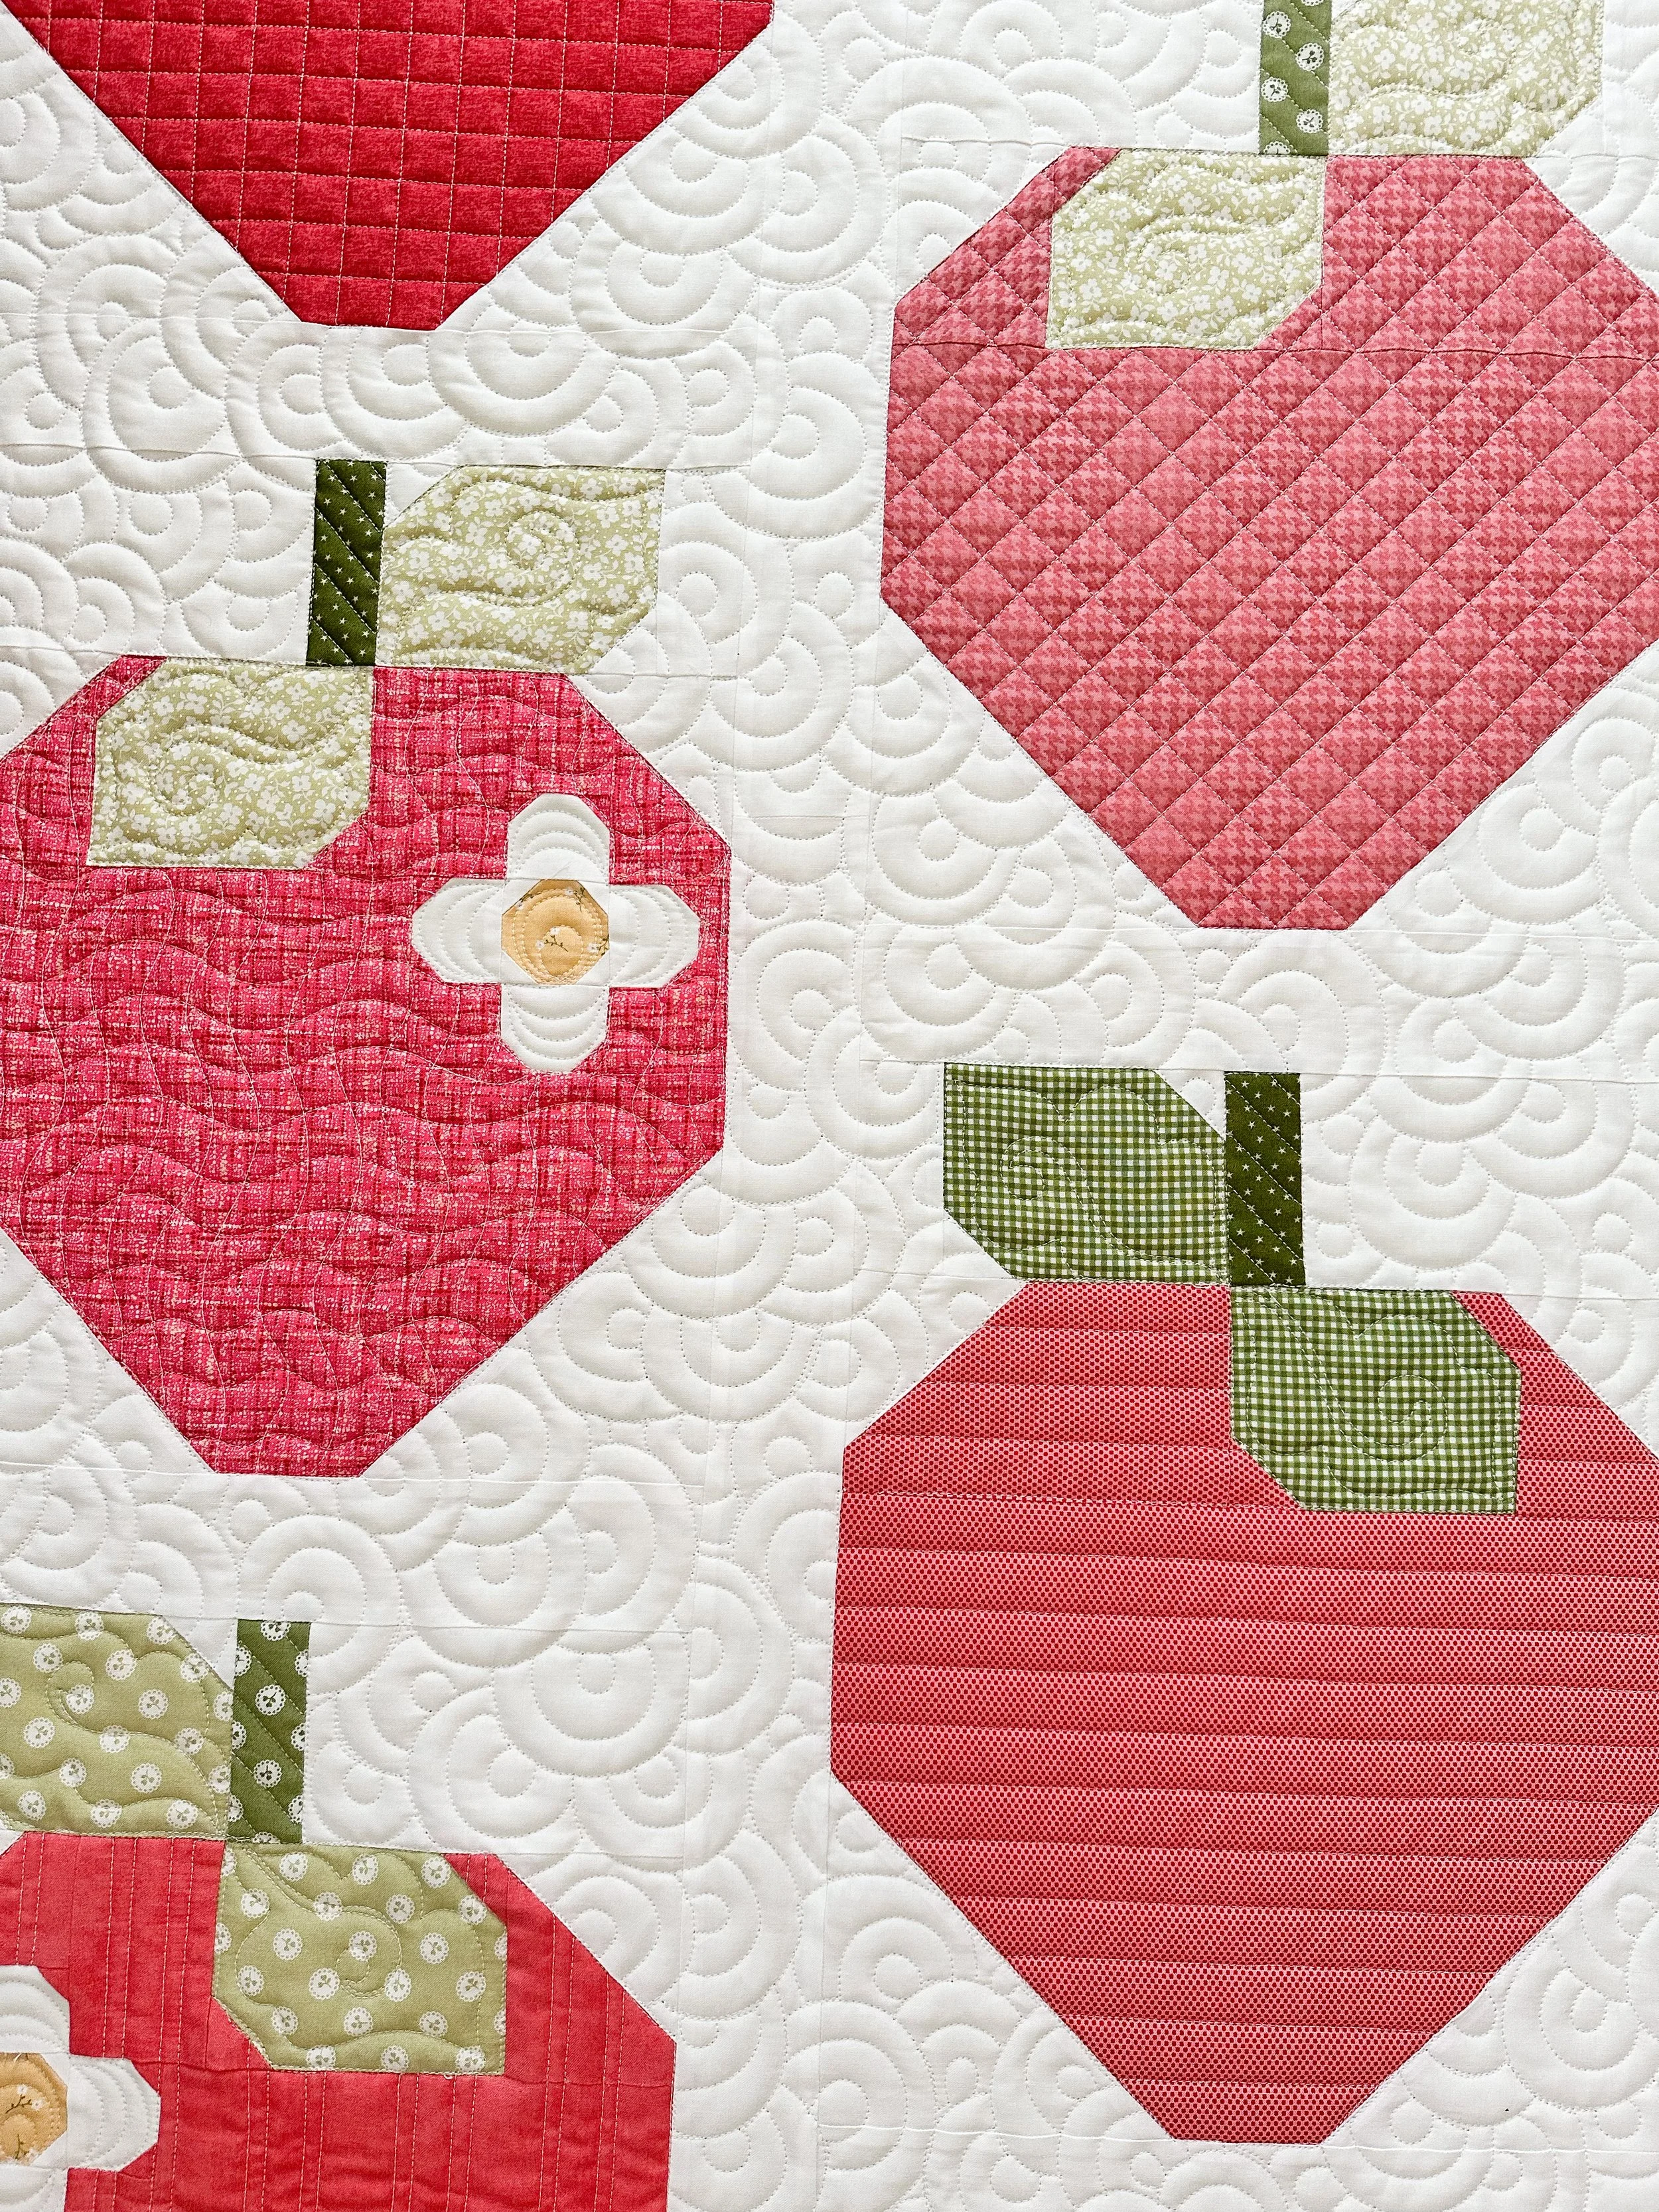
Simple 1/2” horizontal lines even create beautiful texture.

Hope you trim and zoom in to see the lines closer up.
I used Natural White Omni thread from Superior Threads on the entire quilt, which blends beautifully on all the fabrics. Go to: https://www.superiorthreads.com/omni-3002-natural-white/p/134-02-3002?show=Cones and don’t forget to use my non-affiliate code “ASTLEISHA” at checkout to get 15% off.

I loved how the strawberries turned out, and here are a few of my favorites.

Four simple 1/4” lines with an inch space and going both ways creates a beautiful grid.
Simple 1/4” pinstripes are a favorite of mine, but adding different spaces, like the 1/2” between two pinstripes and the one inch space between those lines, creates the sleek stripe design above.

This is the close up on the strawberry with seven 1/4” lines. I love it!!

I couldn’t be more thrilled with how it turned out. 🍓🥰

Sometimes I have a clear vision of what to do on the blocks and background when I’m custom quilting, and then I can get stumped on a border. Which was the case with this one. The shape of the blocks isn’t something I’ve quilted before. So I measured the block itself and then sketched it in graph paper. Then I start filling in the shape with different curves or lines, and this is what I came up with. I added the freehand scallop after seeing the unquilted space above the arc. It creates an almost lace like design. Which adds a perfect texture to the edge of the quilt, which frames it beautifully. Are you interested in watching me quilt a block. Here is a short video. https://youtu.be/cH0jBUauDVA?si=GN6G63VbHesB7dUx
I used my 4”/10” Circle2 ruler to quilt the curves, which are available in a set of 6 in my shop. The ruler sizes range from 2” to 13”. They are made from 1/4” high quality acrylic in the USA. Go to: https://www.quiltingit.com/shop the green 4”/10” is pictured above. Green helps you see the lines on the ruler better, especially on light or white fabrics. The clear ones are great, too. Just a matter of preference, really.
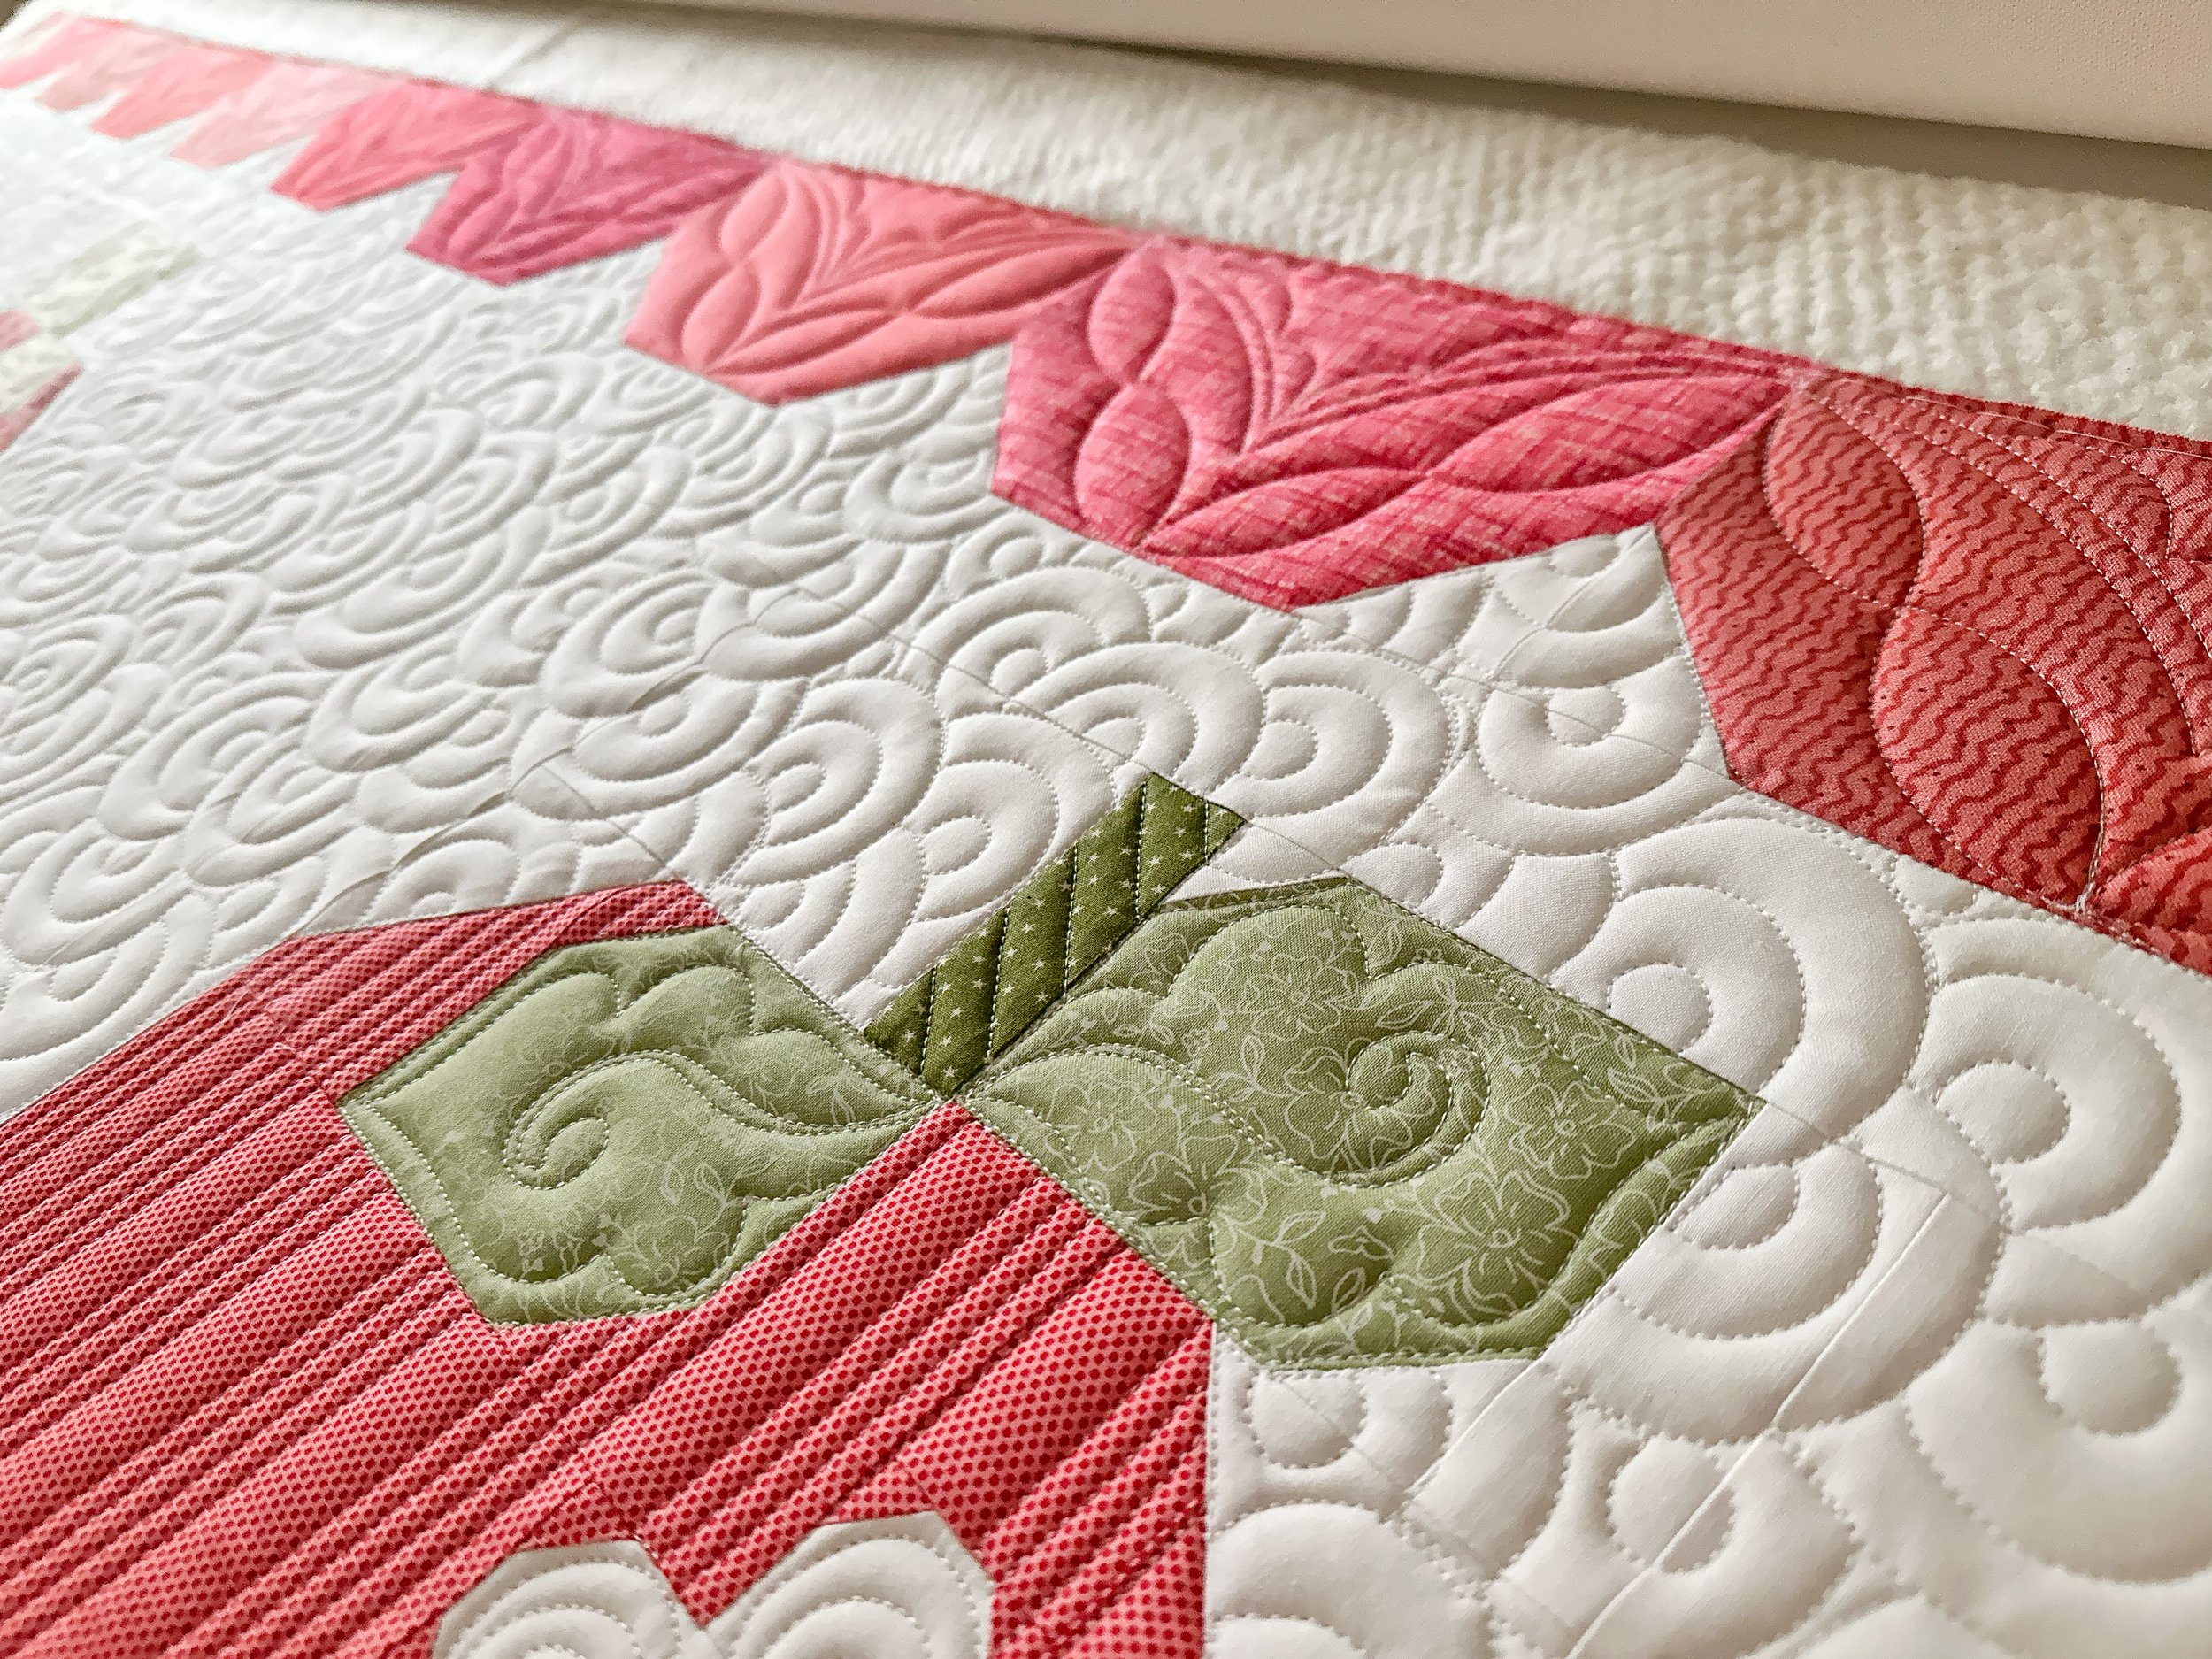
You’ll see above the border design along the top edge of the quilt.
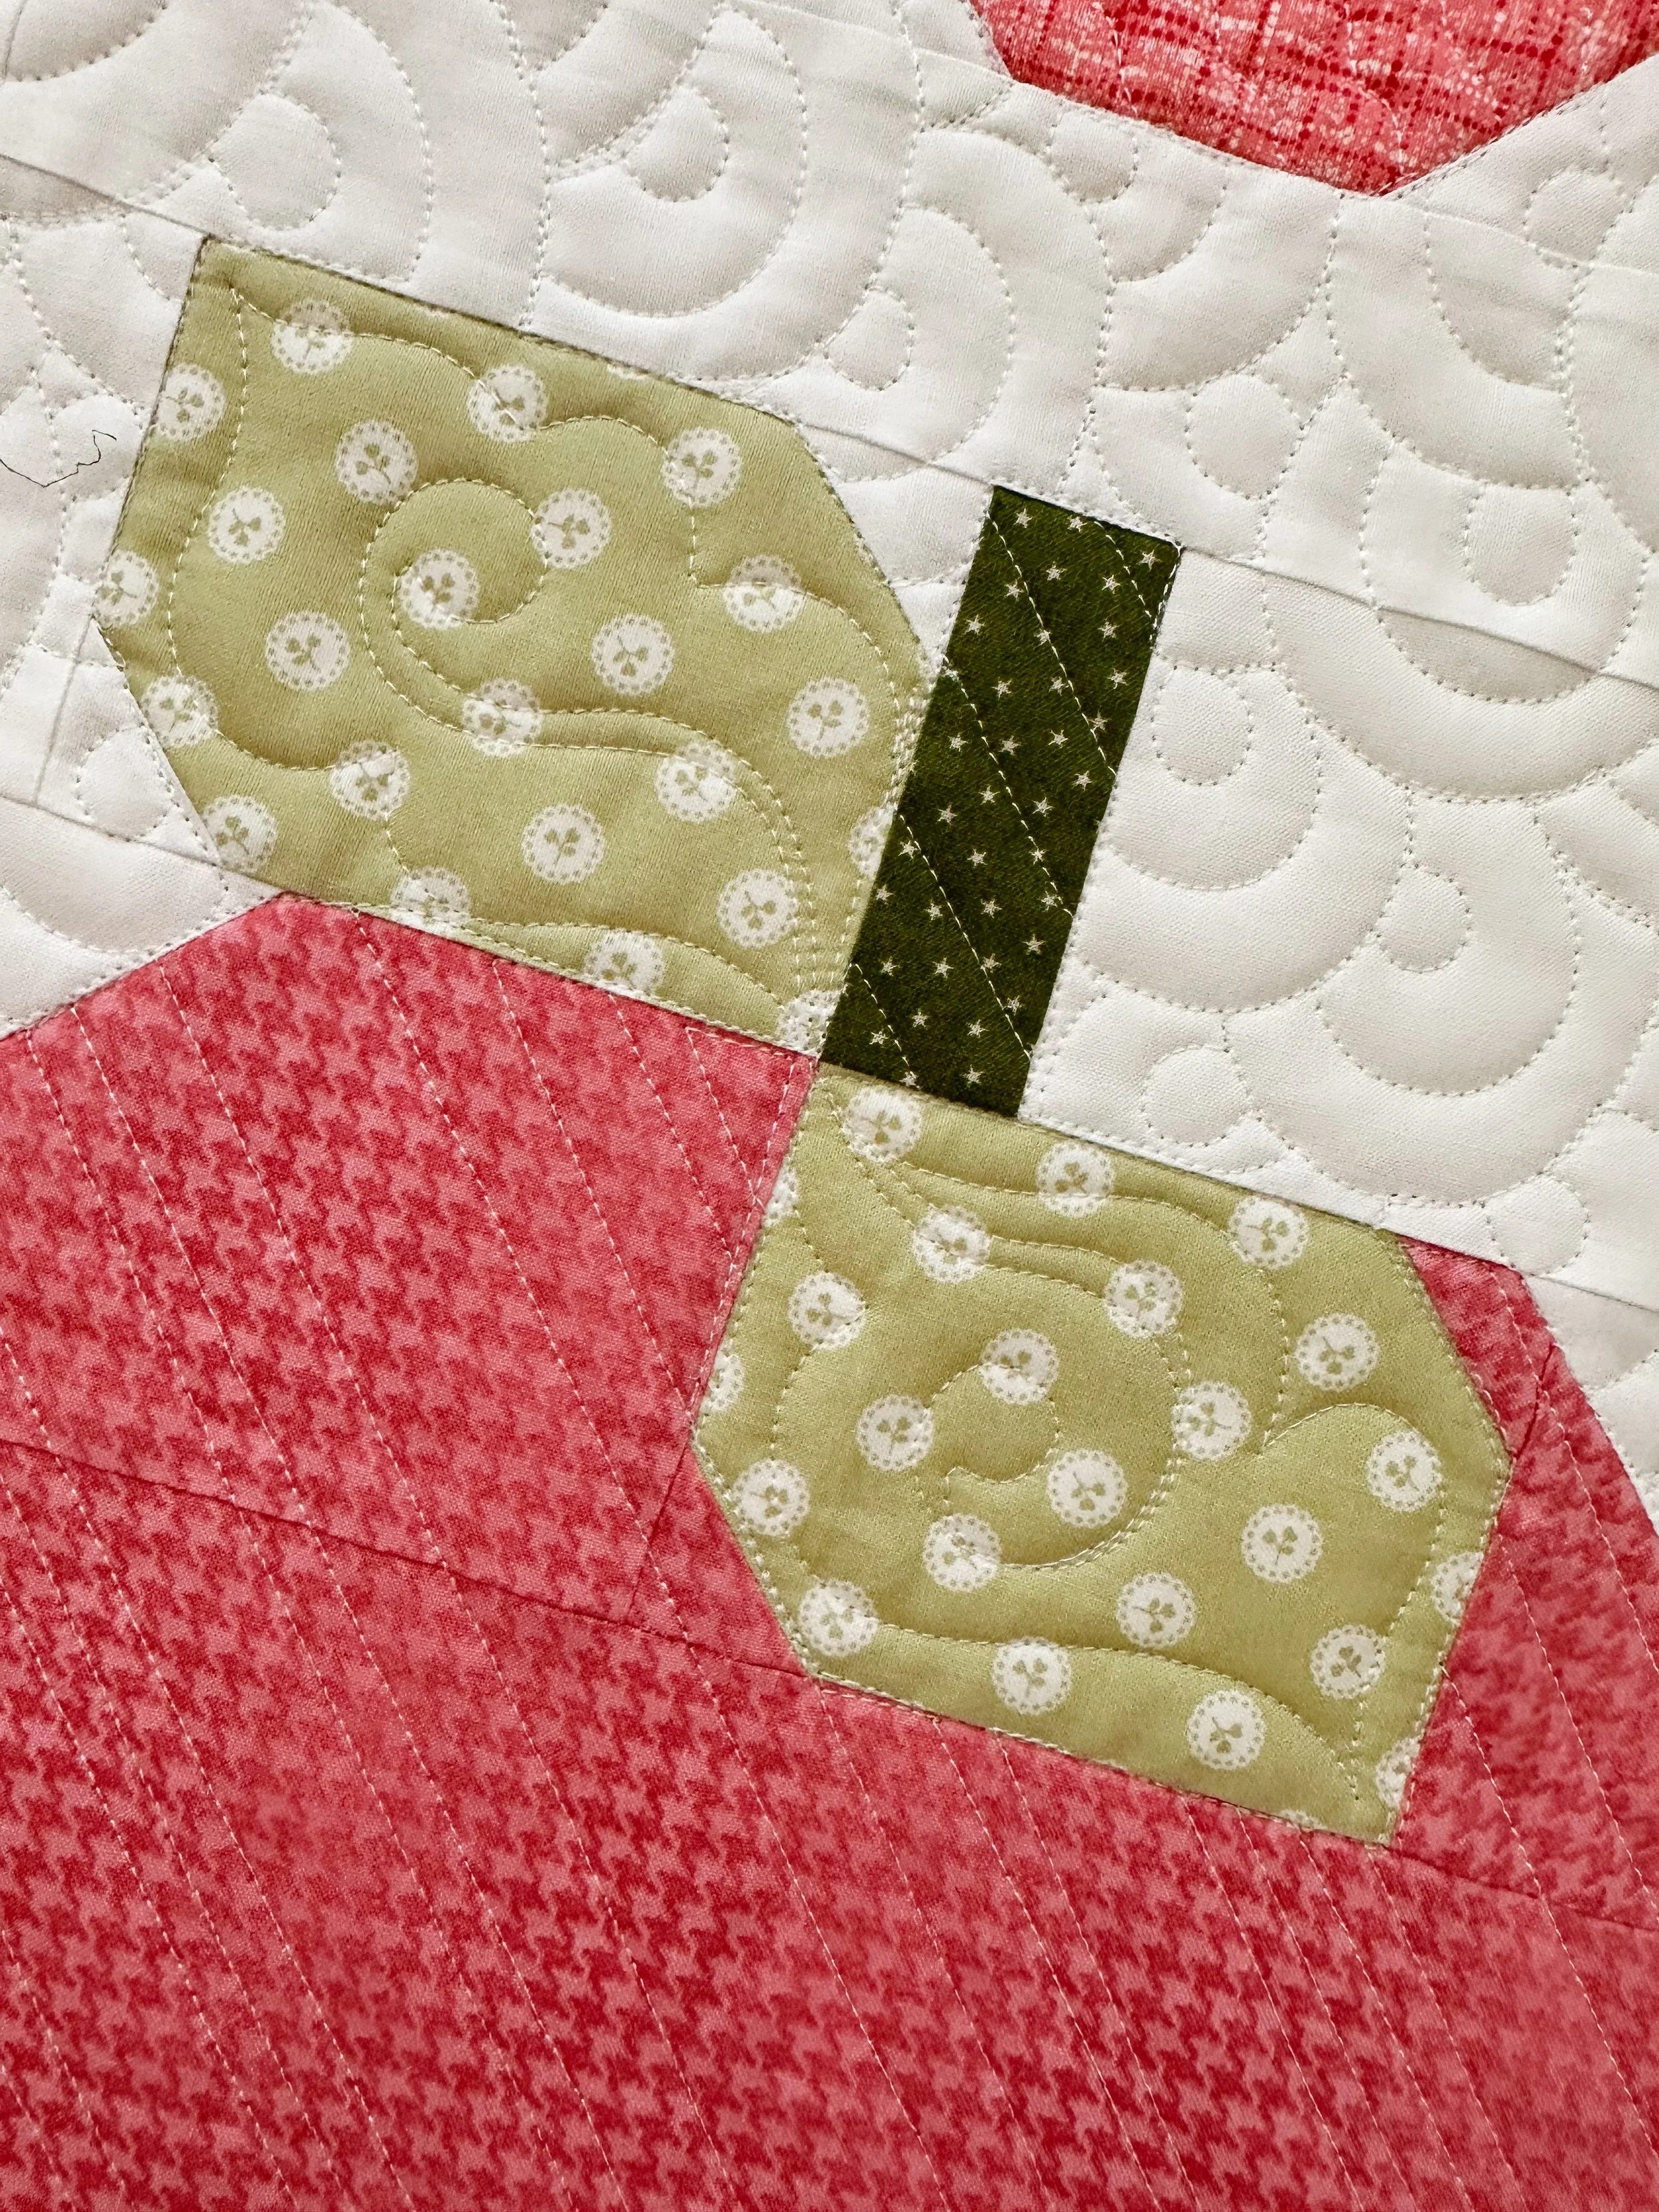
I quilted freehand scalloped leaves with a swirl inside and I quilted in the ditch around the leaves. The stems got 1/2” 45° lines.

I echoed a few curves in the petals of the white blossoms and a few circles in the center. There is also a look at a few border blocks along the right edge of the quilt.

The quilty texture on this one was so fun to create. Quilting really adds depth and personality to quilts.
Are you interested I having me quilt for you? Check out my edge to edge quilting calendar. Go to: https://calendly.com/quiltingit/edgetoedge
Custom quilting spots will open up on occasion. Be sure to follow along on my instagram, where I will share available spots in the future. Go to: https://www.instagram.com/leishakaye
Thanks for stopping by!! Happy quilting! Leisha 💕