


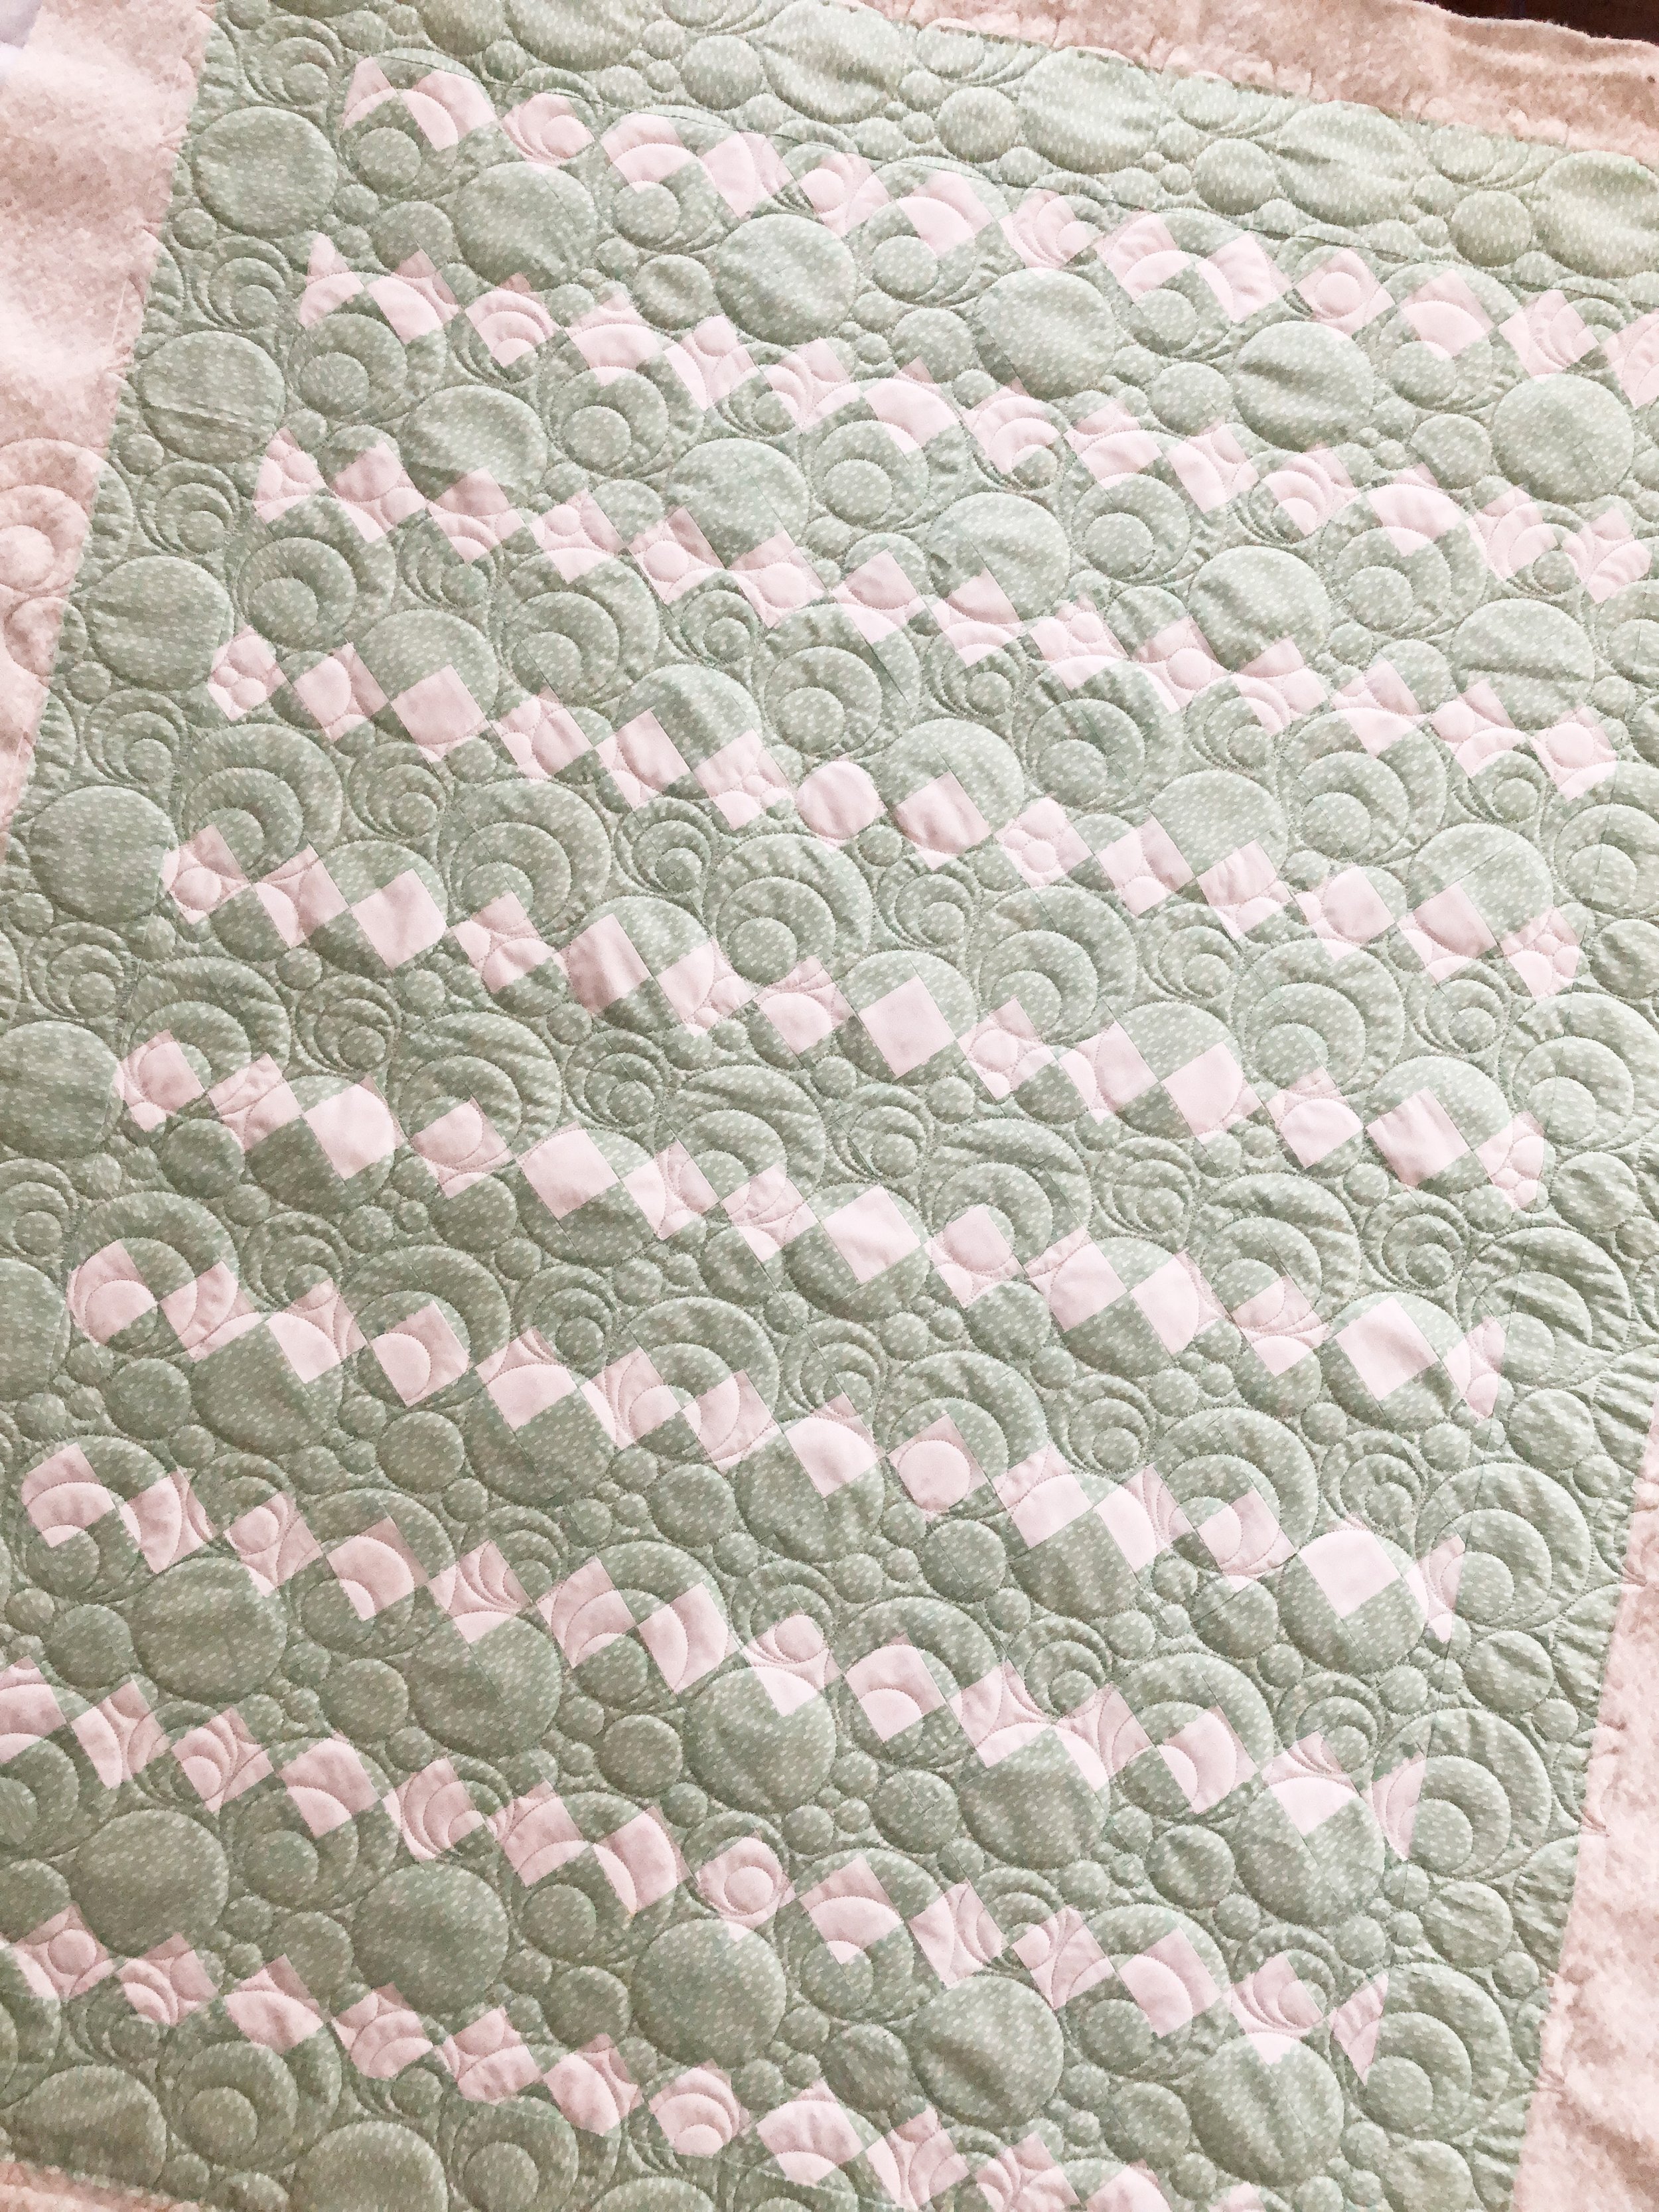
Sandy’s Hugs and Kisses baby quilt (free pattern)
Hi Friends,
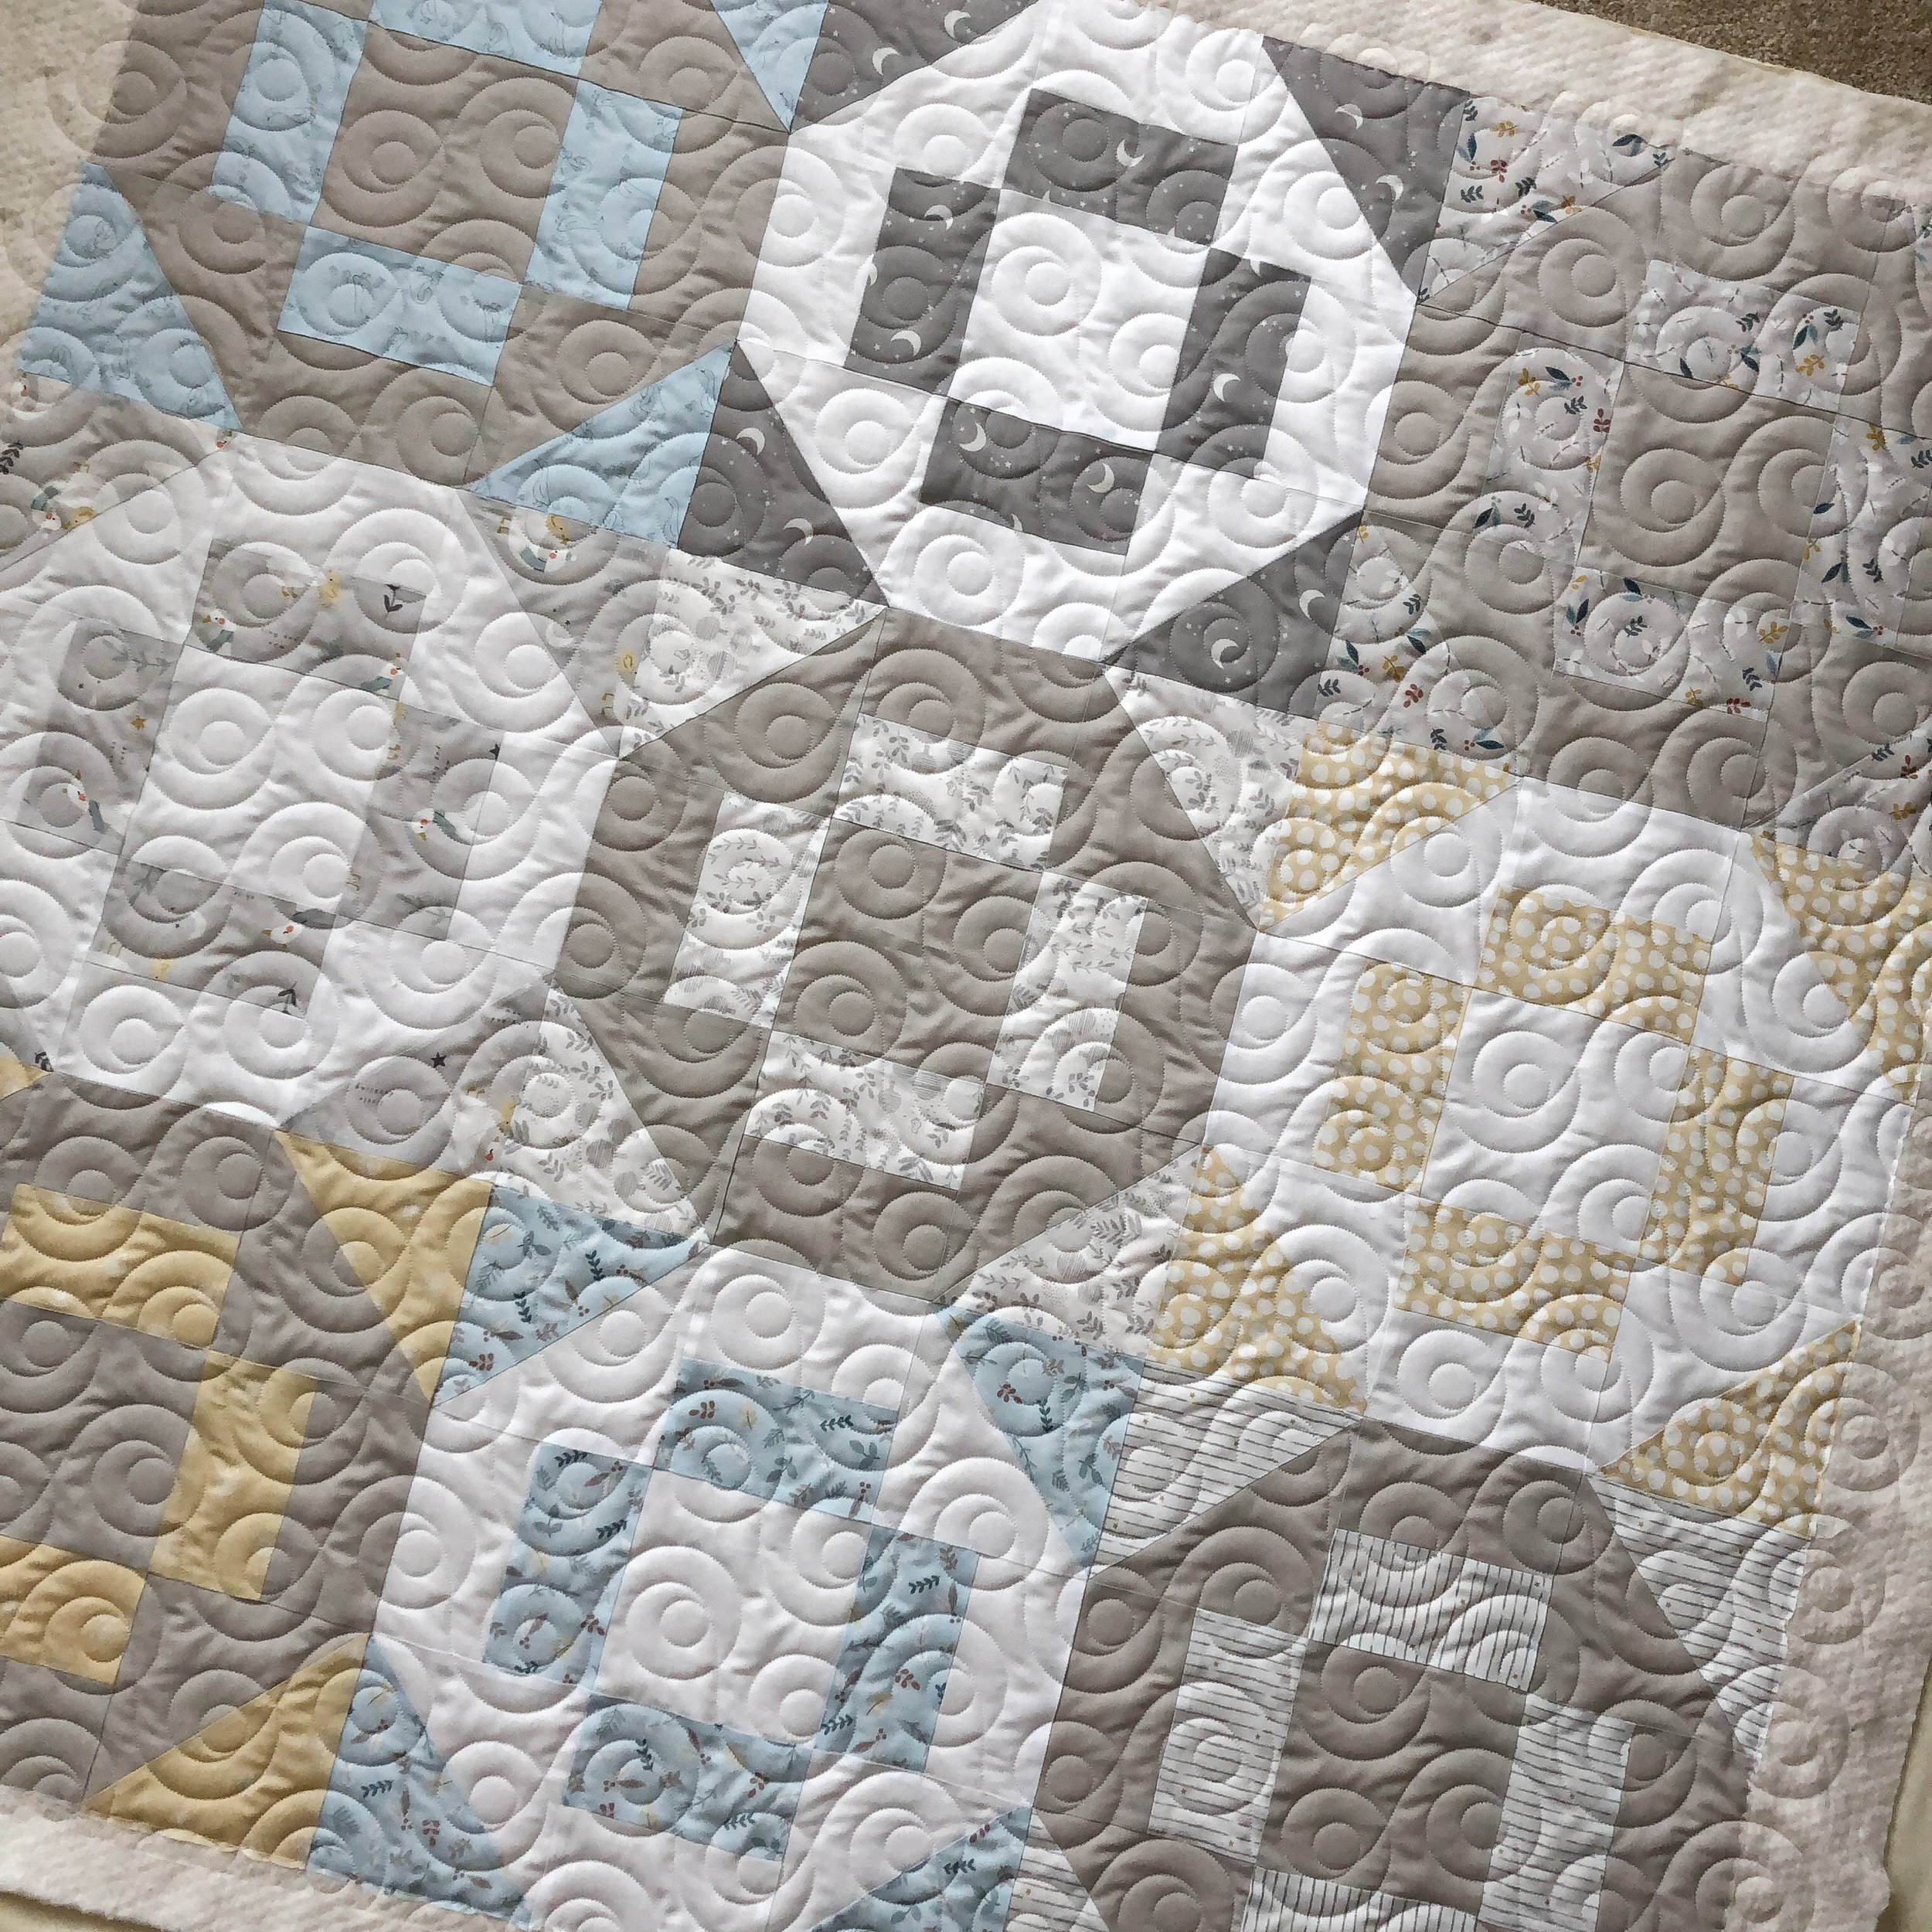
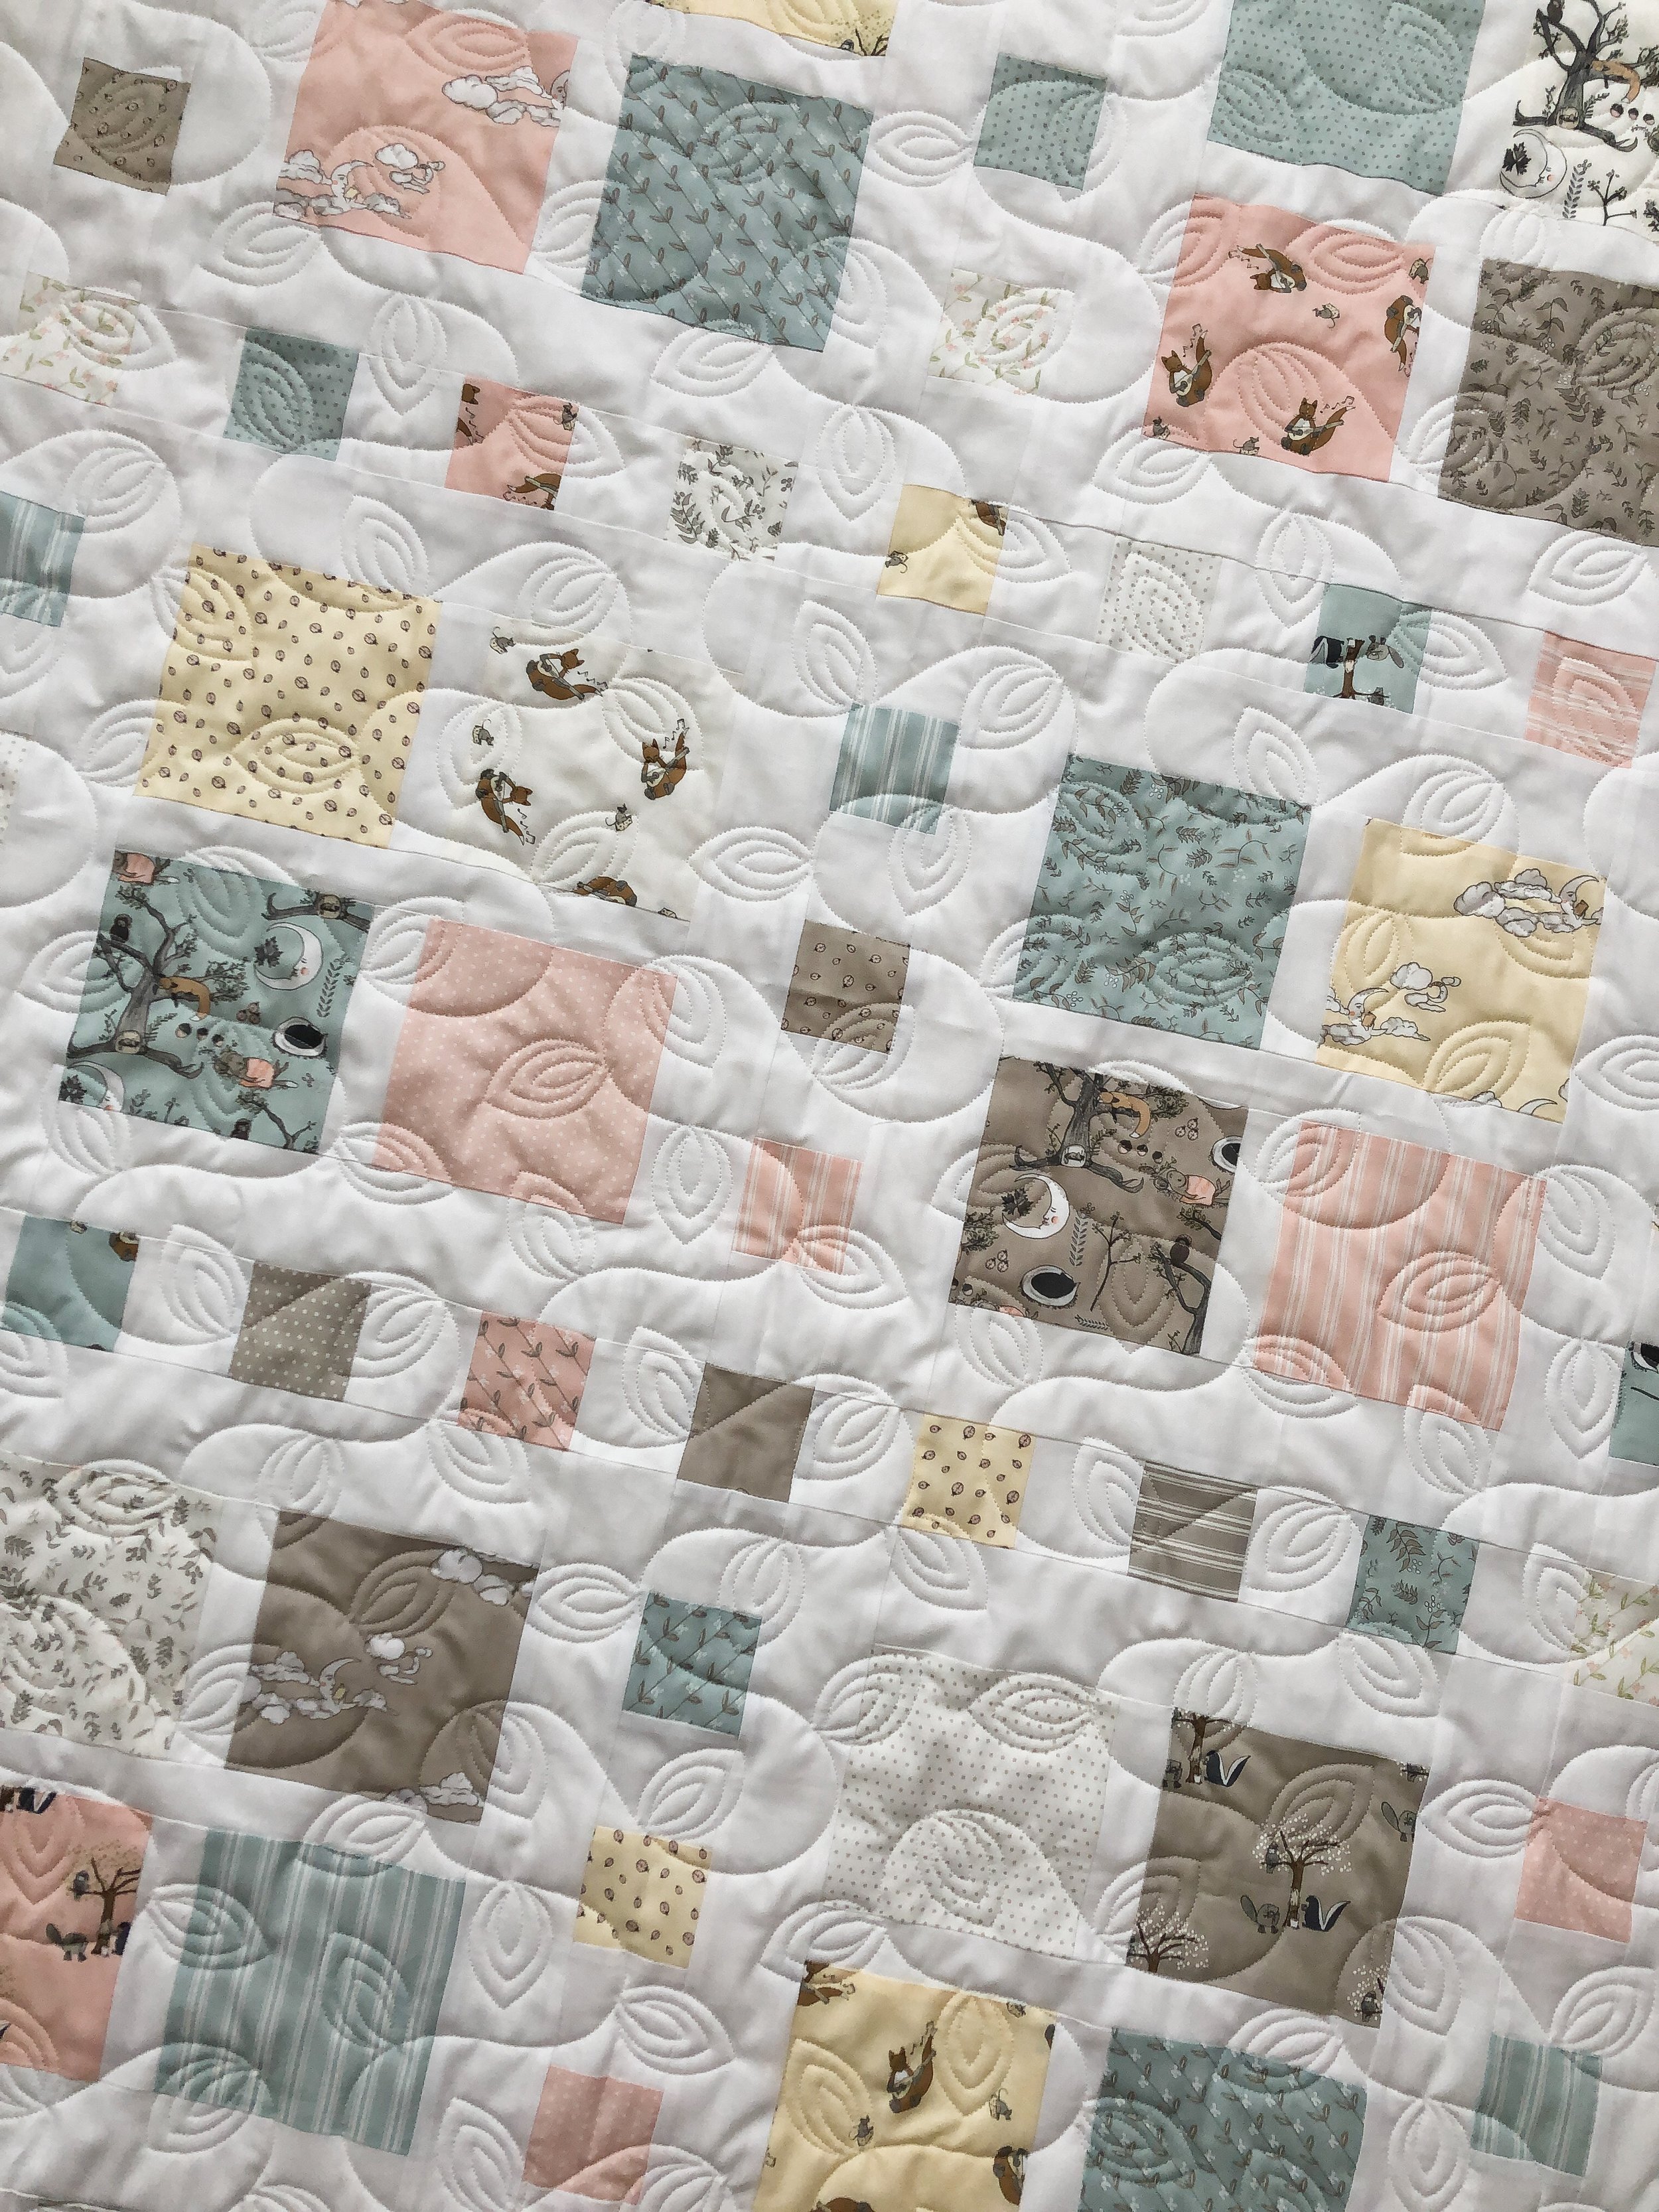
Hope you’re having a great end to summer!! I have a quick baby quilt to share with you today. So sweet, huh?!?!

Sandy made this for a new baby in her family. The pattern is FREE…it’s by Sharon Holland and it’s called Hugs and Kisses. Sharon actually has quite a few free projects on her website.
I used my favorite natural white Omni thread from Superior Threads, and Winline’s 8020 cotton poly blend batting.
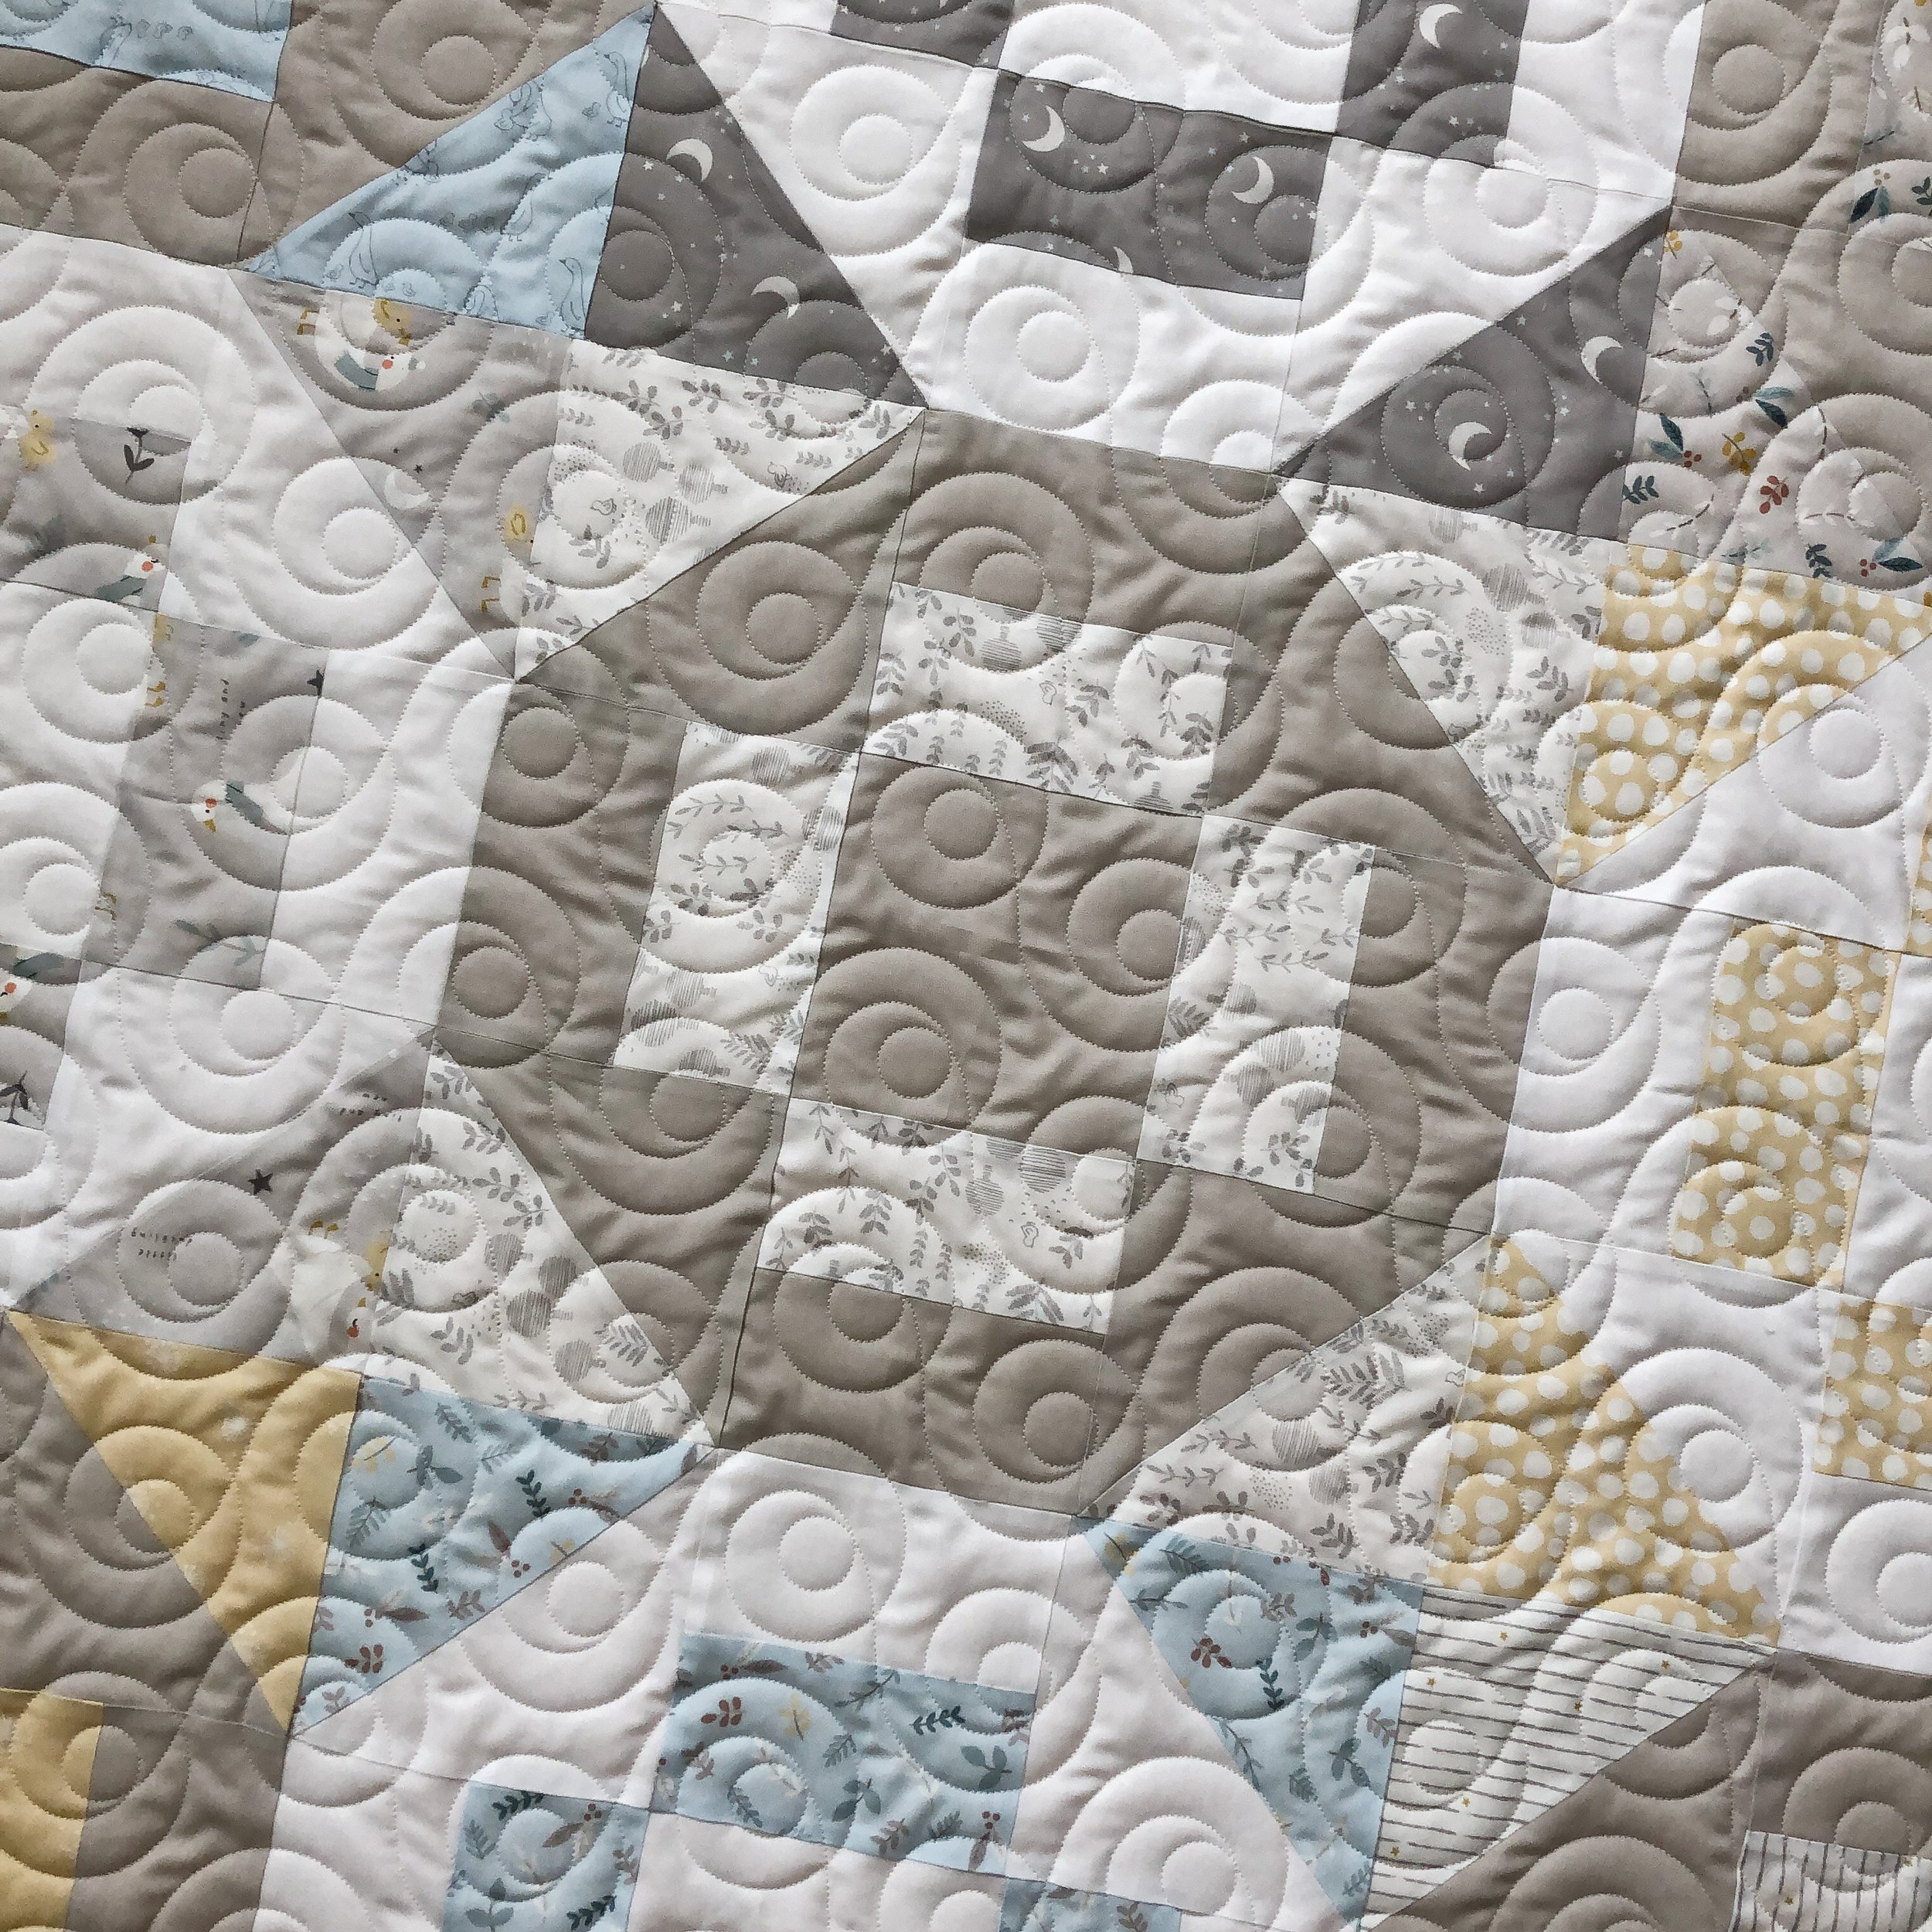
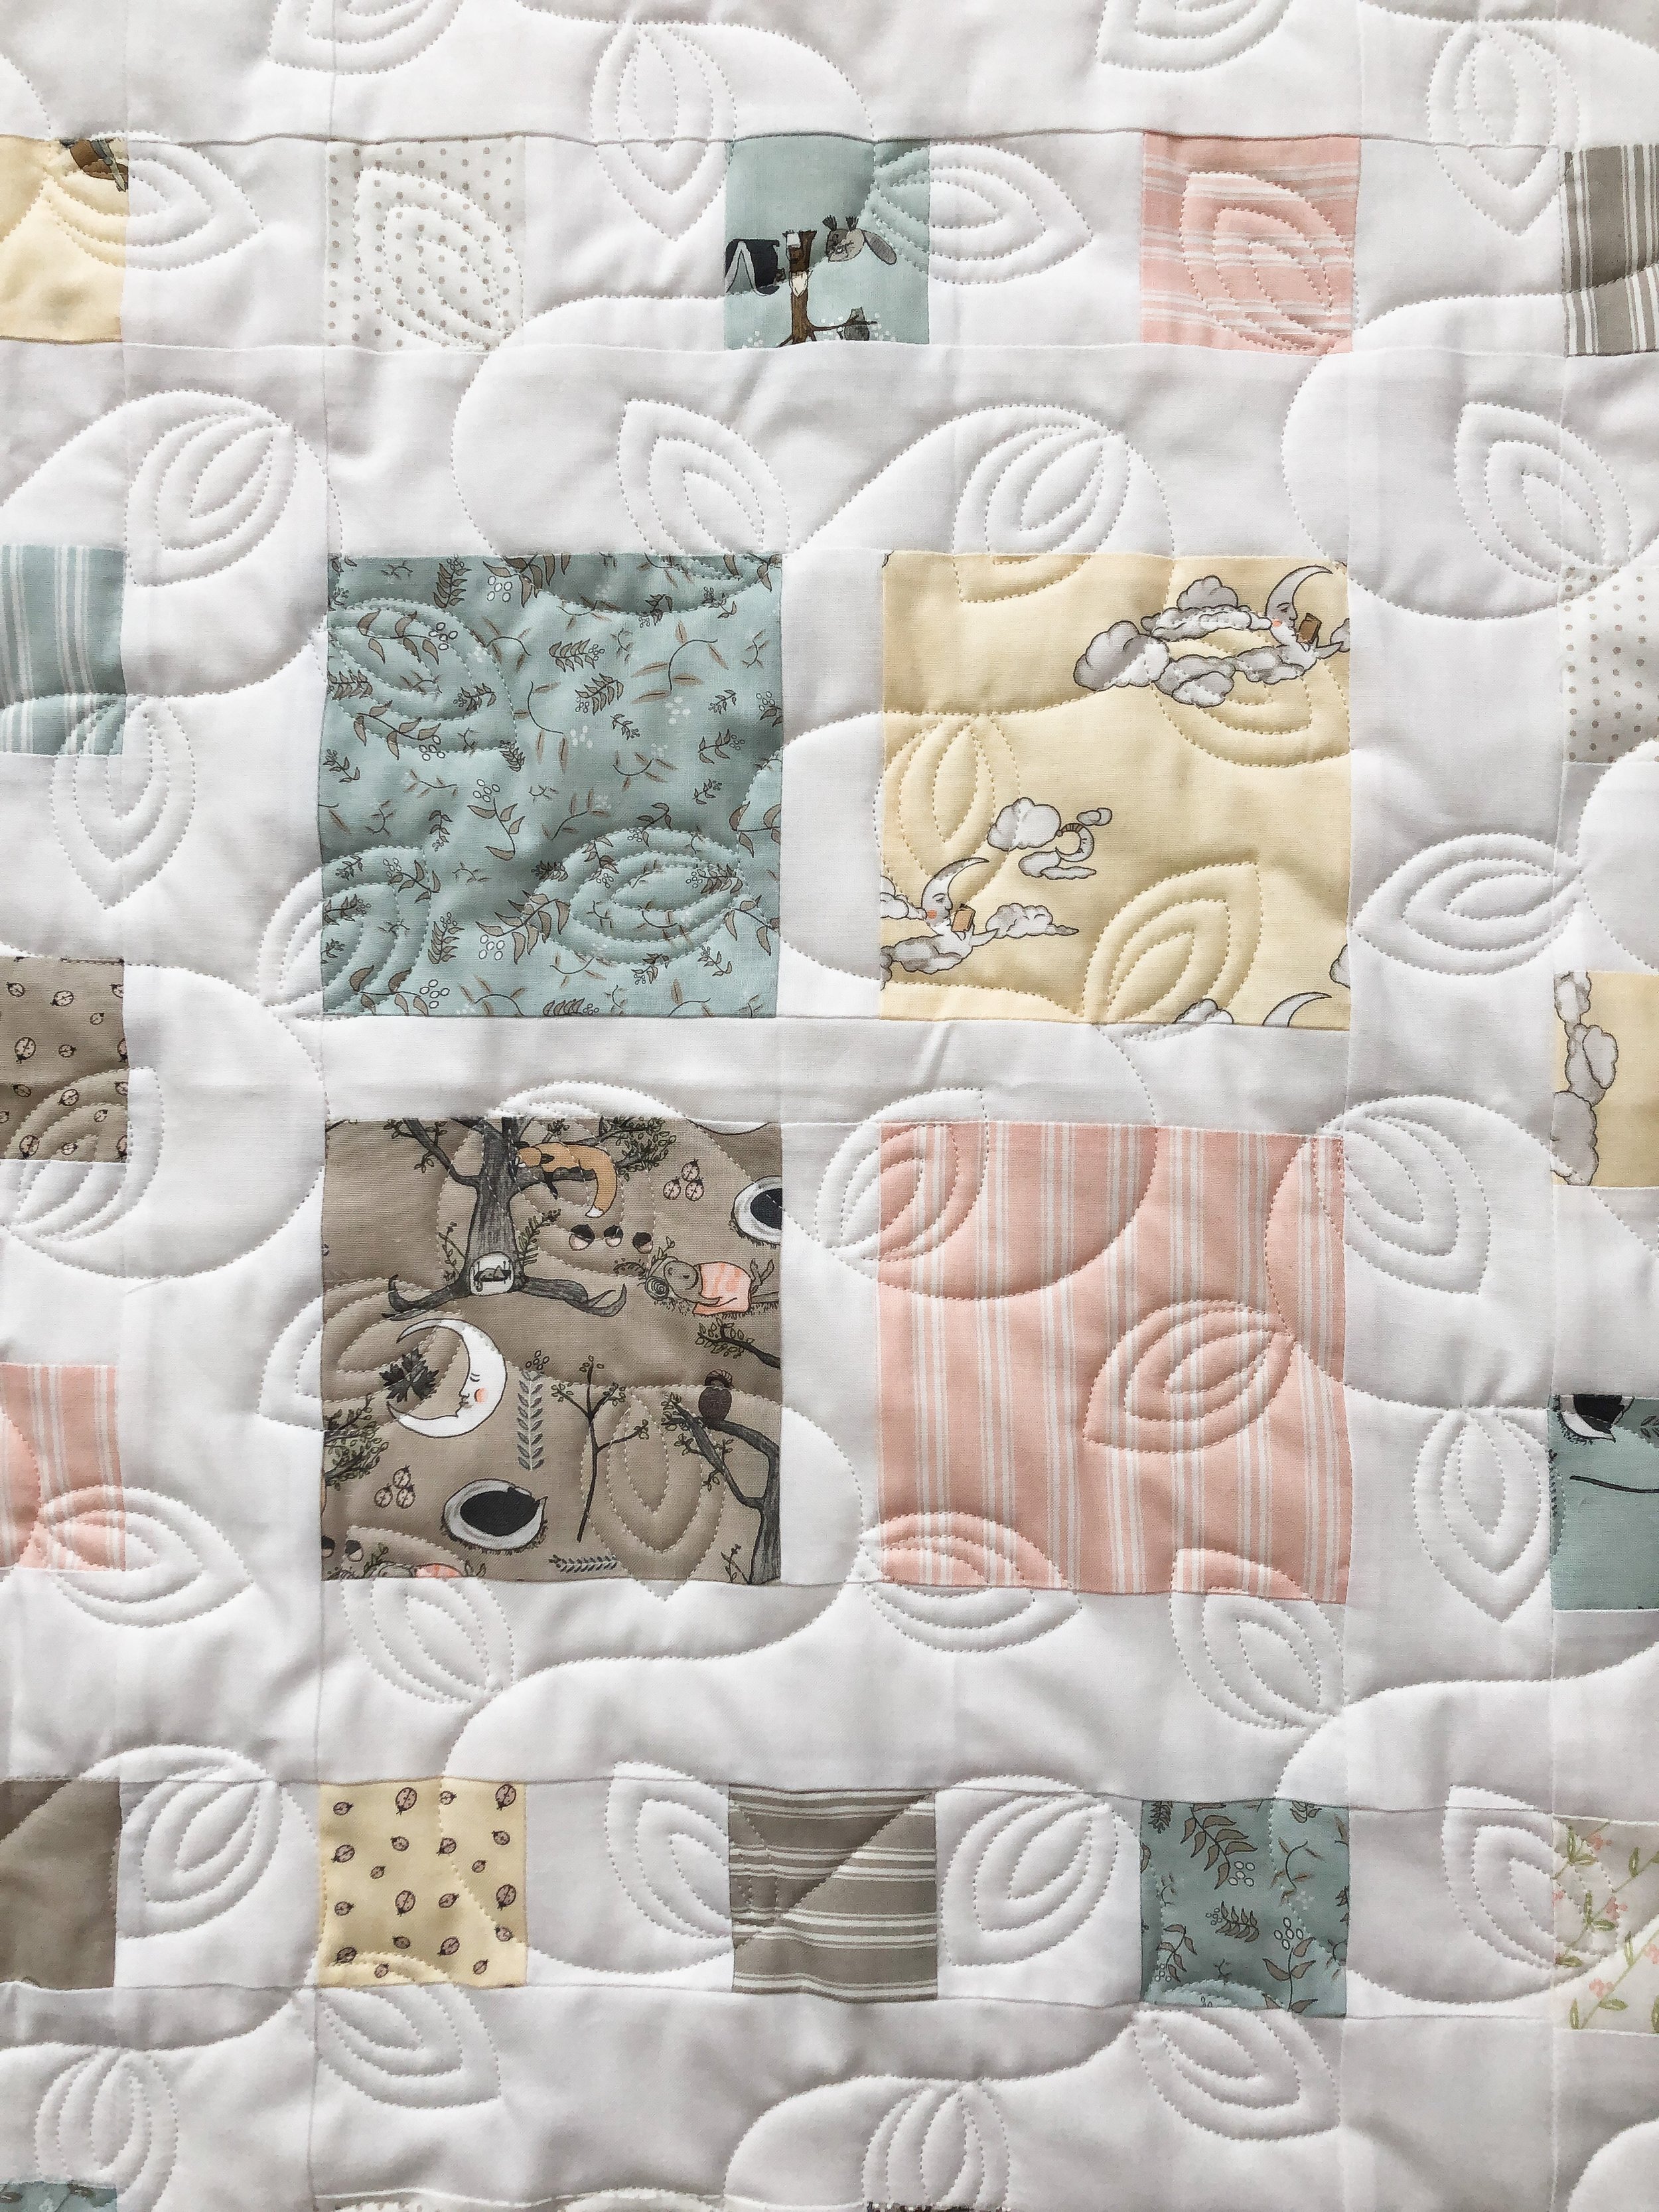
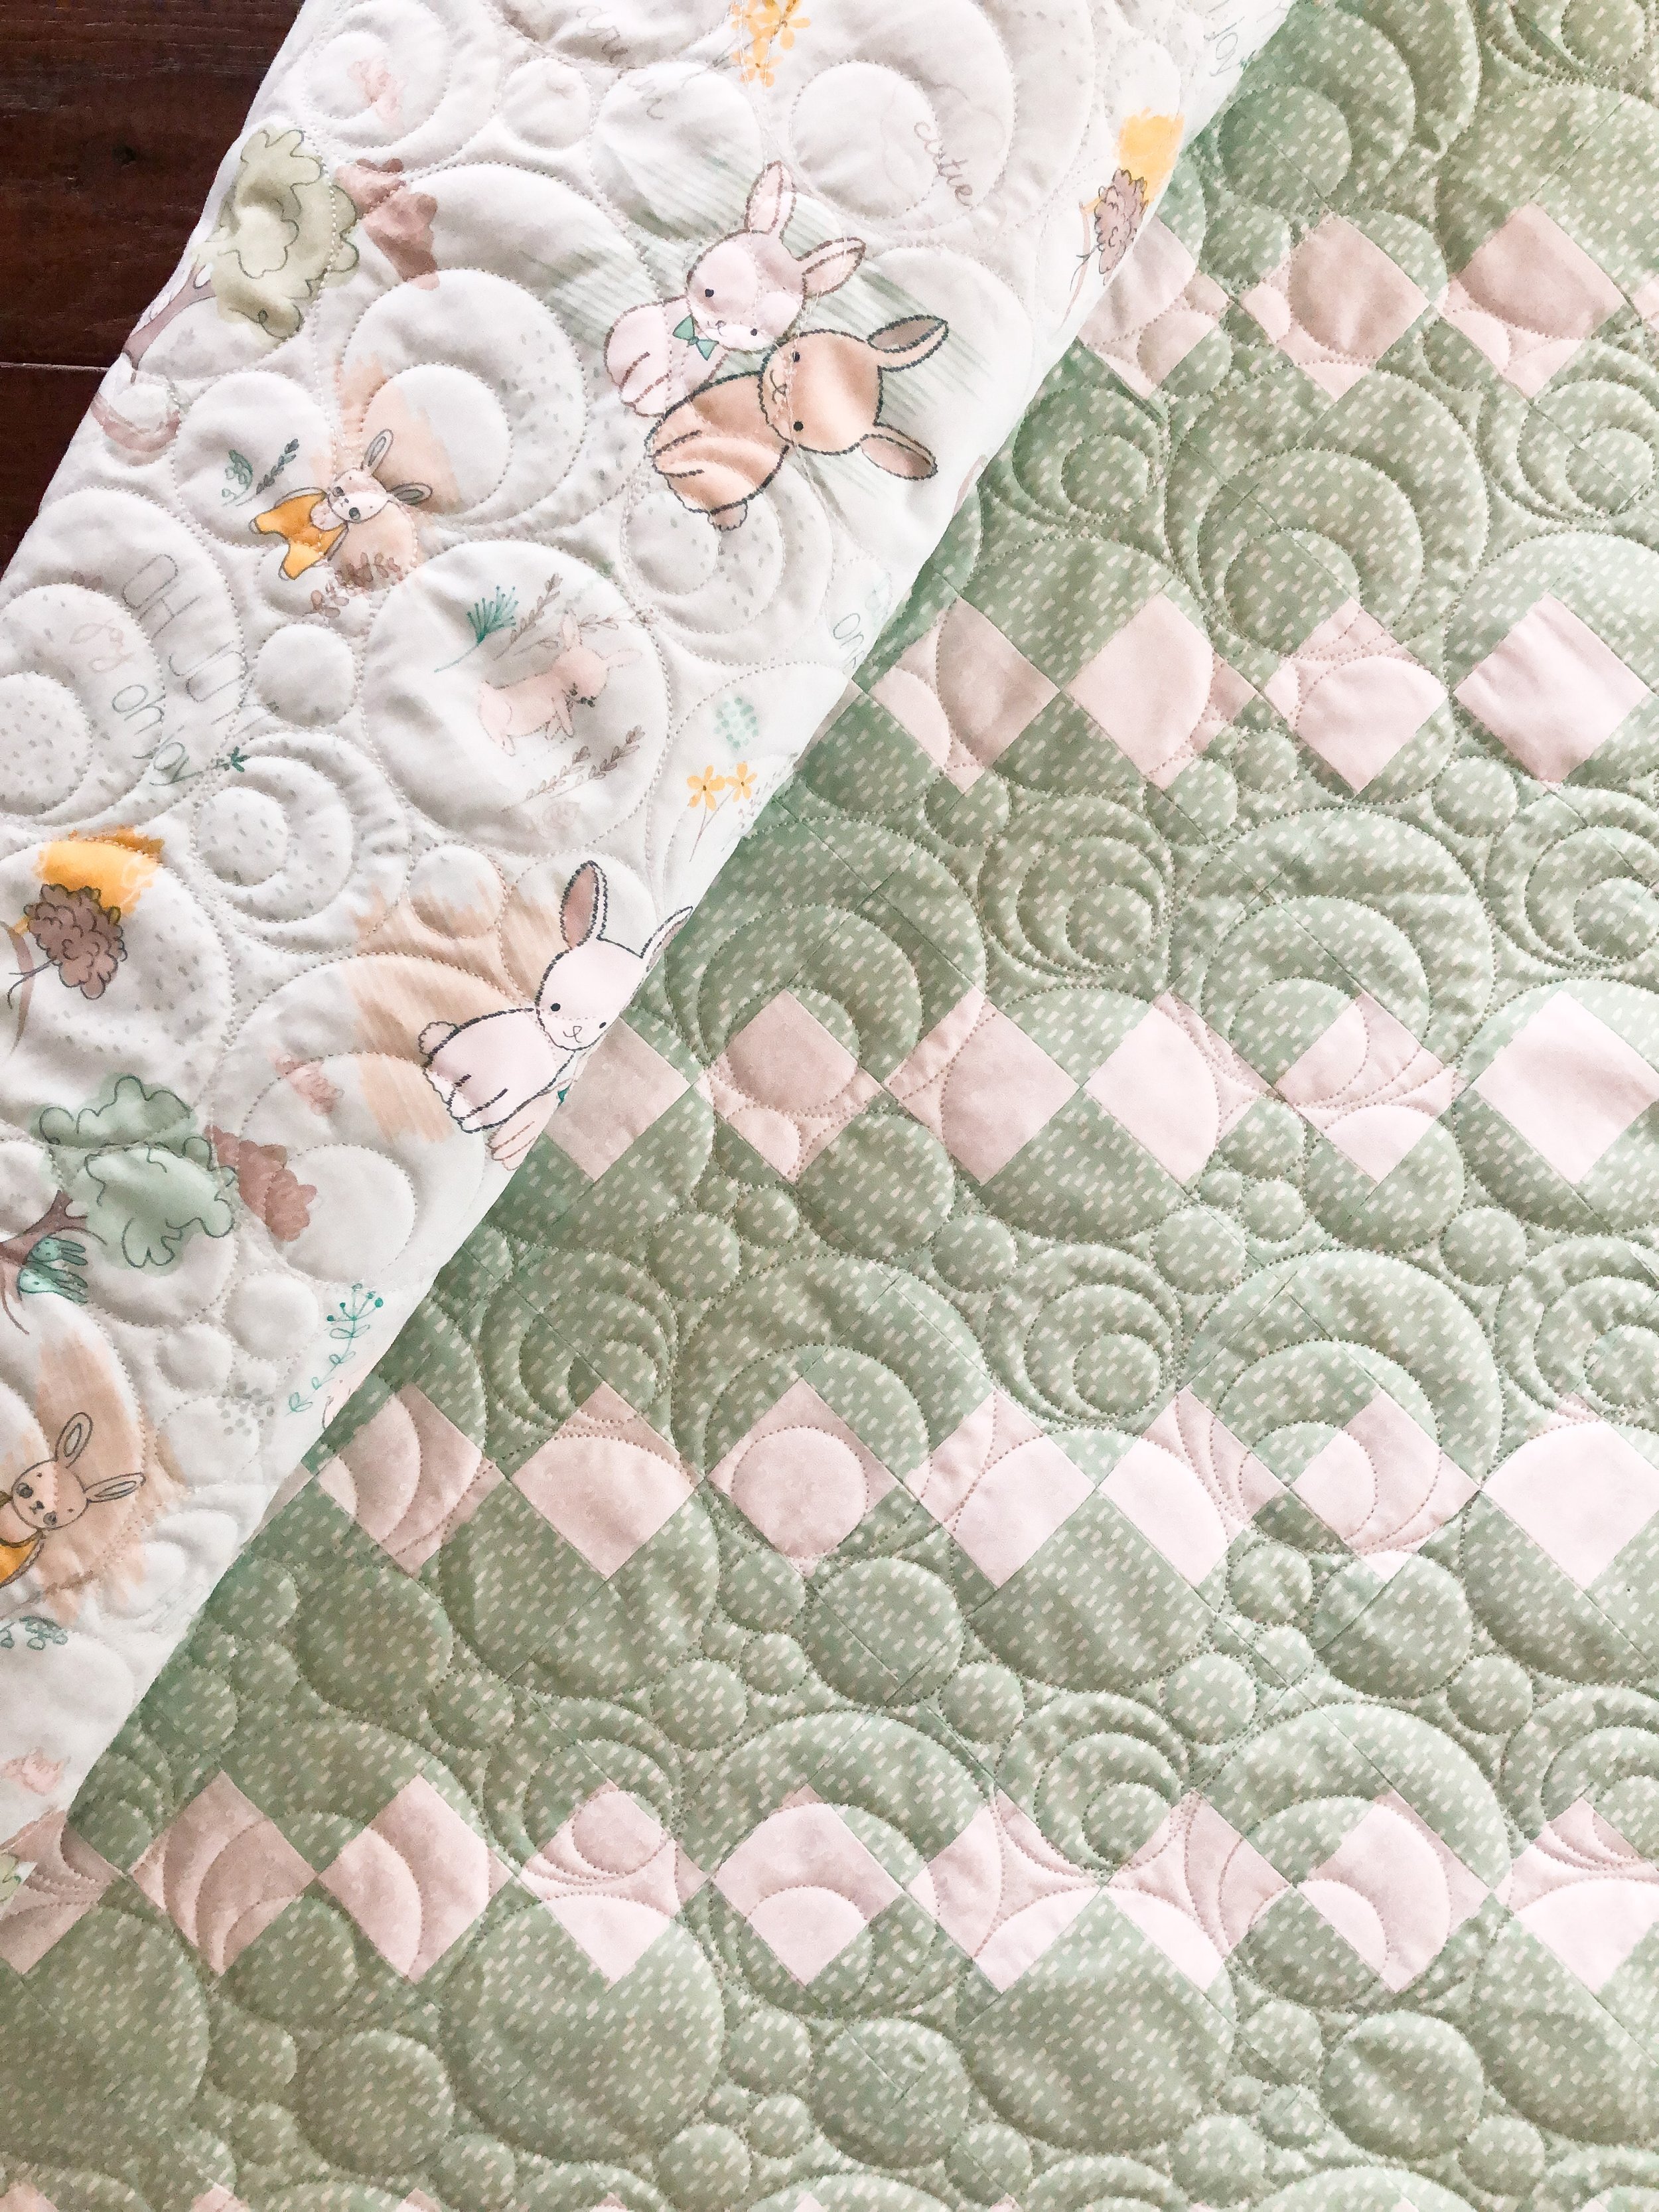
To soften up all the hard lines, I used Mod Dotz by Patricia Ritter from Urban Elementz to quilt it. I love how this design dances up and down across the quilt.
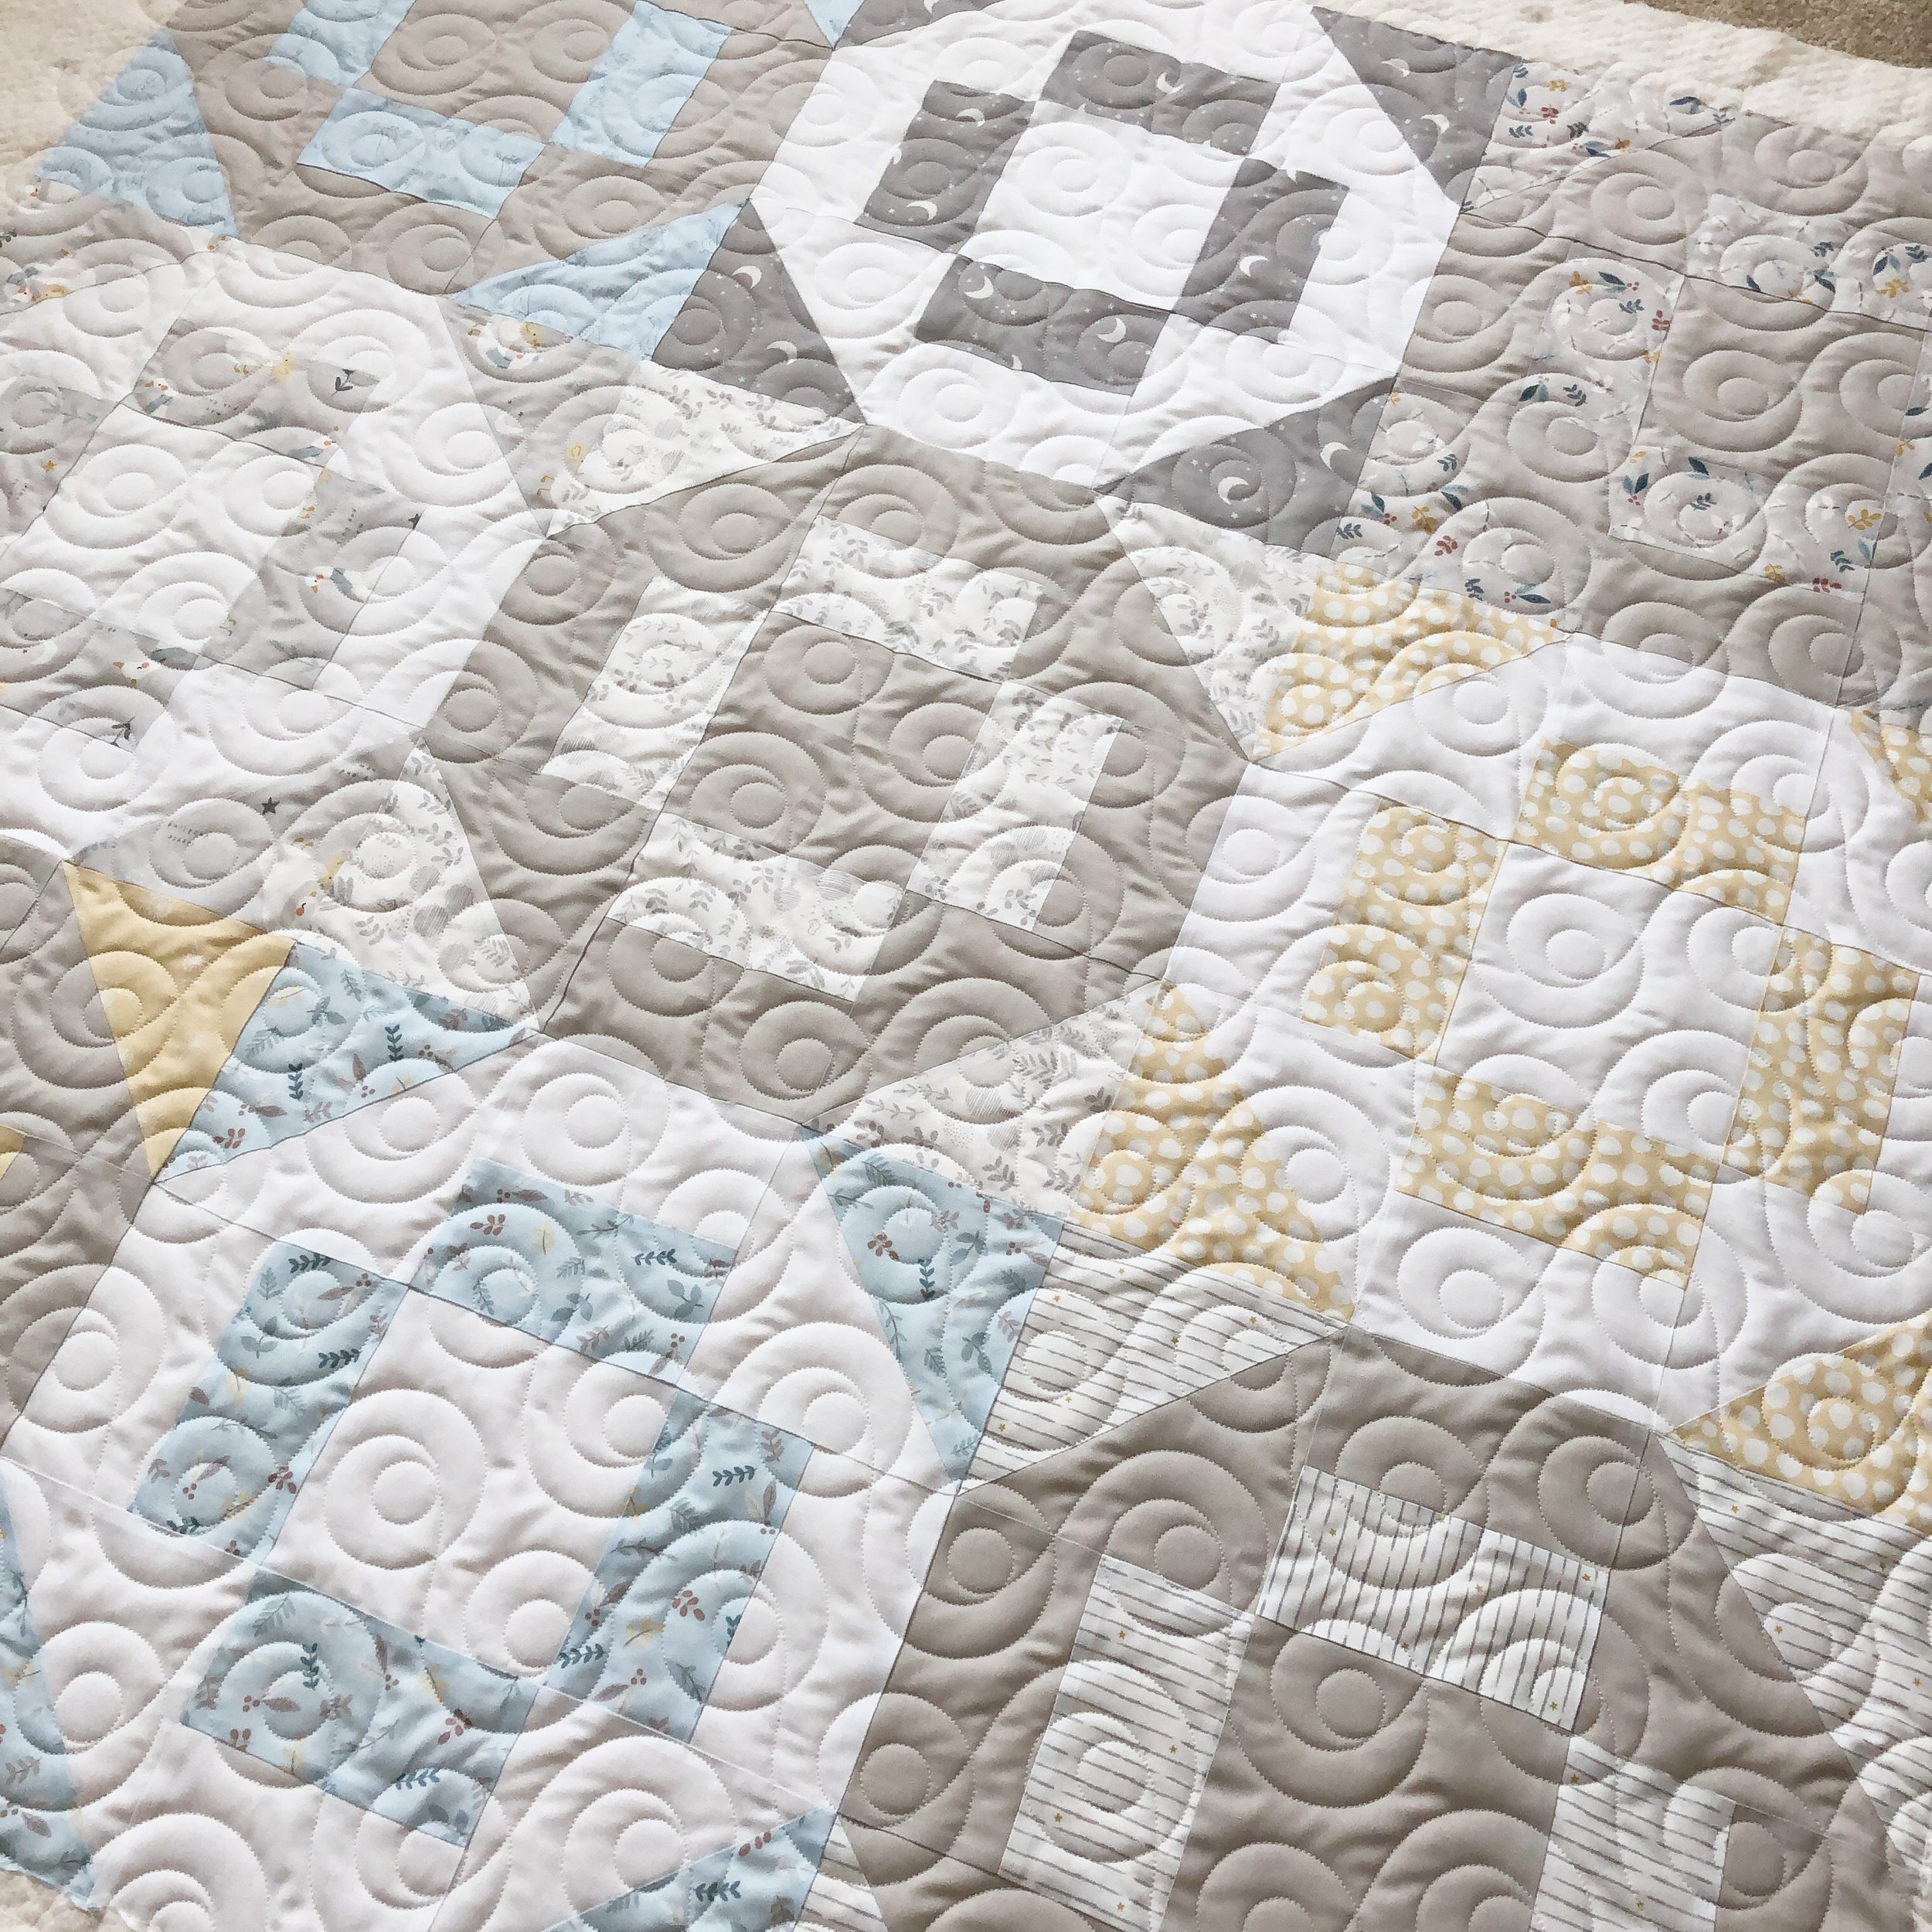
This quilt is perfect size for tummy time!

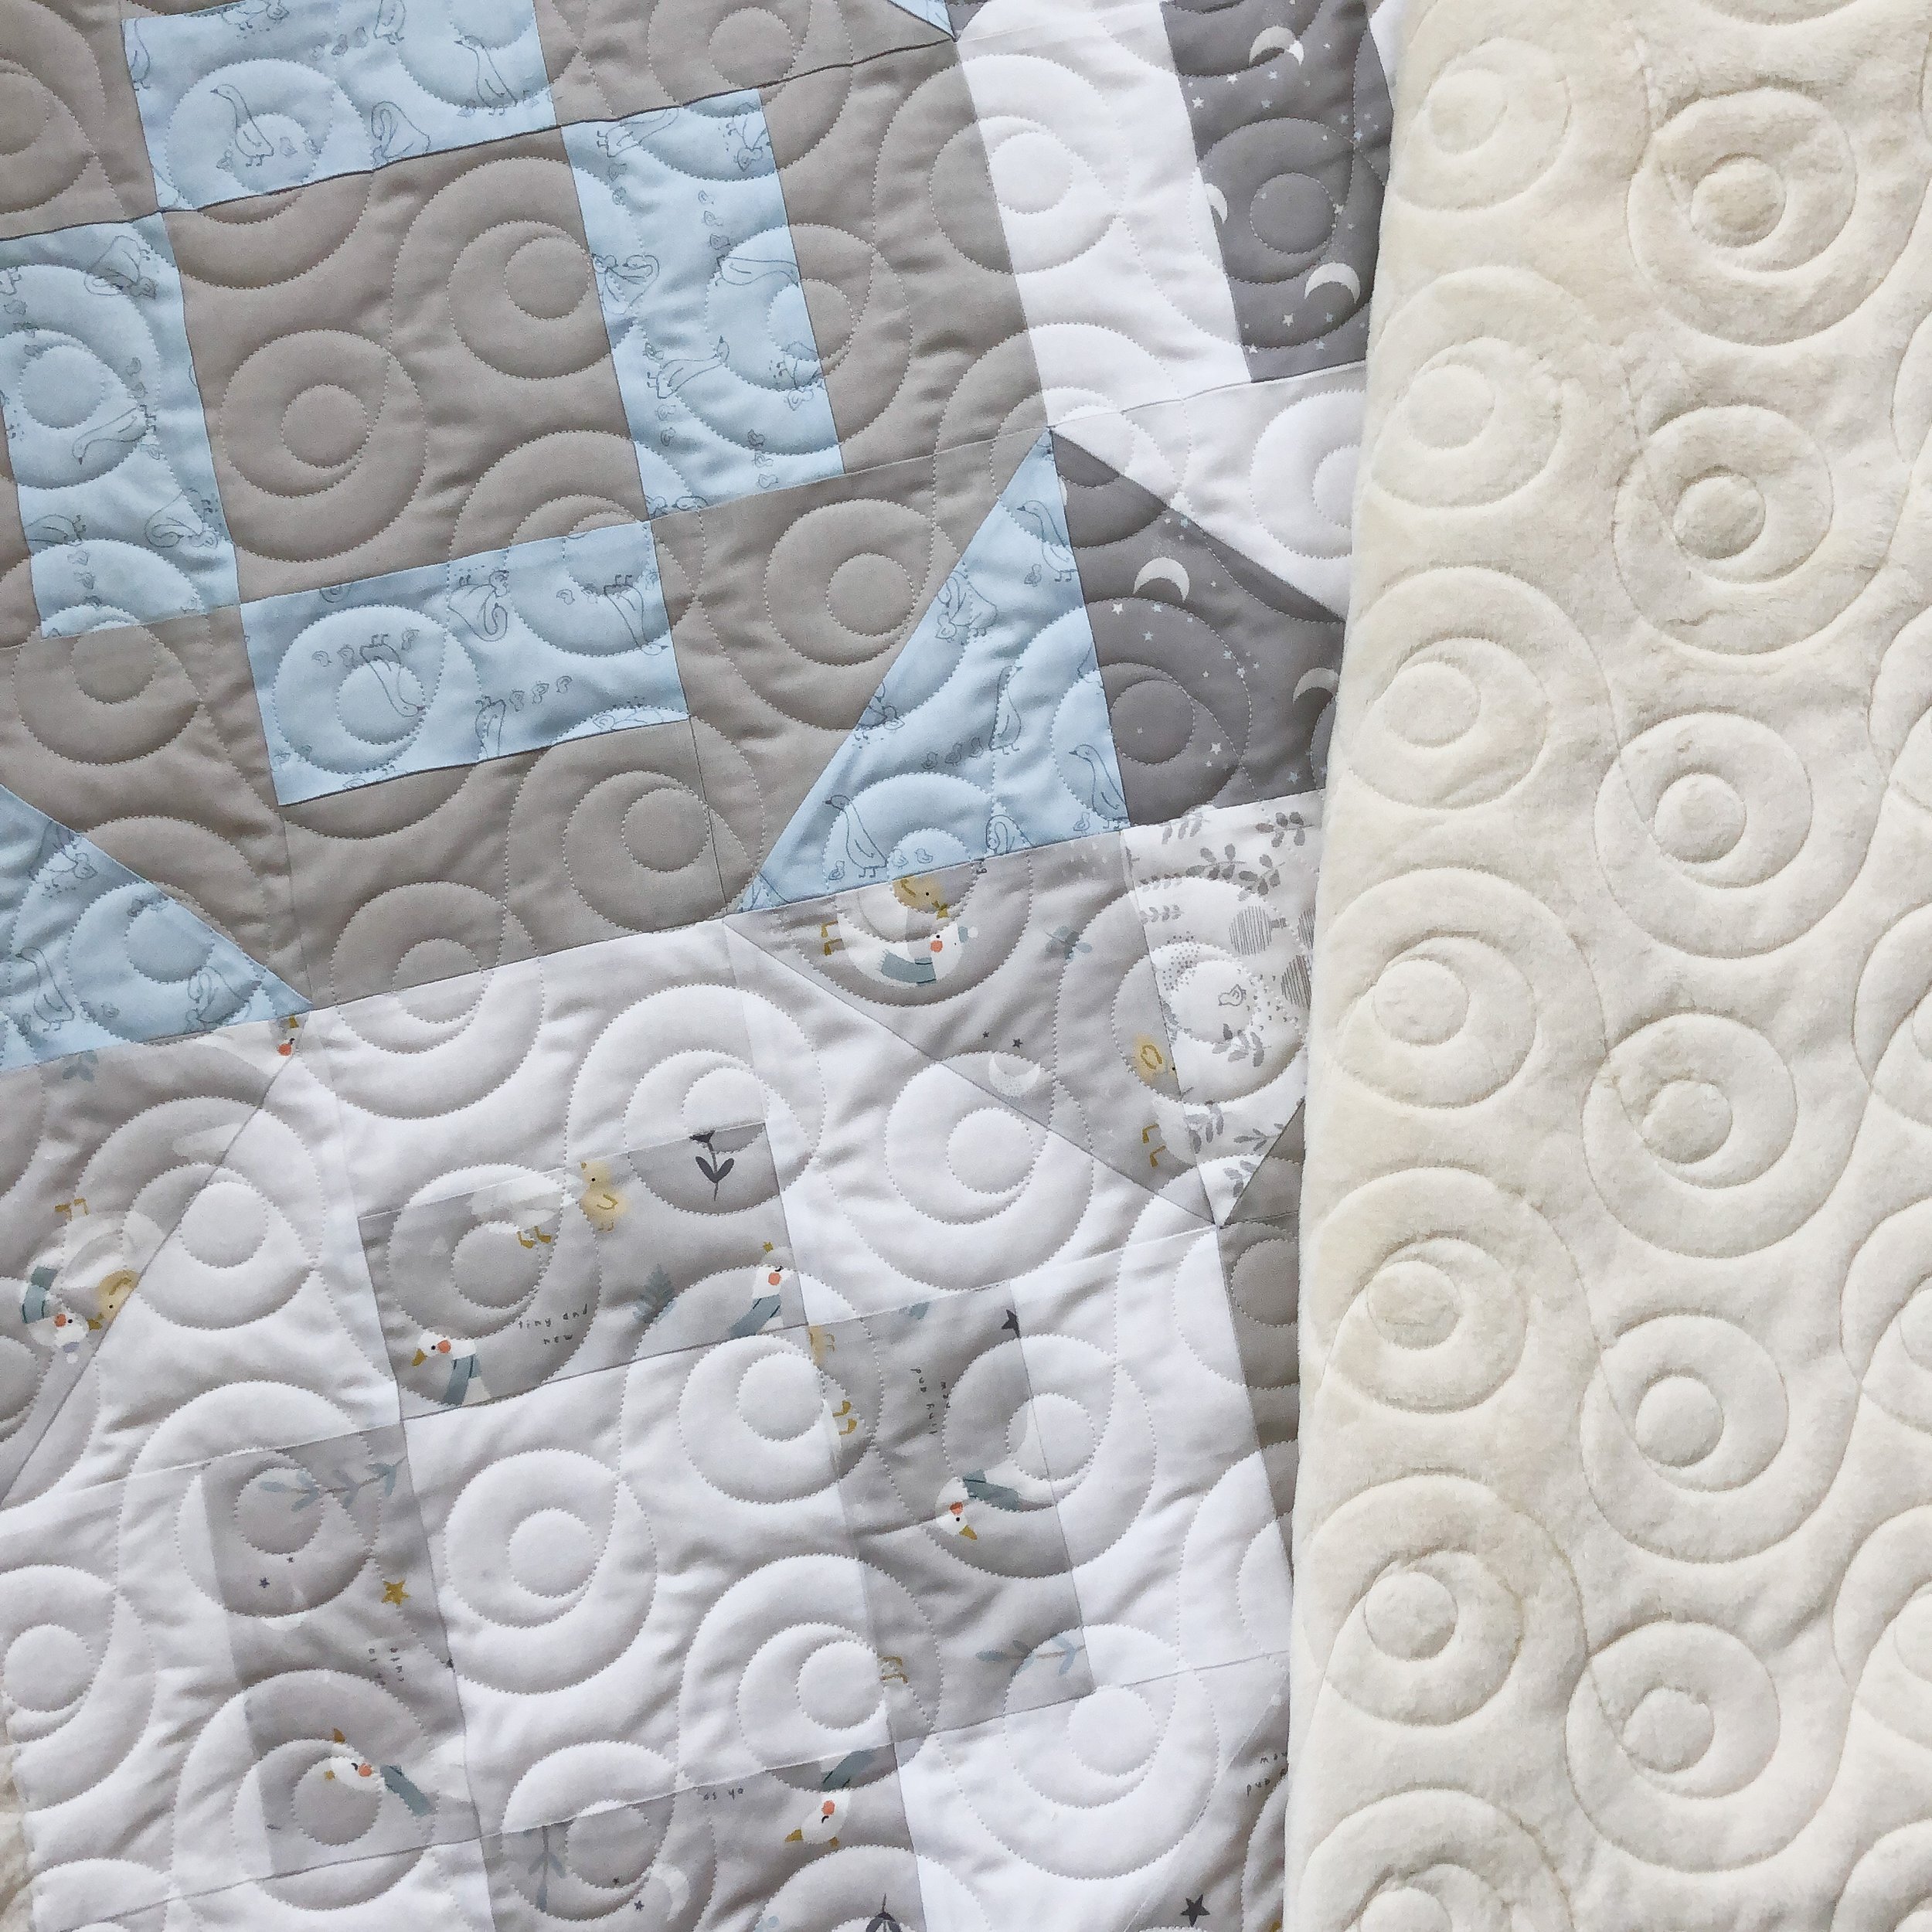
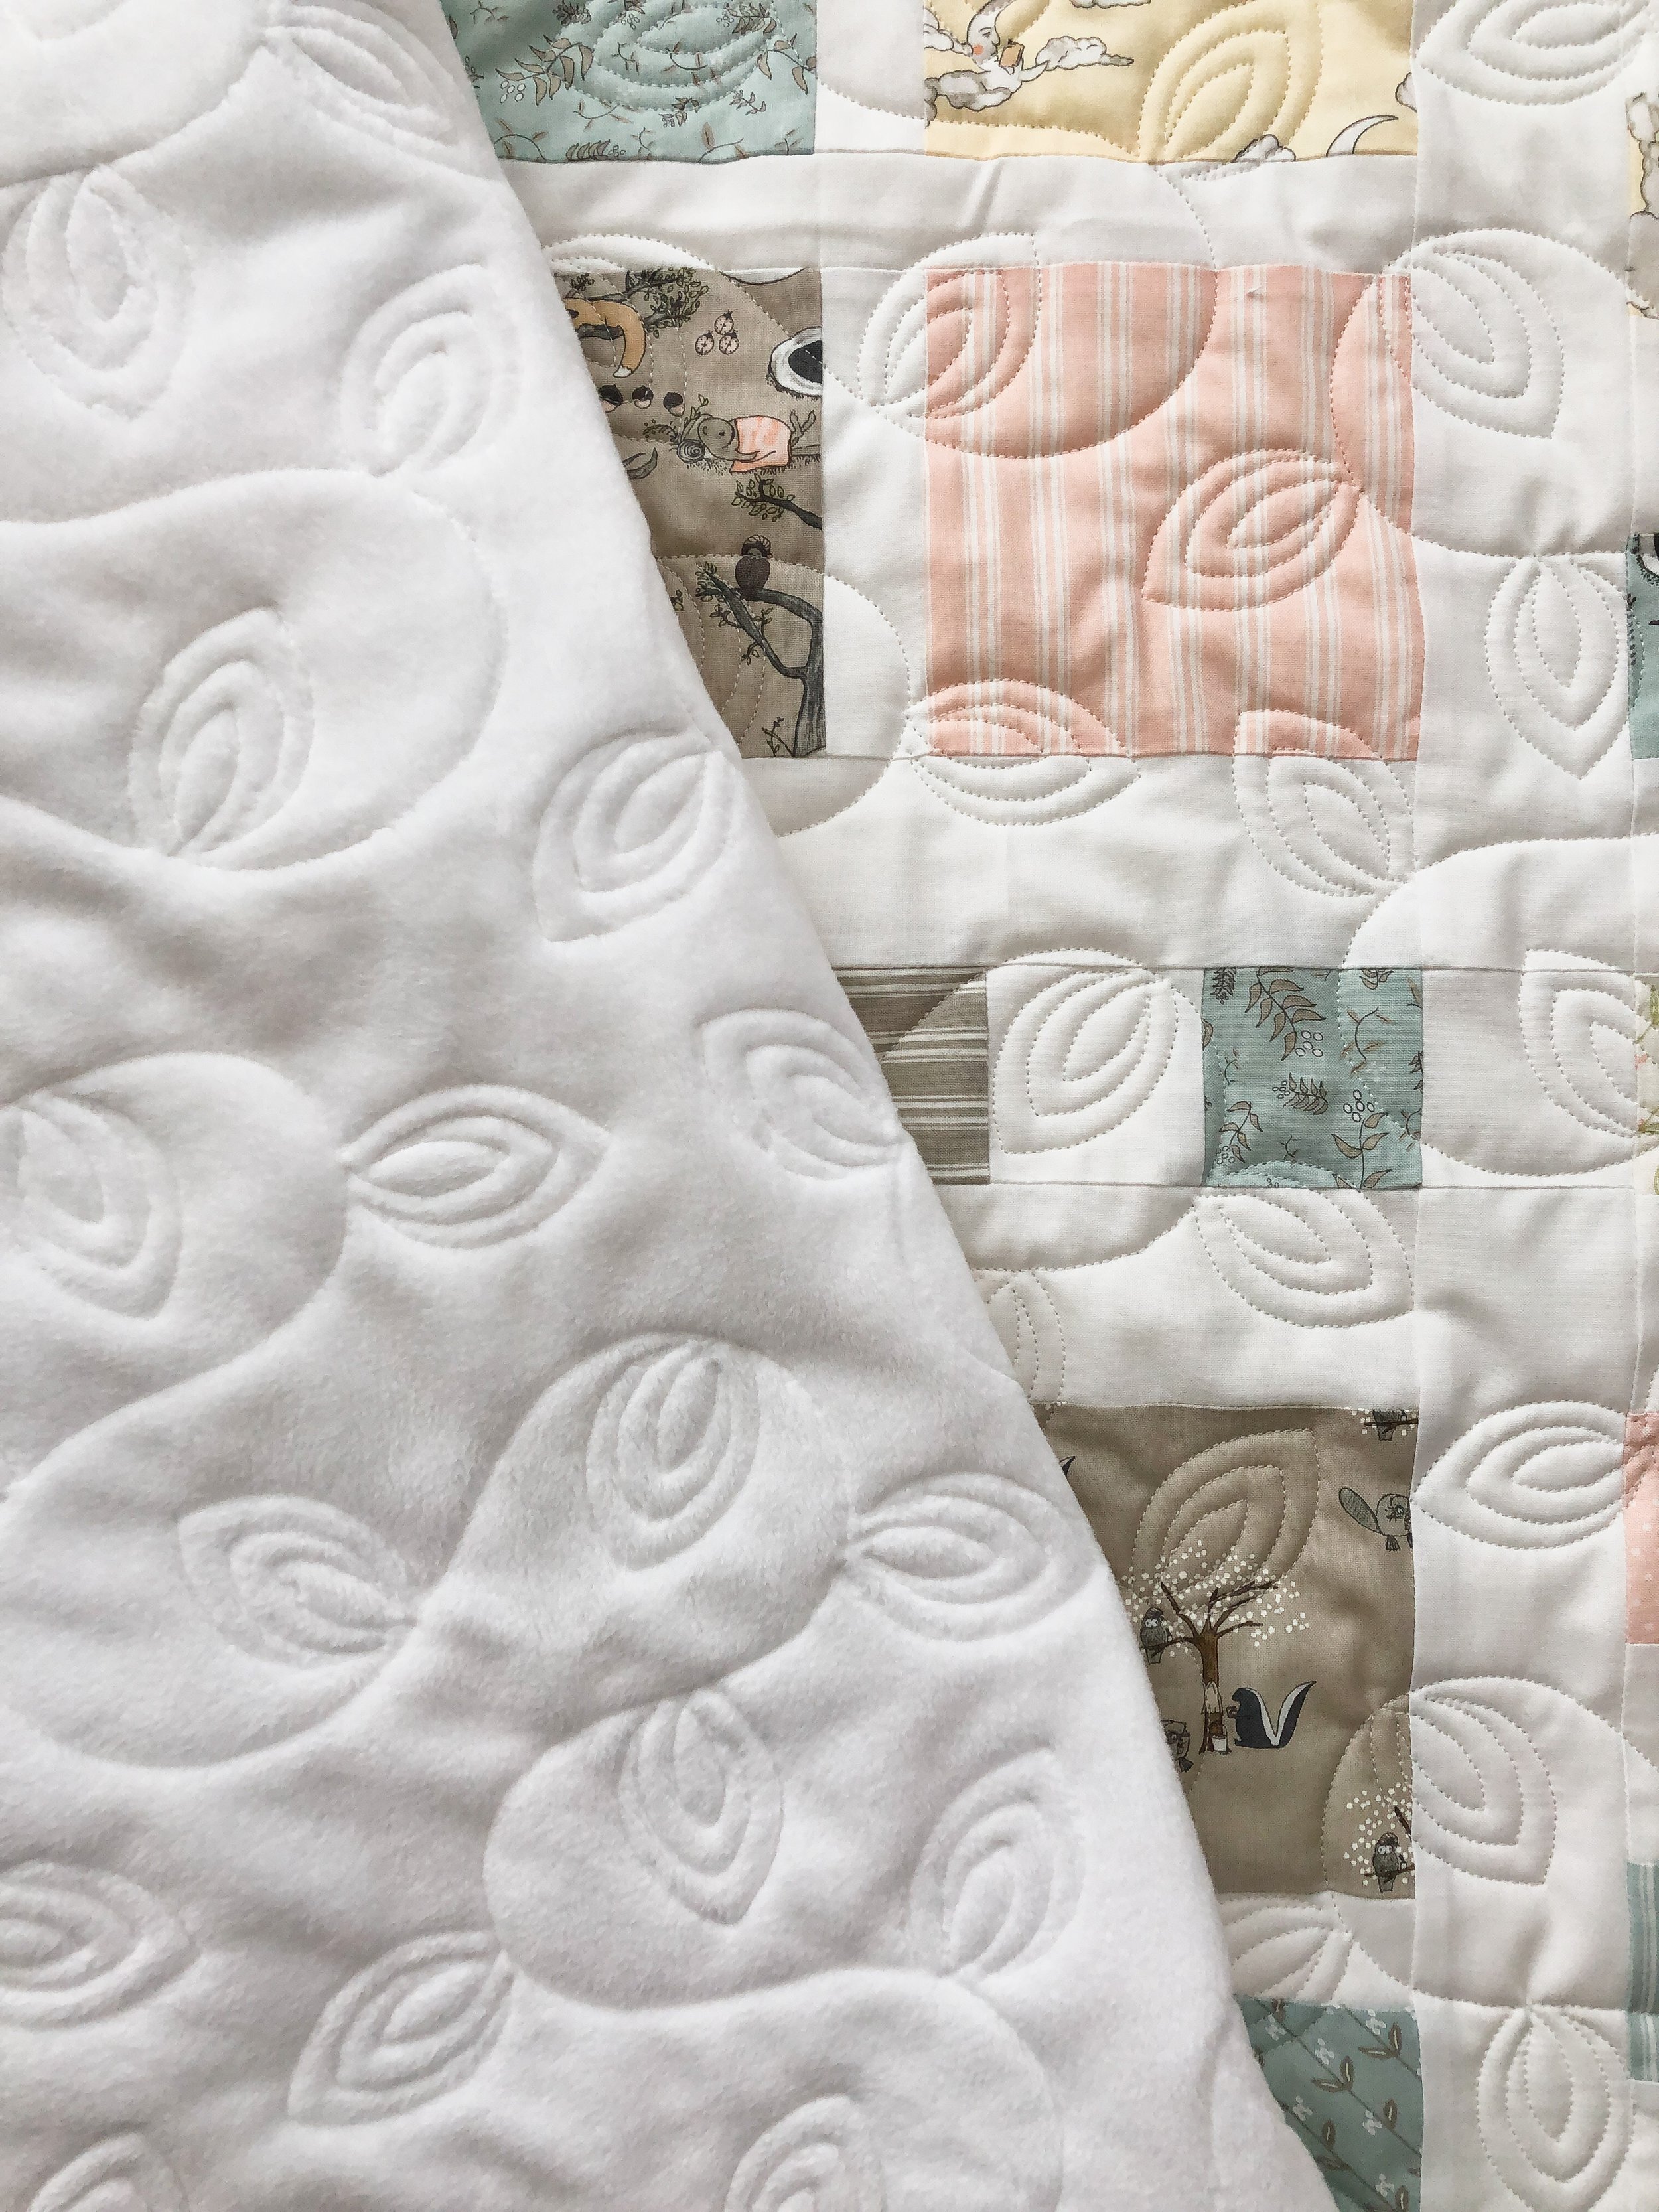
To make it even cozier, the backing is minky.
Thank you for stopping by for a quick look at Sandy’s baby quilt.
Do you have some quilts that you’d like to have quilted? I quilt edge to edge or custom. For more info on my pricing check out my Longarm Quilting Services page. Contact me to get added to my list. quiltingit@gmail.com
Thank you, happy sewing! Leisha

Linda’s Small World Quilt
Hi Friends,
Check out this amazing Small World quilt that my client Linda made in one of Tara Faughnan’s classes. The pattern came in the class, I can’t find it anywhere else. Linda shipped her quilt to me from the east coast, did you know that I accept mail in quilts for longarm quilting? I do!

Seriously fabulous quilt!!! All her points and the beautiful Bella Solids that she used. So so beautiful!
Linda wanted matchstick quilting at 1/2” apart, so I used my Lined 1/2” design to quilt it. Yes, it quilts back and forth. If you’re a longarm quilter and you struggle with quilting lines like these back and forth, turn your needle a little further to the right. It helps there be minimal breaks for me. For those who don’t quilt, a longarm struggles quilting from right to left without having lots of thread breaks. To help with that I turn my needle to about 5:30, if not a touch more, and it doesn’t the trick. Sometimes different threads can help. It just happens. It’s worth the extra effort when this is the result. I have my Lined design available in 1/4”, 3/4”, 1” and a bundle of all four, as well. They are available in my shop.

I used my favorite go to white thread from Superior Threads, Natural White Omni. I also used a lovely 4 oz bamboo batting from Winline Textiles out of Ogden Utah. I also carry a 6 oz bamboo batting, which I loved putting in my Perfect Picnic Quilt recently.

I think lines are perfect for a quilt like this!! It’s fresh and modern. Love it!!

Can we just pause and look and all of those beautiful points?! Linda added a border to it as well.
Close up on the quilty texture.

And finishing off with a quilt swirl.

Not every quilt needs complex quilting, simple can be pretty perfect, too. Thanks for stopping by, and happy quilting! - leisha
PS…I’d love to quilt for you. Contact me or email me at quiltingit@gmail.com • I look forward to quilting for you!
Ice Dyeing Fabric
Have you ever Ice Dyed before? I haven’t until recently. My good friend Christy has done it several times, and she agreed to have Gale, Holly, and I over for an Ice Dyeing party! Lucky us!
I love these ladies!! They along with Molly, are in my local longarm quilting accountability group. It’s been great to spend time with them and talk about longarm quilting in our local community. We missed Molly this time, she was out of town.
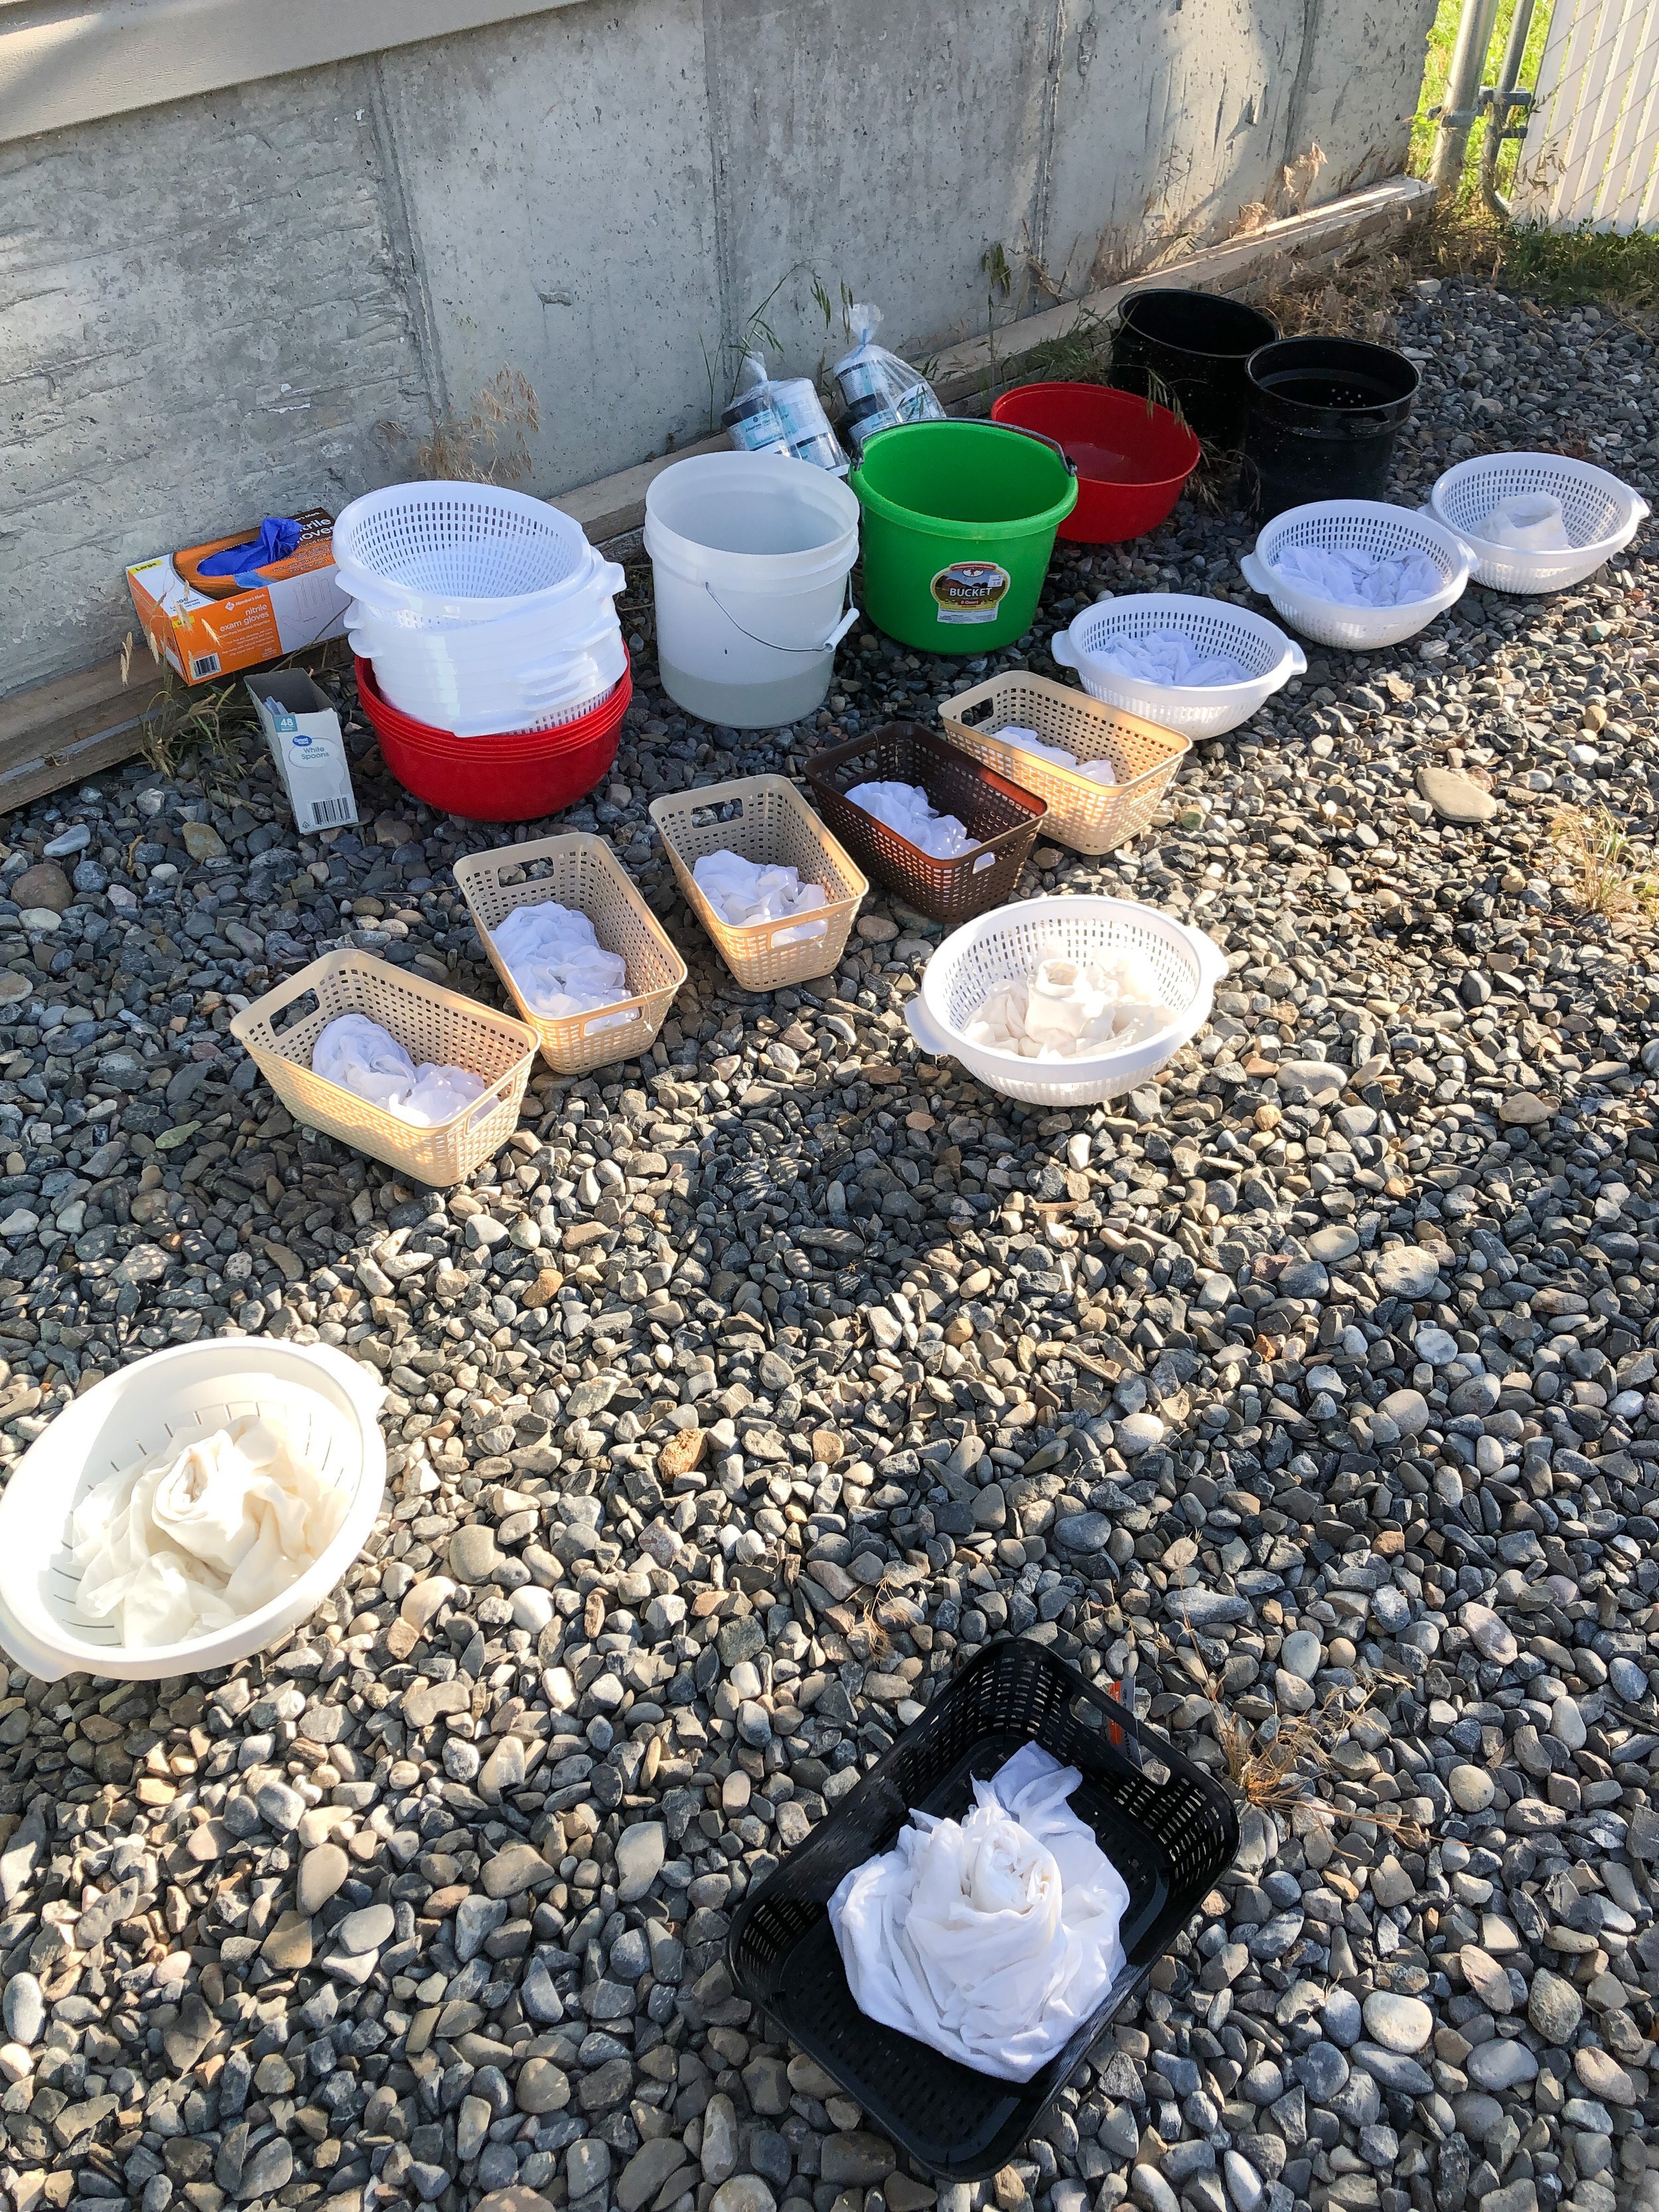
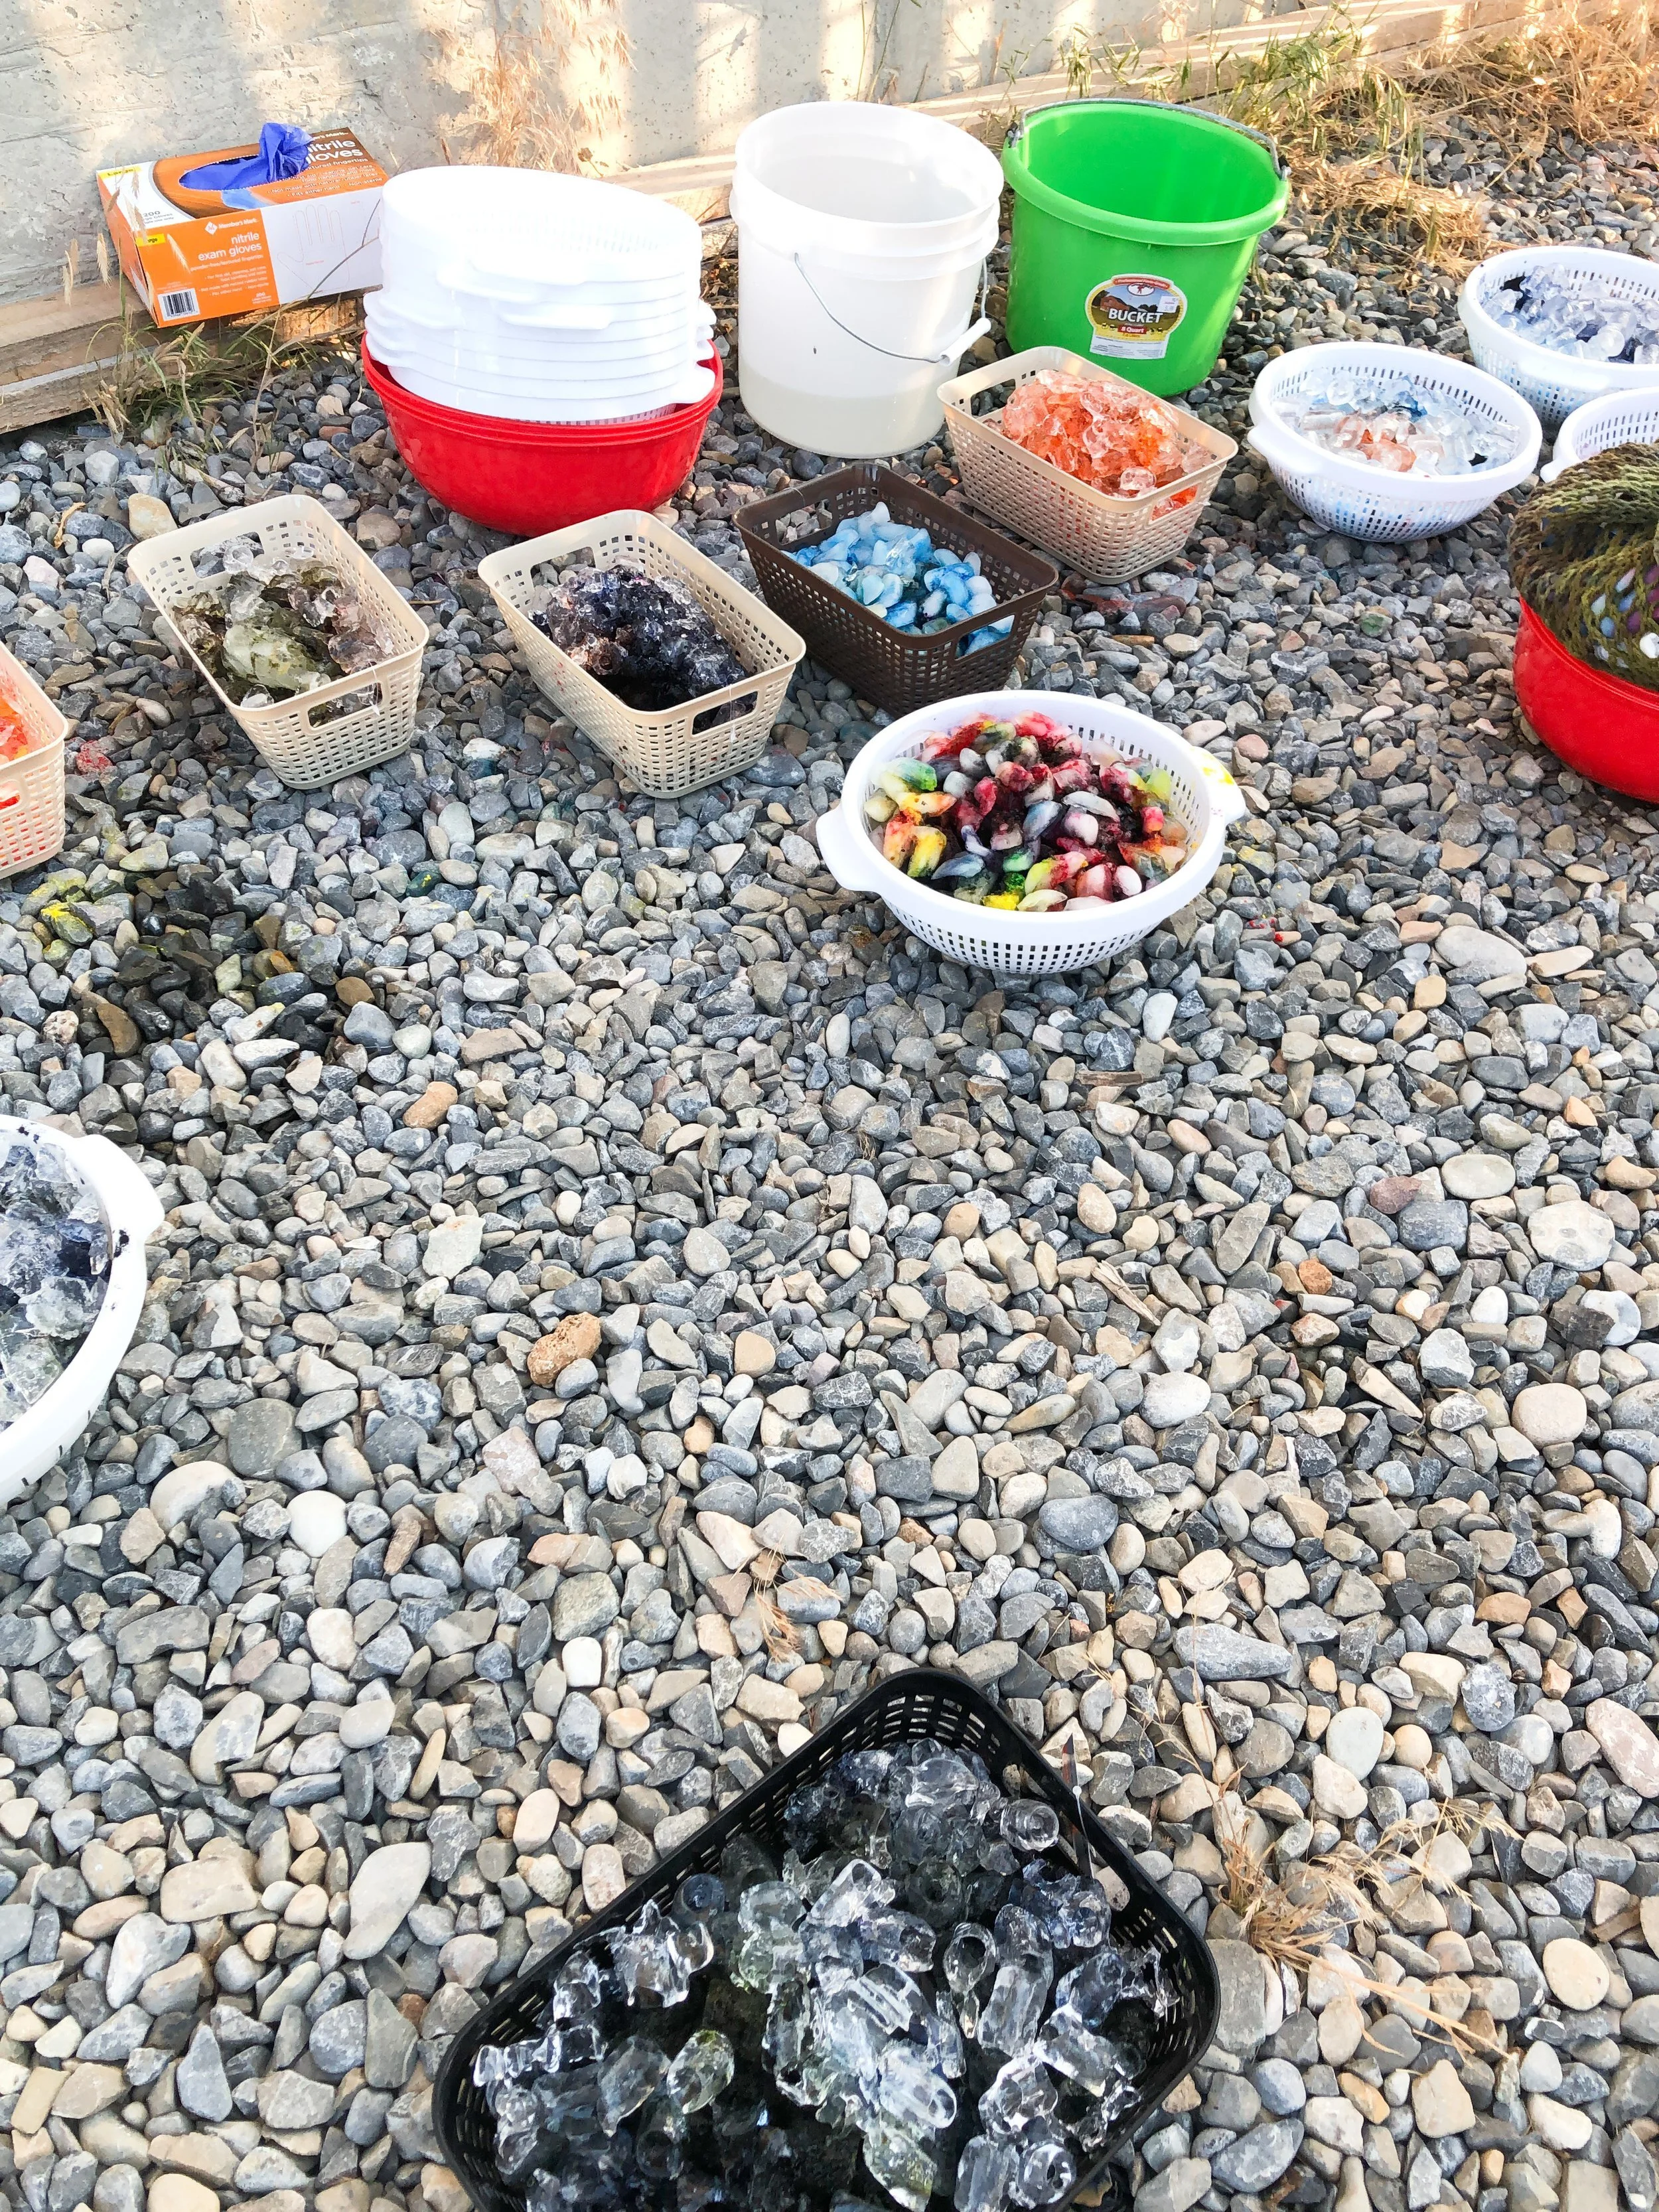
Christy told us to bring a 45” cut of PFD fabric, which means Prepared For Dyeing or a 100% cotton t-shirt. Our local quilt shop was out of the fabric, so Gale brought me a piece. She’s a gem! Christy also asked us to bring a strainer or container with holes in it, for the water to drain out when the ice melts. I found the black rectangular container at the dollar store. We also each brought a bag of ice. Christy had the dyes, soda ash, and synthrapol on hand.
When we got there Christy had a bucket with Soda Ash in it to soak our fabric in for 15 minutes. She used one cup of Soda Ash to a gallon of water. Note: don’t throw out your Soda Ash/water mixture. You can use it again. I’ve never used or even heard of Soda Ash, but apparently it’s a great thing to use when you wash dark clothes for the first time. Holly said she washed her son’s black baseball pants in soda ash when he first got them, and they maintained their color throughout the season. Awesome stuff!!
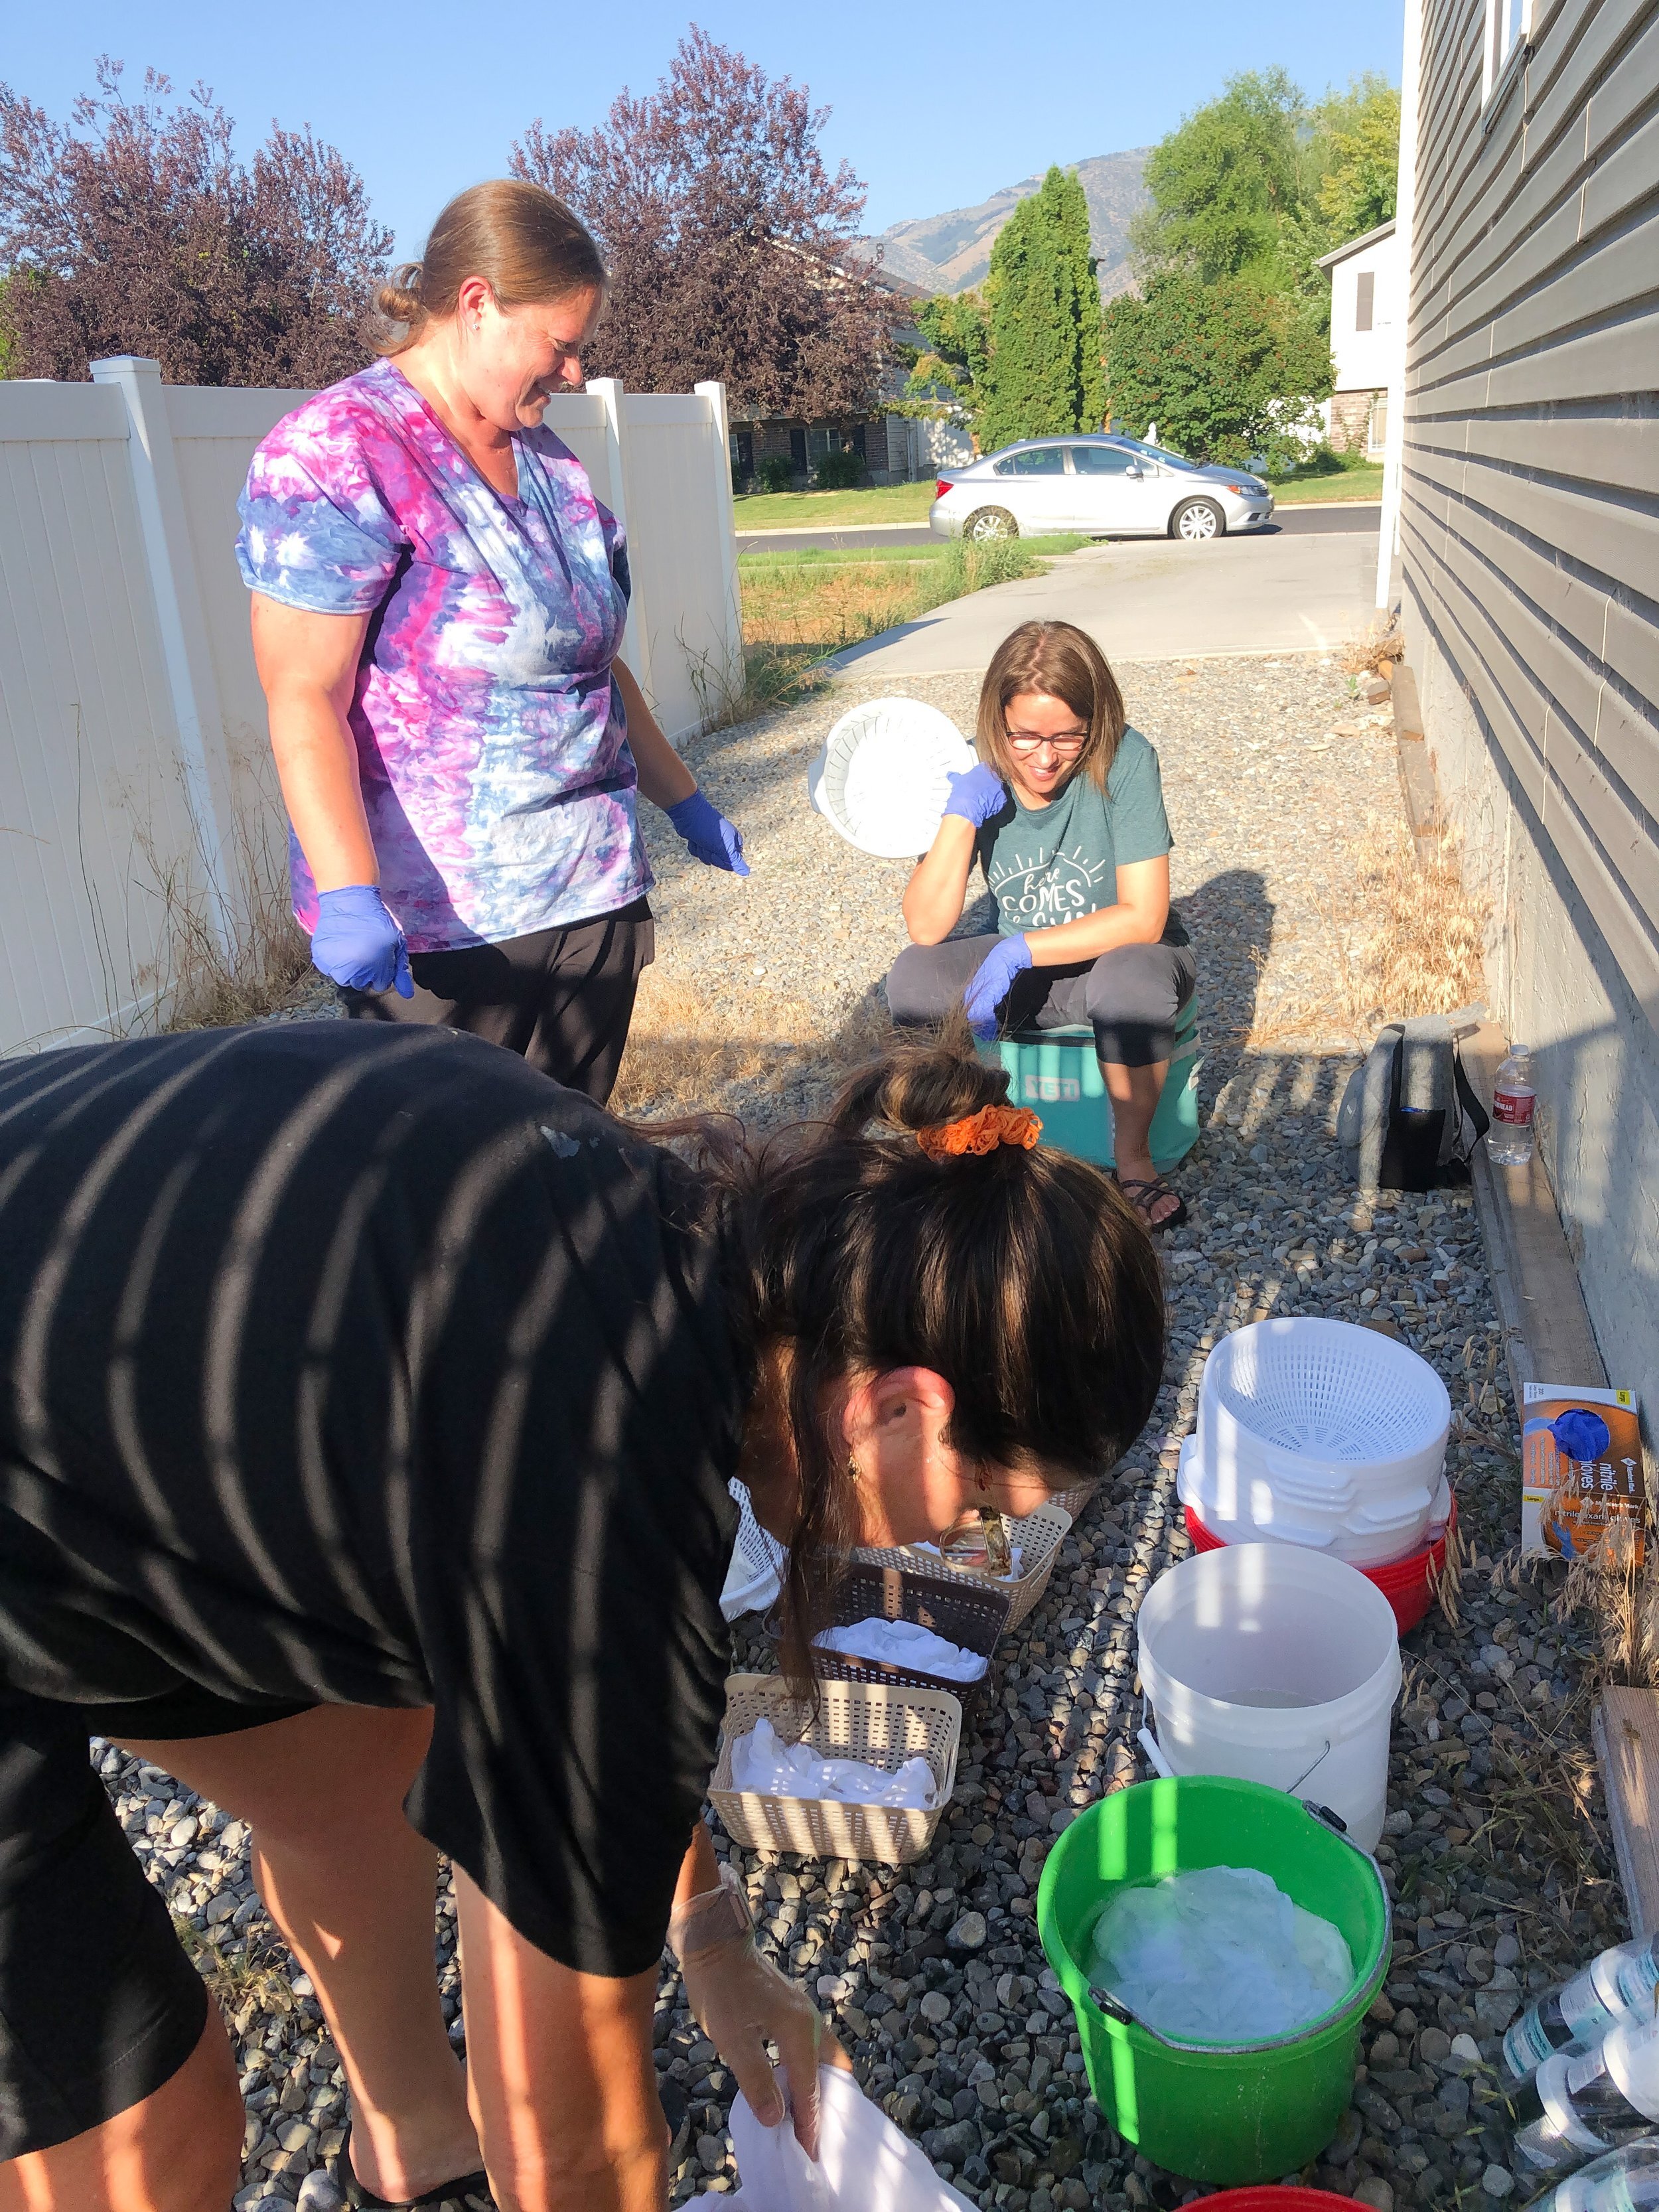
This is Gale, Christy, and Holly…putting their fabric and shirts in the containers getting ready for the ice.
After soaking the fabric in Soda Ash, we folded up the fabric in half and then half again so it is square. Then we folded it on a diagonal, similar to the shape of a paper airplane before you open it back up. Then we loosely rolled it from the point to the edge, which is like rolling a croissant. Then as you can see in the picture below we opened up the end a little and laid it in our containers. Christy helped me with mine. The fabrics or shirts need to be looser than you think, so they can accept the dye. For other ways to fold the fabric or shirts, google it or experiment.
The next step is to completely cover it in ice, as you can see my container below. Yes, before dyeing you put the ice on.
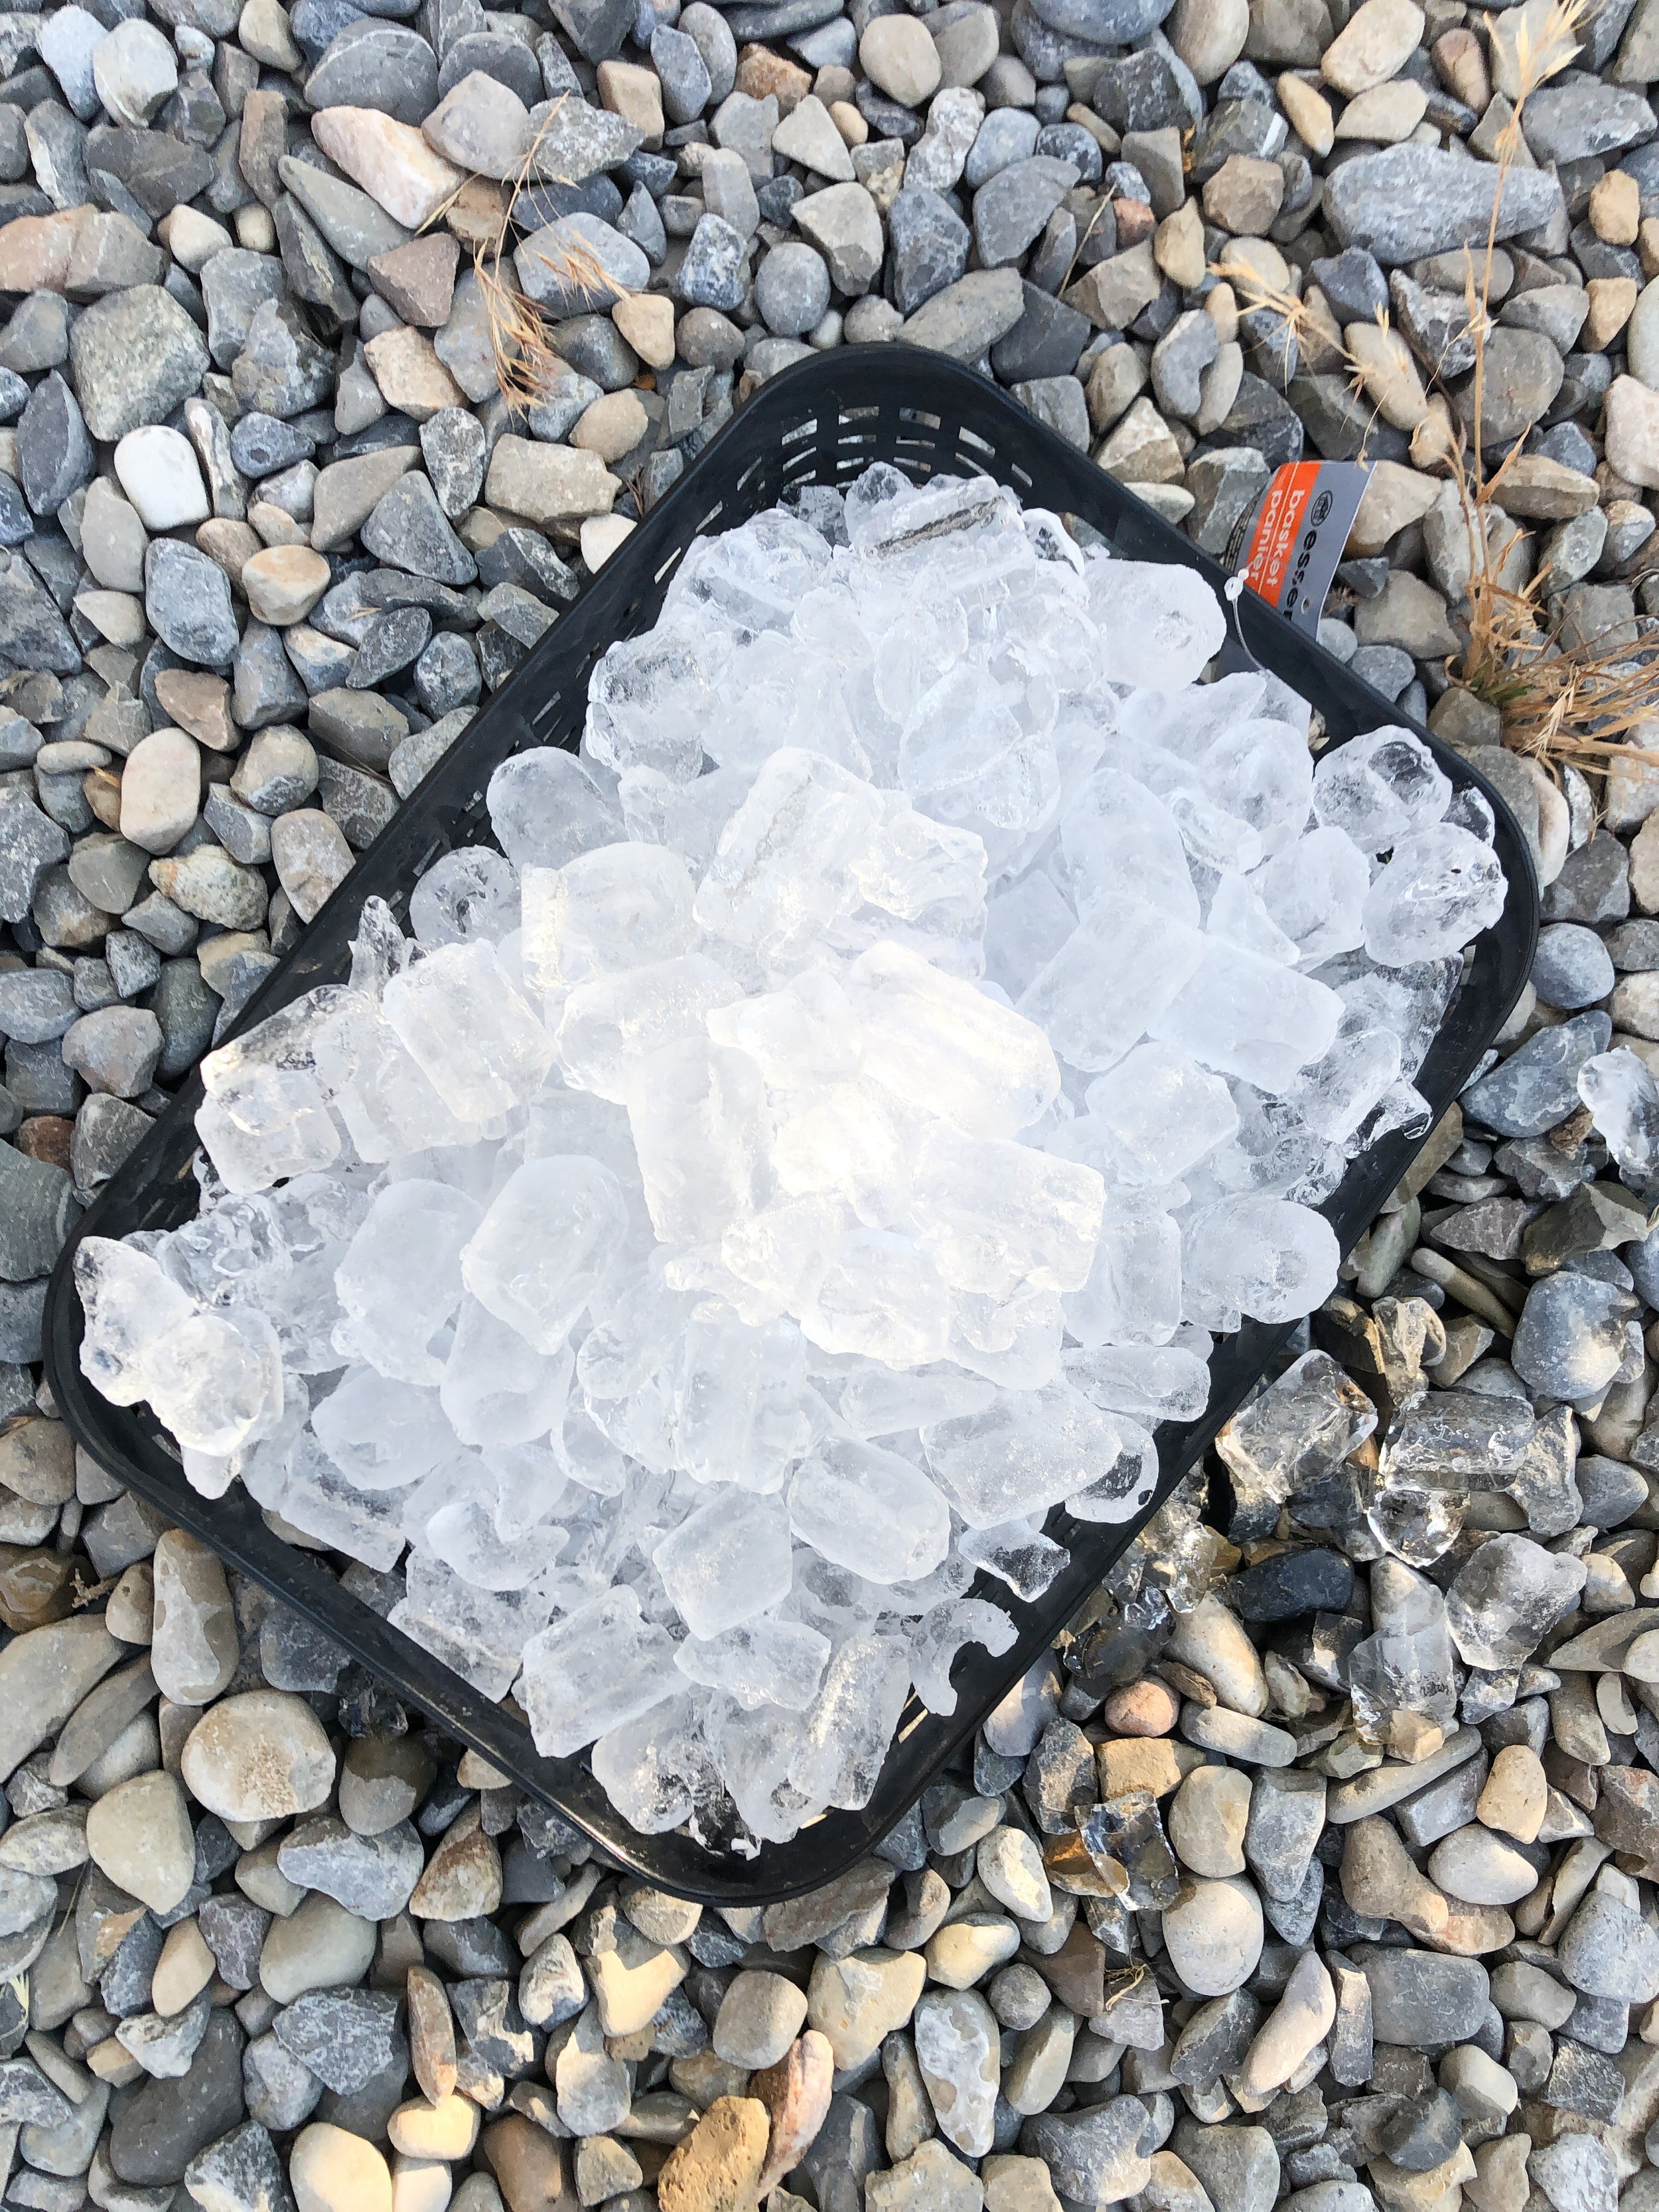
All iced and ready to go!

These are the powdered dye that Christy loves to use, a little goes a long ways.

The colors are so beautiful! We used plastic spoons and made sure to wear gloves.

Here is Gale doing one of her shirts or her fabric.

Below is my container. I put an olive green and navy color on mine. I should have gone lighter on the navy, to see more of the green.

Here are a few of Gale’s.
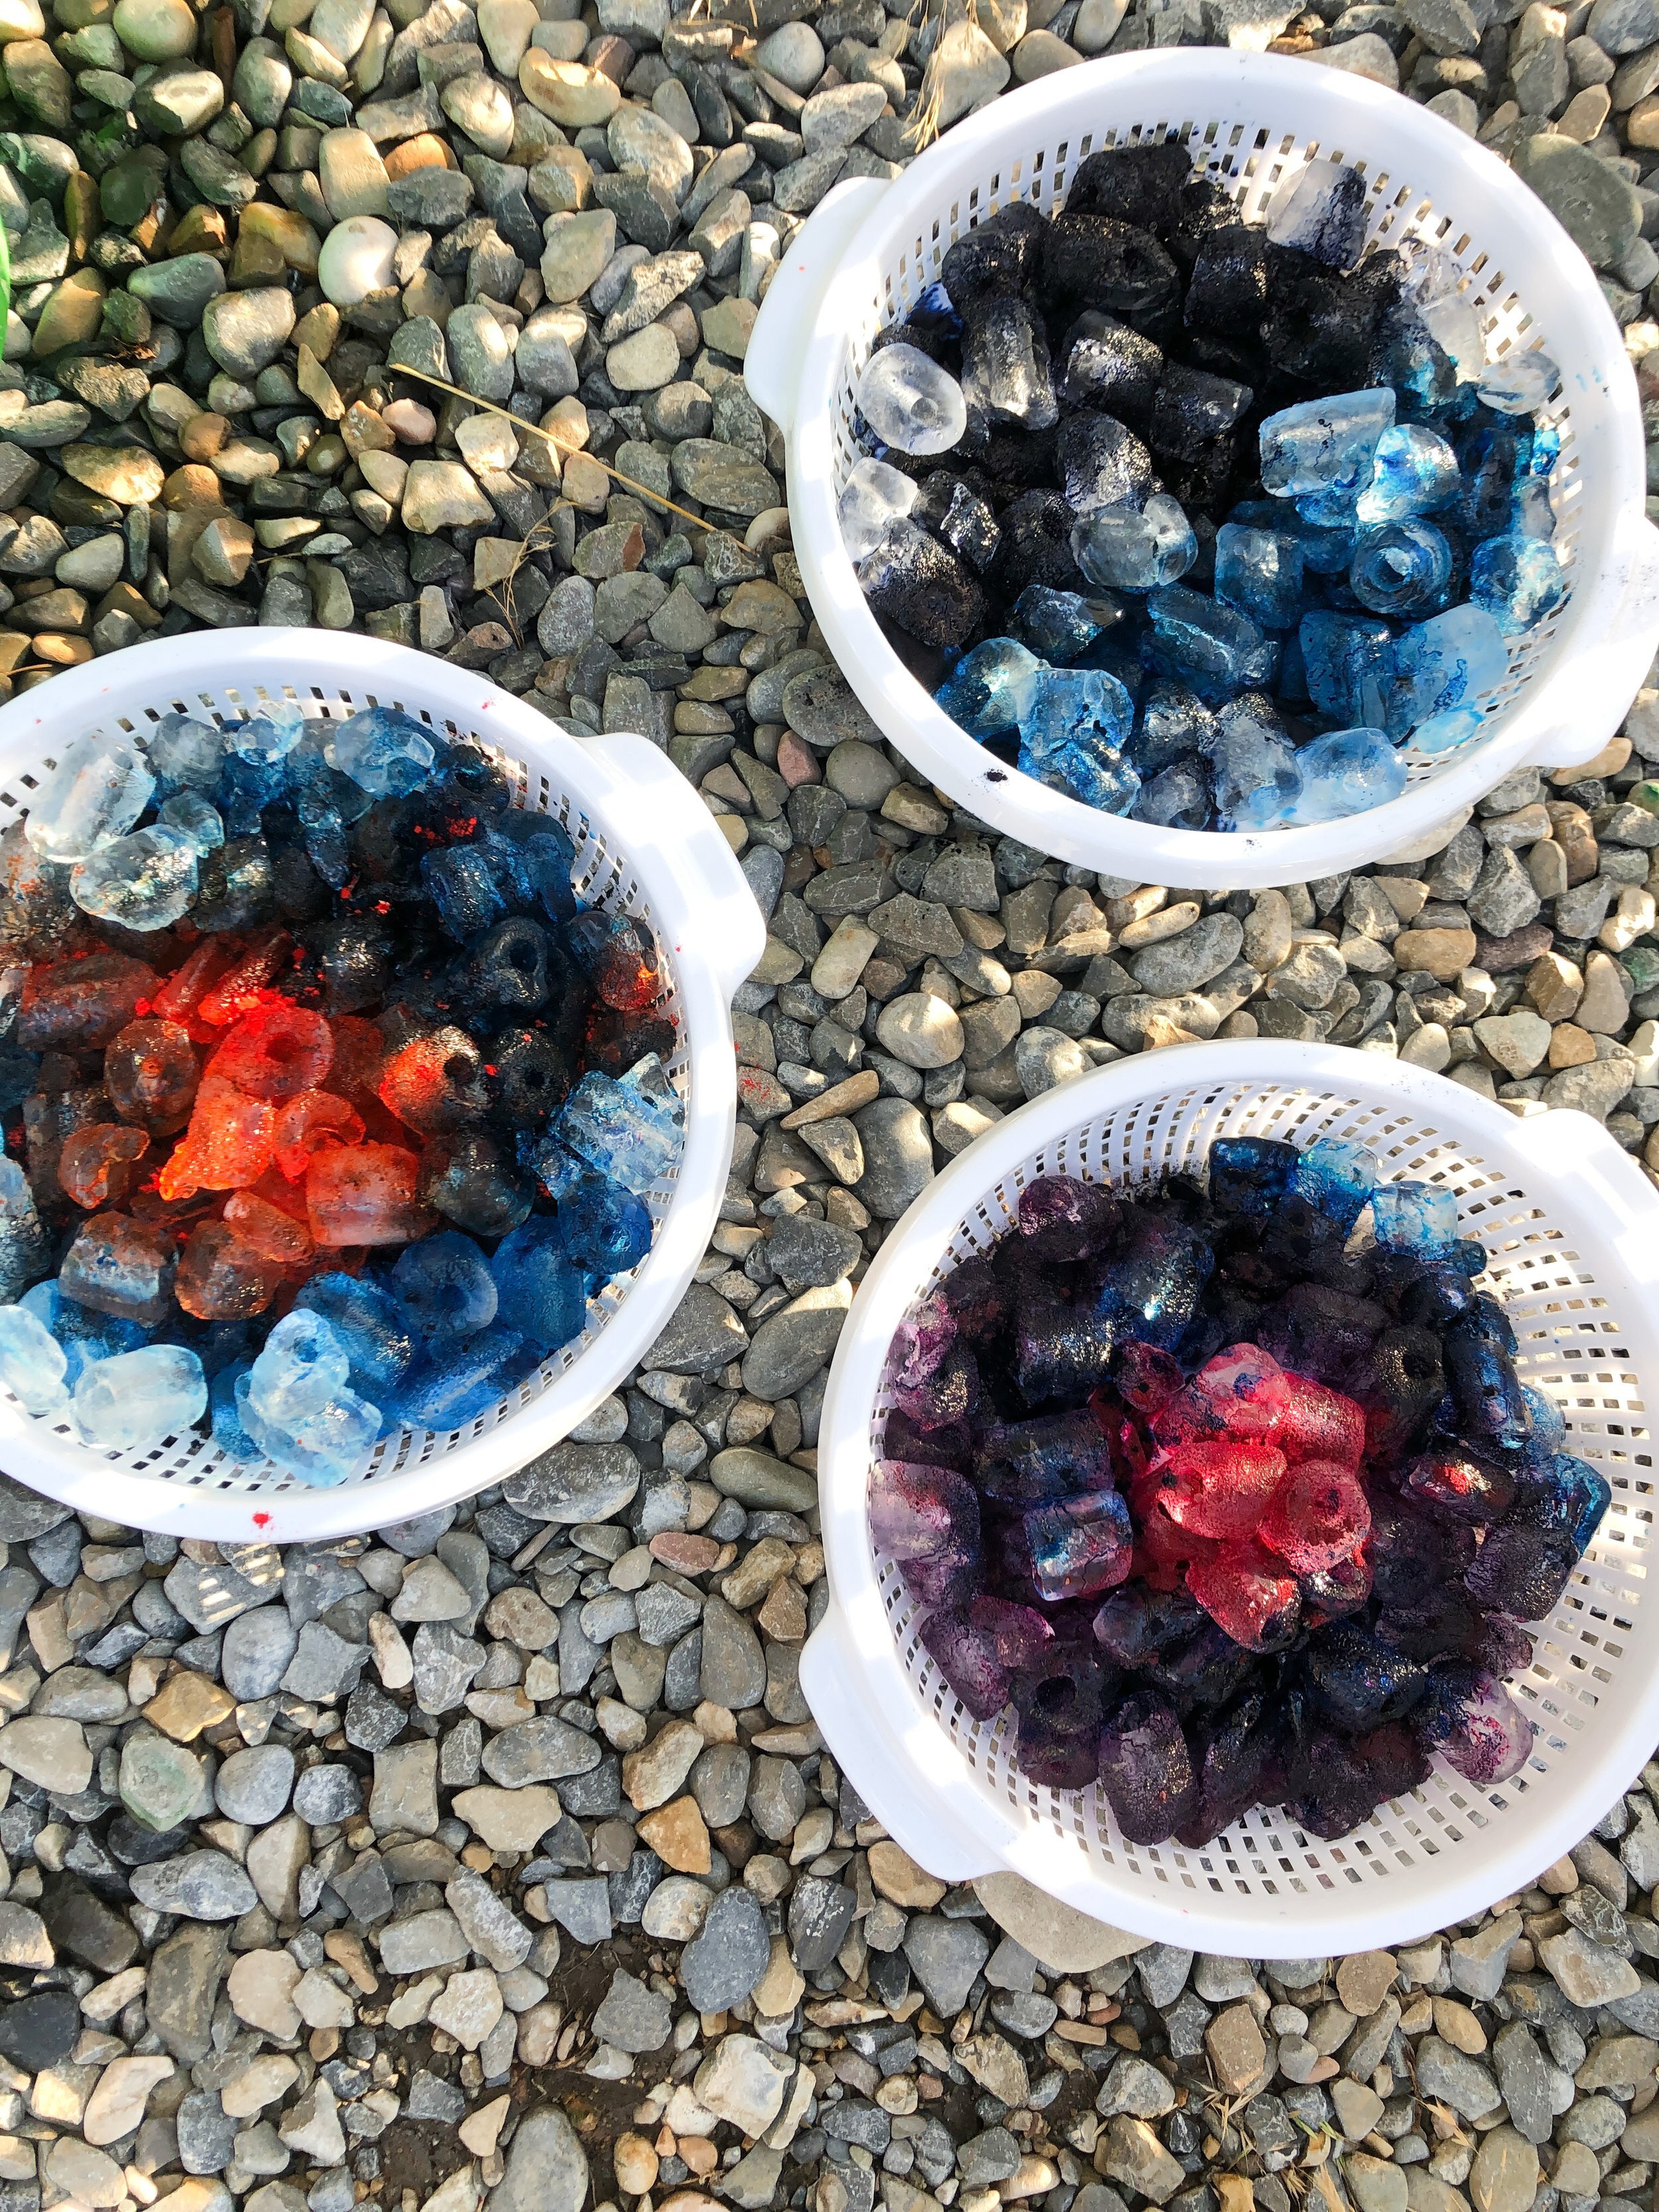
Then it’s time to wait…and wait. We actually visited for an hour or so after we were done and then took them home with us. I put my container in two garbage bags and then used a red bowl underneath the bags to get mine home without getting dye in my car. I’m glad I had the bowl. The garbage bags ended up ripping. Christy had a perfect spot on the side of her house to do this. Be mindful of where you let your container sit to melt and dry. You don’t want animals or kids to get to it, and you don’t want it on cement. When I brought mine home, I put it on the grass to let the ice continue to melt. I also covered the top with a plastic bag to keep out any animals. We let them sit for 24 hours before rinsing. If you’d like to add more ice after the first ice has melted you can, it can help distribute the dyes even more.
I didn’t get a picture of it when the ice completely melted, sorry!! Next up, put gloves back on and now it’s time to rinse out the dye until you don’t see any more dye. Laid mine out on the grass and rinsed it with the hose, trying not to splatter and get it on me. Christy has a utility sink in her laundry room that she rinses hers out in, and she showed us that the dyes don’t stain her sink. It’s up to you.
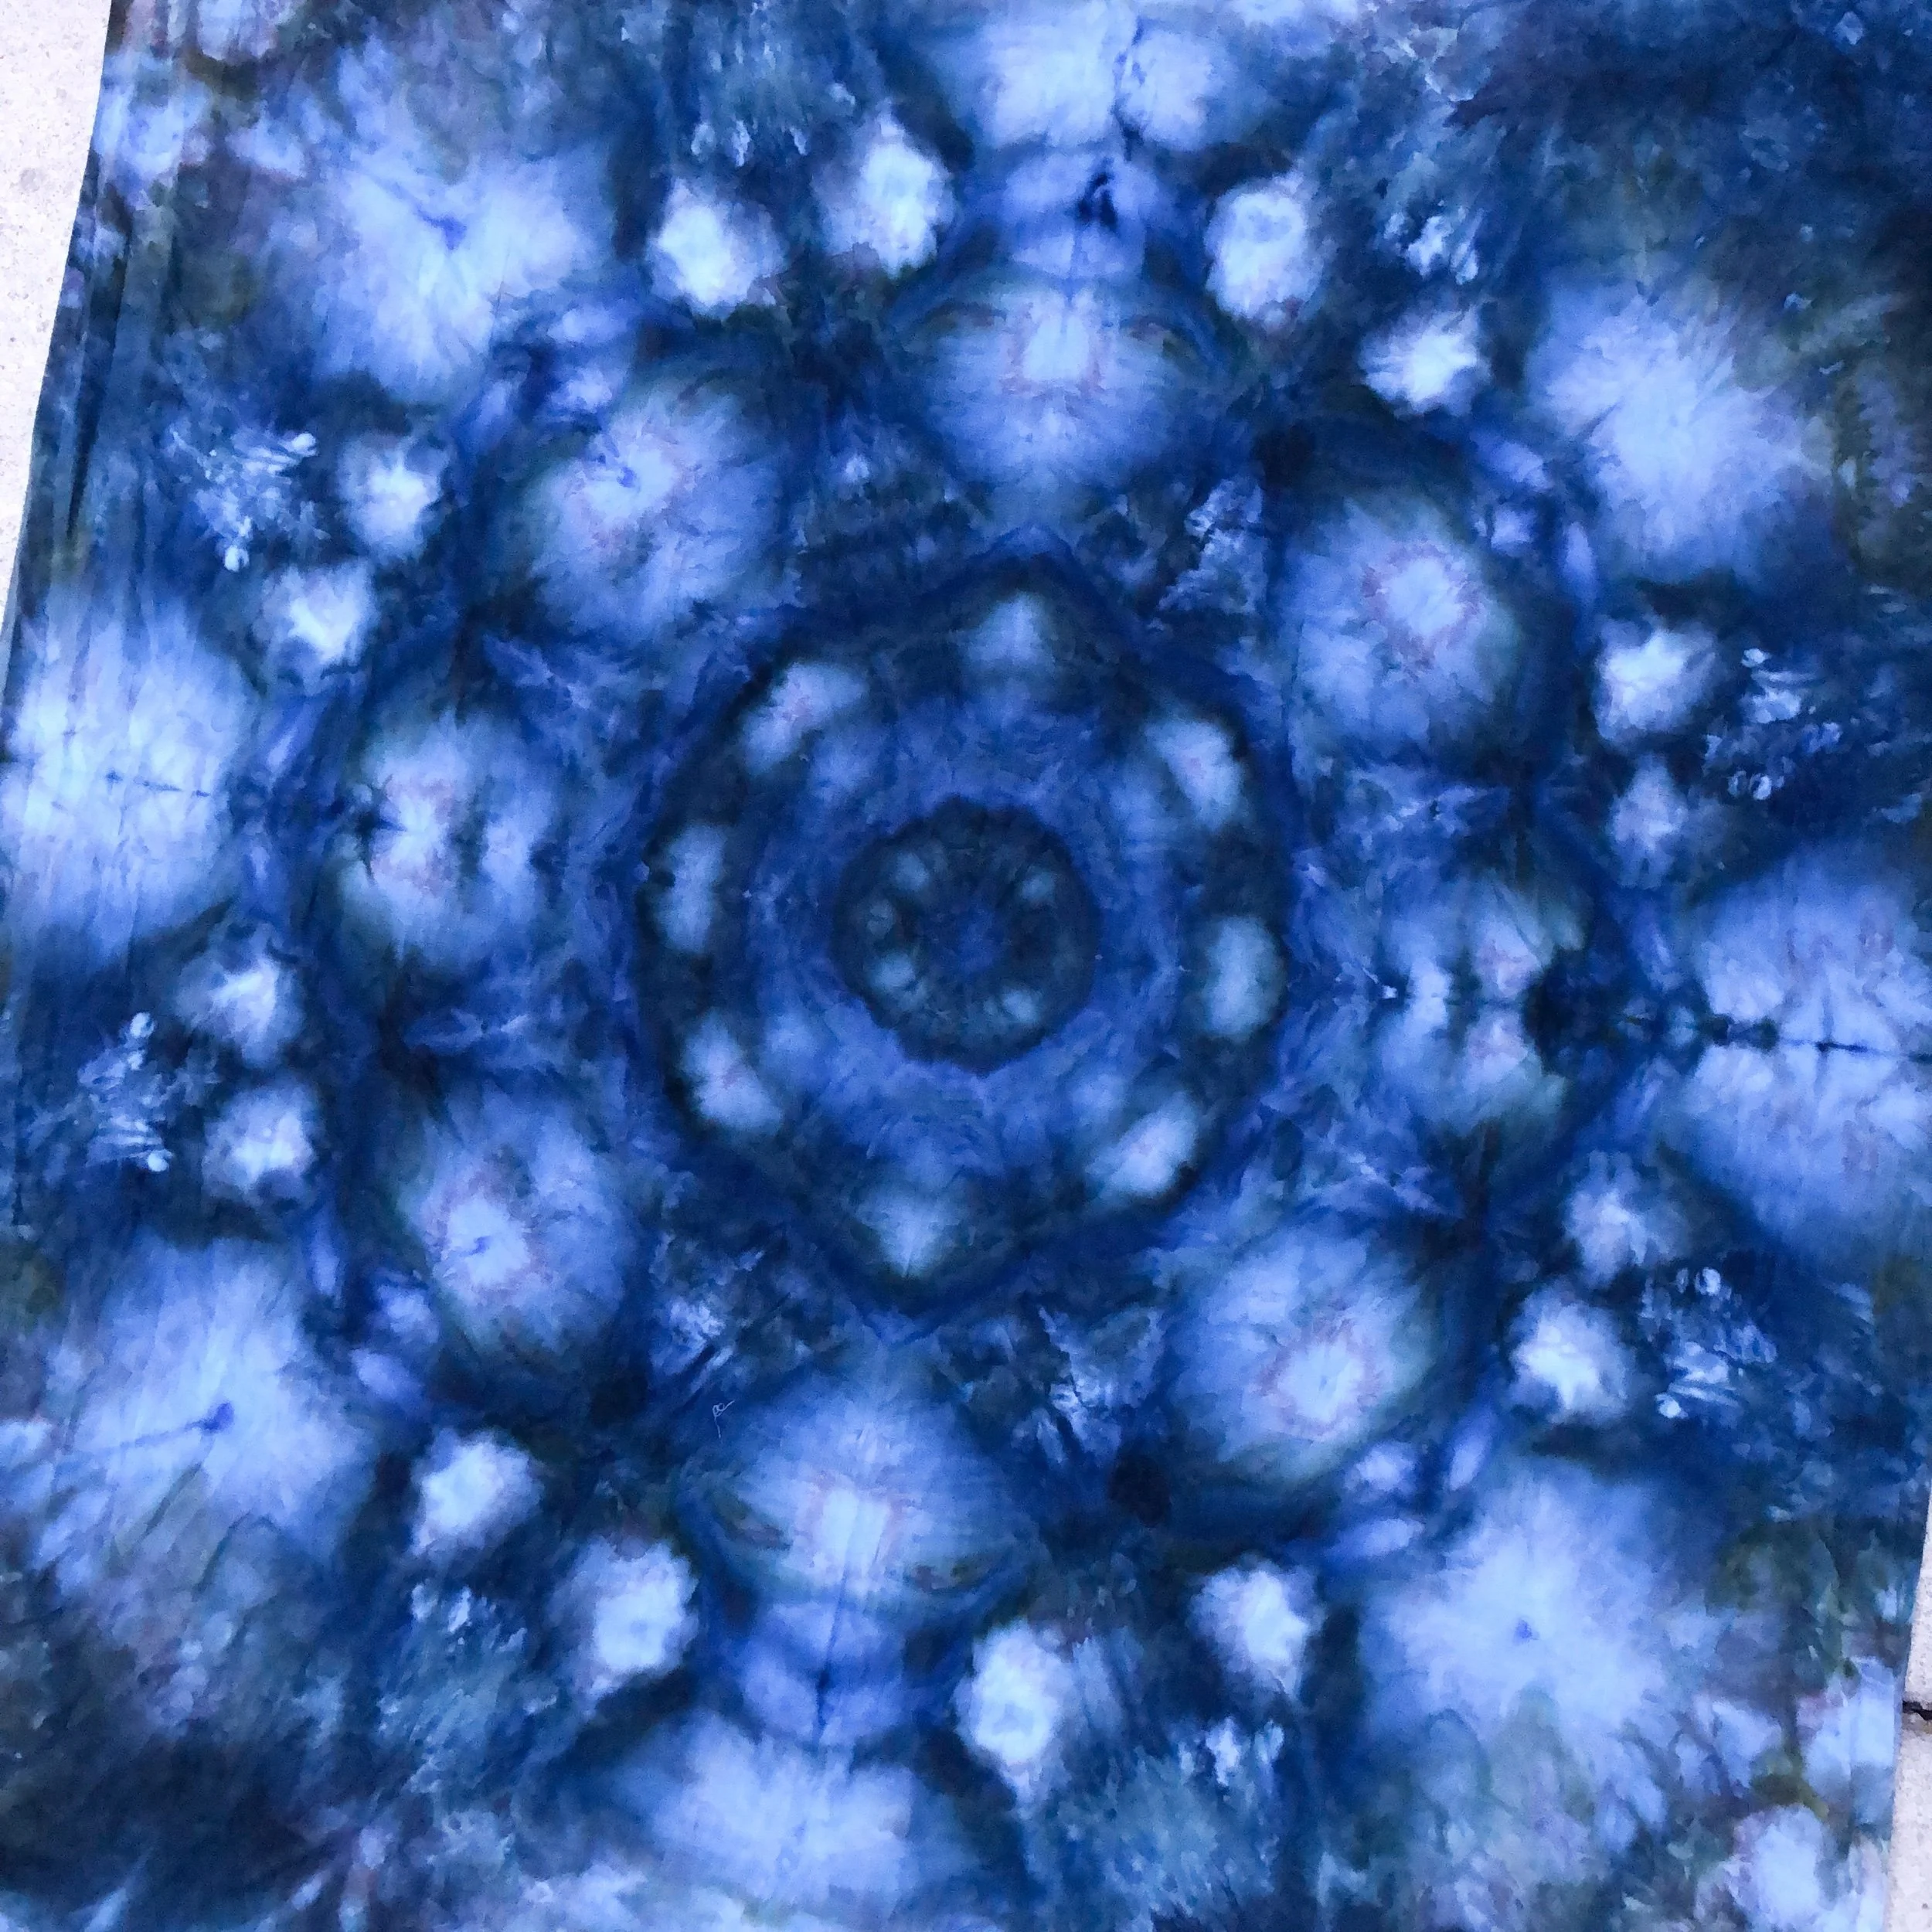
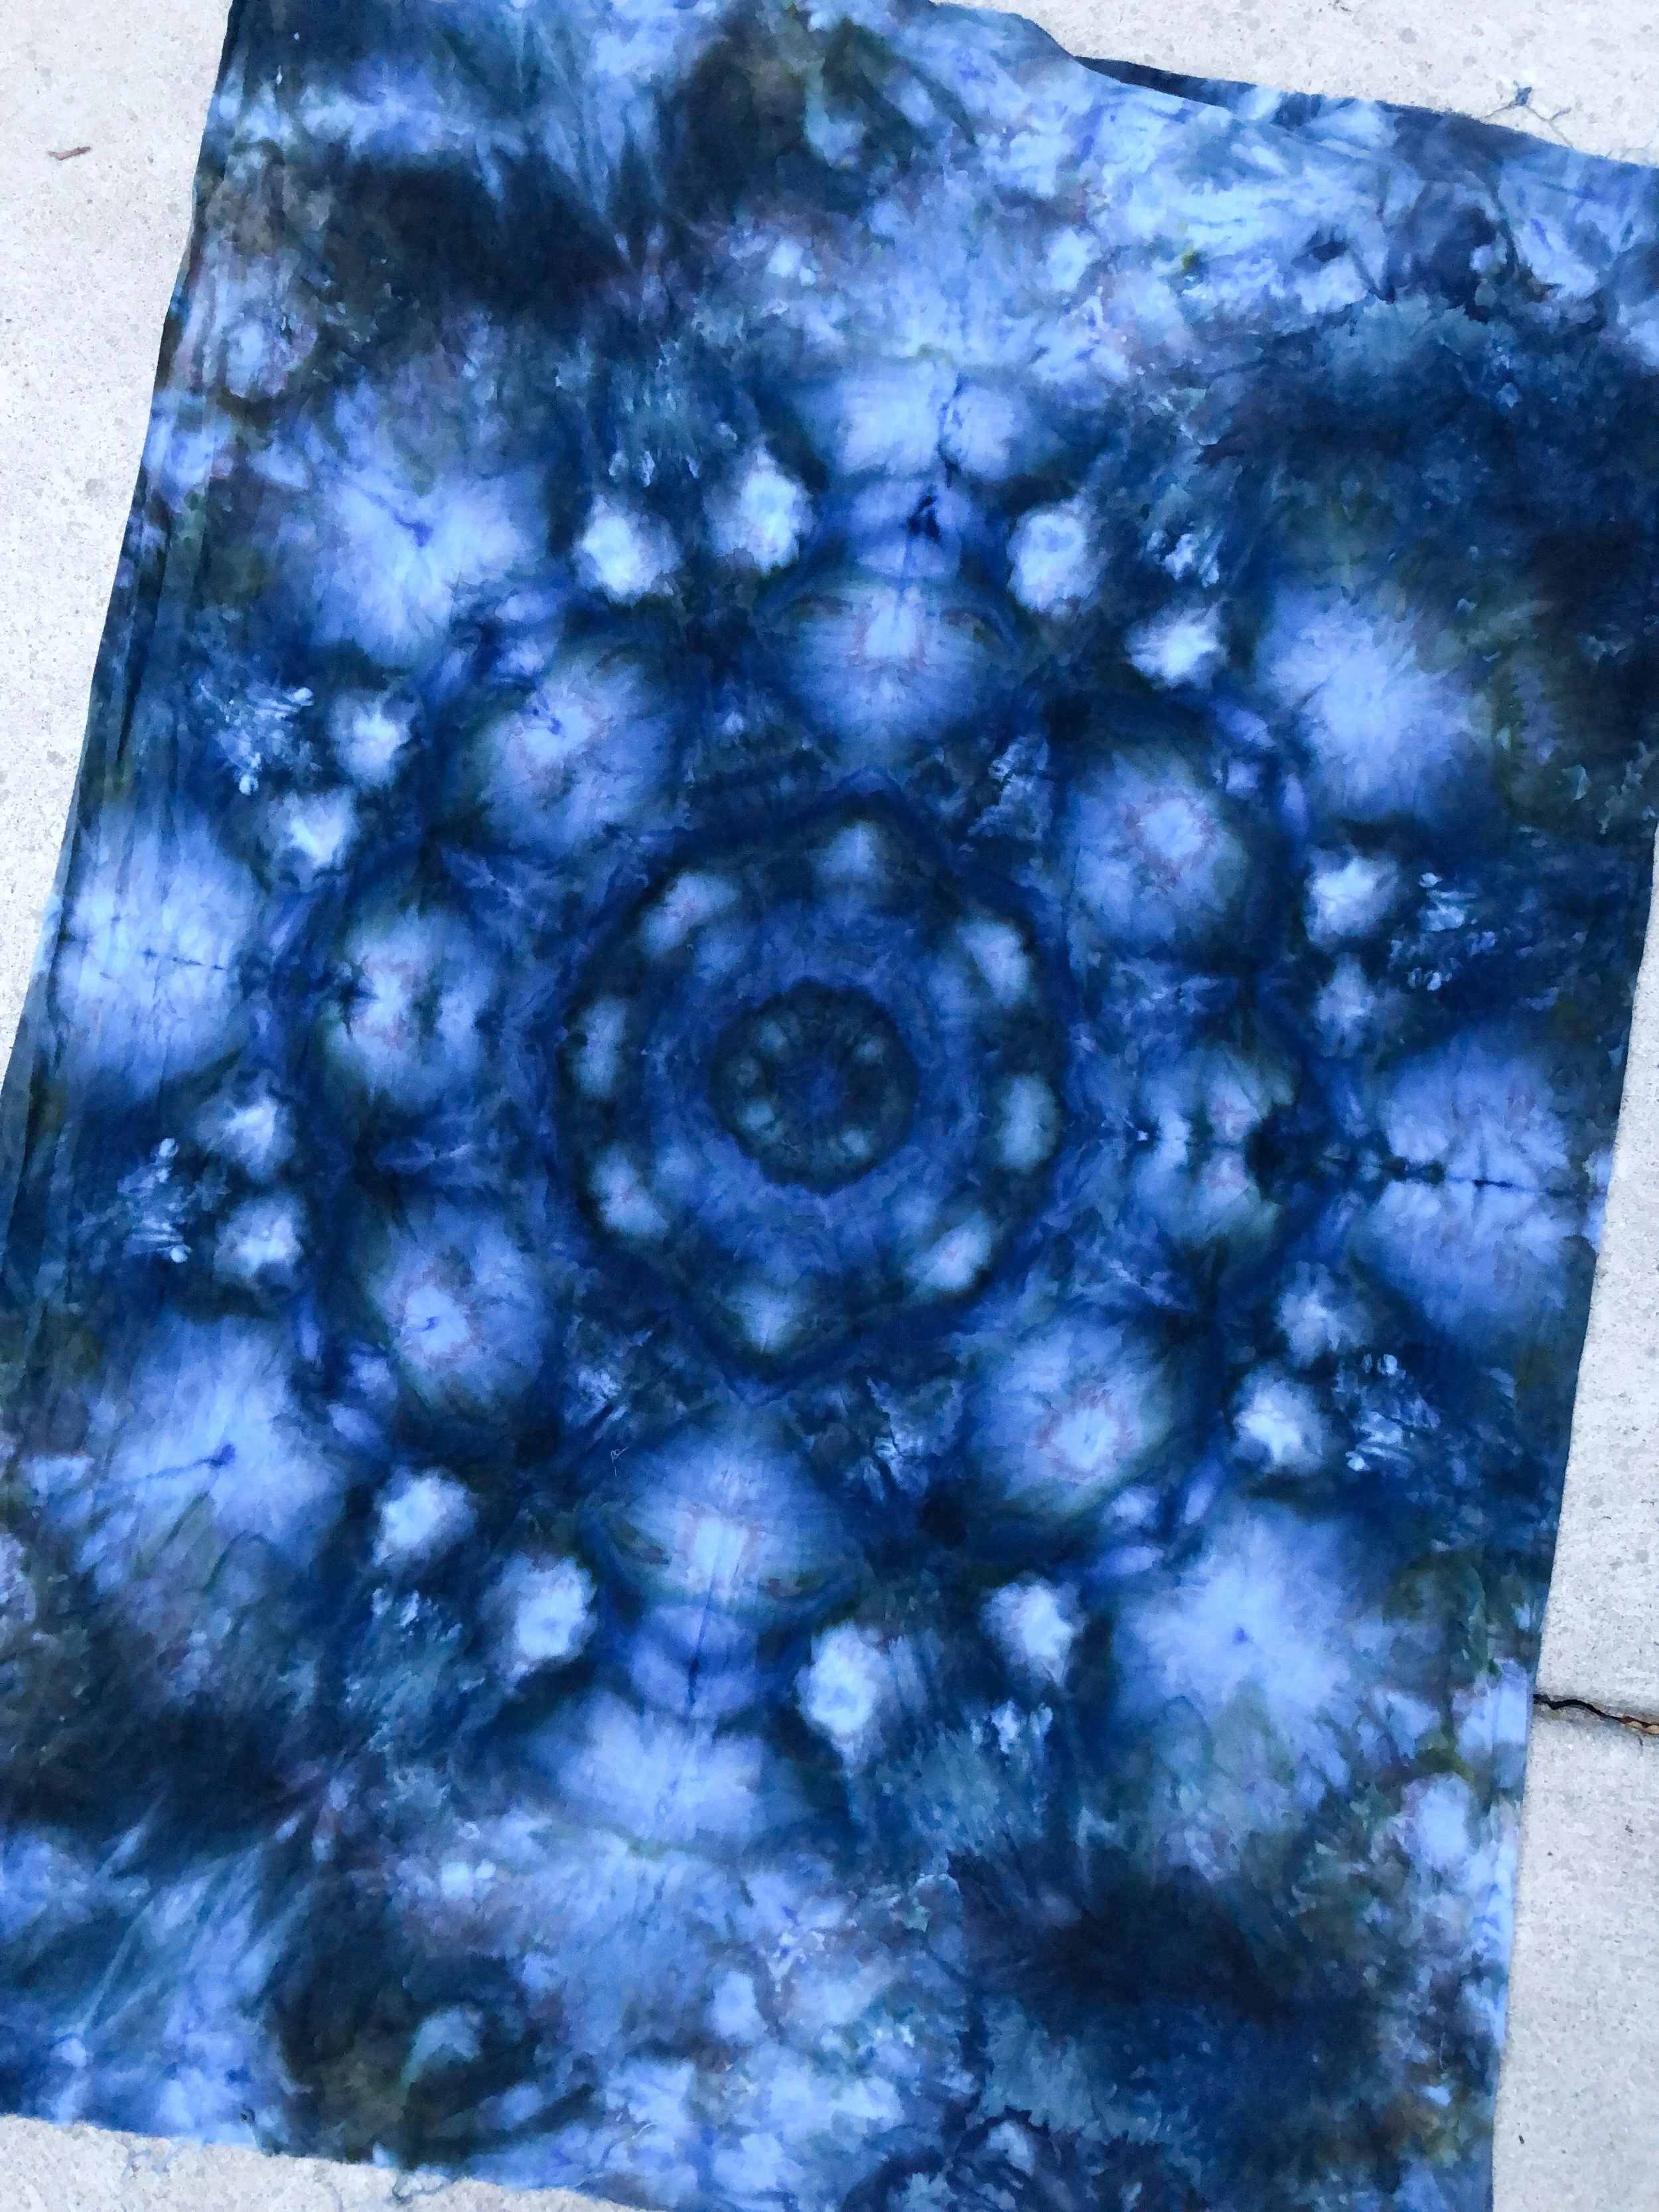
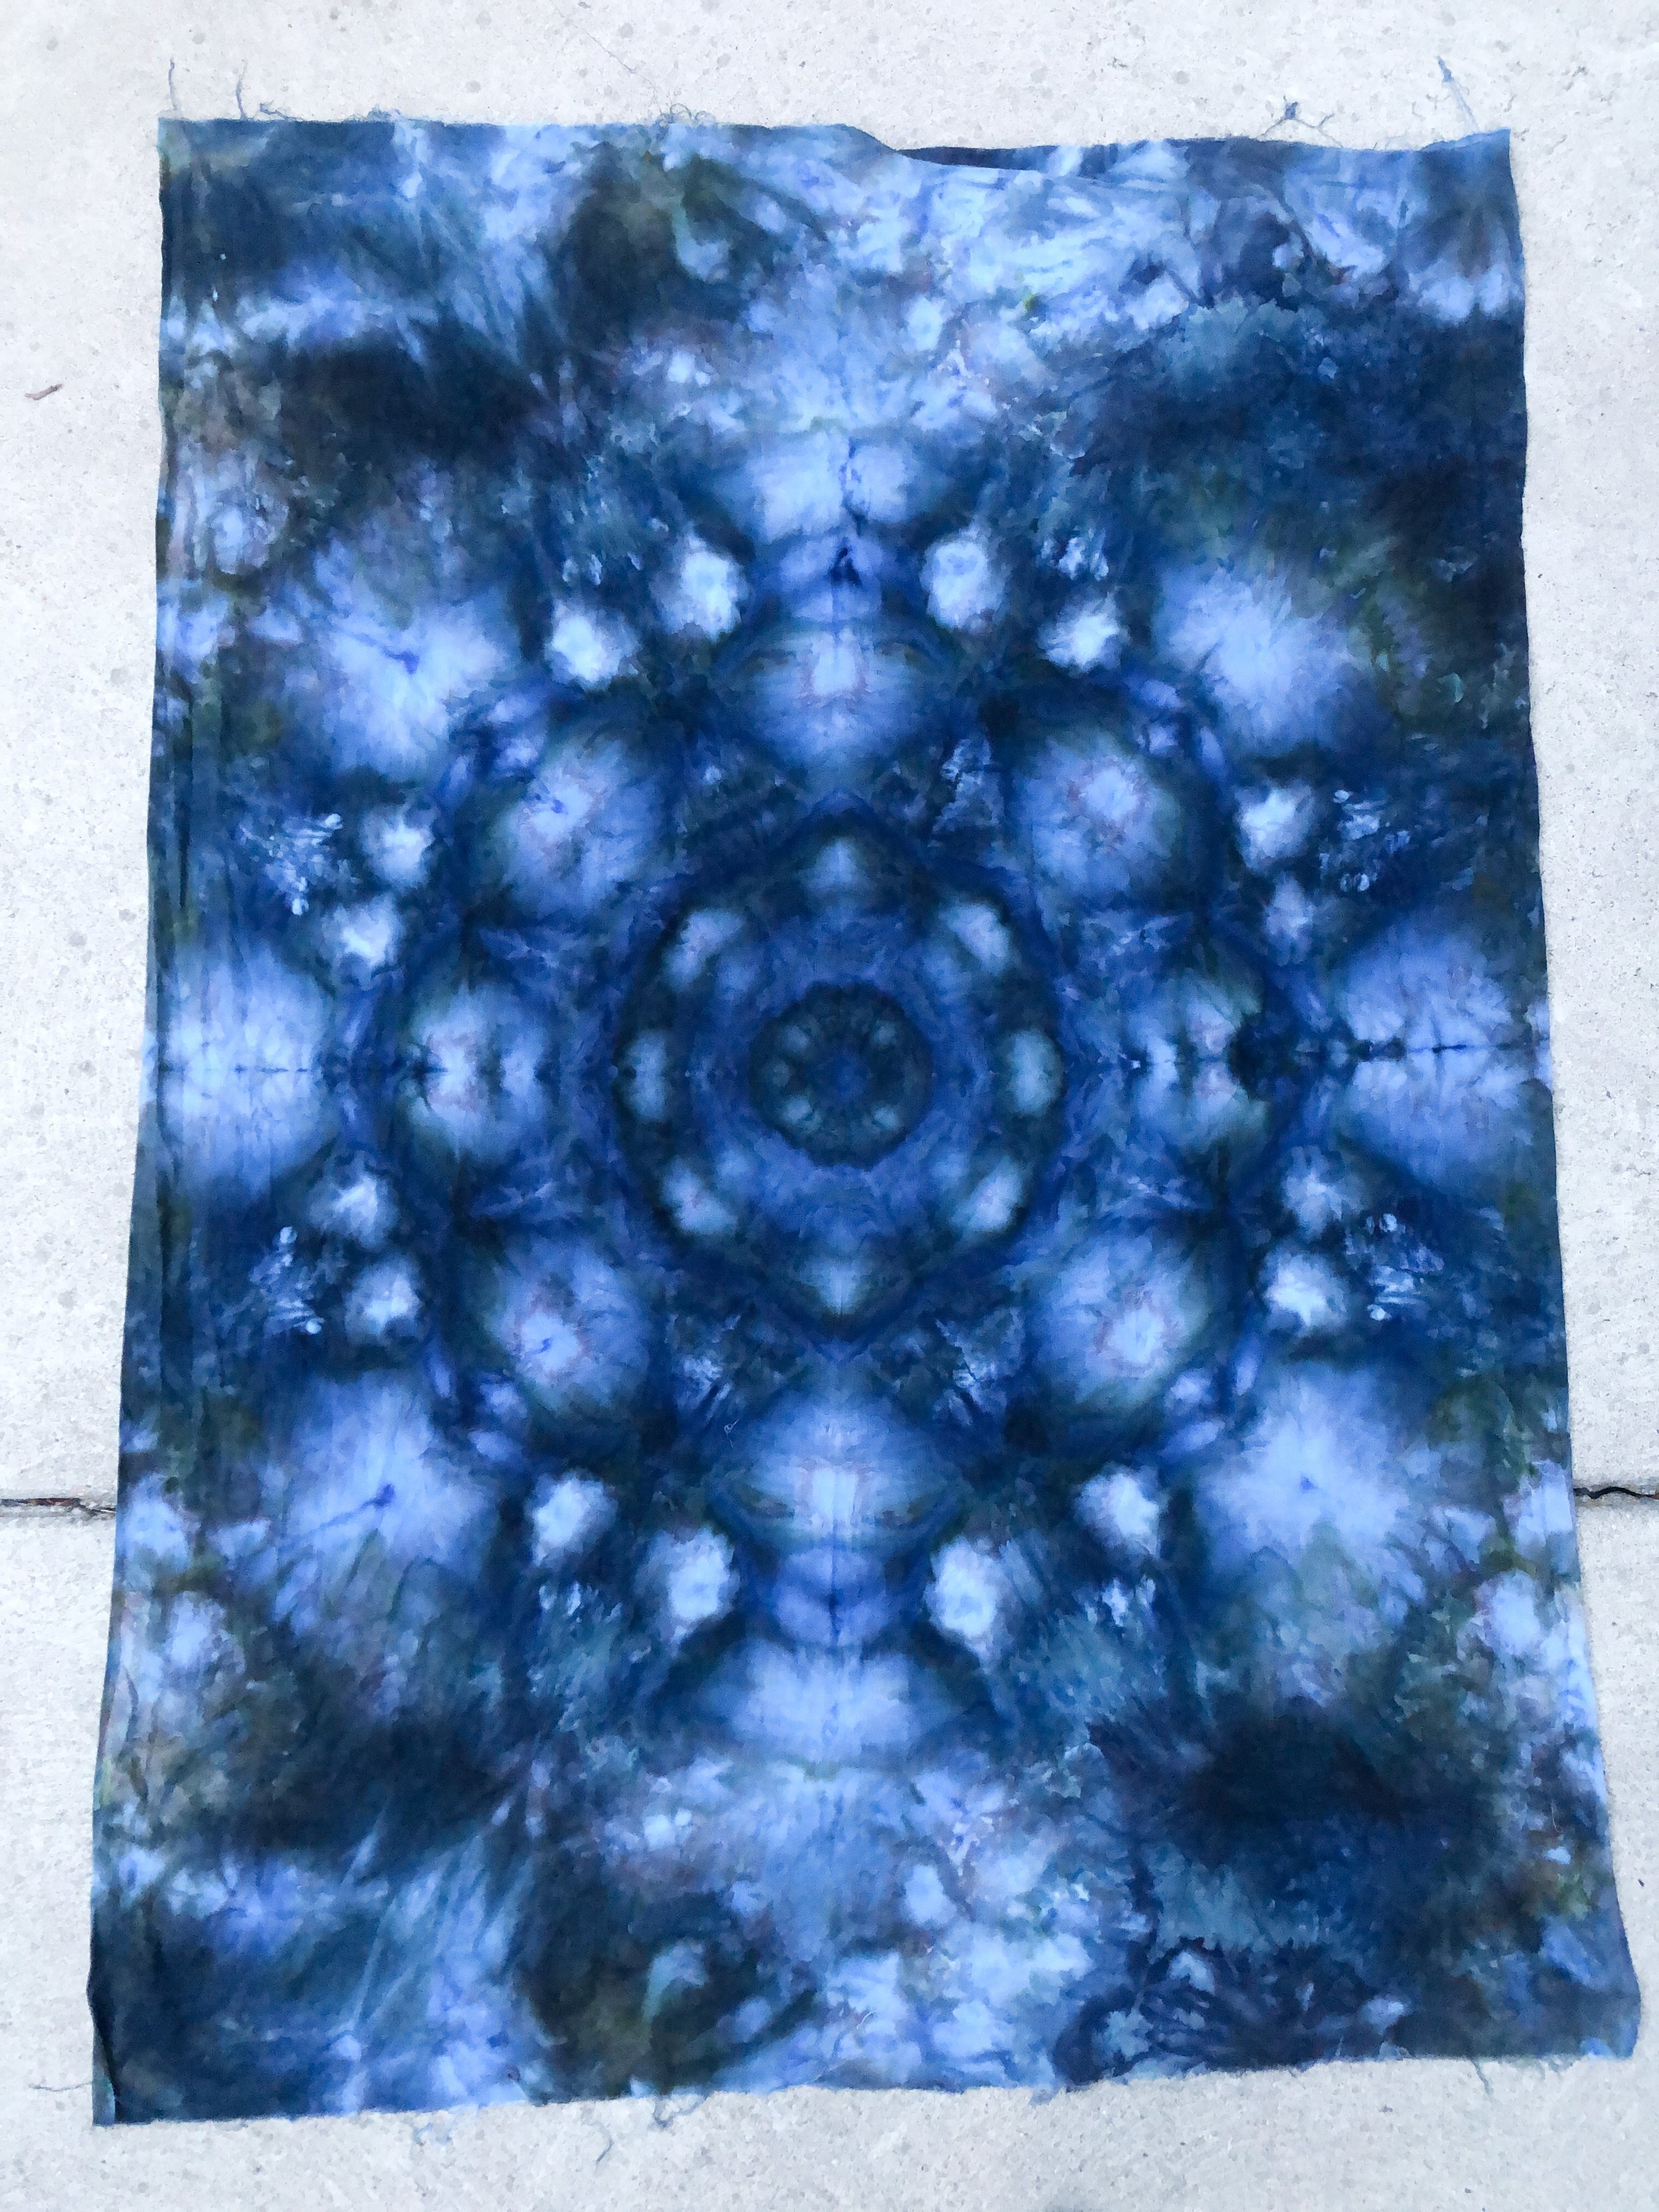
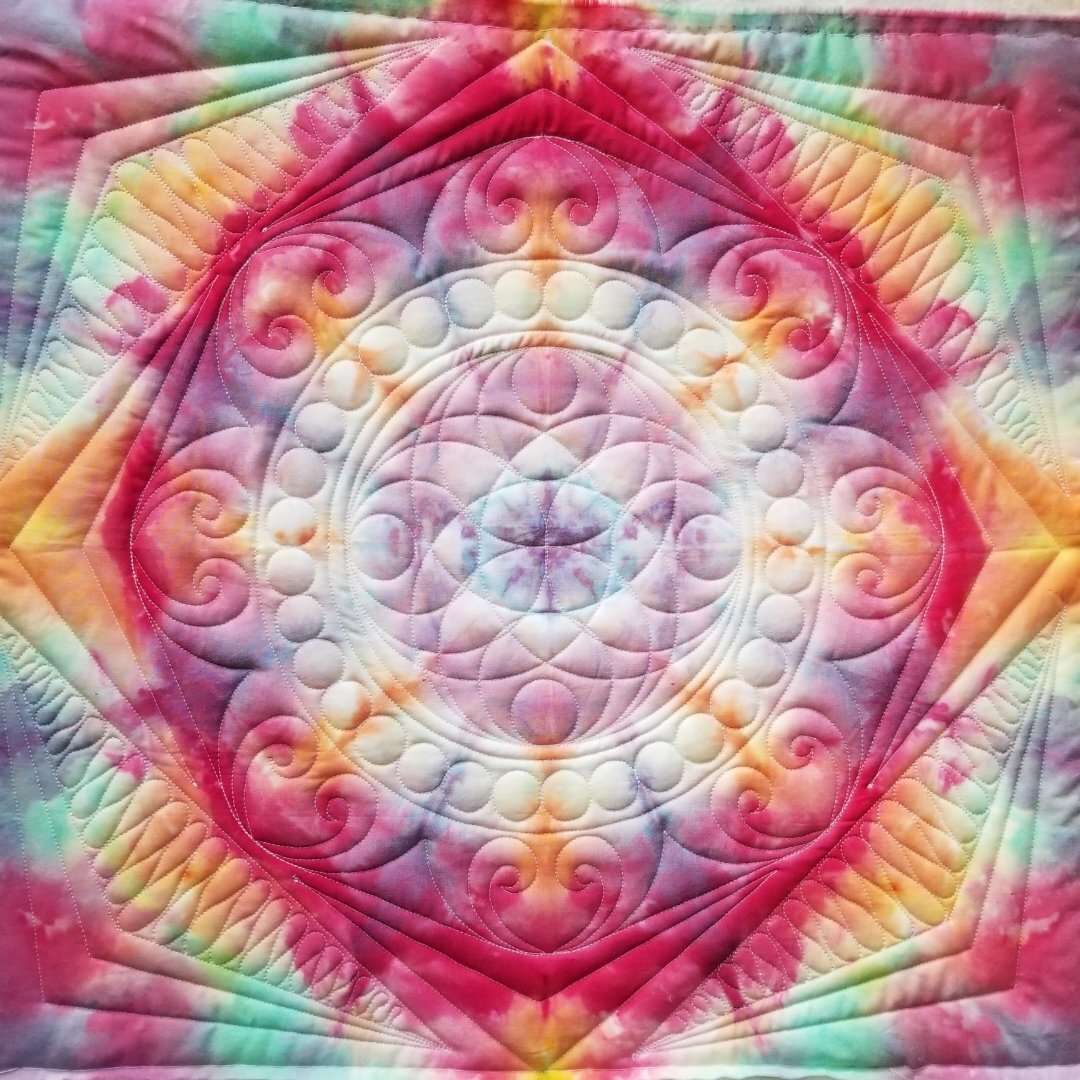
Here is my fabric! It’s fun to see the mandala in the middle of each of these. You can see touches of green a little bit, unfortunately I used too much navy.
Below is Holly’s. Amazing huh?!?! She folded hers the same way…in fact we all did. Holly just sprinkled her dyes differently than I did and added more of the green.
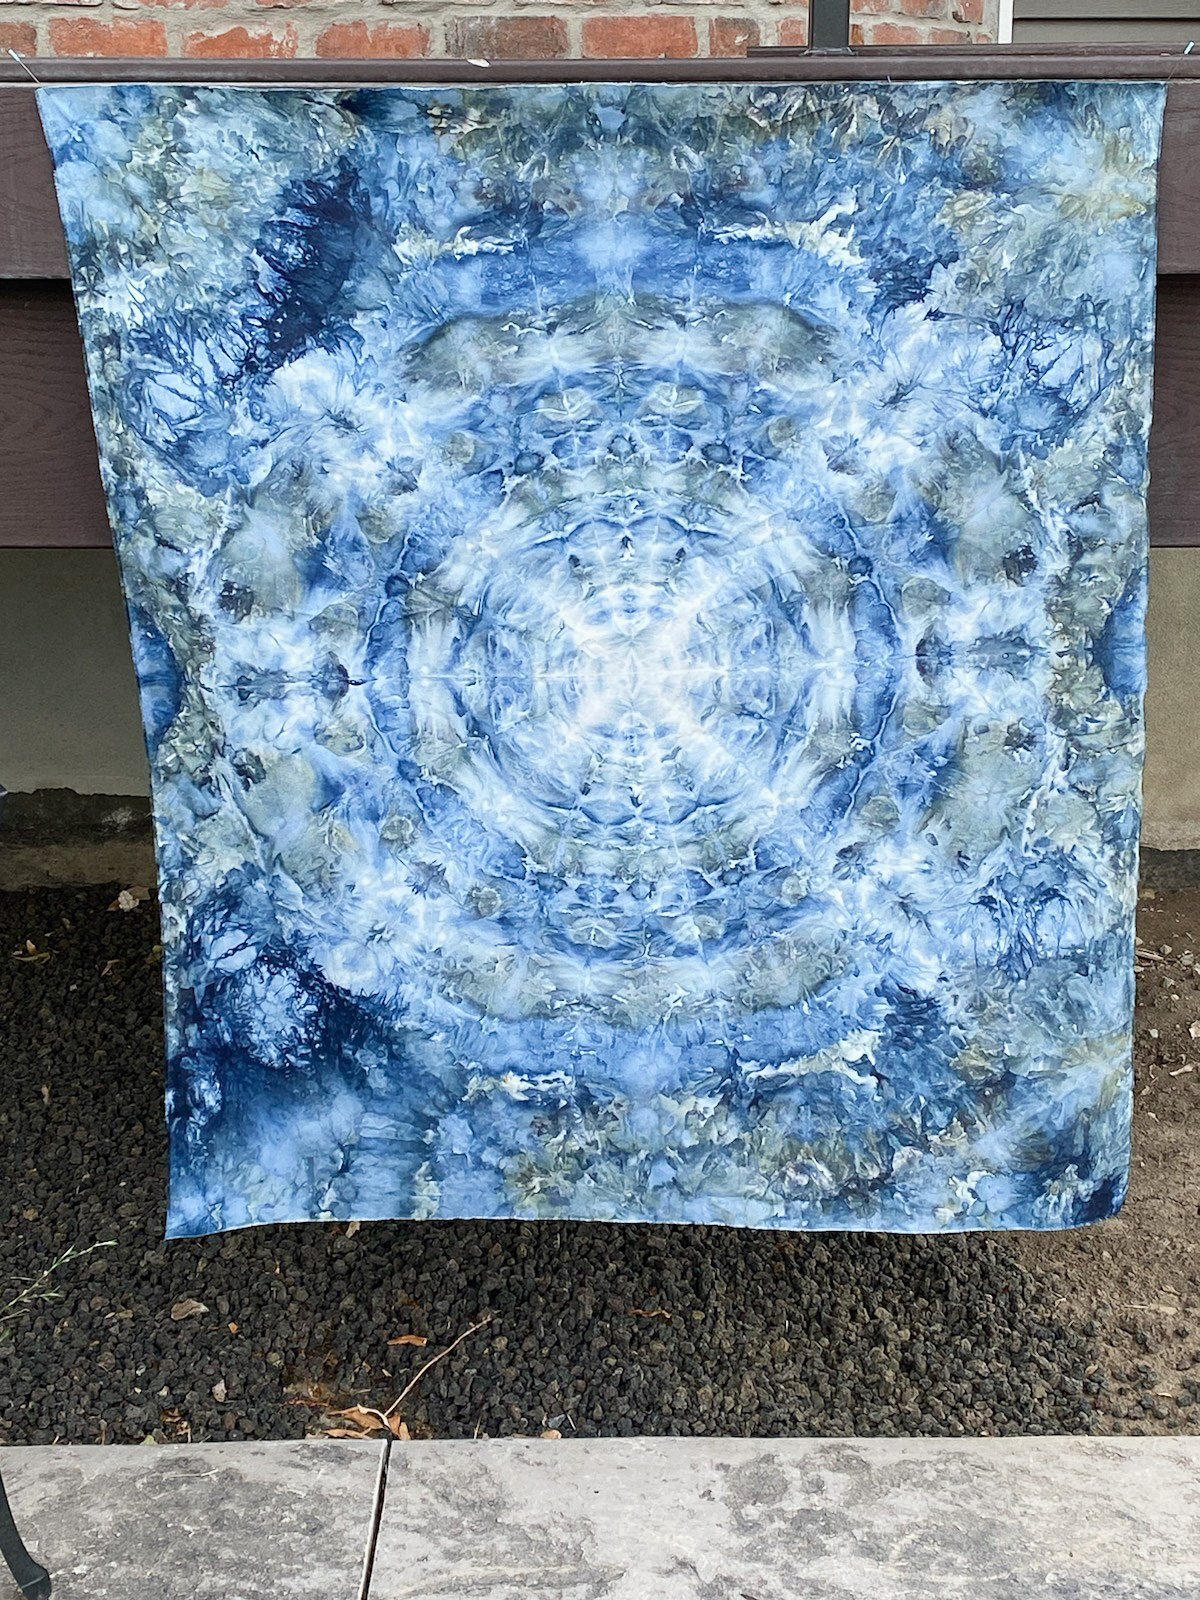
Below is Gale’s. It’s so beautiful with all of the deep colors. I love her mandala. I believe she used the red, purple, and aqua.

Below is Christy’s. Incredible!!! She’s so good at distributing the dyes and using the best color combos. Her Mandala is so detailed, I’m amazed.

After you rinse out your fabric or shirt, put it in the washer with a tablespoon of Synthrapol. Then dry it. The heat in your dryer helps set the dyes.

As we were checking out one another fabric, one of them pointed out it looks like I have cats in my mandala. Can you see it? While I haven’t done anything with my fabric yet, this is what Christy did with another one she previously dyed. Isn’t it beautiful?!!!!
It would be fun to dye a bigger piece and make a throw quilt, quilting it with a funky texture.
Does this make you want to ice dye some fabric?
I’m no expert, if you’re interested in more info google it and check out what tutorials may be available. This was such a fun thing to do for our August meeting. This is why you need awesome friends in your life who teach you new things.
Thanks for stopping by!! Happy quilting, friends! Leisha
PS…I’d love to quilt for you. Contact me or email me at quiltingit@gmail.com • check out my Longarm Quilting Services page, to see more info and to print the Quilting Request Form to send with your quilt. I look forward to working with you!

Lisa’s On Point Quilt
Hi Friends,
Happy Friday!!! I’m back from visiting my sister, and ready to share some more quilts with you!
This was a fun one to custom quilt! Lisa was one of my first mail in clients, and it’s been so much fun to see the quilts that she’s made over the years. This one is called On Point by Cozy Quilt Designs. It was a Craftsy pattern. I can’t find it in their shop. If your interested in the pattern, contact them on their website.

Lisa wanted it quilted custom, and I think it turned out so fun. It has a clamshell like look to it. I went light on the custom quilting, except for the border, because she sent minky for the backing. I think too much quilting can make the minky more stuff instead of the soft and cozy we all love.
I love the fabrics, especially the off white grunge background.

I used my favorite natural white Omni thread from Superior Threads, and my go to 8020 cotton poly blend batting from Winline Textiles out of Ogden Utah.
Lisa’s quilt looks sooo soft and cuddly.
I used my favorite Edge ruler from Linda at The Quilted Pineapple for the 1/2” lines in the strips and the Diamond motif inside the centers of the blocks.
I decided to do something fun in the borders, some of my Overlapping Lines but with pinstripes instead of just lines. With some Overlapping Circles to break up all the hard lines. If you’d like to learn how to freemotion quilt either of those designs, head on over to my shop and check out the Quilting It Freemotion course that I have available.
A little quilty swirl is always so fun.

Another look at all that beautiful quilty texture.

I’d love to quilt for you!! Contact me or send me an email at quiltingit@gmail.com
Check out my Longarm Quilting Services page for more info, and please print and fill out my Quilting Request form to send with your quilt.
Thank you for stopping by!! Happy quilting. Leisha

Kim Diehl’s “Hope and Harmony” Quilt
Hello Friends,
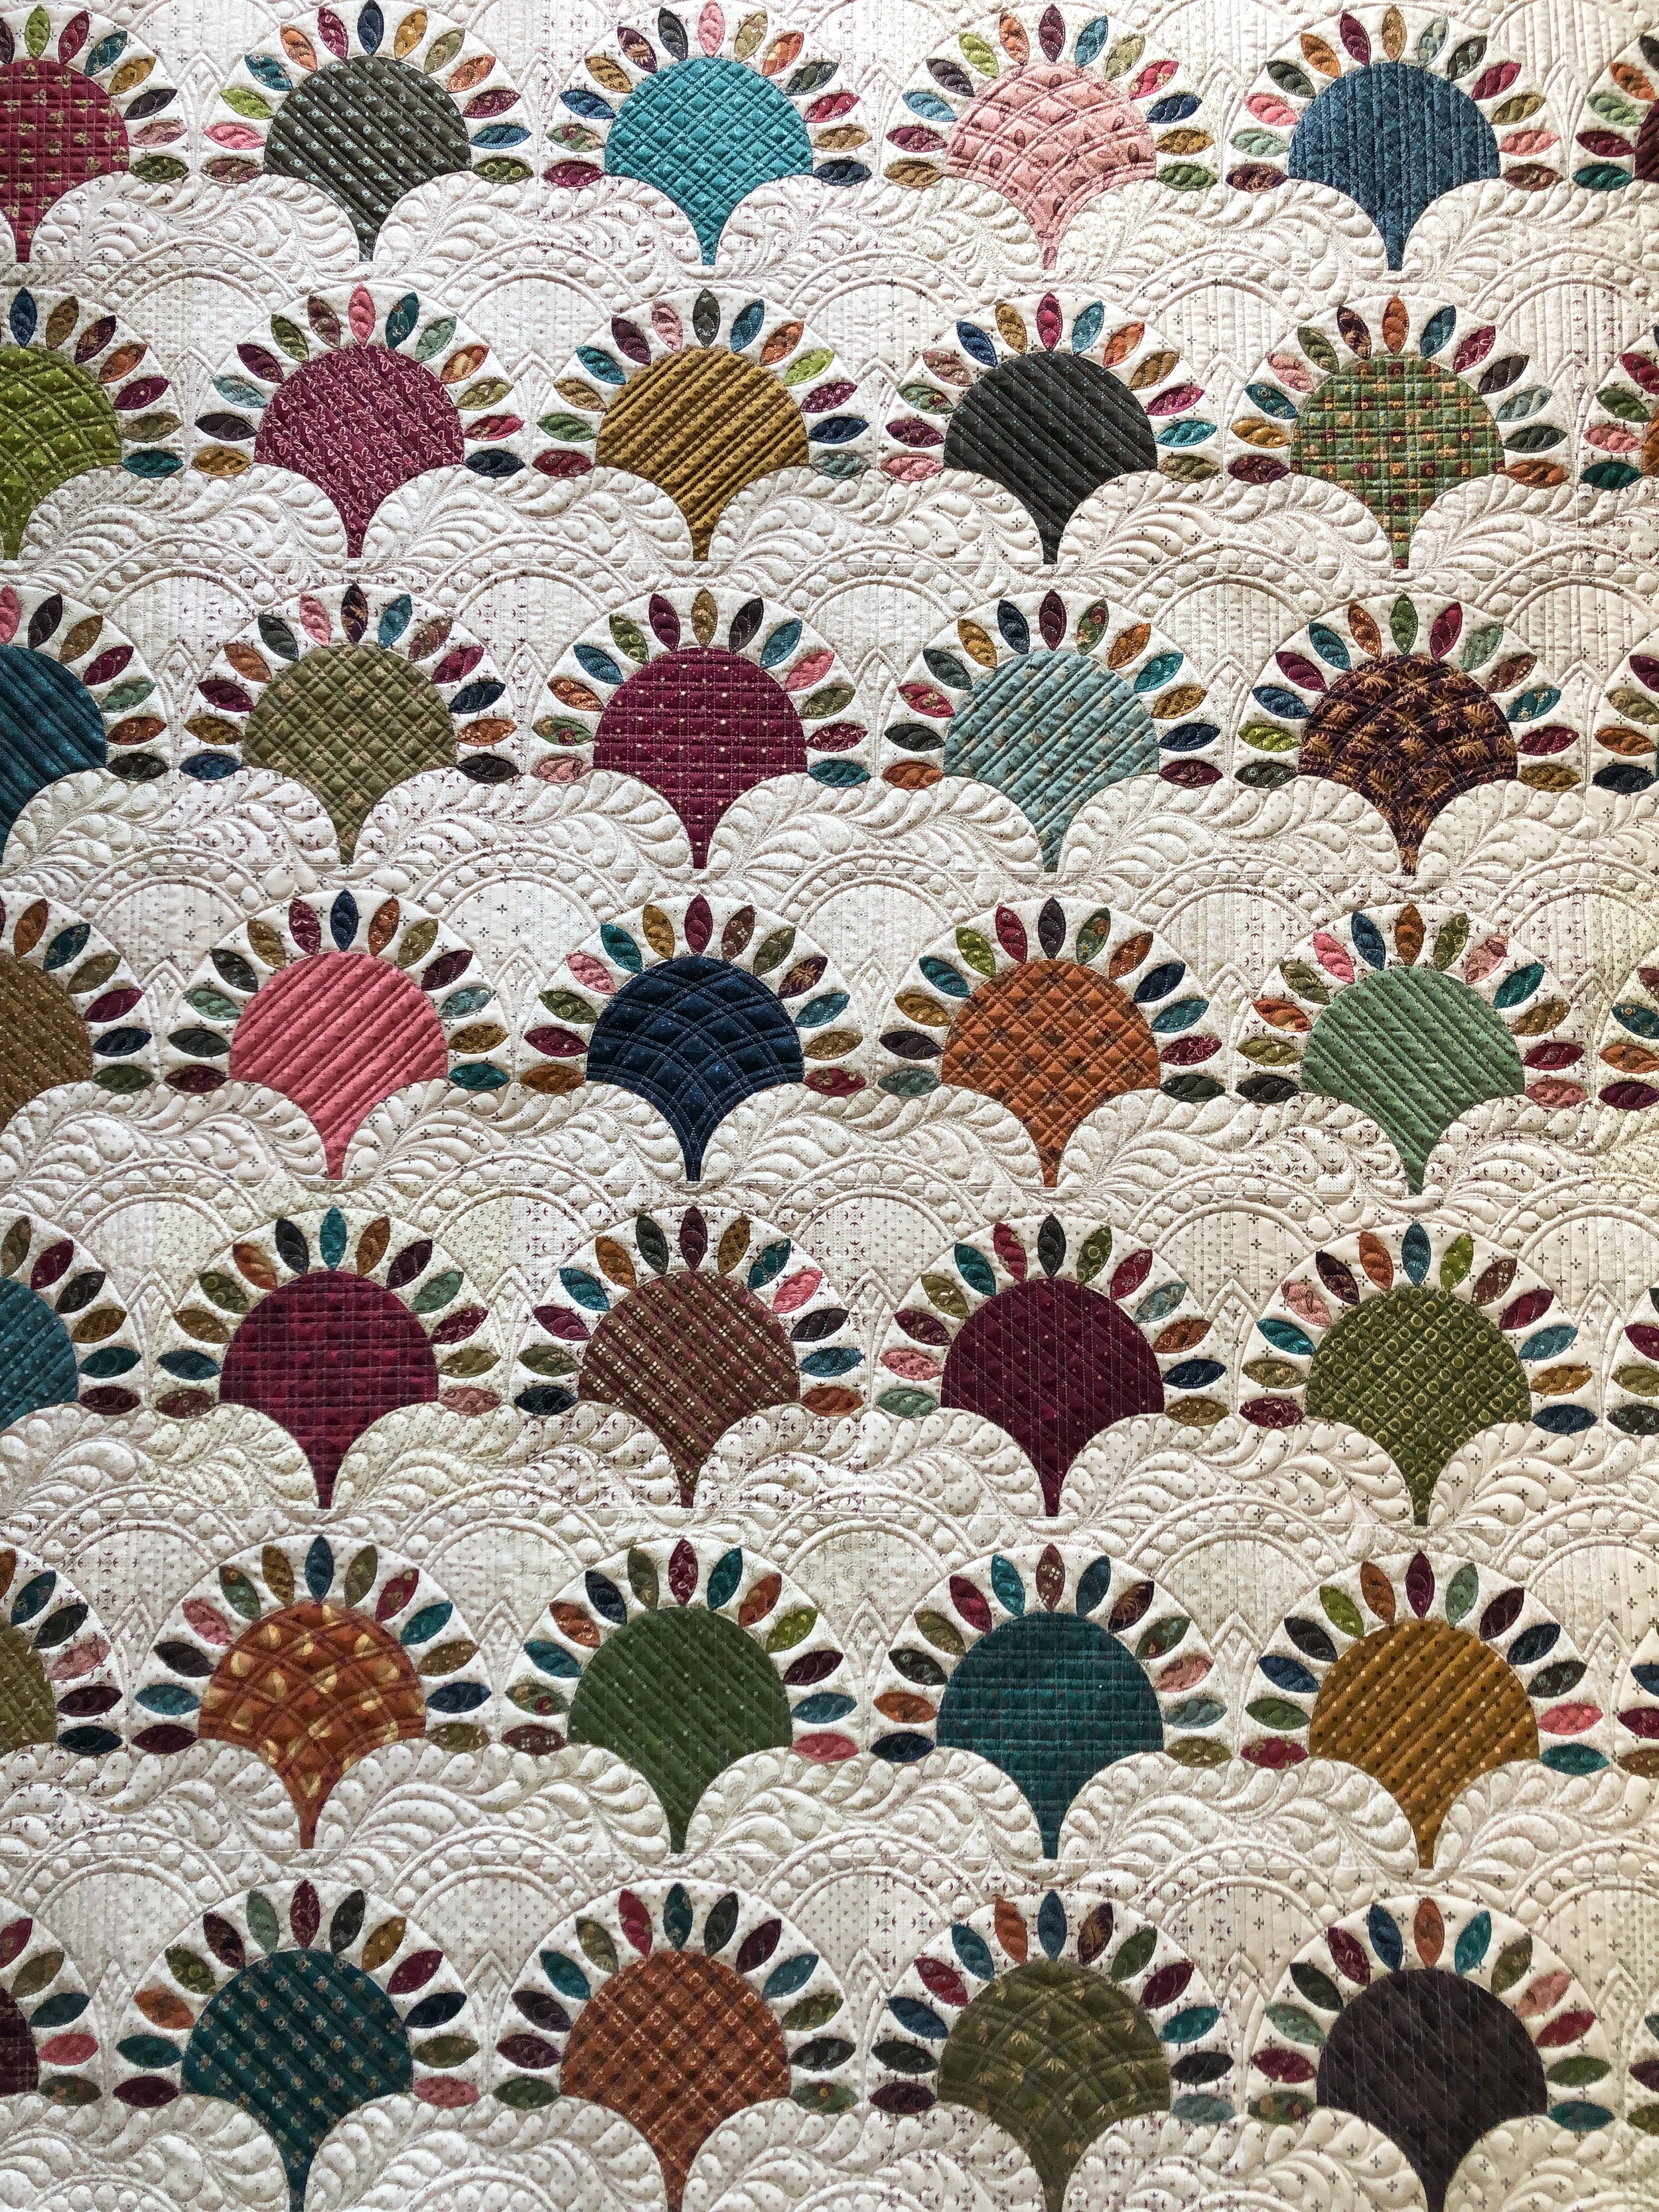
I am beyond thrilled to finally share with you a quilt that I custom quilted back in March!! I had posted on Instagram that I was almost caught up with longarm quilting, and Kim Diehl reached out to me asking if I would be available to custom quilt a quilt for her new Simple Double-Dipped Quilts book. I was absolutely thrilled to quilt for Kim! Her book is set to release the first week of October, and is available now for preorder on Amazon and it will be available soon at Shop Martingale with Kim’s other books. Kim has several gorgeous quilts in her book, this one is called Hope and Harmony. I wish you could all see it in person, its so beautiful.

Photo is courtesy of Kim Diehl
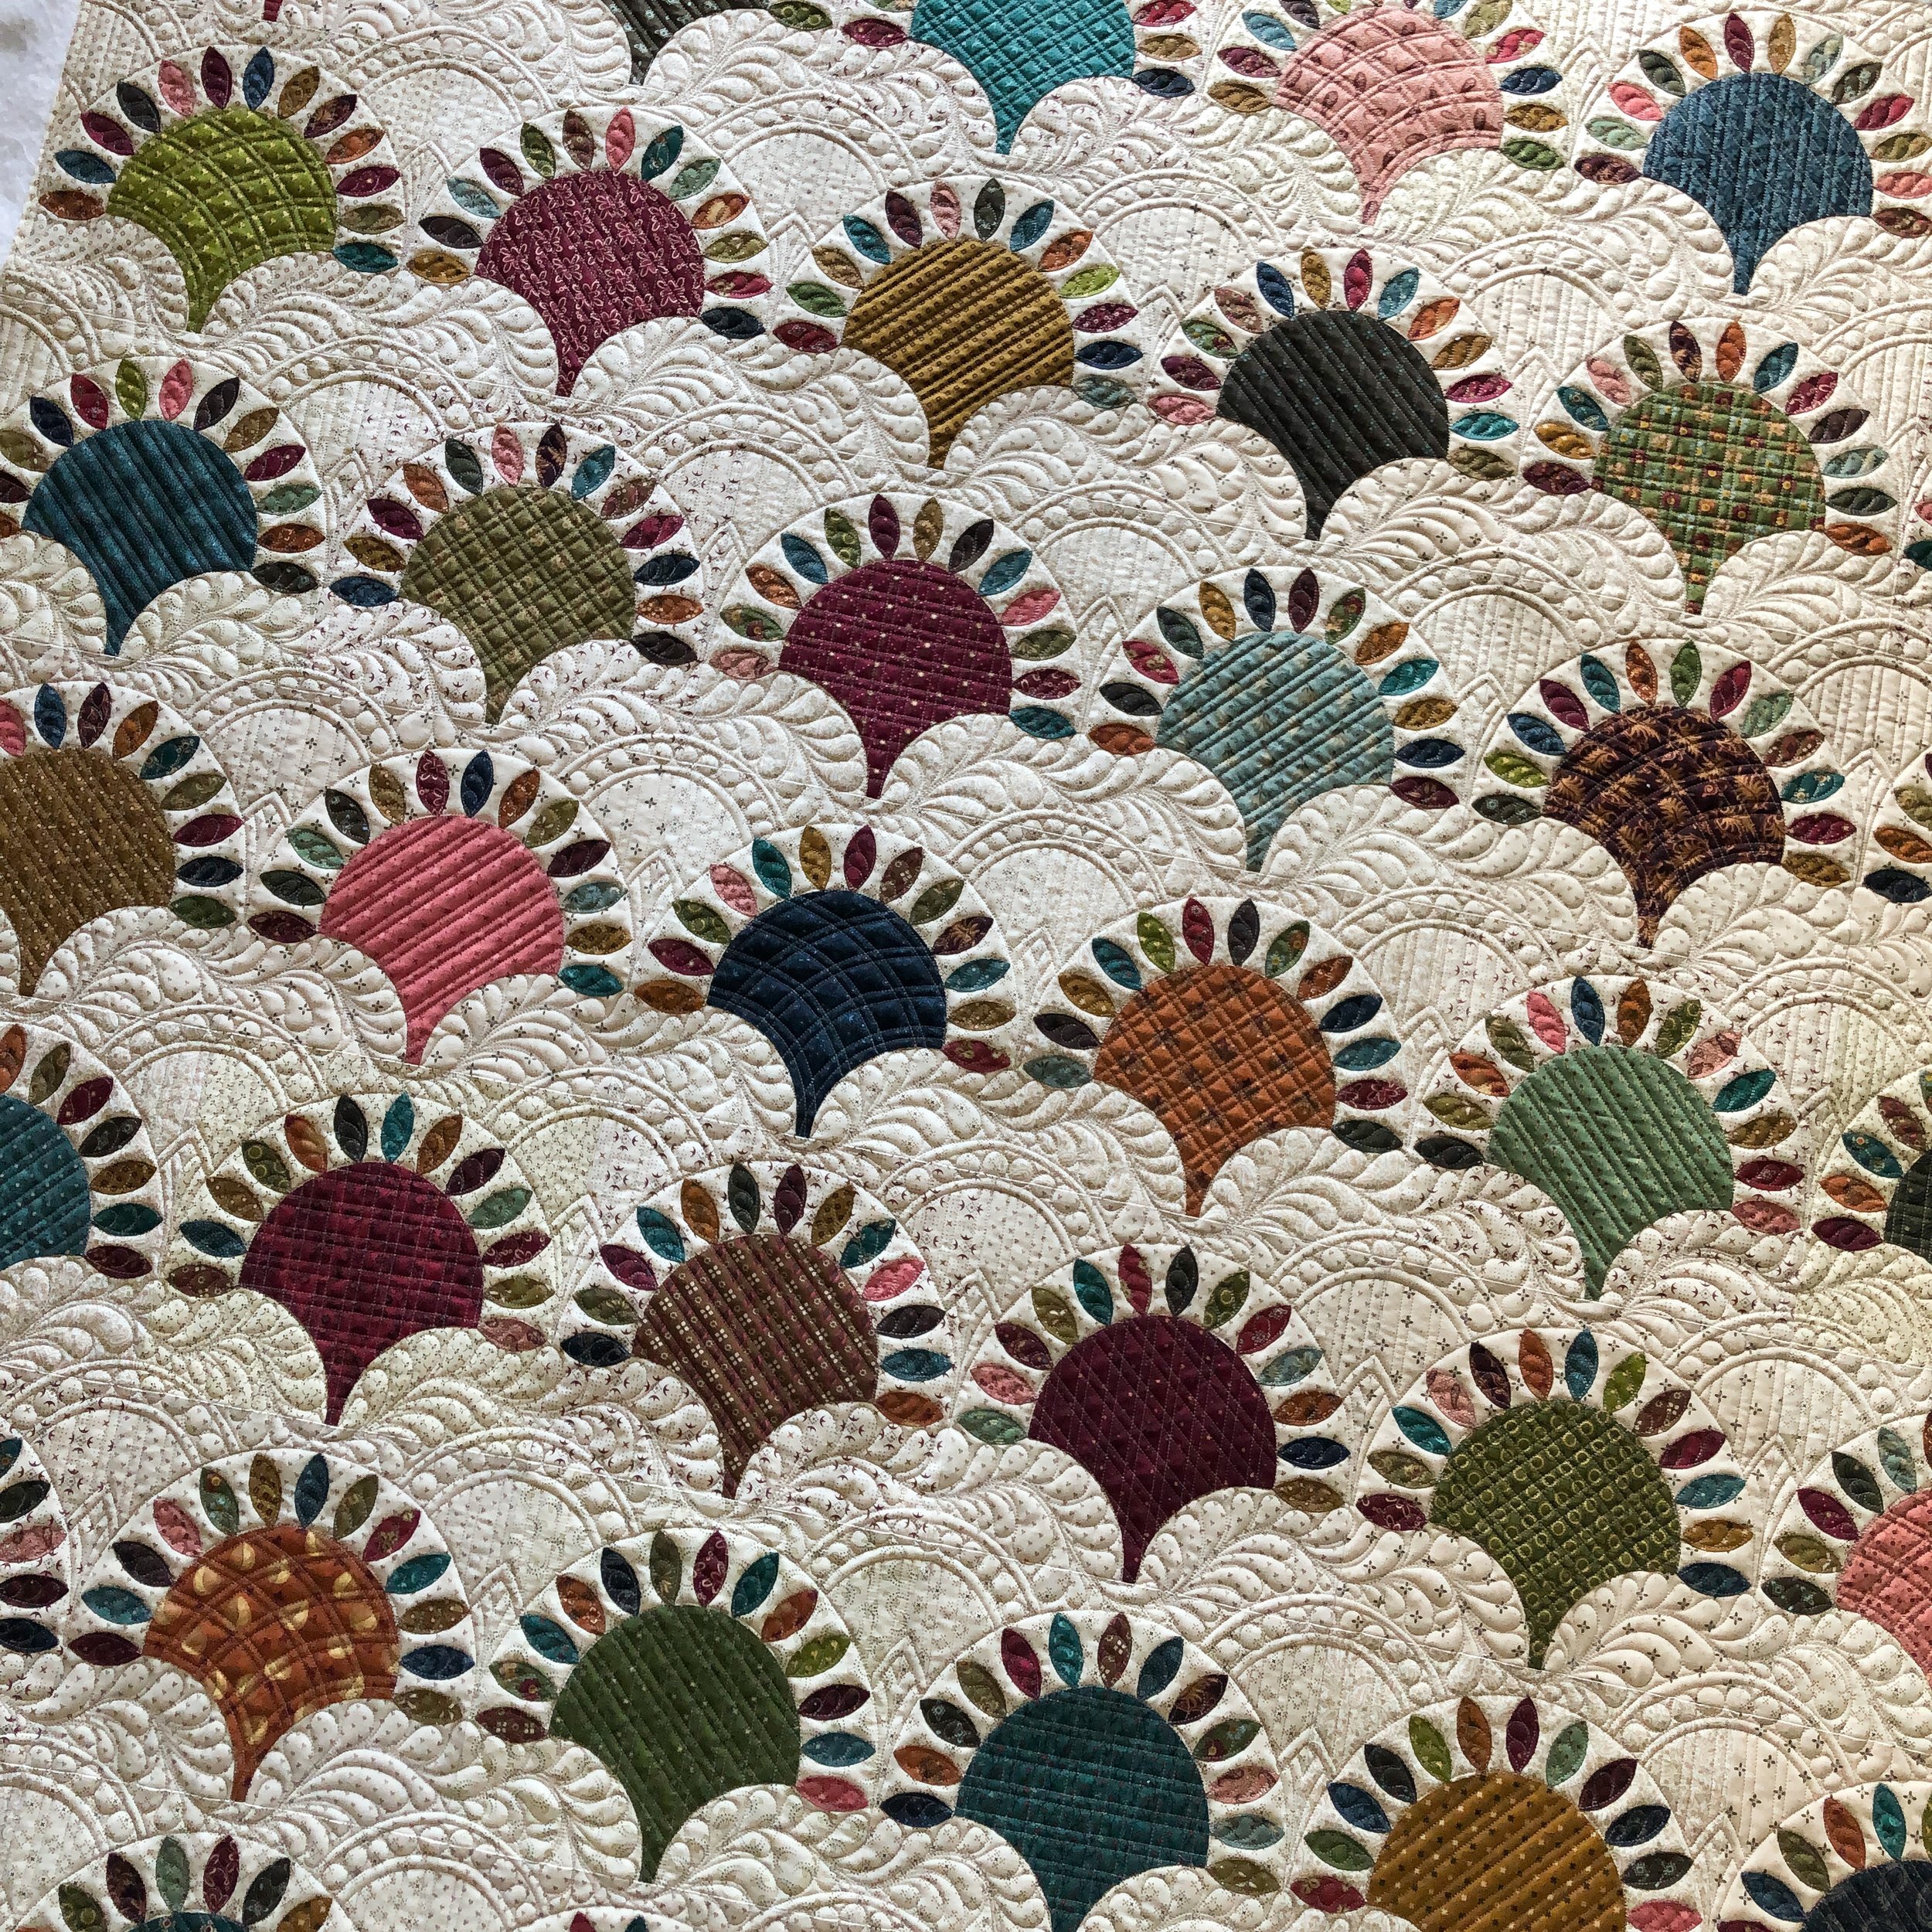
When I first started making quilts years ago, I became familiar with Kim’s beautiful timeless fabrics. The great thing about a scrappy quilt like this, you can pair a variety of Kim’s fabrics from over the years together and they harmonize so beautifully. Kim had sent me a picture of the quilt when she was done piecing it, and I was amazed, then I saw it in person and I was in awe! All of those petals!!
Kim sent me a few ideas she had for the custom quilting, and then left it up to me. She wanted to be sure that I was able to use some creativity of my own, which is what I love! It helps me to know when one of my clients has a vision of what they are wanting for the quilting, even better when they still allow me some creative liberty as well. Its such a fun process. If one of my clients isn’t quite sure what they want, first they typically specify if they want freemotion custom or edge to edge, and we go from there. I will suggest some designs or draw something out, which is a great way to collaborate on a quilt. It was such a joy to work with Kim, and I look forward to quilting for her again.
Here are a couple of pictures of the quilt when I finished quilting the first section. Kim wanted some variety in the clamshells, which I think is great! I quilted a different design inside each clamshell across the first row. Then on the proceeding rows I mixed up those designs, so that each row and column had the design once. The only row that was repeated was the very last row. It’s a great way to make your eye travel throughout the quilt.
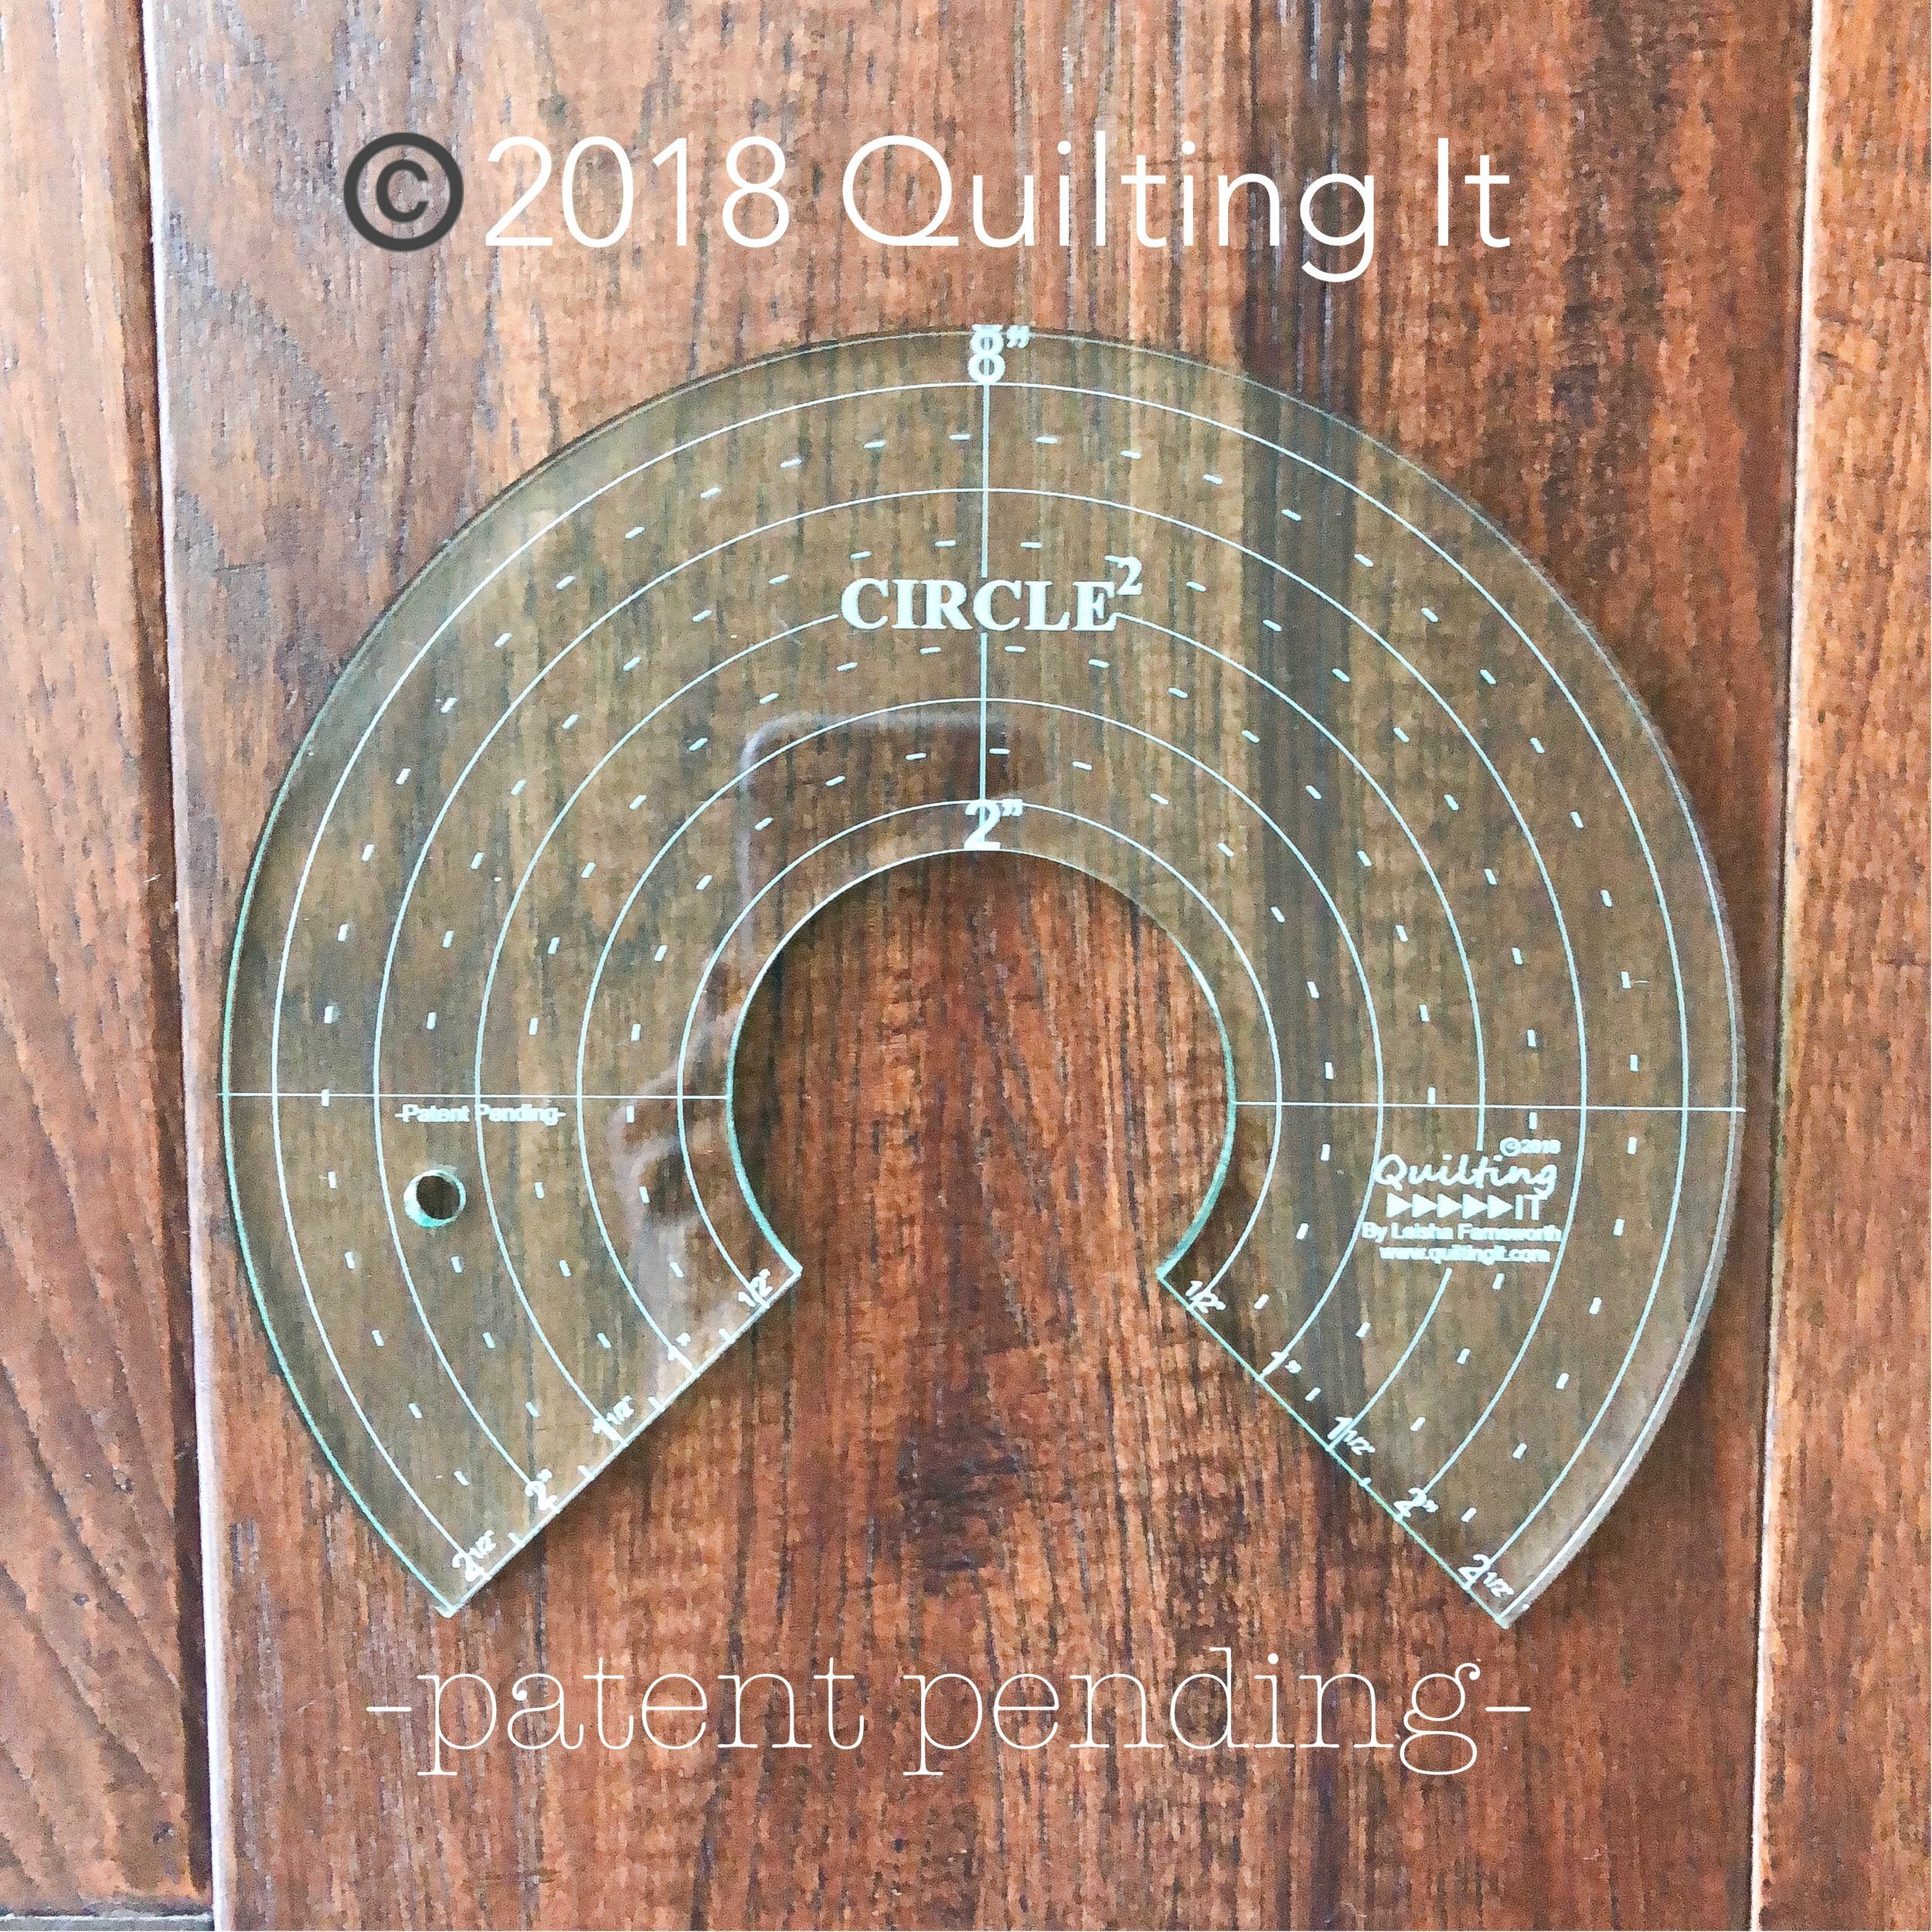
I love using my Circle2 machine quilting circle rulers when I freemotion quilt. I used my 10” and my 5” rulers to create all those beautiful curves. If you notice the curve that I quilted on the outside tips of the 13 petals on each block, I used my 10” Circle2 ruler. By quilting that curve, it helped create a boundary for all of the designs that are between the next block and it enhances the overall clamshell look. I also used the 10” ruler for the curved plaid in some of the clamshells, which I have pictured below.

I created my Circle2 machine quilting circle rulers back in 2018 because I couldn’t find anything like them on the market. They come in a set of 6, and the circles range in size from 2” up to 13”. As you can see in the pictures above and below, there are two sizes of circles per ruler. I took into consideration the 1/4” hopping foot, which means when you quilt out a 5” circle using my 5” Circle2 you’ll get a 5” circle, not a 5.5” circle that you’d get using the other rulers that are available on the market. I also love having only six rulers, instead of the twelve that I had before. The 3/4ths of a circle design makes it easier to handle the ruler as you freemotion quilt. My Circle2 rulers are made in America from high quality 1/4” acrylic, and can be used on a longarm or a domestic machine (if you have the correct quilting foot for it.) The rulers come in clear or green, and are available in my shop.
- Design Patent D875,574 -

I used the 5” Circle2 ruler for the curves that arc on top between the two clamshells. I loved creating that secondary design. I used the handy lines on the rulers for the spacing and the filled in with pebbles or other curves. All of the lines were quilted using an Edge ruler from Linda at The Quilted Pineapple. Her straight rulers are my absolute favorite!!
Can you see the curved plaid in the rose colored clamshell below? That is how I used the 10” Circle2 ruler inside the clamshells. Also while you can see a closeup, I wanted to point out the simple feathers inside of the petals. They all start facing up on the bottom right side and end face down on the bottom left side. Those feathers also tie in the feathers below each clamshell block. You will also noticed that I didn’t quilt anything around each petal. Sometimes quilts need parts left unquilted so the quilting can breathe, which enhances parts of the quilt block. Too much quilting, can be too much. Of course this is my personal opinion. I also don’t quilt in the ditch around everything, either. I don’t think that it is necessary. You may disagree, and that is totally fine. My goal with custom quilting is to create a cohesive design that looks beautiful with the quilt pattern. This is definitely one of my all time favorites!

After figuring out the first section, then I just repeated my quilty plan throughout the rest of the quilt.

Can you see all the beautiful textures?!?!?!

Here is another glimpse of all of the quilty goodness.
I used my favorite 8020 cotton/poly blend batting from Winline Textiles out of Ogden Utah, and an Omni tan thread #3008 called Sesame Seeds from Superior Threads which I used on the entire quilt. Kim actually requested the thread color to match the darker color in her cream on cream background fabric. By doing this it helps the quilting to stand out a little more, instead of blend in so much it’s not even noticeable. After 17+ years of longarm quilting, I’m still learning new things. I love it!
Here are some more closeups of the quilting in the clamshells. Angled lines, plaids, pinstripes, and I love how beautifully they are play together. I love mixing curves, lines, some freehand designs…and this is the result! I love what I do.
Another closeup.
The diamond plaid design, pictured below, in the clamshell is an easy one to create. I typically start with vertical pinstripes with a 1/2” space between the pinstripes, and then I do the same kind of thing working from the bottom left and going to the top right at a 45 degree angle. I love love love how sharp that design looks.
For the background design pictured below, I started by quilting the first curve that is located right below the pebbles, which if you notice is starting at the tip of one of the petals and going to the tip of another petal, the 5th petals on each side. I then quilted the next line 3/4” above using the 1/2” mark on my 5” Circle2 ruler, which then gave me a boundary for the freehand pebbles. I then quilted the 1/4” curve above and below those “boundary” curves, to add some more detail to the overall design. When you’re looking to enhance a shape, adding that extra 1/4” line adds so much! Try it when you’re custom quilting sometime. Then I headed down into the tip between the clamshells to create the curved V. I used the 3rd petal on each side to start the curve, echoed it 1/4” above and then added the V. After that I filled in with the pinstripes. Last but certainly not least, the feathers. I quilted the stem from left to right, then quilted the feathers on both sides of the stem as I worked my way back to the left…which is definitely efficient but also fun! My biggest tip when custom quilting a variety of designs in the same area, first create some “boundaries” then fill in…create some more and fill in some more, until you get your desired result. Then, of course have fun with it. When I’m quilting such a detailed quilt, I actually enjoy listening to music. It makes it go by faster some how, or I just get into a really great groove. Haha! Pun intended.
Do you have any questions??? Comment below and ask away!

One of my favorite parts about custom quilting a quilt is pulling it off of the machine, and seeing the overall look. It’s incredible for me to see it all together, and its so rewarding.
I hope that you loved the more detailed look into the quilting process for me. Its fun to share!

What is your favorite element of the quilt? And, the quilting? Comment below, Kim and I would love to know.

Layers of quilty goodness…

And, of course a glimpse at the backing. Seeing all of that stitching makes my heart so happy!

I am going to do an exciting giveaway with Kim when her book is released in October!! Make sure you’re following me on my instagram, so you don’t miss out. Happy quilting… Take care, - Leisha
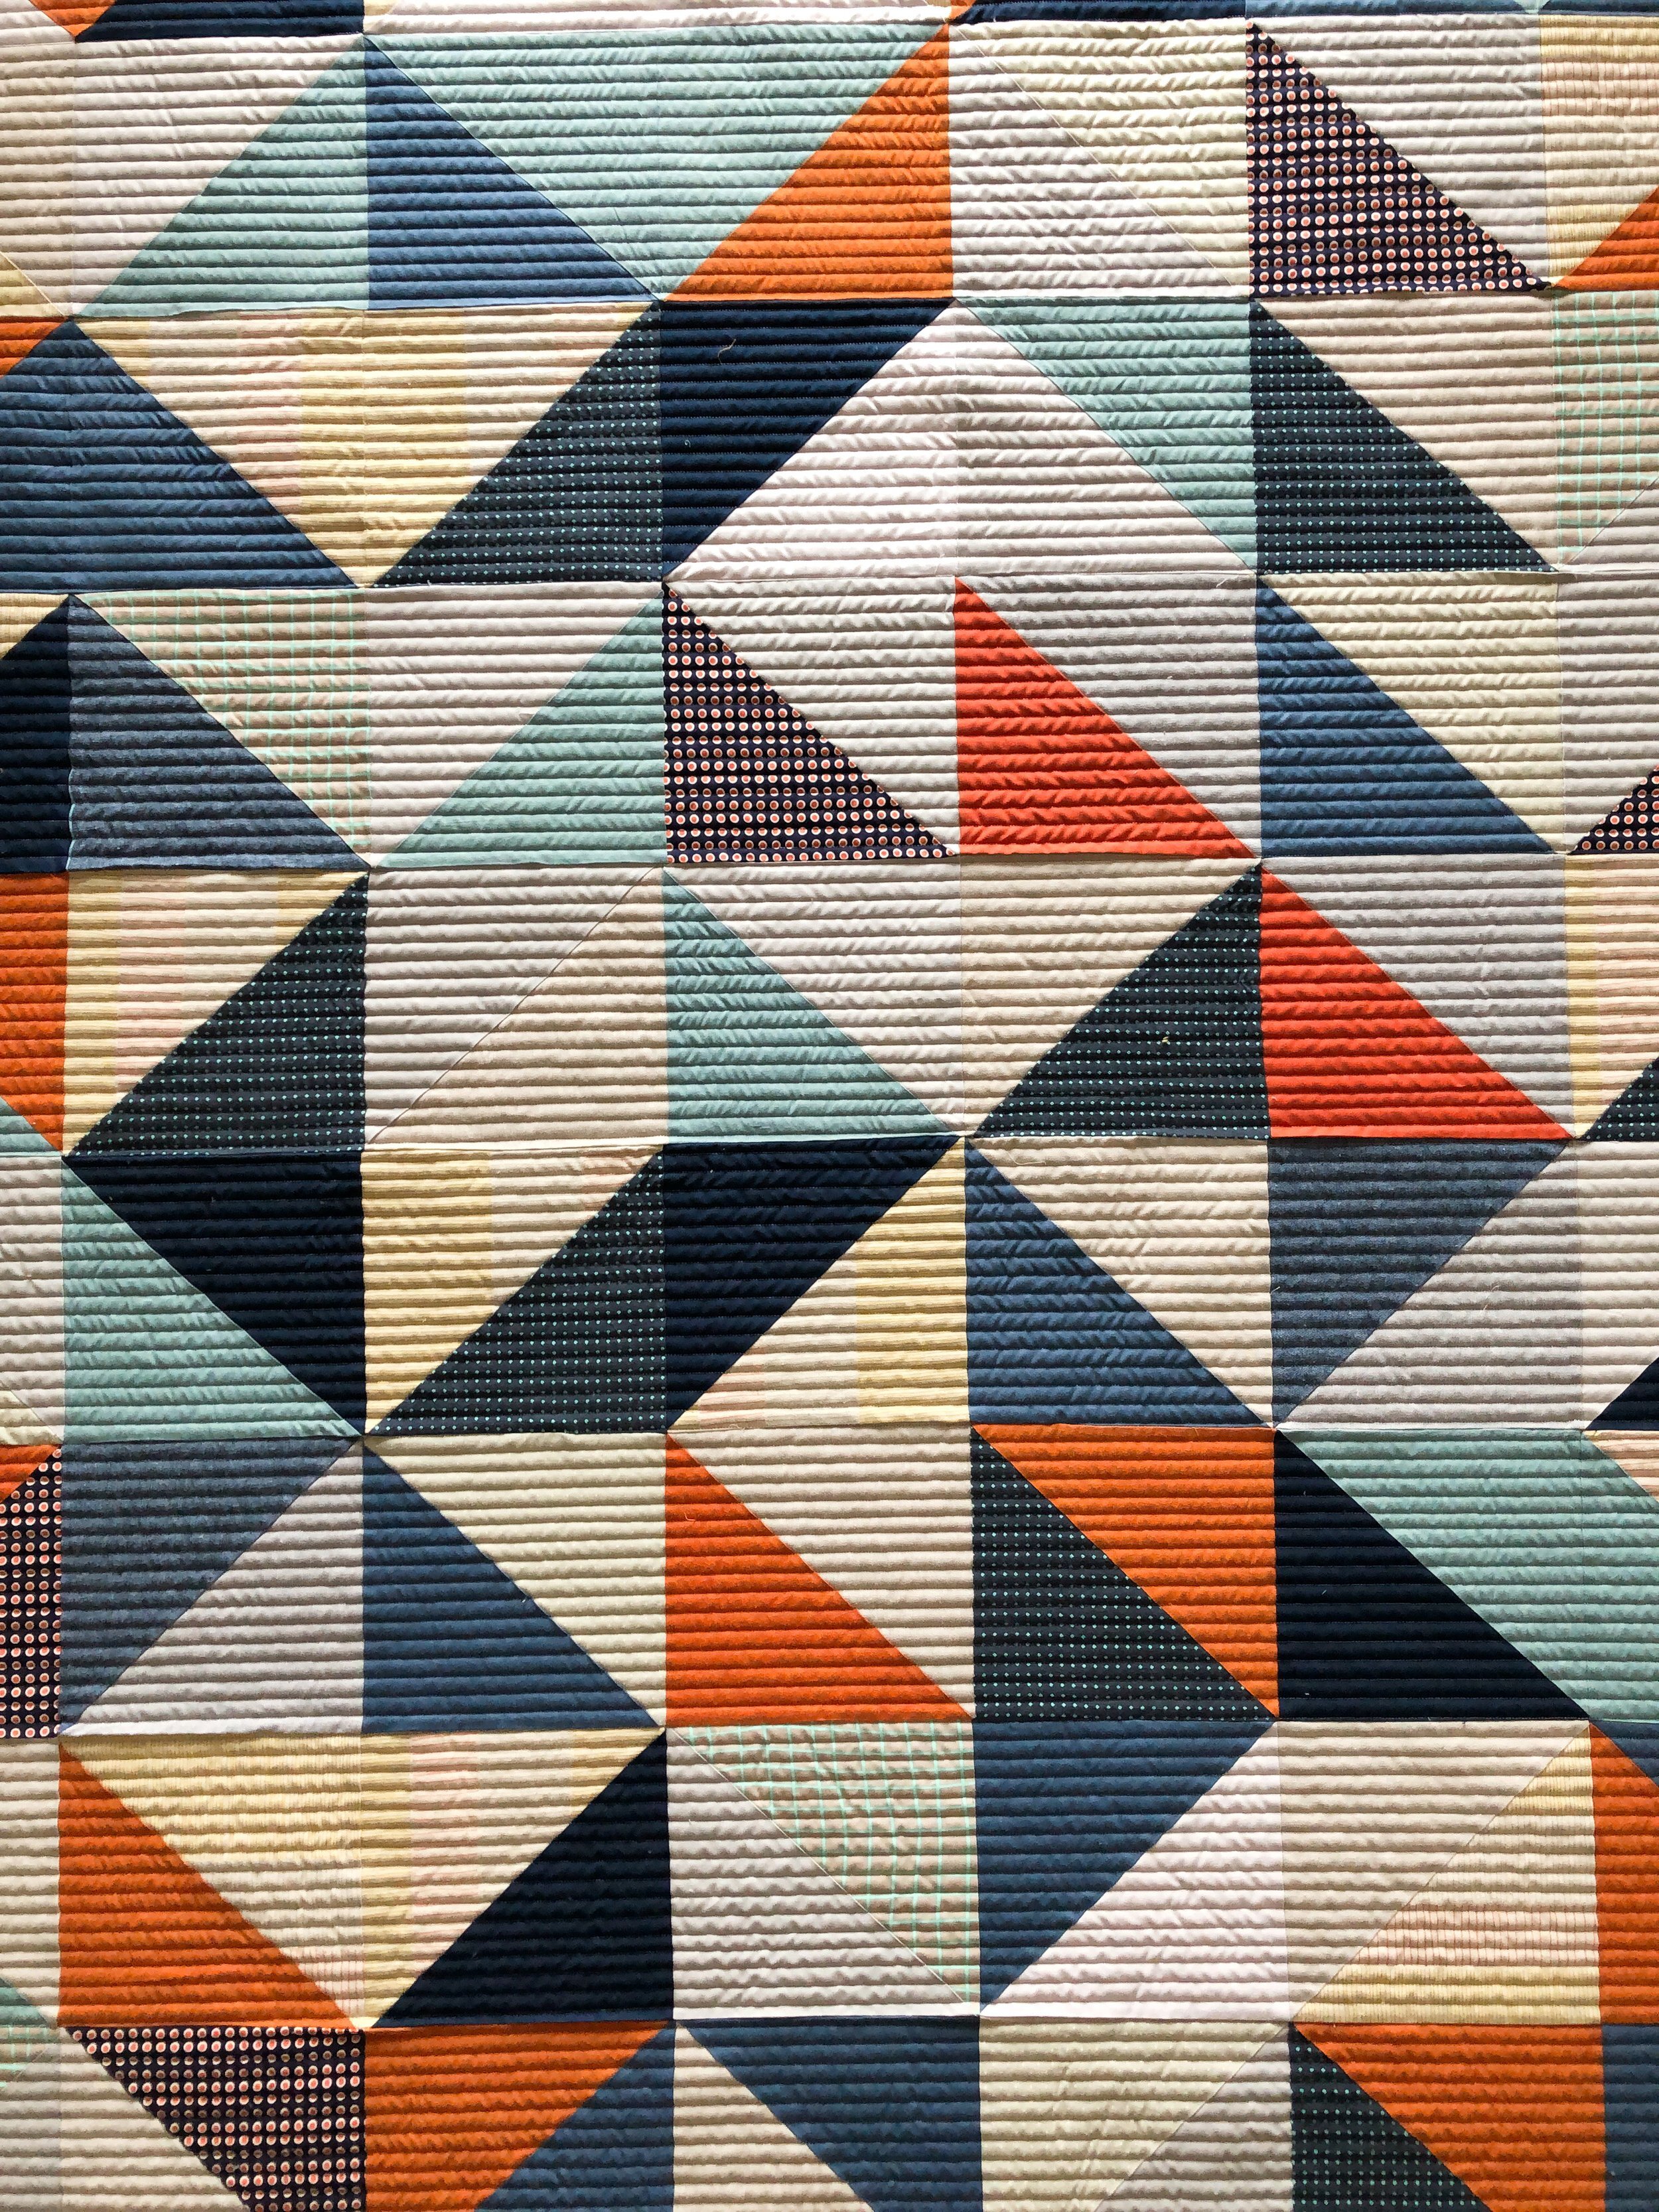
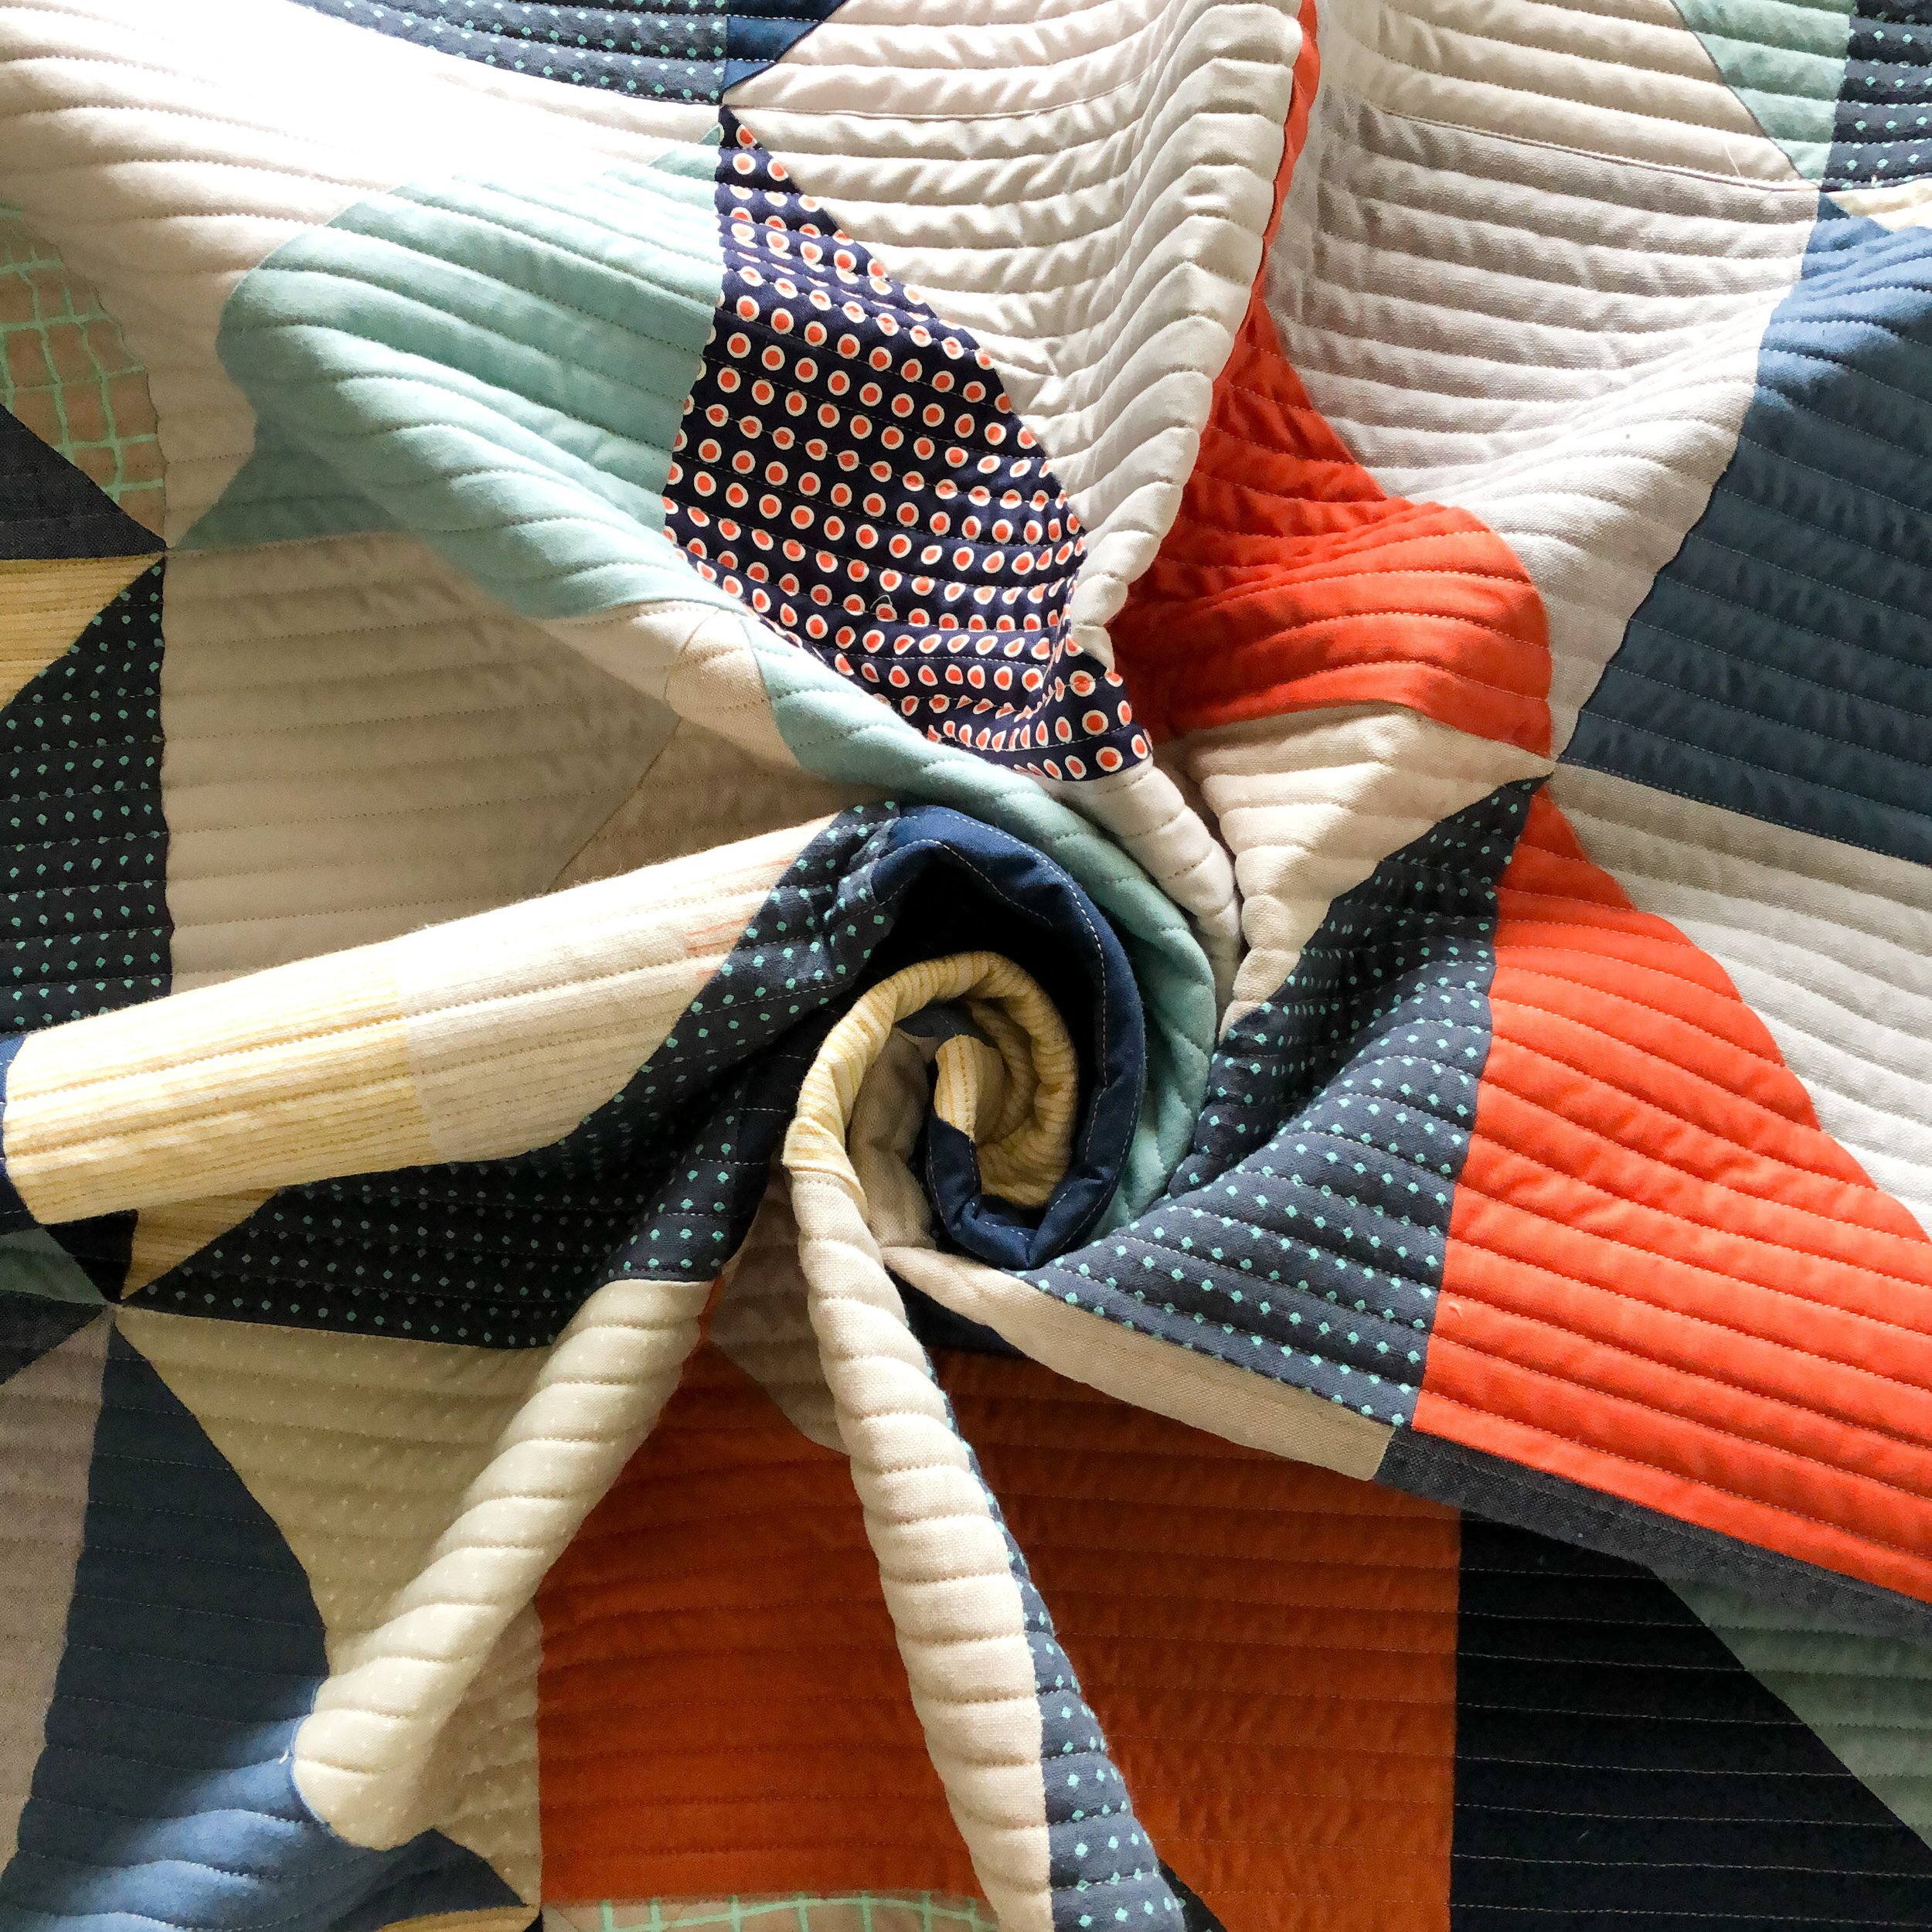
Abby’s Improv Triangle Quilt
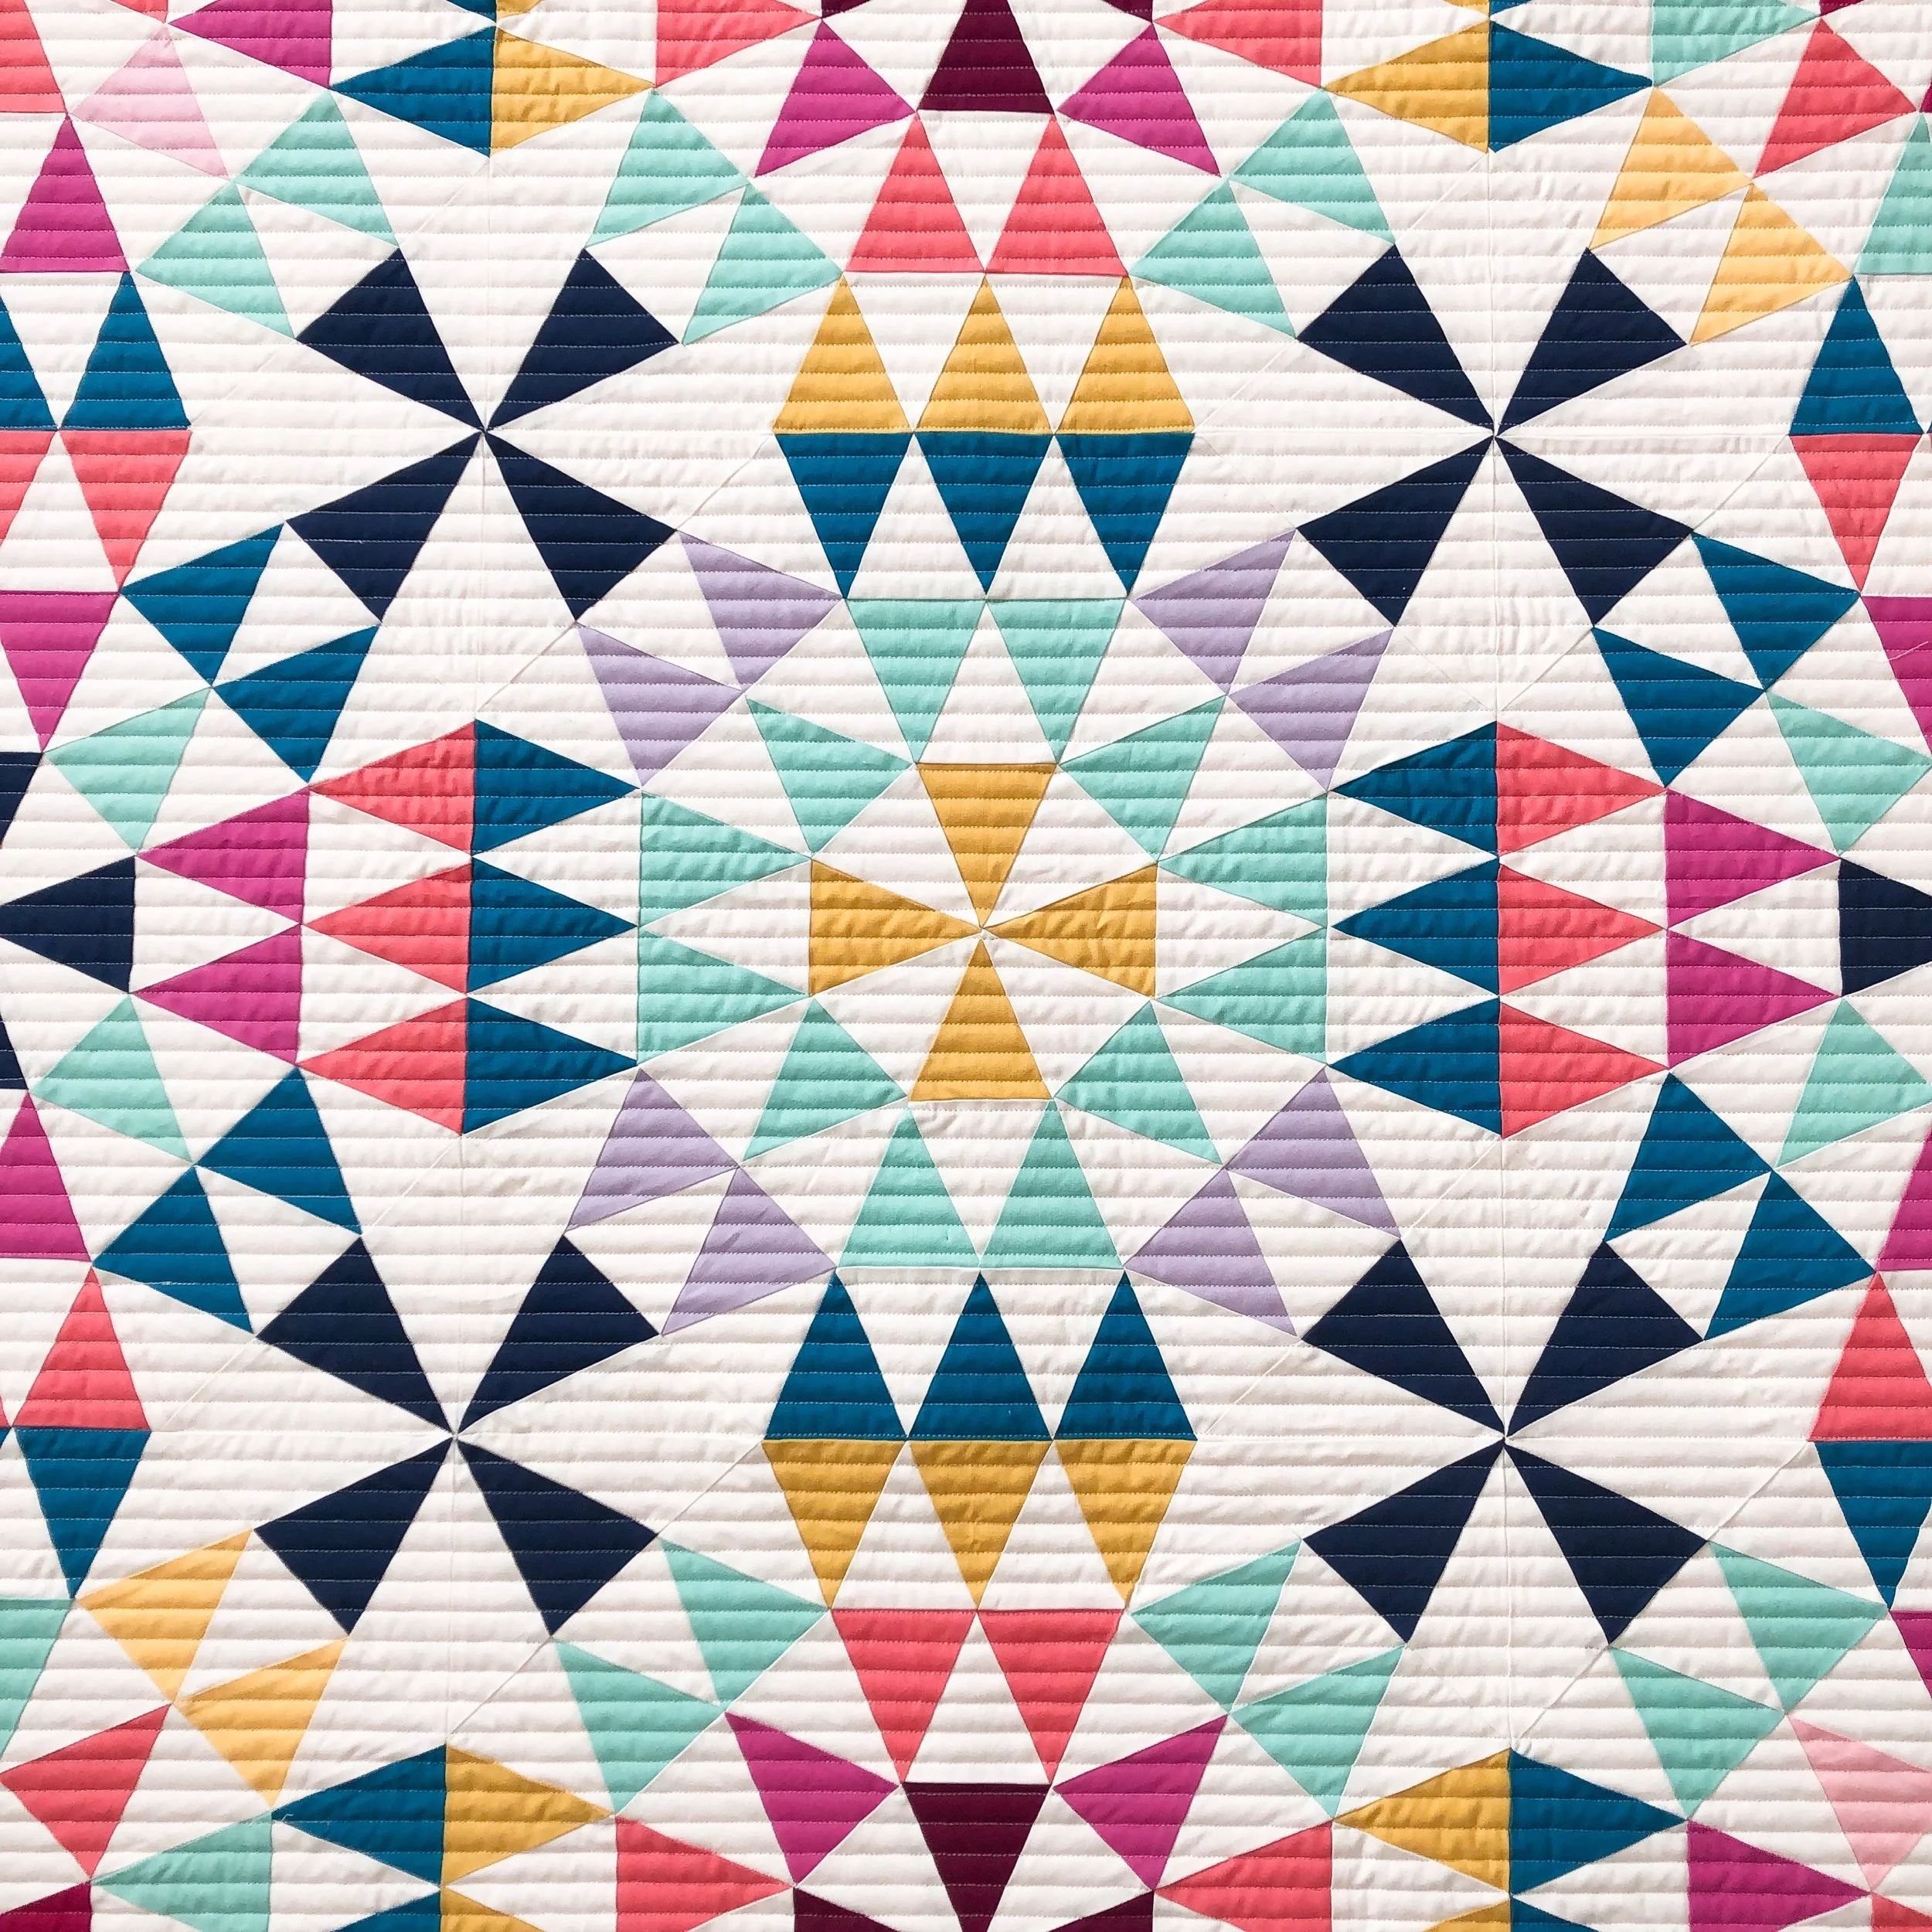
Hello there,
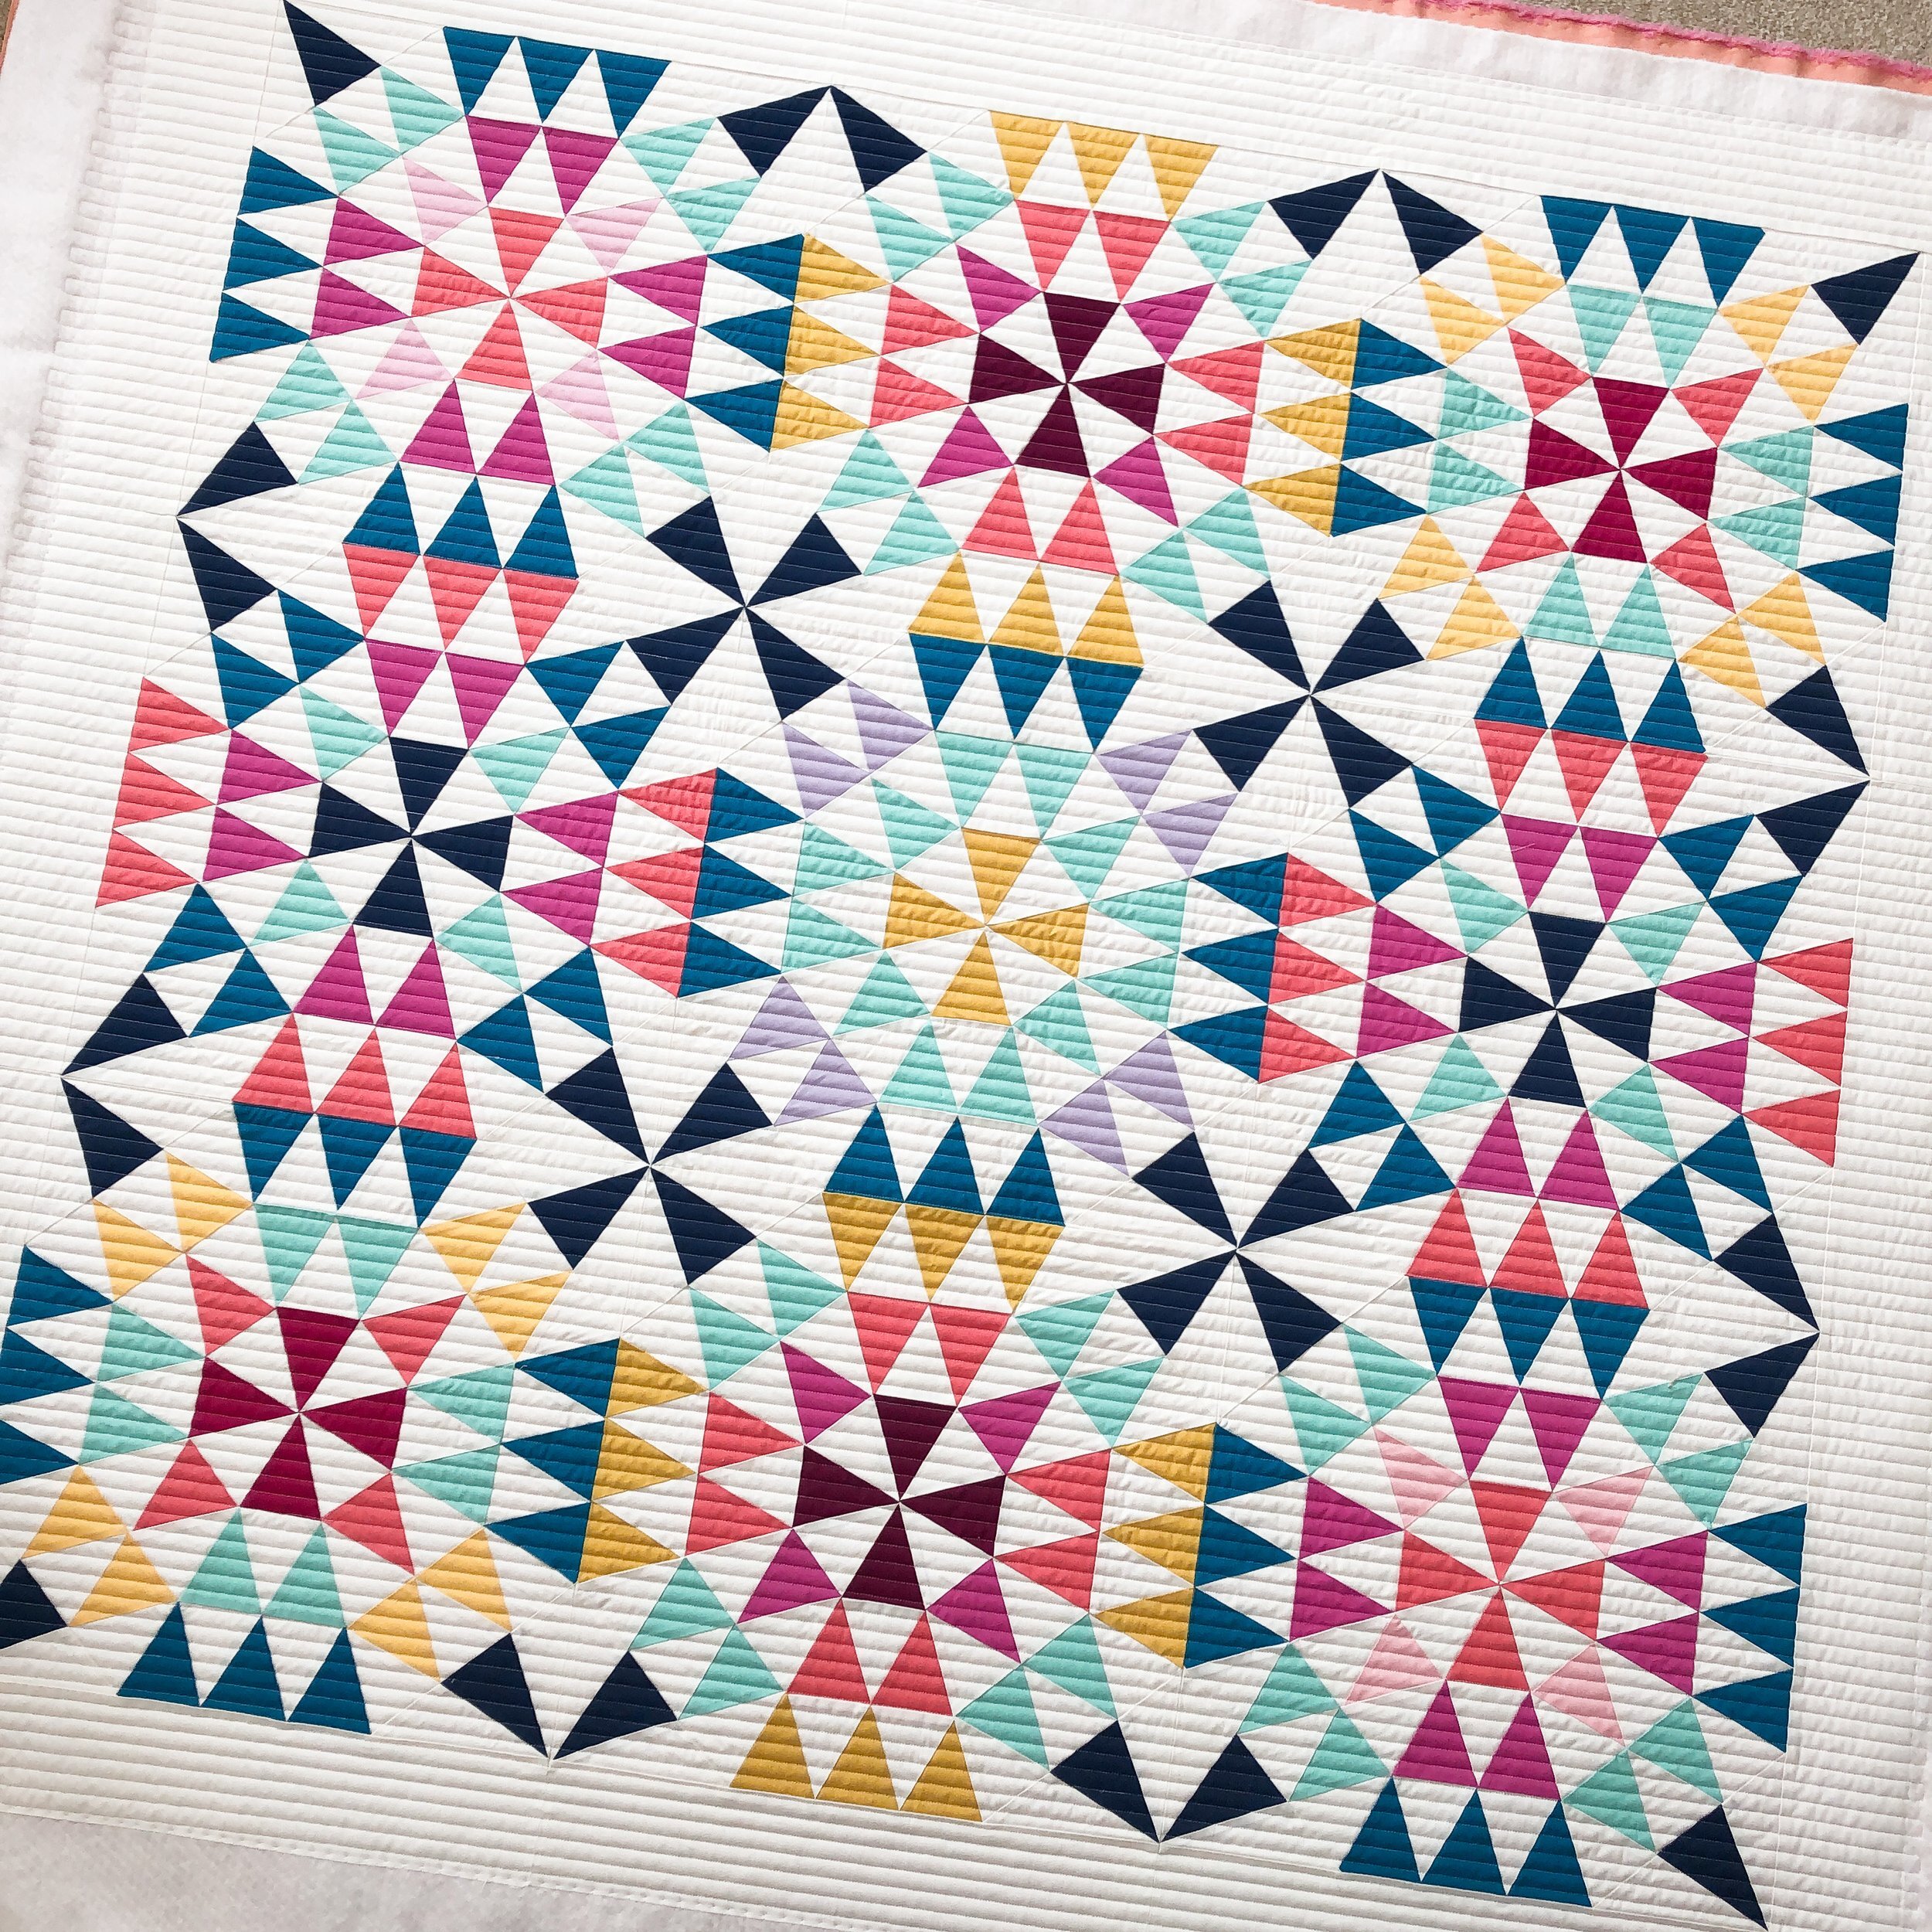
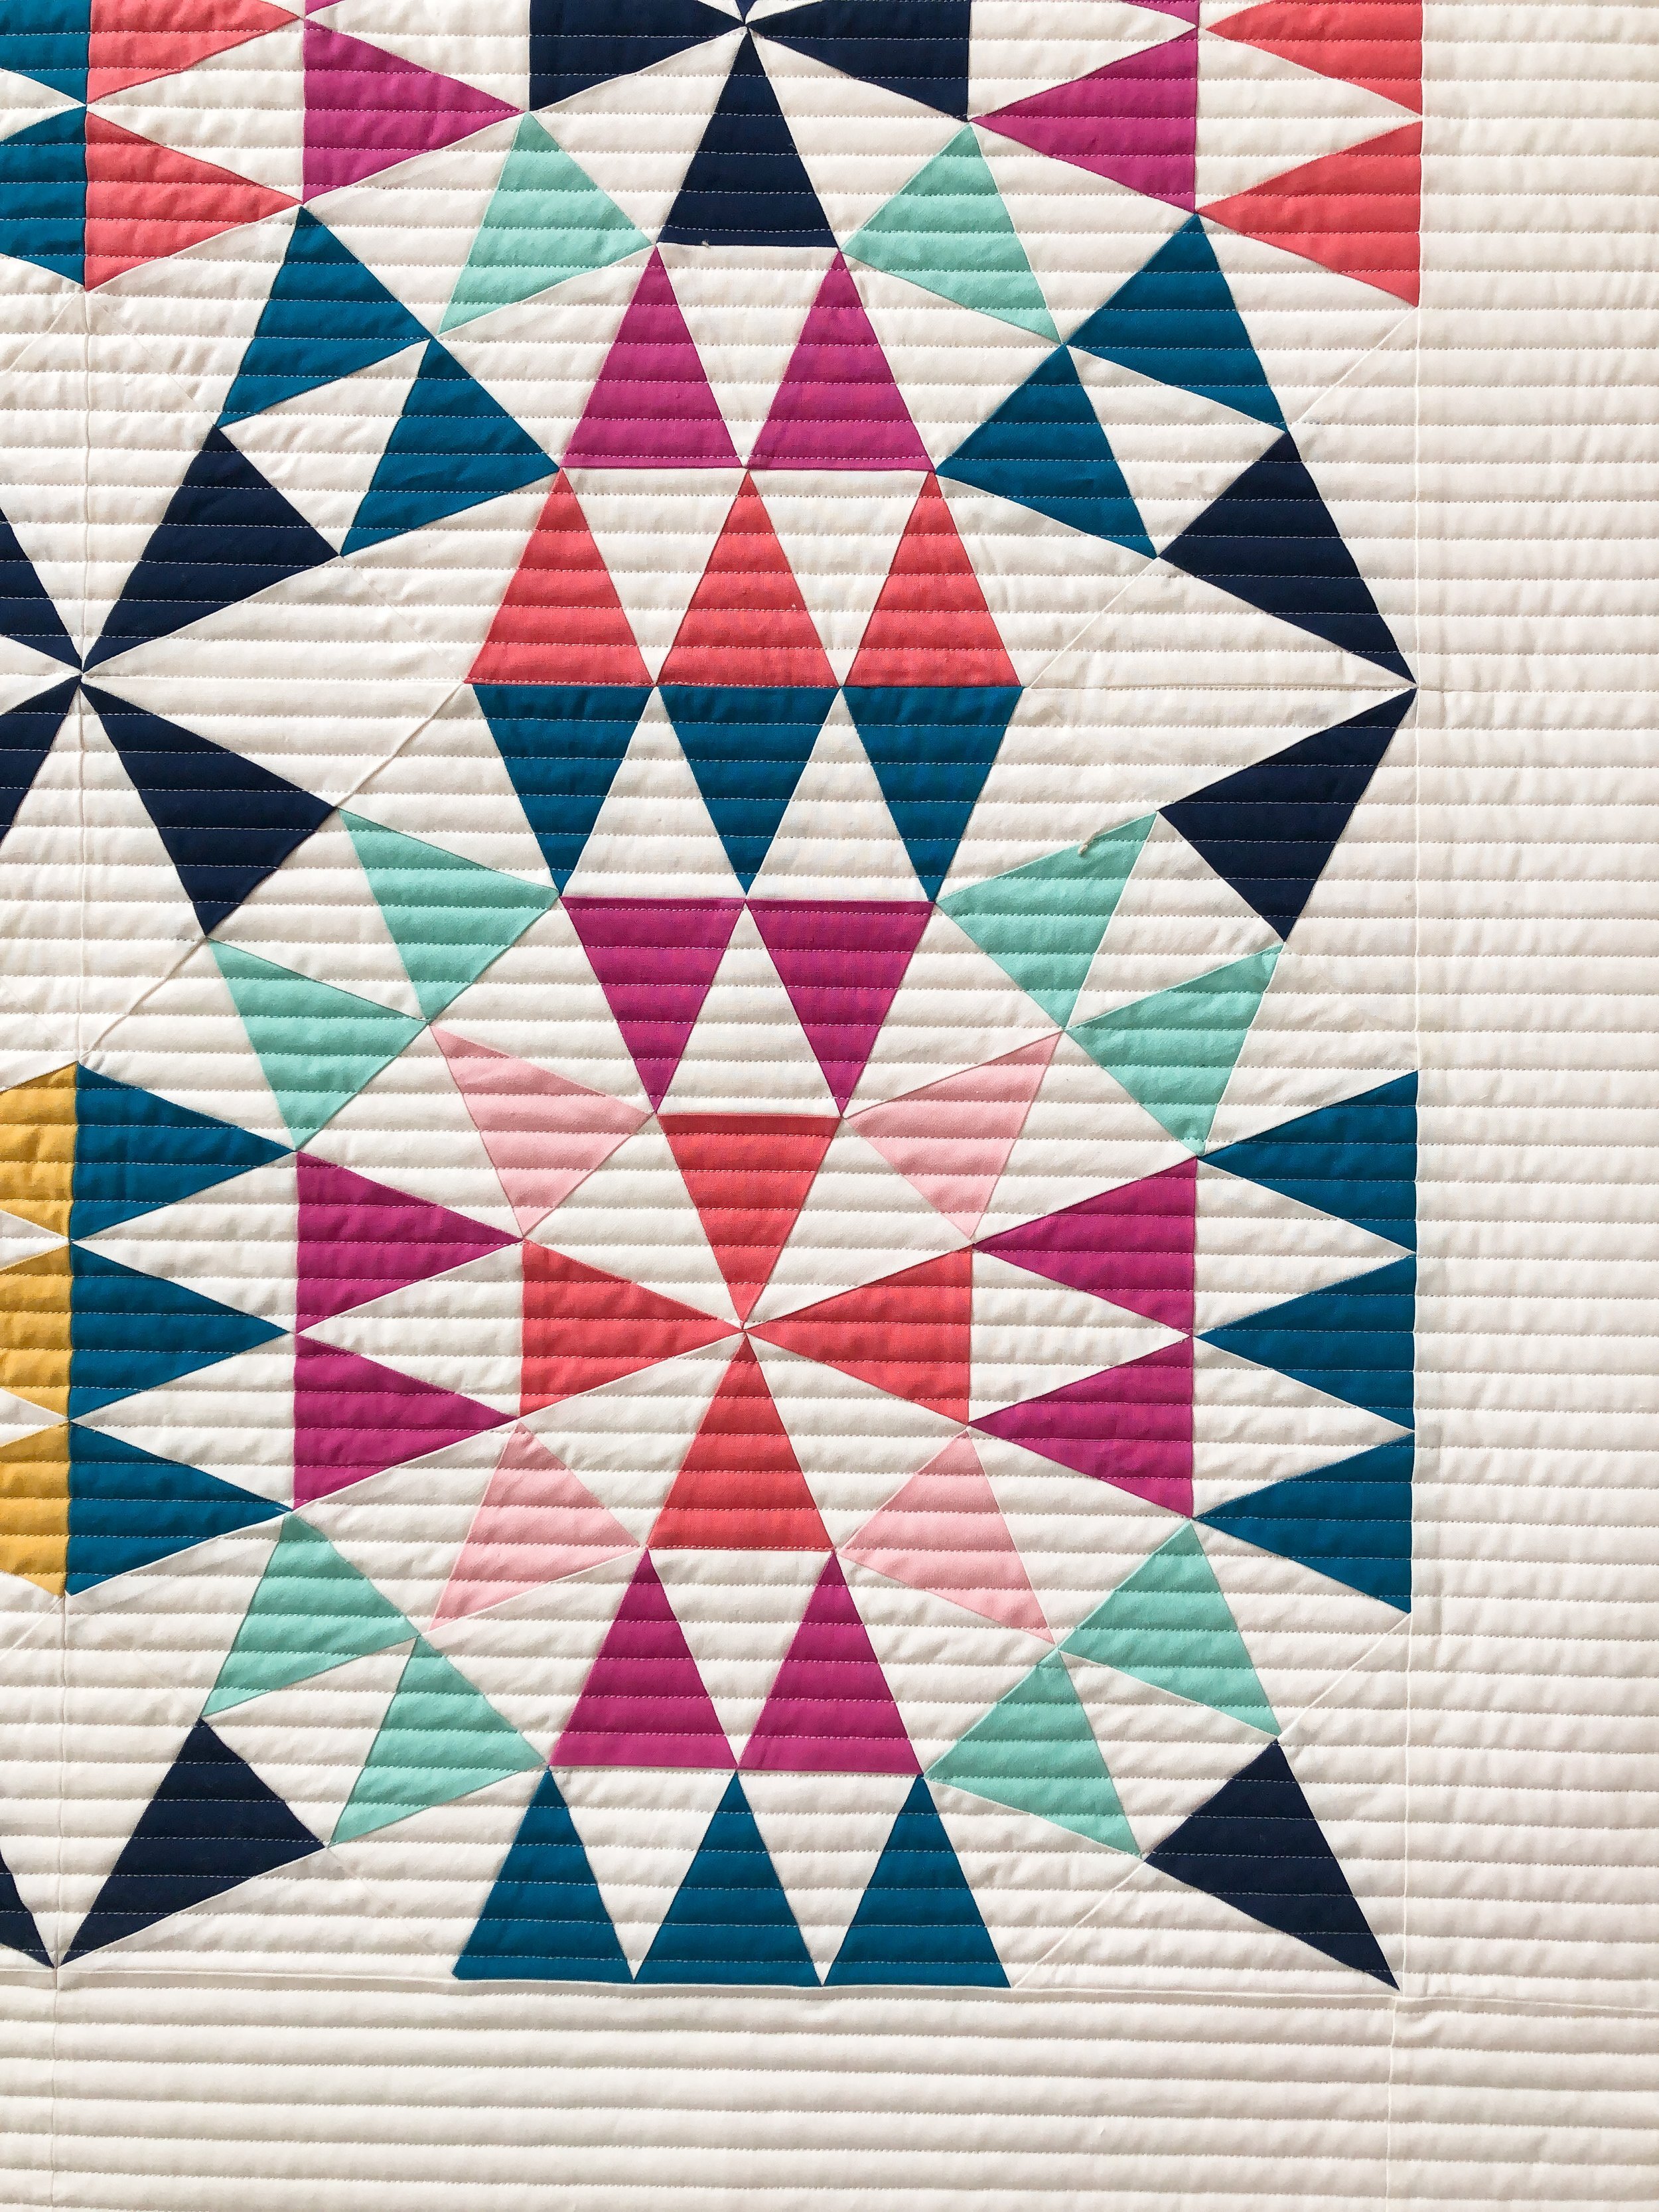
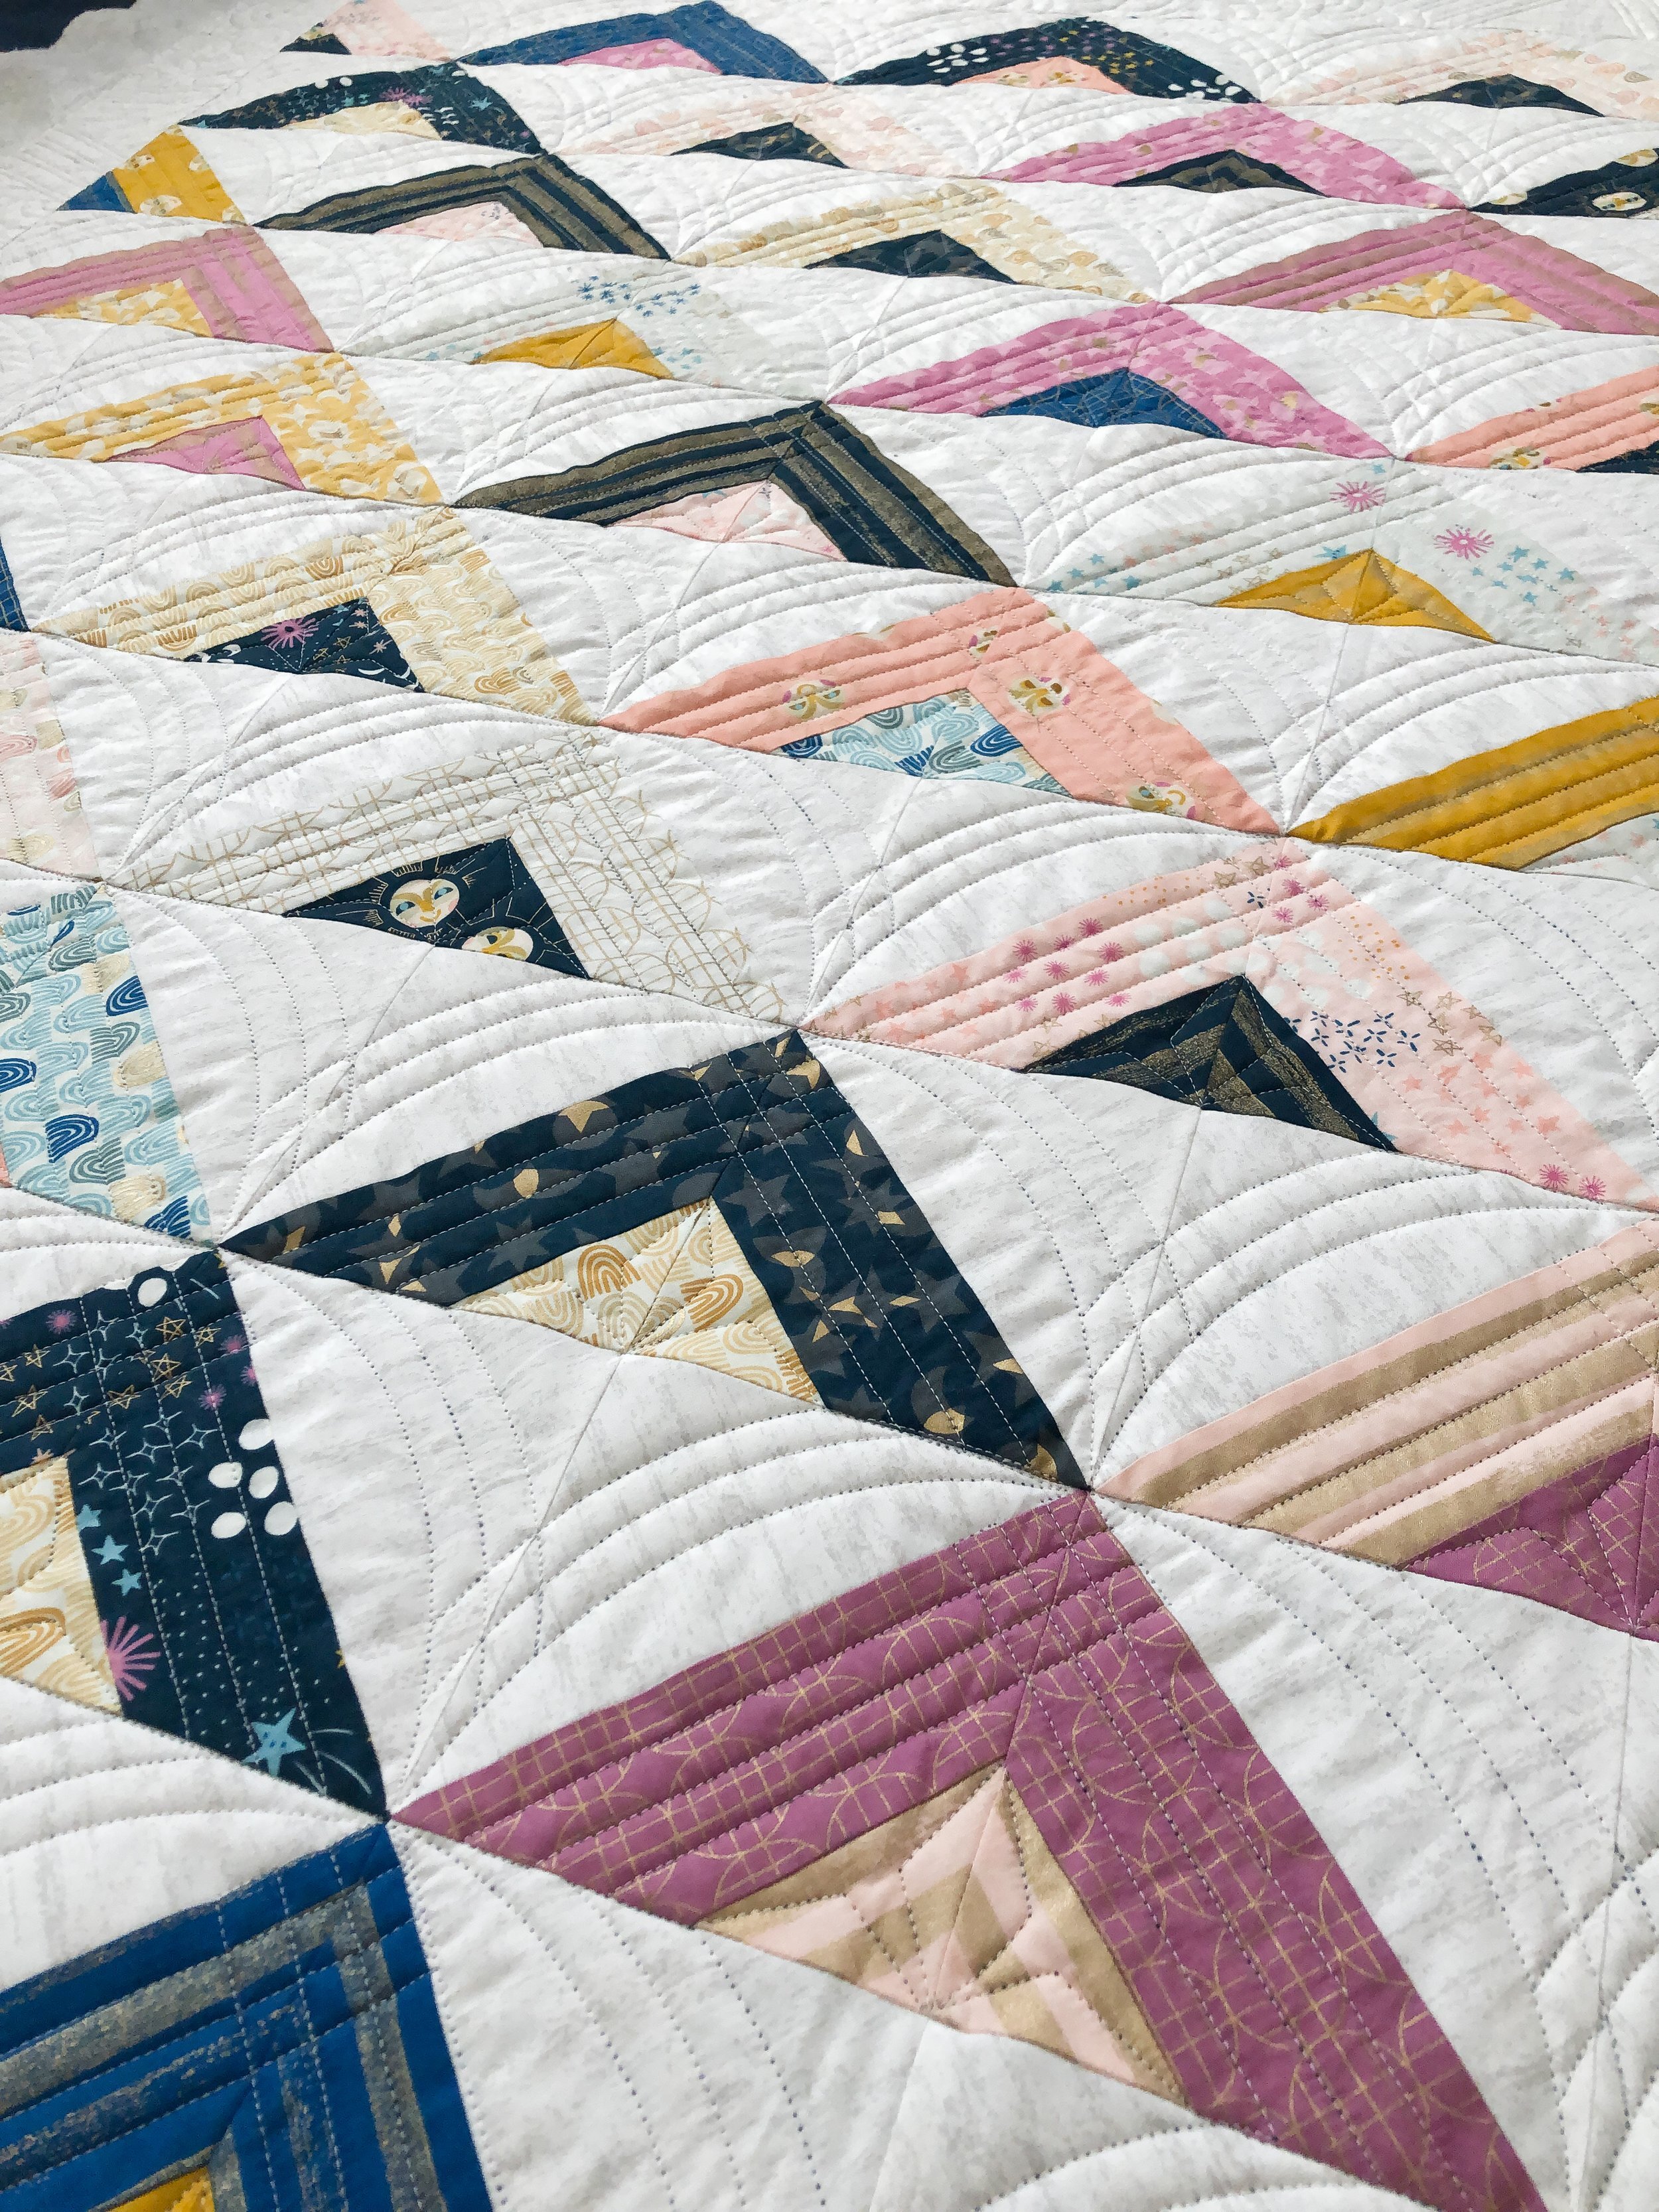
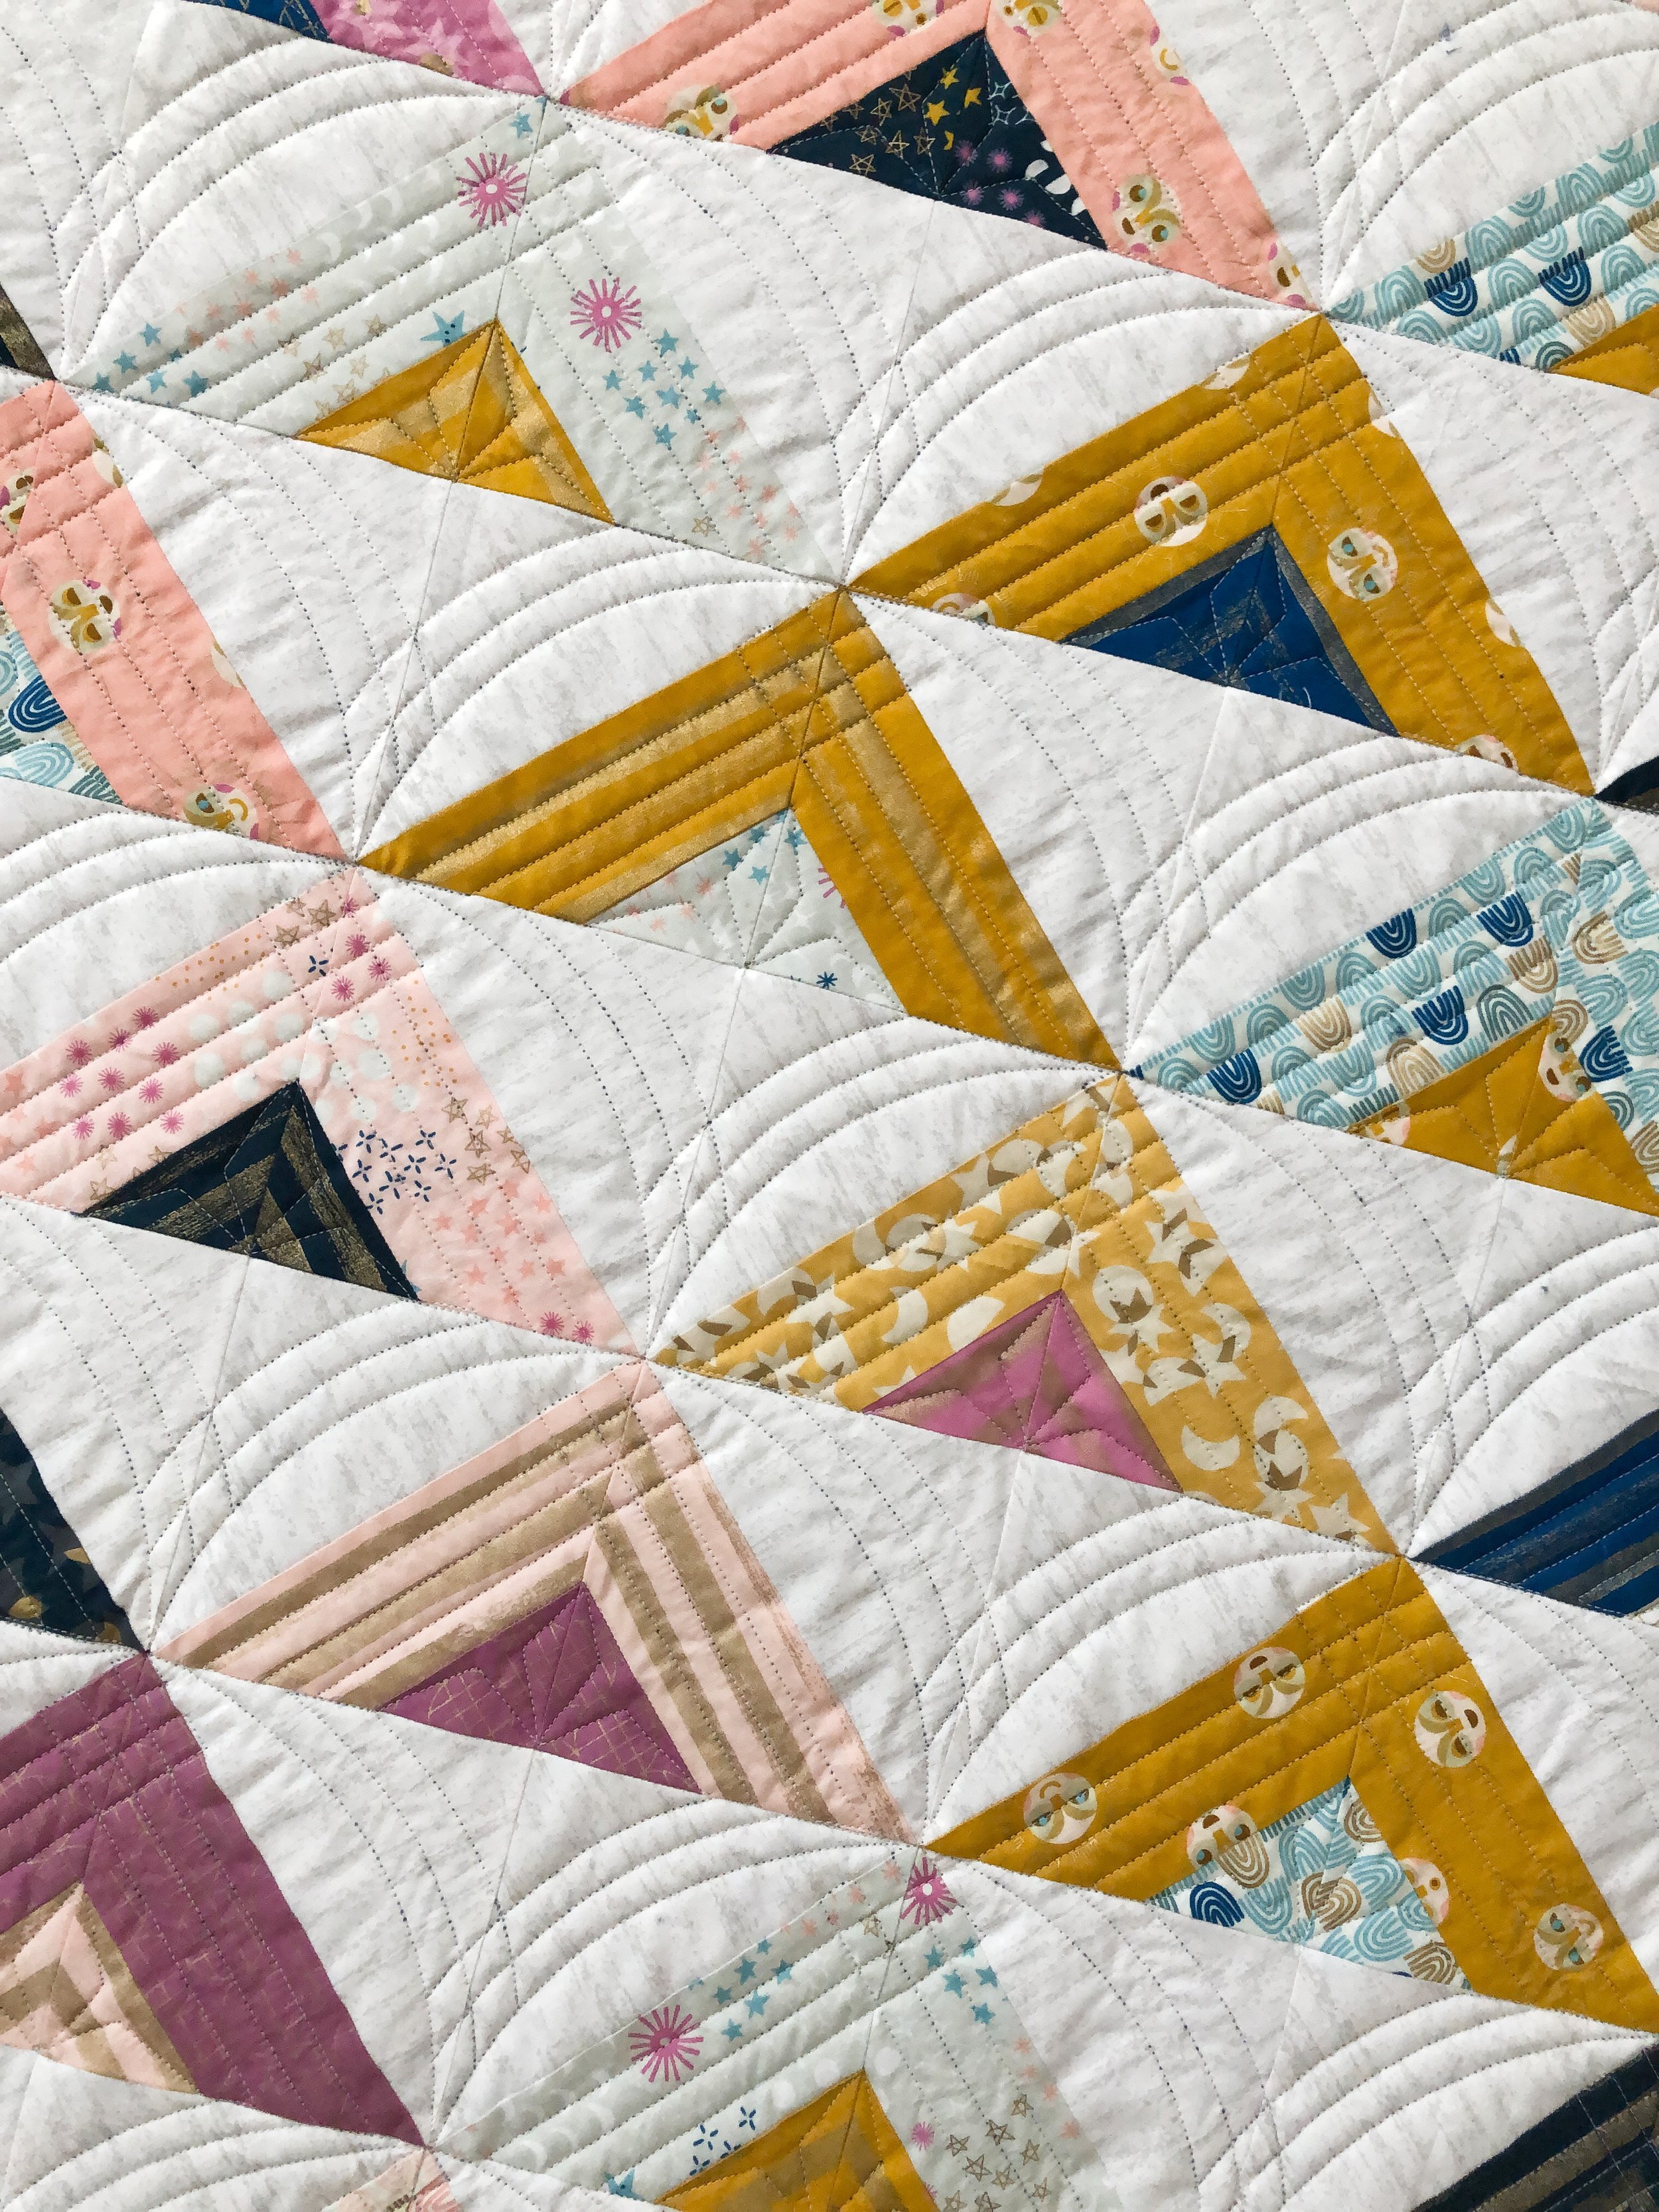
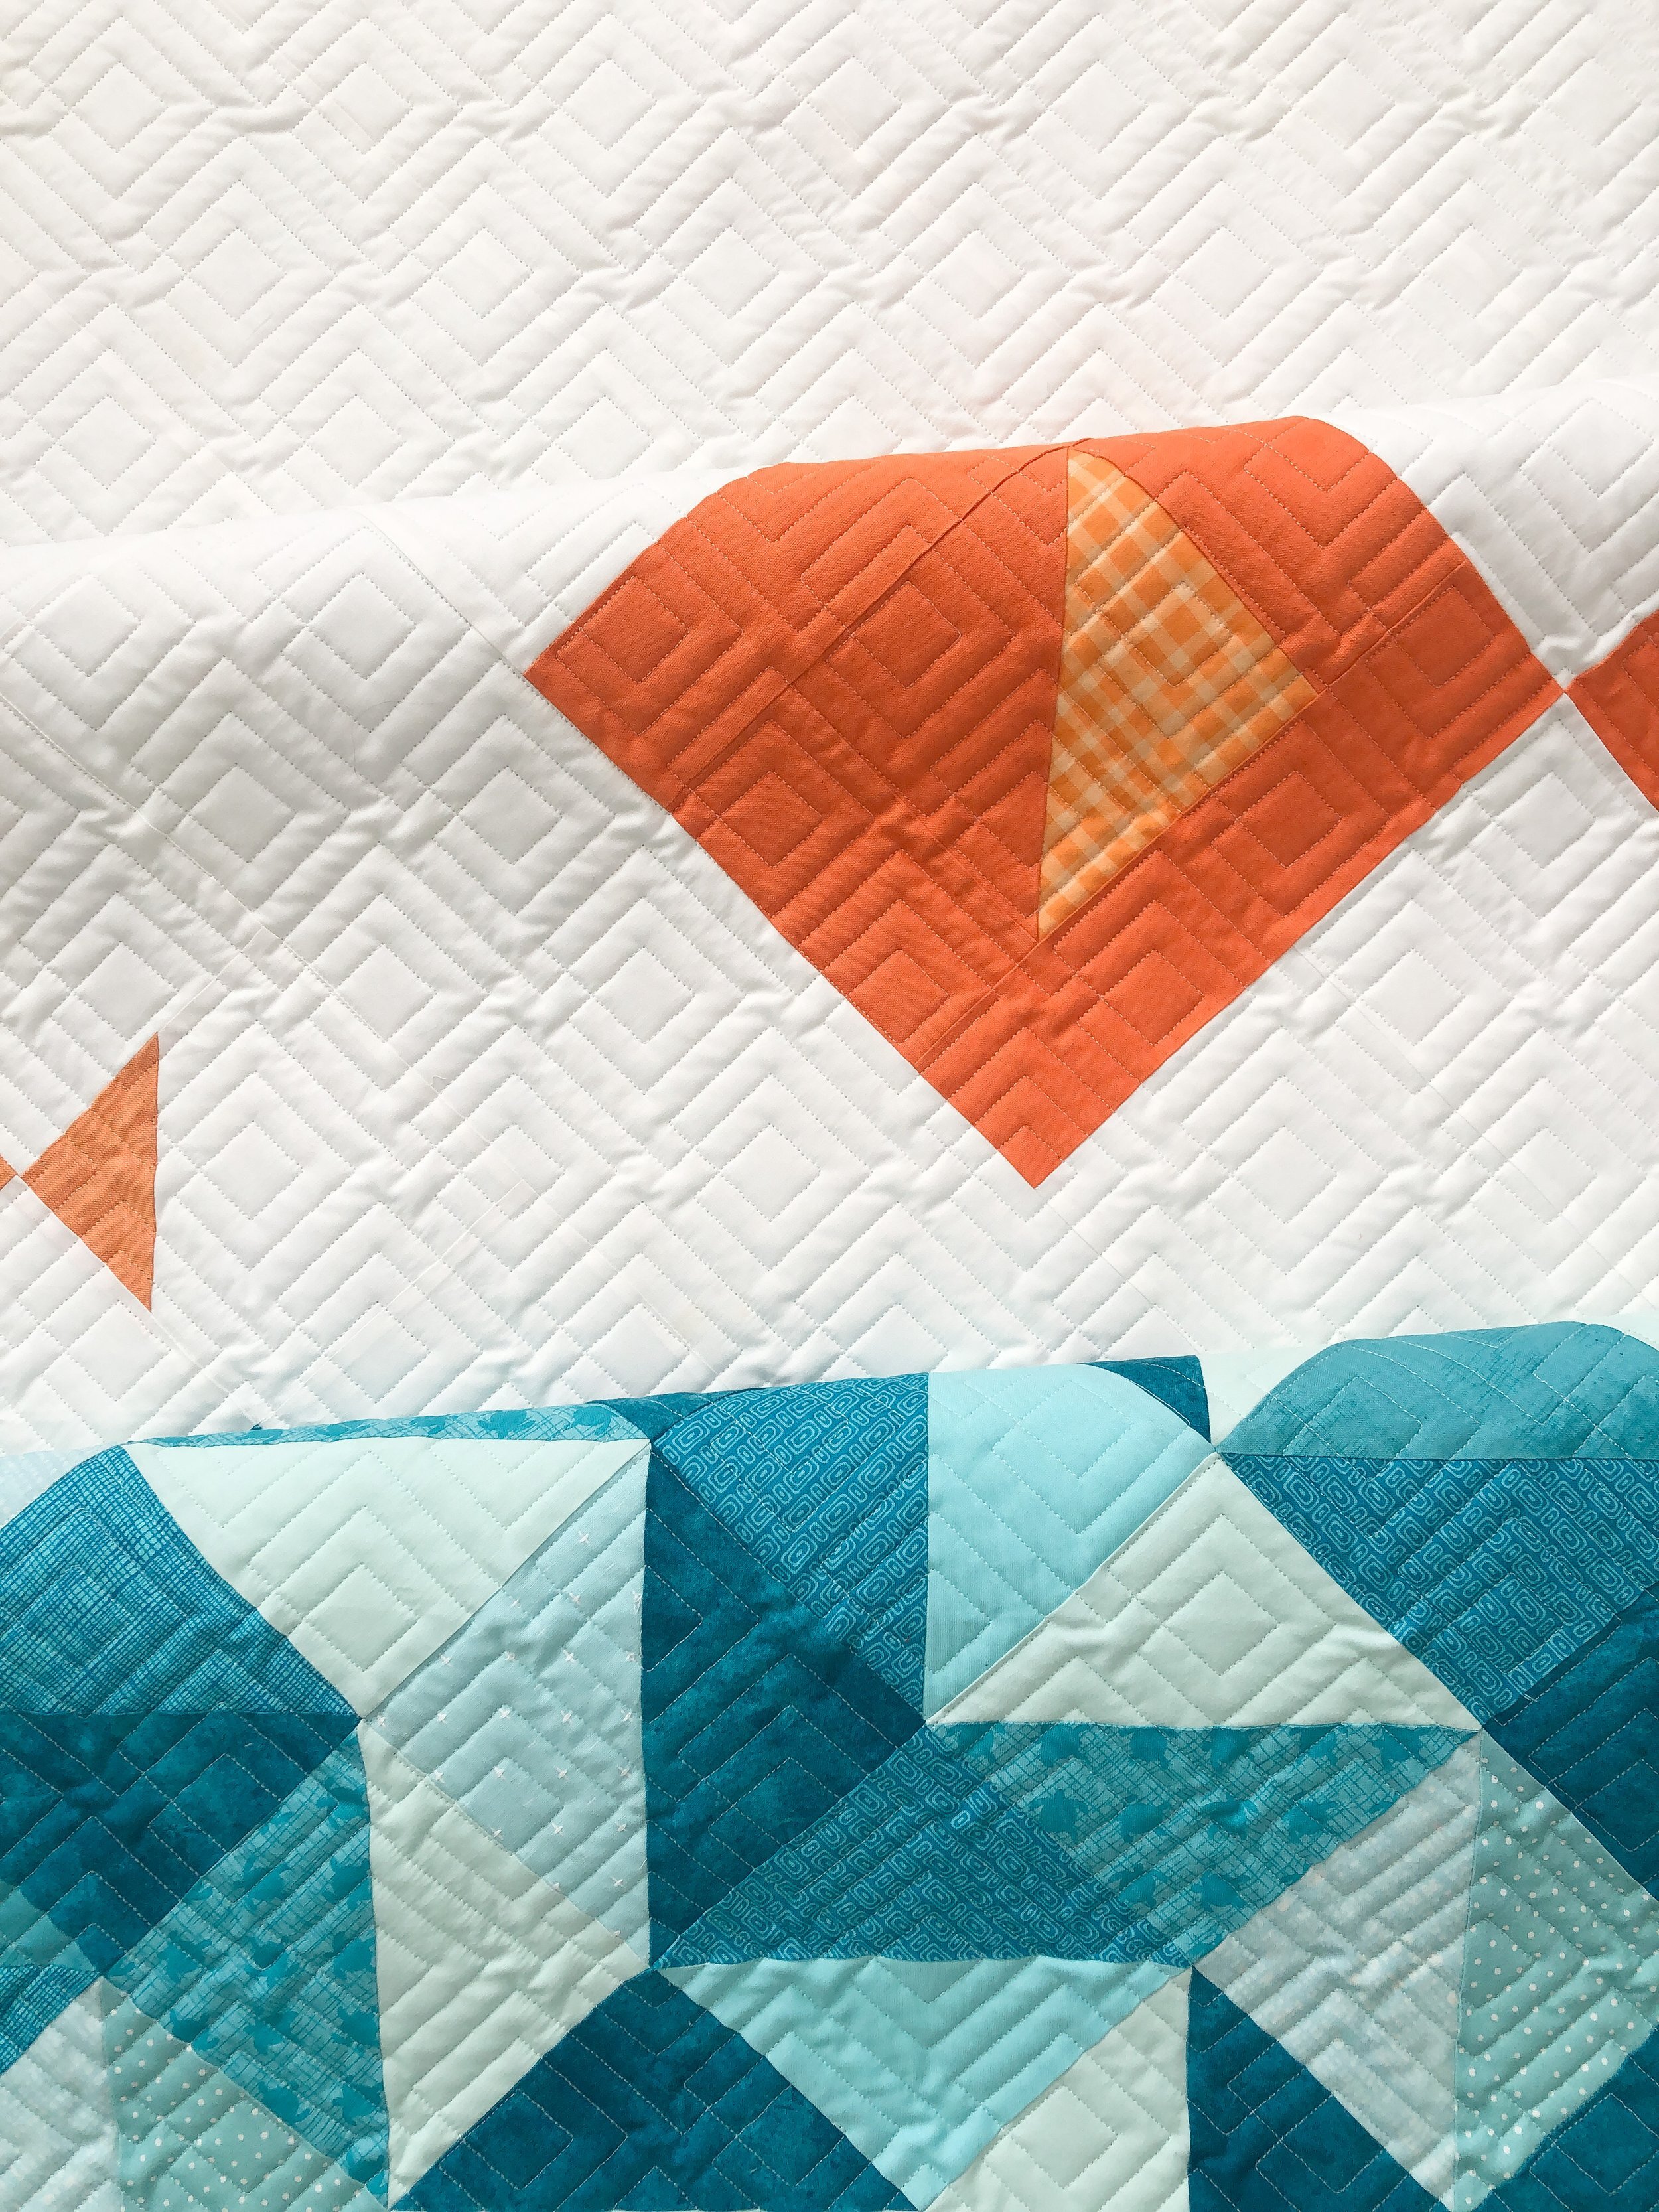
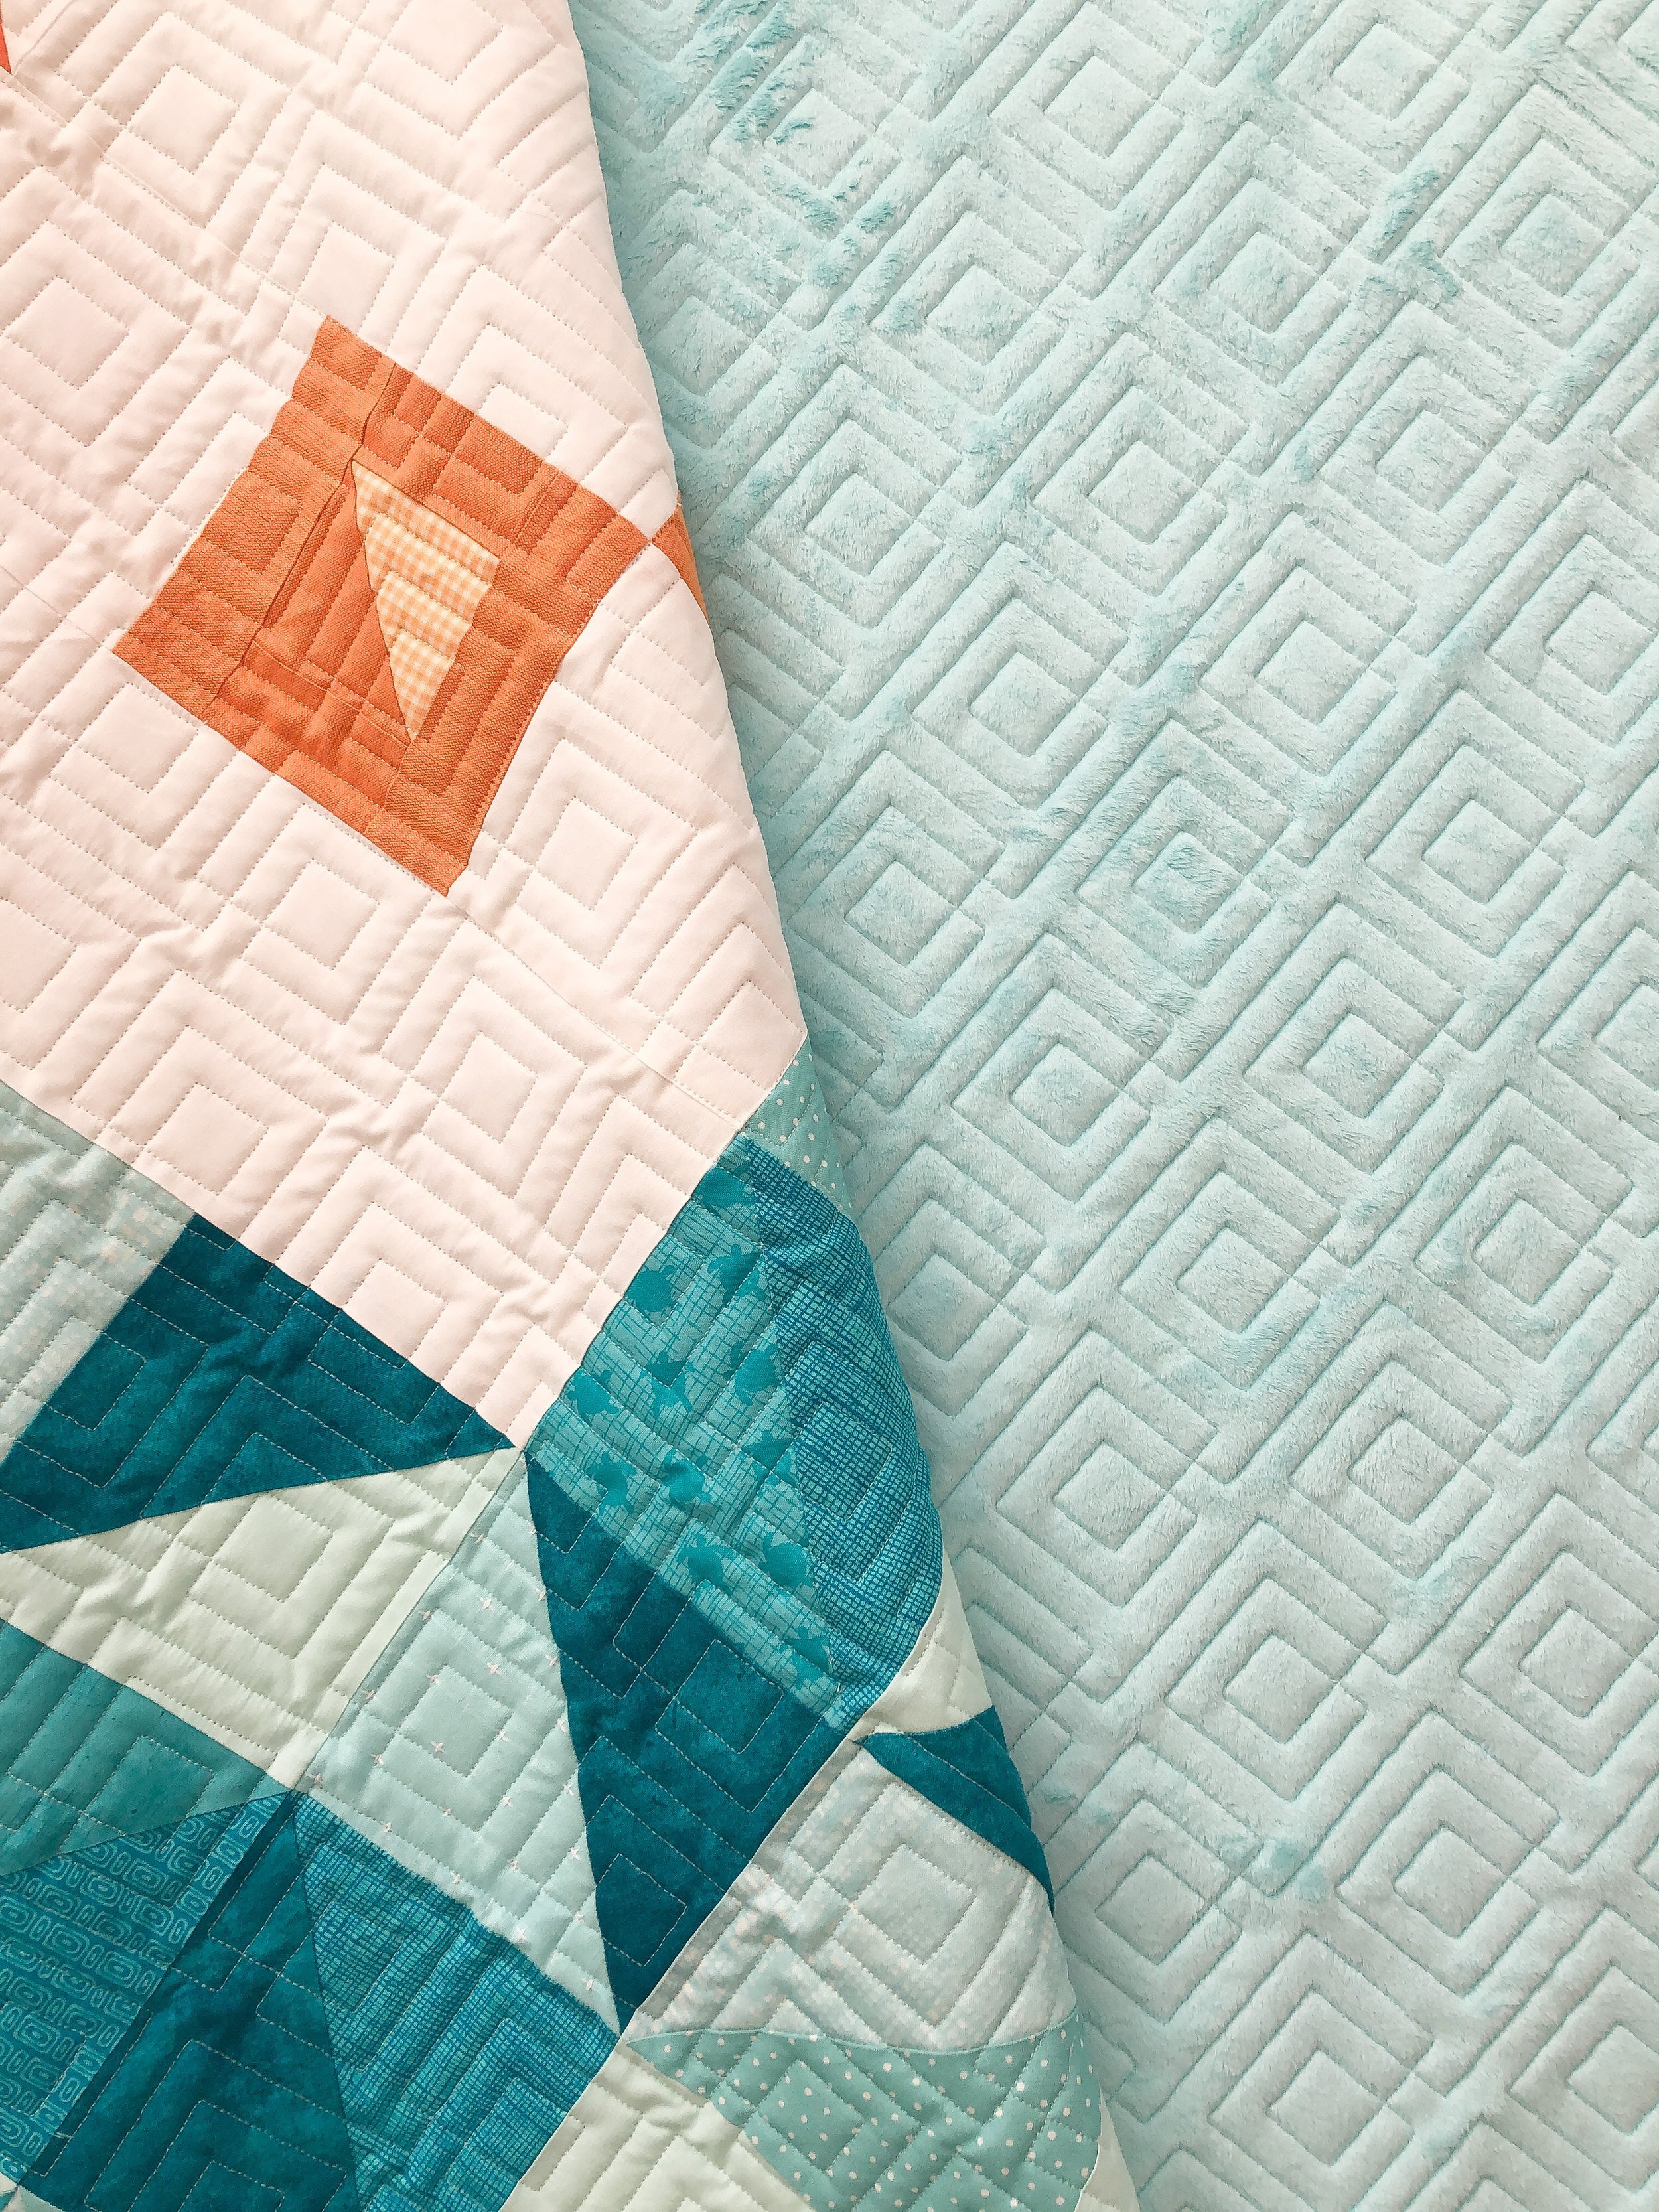
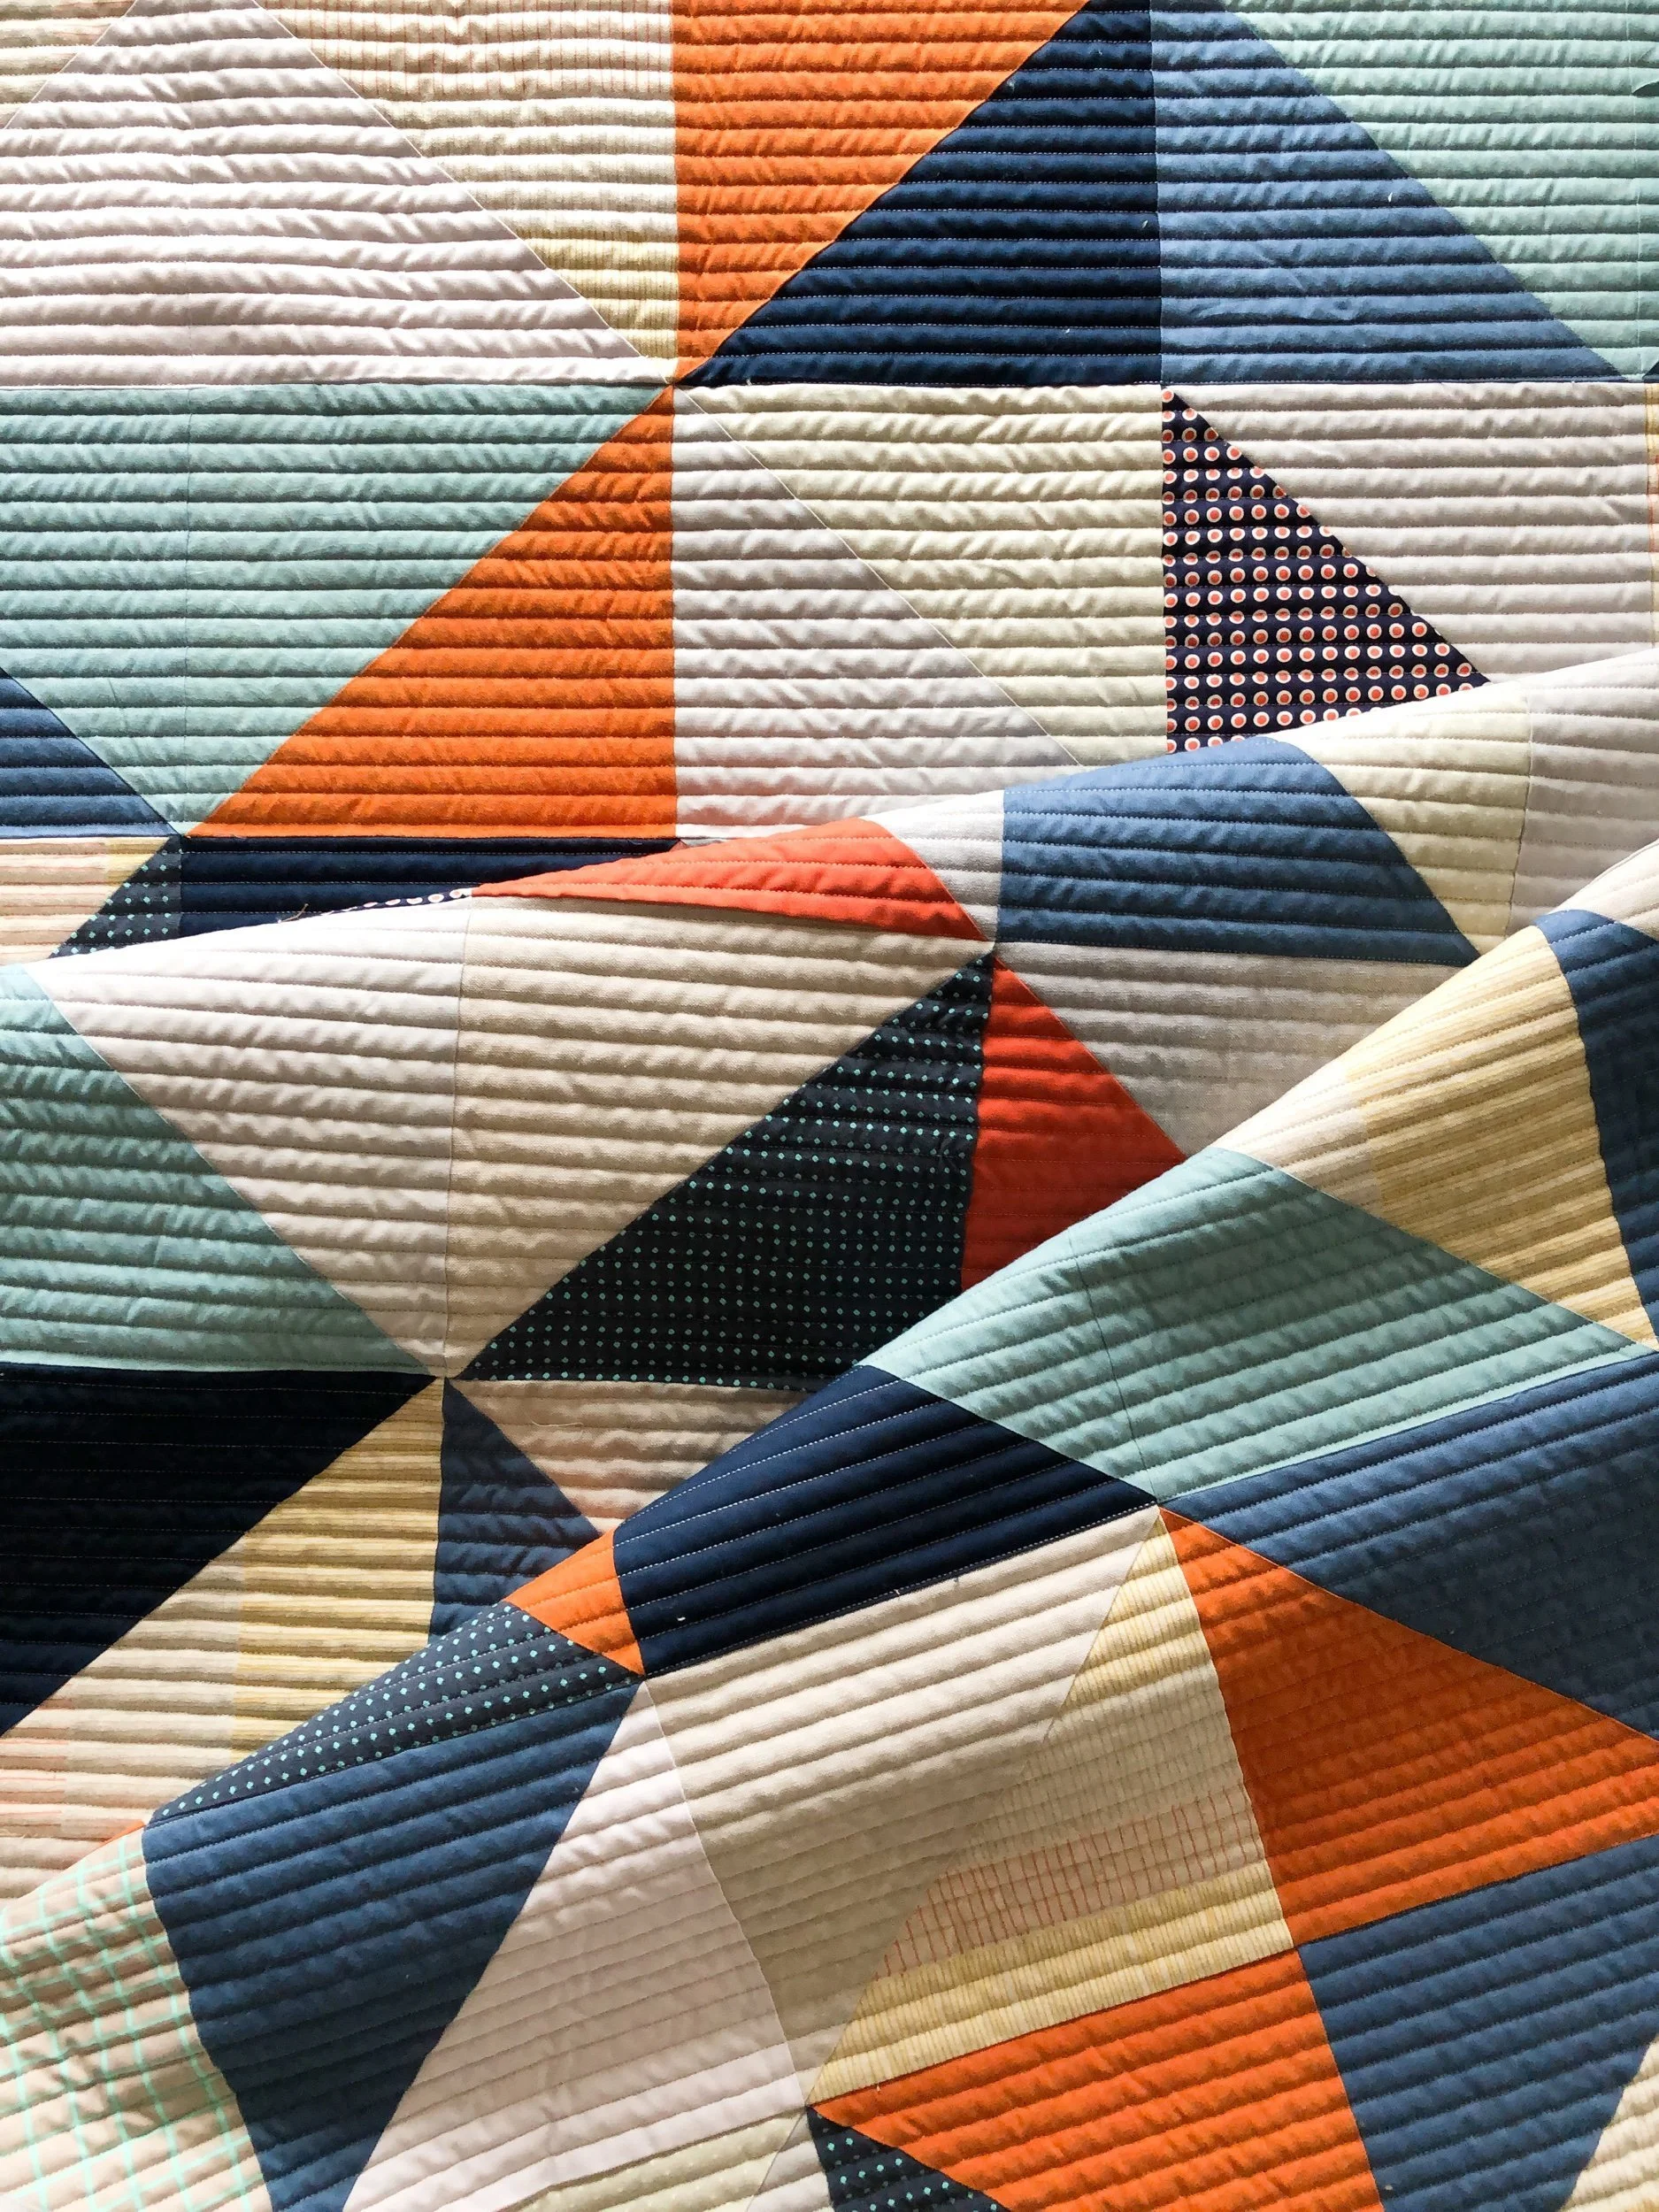
Have I got a treat for you!! My friend Abby from @orangepeelsews is a master at achieving a modern look, with lovely texture, and beautiful fabric combinations…please check out this beauty. I want to create quilts like she does when I grow up. Seriously, she’s so talented. I’m so grateful I get to quilt for her.

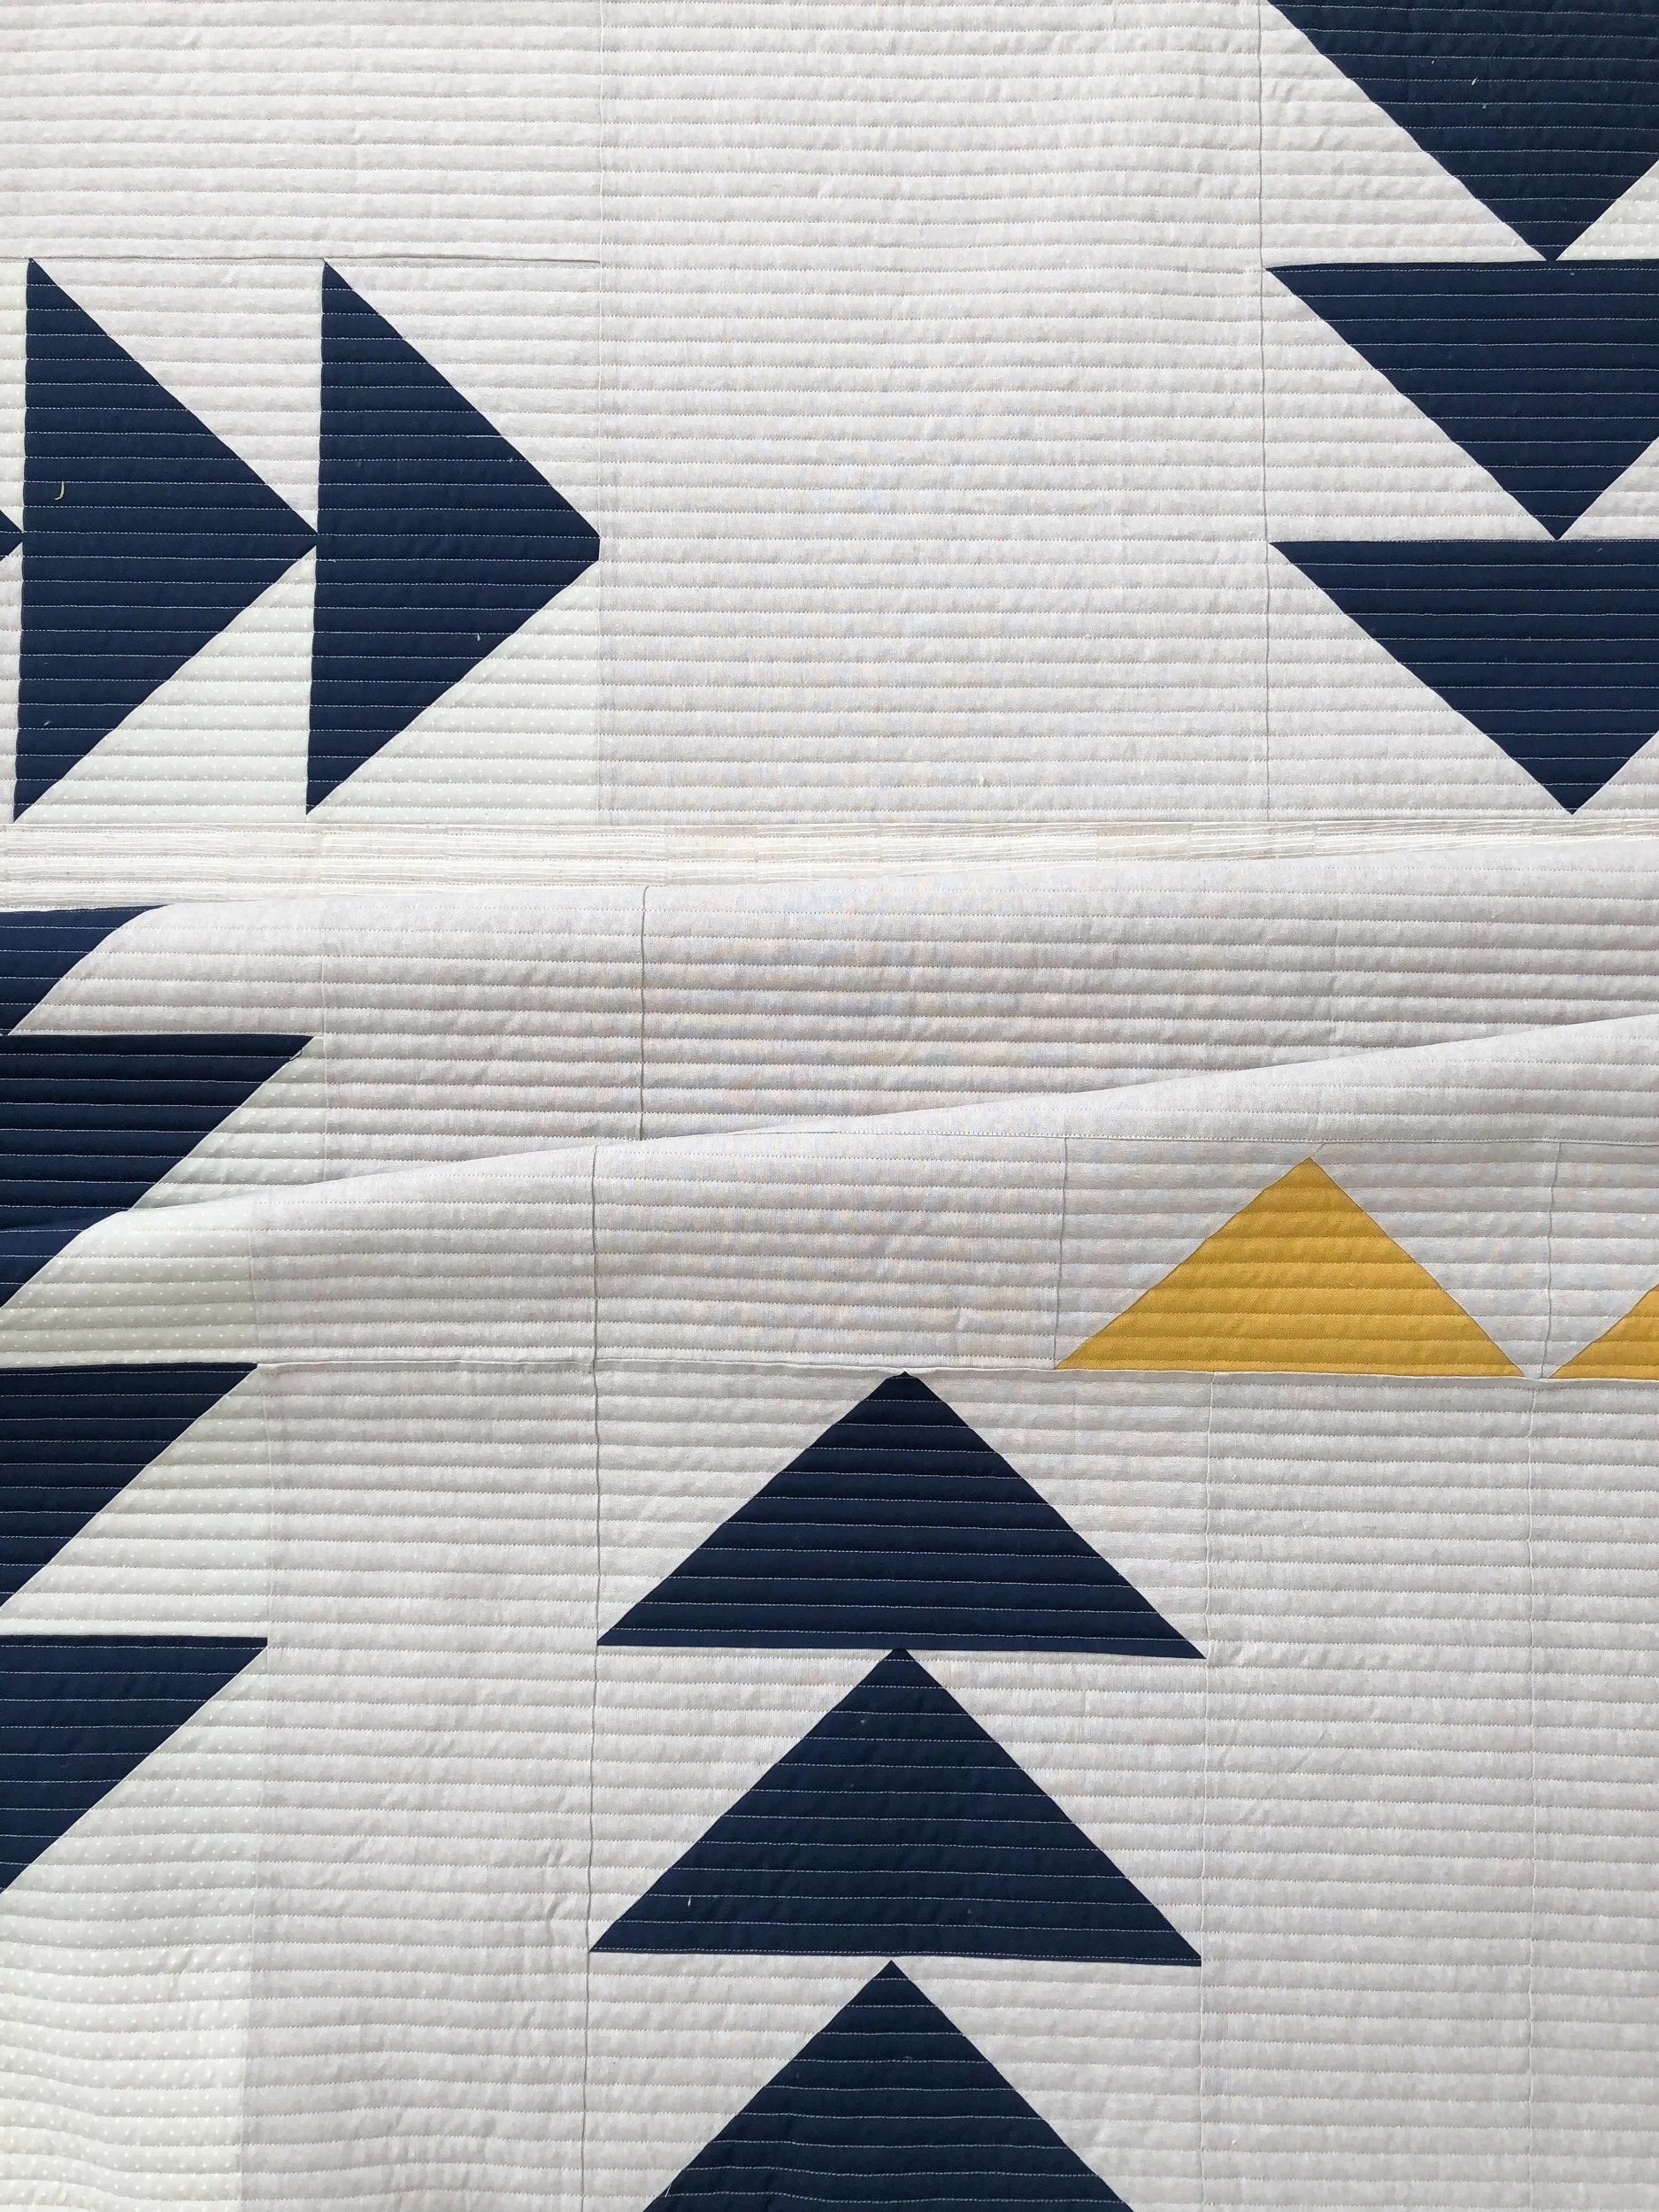
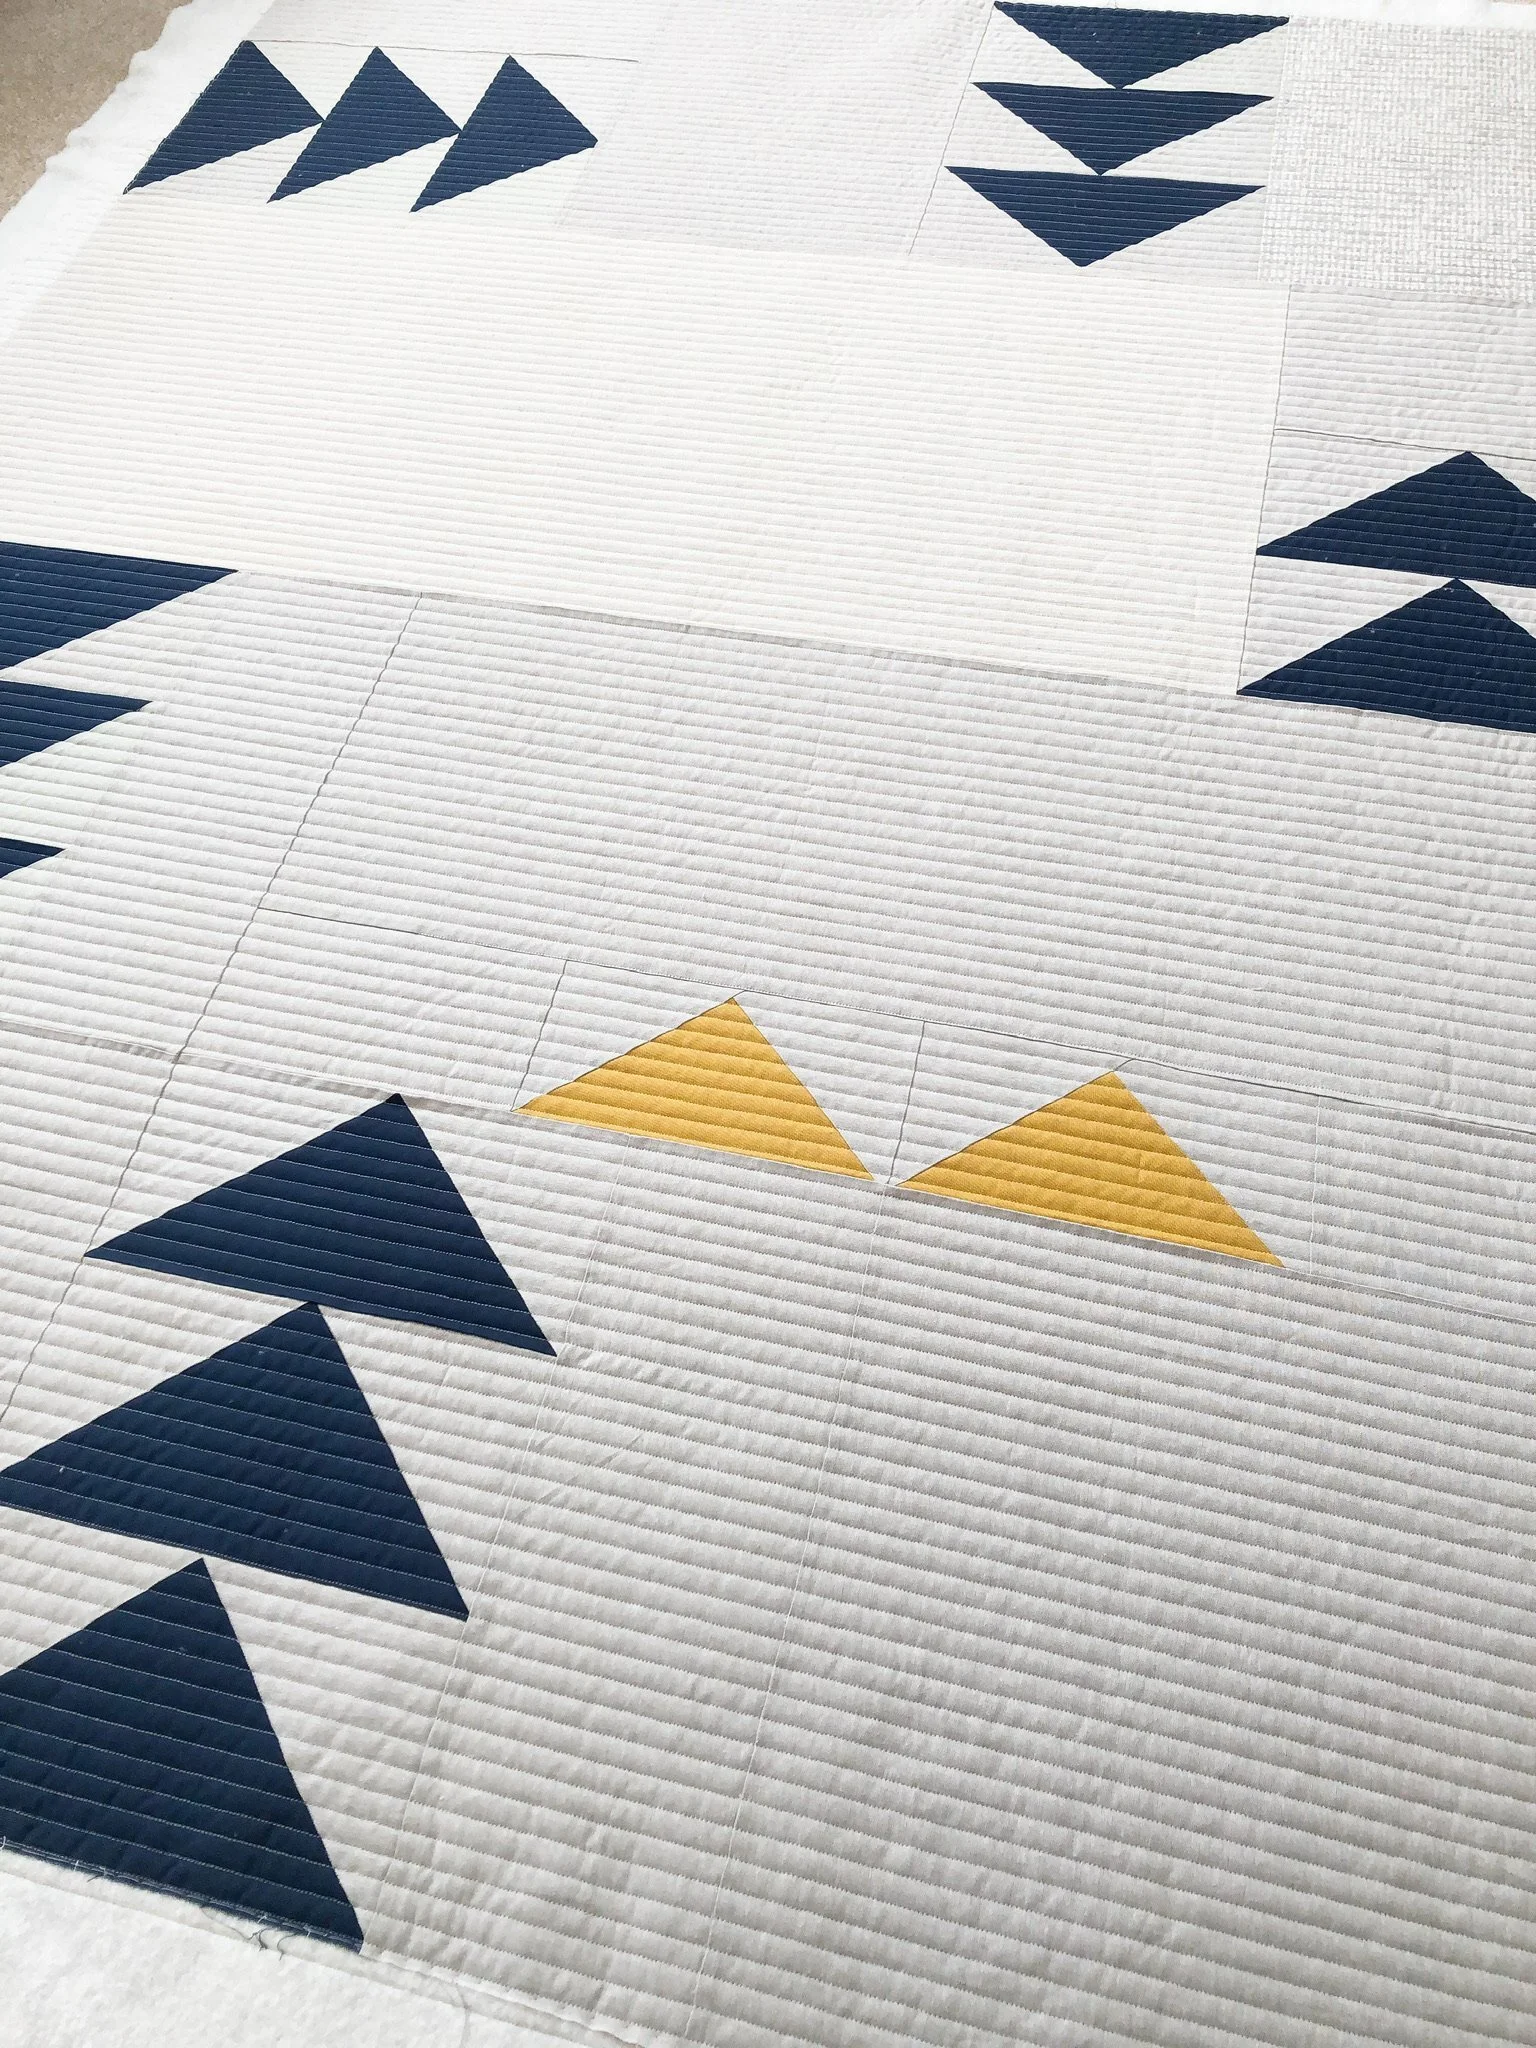
Yes, this quilt is improv. She decided on how big she wanted the flying geese to be, and then she just made it up as she went. There is no pattern. If you’re interested, use it as inspiration and create some improv yourself. Maybe I should, too!

I used 8020 cotton poly blend batting from Winline Textiles out of Ogden Utah, and a cream Omni thread from Superior Threads to quilt it.
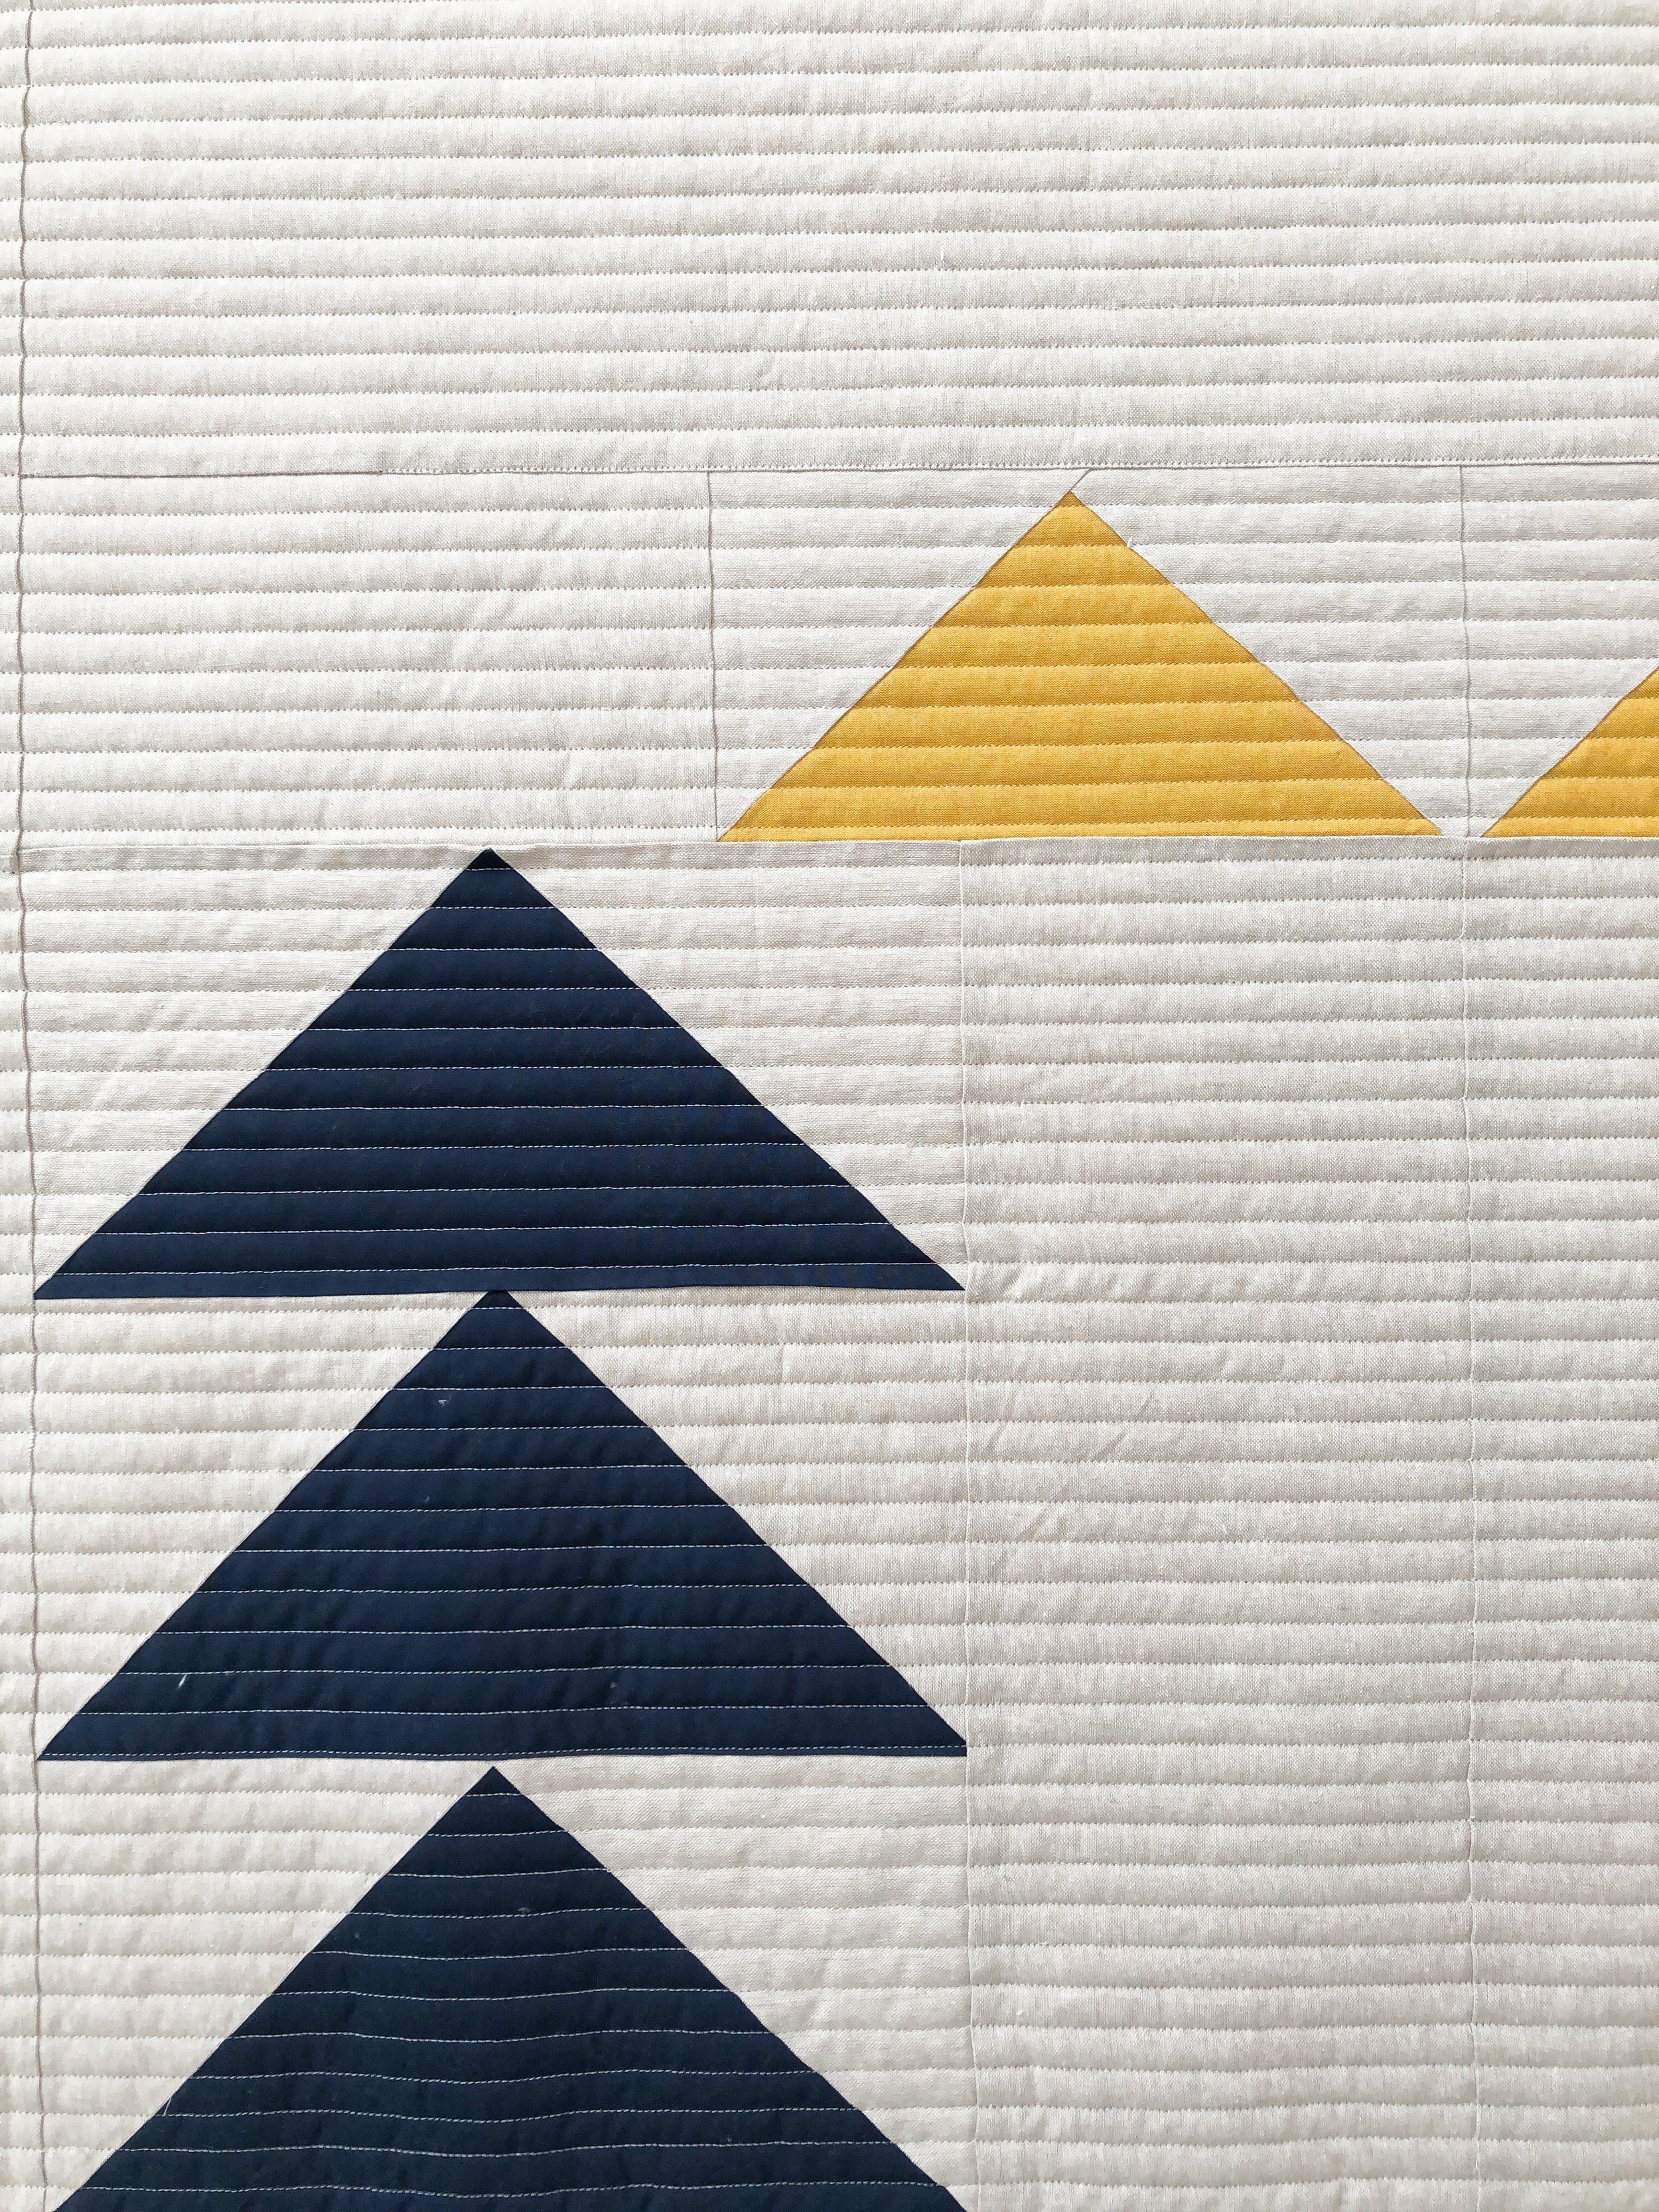
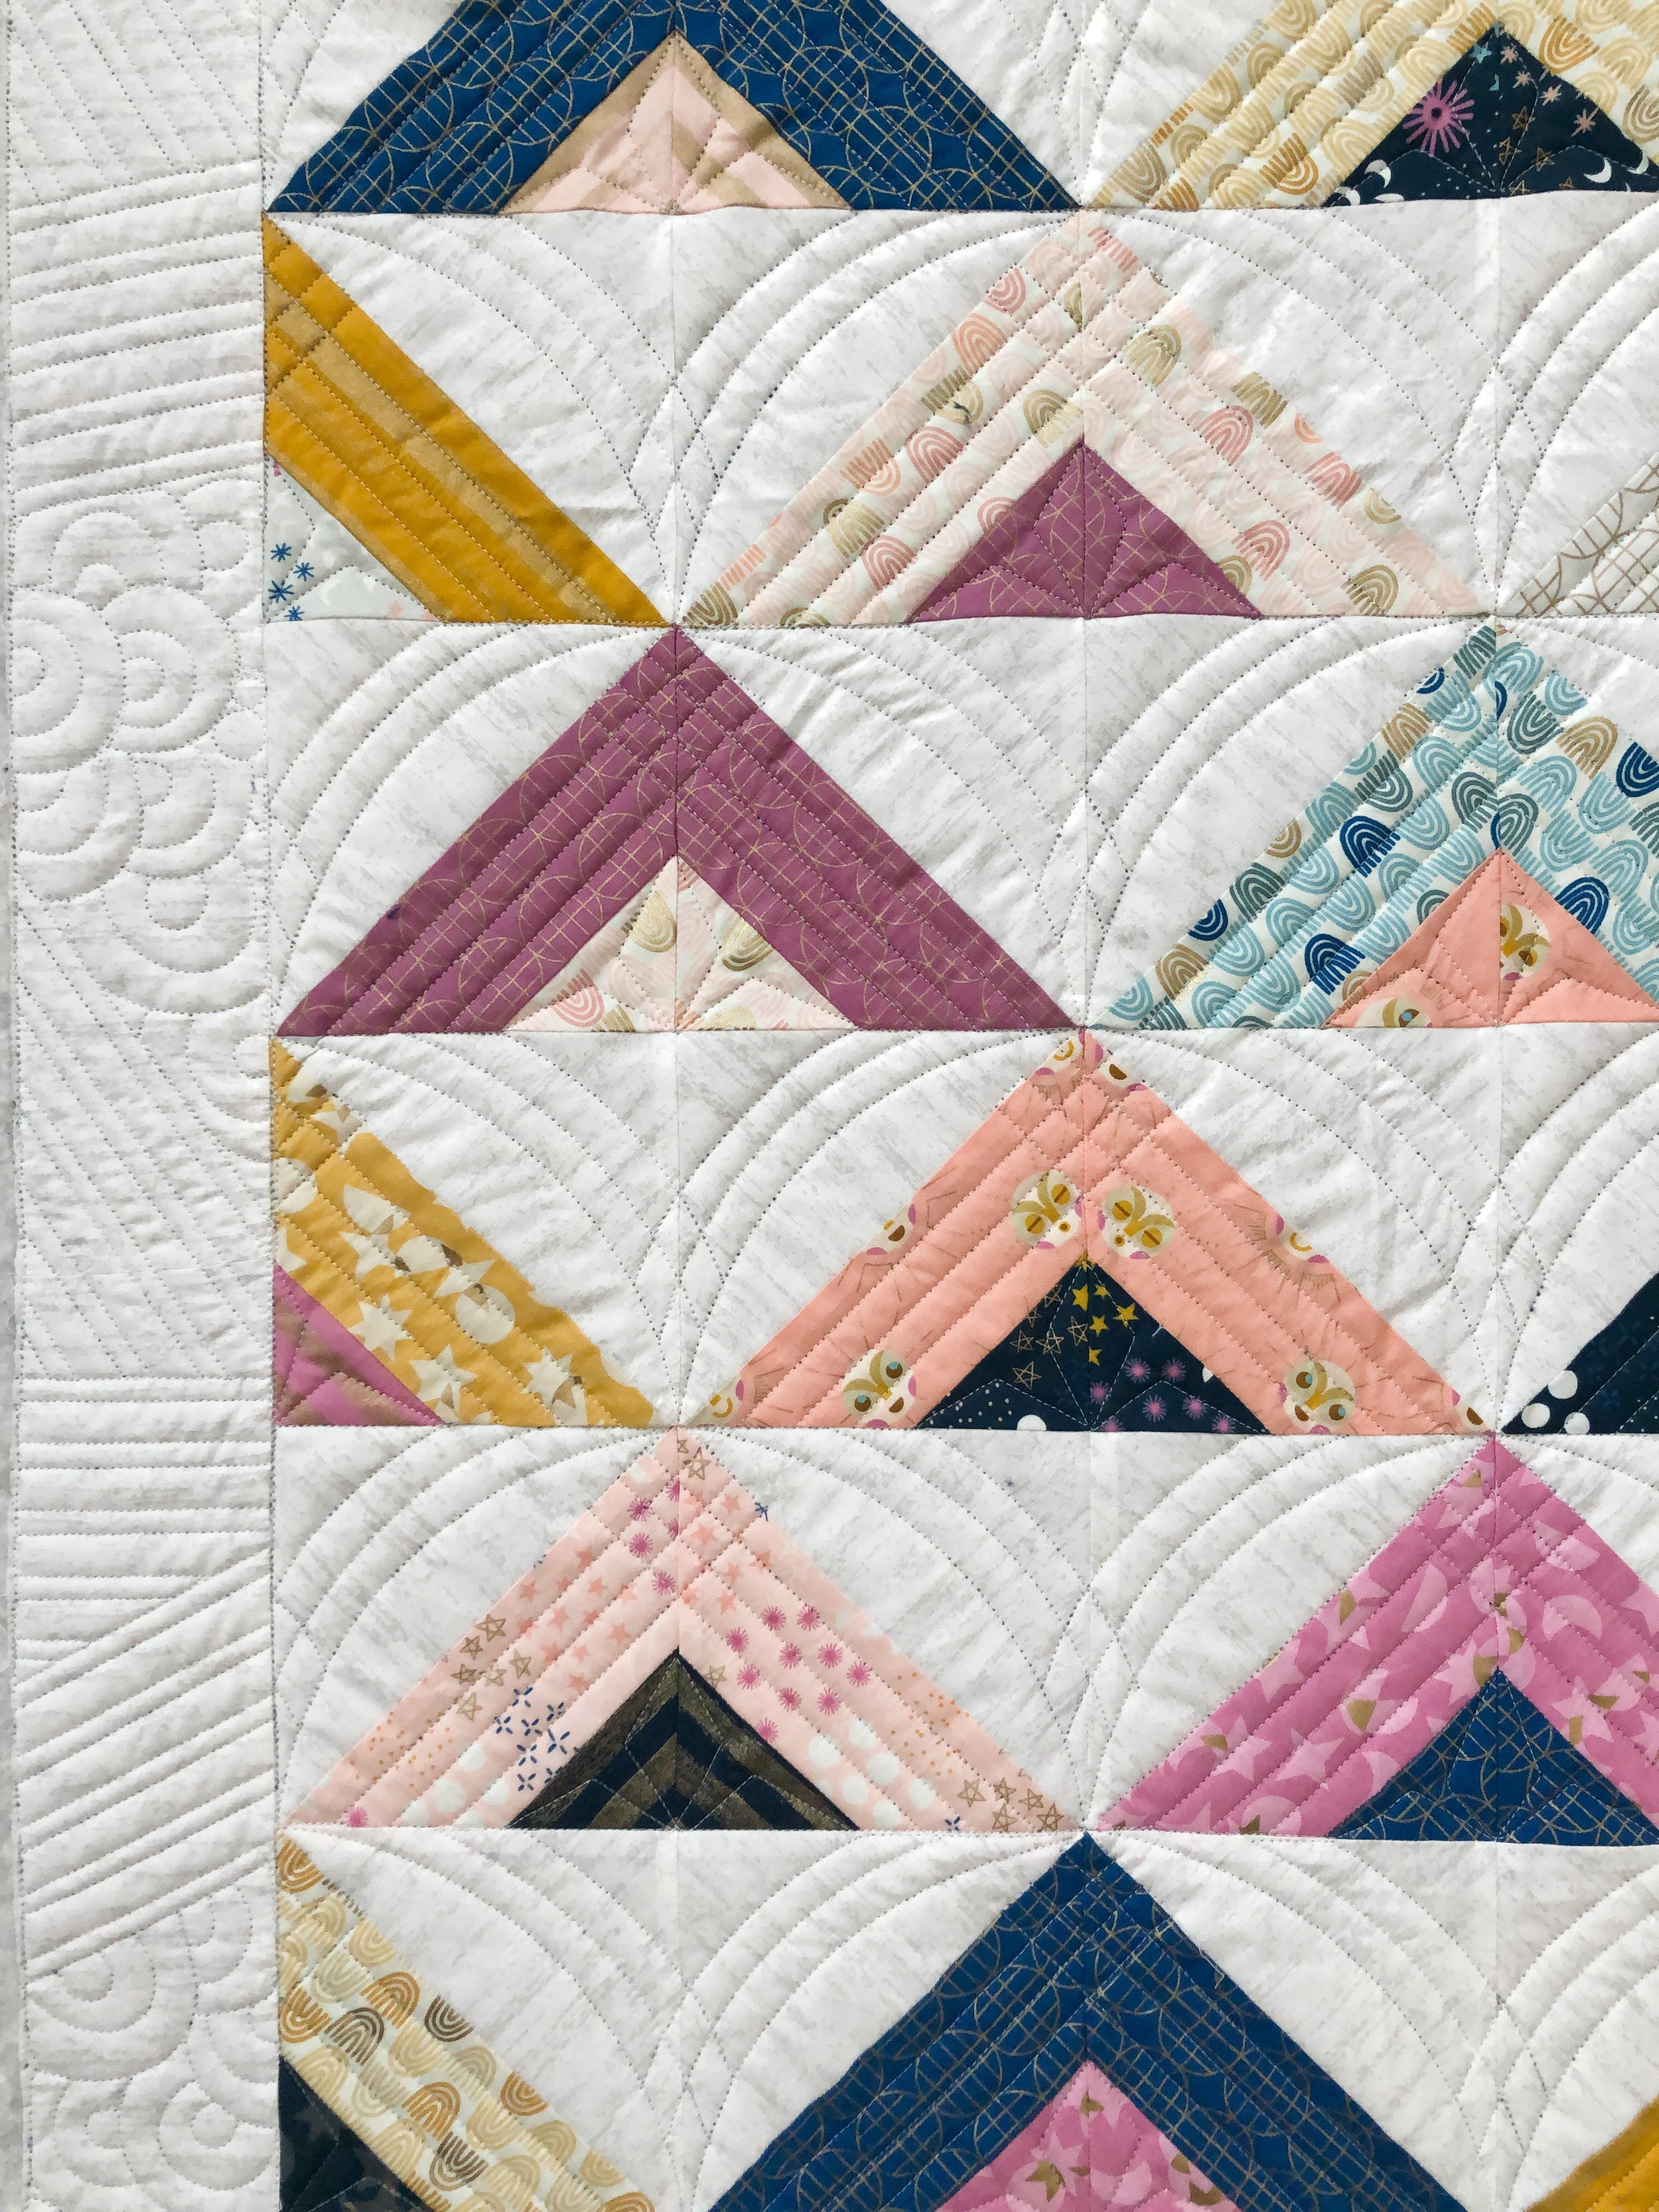
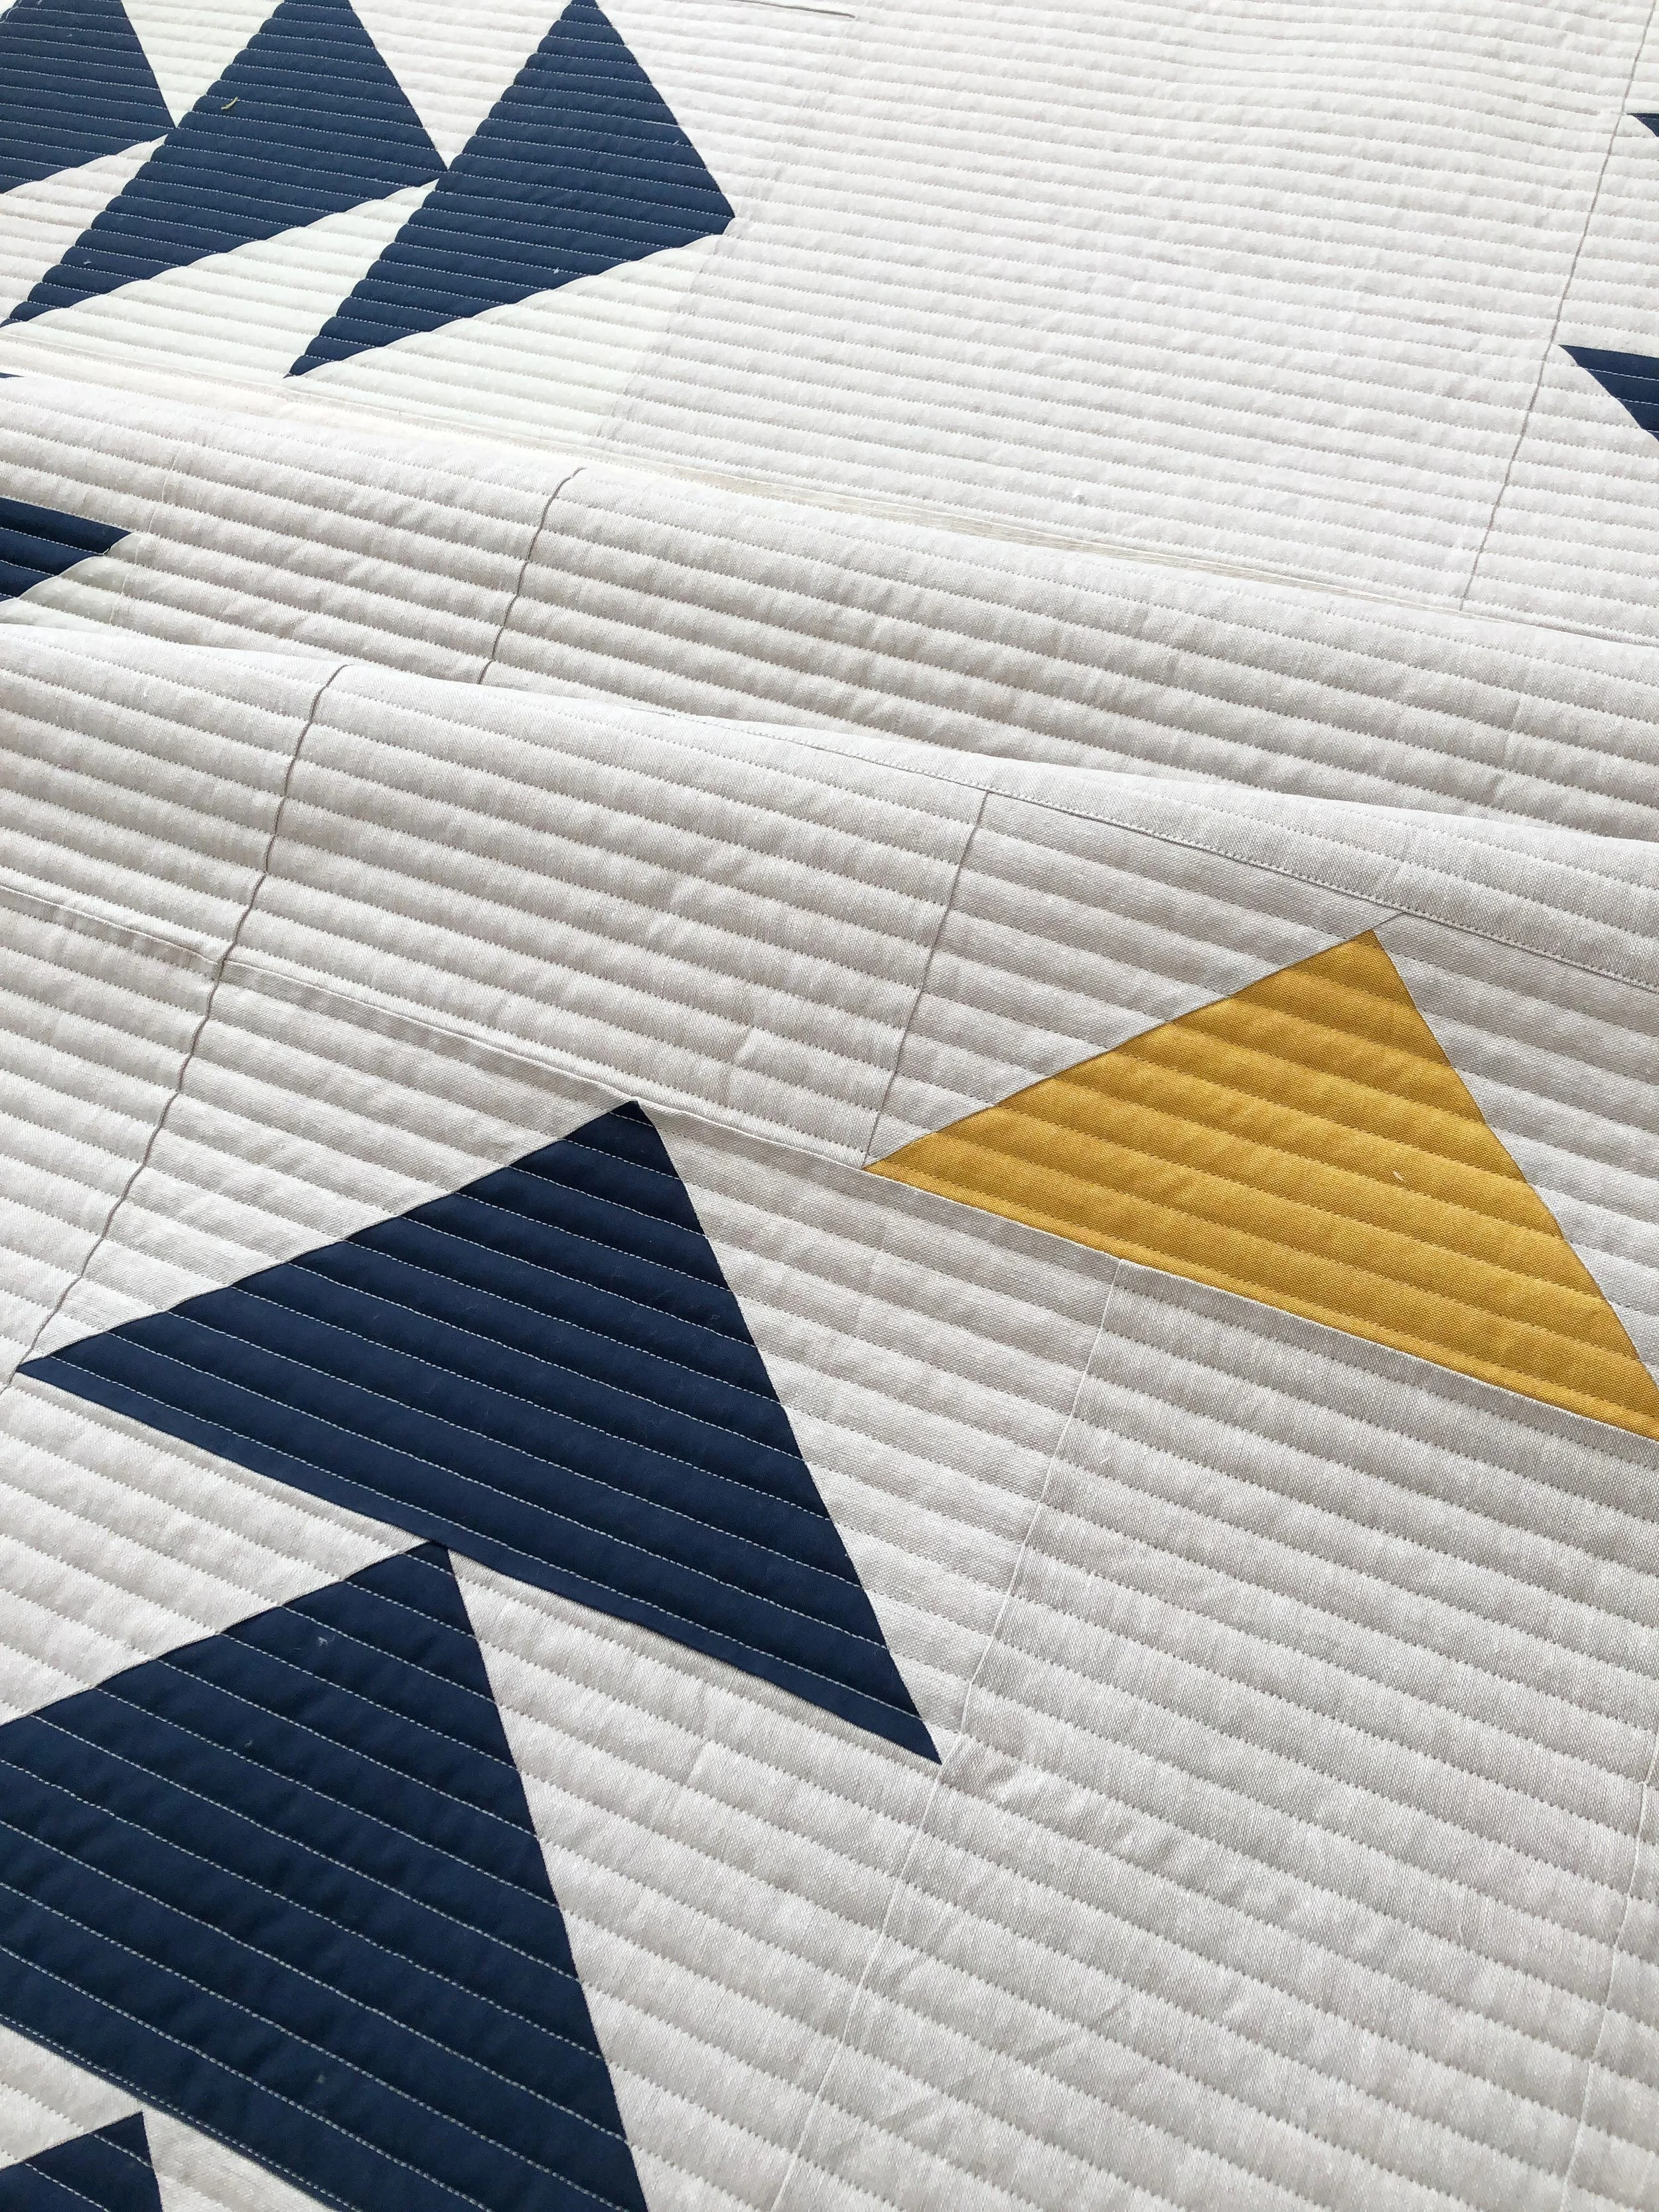
One thing Abby LOVES is straight lines. I used my Lined 1/2” design to quilt this one. I have four different Lined designs with different spacing between the lines. 1”, 3/4”, 1/2”, and 1/4”. All are available in my shop, or you could get the bundle of all four. They stitch back and forth. Please read the description on each design’s page for tips on quilting back and forth. My biggest tip is turning the needle a hair more to the right than you normally have it. It really minimizes thread breaks.
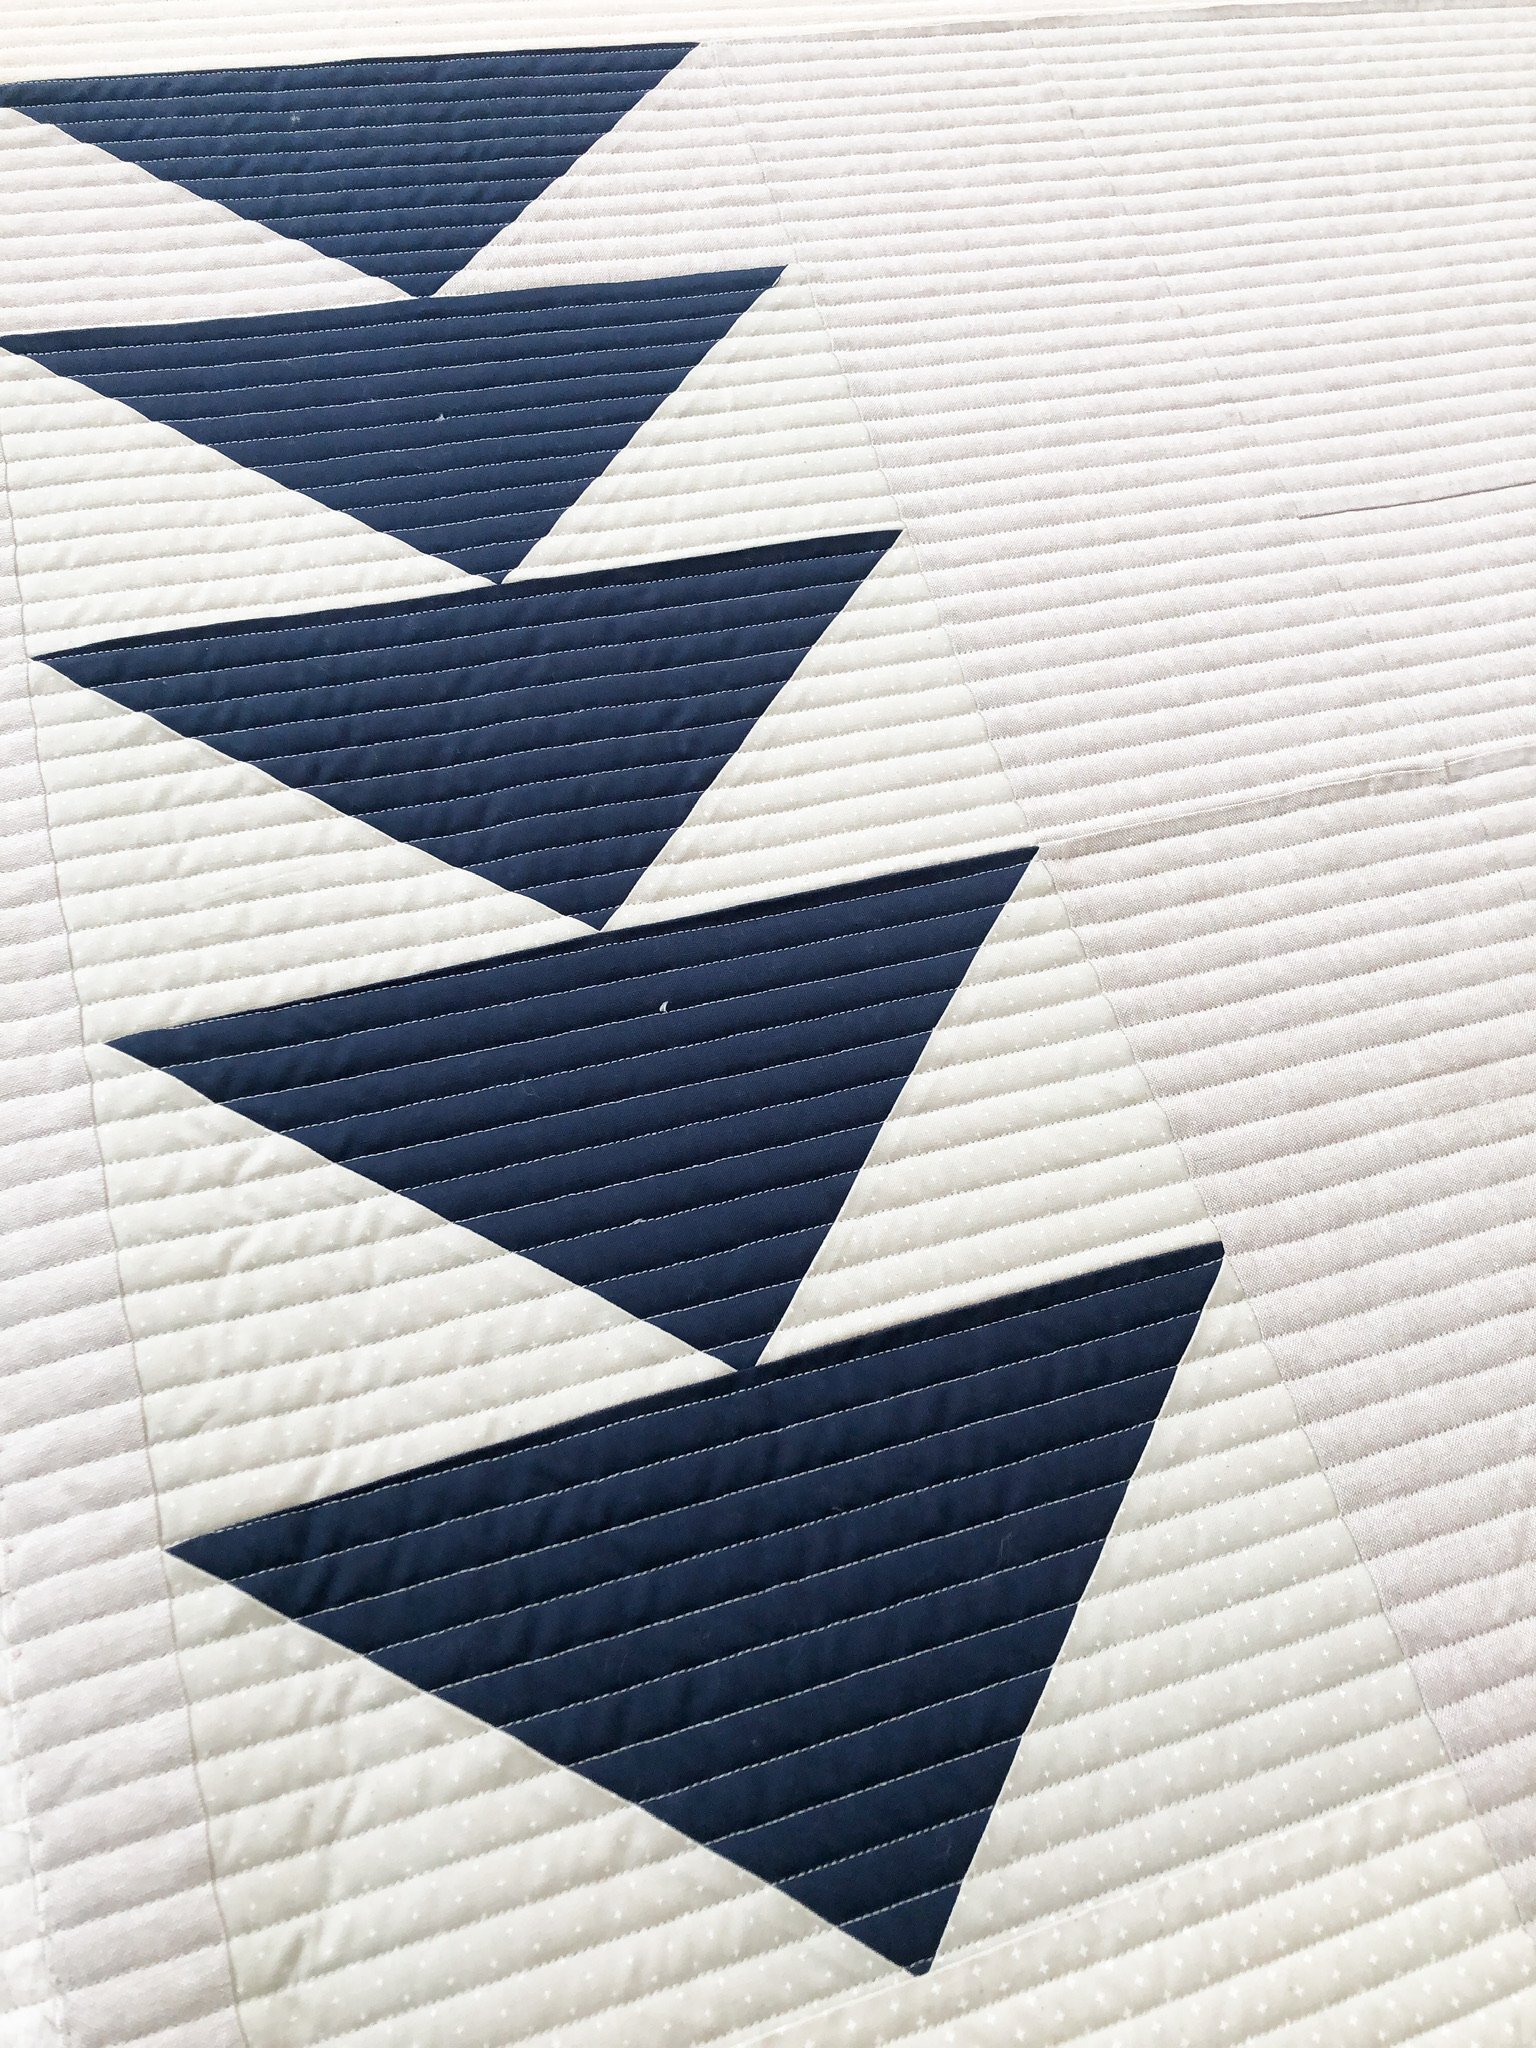
Remember when I was talking about mixing fabrics and textures? Look at these beautiful background fabrics.
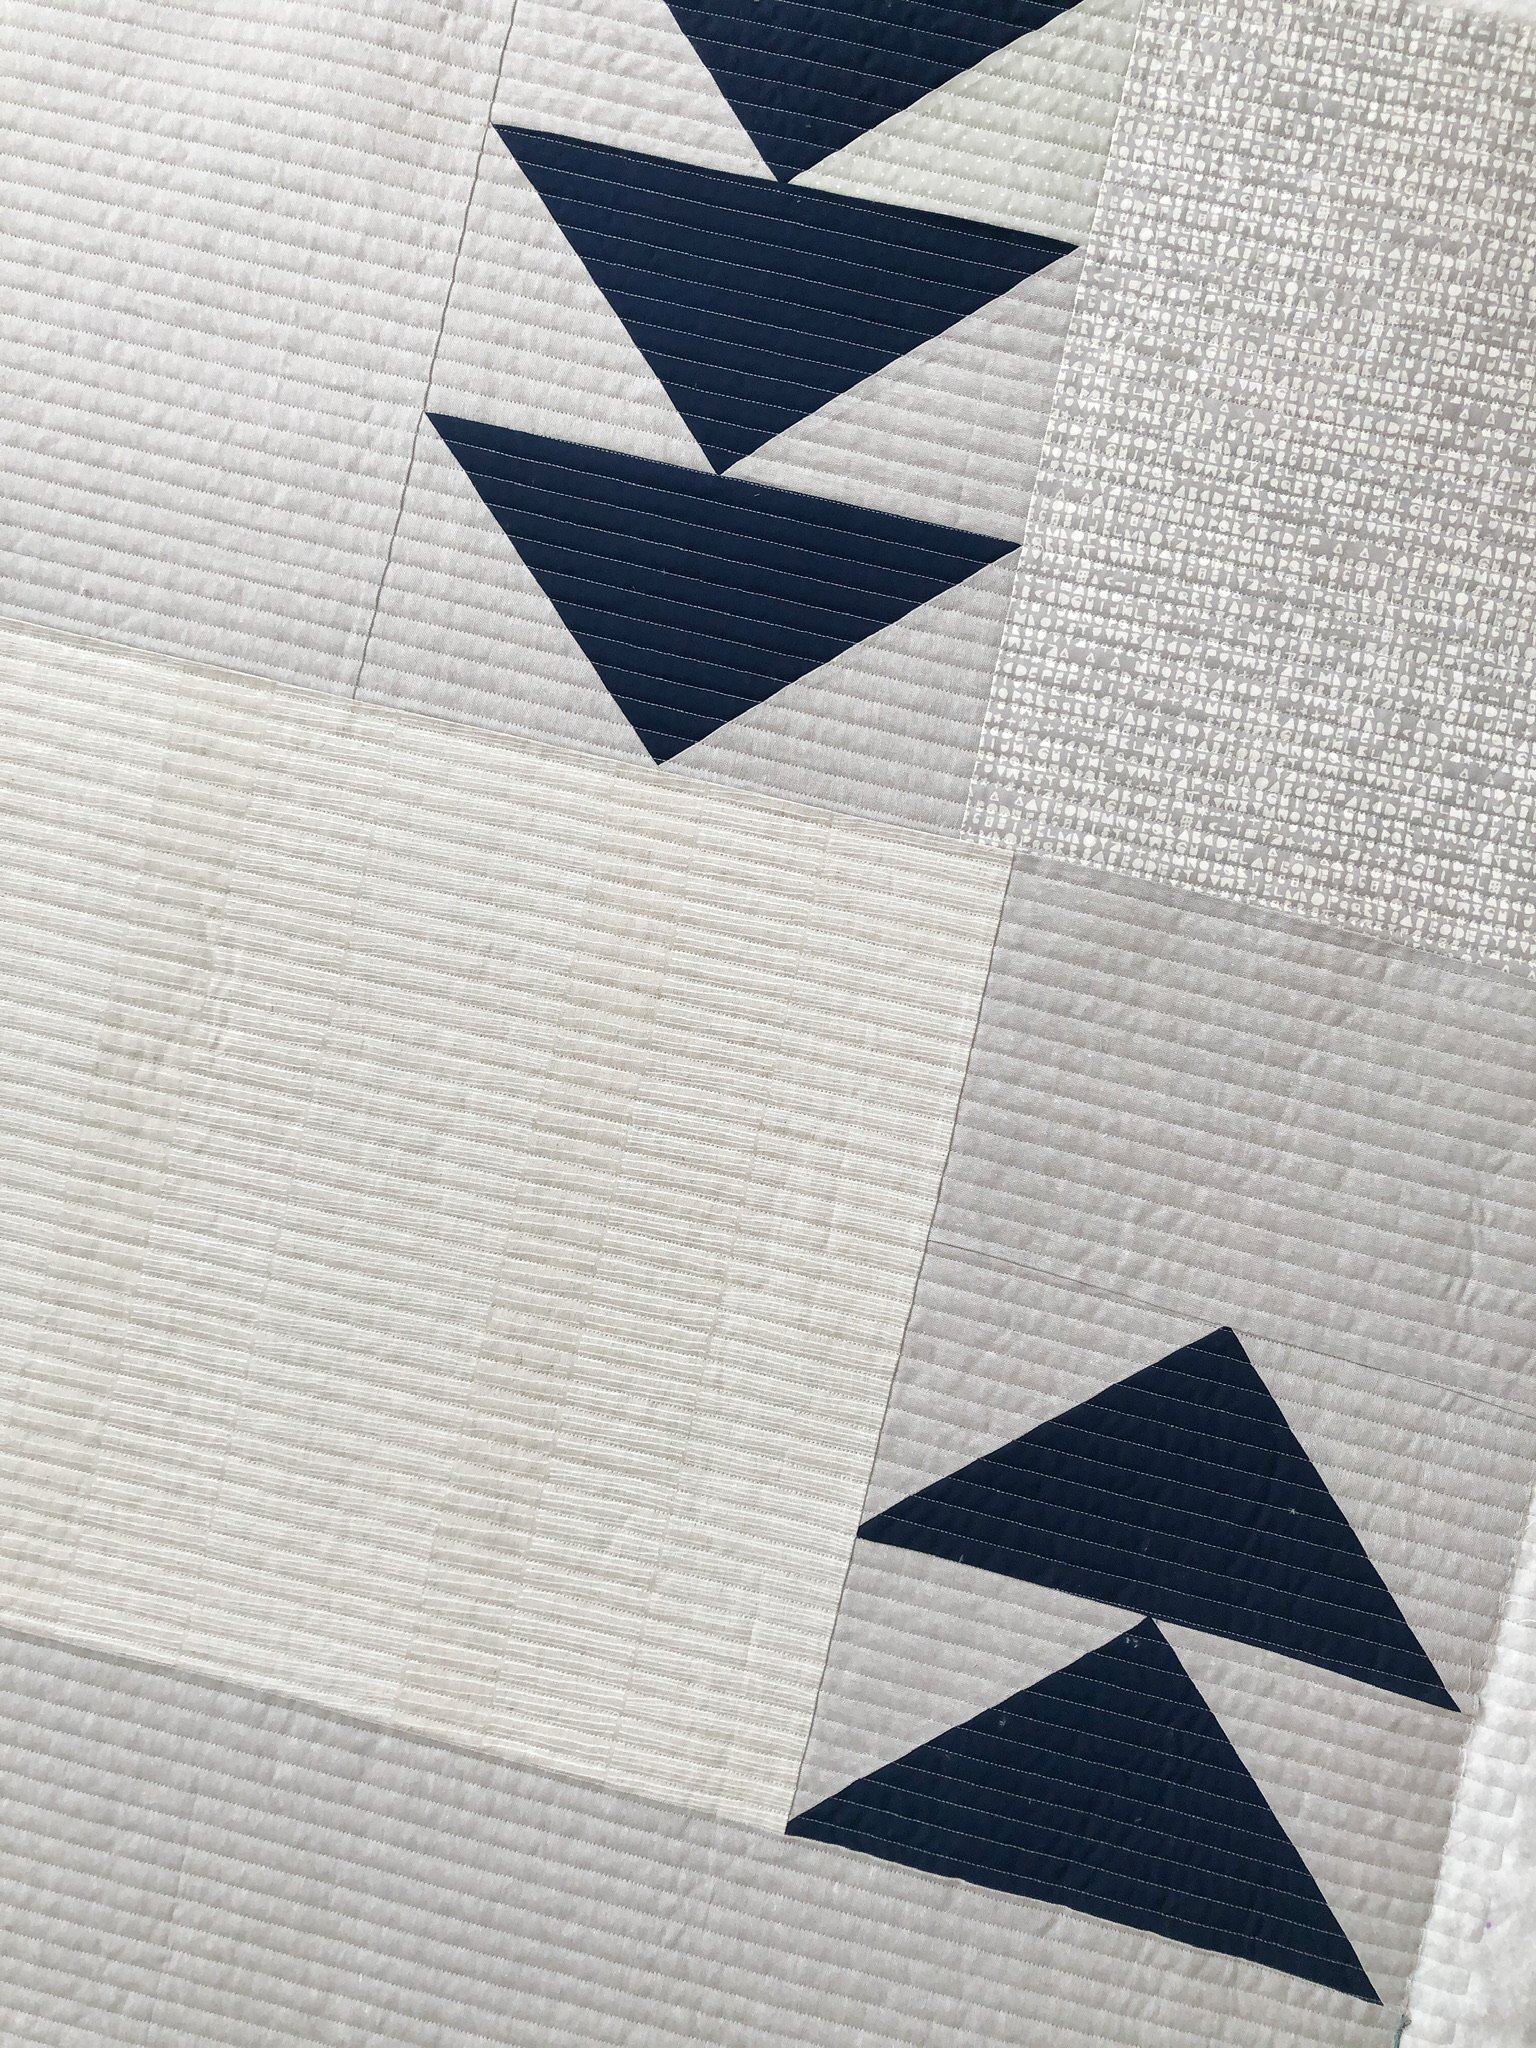
It’s simple, classy, modern, and super cool! The touch of yellow is so fun.
Do you make modern quilts? Do you have one you’d like for me to quilt? I would love to. Email me at quiltingit@gmail.com or contact me. I look forward to working with you!
Thanks for stopping by!! Happy sewing! - leisha
Brynne’s Tumbler Quilt
Hi Friends!!
Happy almost weekend! I hope you’re week is going well. I have an extra sweet quilt to share with you today.
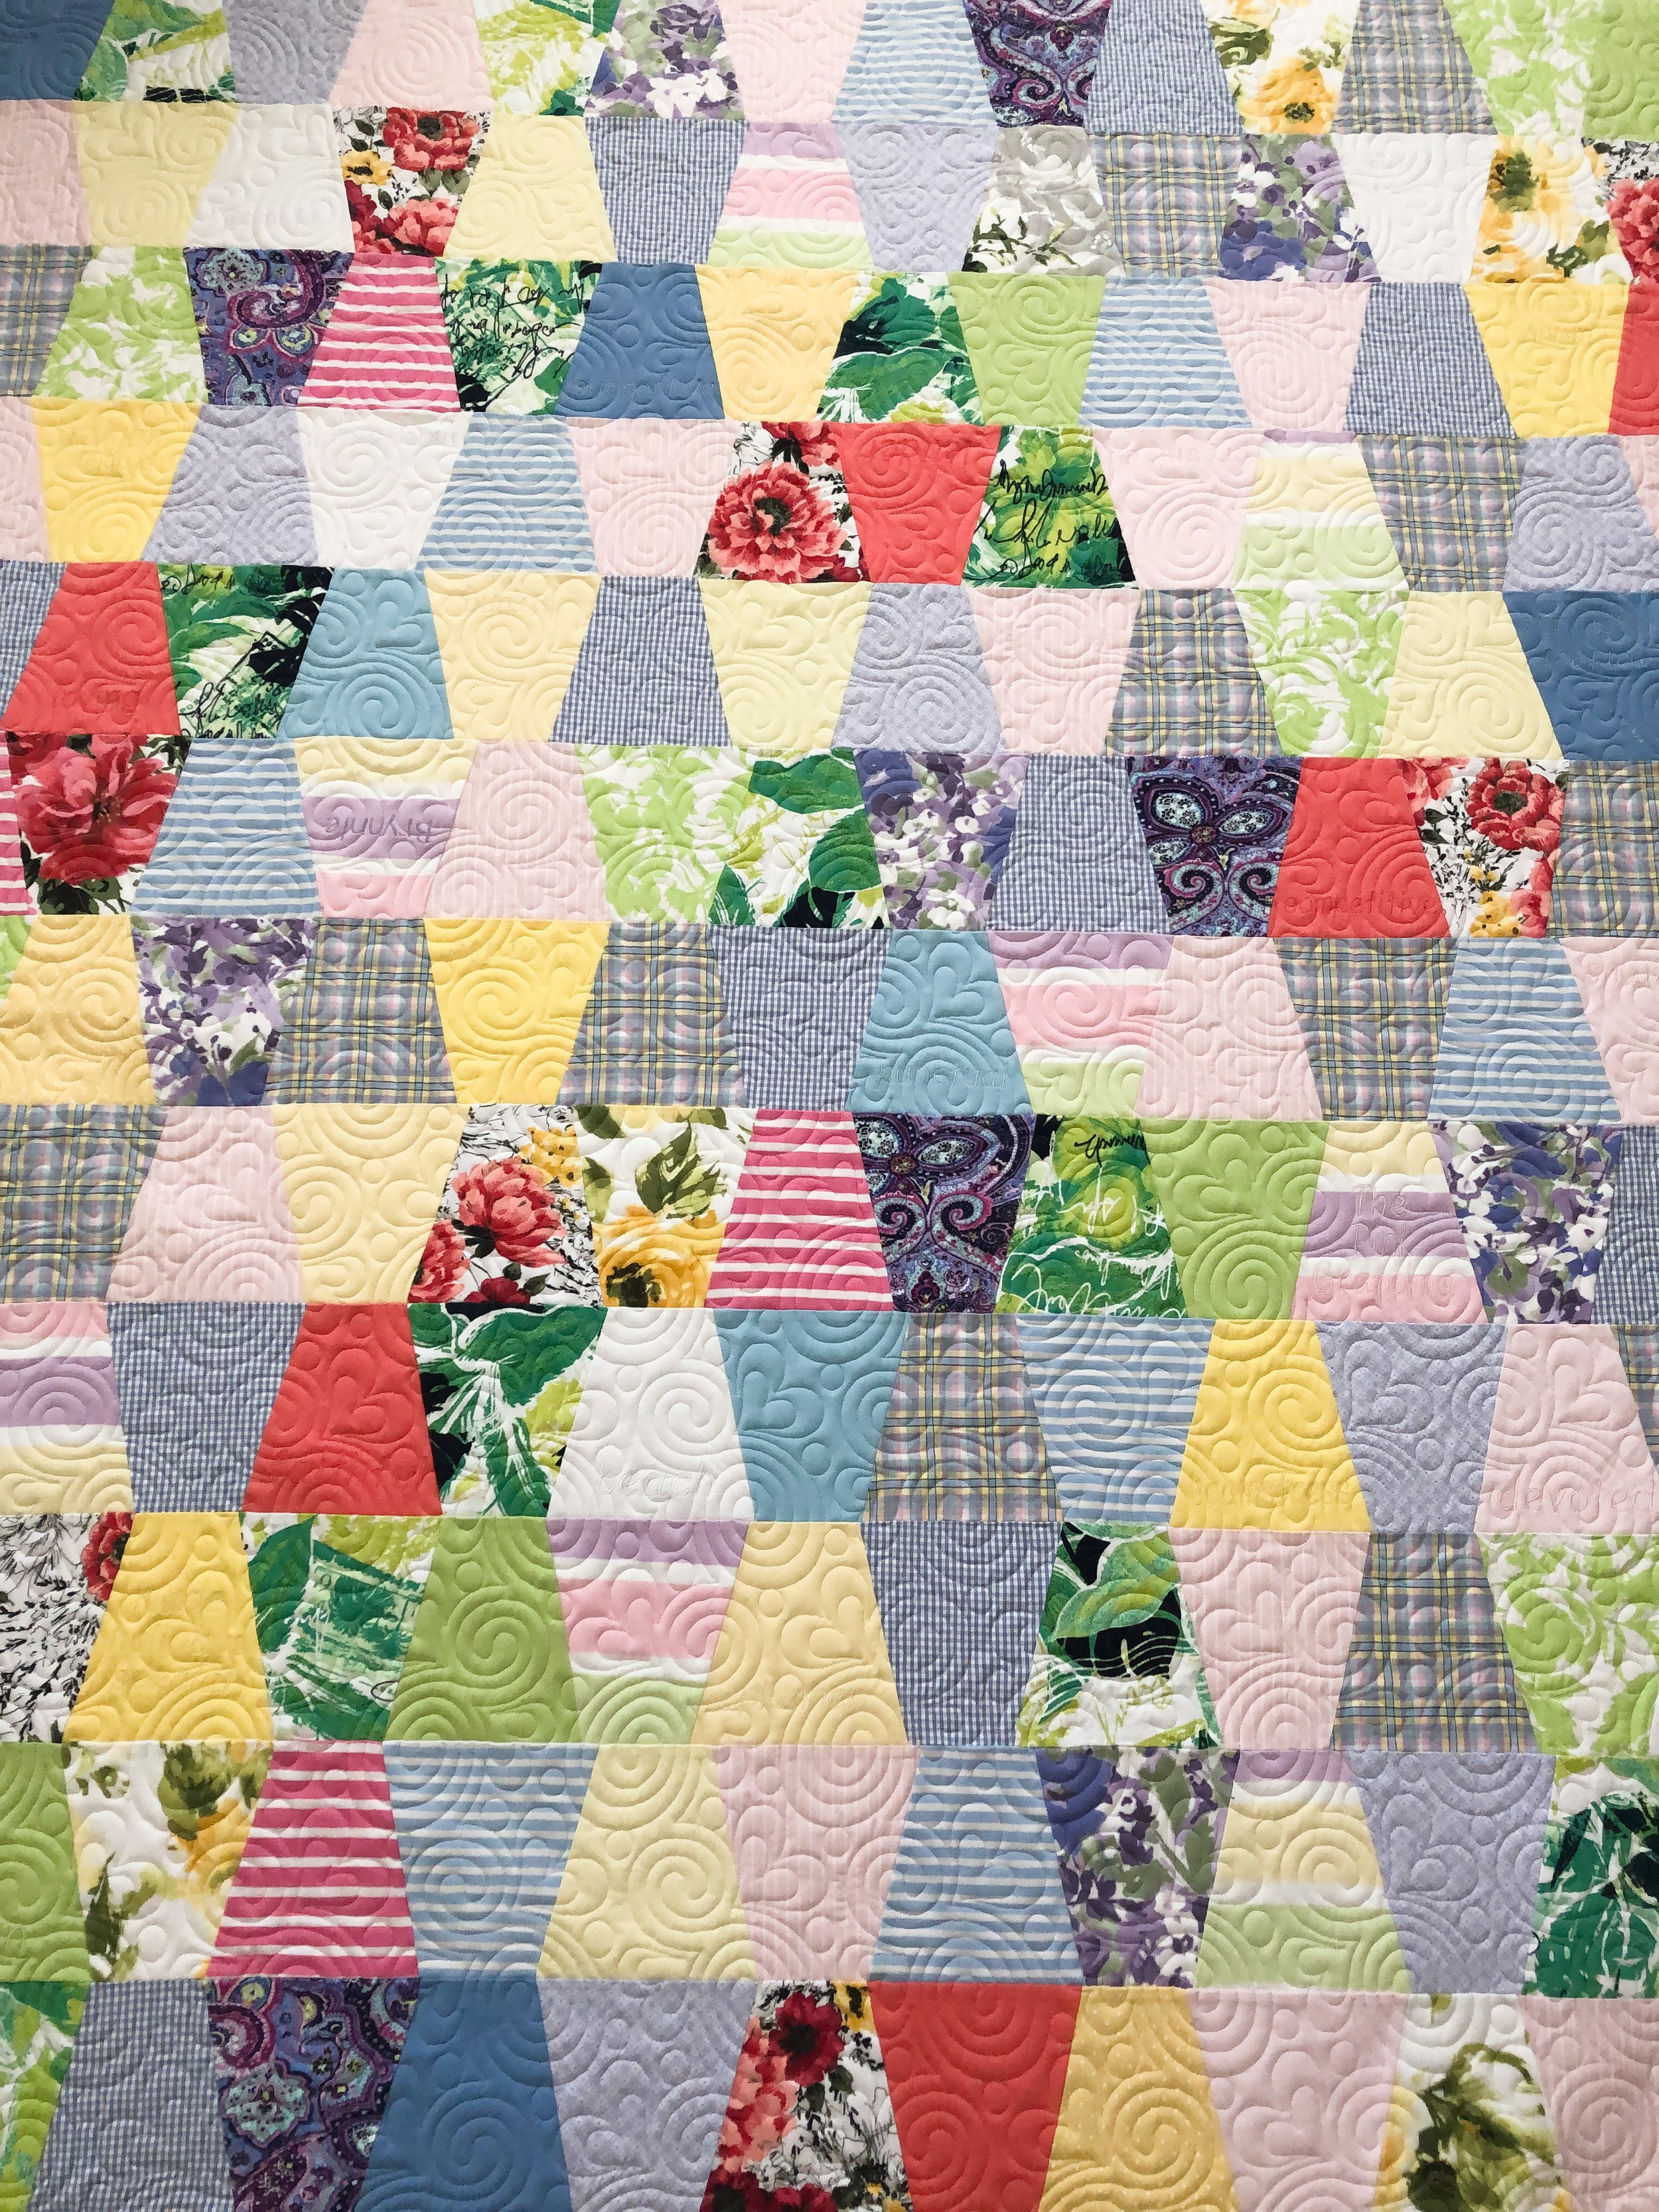
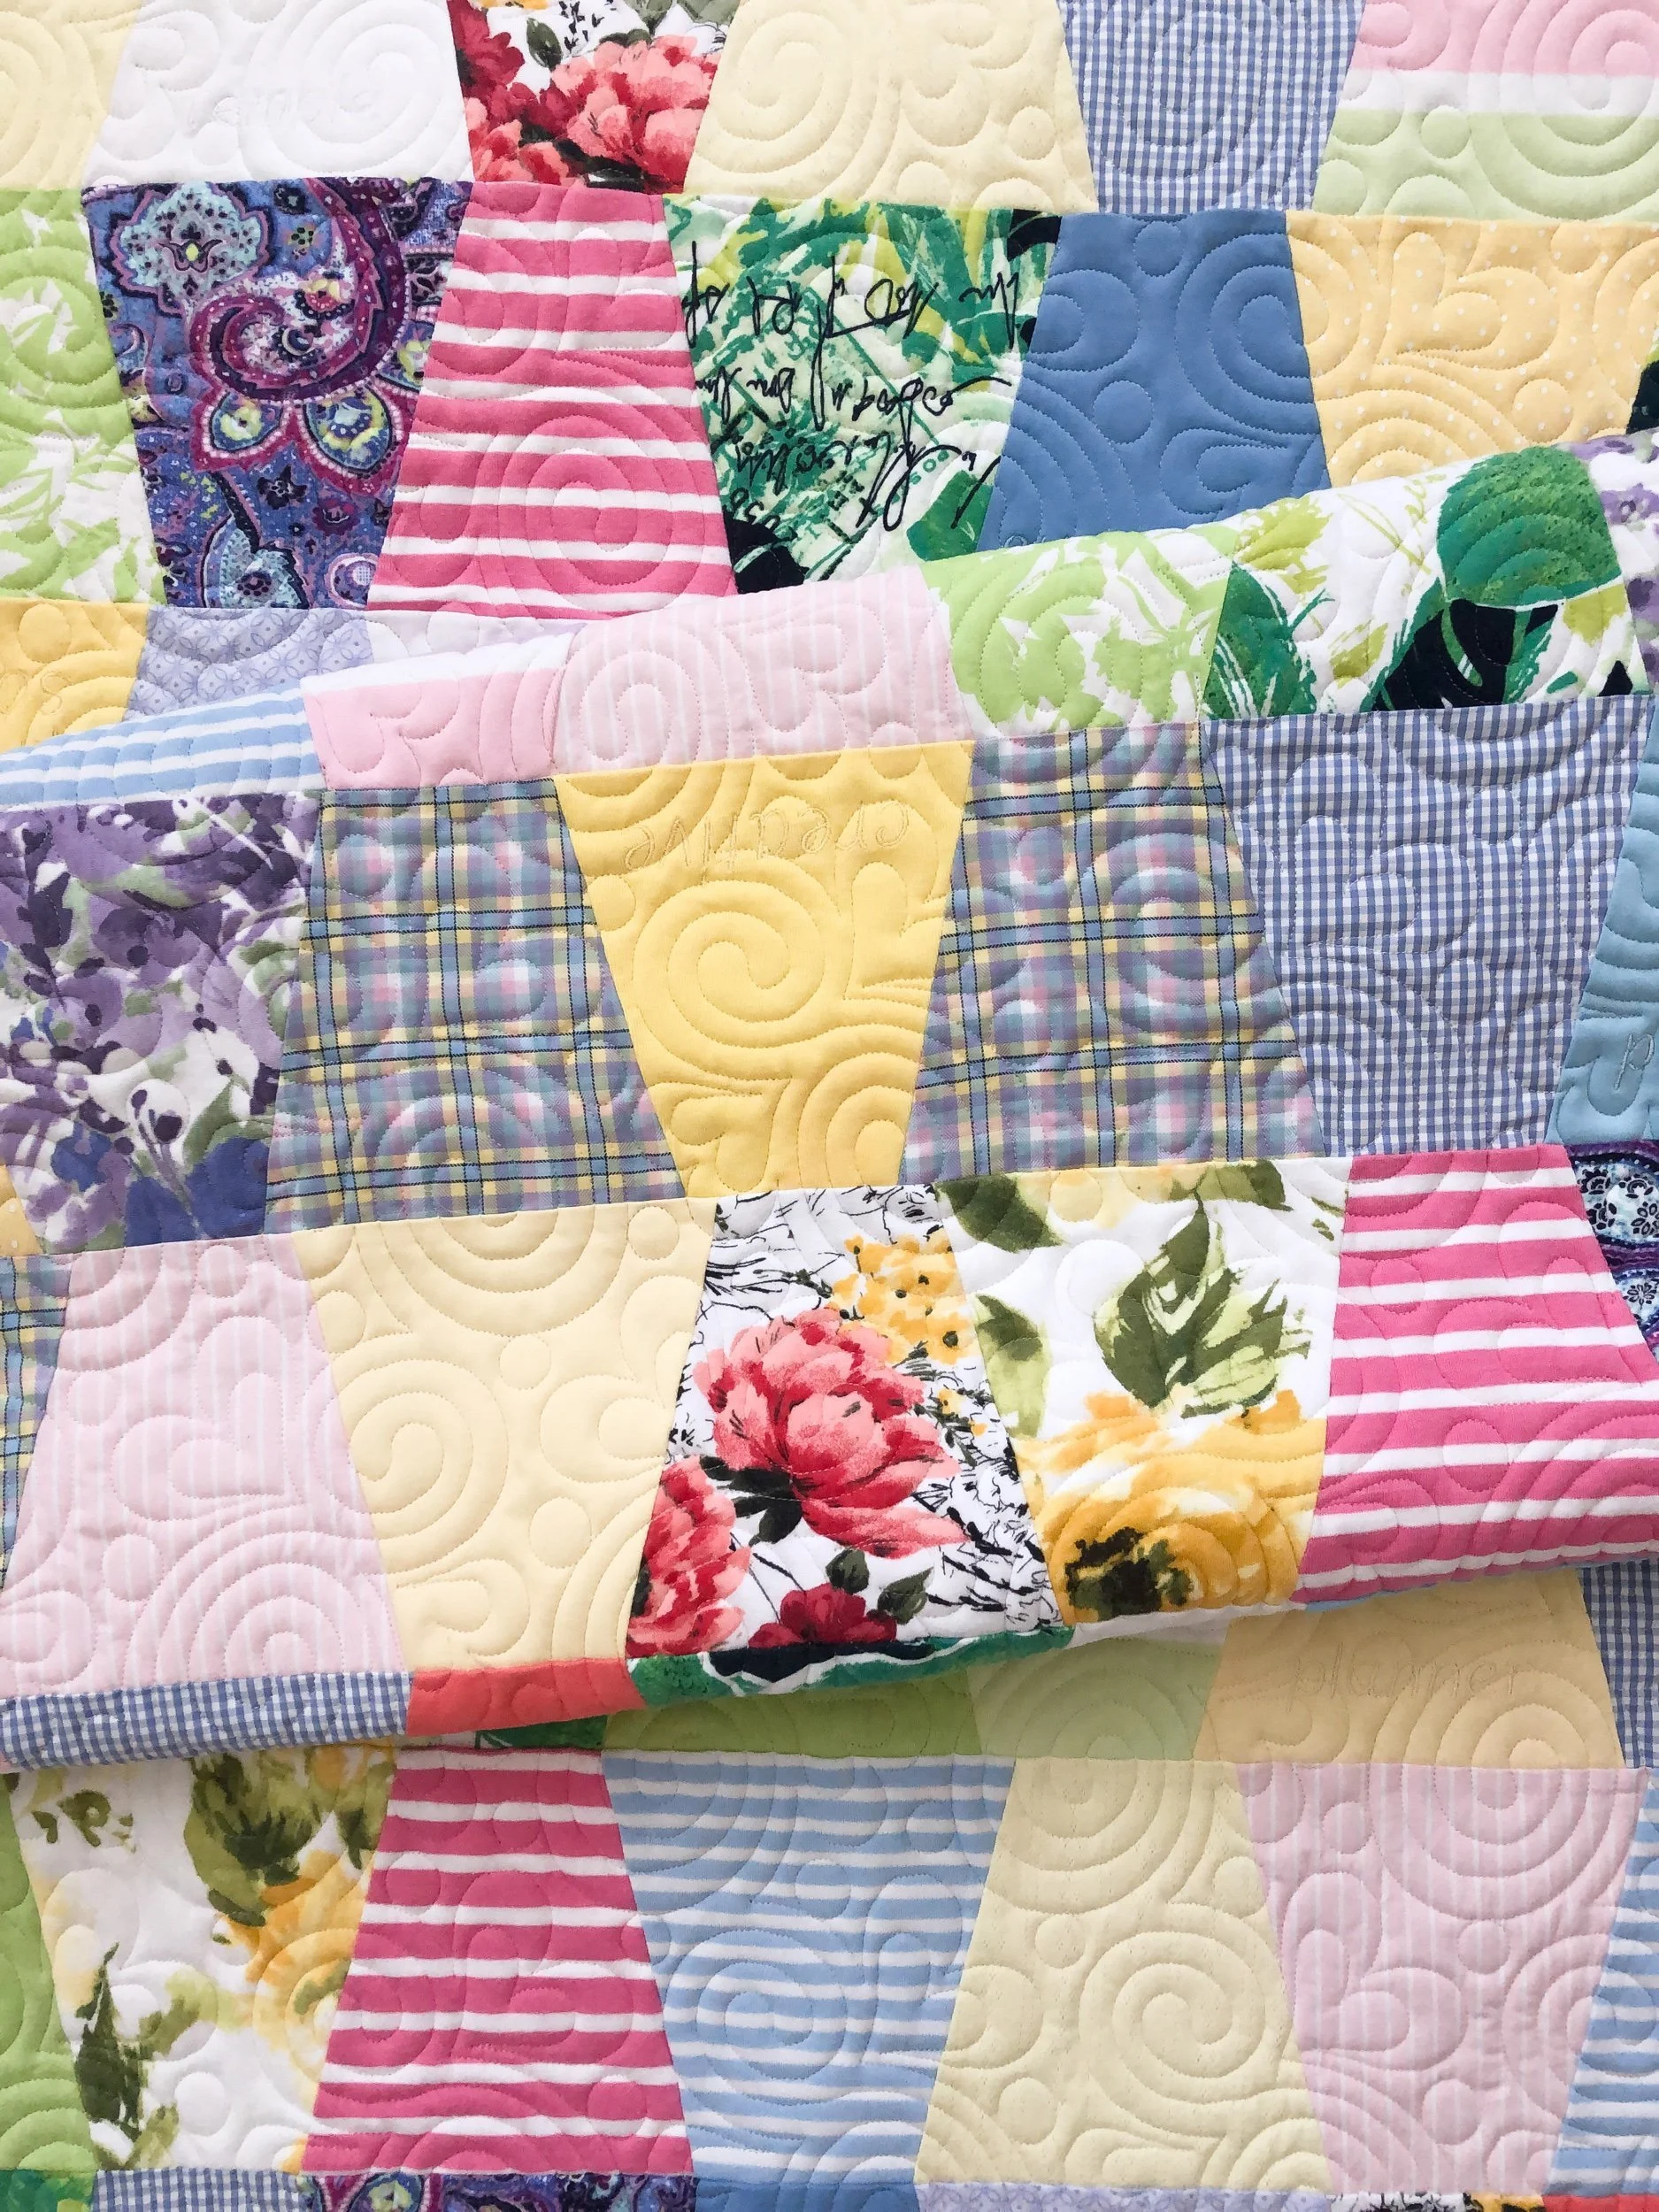
My sweet friend Brynne lost her mom, and decided to use her clothes in a beautiful way to remember her. I’ve seen several memory quilts over the years, and this one is definitely a favorite! I love that she did a different shape other than the typical squares.
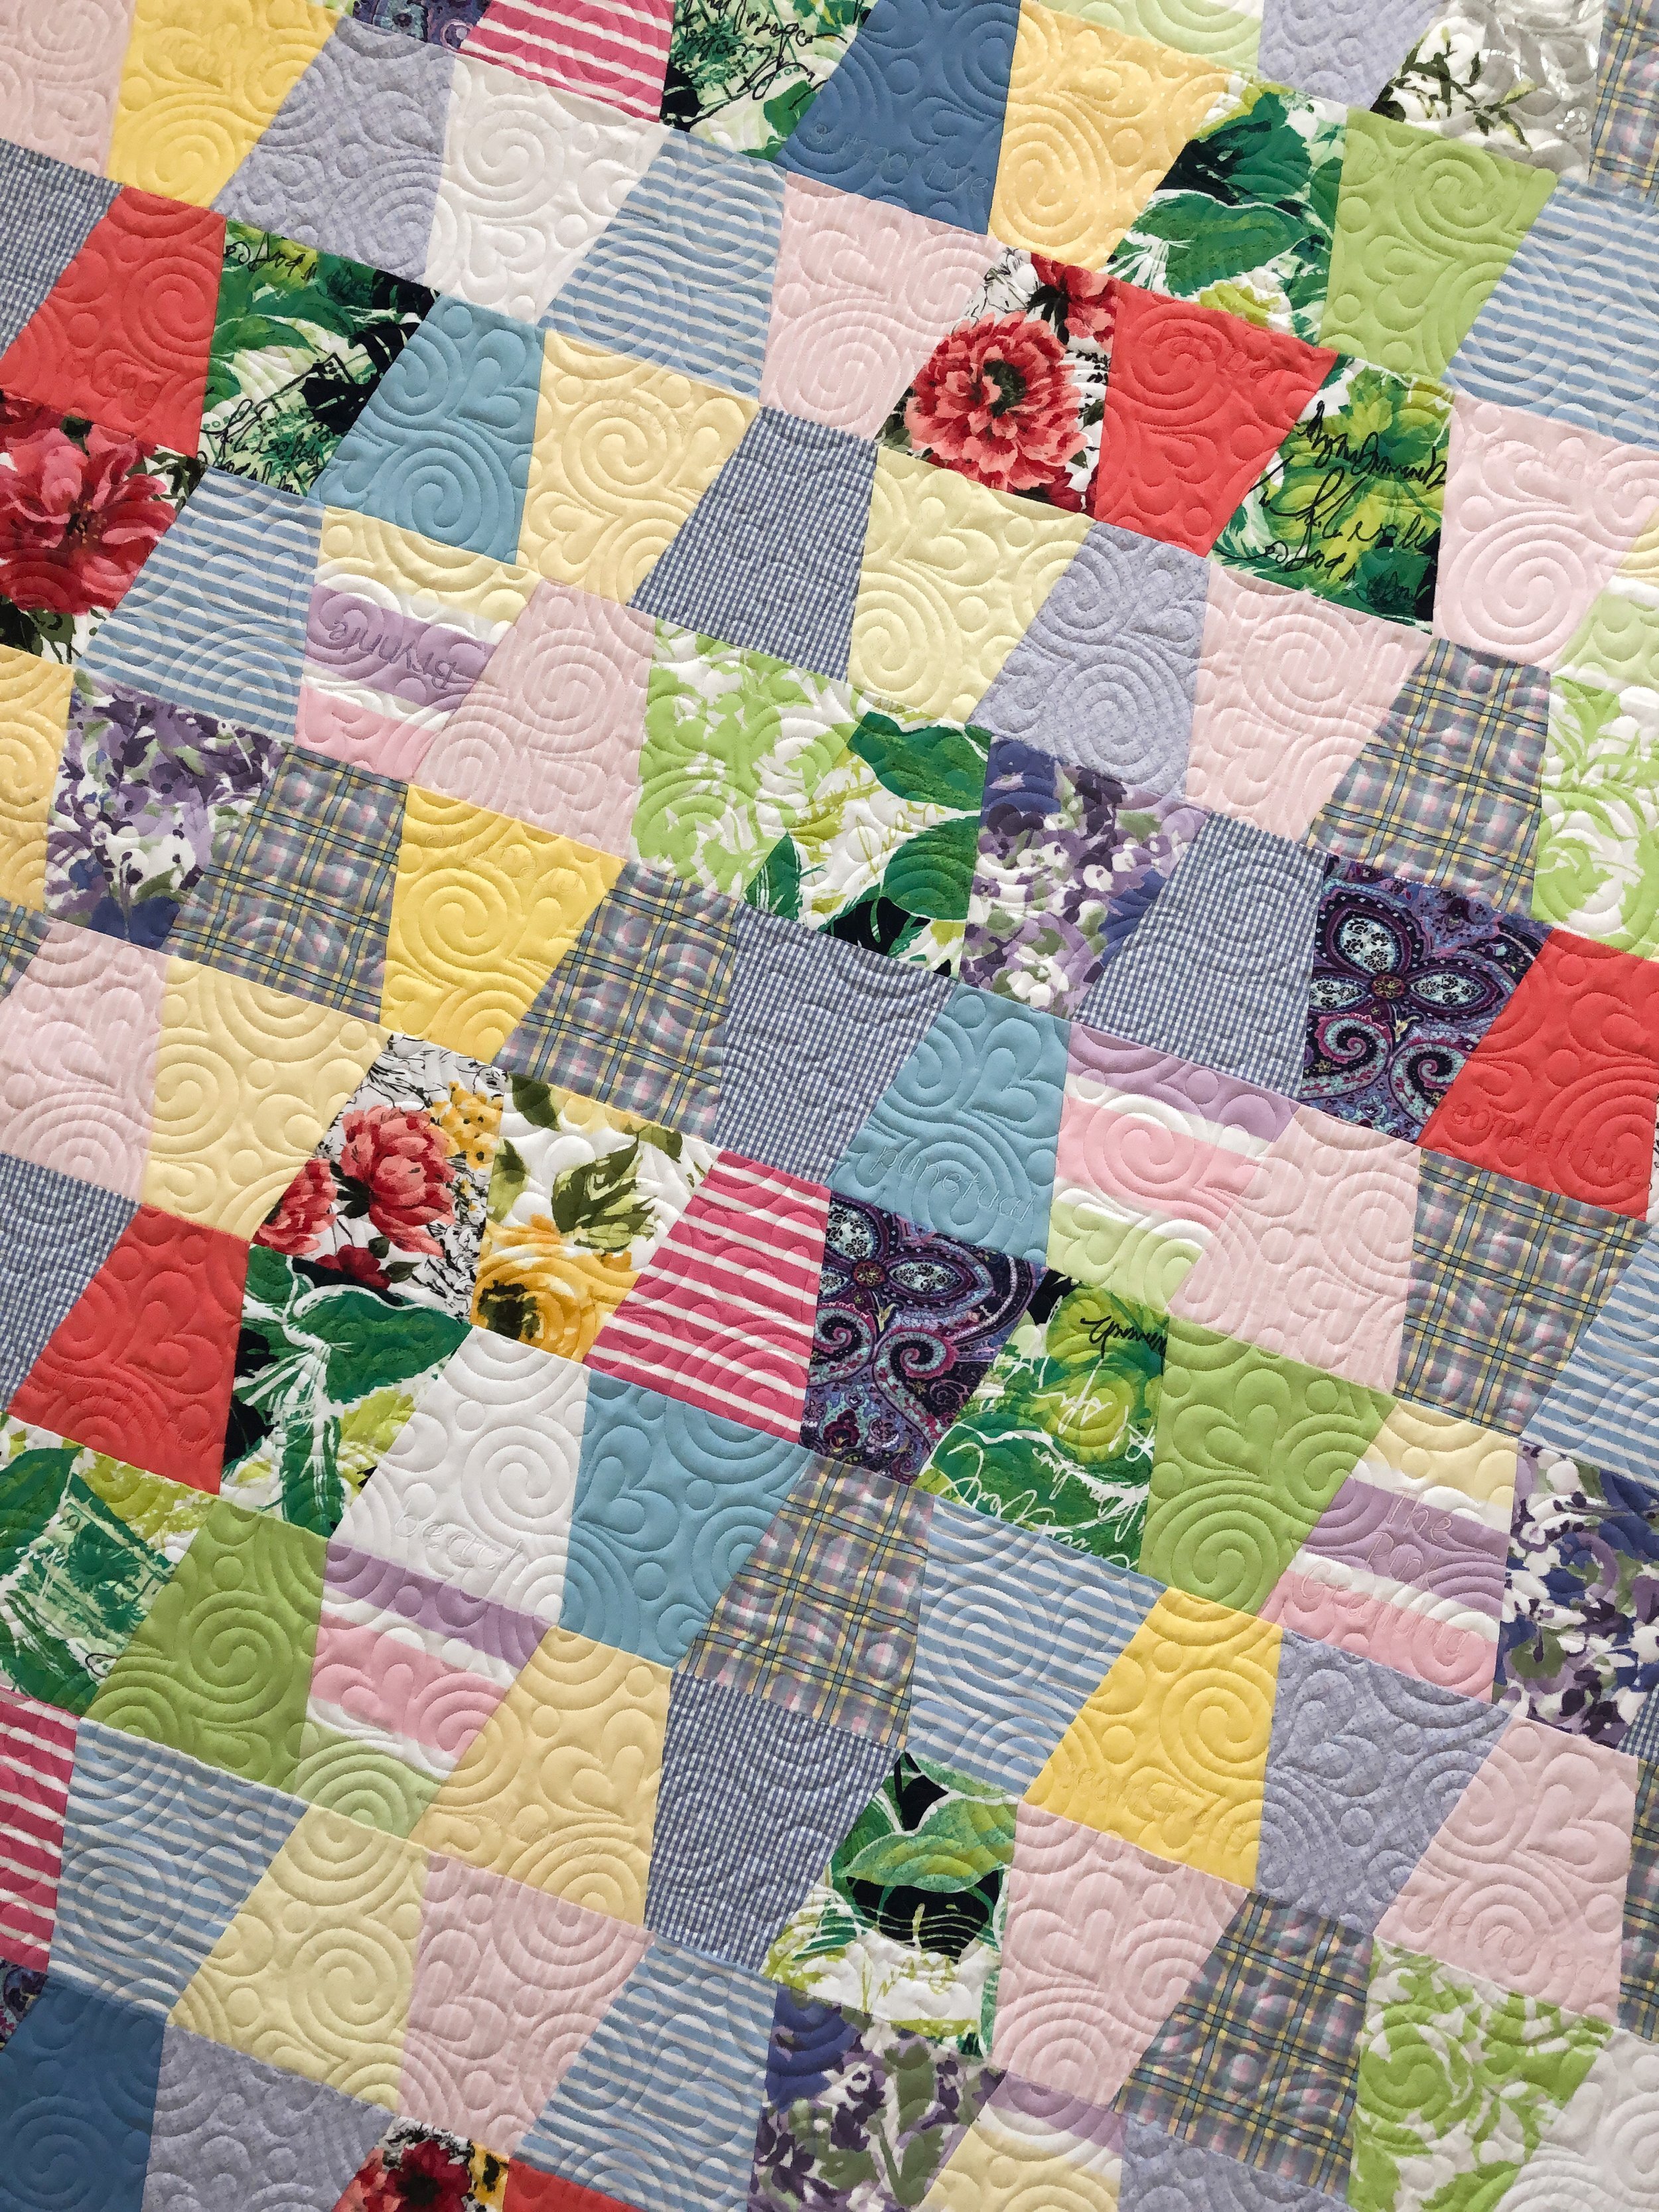
Tumblers are a great way to showcase fabrics and add interest to the quilt without all the effort of complex quilt blocks. There are many tutorials out there, and even some rulers. Do a google search and find a tutorial that works for you.

I used my favorite 8020 cotton poly blend batting and natural white Omni thread. The natural white thread blends so well with all of these colorful lovely fabrics.
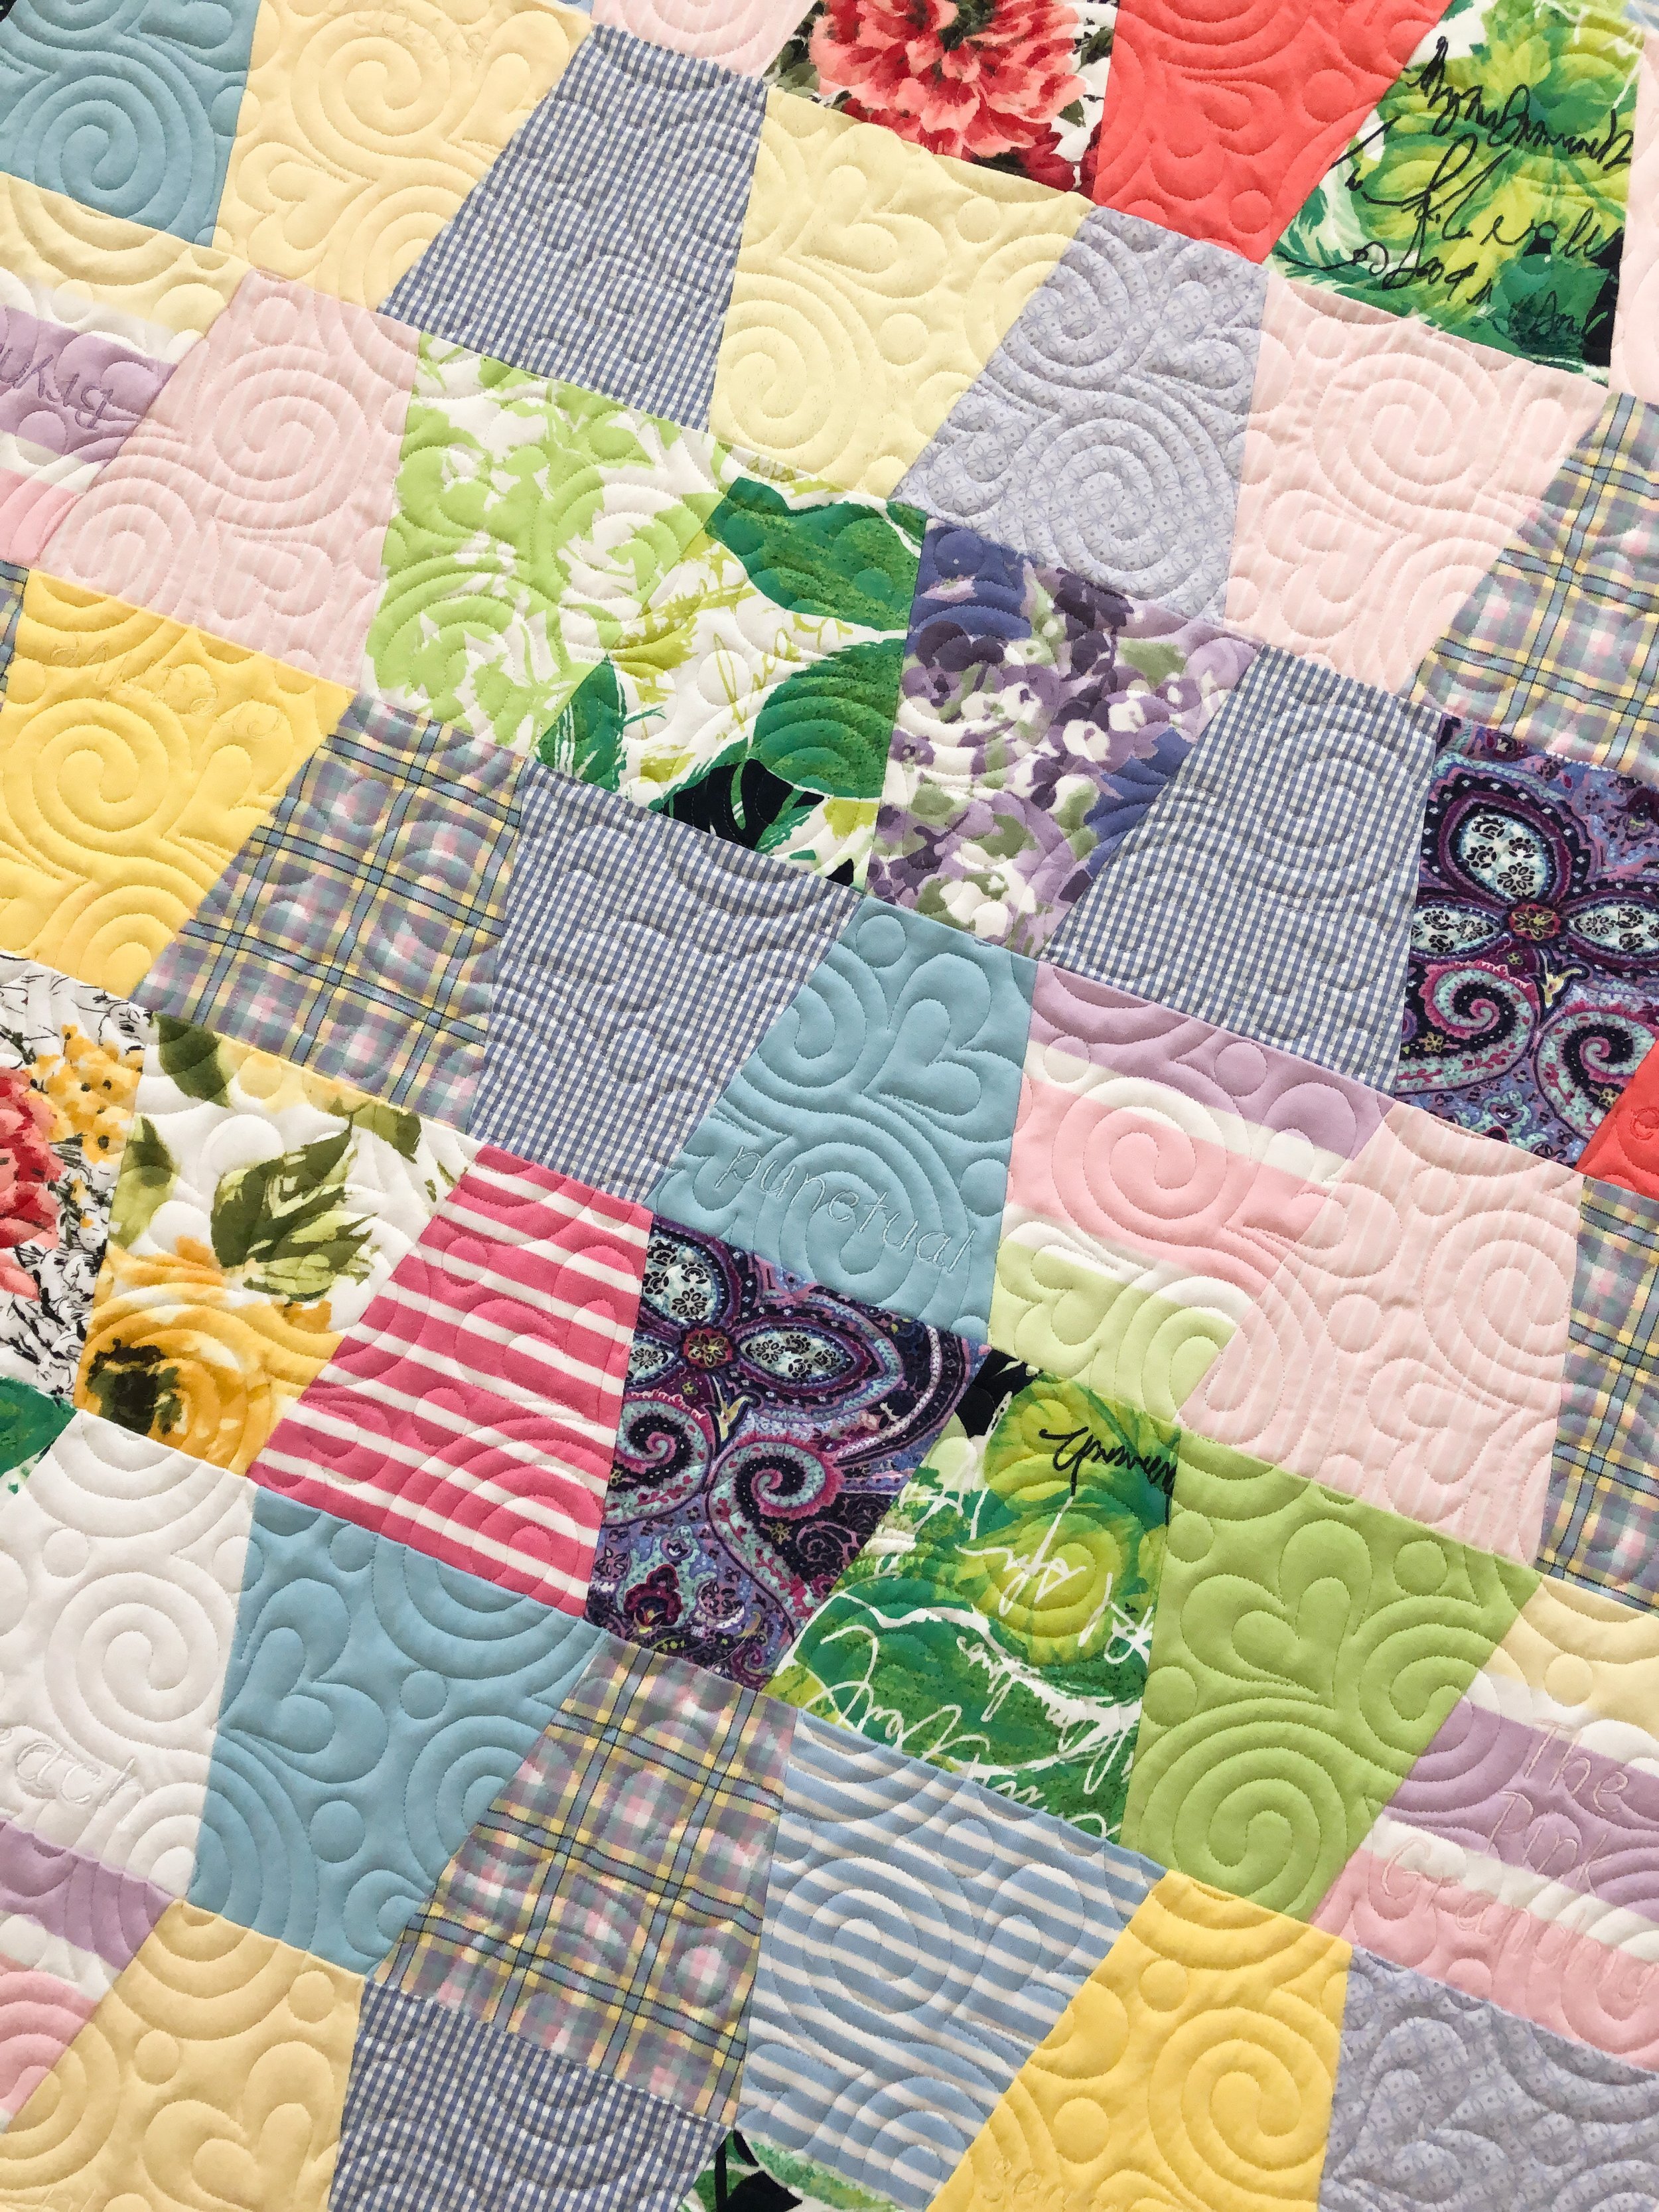
I gave Brynne a few options for quilting, and she chose Sweet Marmalade. I love how it turned out!! I hope that little extra love helps Brynne feel her mama’s love for her.
Sweet Marmalade is available at Urban Elementz, and is one of Patricia Ritter and my designs.

When using clothing for a quilt, I highly recommend using the clothing interfacing to stabilize the fabric. Brynne did, and it made it soooo much easier to quilt. Otherwise, there are random stretches or ripples when it’s being quilted, which can lead to lots of puckers. No one wants that!! It is also easier for you as you piece the quilt together, and not have it stretch all over the place. It’s an interfacing that you iron to the back side of your fabric and leave there. The same interfacing I’ve used on t-shirt quilts.

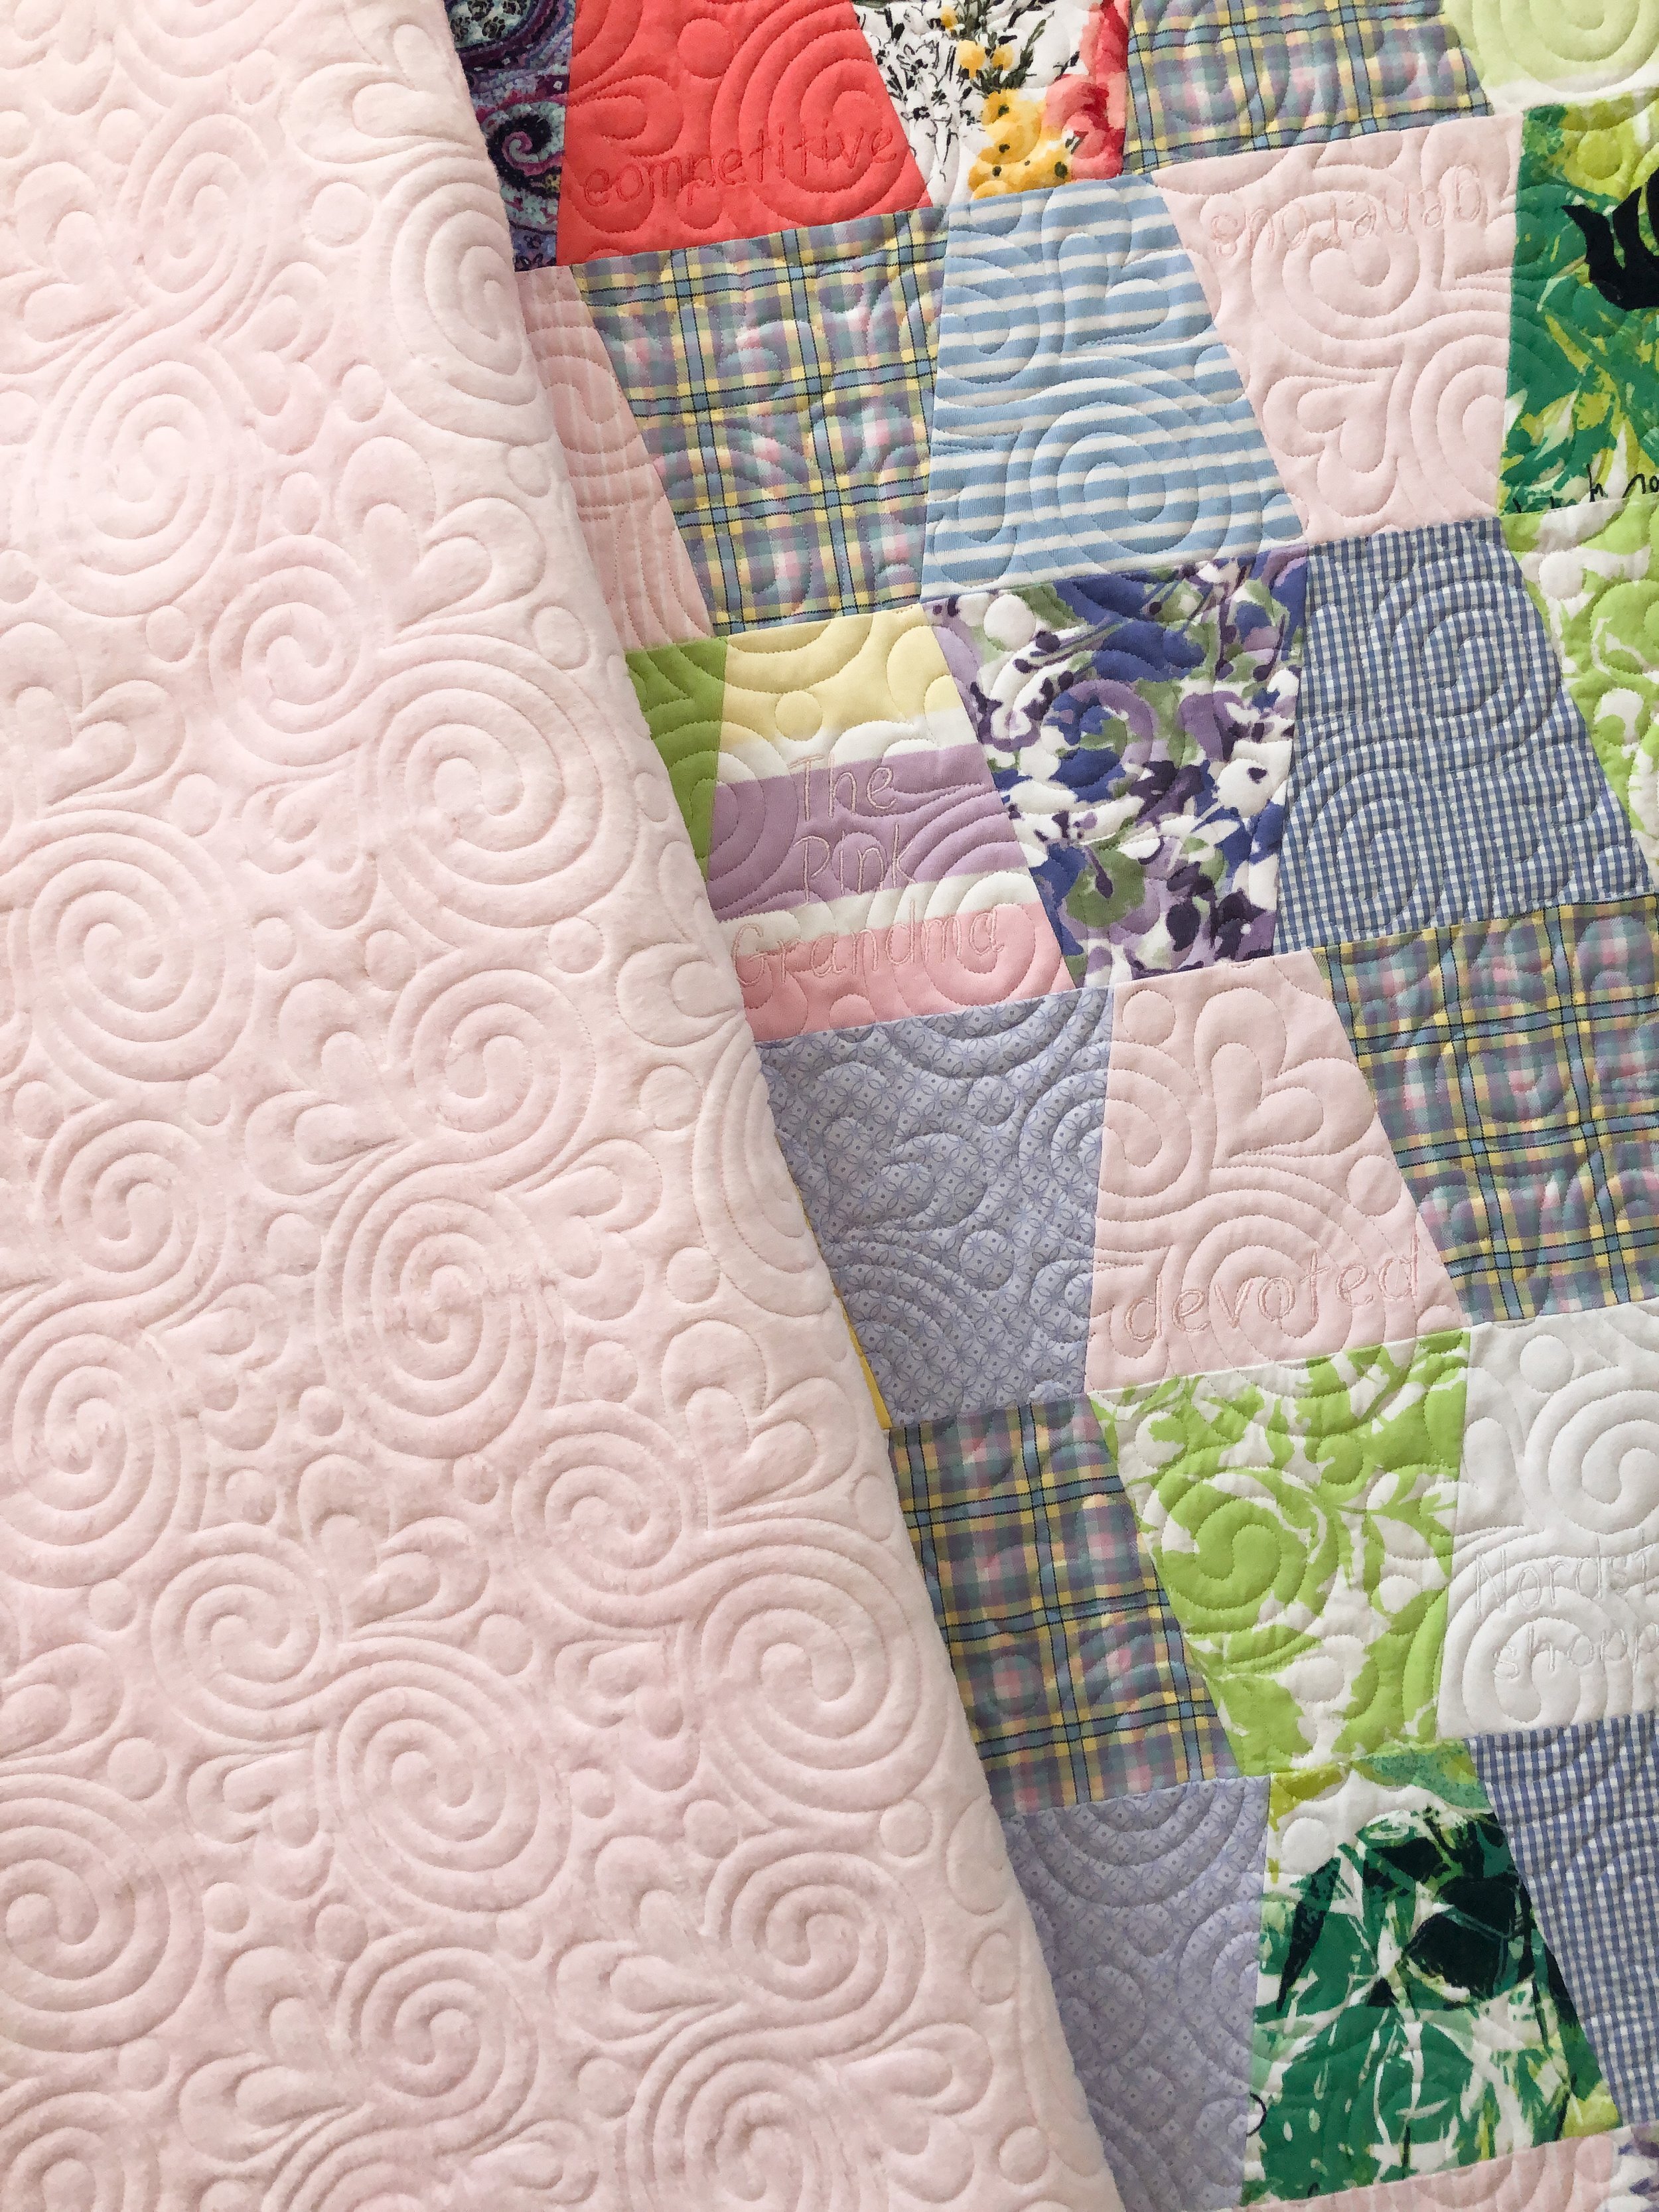
Loving the soft pink minky on the backing!! My friend Abby Latimer had some in stock, and she saved the day…especially with the minky shortages we’ve been having.
That quilty texture just makes me so happy!! Have you had your longarm quilter use Sweet Marmalade on a quilt of yours yet? If you’d like me to quilt it on one of your quilts, send me an email at quiltingit@gmail.com or contact me. Thank you!! Look forward to working with you.

Thank for stopping by!!! -leisha
My Perfect Picnic Quilt
Hi Friends!
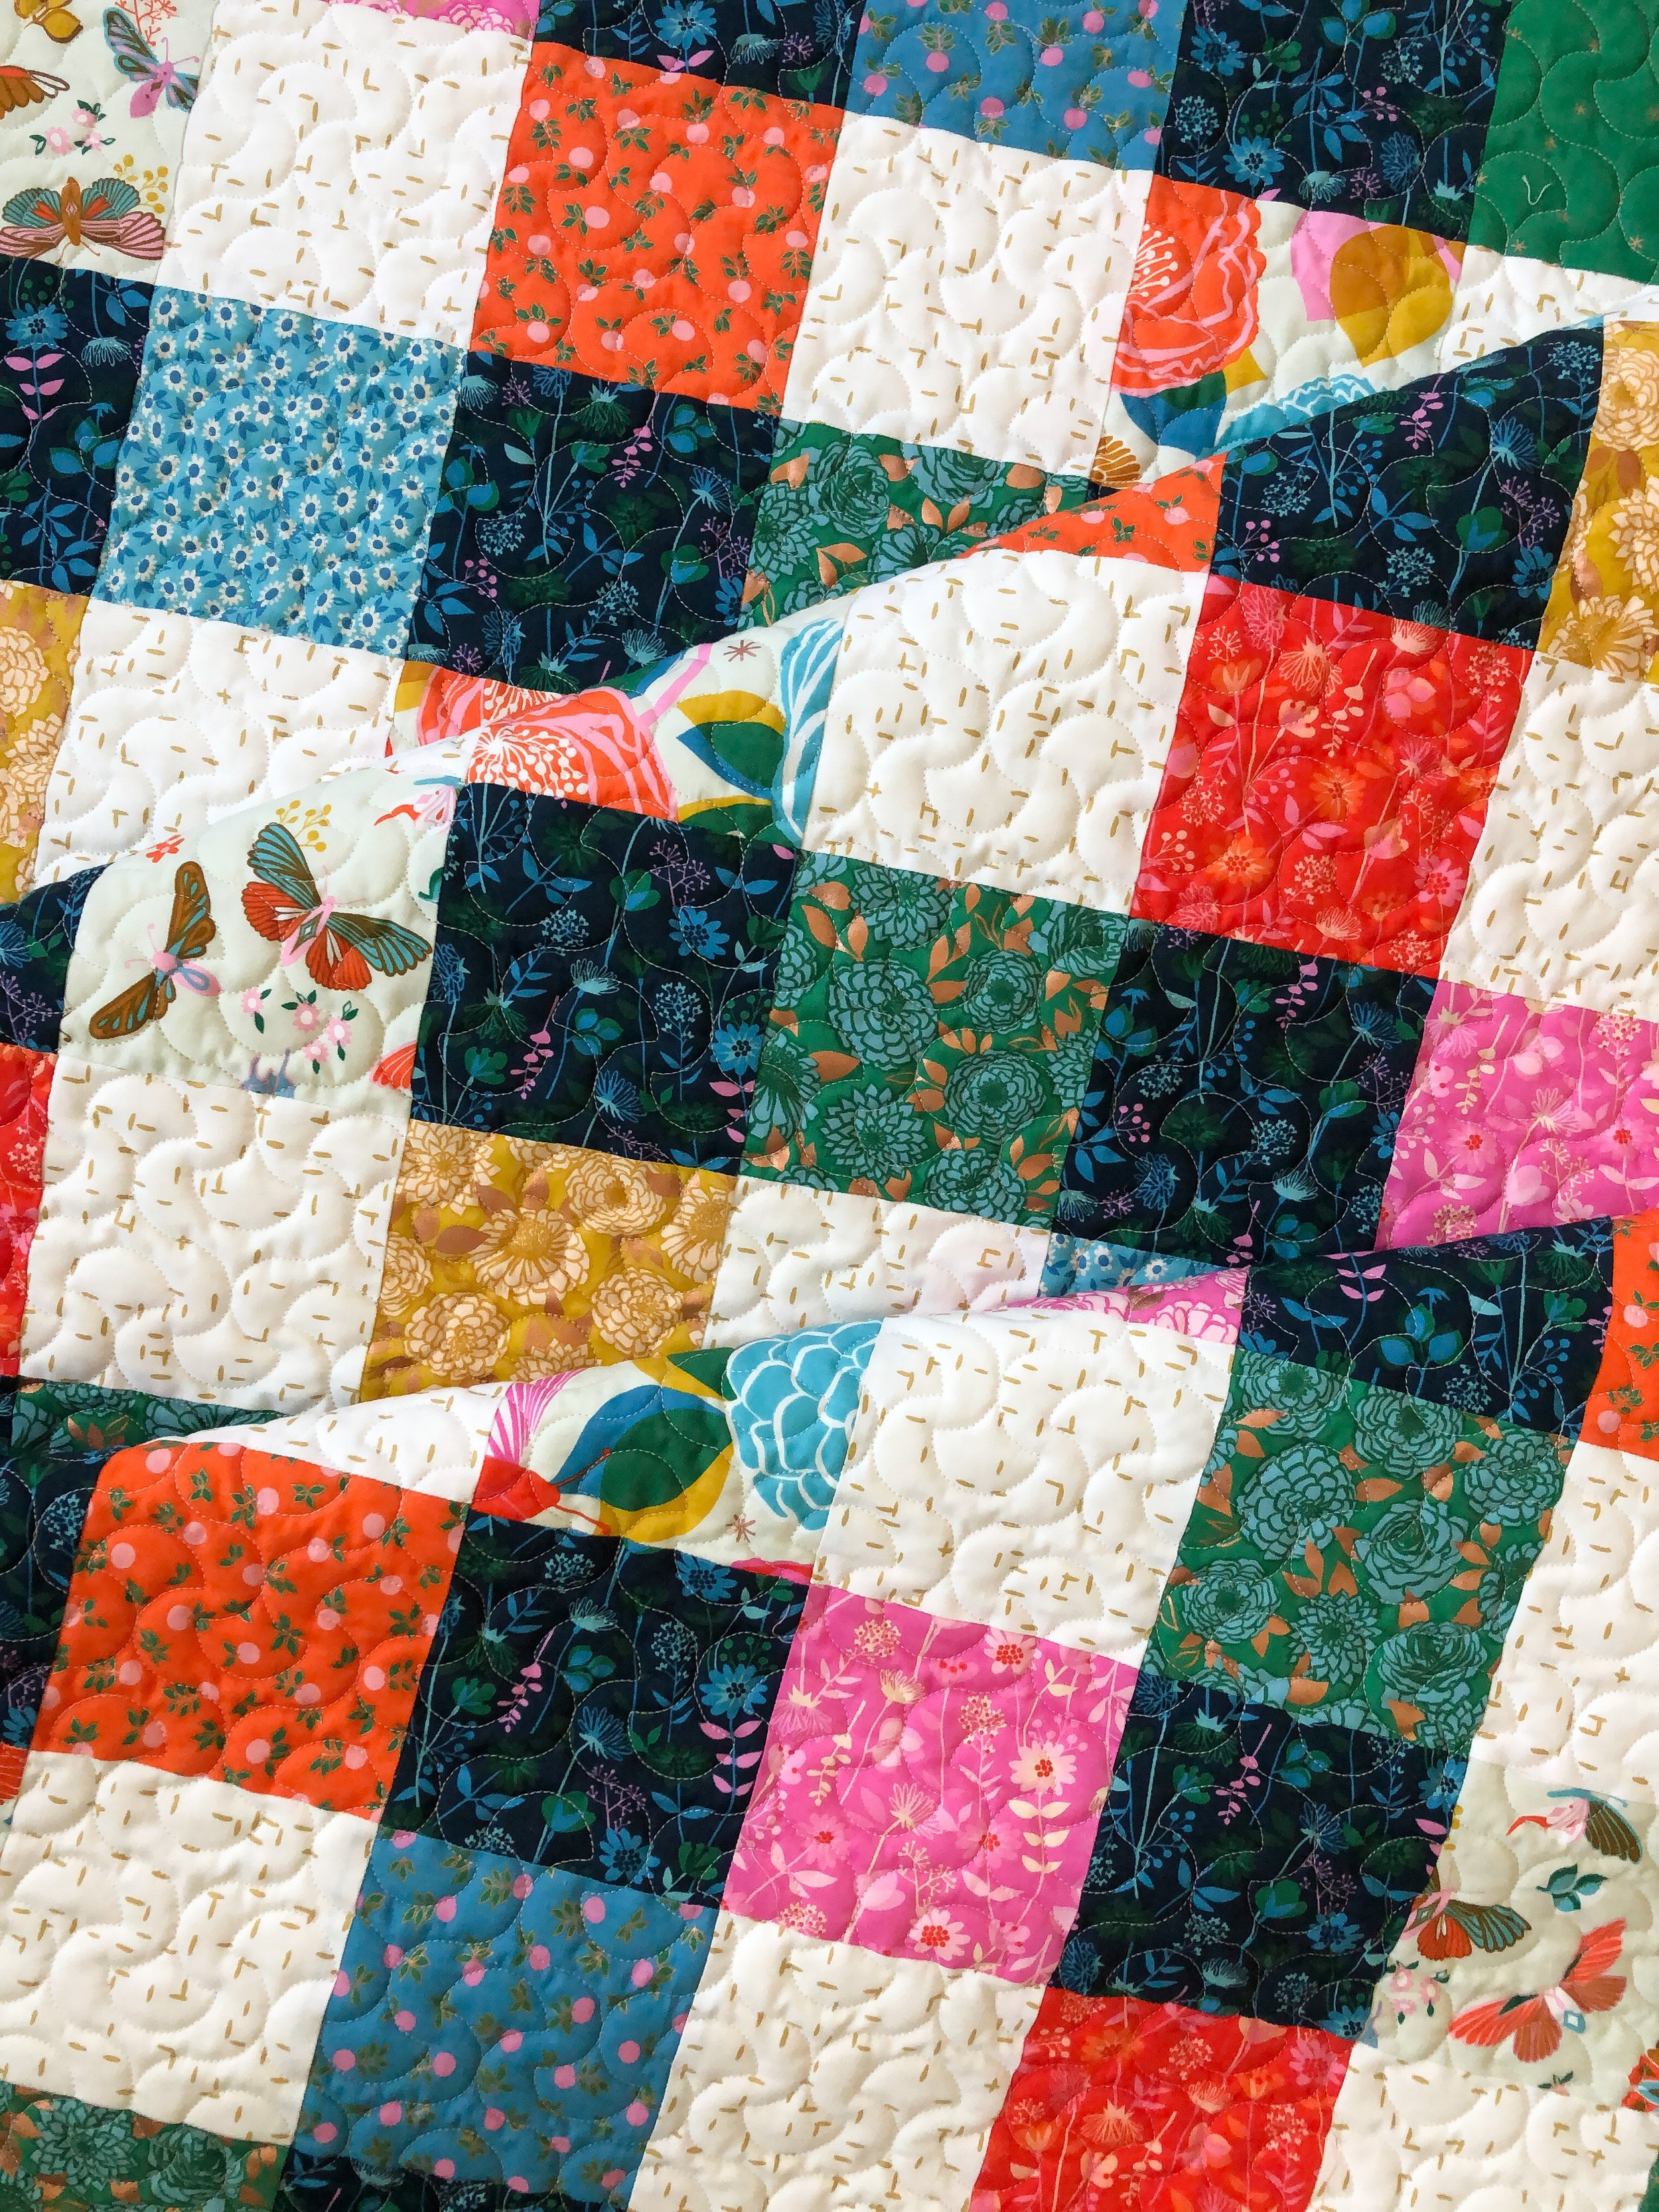
I made a quilt!! If you’re looking for a fun, fast, and colorful quilt to make…check this one out!! Ruby Star Society did a fun summer sew along, and offered a free pattern for the Perfect Picnic Quilt. I wasn’t going to join in, but then I saw a couple of friends making one and of course had to join them. I’m now sitting on the couch writing this post under this very quilt. It’s cozy!!

Yes…quilts in doors is a must when the air conditioning is on. Haha!!
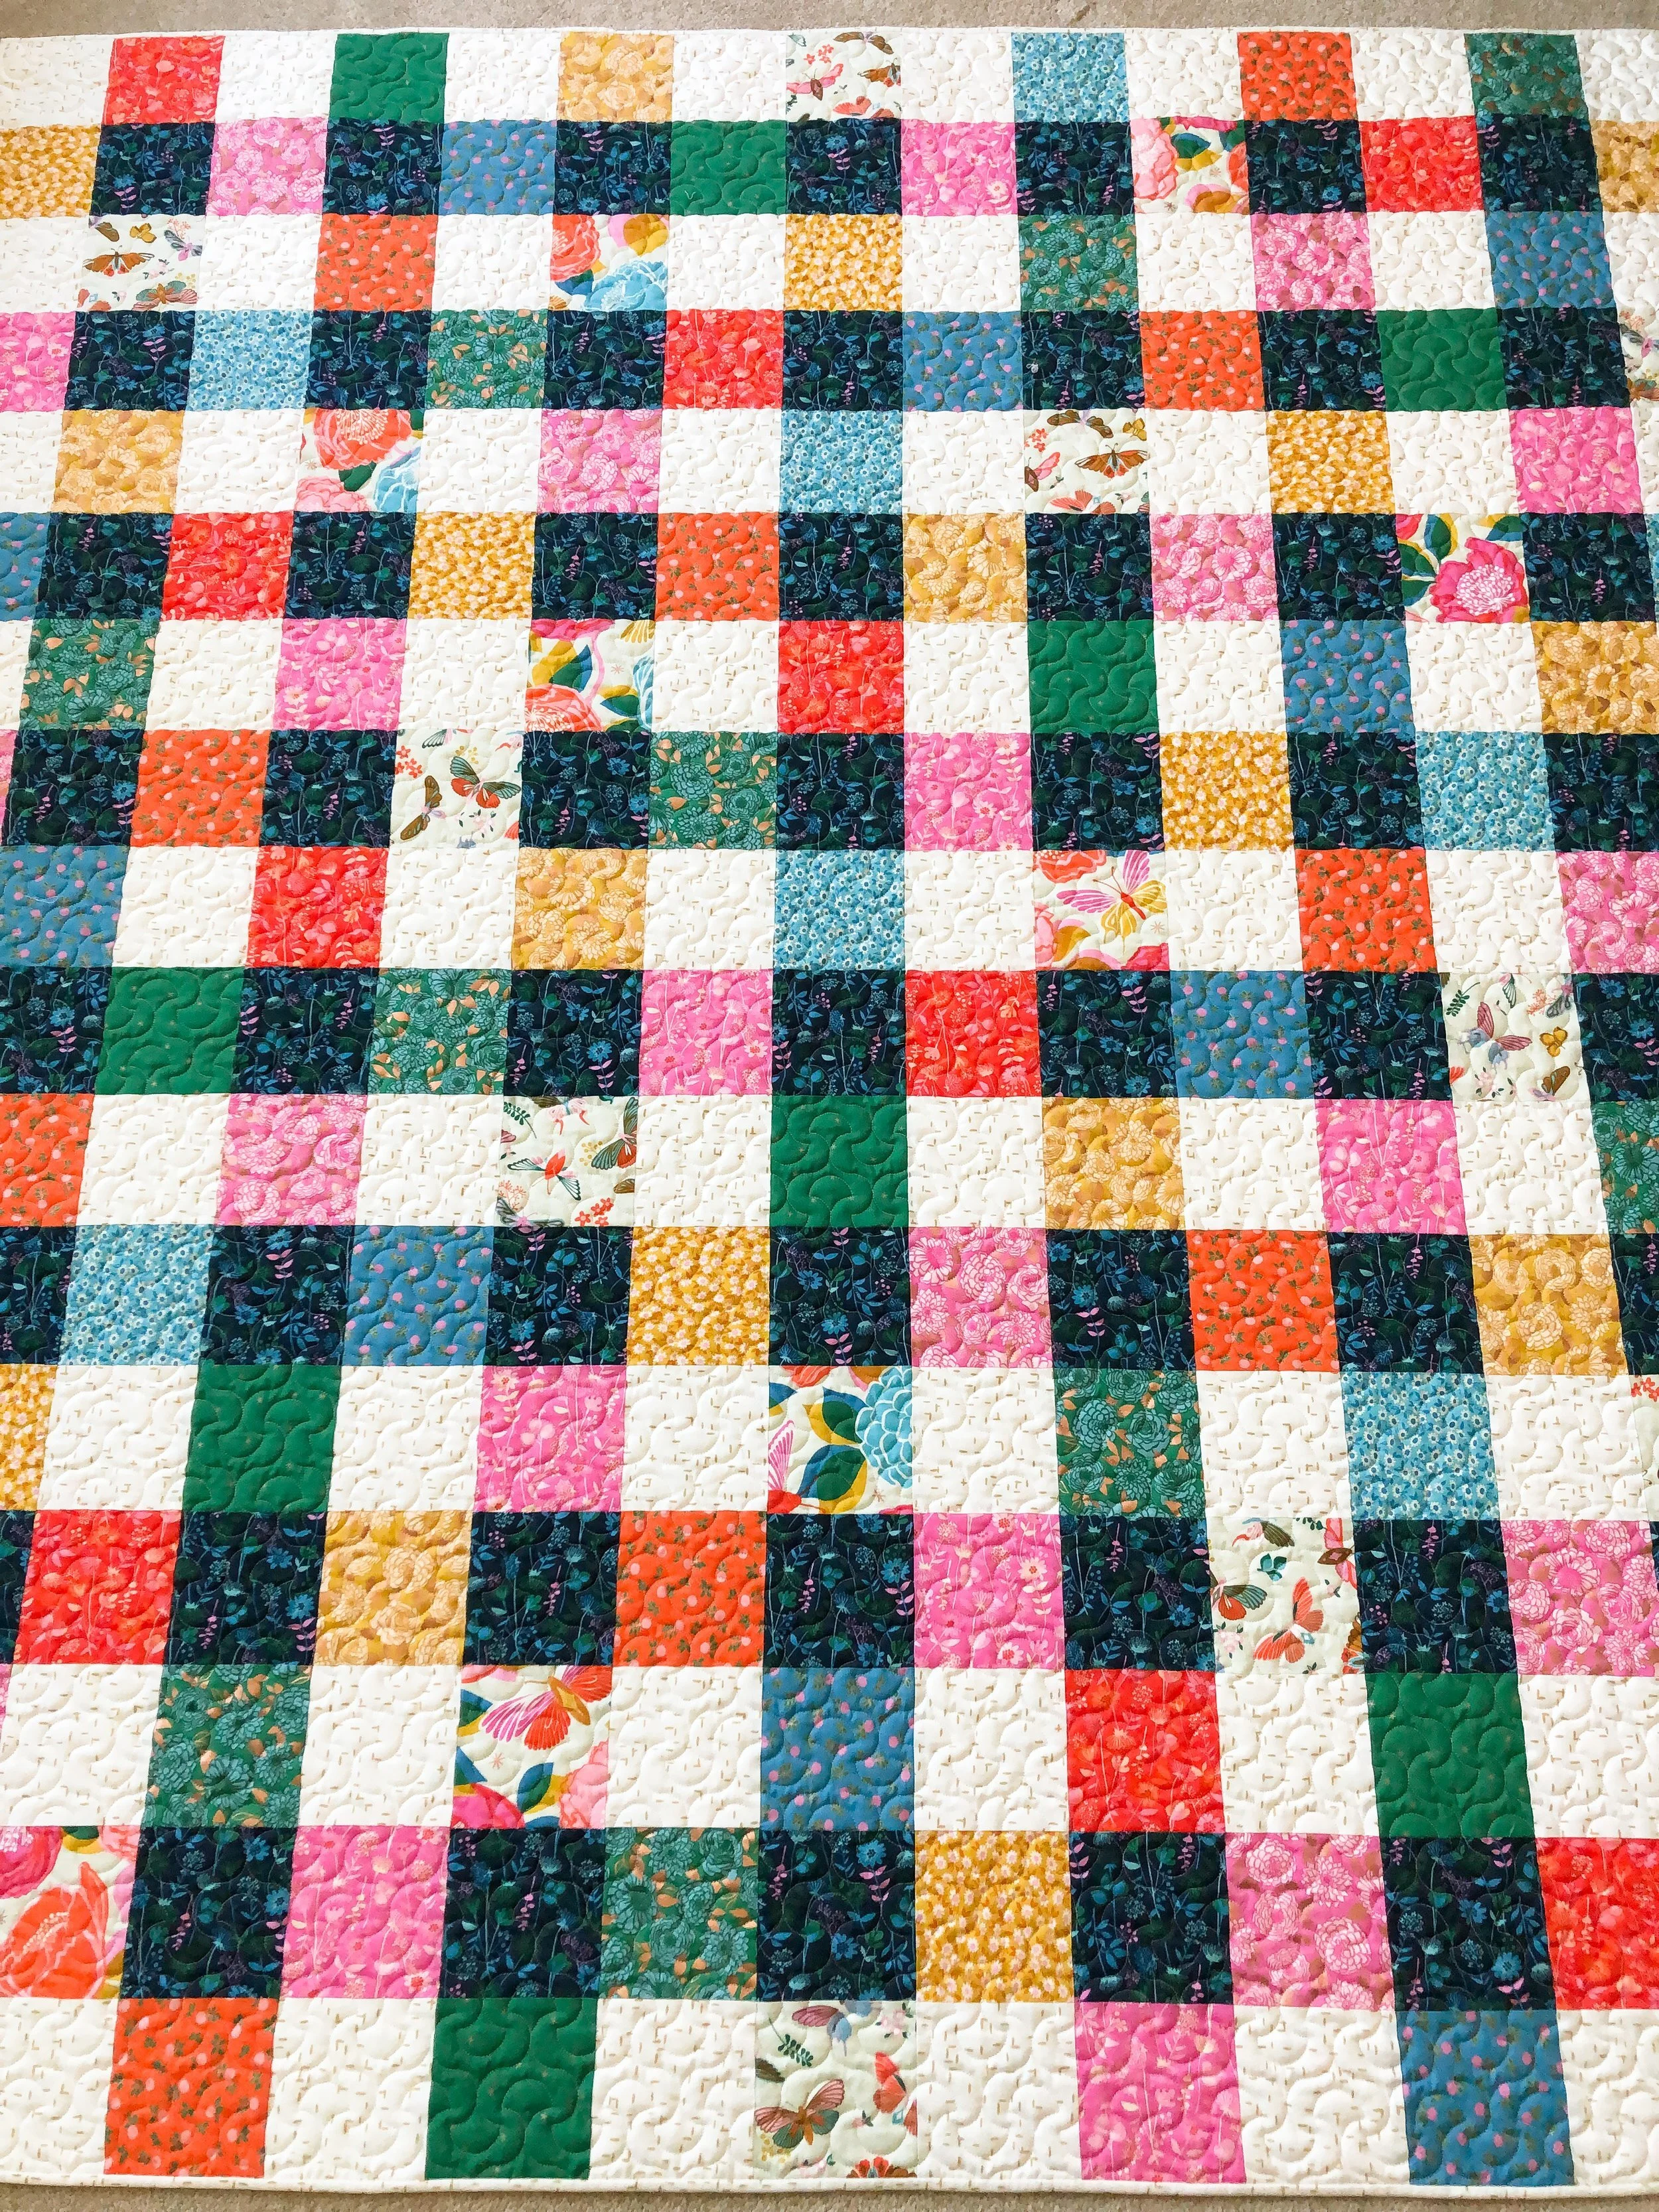
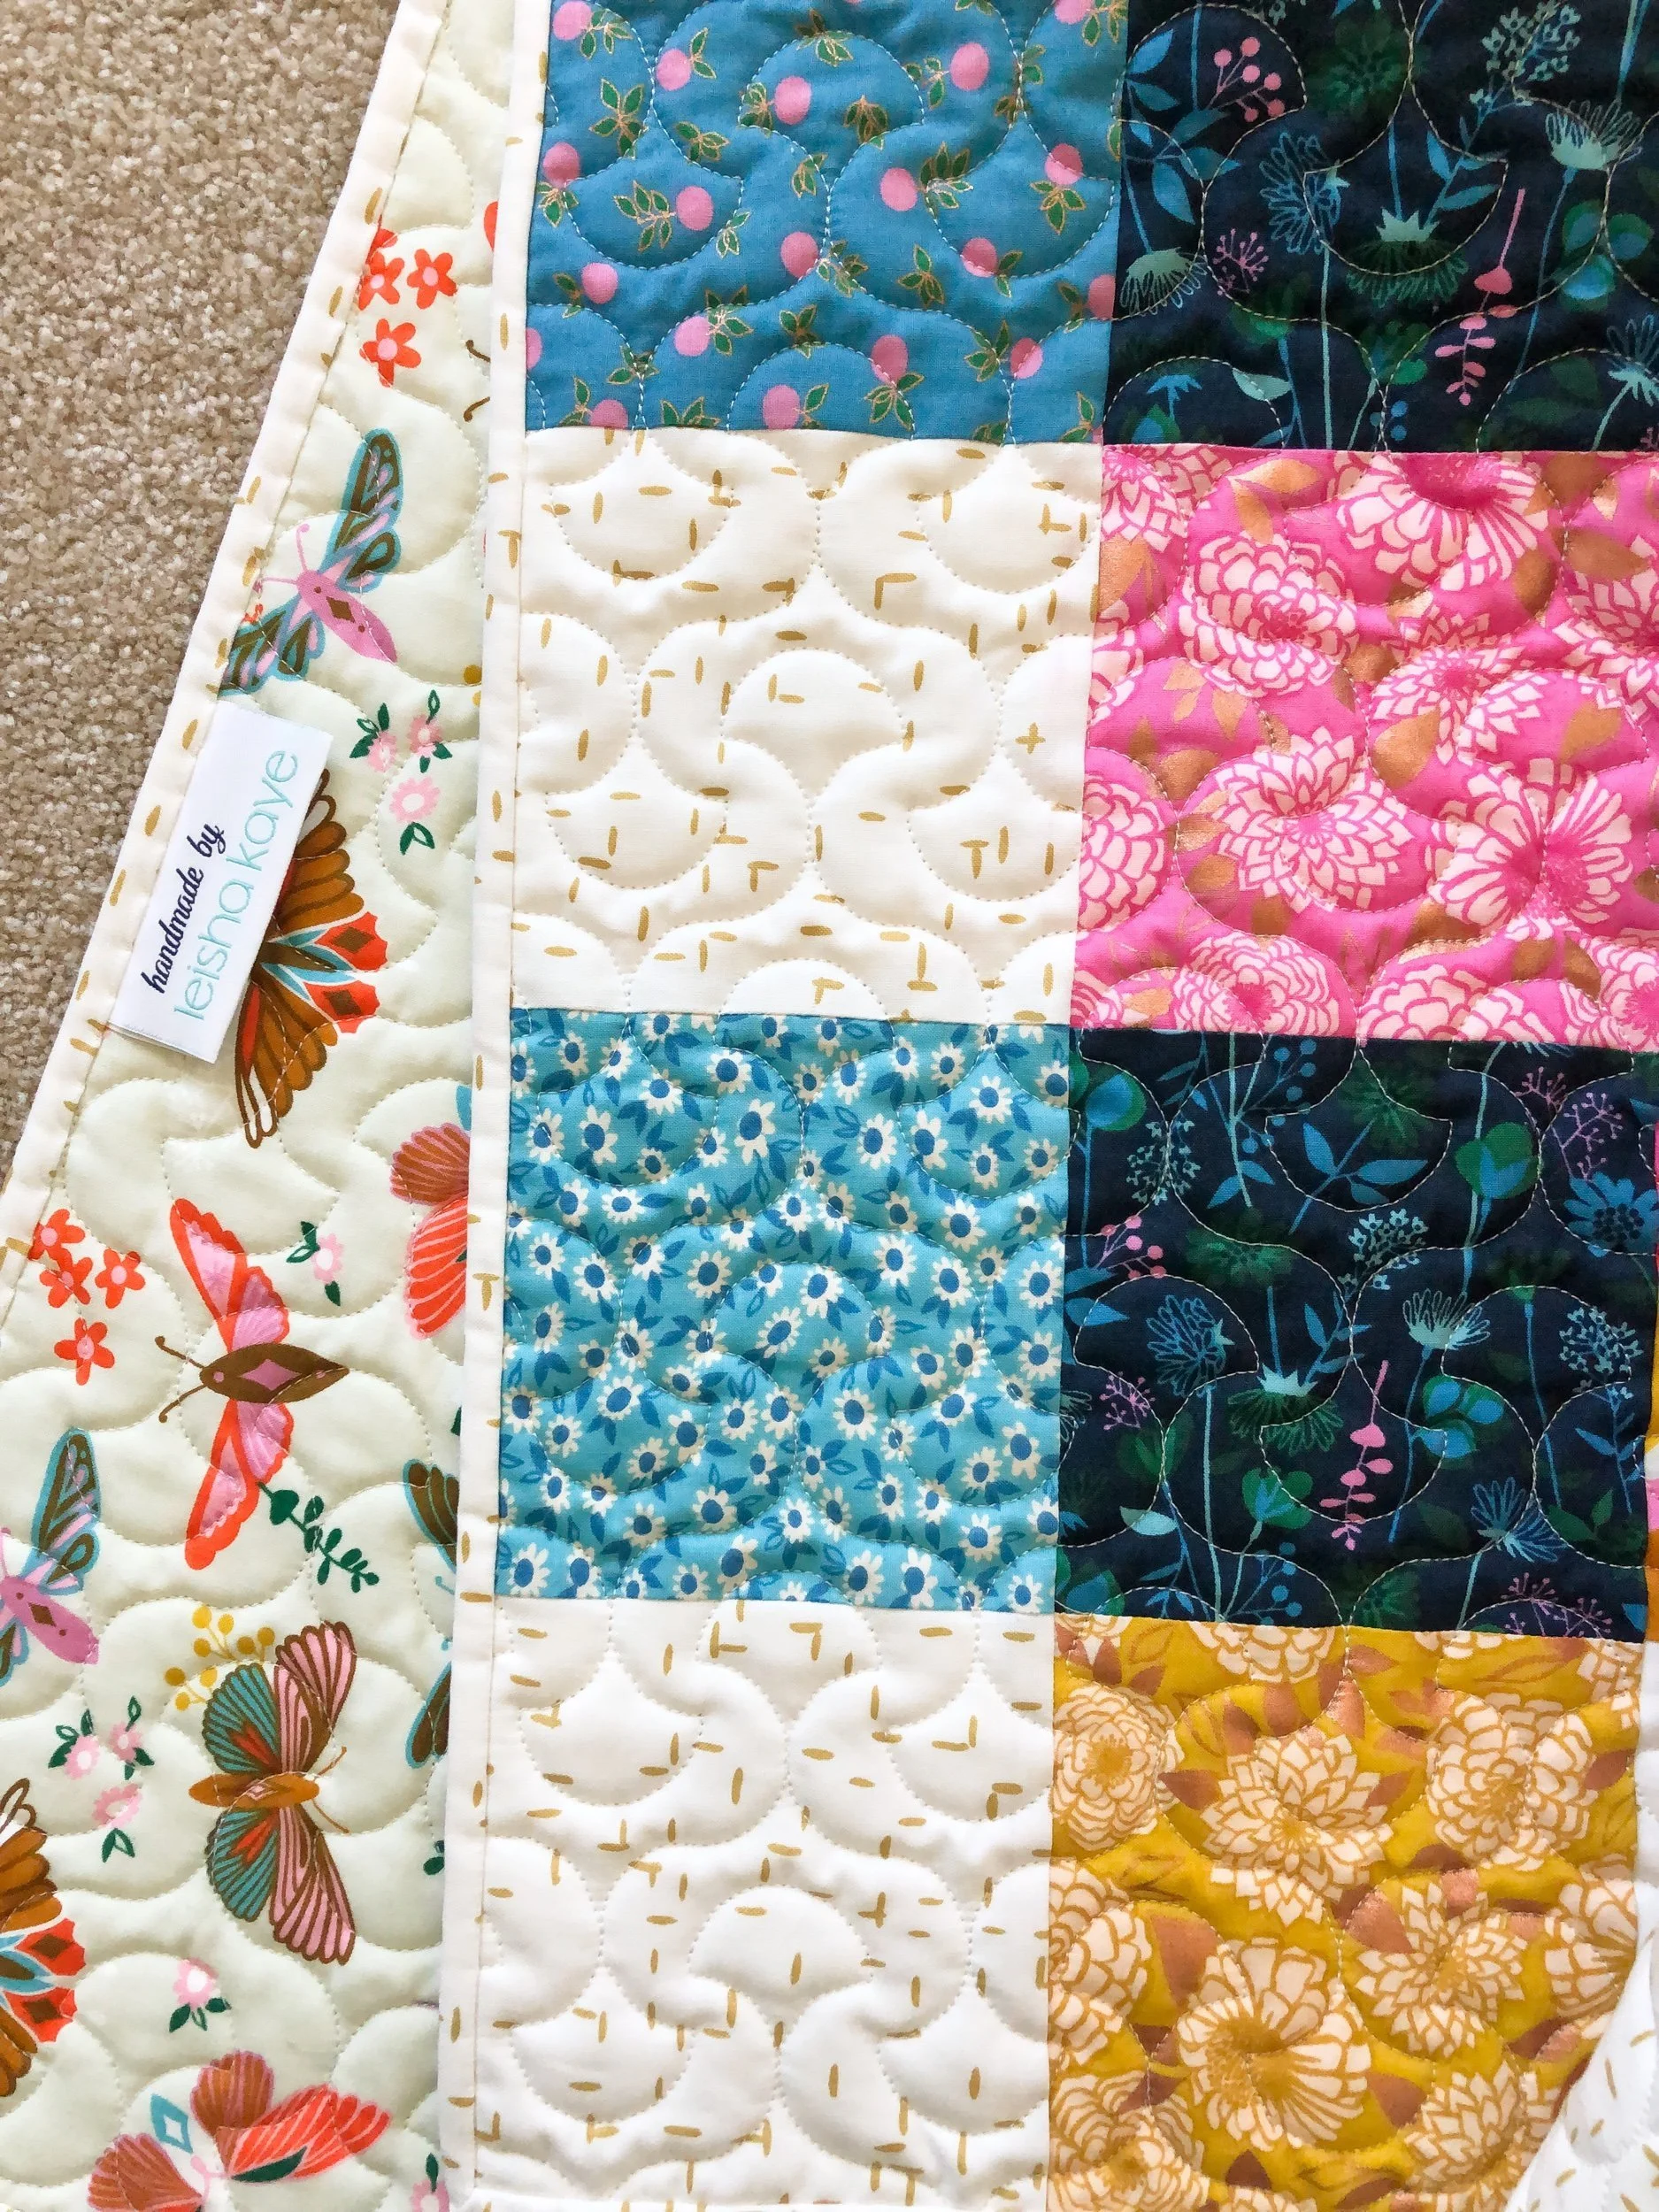
Ruby Star Society made several mock-ups with fabrics from their different designers. I loved the fabrics by Melody Miller. I used a fun off white fabric with an alternating little gold dash, by Gingiber from Moda, for the white background and binding. Which I love!!! The gold marries to well with the golds in Melody’s florals and butterflies. I love the butterflies so much, I chose that for my backing fabric. I got all of my fabrics from my favorite online shop, Sisters and Quilters.

I used the lovely dark navy floral for the deep contrasting fabric, and then choose two fabrics in each color for the scrappy mid color. This is the perfect quilt to use up some of your stash…especially if you want to show off some of your favorite fabrics.
I used my favorite Natural White Omni thread from Superior Threads, and 6 oz. bamboo batting from Winline Textiles out of Ogden Utah. I wish you could feel the extra puffiness, I’m loving it!! If you’d like to add either of my 4 oz or 6 oz bamboo to a quilt, let me know they are divine! The 6 oz is thicker than the 4 oz.

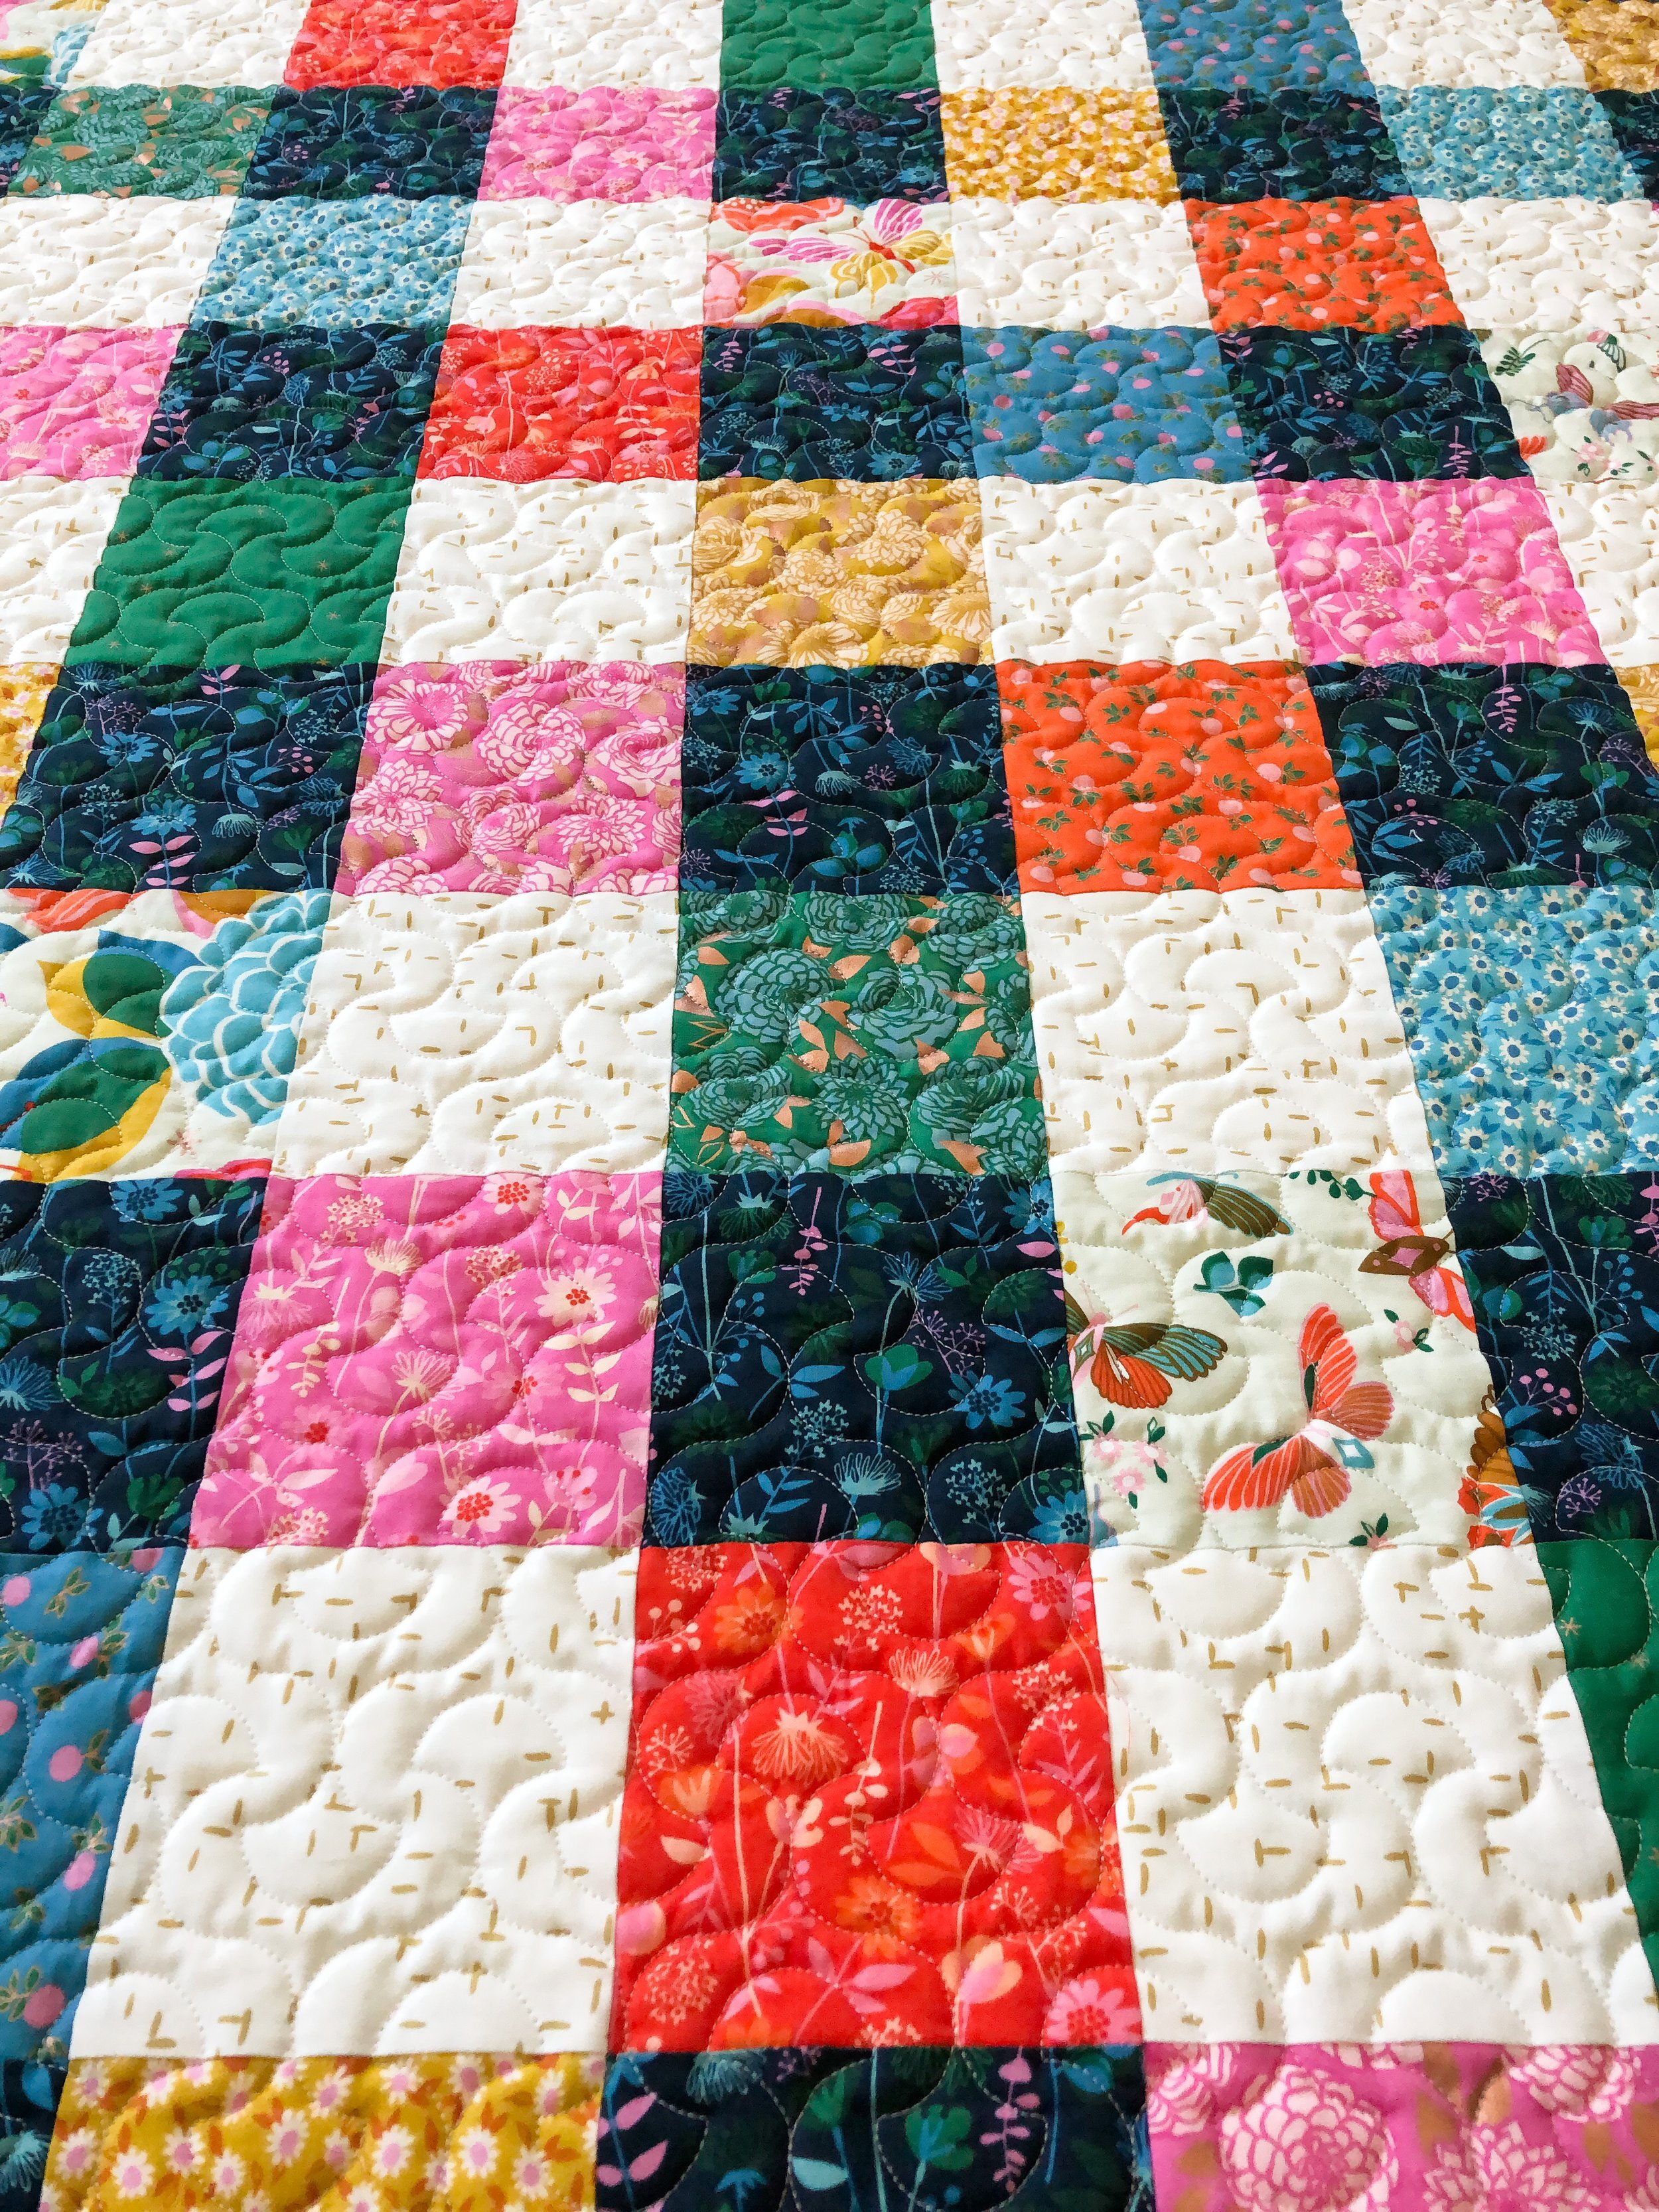
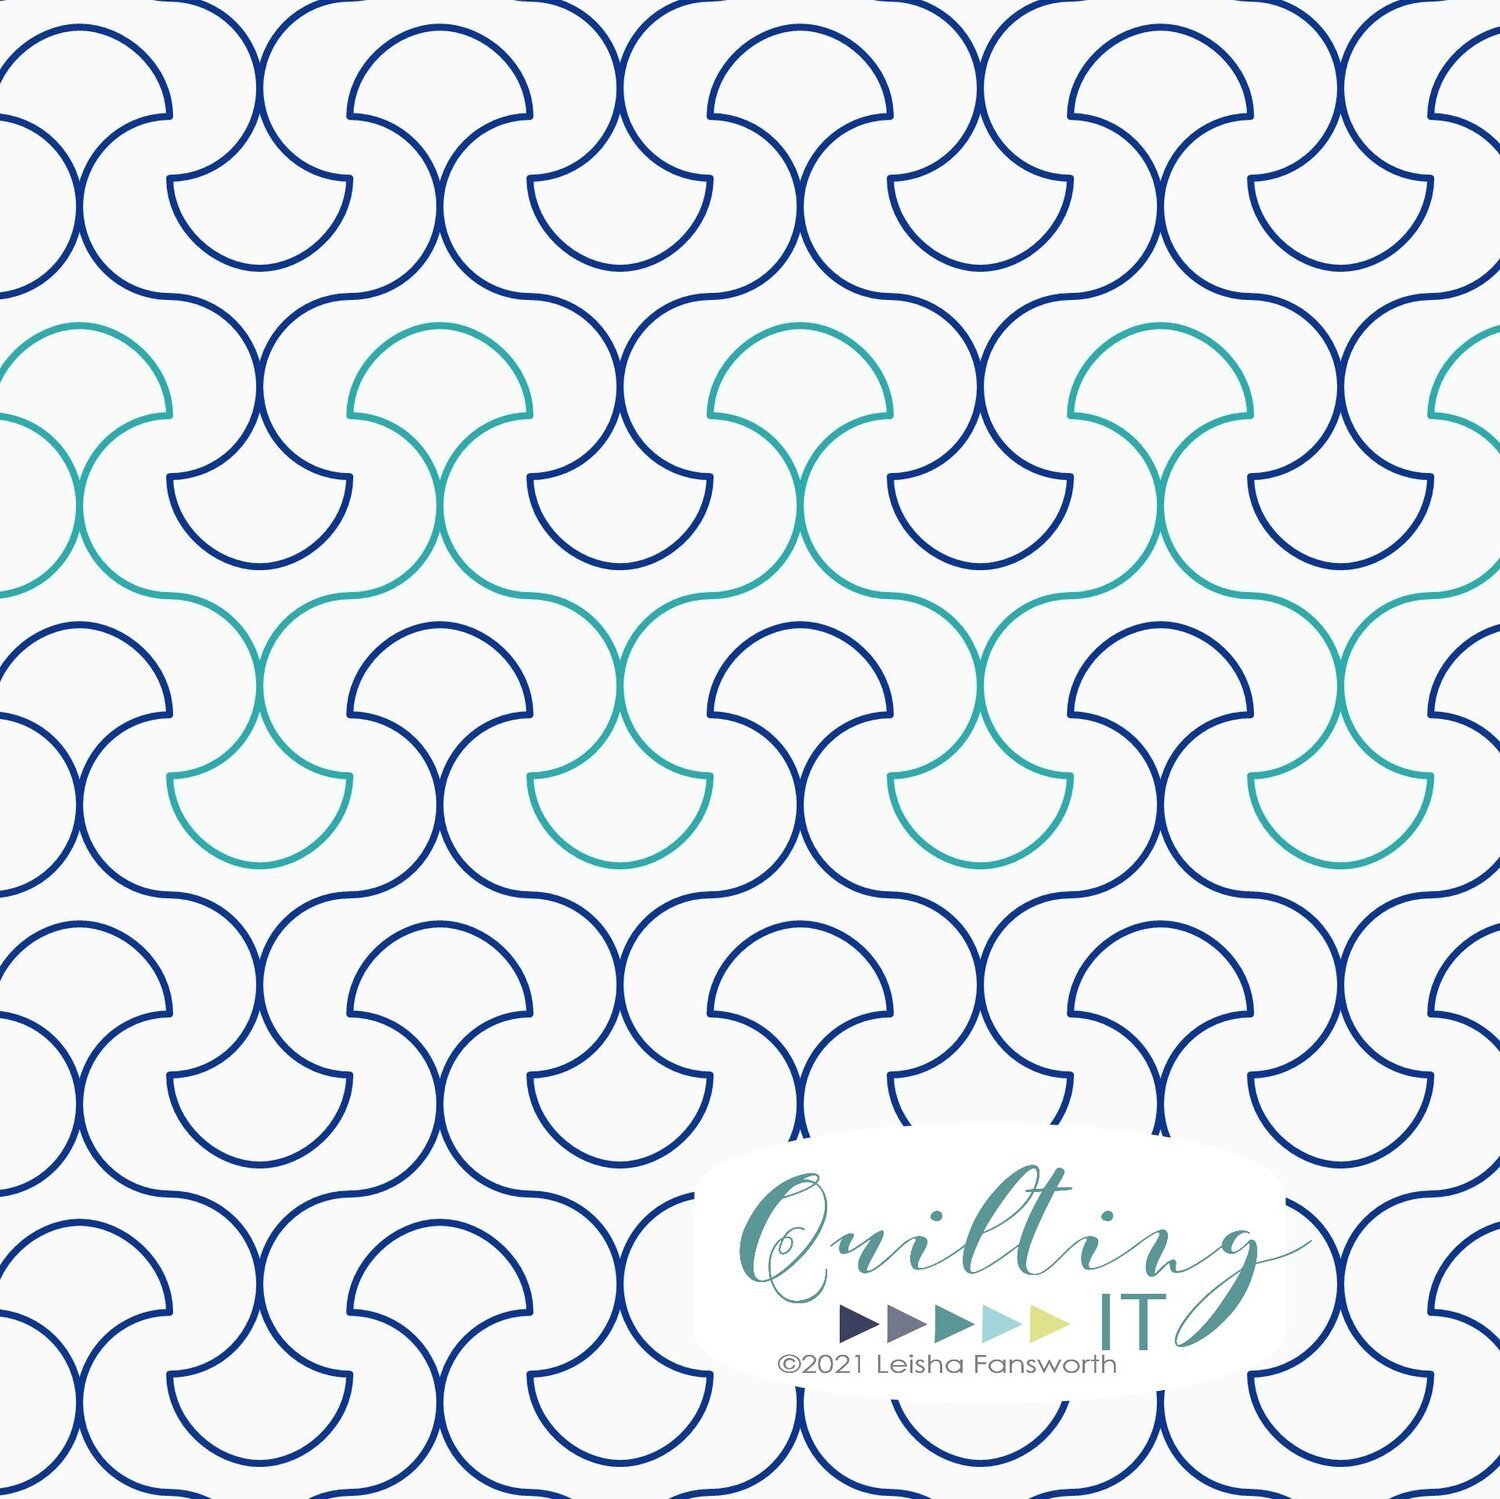
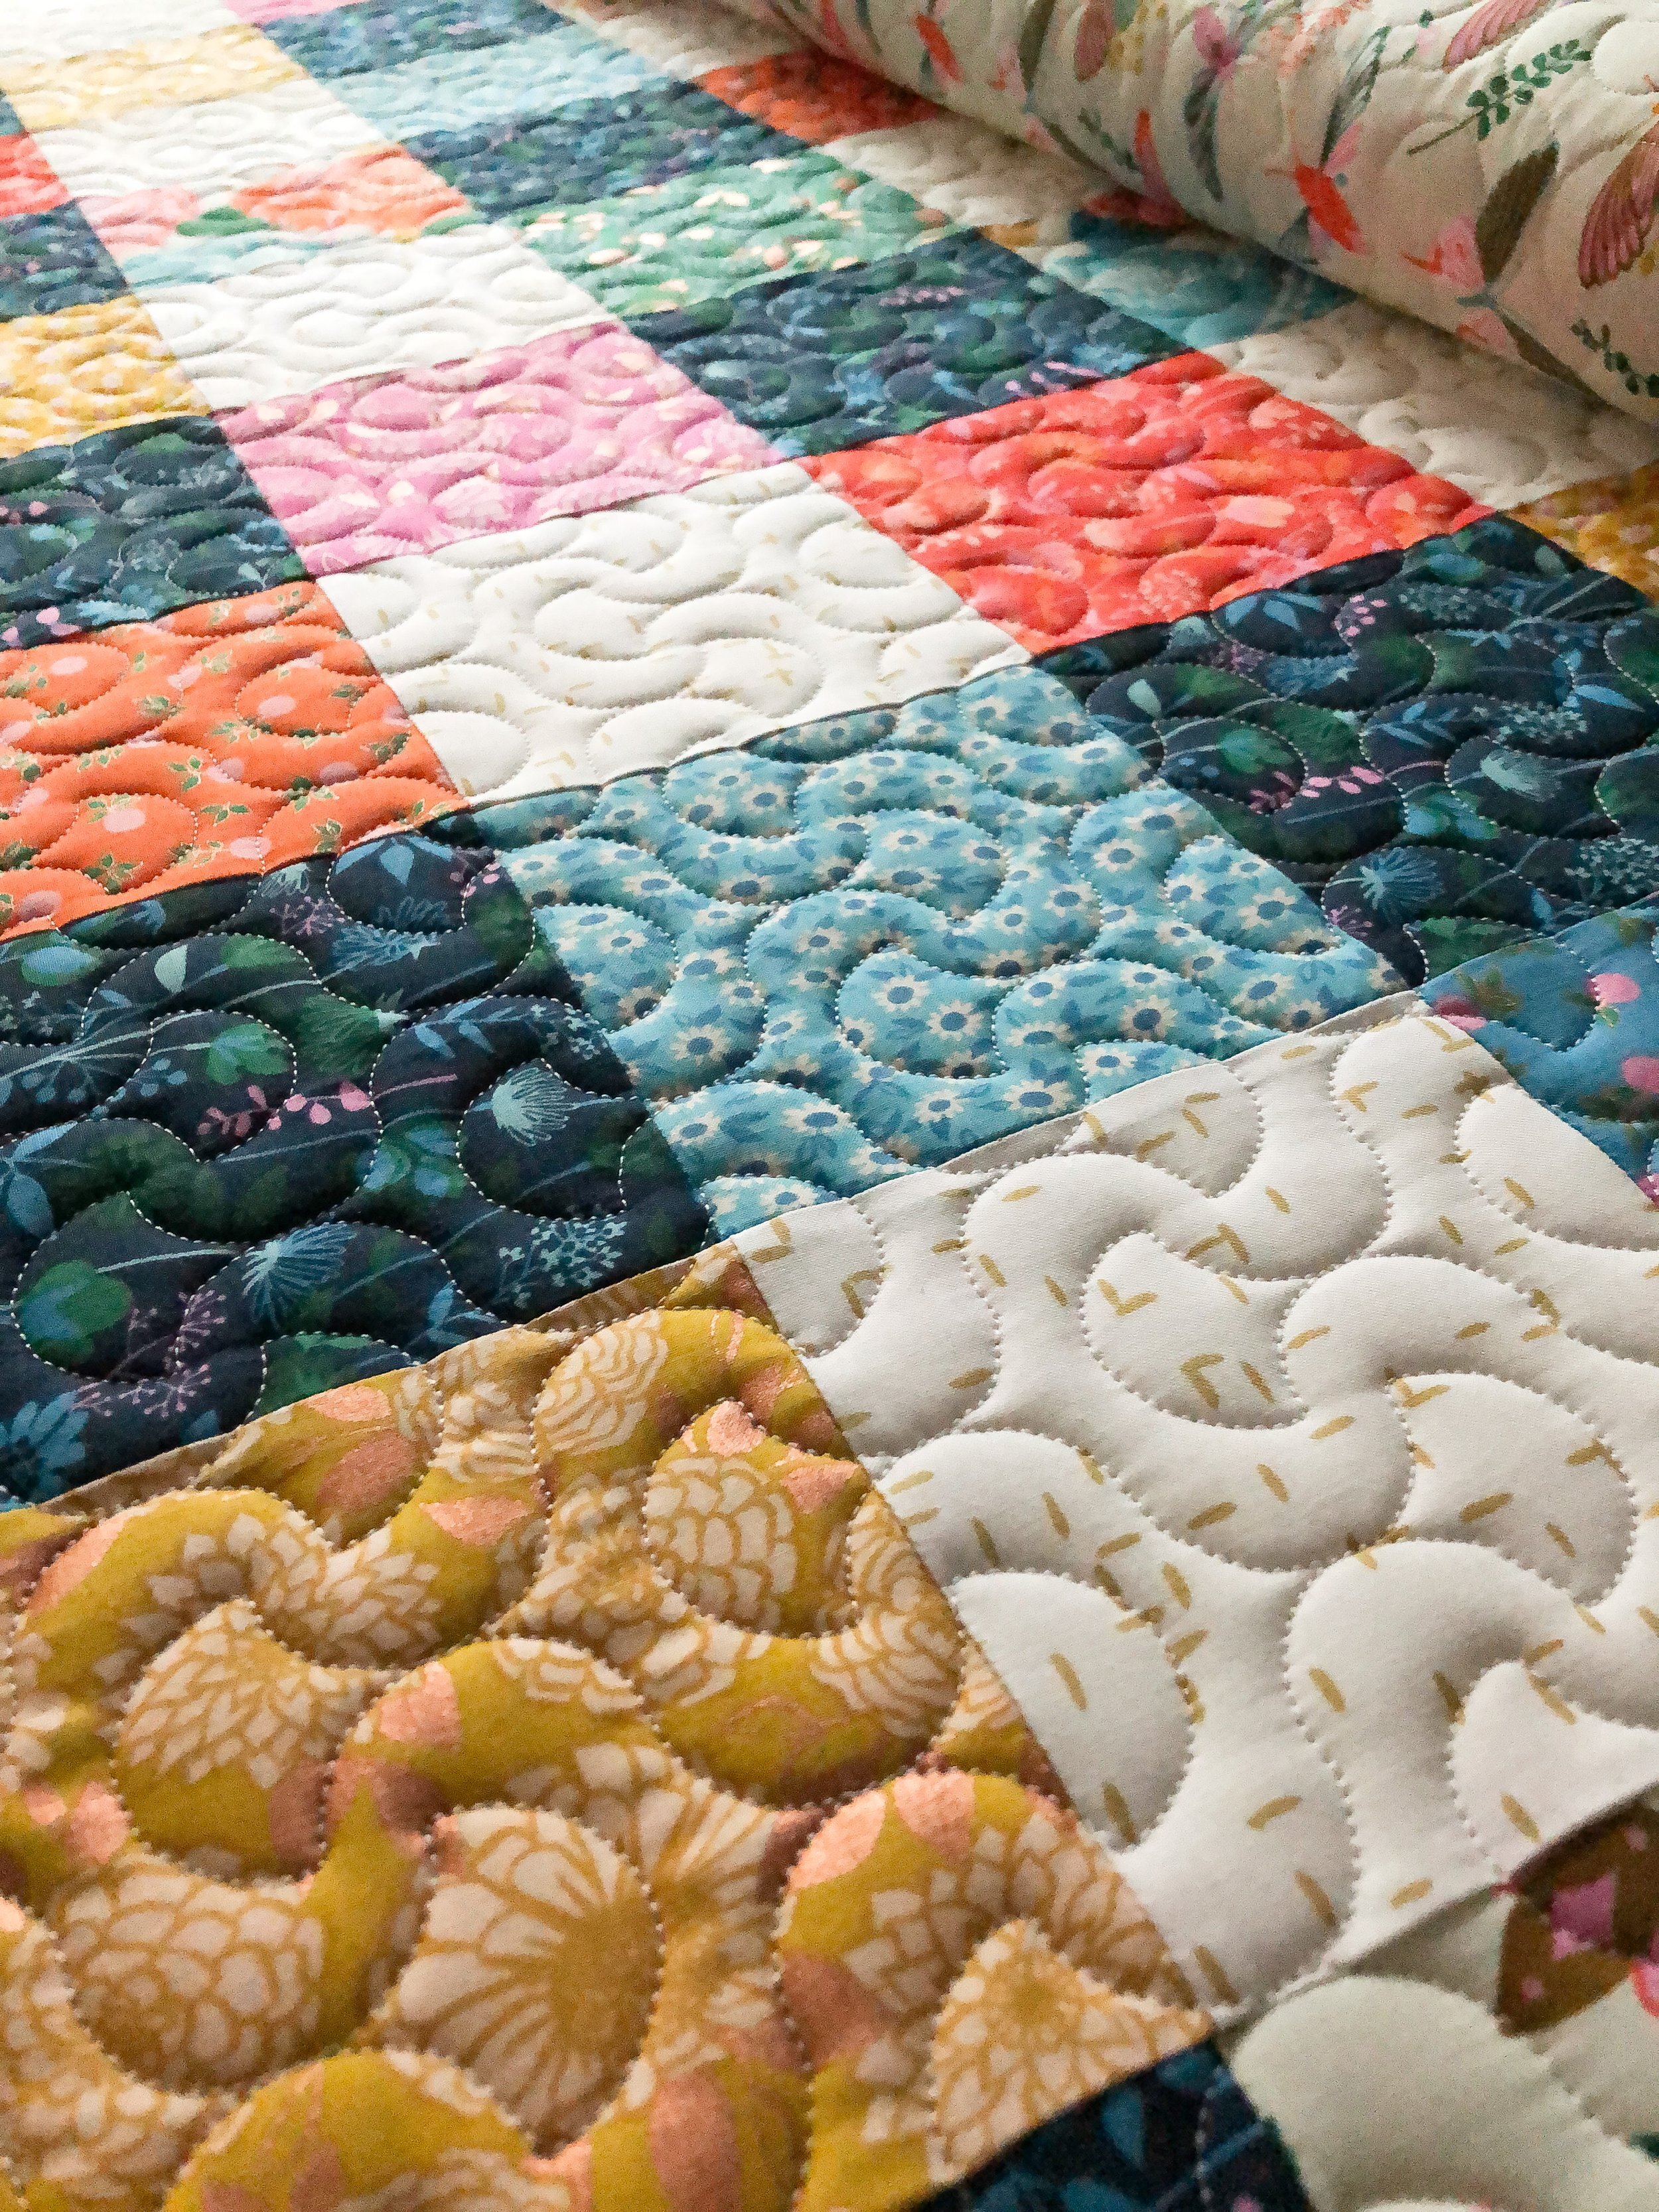
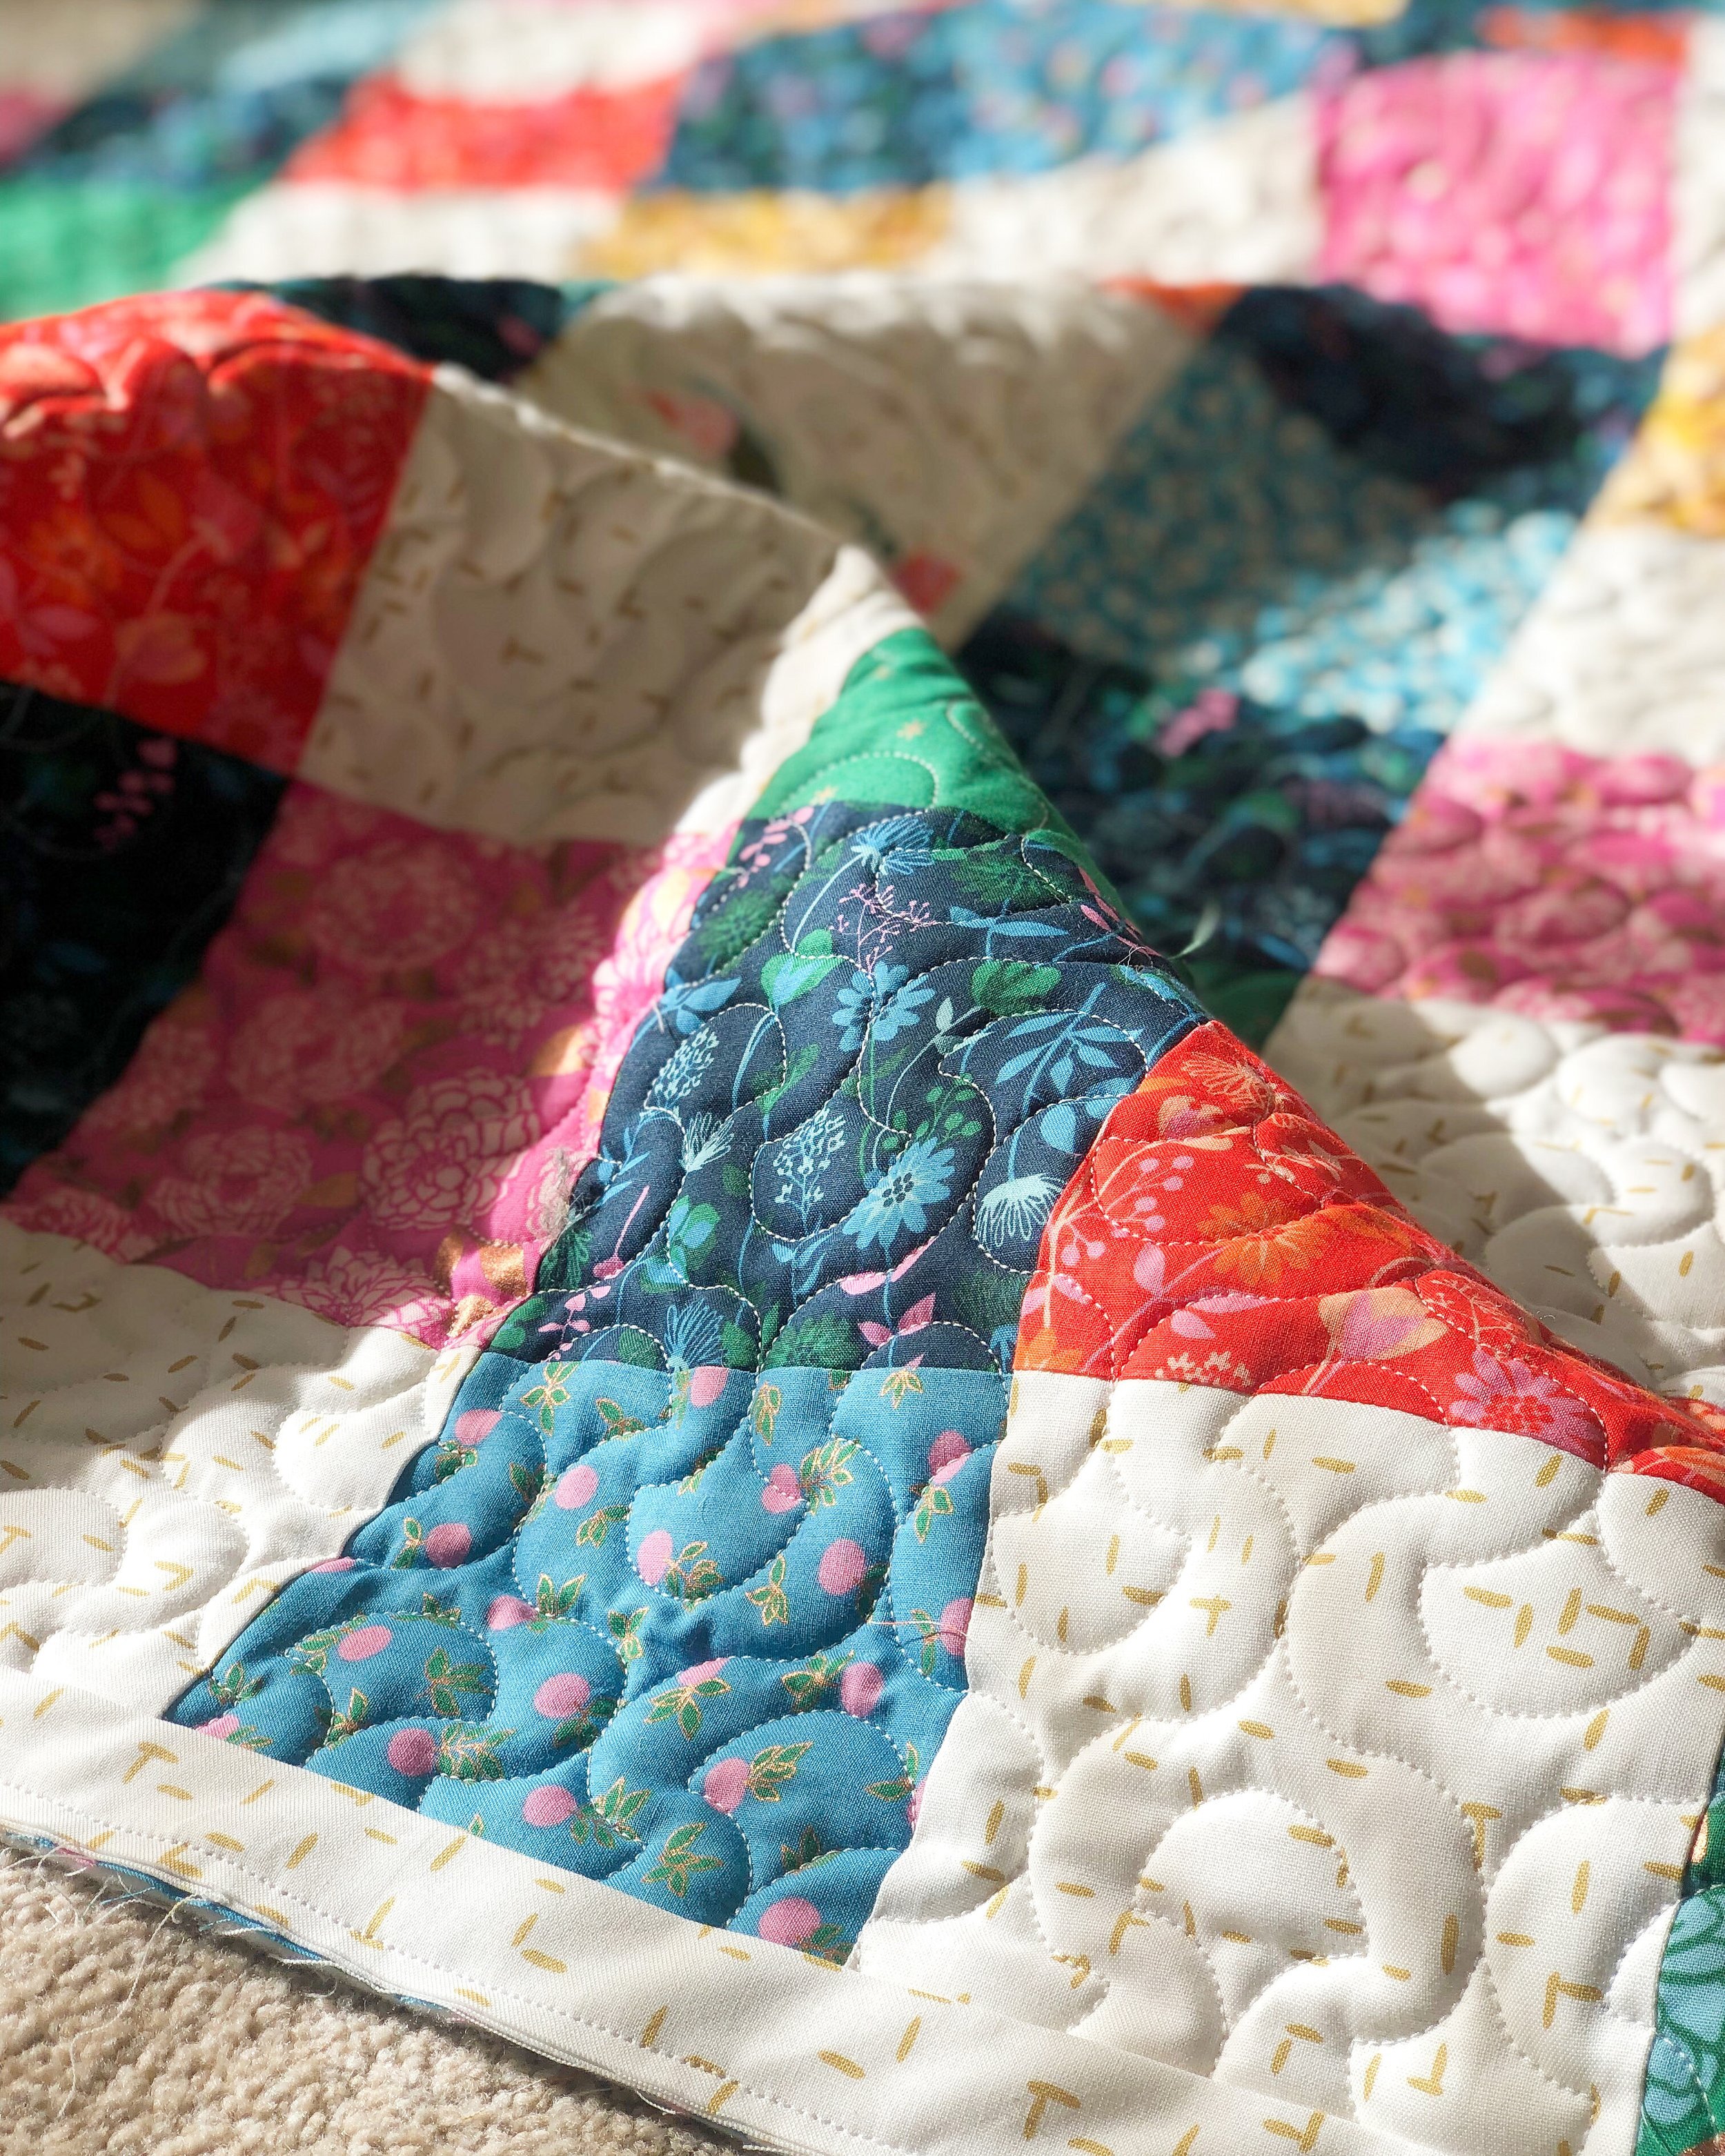
It’s really funny when I’m making a quilt of my own, sometimes I take awhile to decide how I’m going to quilt it. Not this one. I was sewing it together, and started dreaming of quilting Kapari on it. I love how the curves of the design play so well with the lovely floral prints. Kapari is one of my pantos, and it’s stitches out beautifully. It’s available in my shop. A panto is another name for a quilting design that has several repeats of a single motif. Longarm quilters use pantos to quilt quilts, whether it comes in a paper or digital format, it is still called a panto. I have a huge variety of pantos, check them out in my shop or at Urban Elementz.
I’m loving the buffalo plaid look to this quilt. Very different having the mid color be so scrappy and colorful.

A couple of more looks at the beautiful texture!
I love a fast sewing project…which ones have you made lately? I’m typically a very slow sewer, that it takes me awhile to make a quilt. Part of that is finding the time to actually sew.

I would love to quilt for you!! If you’re hoping to get some of your quilts finished, send me a message or email me at quiltingit@gmail.com
For more info on my Longarm Quilting Services, check it out.
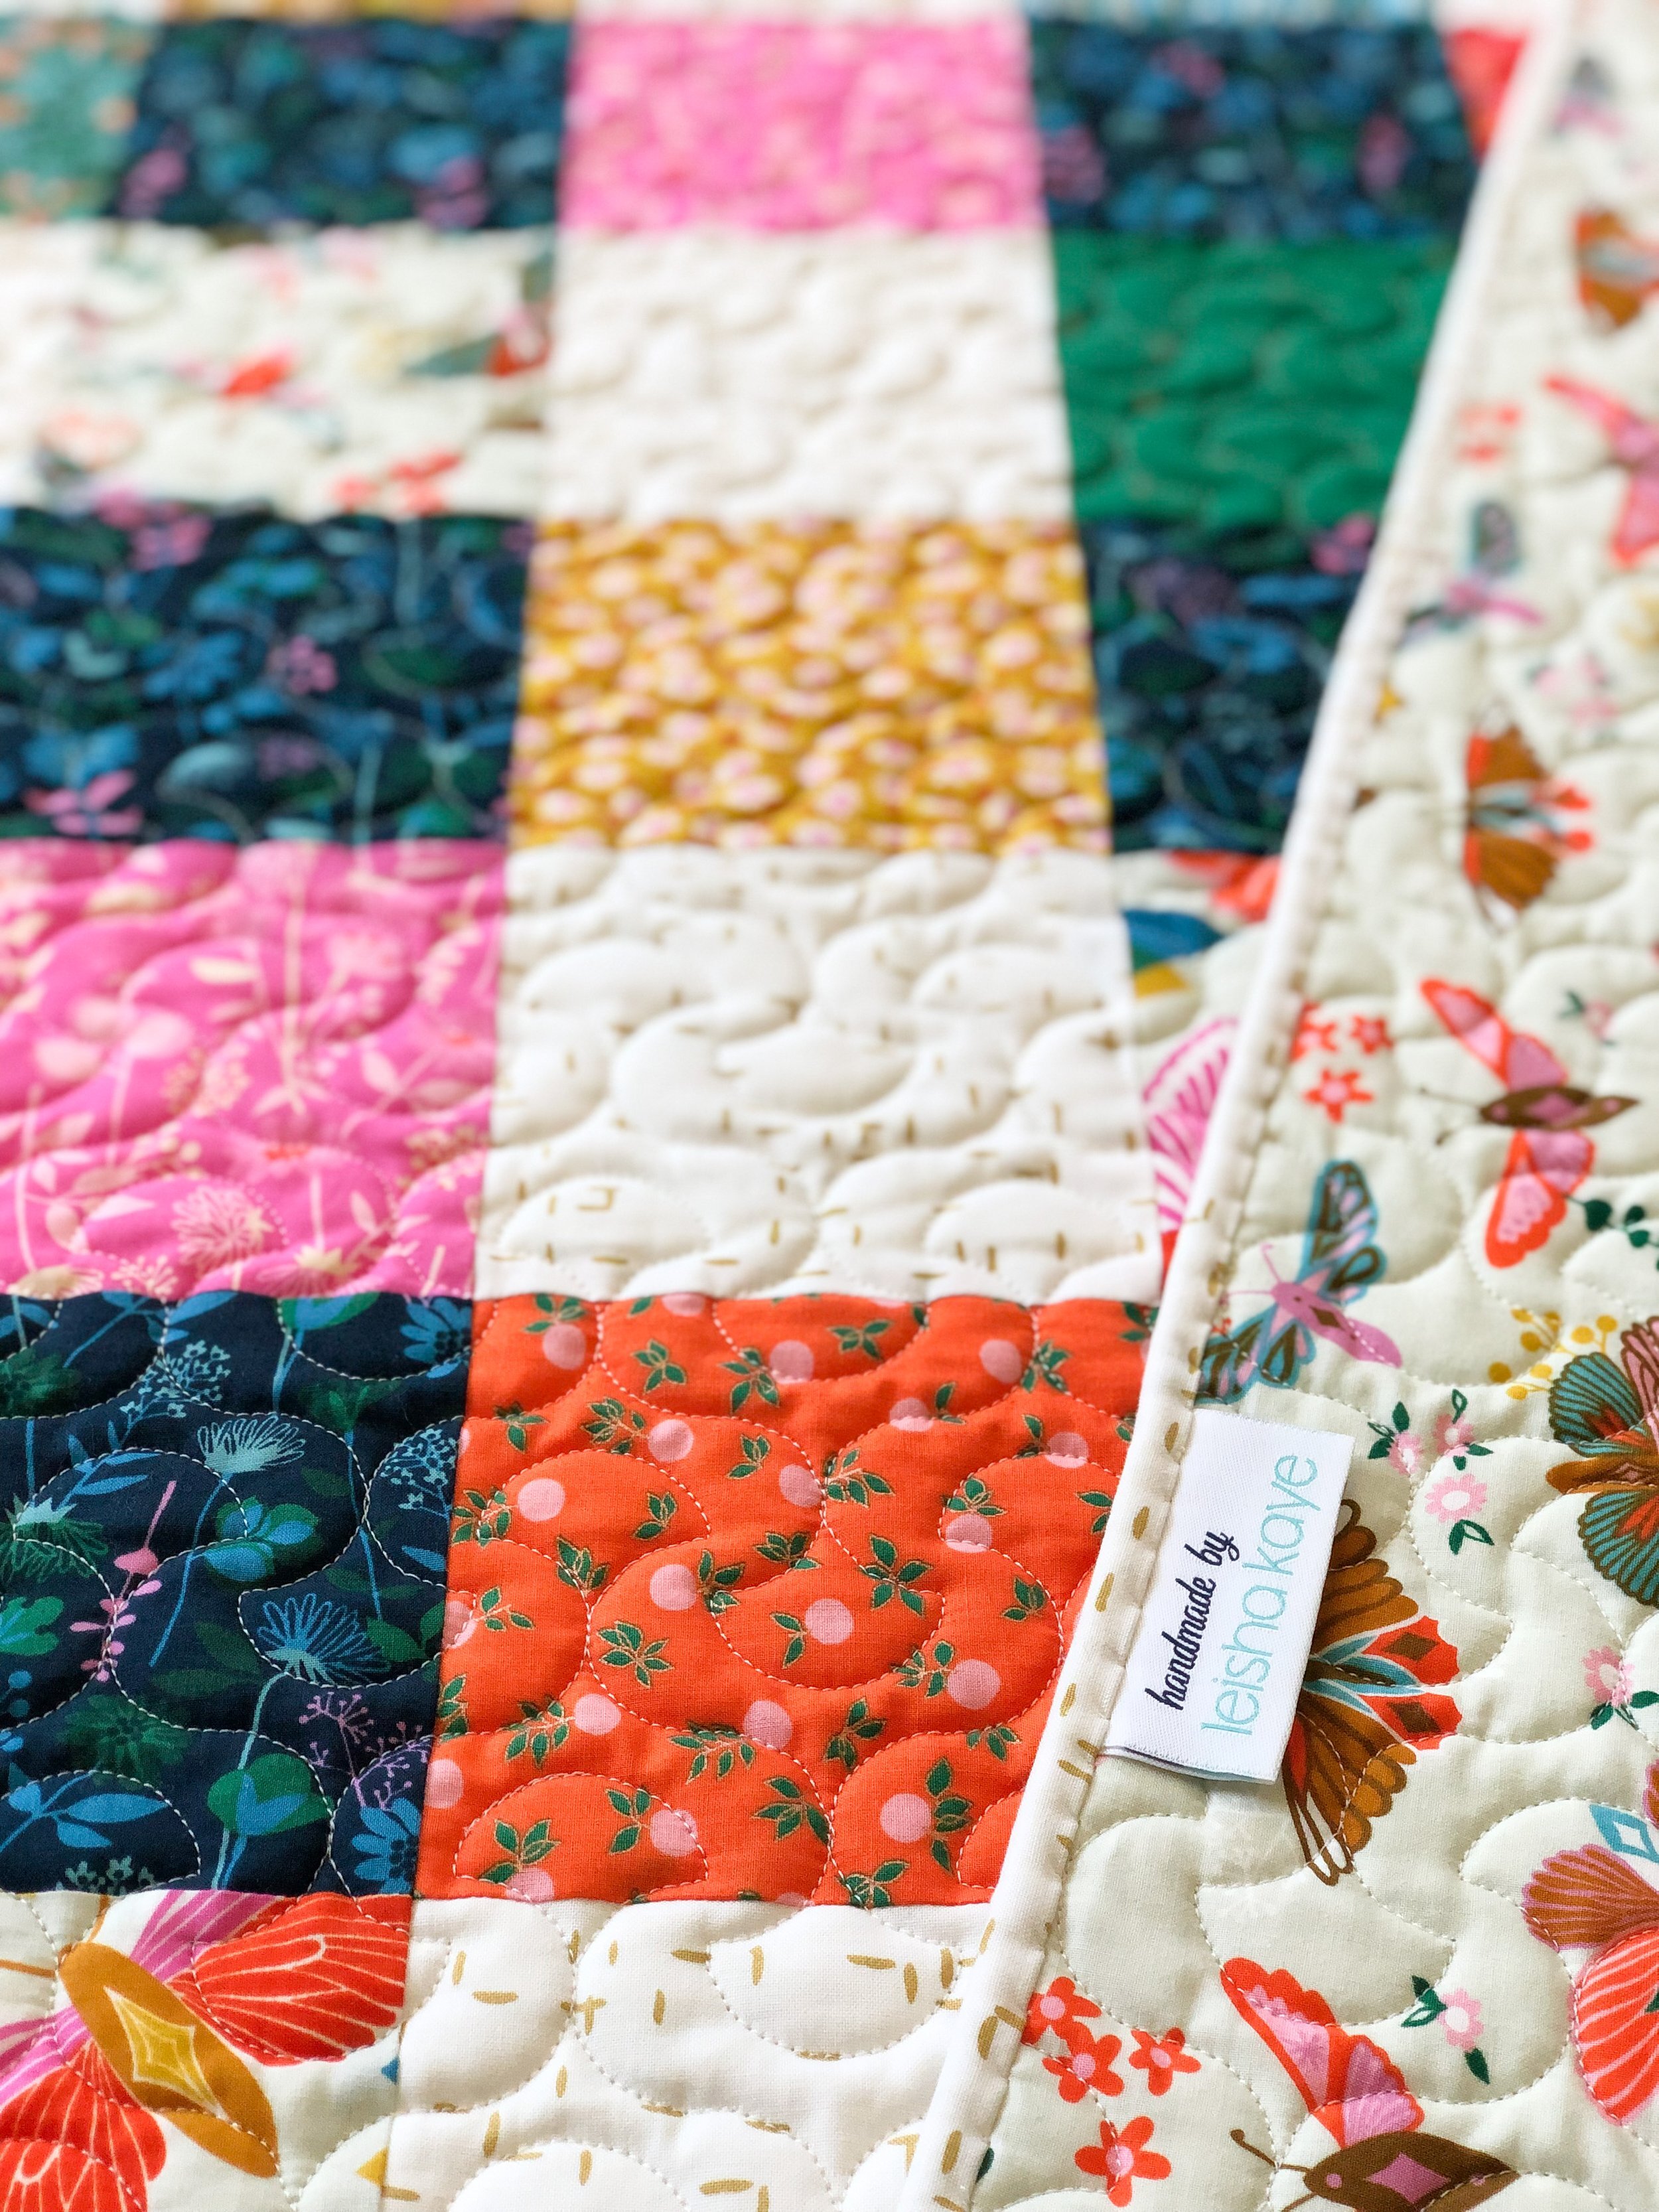
I love adding my little quilt labels to my projects. They were made by Custom Labels 4 U. Reach out to them, they are great to work with.
Here are a couple of progress pics. The one above is while it’s still on the longarm, and below is right before I started the hand binding…my favorite part.
Thanks for stopping by!! I hope you’re working on some fun projects. Take care, and happy sewing. - leisha

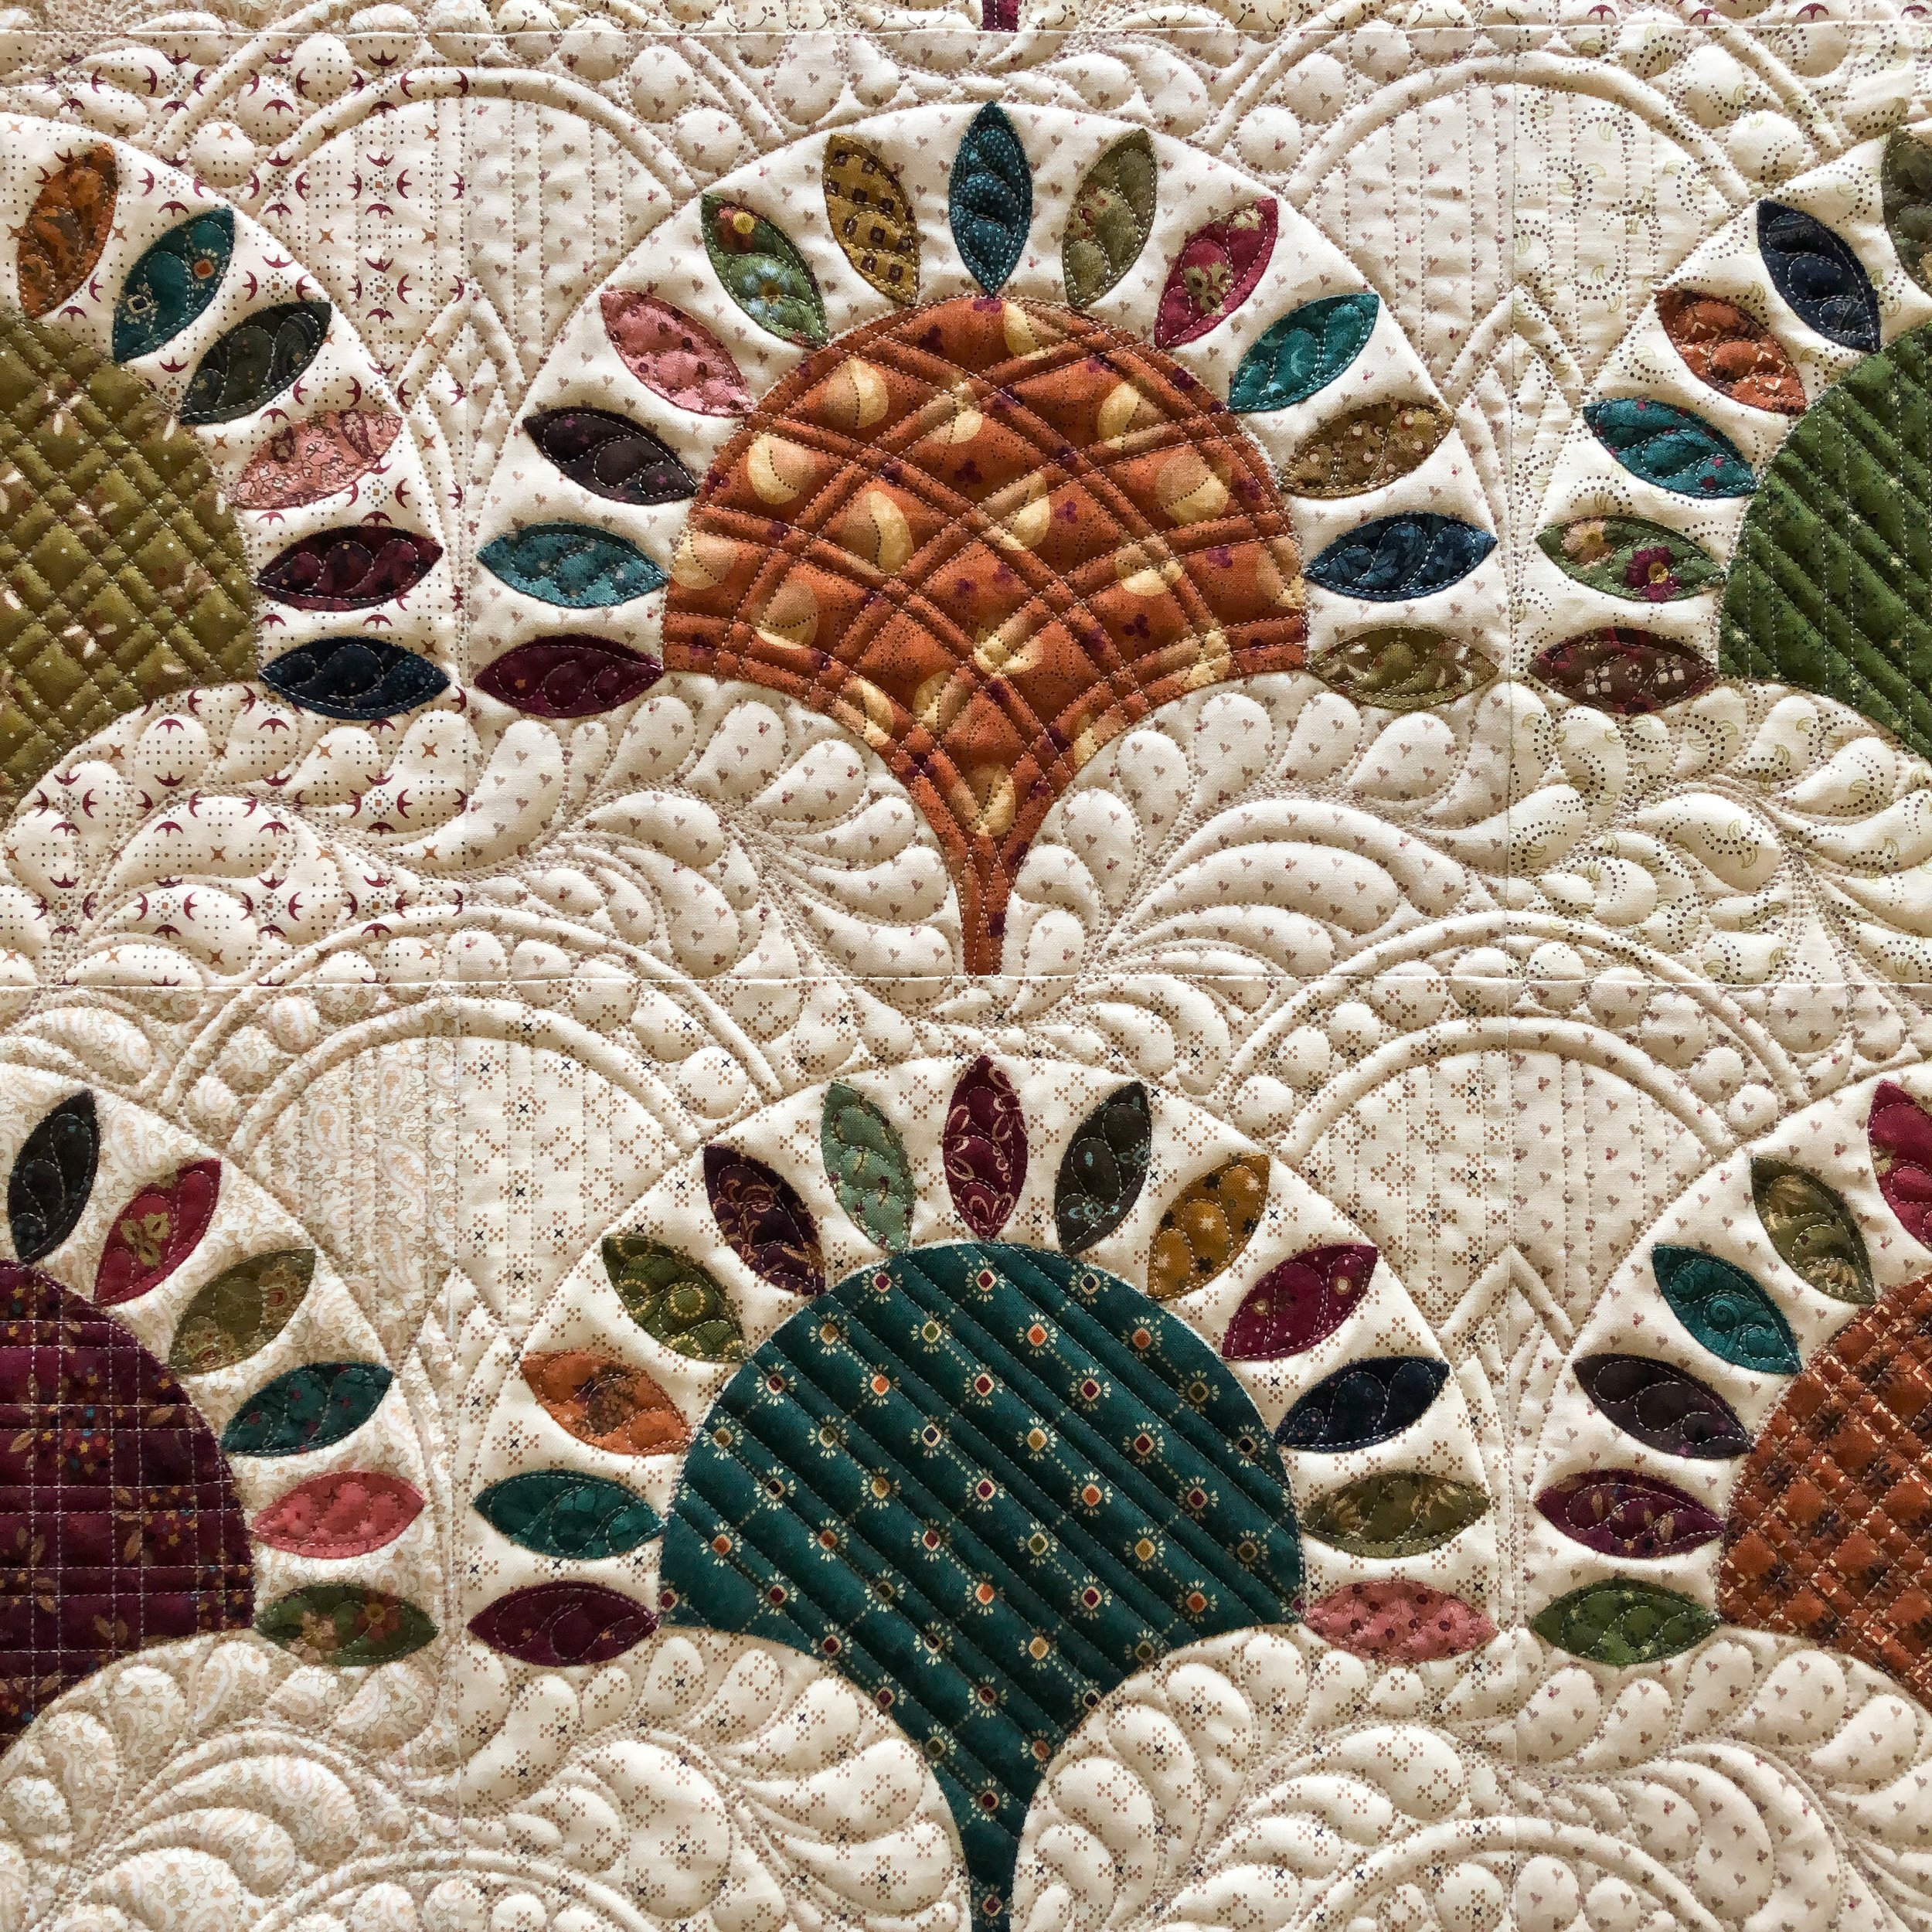
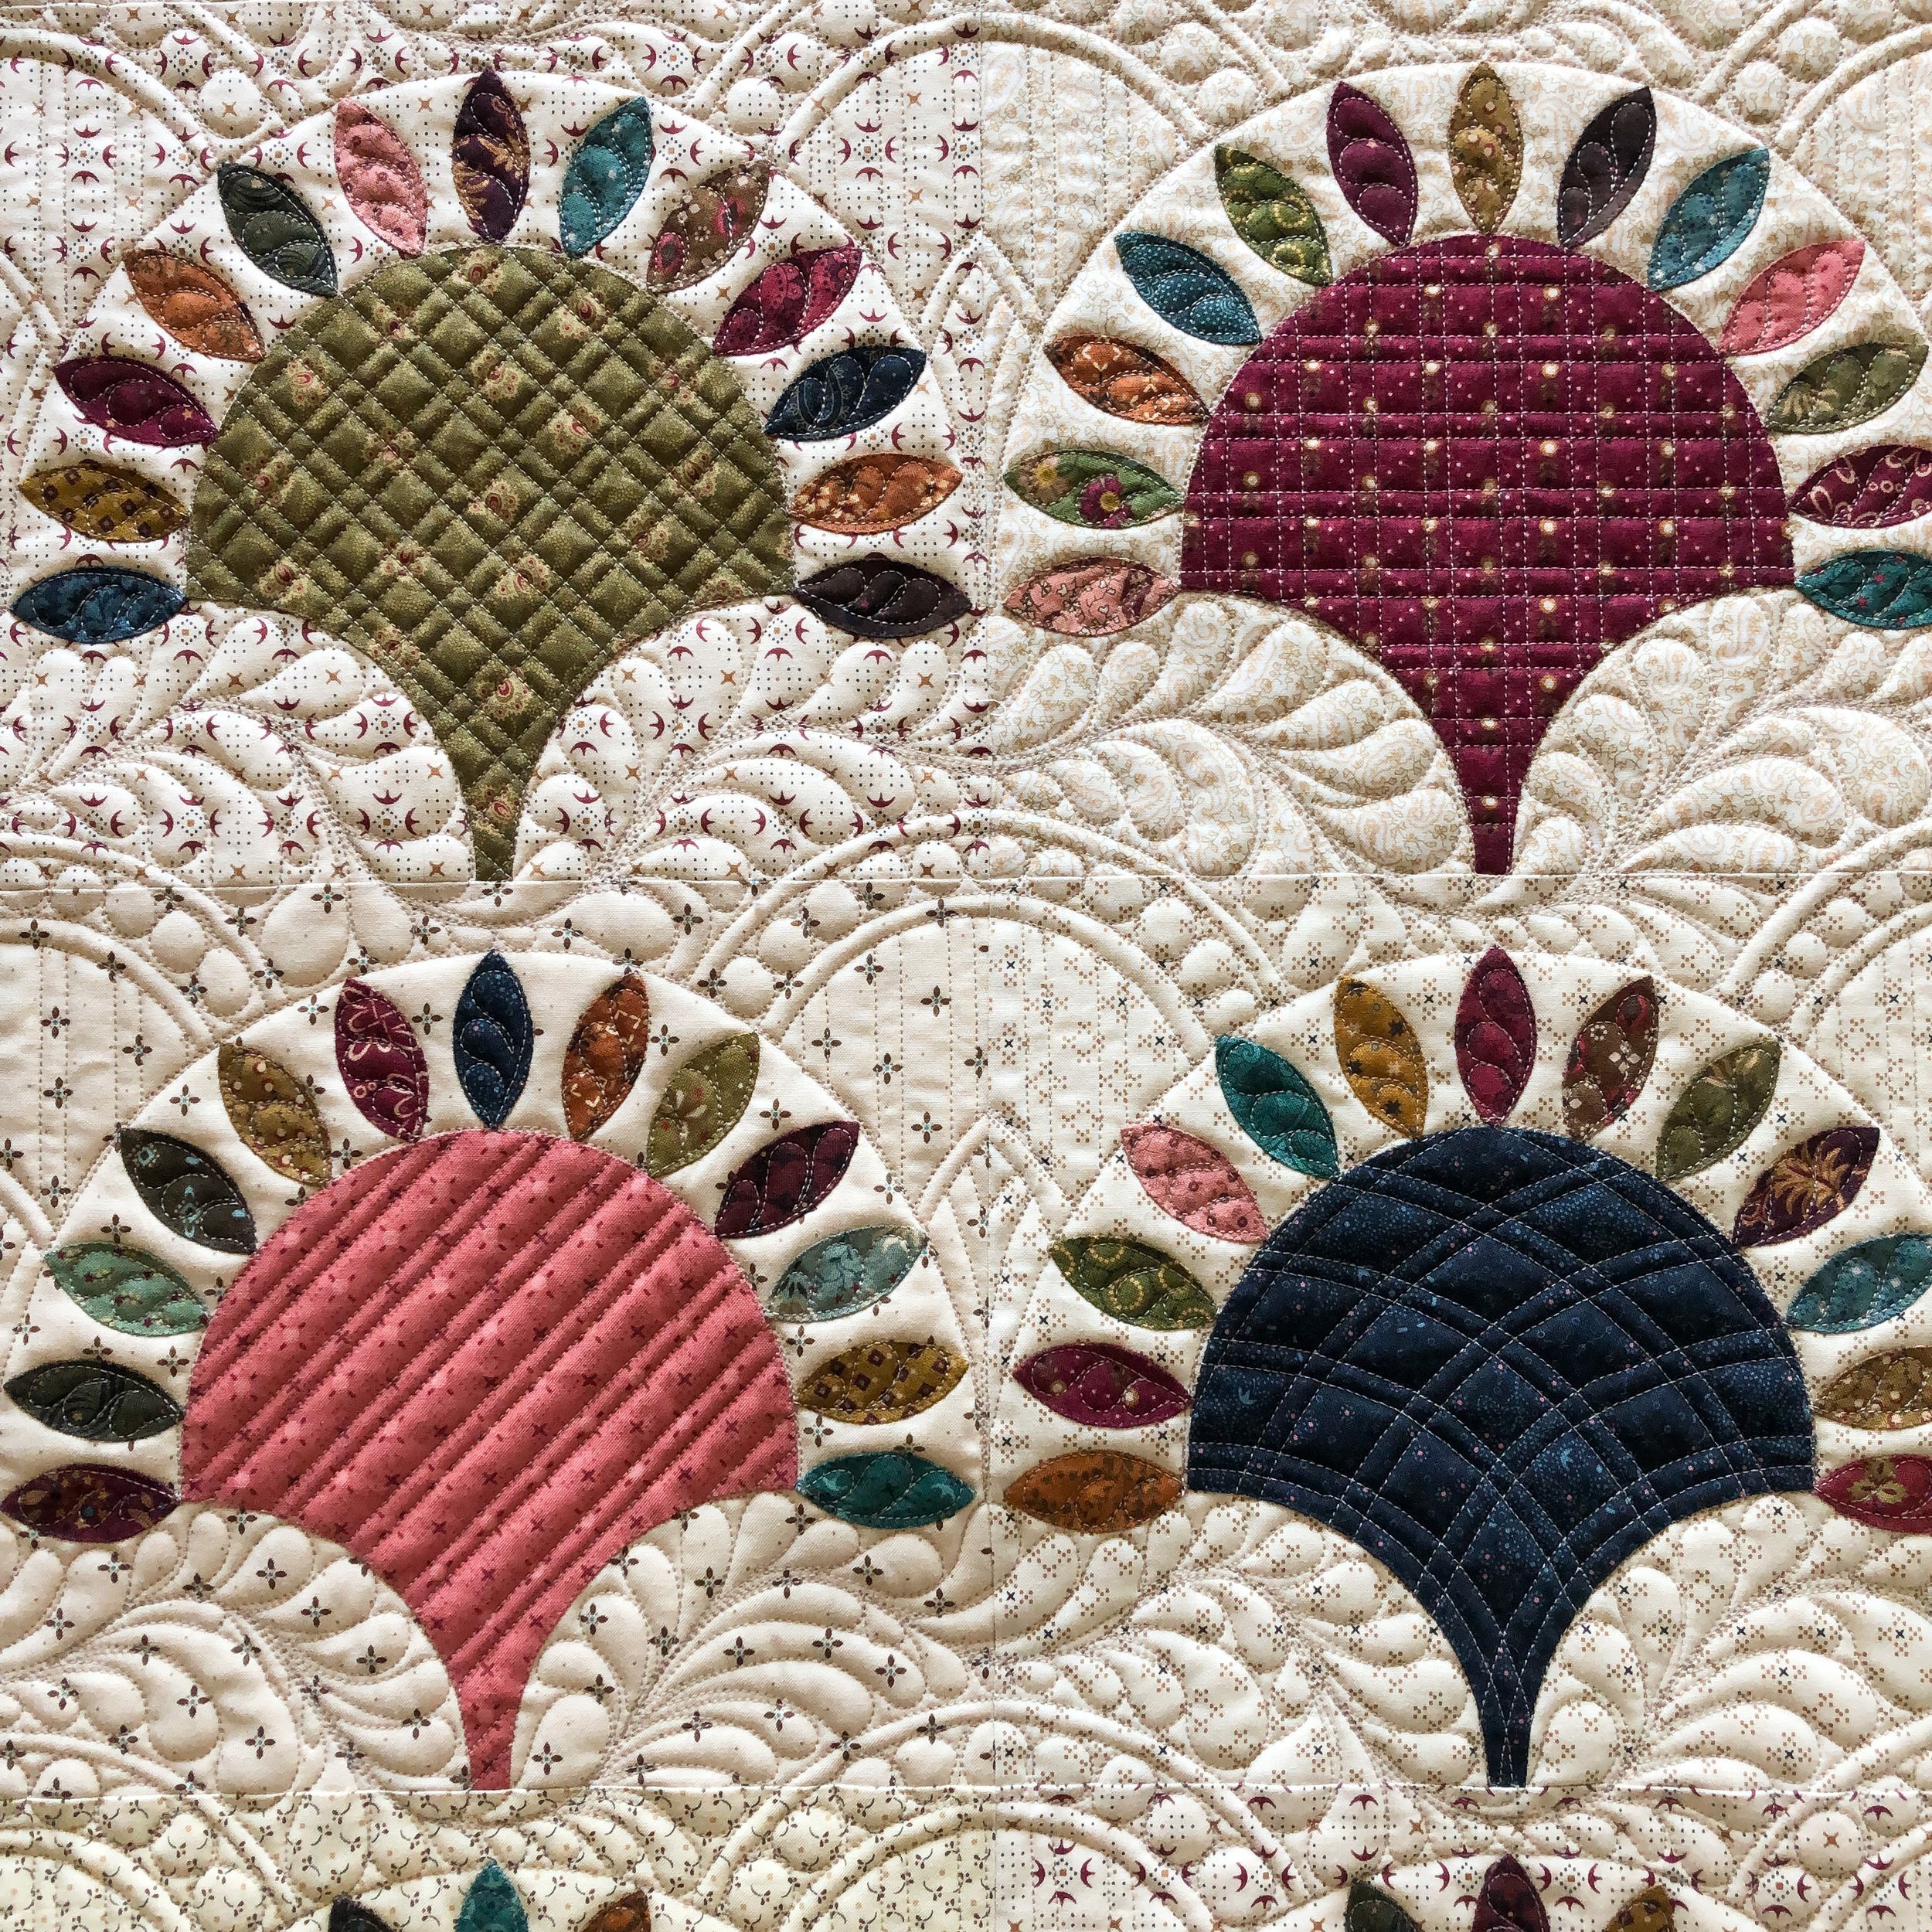
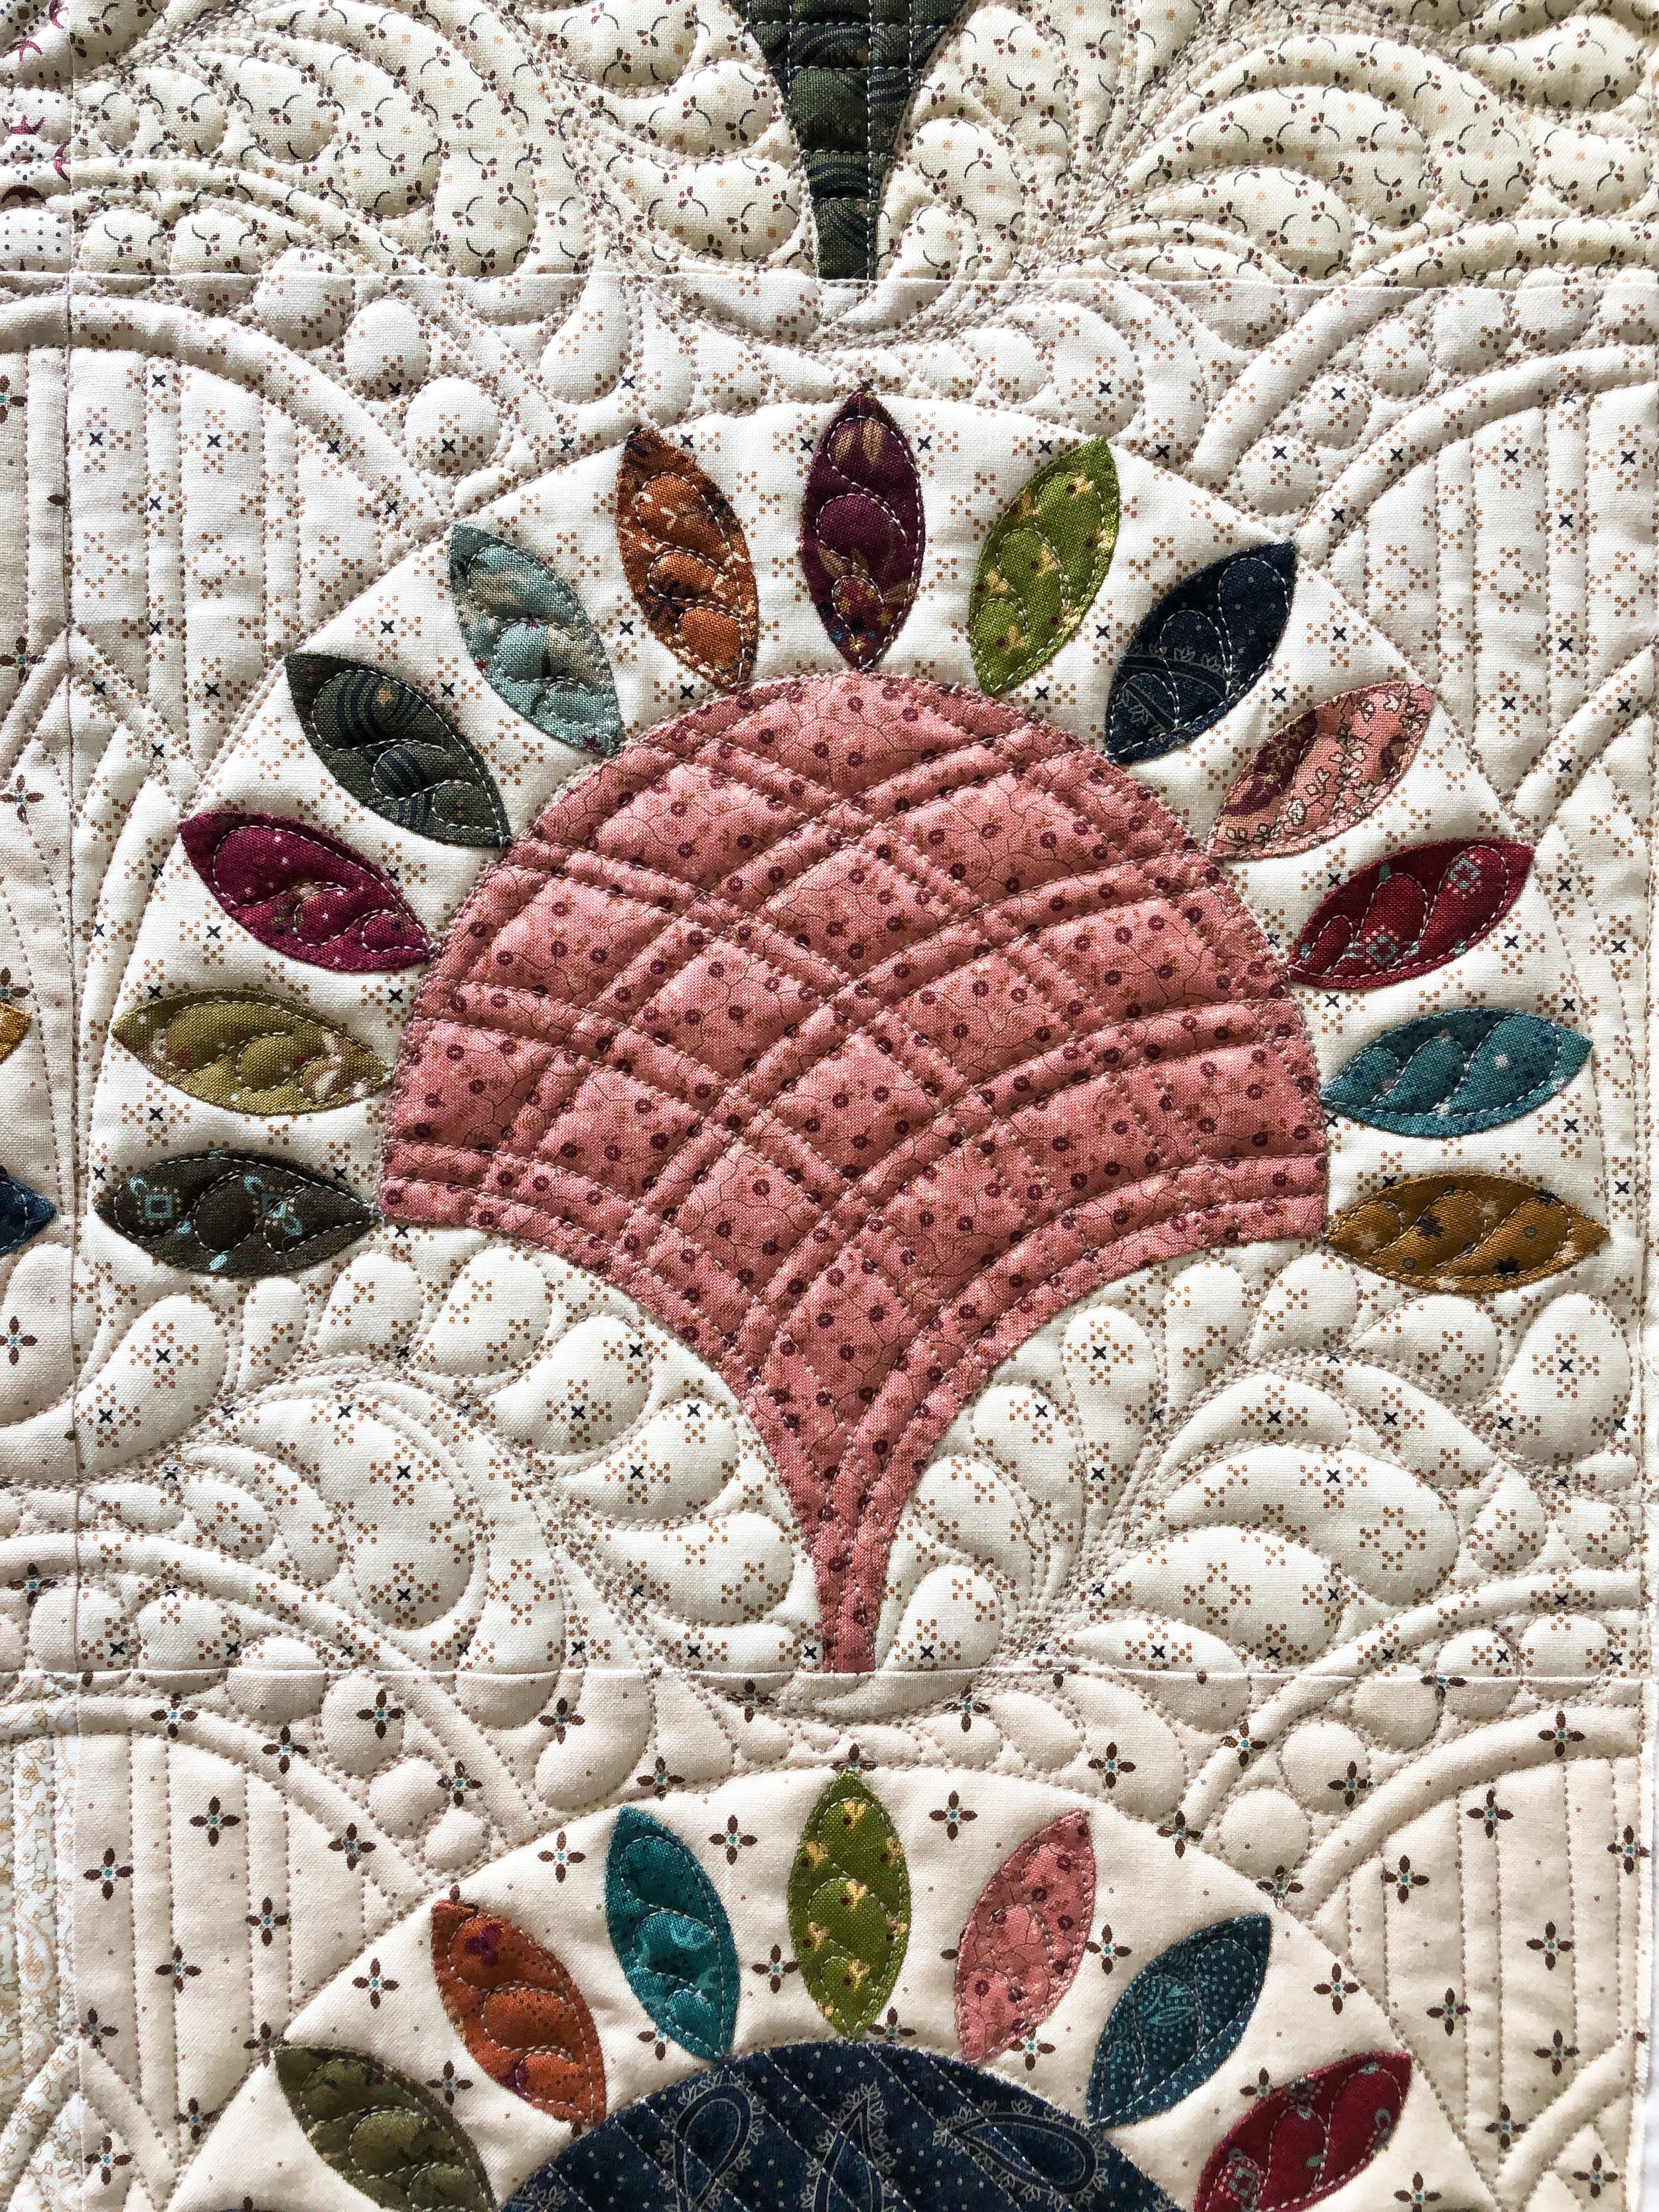
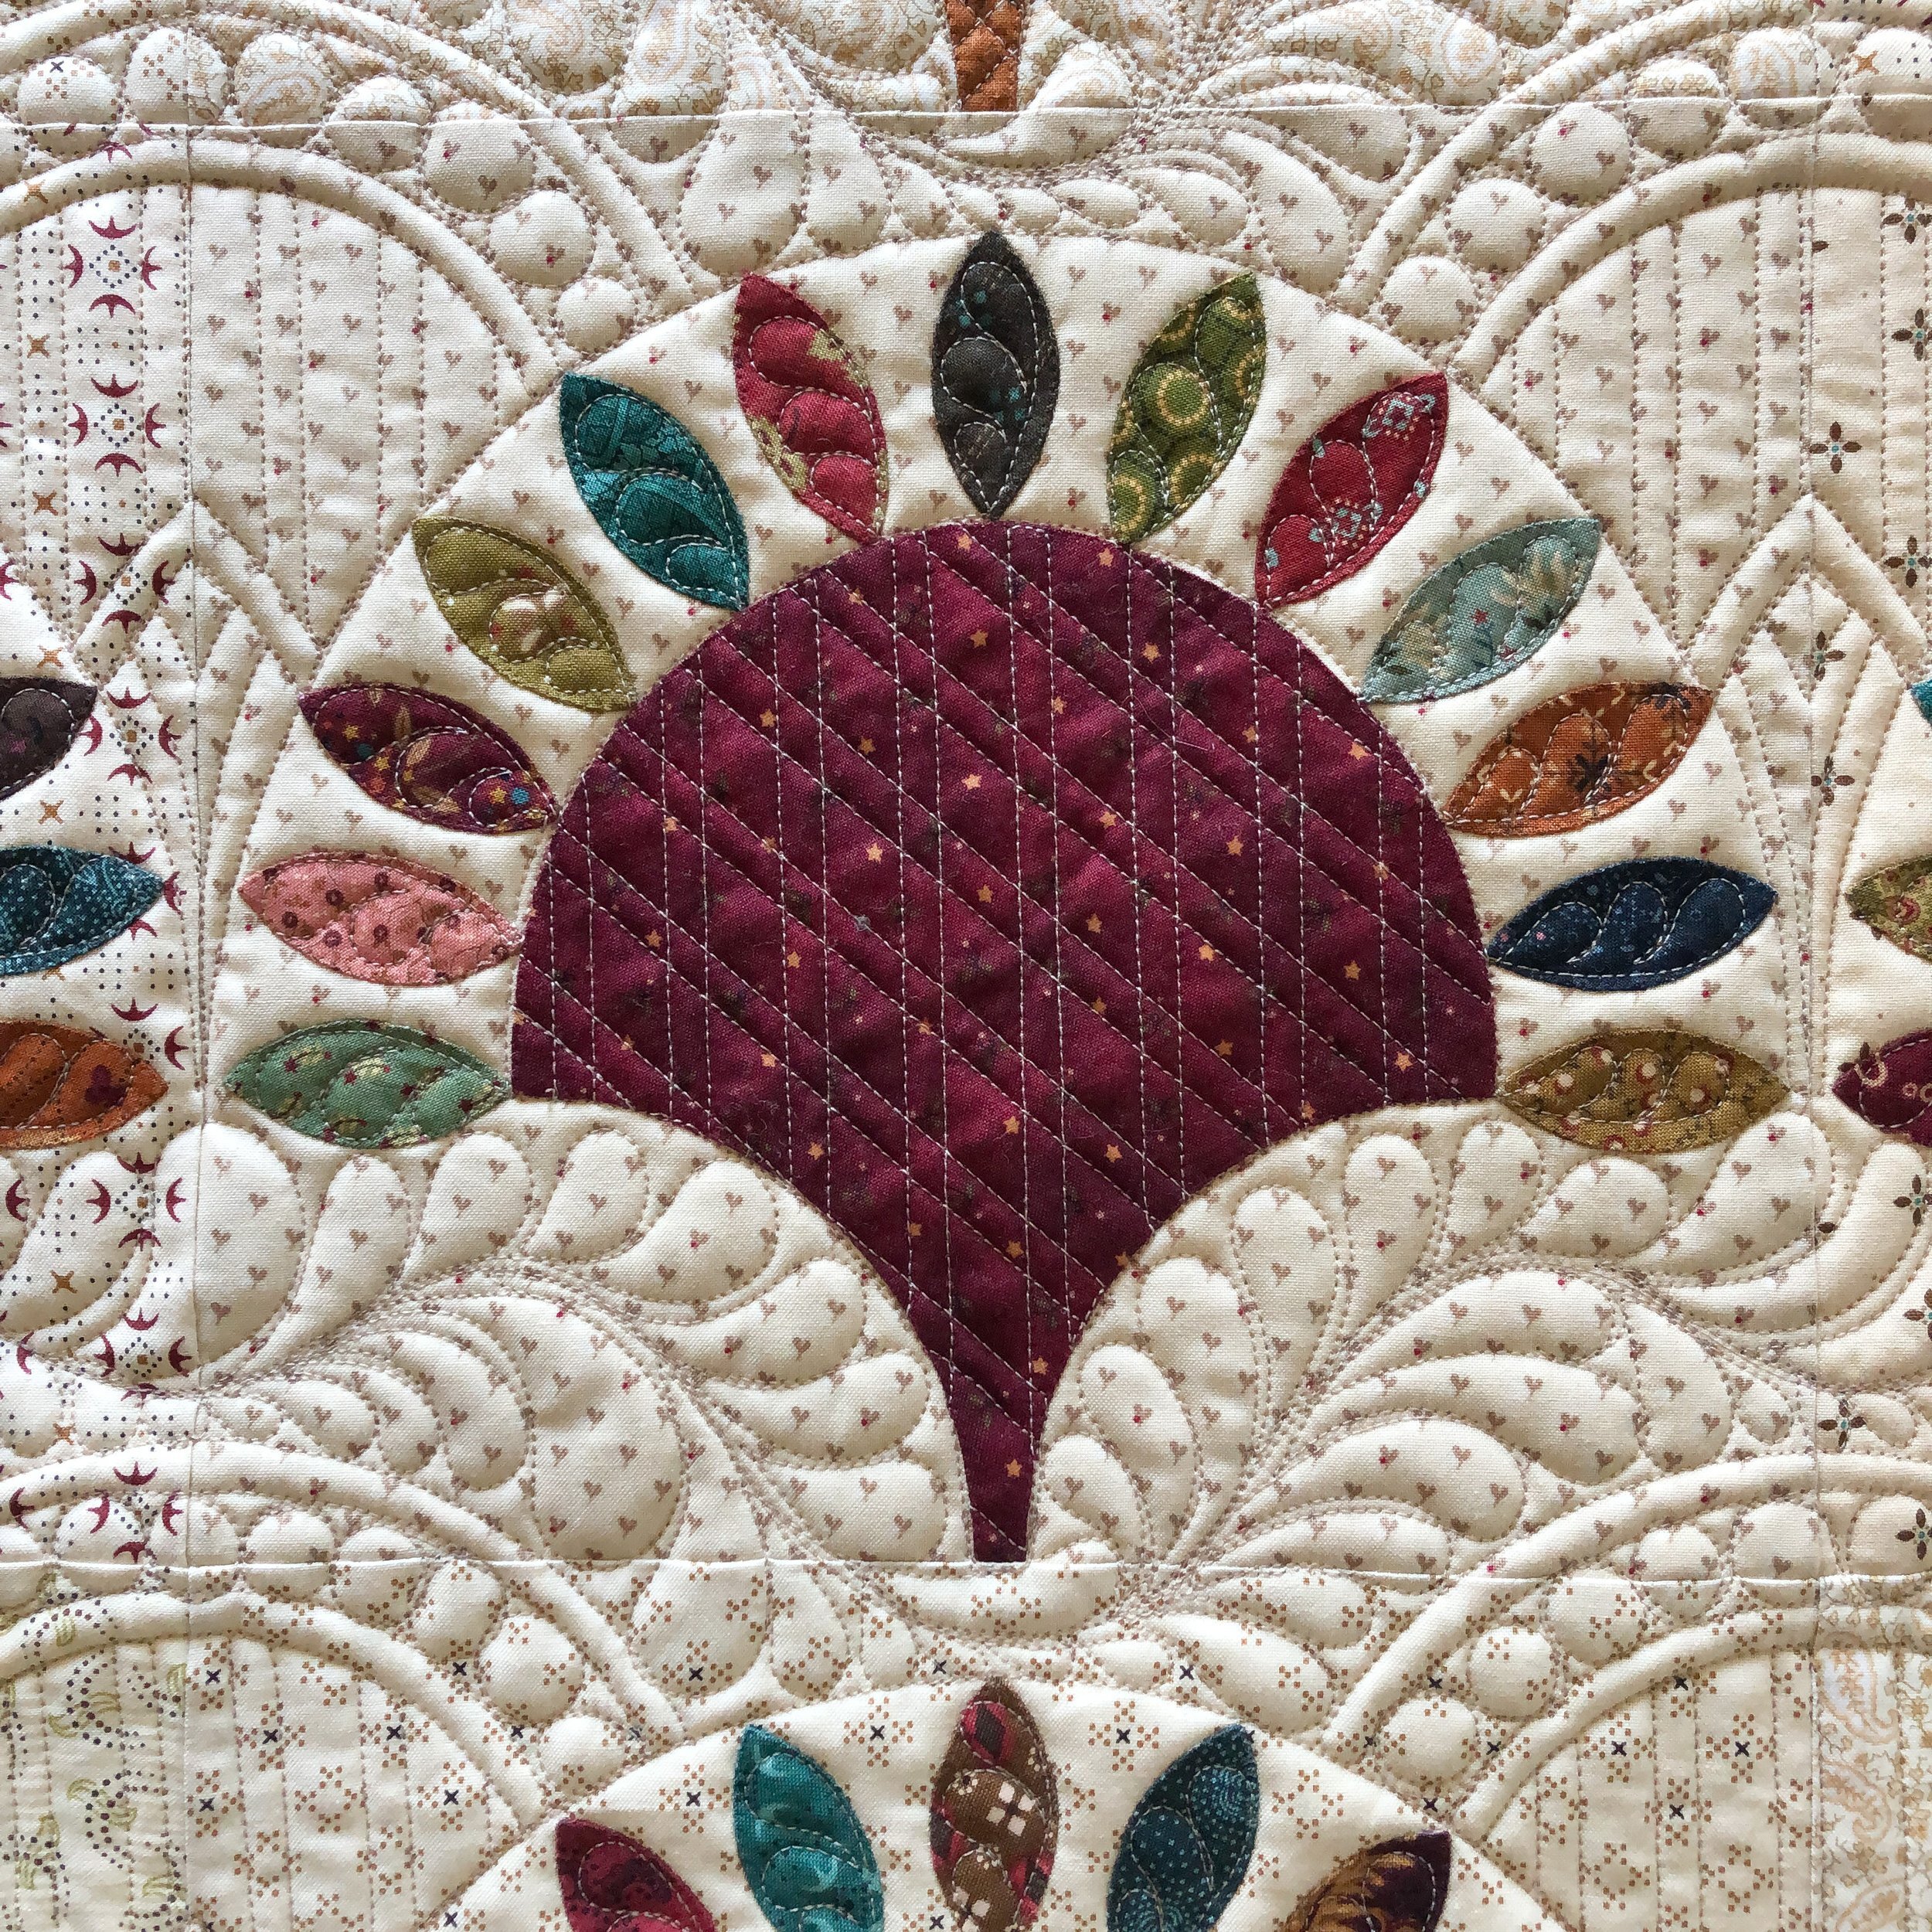
Susan’s “William Morris and Friends” Quilt
Hi Friends!!
Happy Monday! I hope your week is off to a great start. I have a gorgeous quilt to share with you!

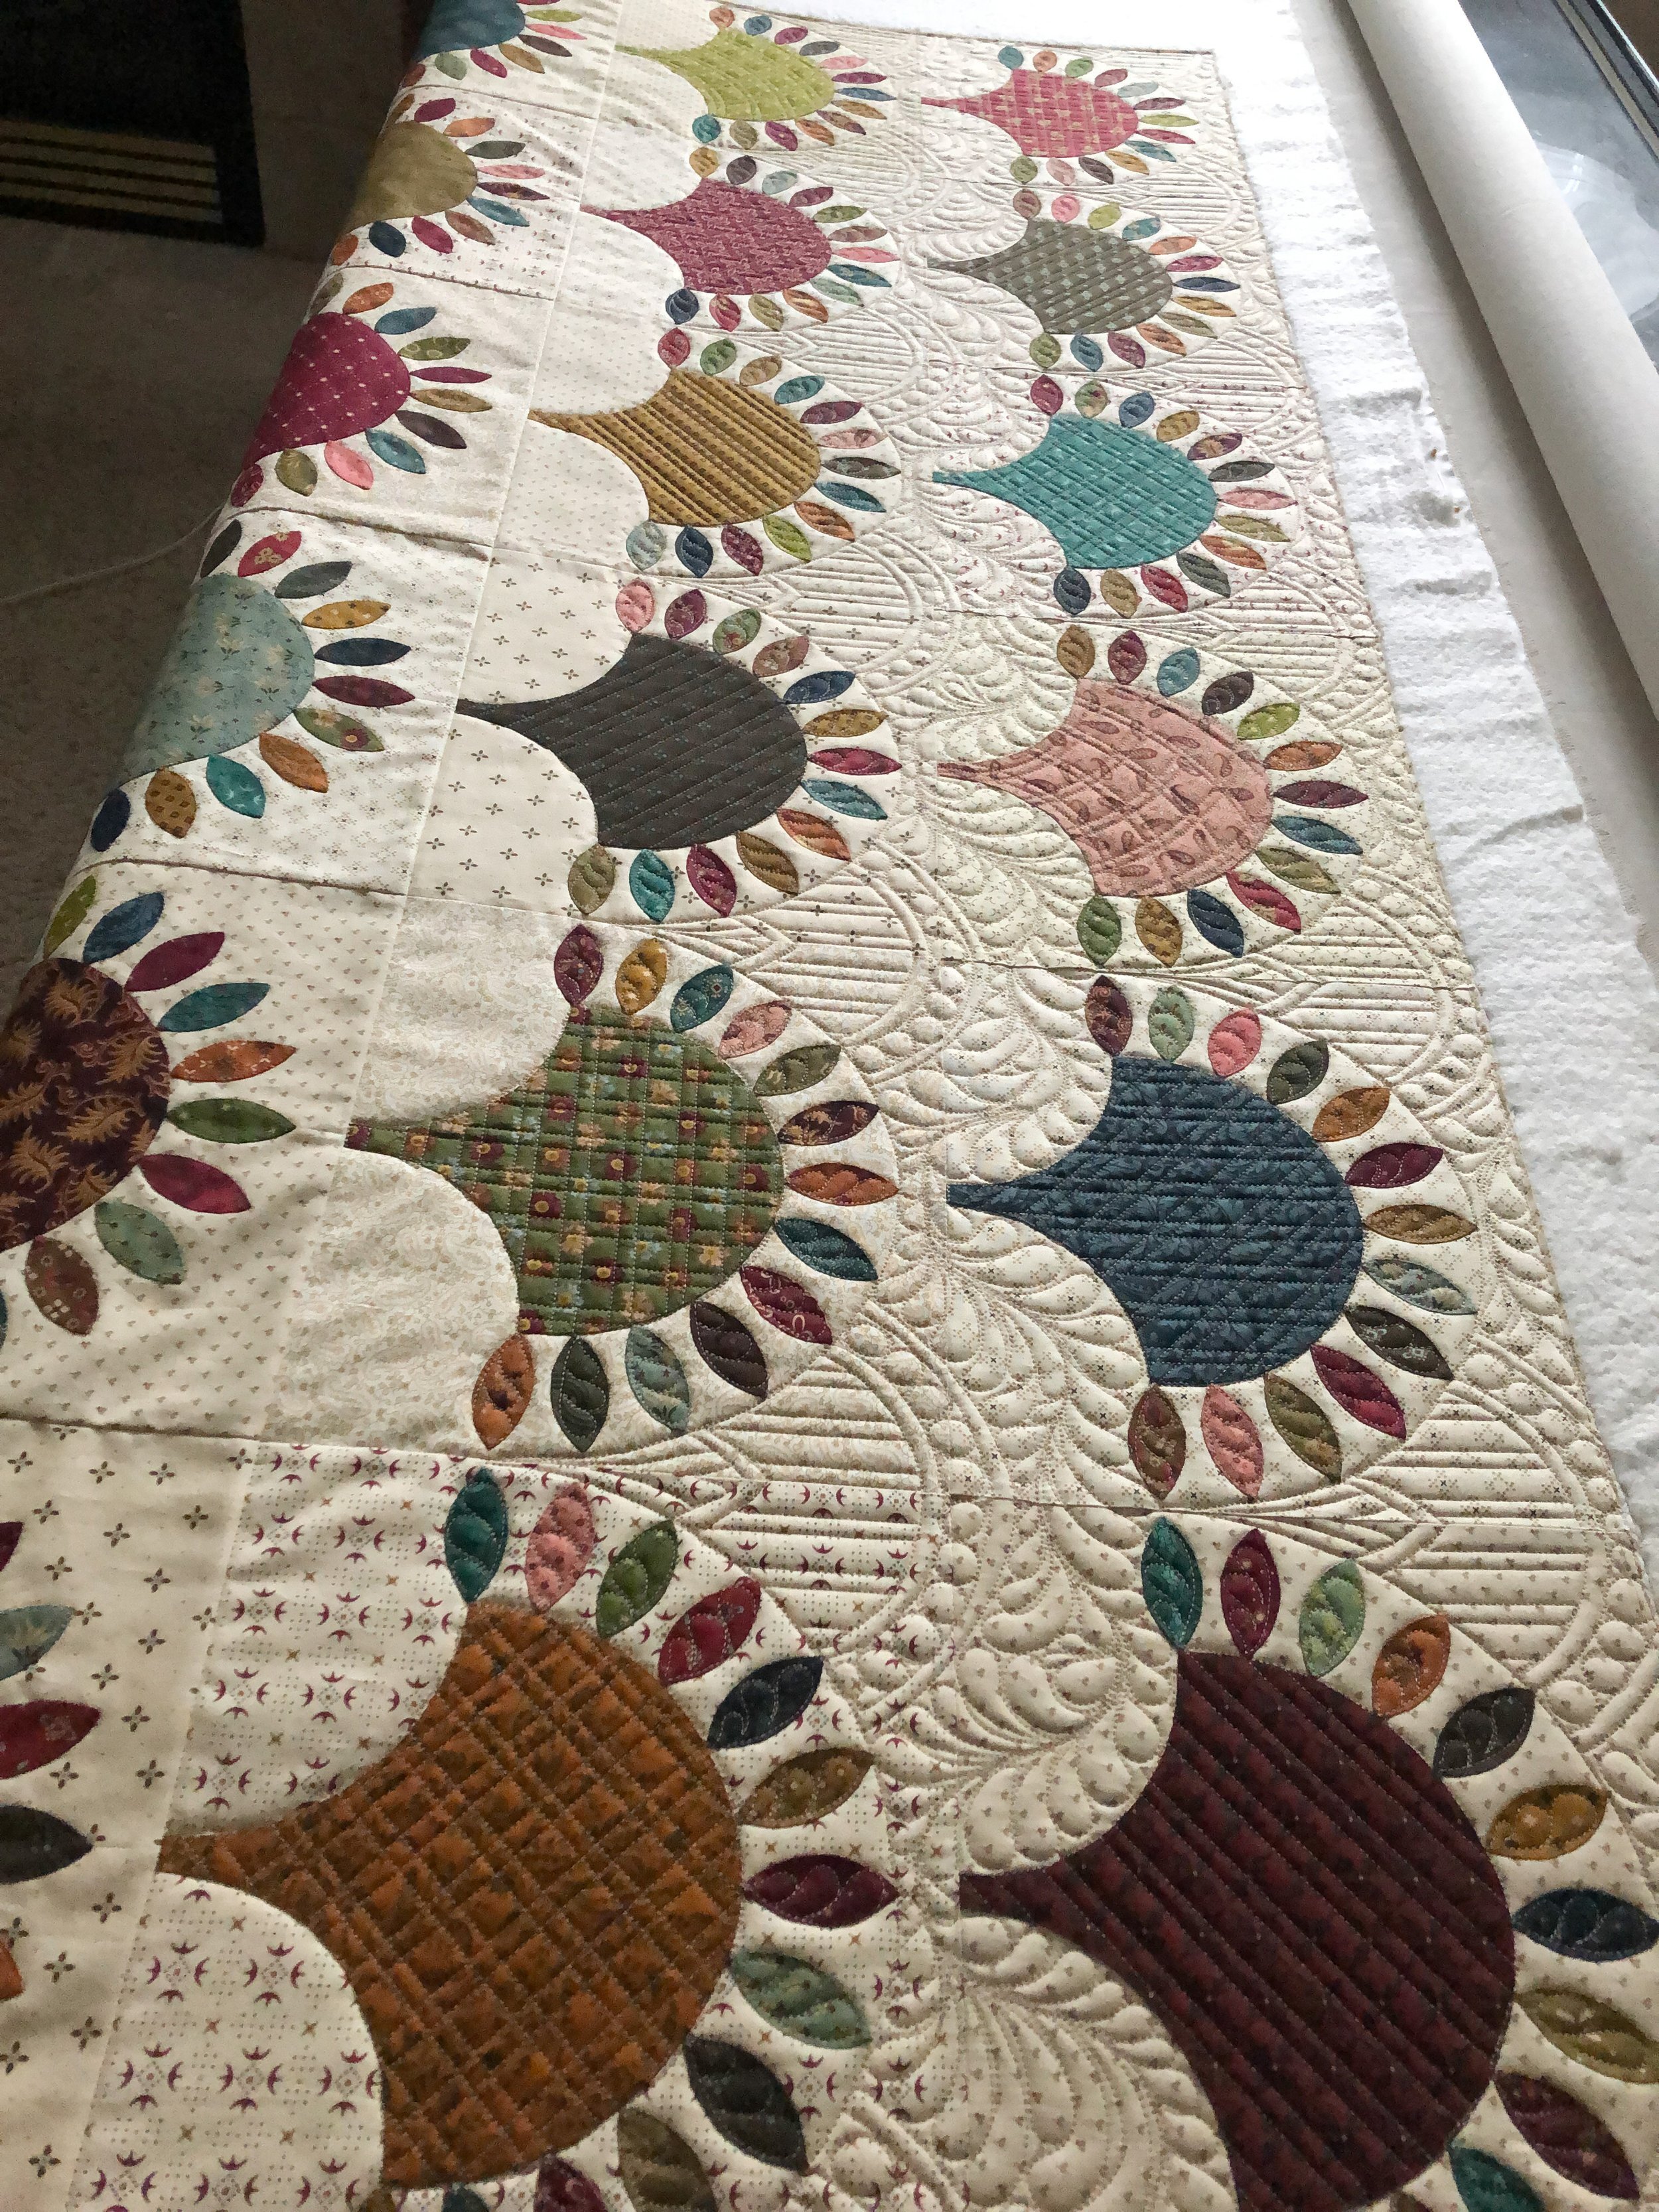
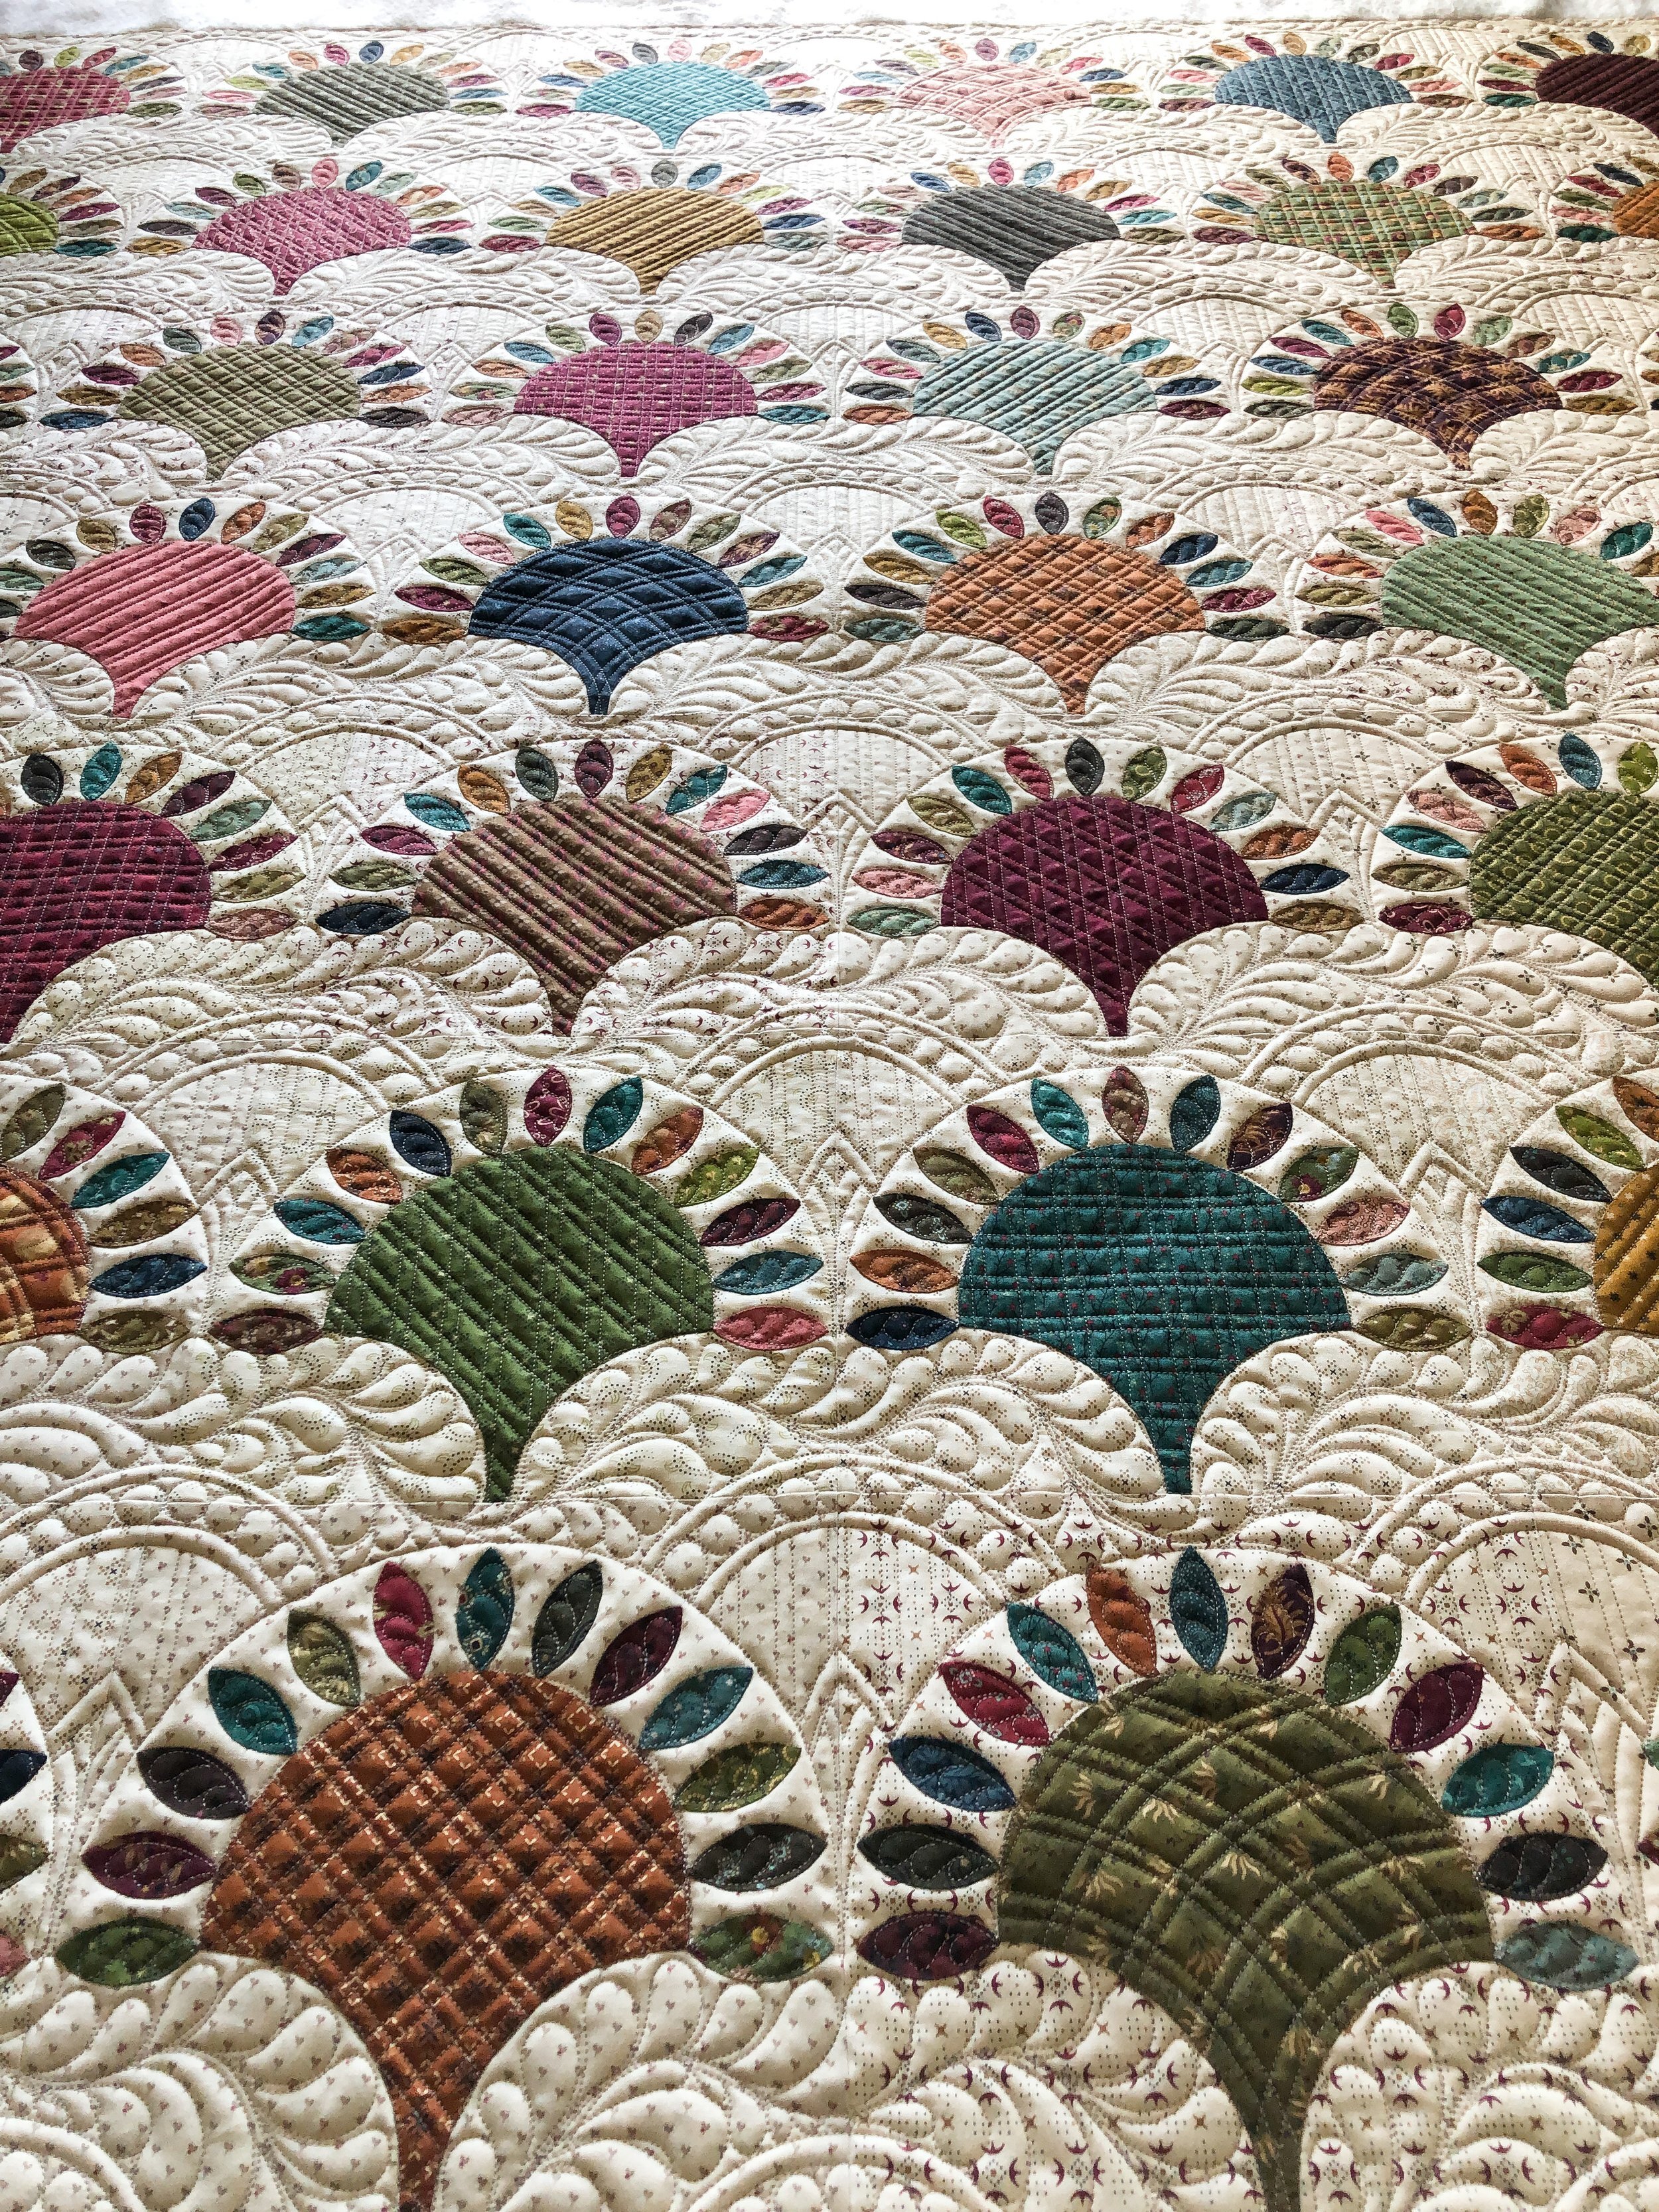
Susan is one of my sweet clients, who mails her quilt to me from the east coast. I’m located in northern Utah, and shipping quilts back and forth is easy peasy. The pattern for this quilt is called William Morris and Friends by Michele Hill, and is in one of her books. Susan made a simplified version of the quilt.

I used 8020 cotton poly blend batting from Winline Textiles out of Ogden Utah and natural white Omni thread from Superior Threads.

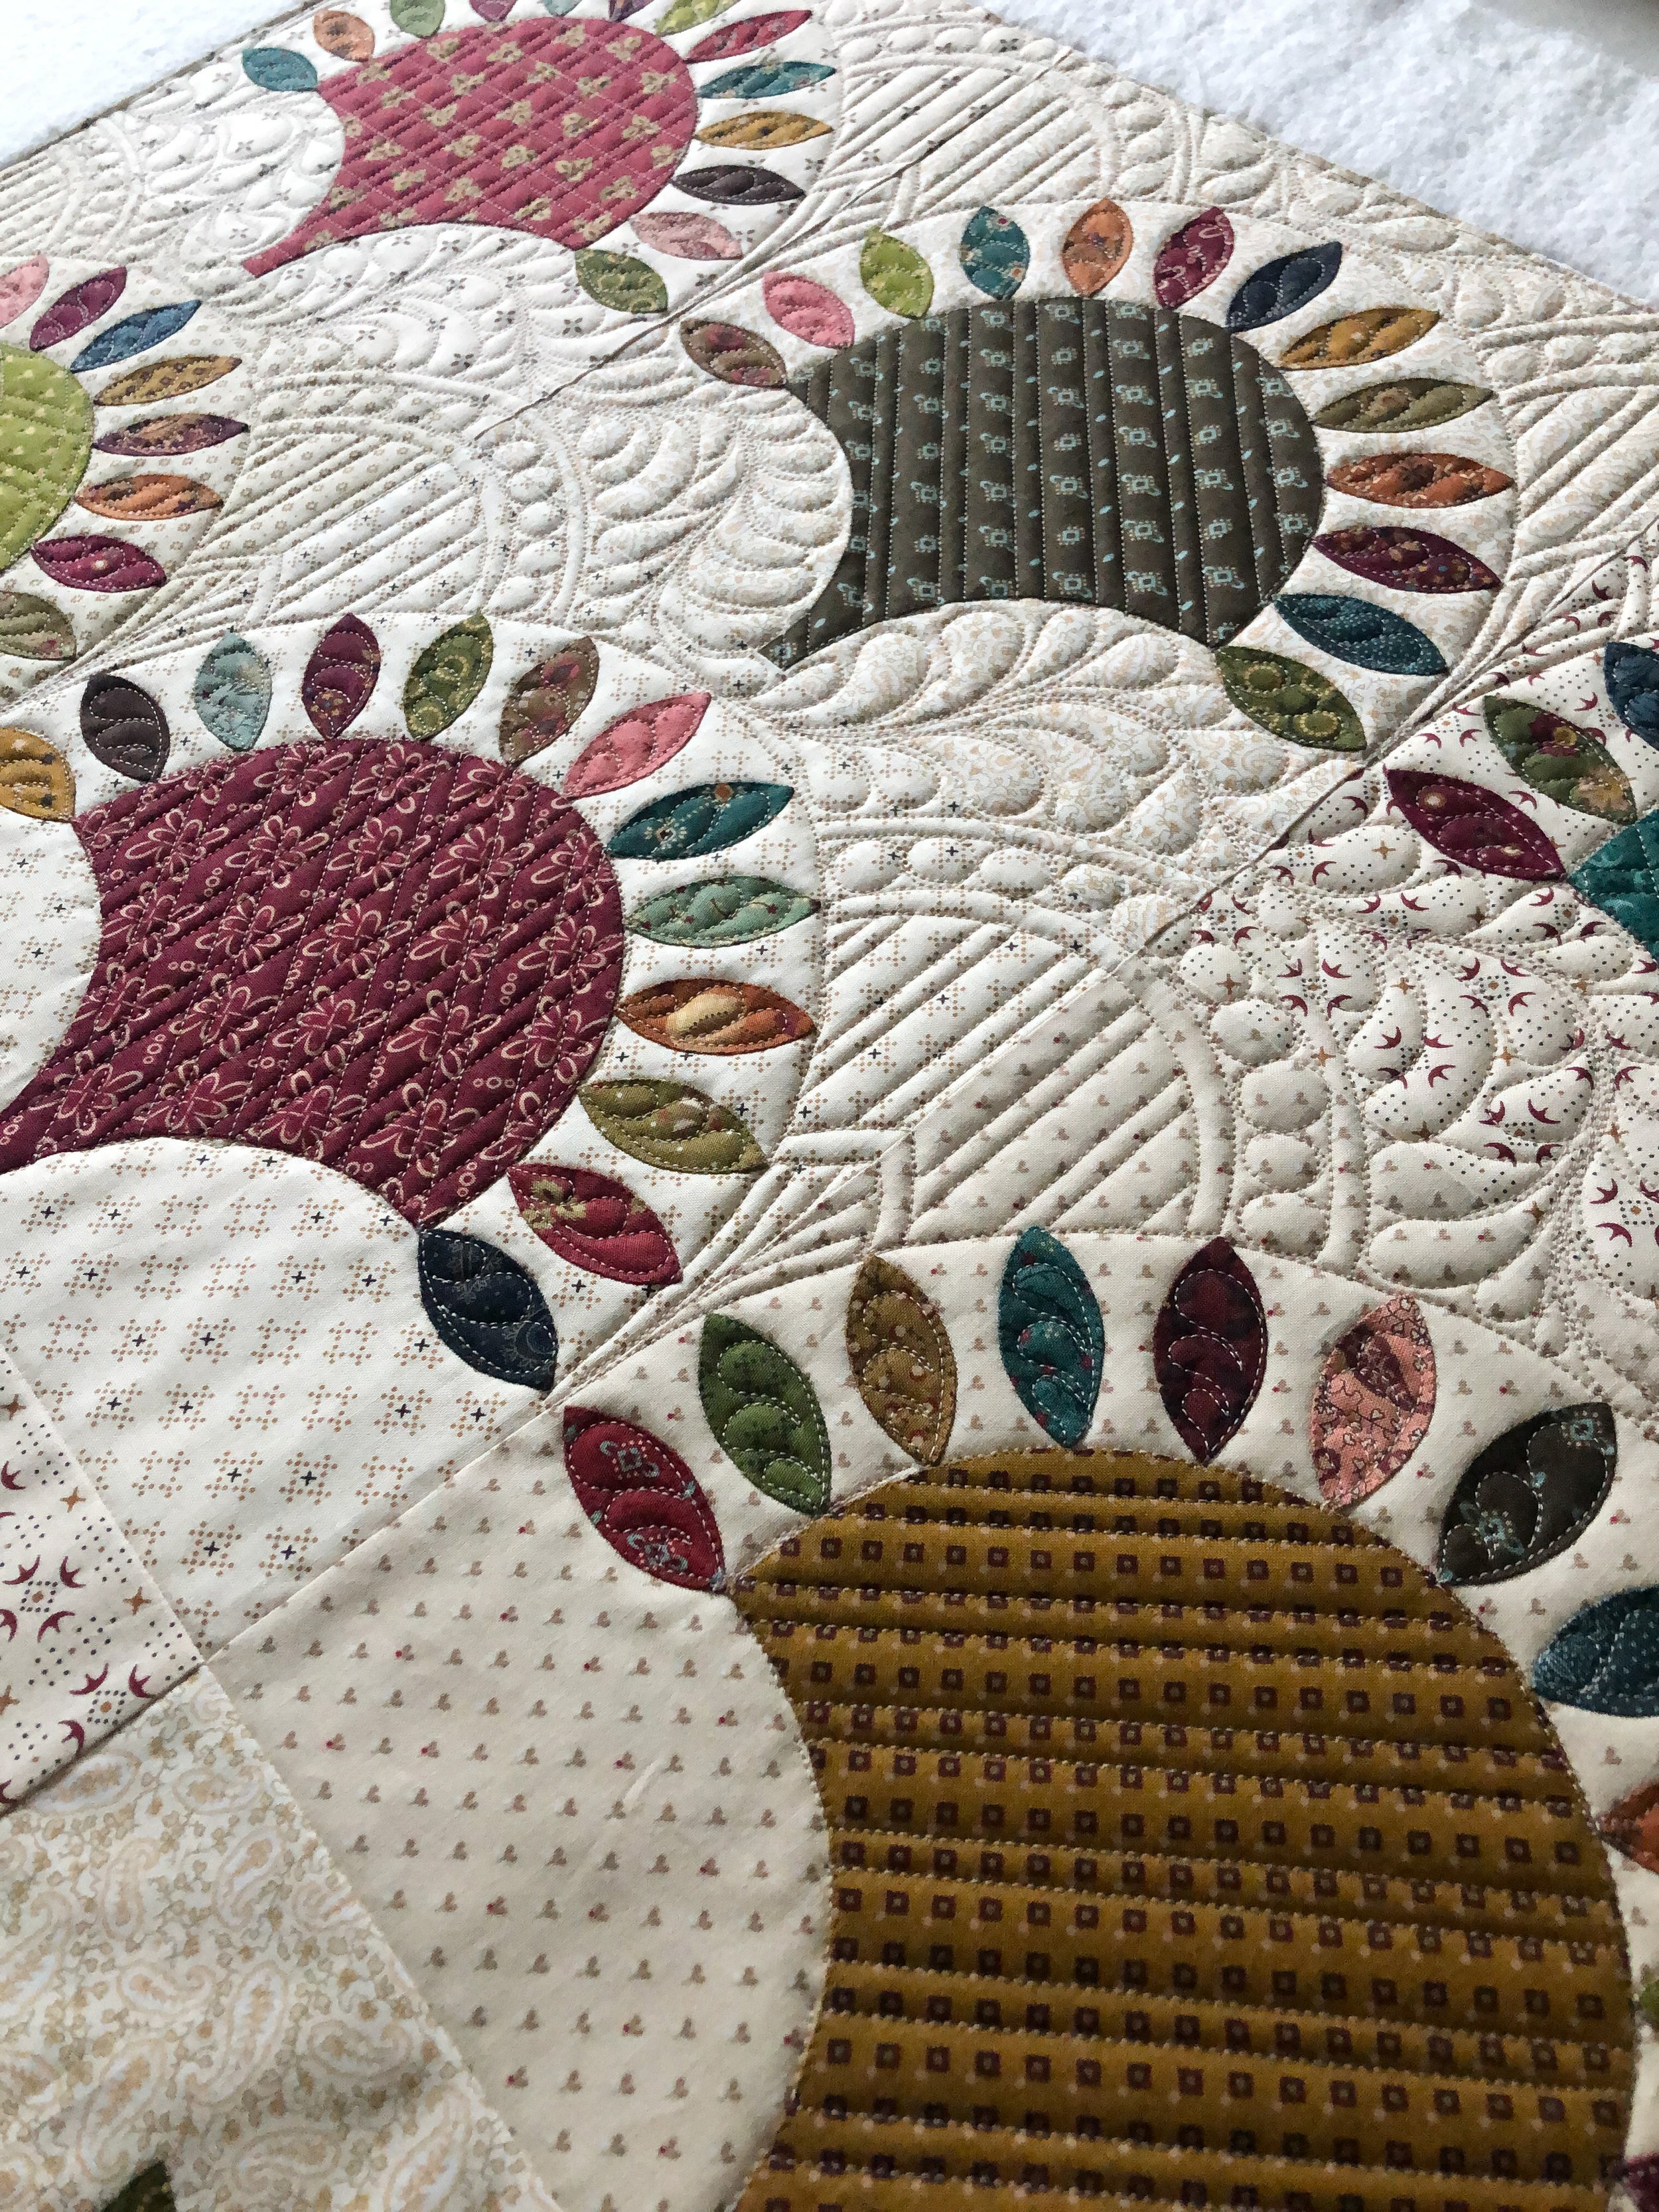
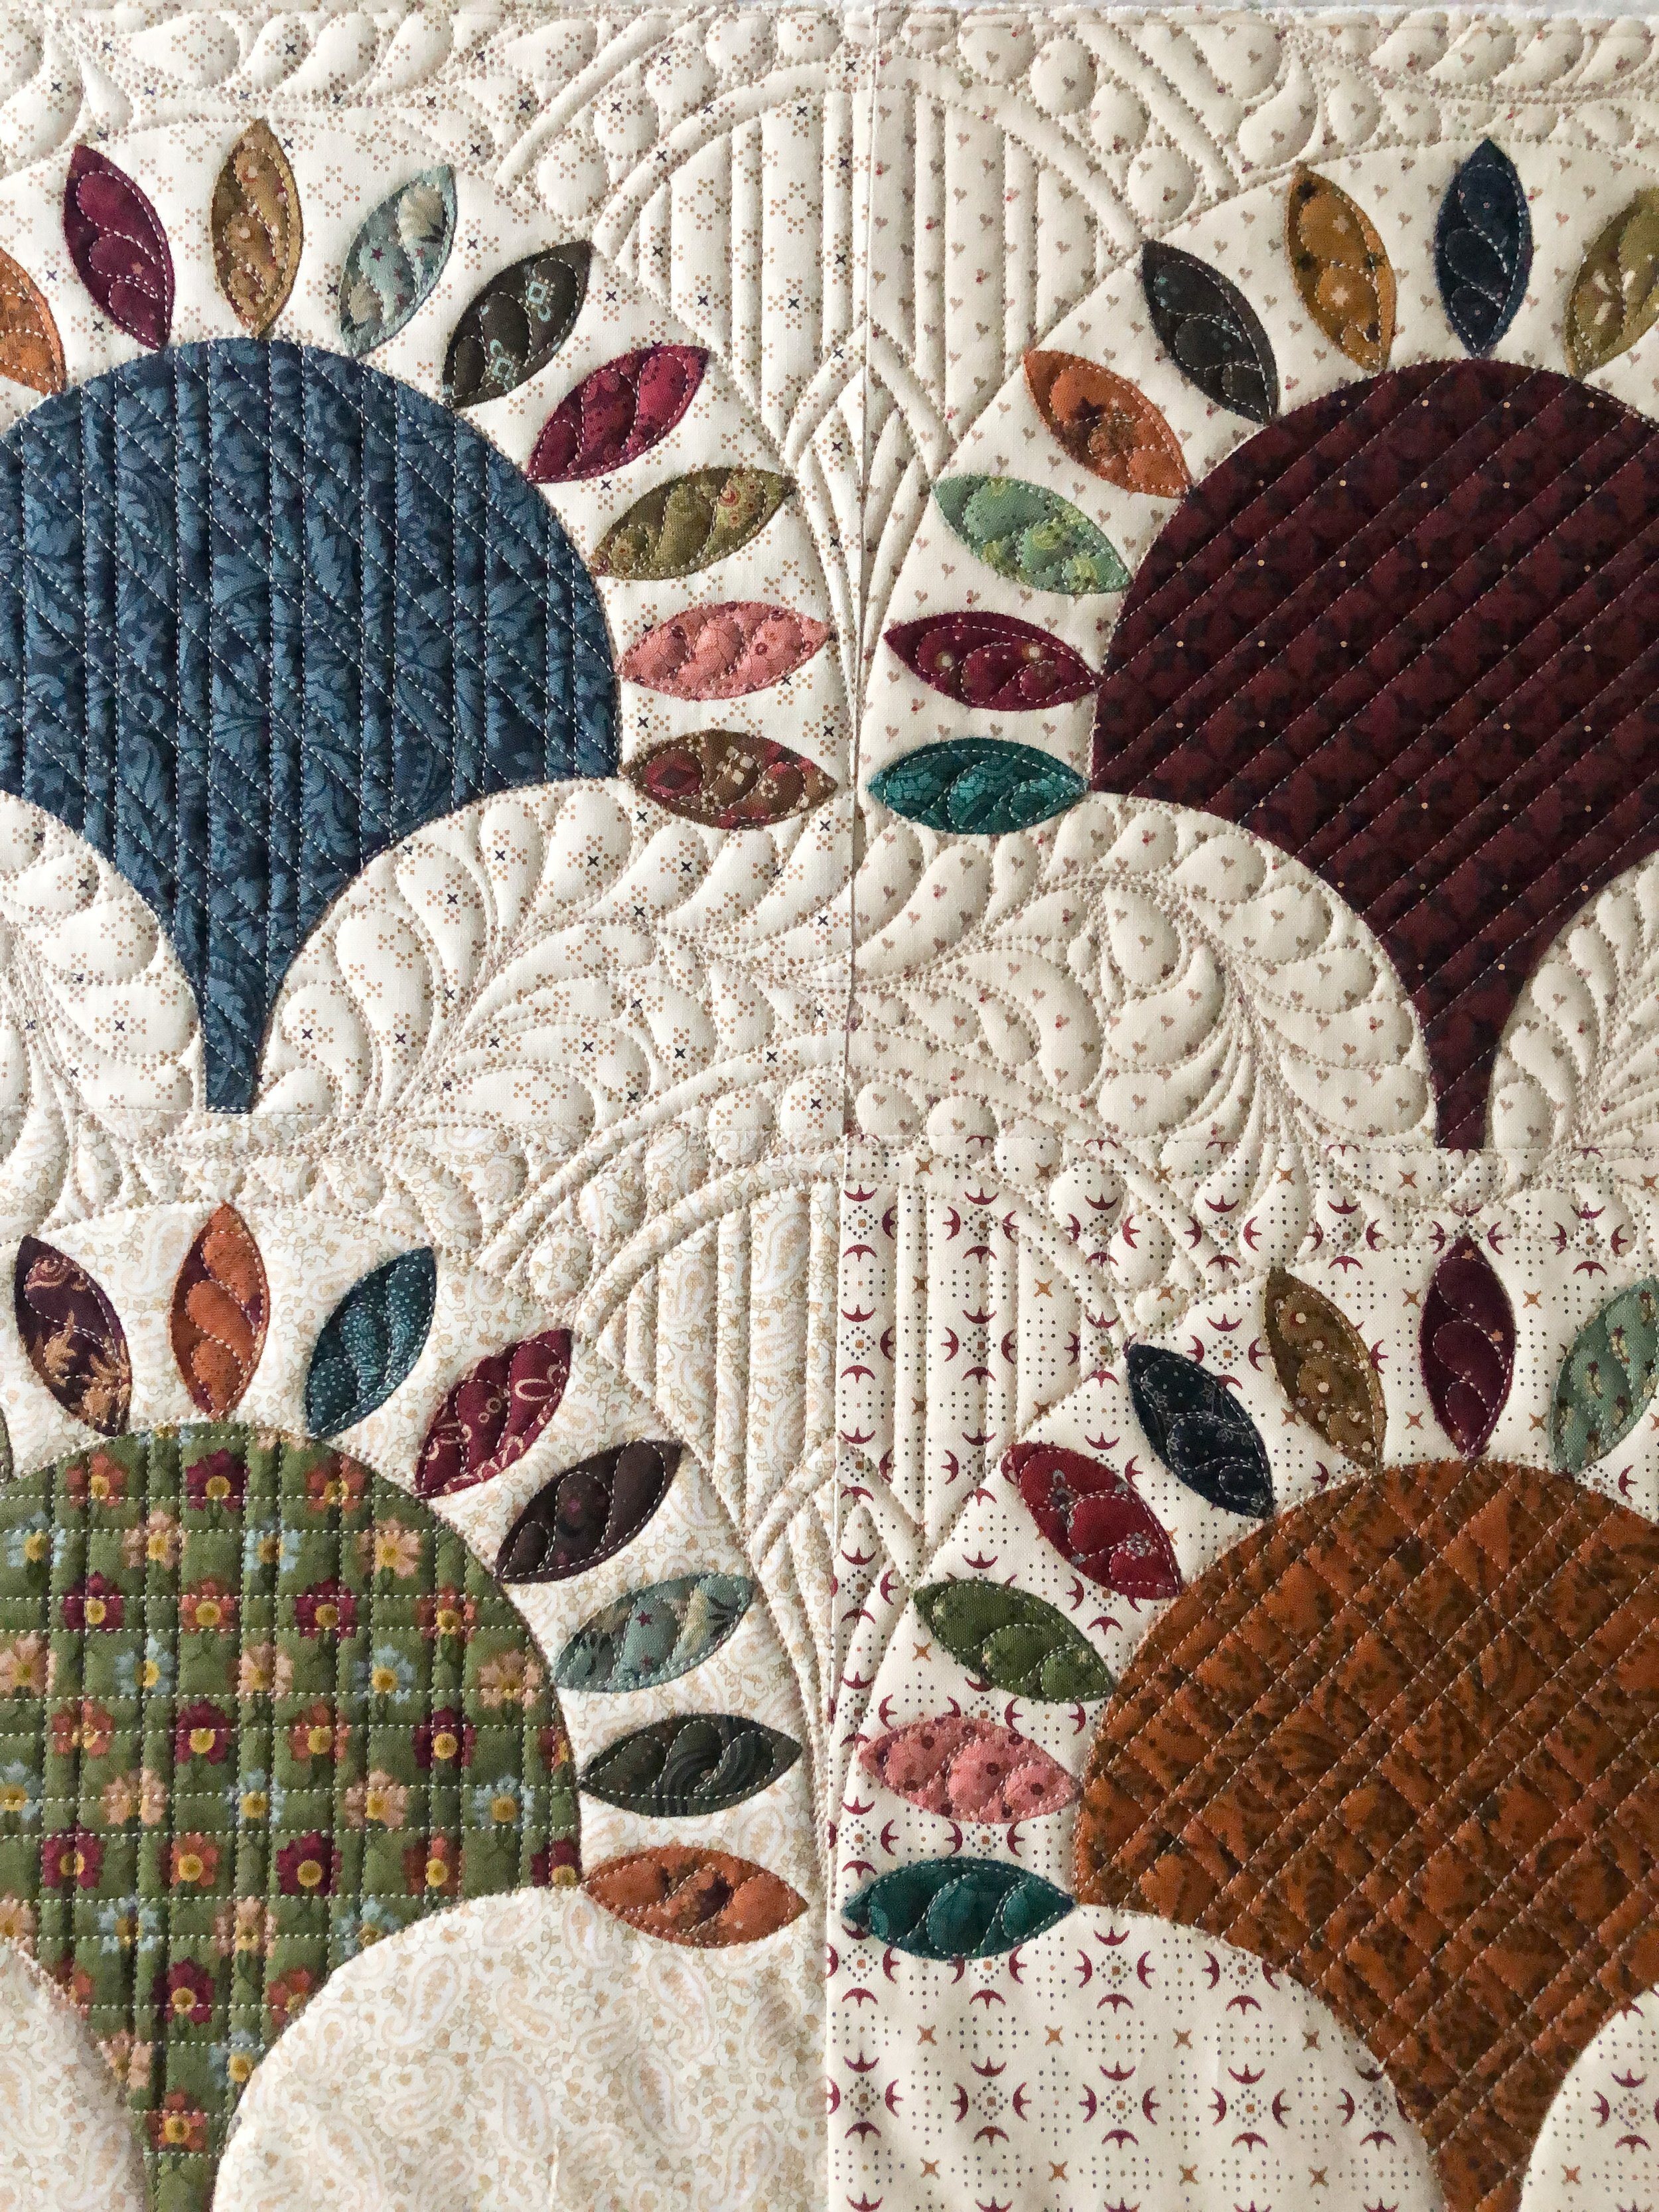
The quilting is beautiful on the ornate fabric and appliqué.

Yes, I did quilt right over the appliqué. Which I think looks beautiful!!!

Thanks for the quick visit. Have a wonderful day! - leisha
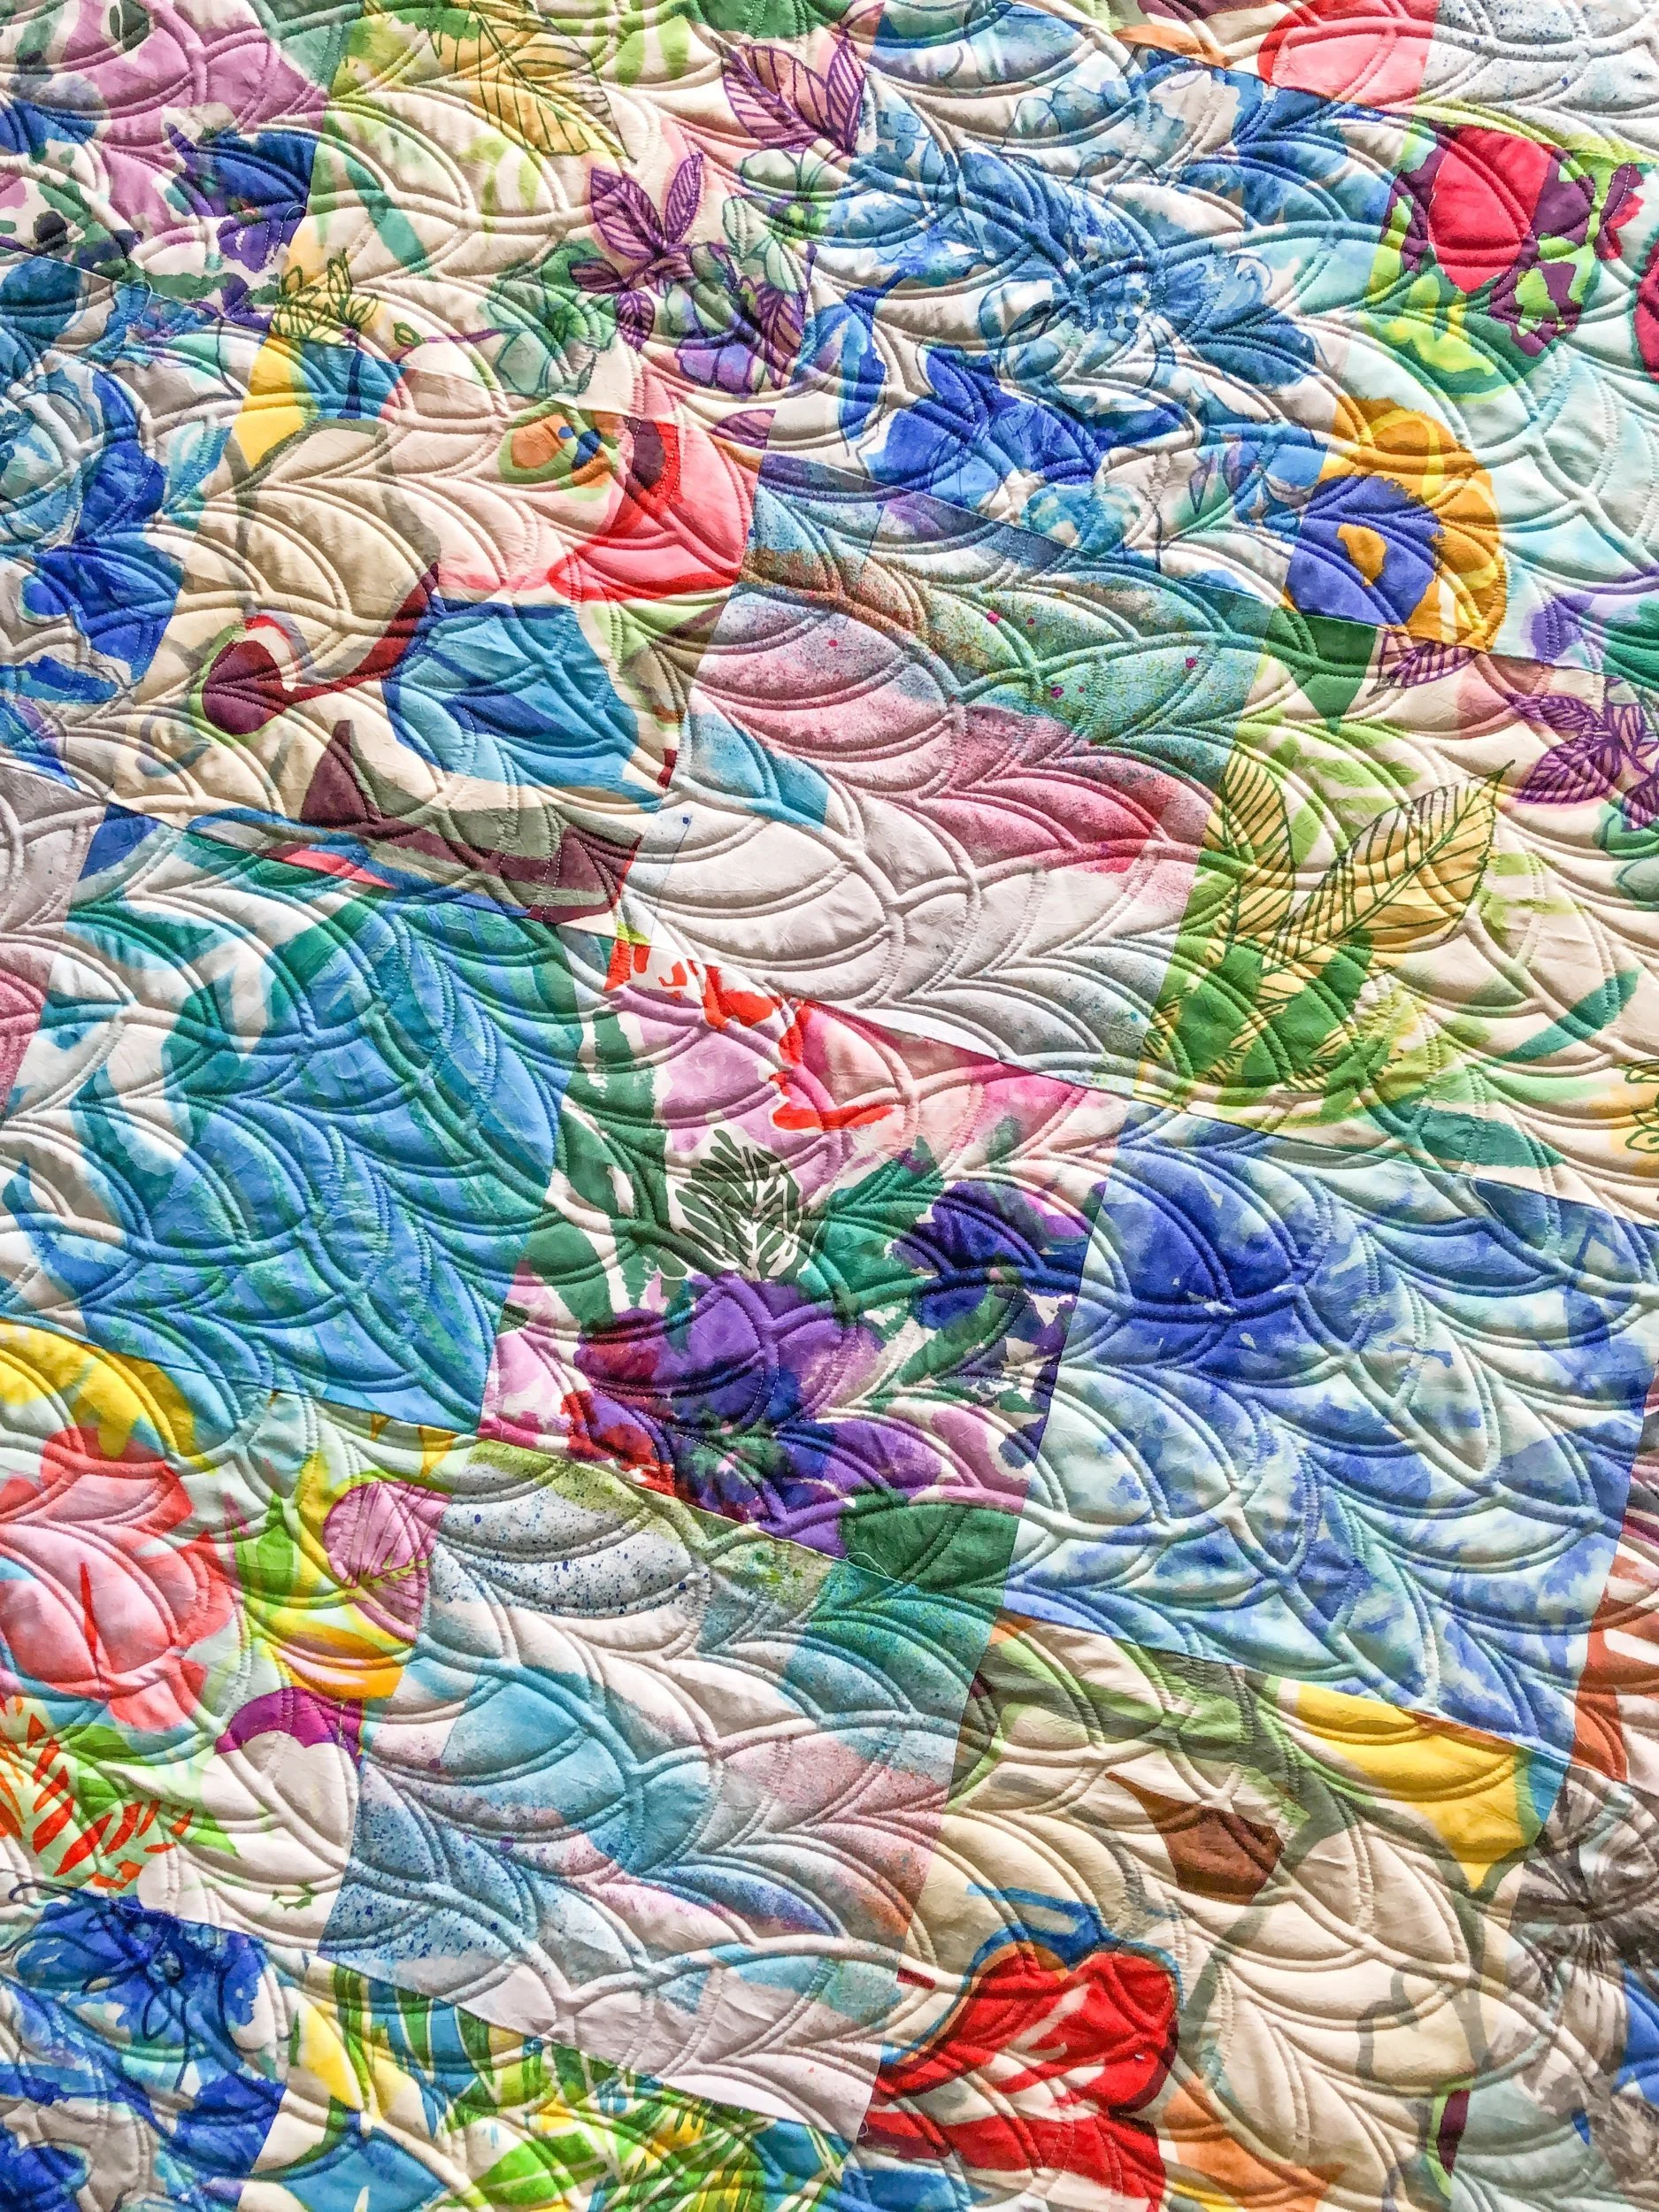
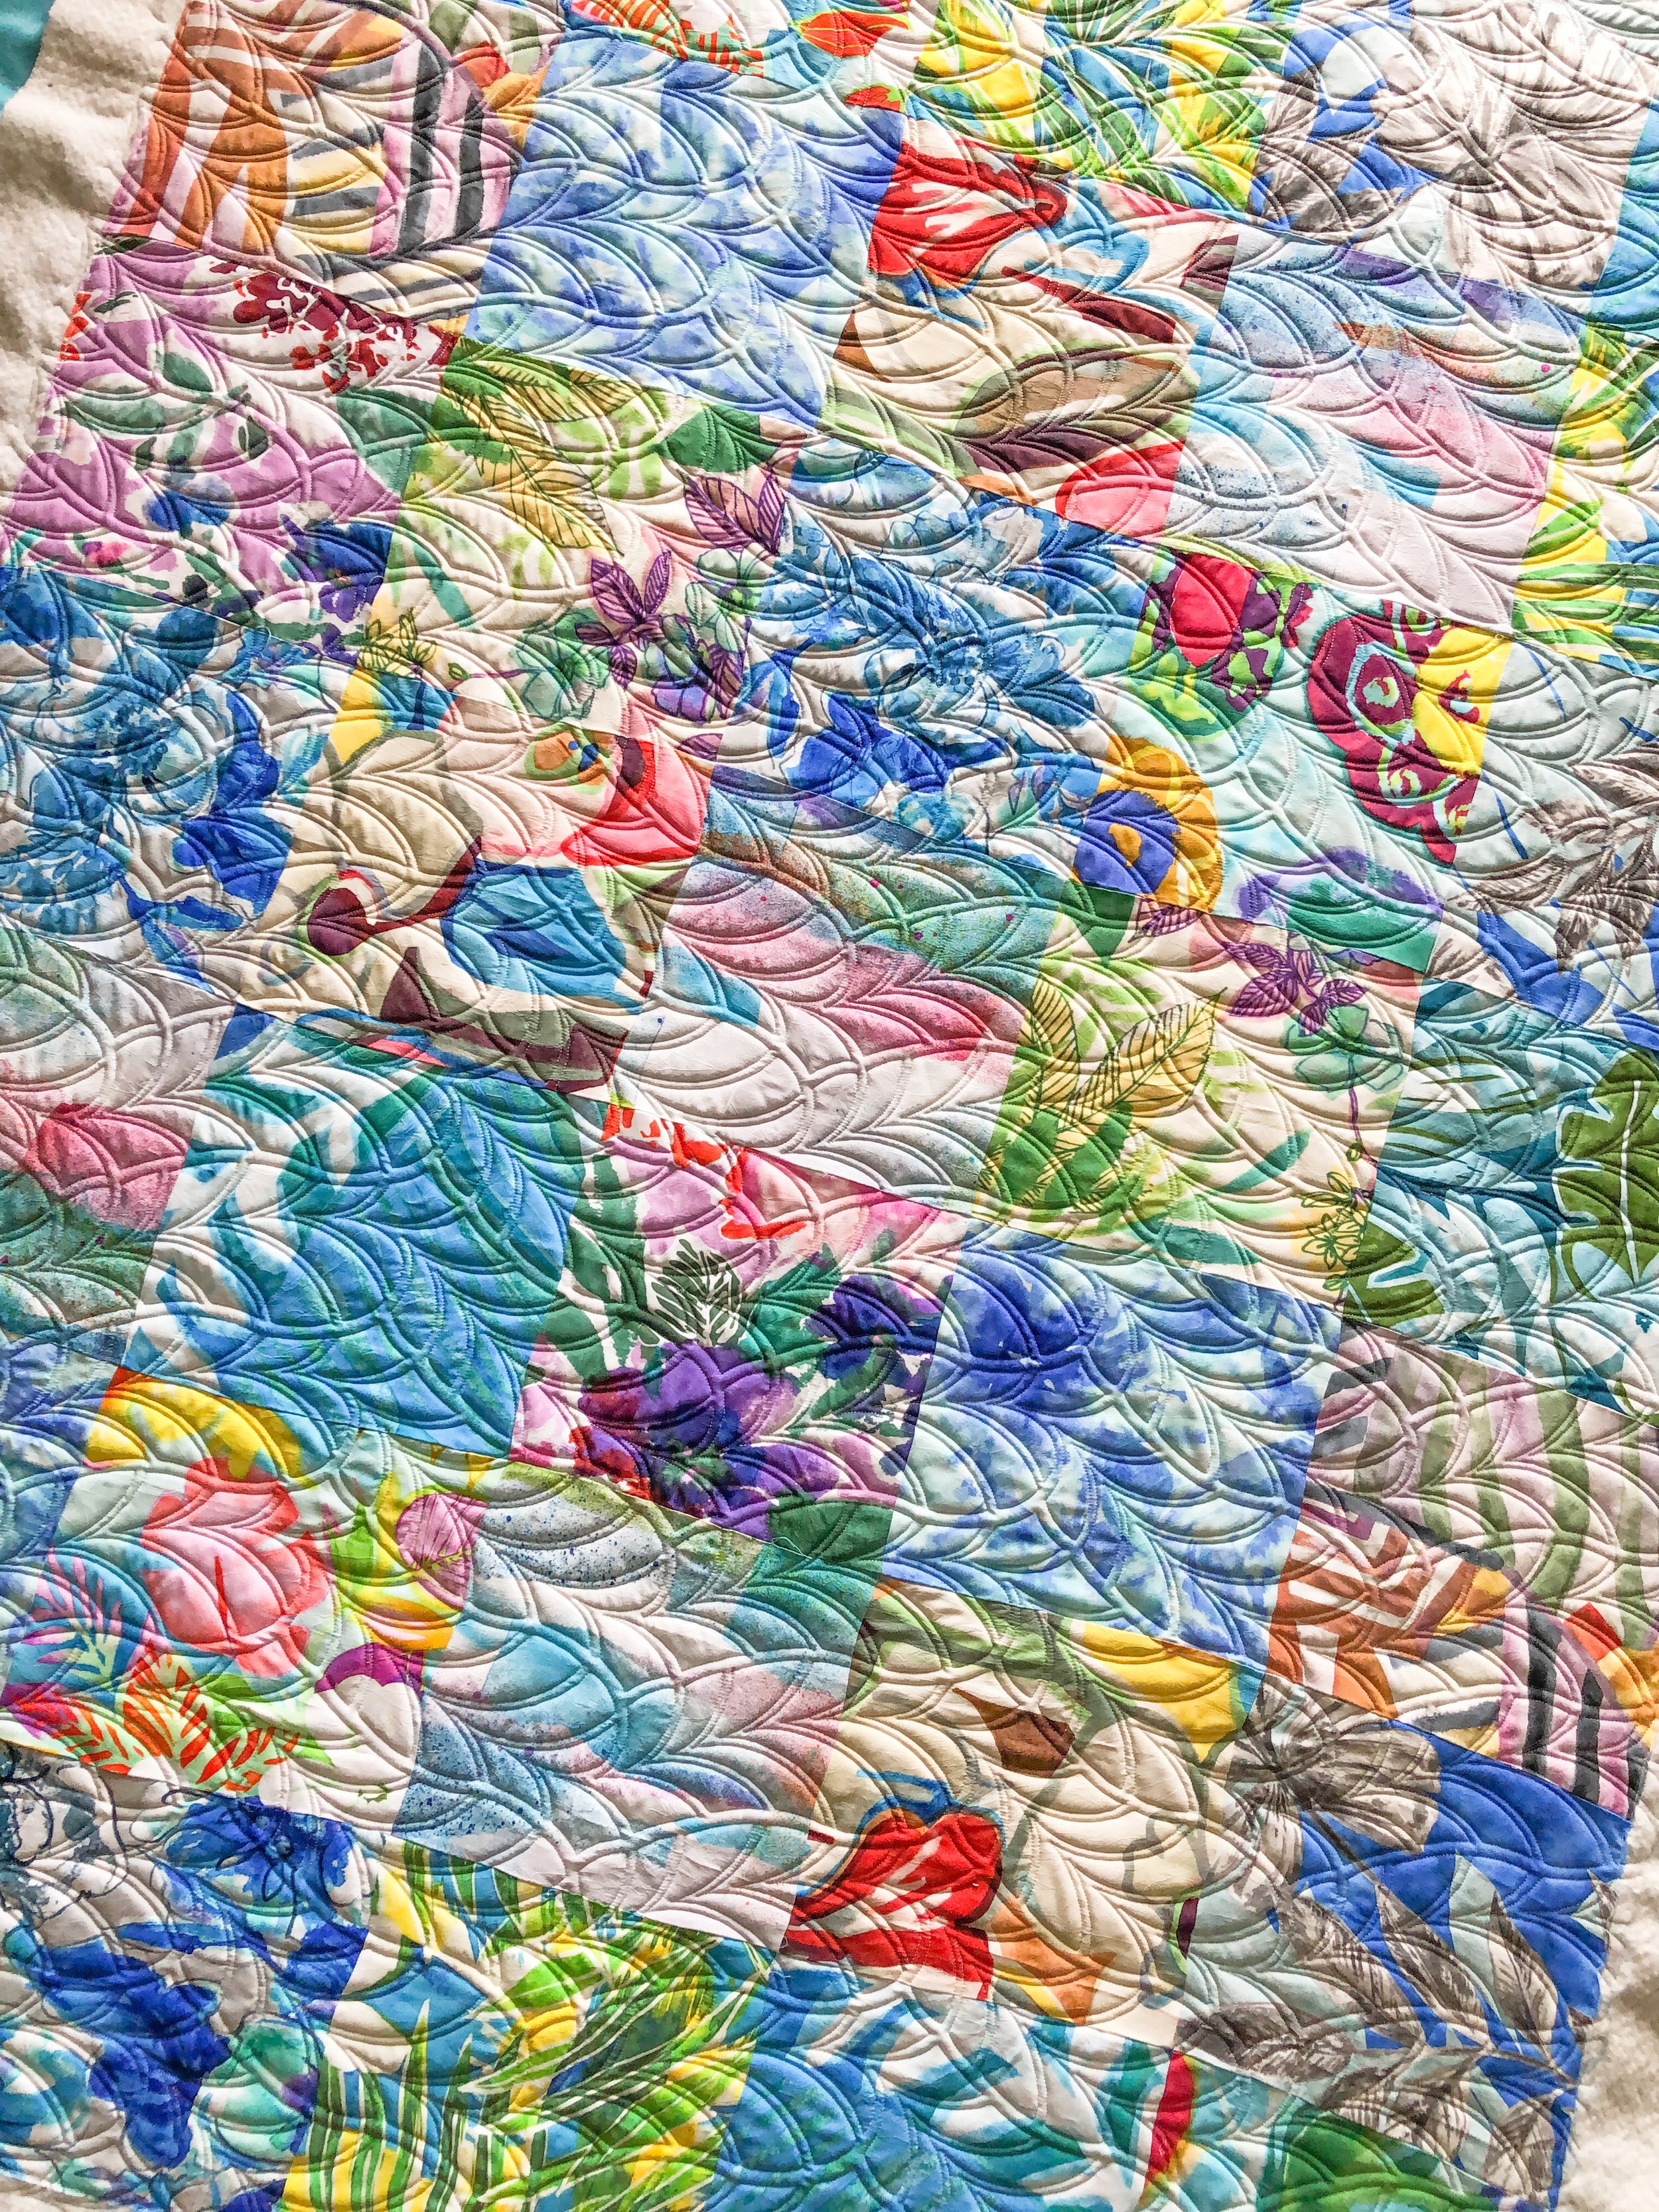
Lisa’s Little Fishies Quilt
Hello Friends,
Does anyone else feel like summer is flying on by? I’m trying to soak up as much of it as I can!!
I have a sweet quilt to share with you!! But first, if you have some quilts that you’d like to get machine quilted, let me know. I’d love to quilt for you!!! Contact me or email me at quiltingit@gmail.com
Thank you!!
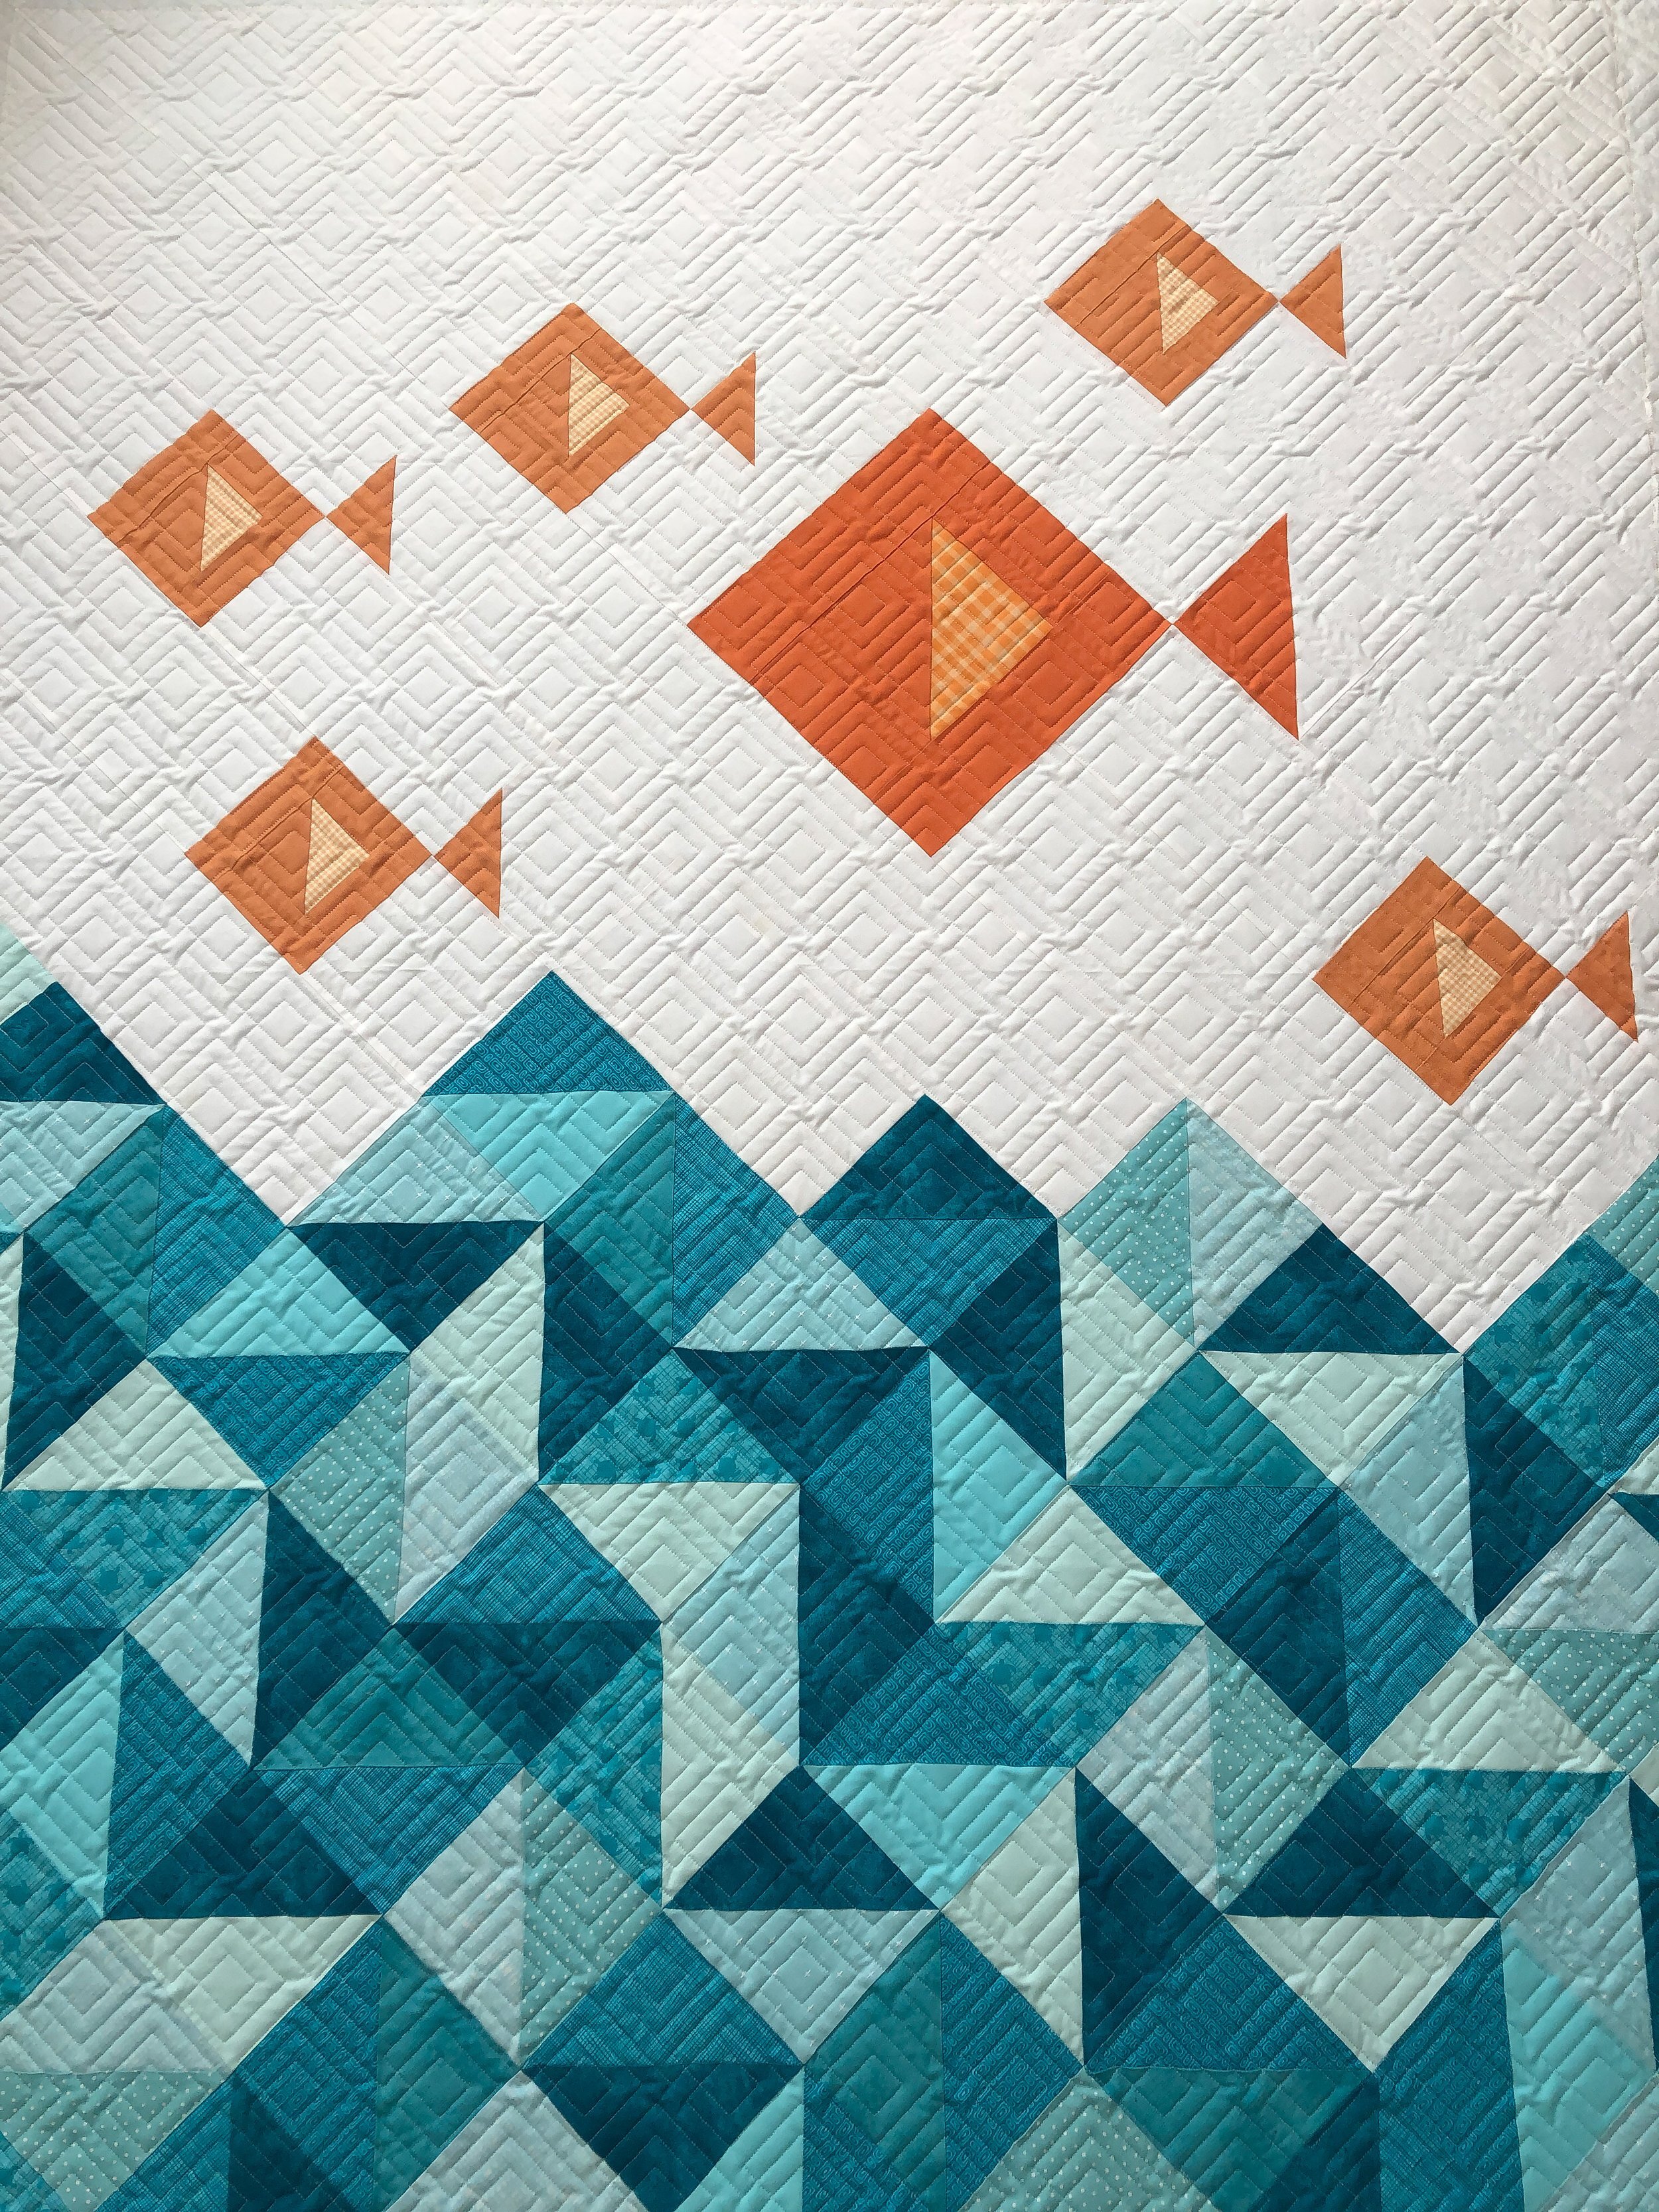
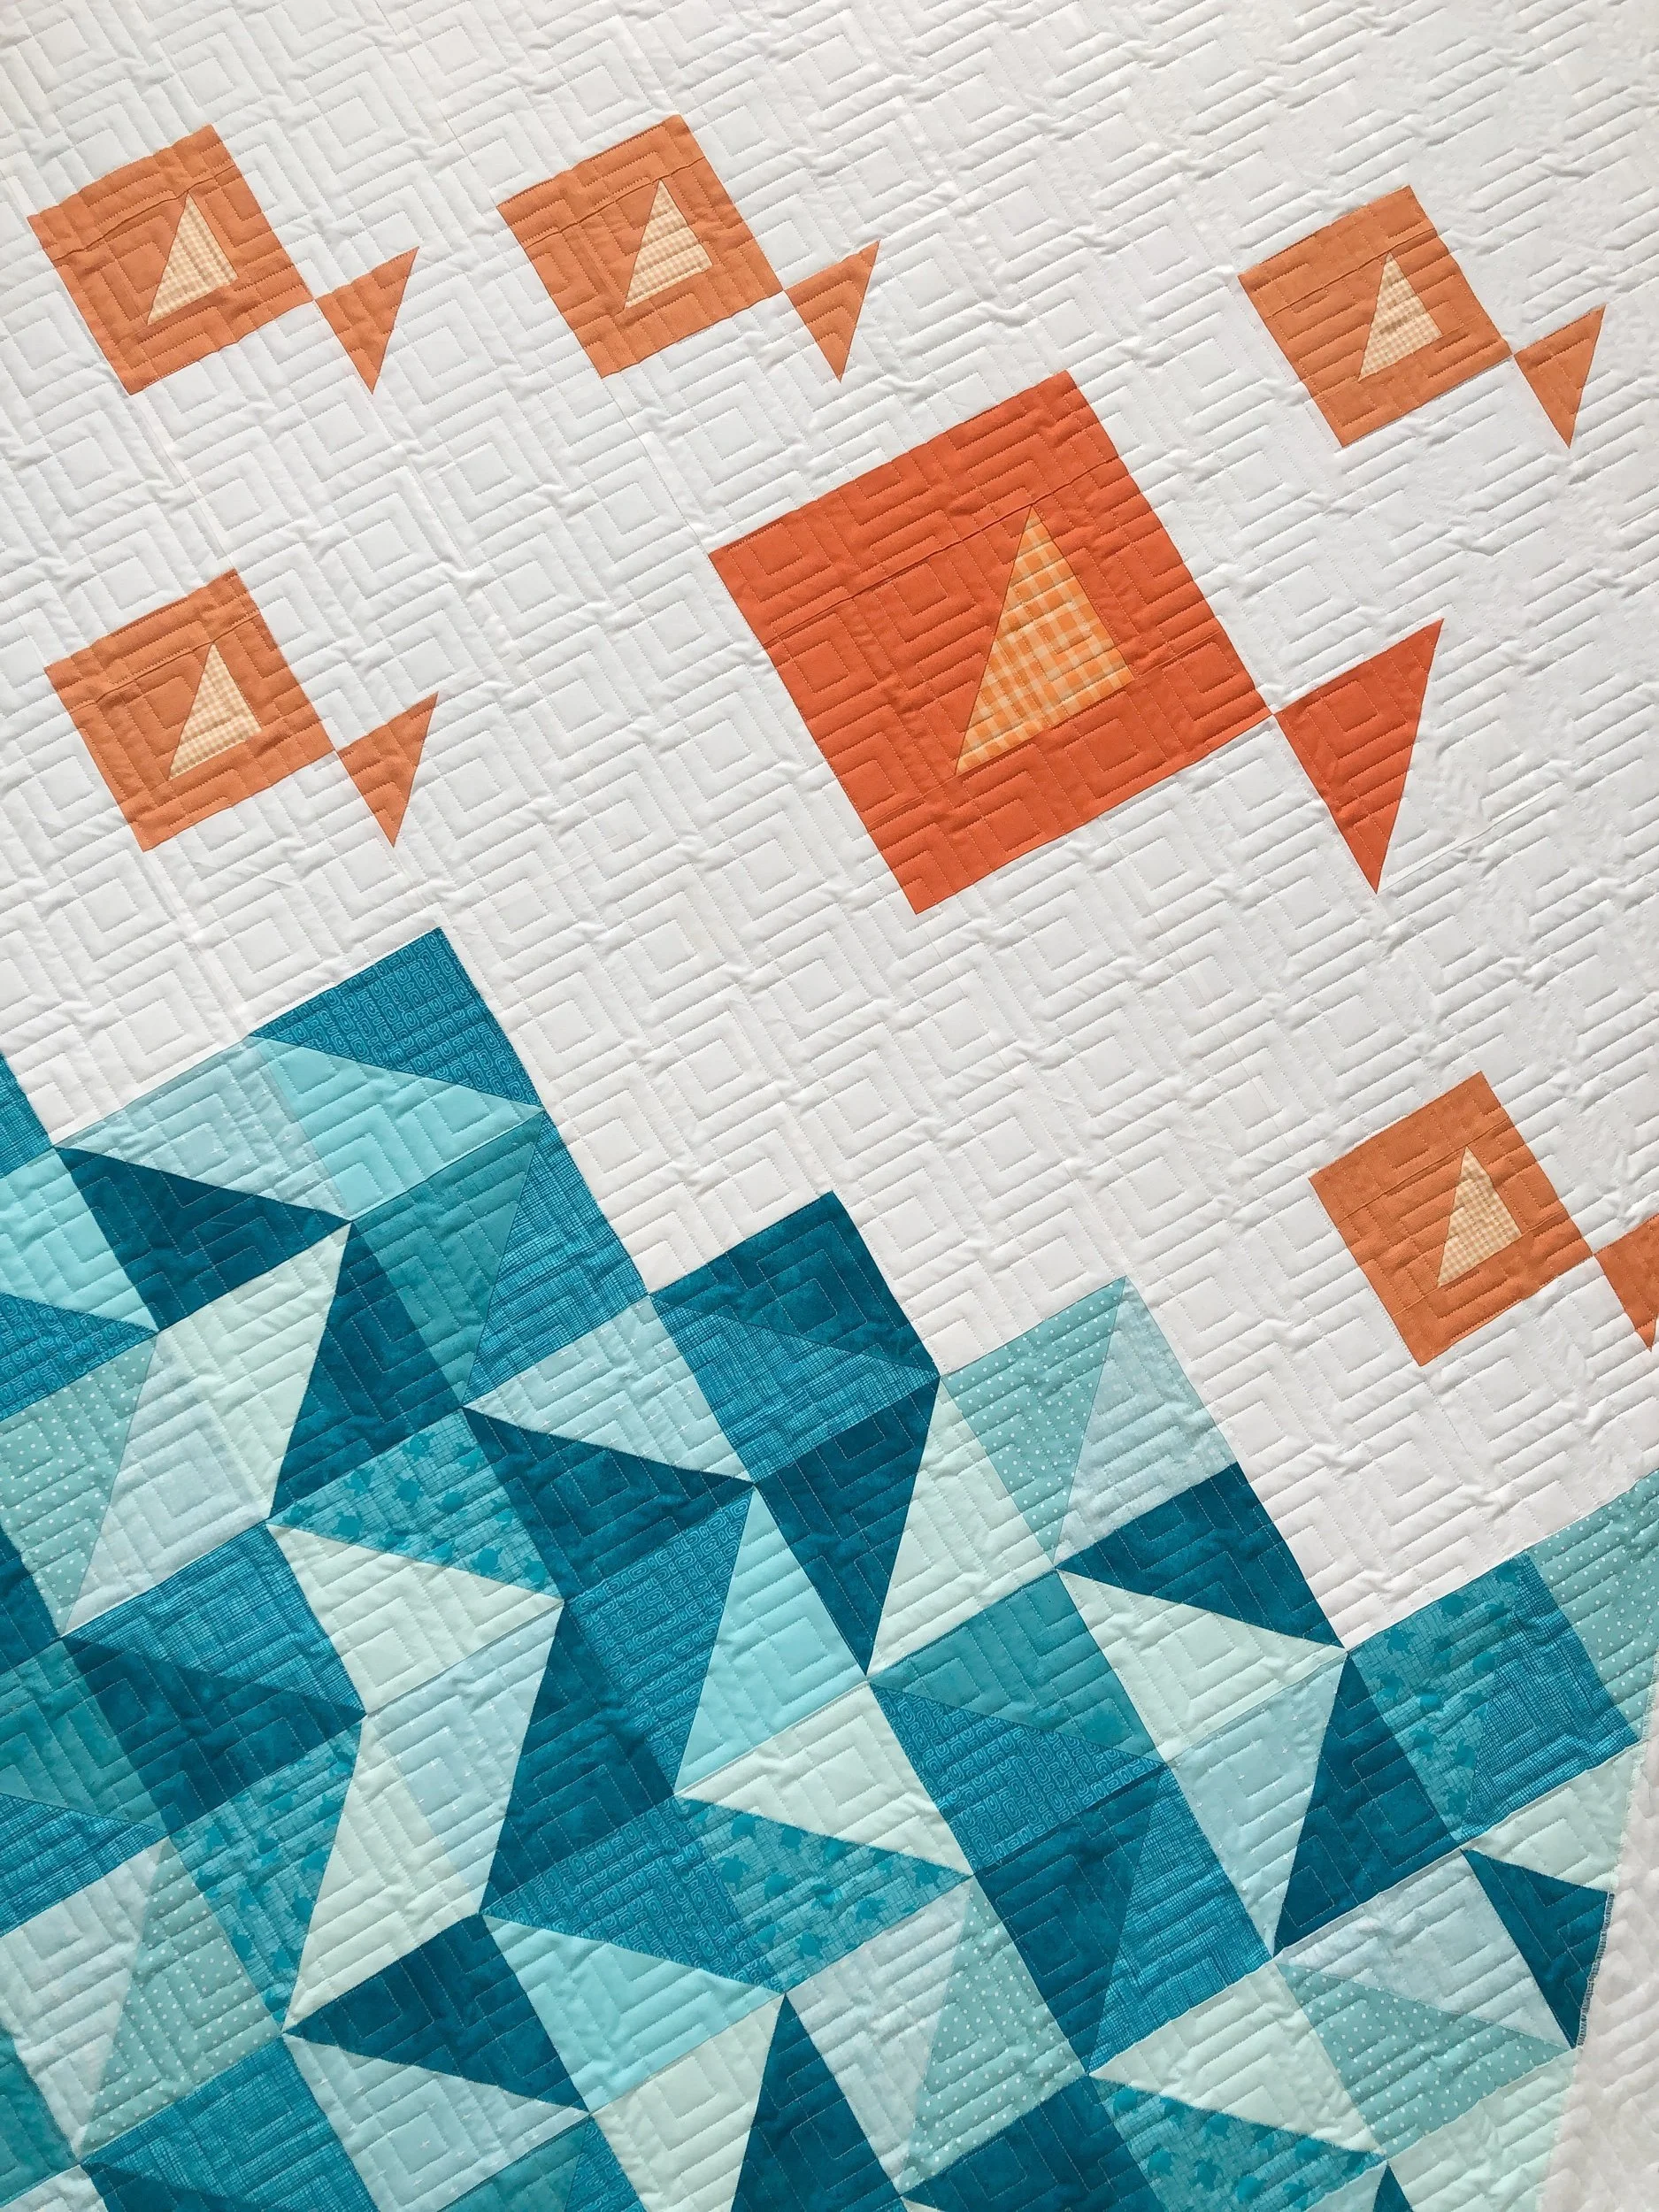
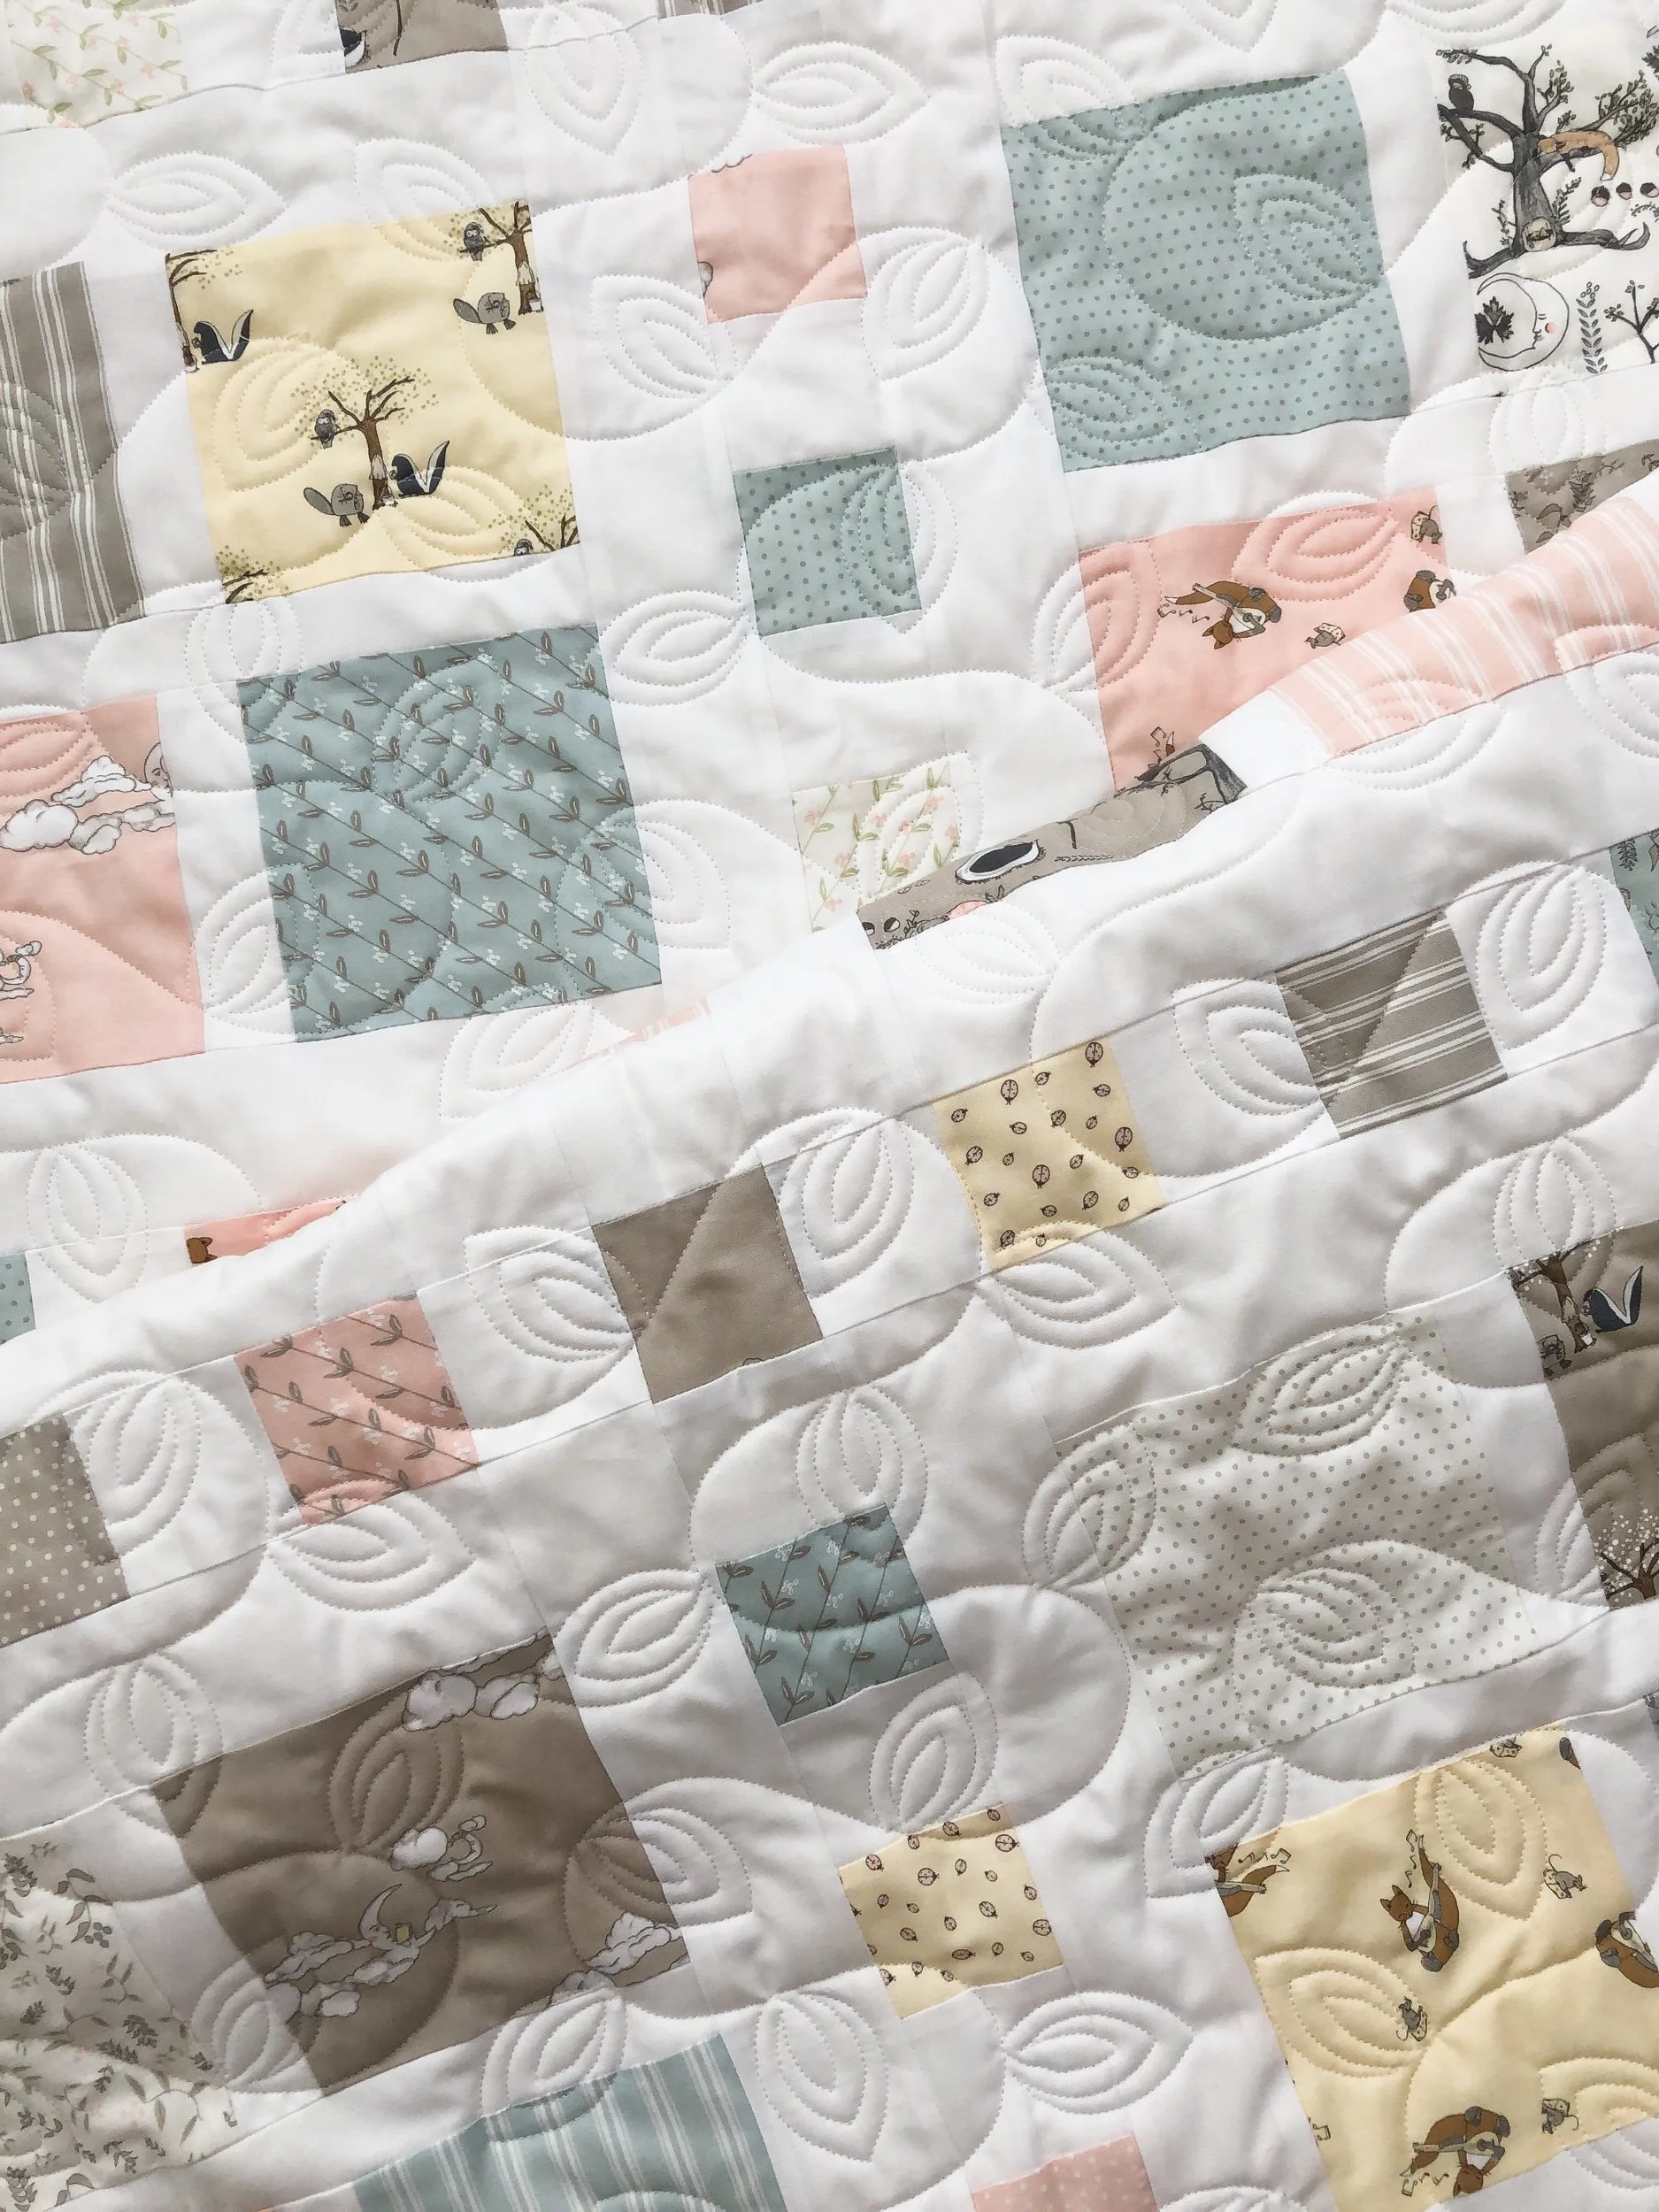
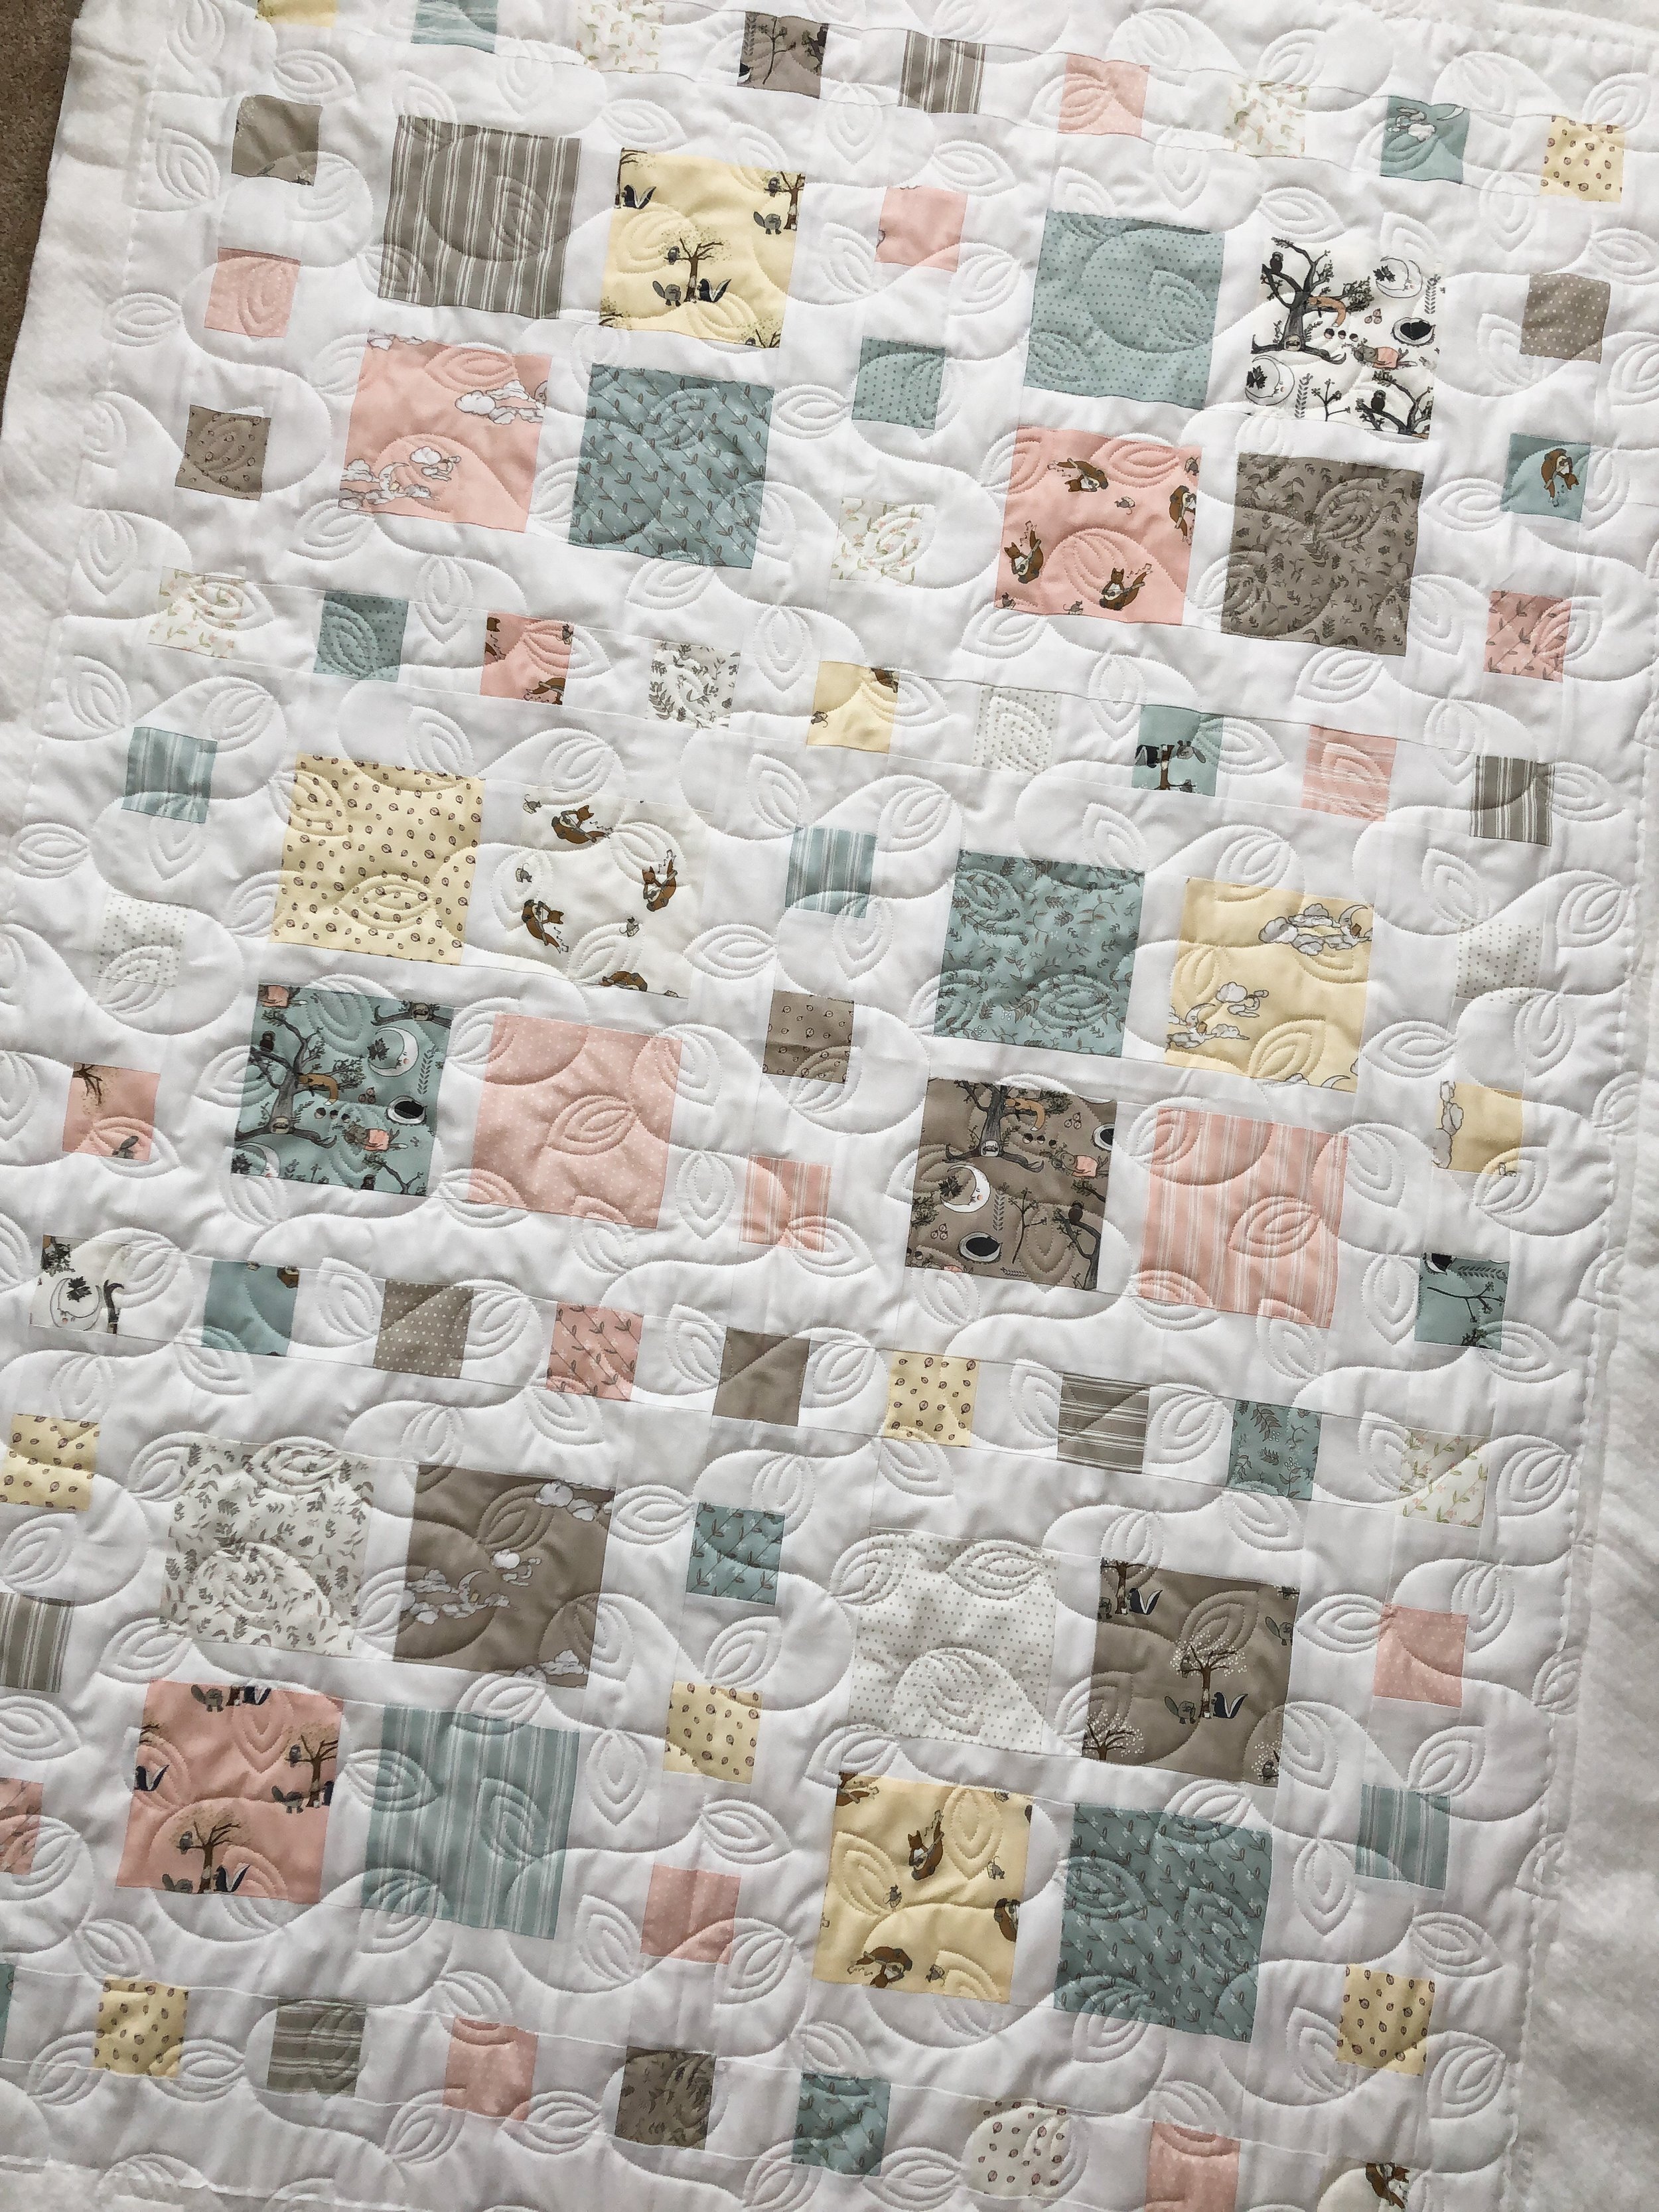
Lisa made this adorable baby quilt!!! The pattern is called Little Fishes Quilt by Whole Circle Studio. It was such a fun one to quilt.

I love quilting custom, but it’s also really nice to take a break sometimes and quilt edge to edge with my computer.
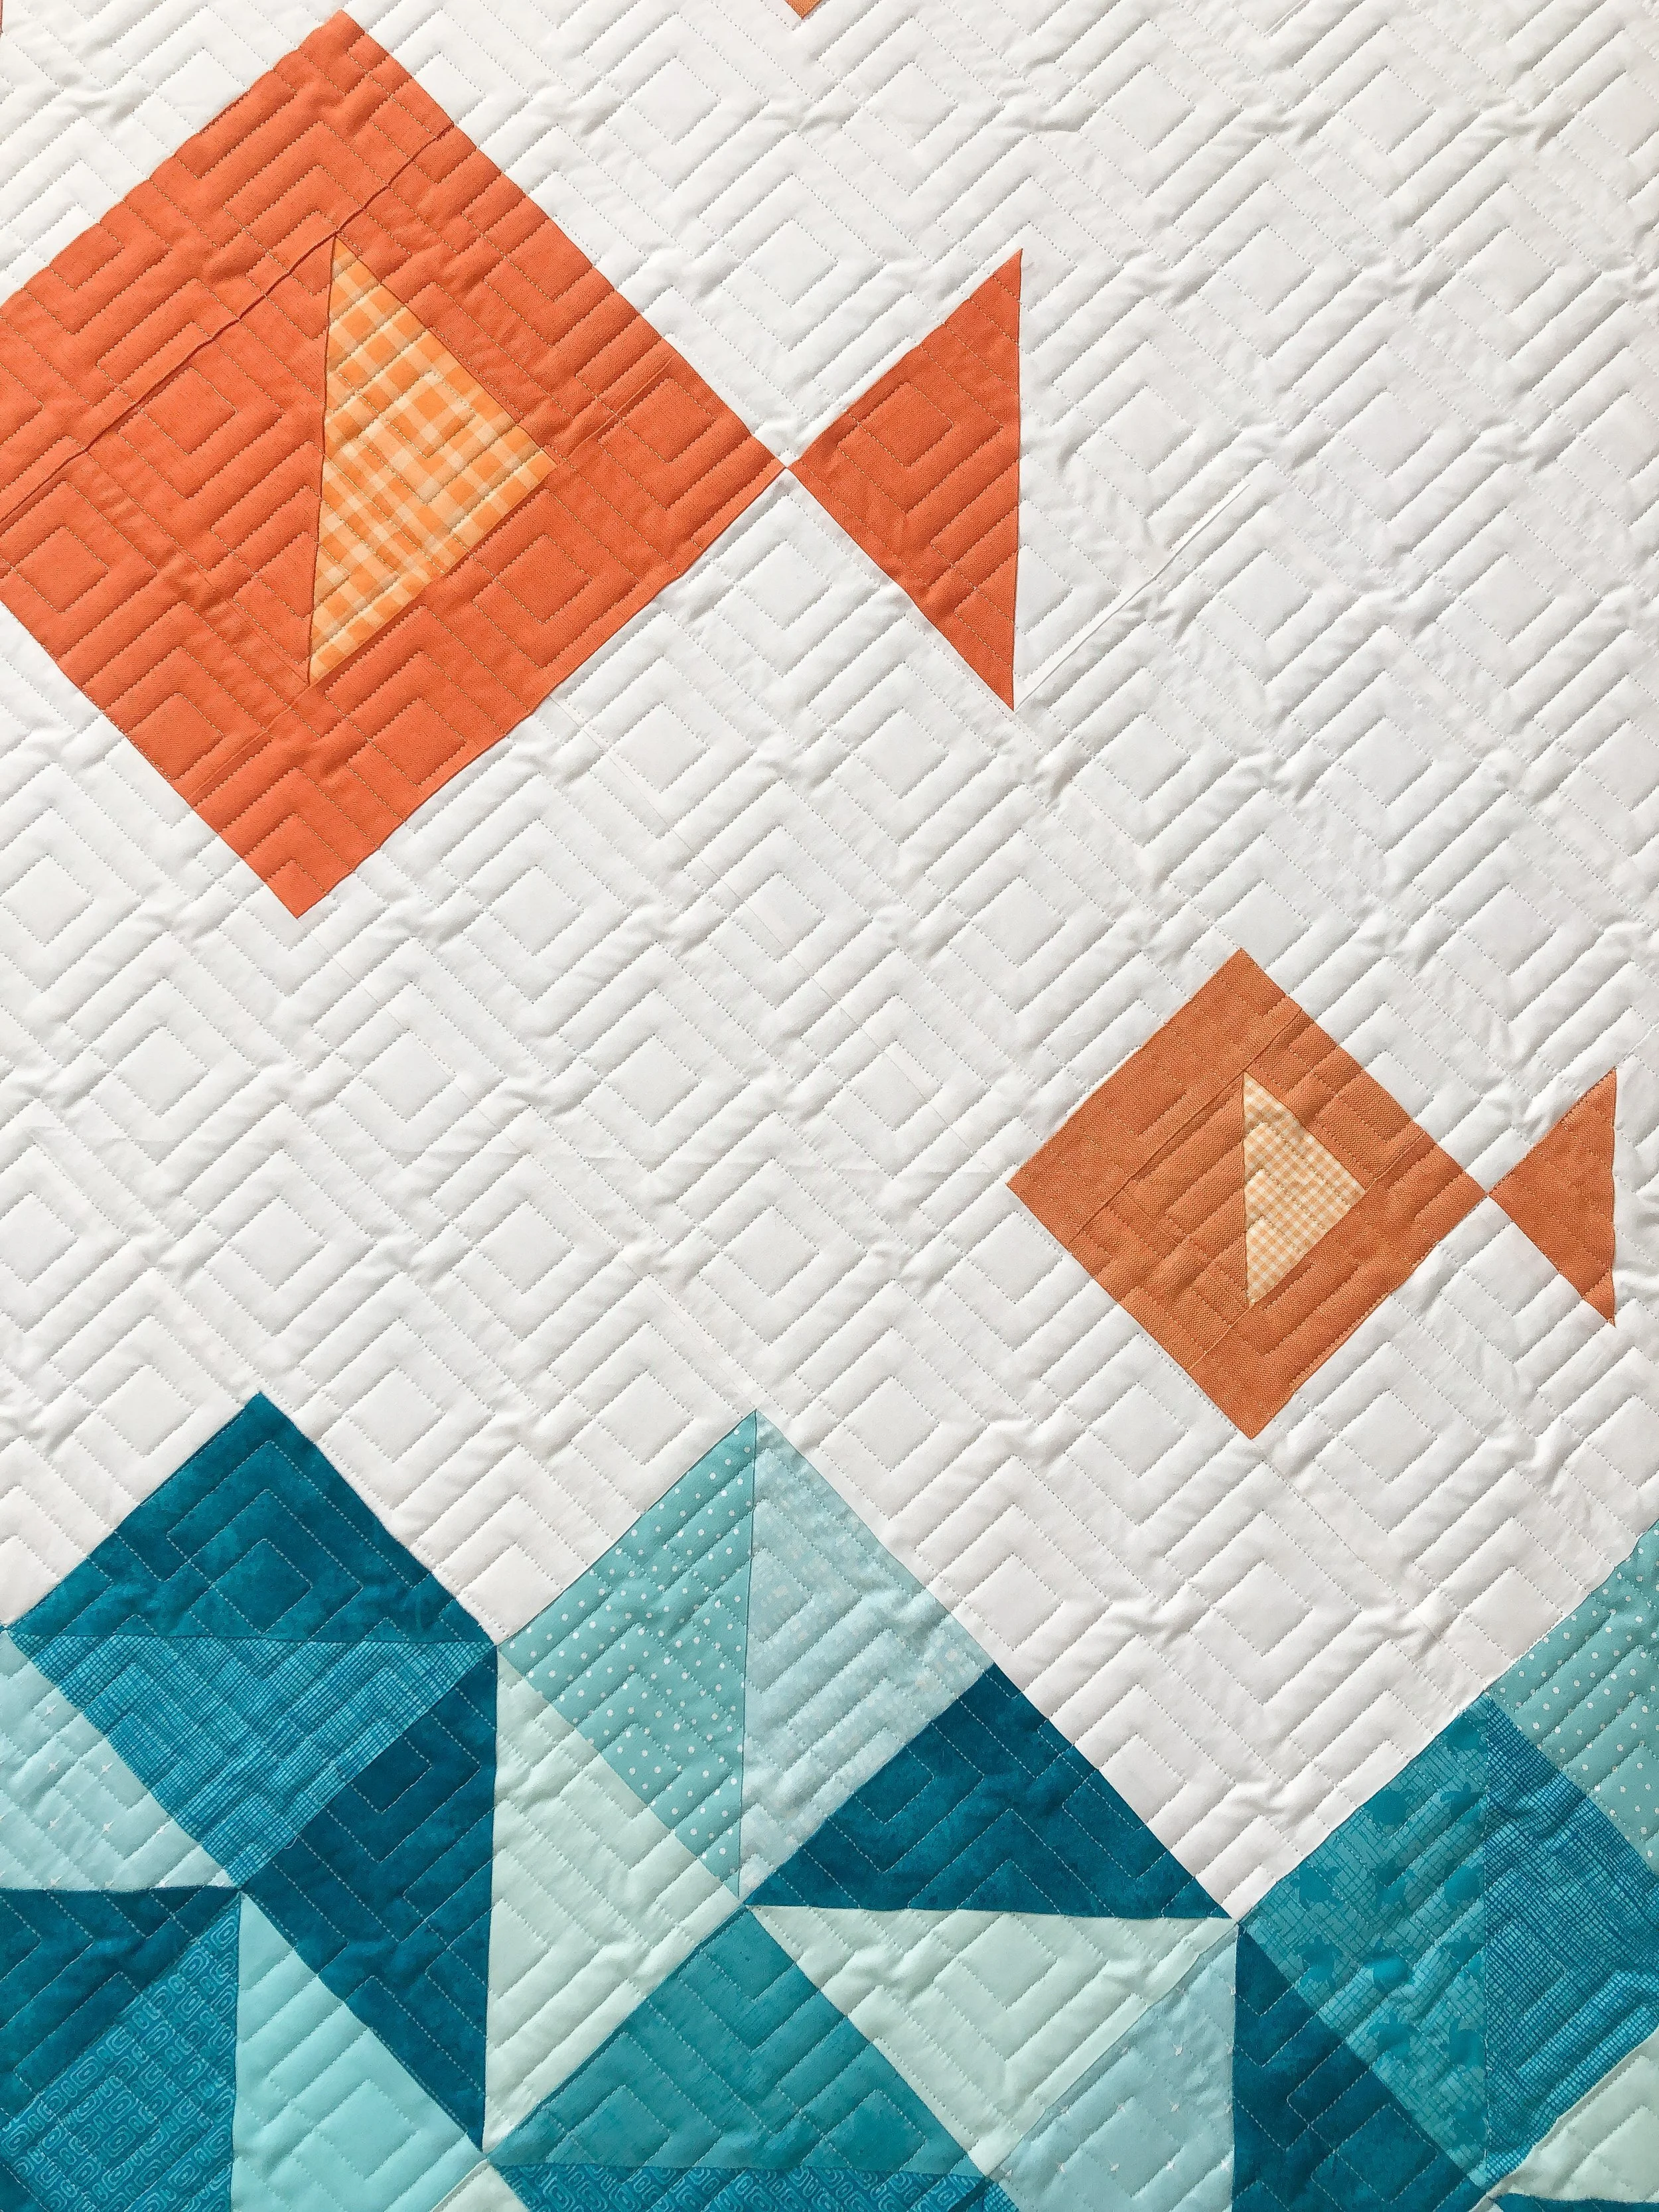
Especially when I get to use one of my own designs!! That’s a treat!! This is my Squared©️ design. Squared was one of my very first solo designs. It’s definitely been a favorite. I’ve quilted it on t-shirt quilts, baby quilts, geometric quilts and all different kinds of masculine quilts. It’s a good one!! If you don’t have it for your machine yet, head on over to my shop.

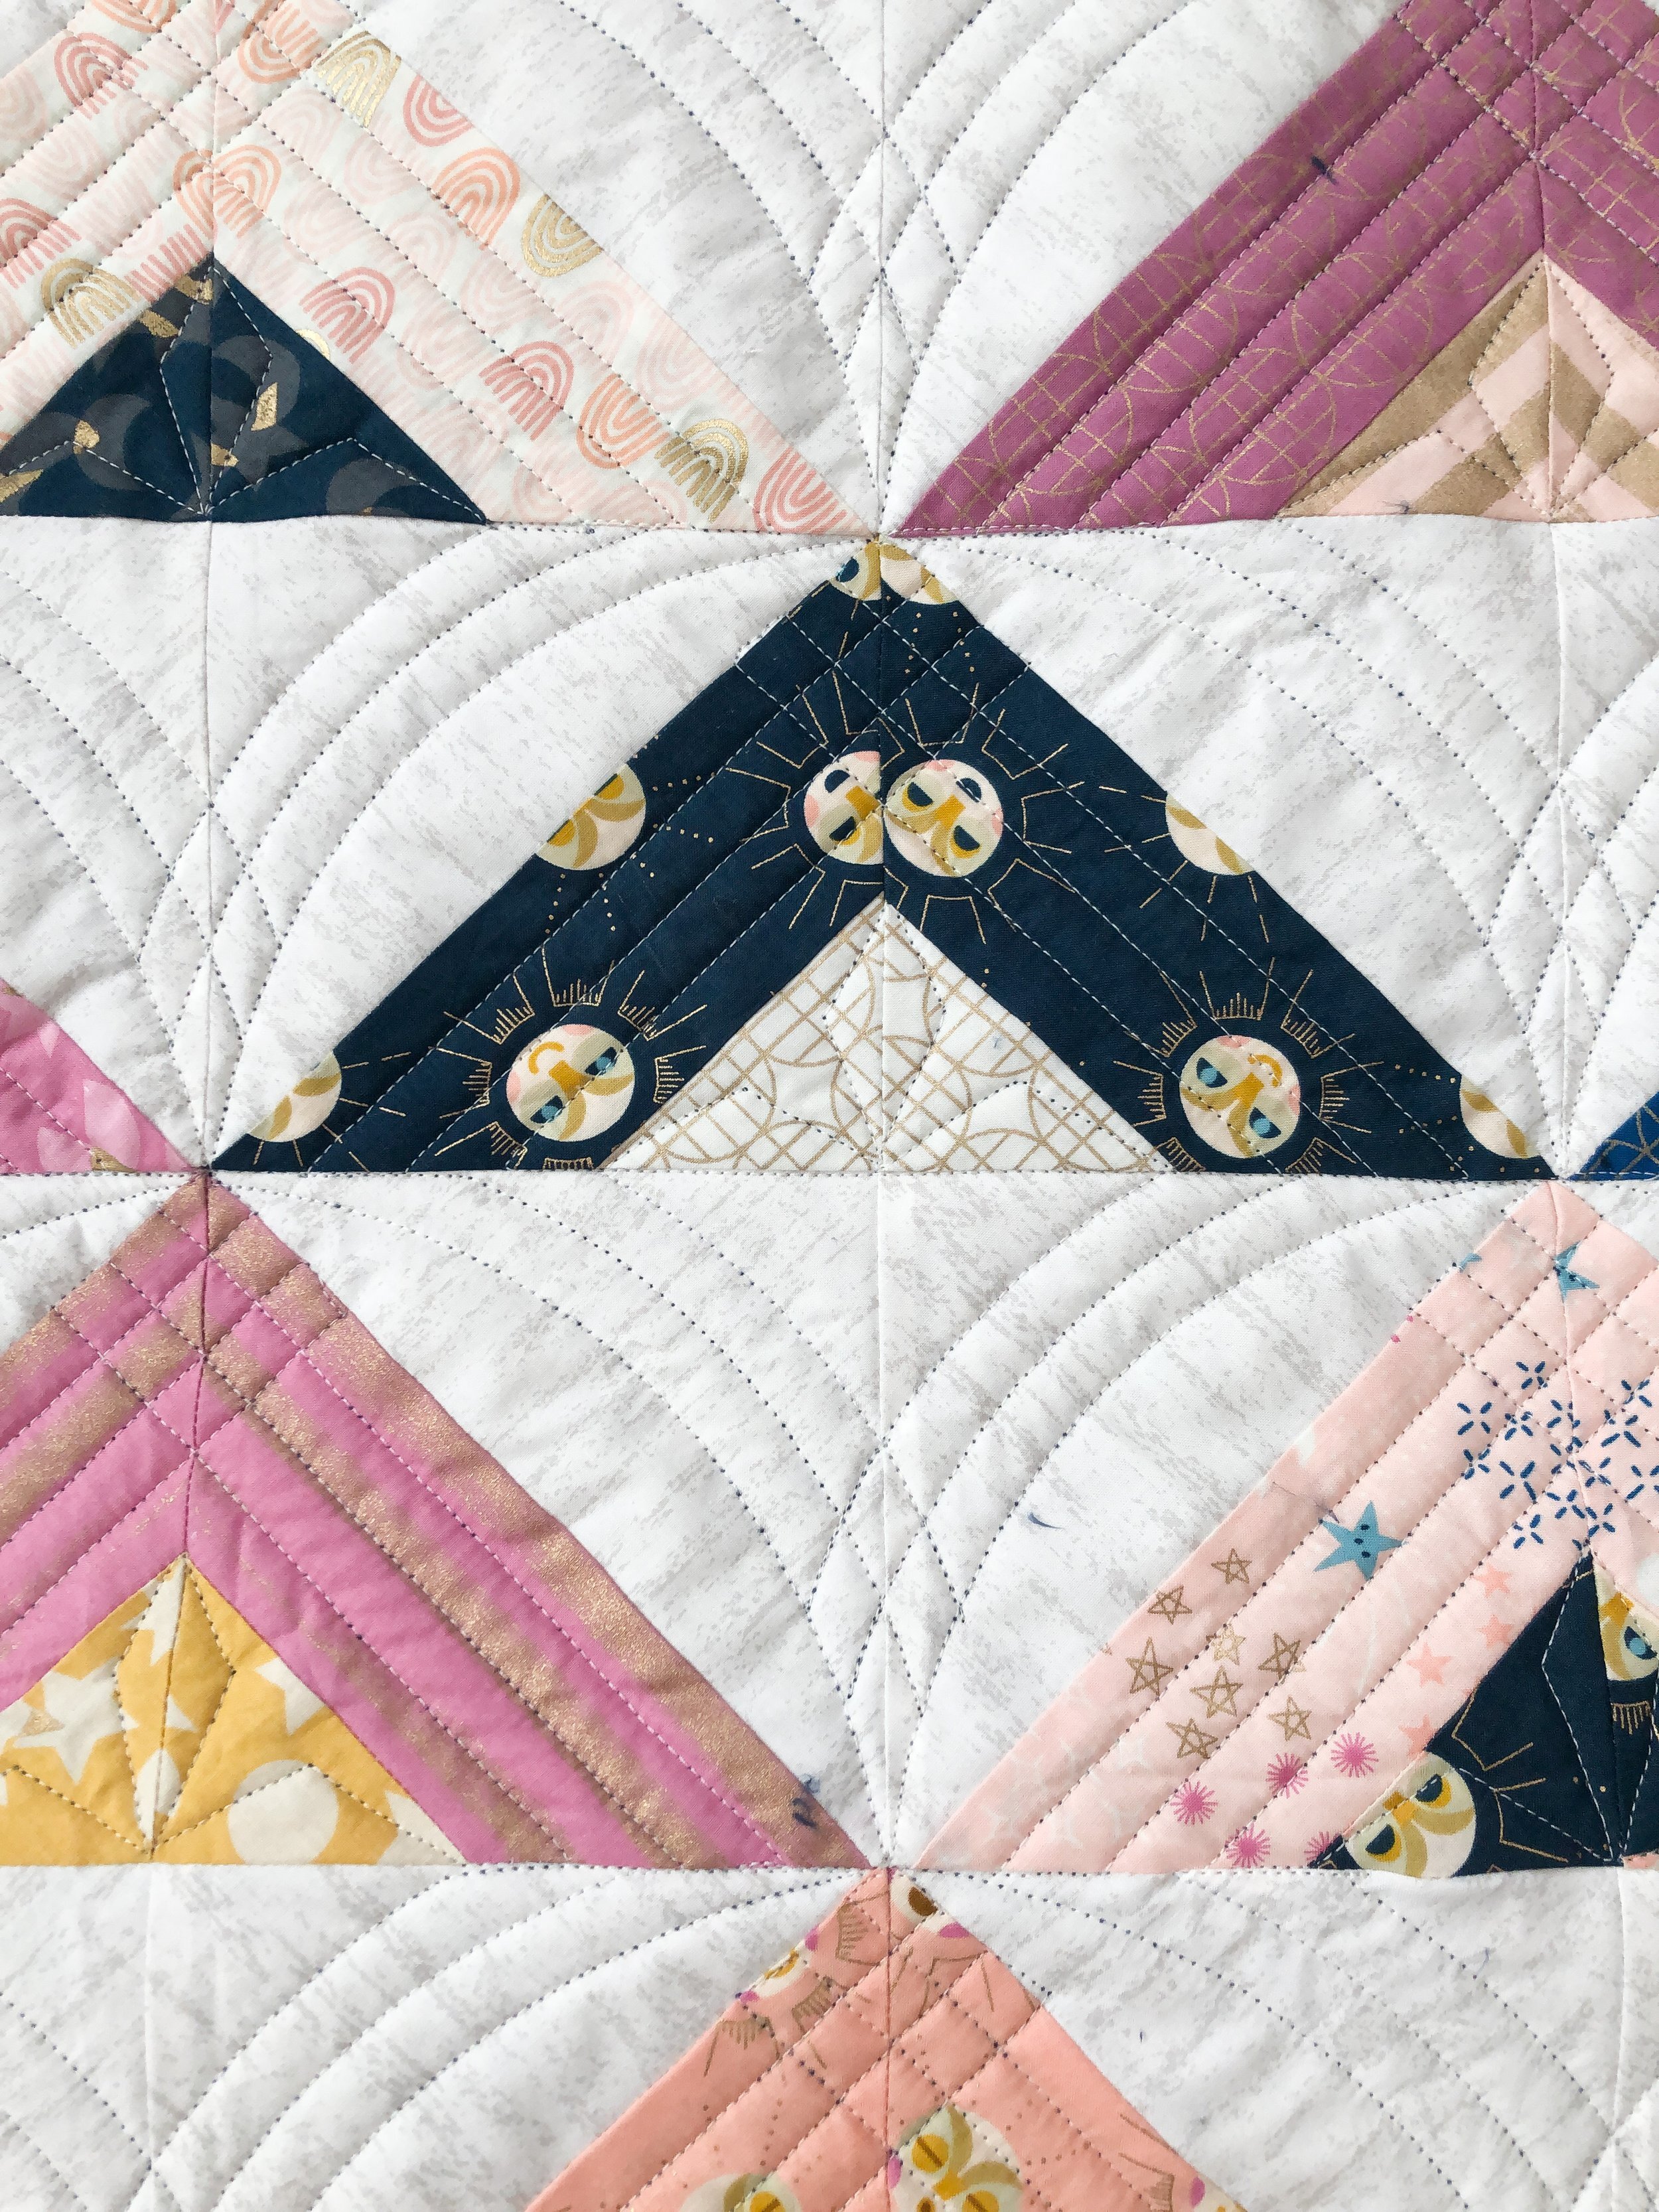
You can see how the design looks close up on the triangle blocks along the bottom of the quilt…it’s such a fun texture!

I used my favorite 8020 cotton poly blend batting from Winline Textiles out of Ogden Utah, and natural white Omni thread from Superior Threads.
Check out that quilty texture on the minky backing!!! Love it!
Thanks for stopping in!! Happy sewing! - Leisha
Beth’s amazing Smitten Quilt
Hi Friends,
I hope you’re having a great week! I have a few fun things going on over here. I recently had the opportunity to have a chat with Susan Smith on her Measure Twice Cut Once podcast. We talked about quilting, business, and creating passive income. Go have a listen. If you follow me on Instagram or Facebook you may have seen me post about a running challenge I gave myself. If not, I decided to run 100 in 3 months which I accomplished in 2.5 months. So of course I had to keep going, and I’m hoping to get to 200 miles, which includes the first 100, by September 1st. I’m at 123.4 miles, after my run today! It’s exciting for me to have goals in every part of my life. I’m especially grateful to be able to run again, after not being able to for 19 years. Also, I just had a huge site wide sale!!! I’m so grateful for the support I’ve received over the years. Being about to create designs for you and your client’s quilts is such a joy for me. I love seeing them on social media when people tag me. Thank you!!
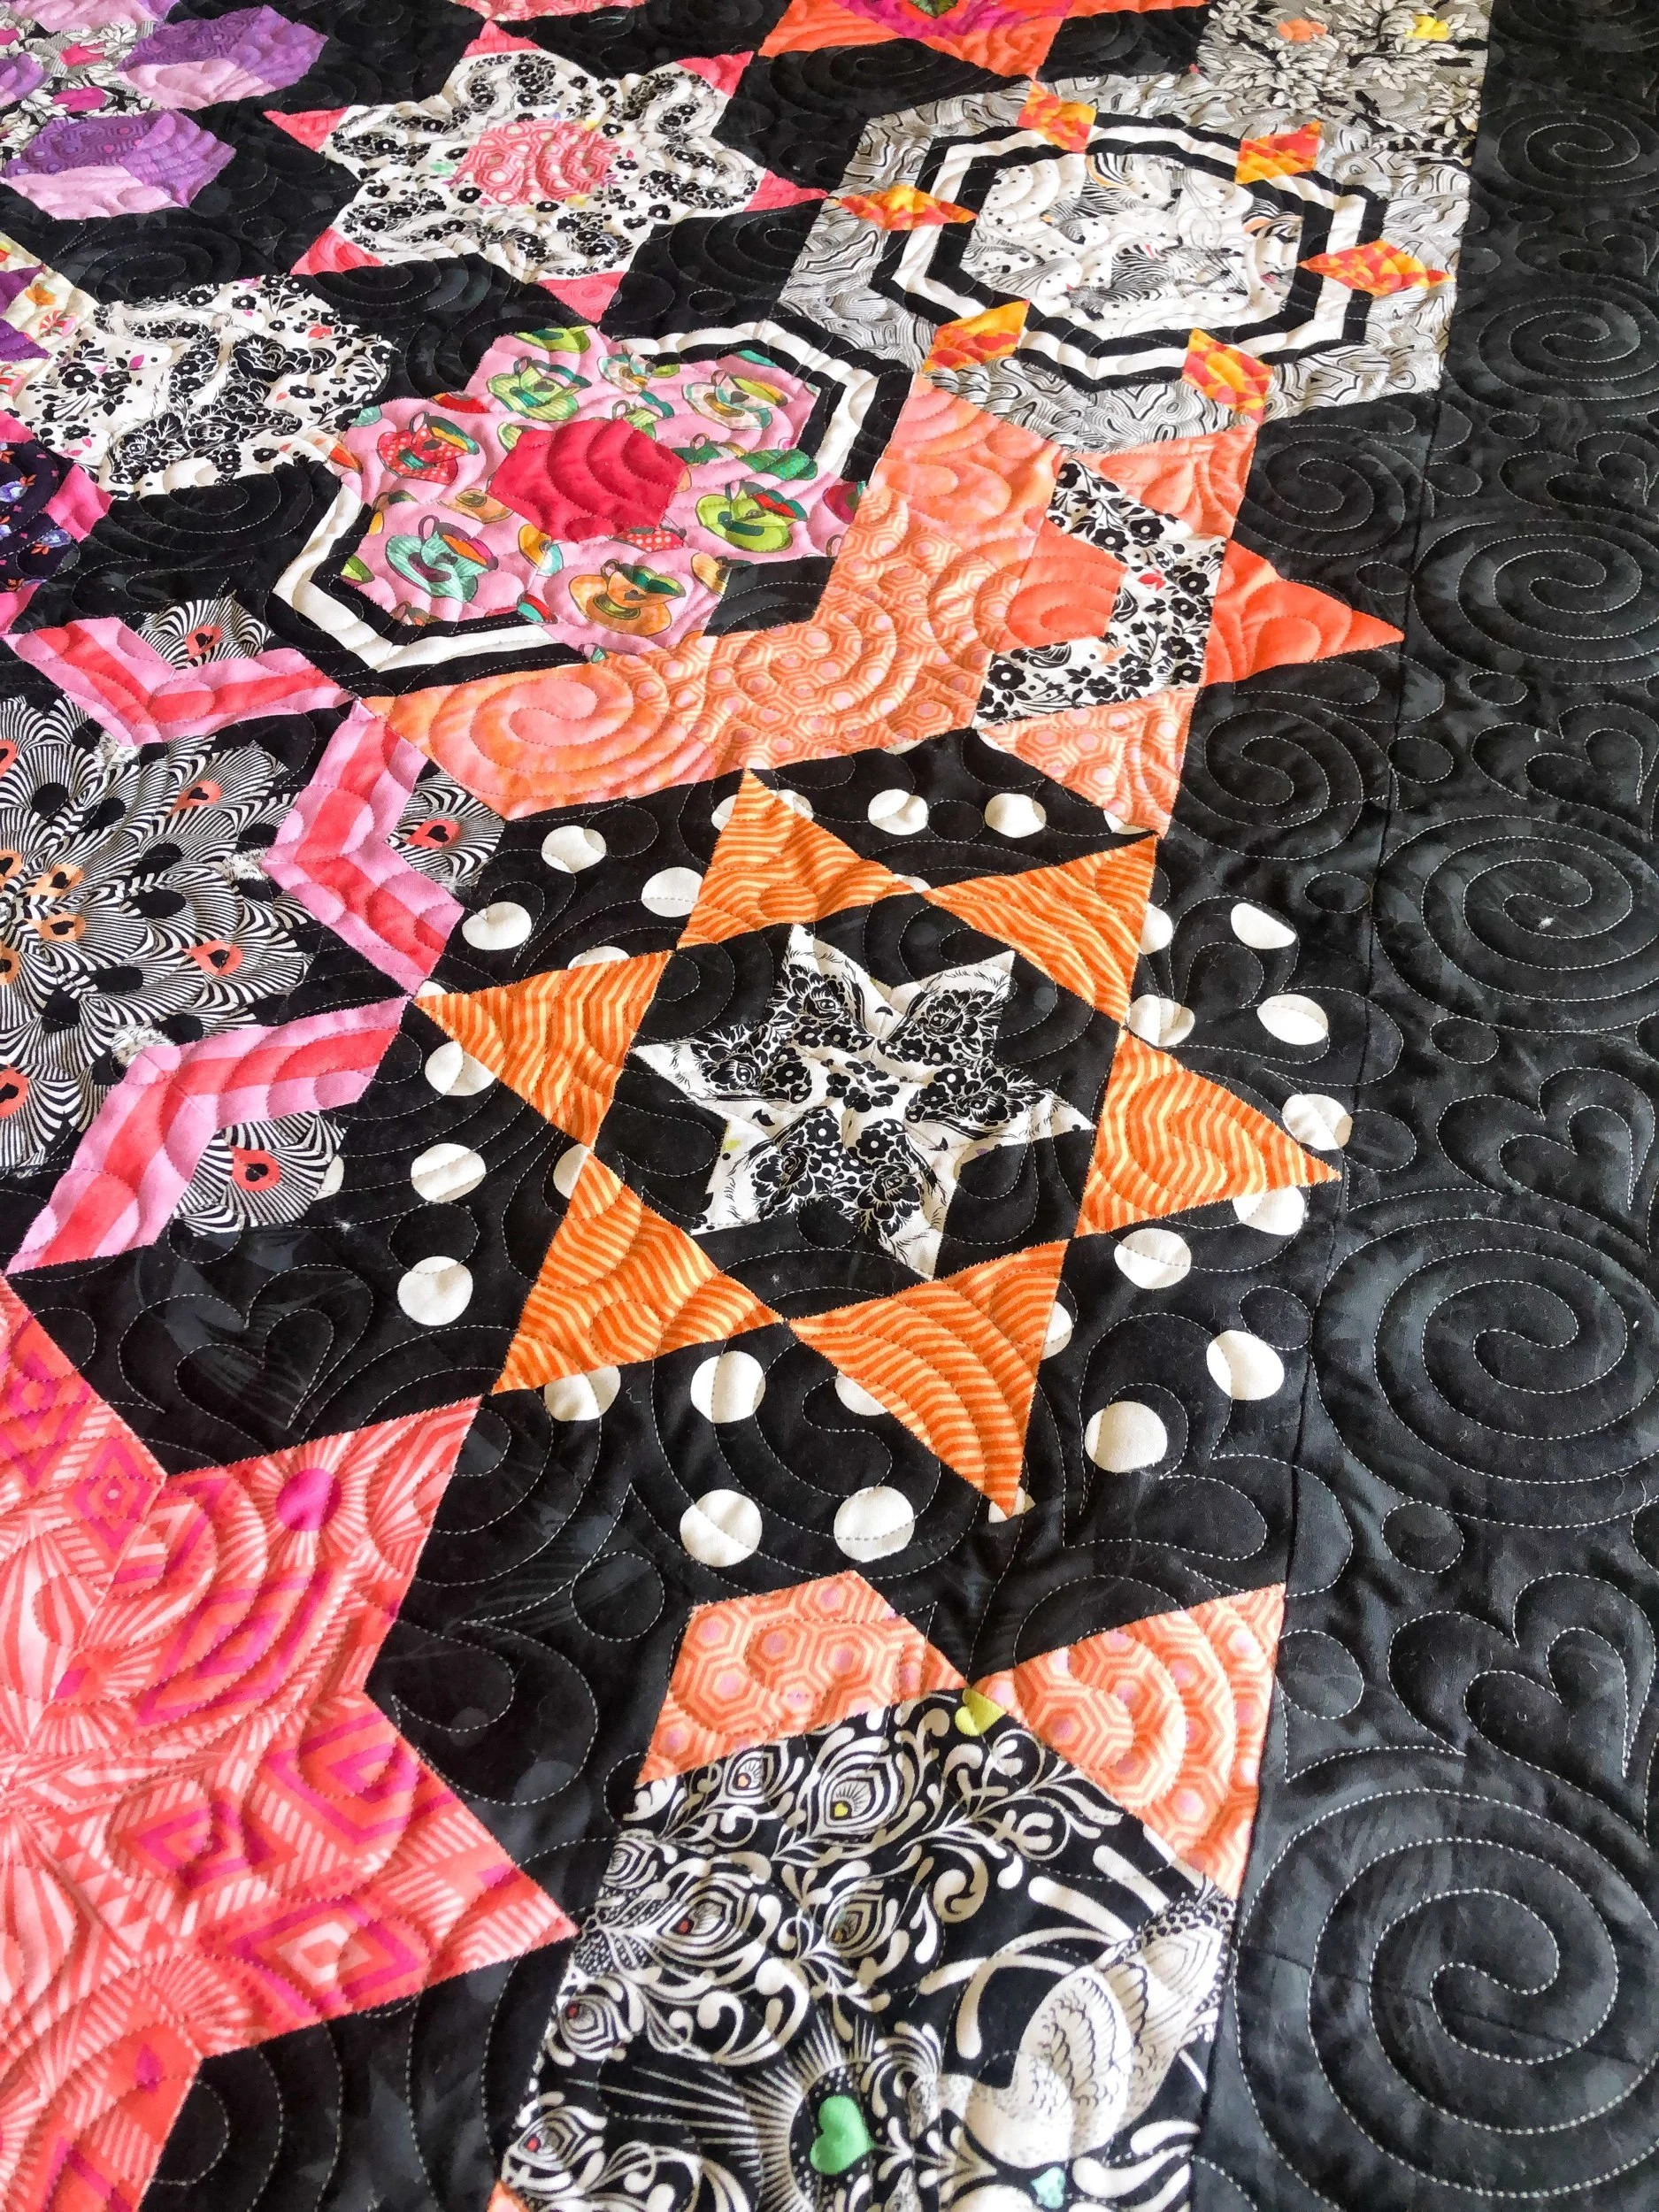
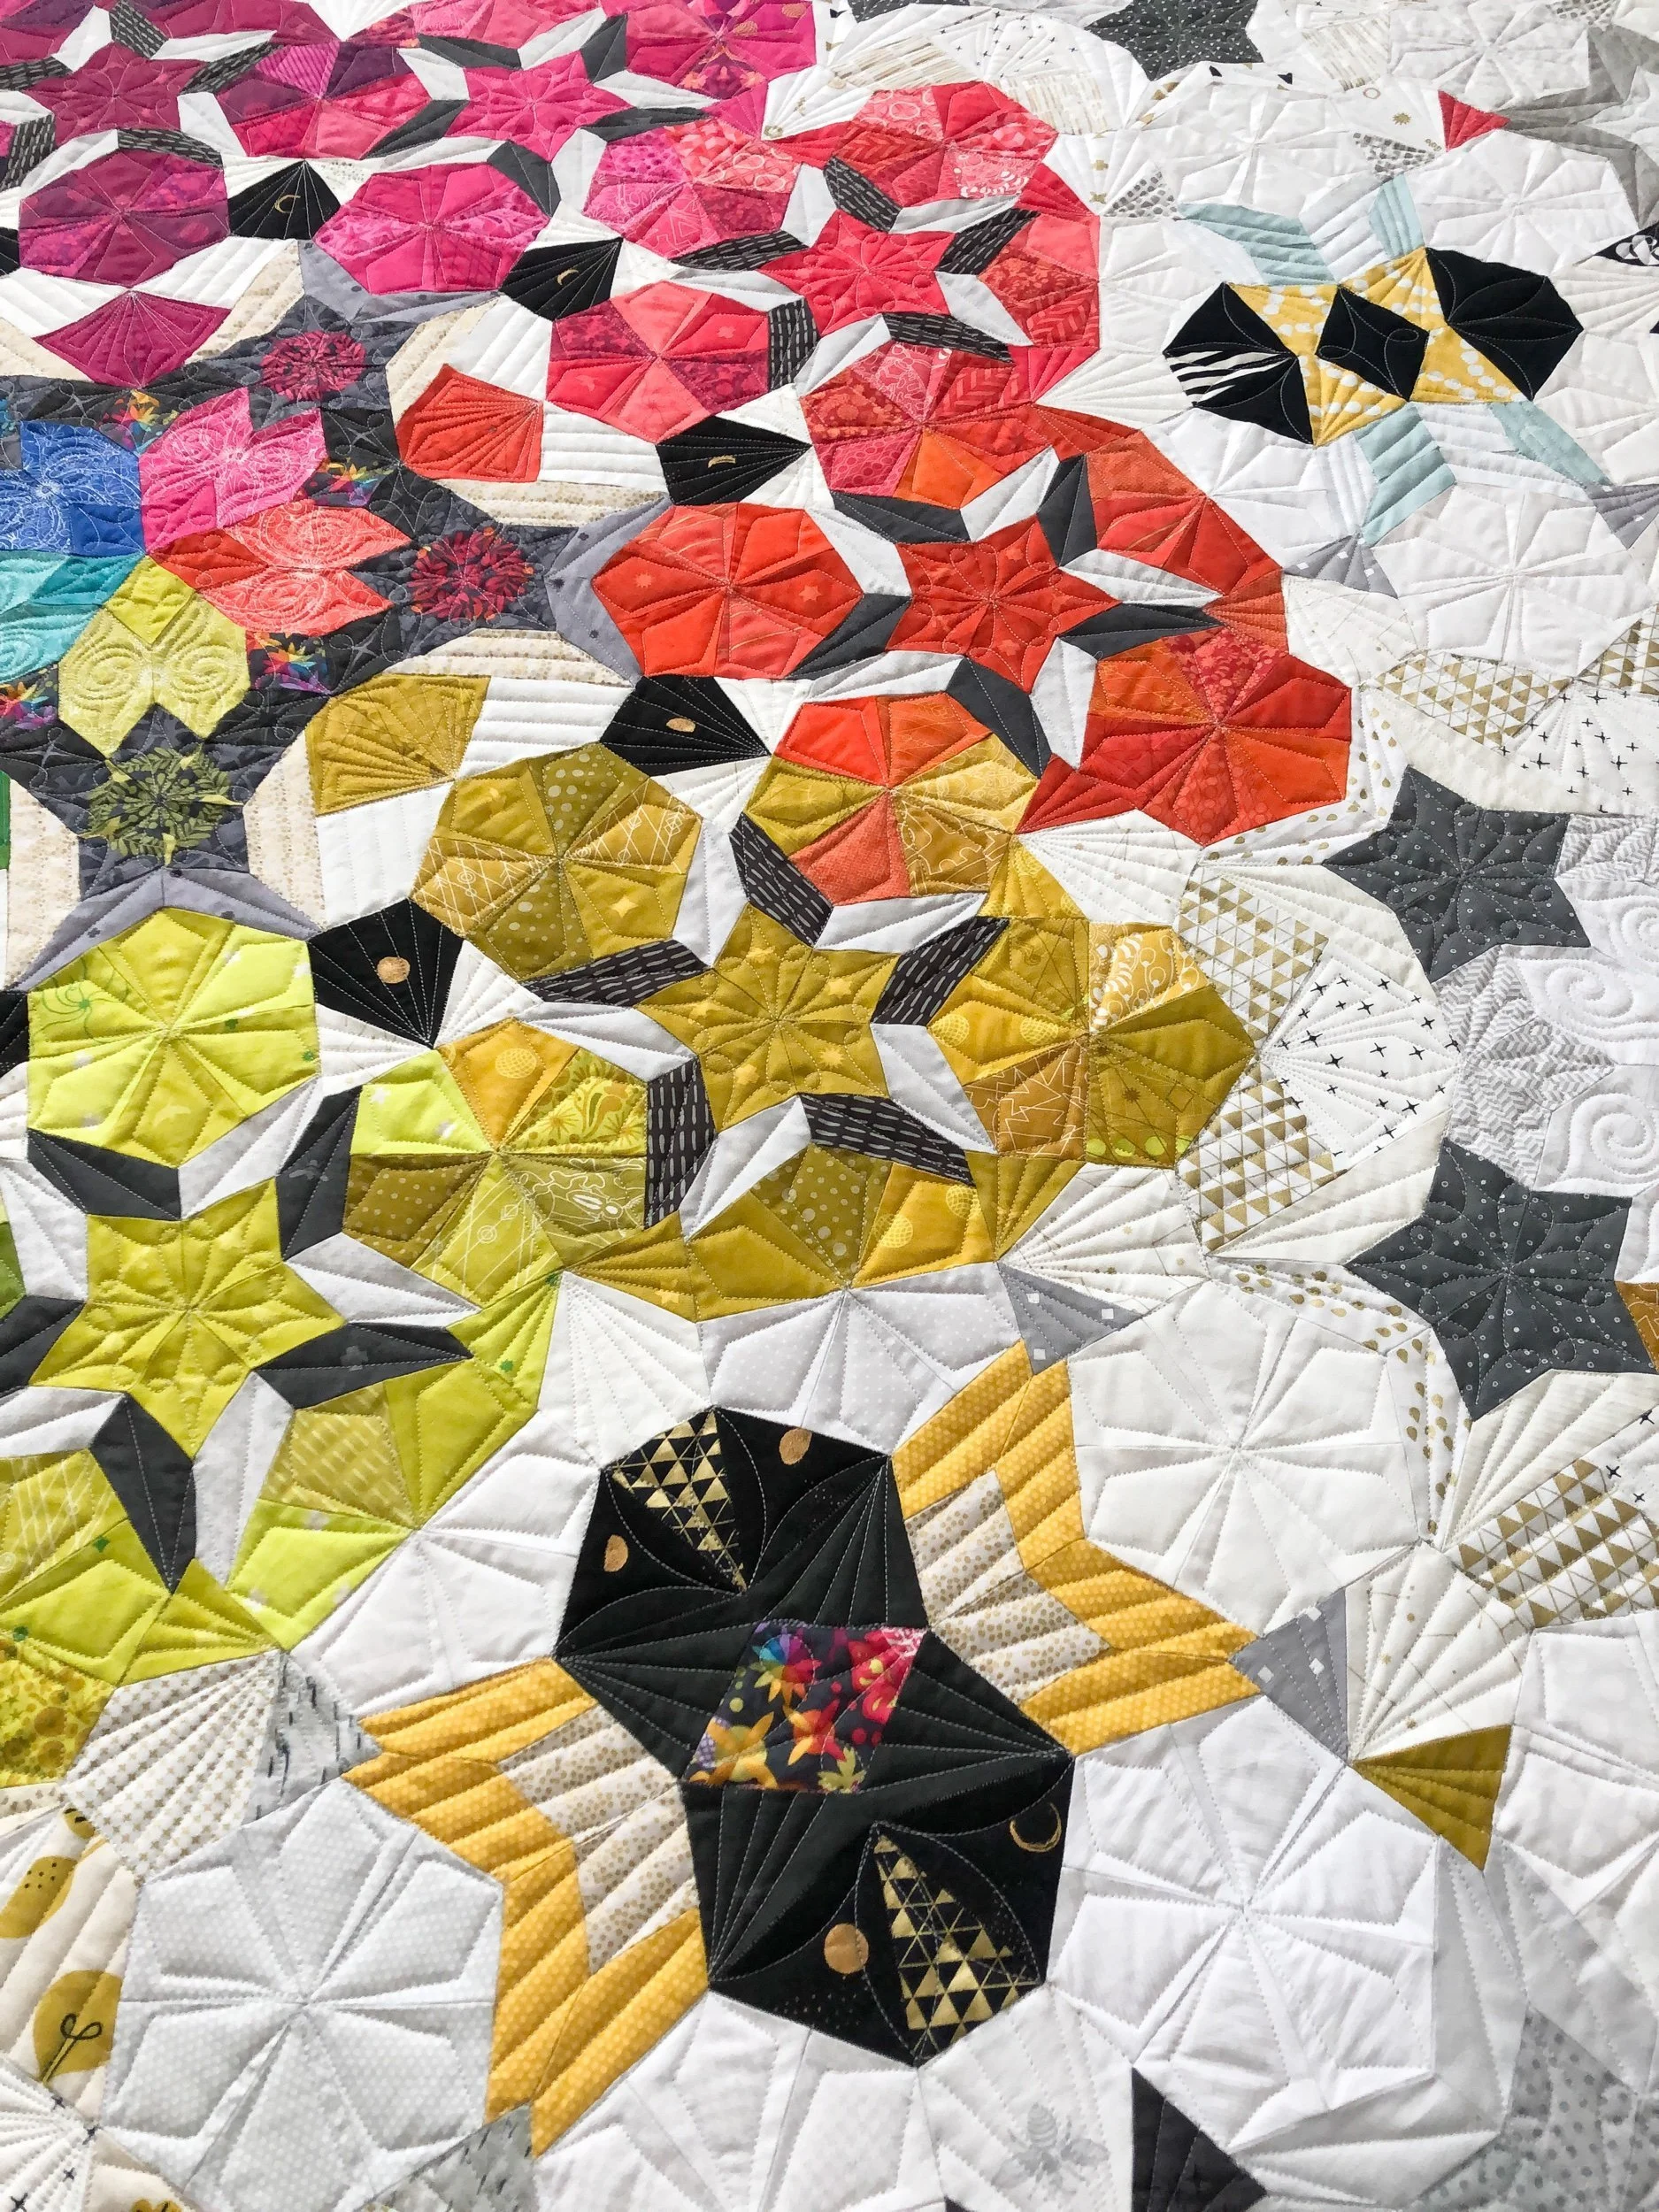
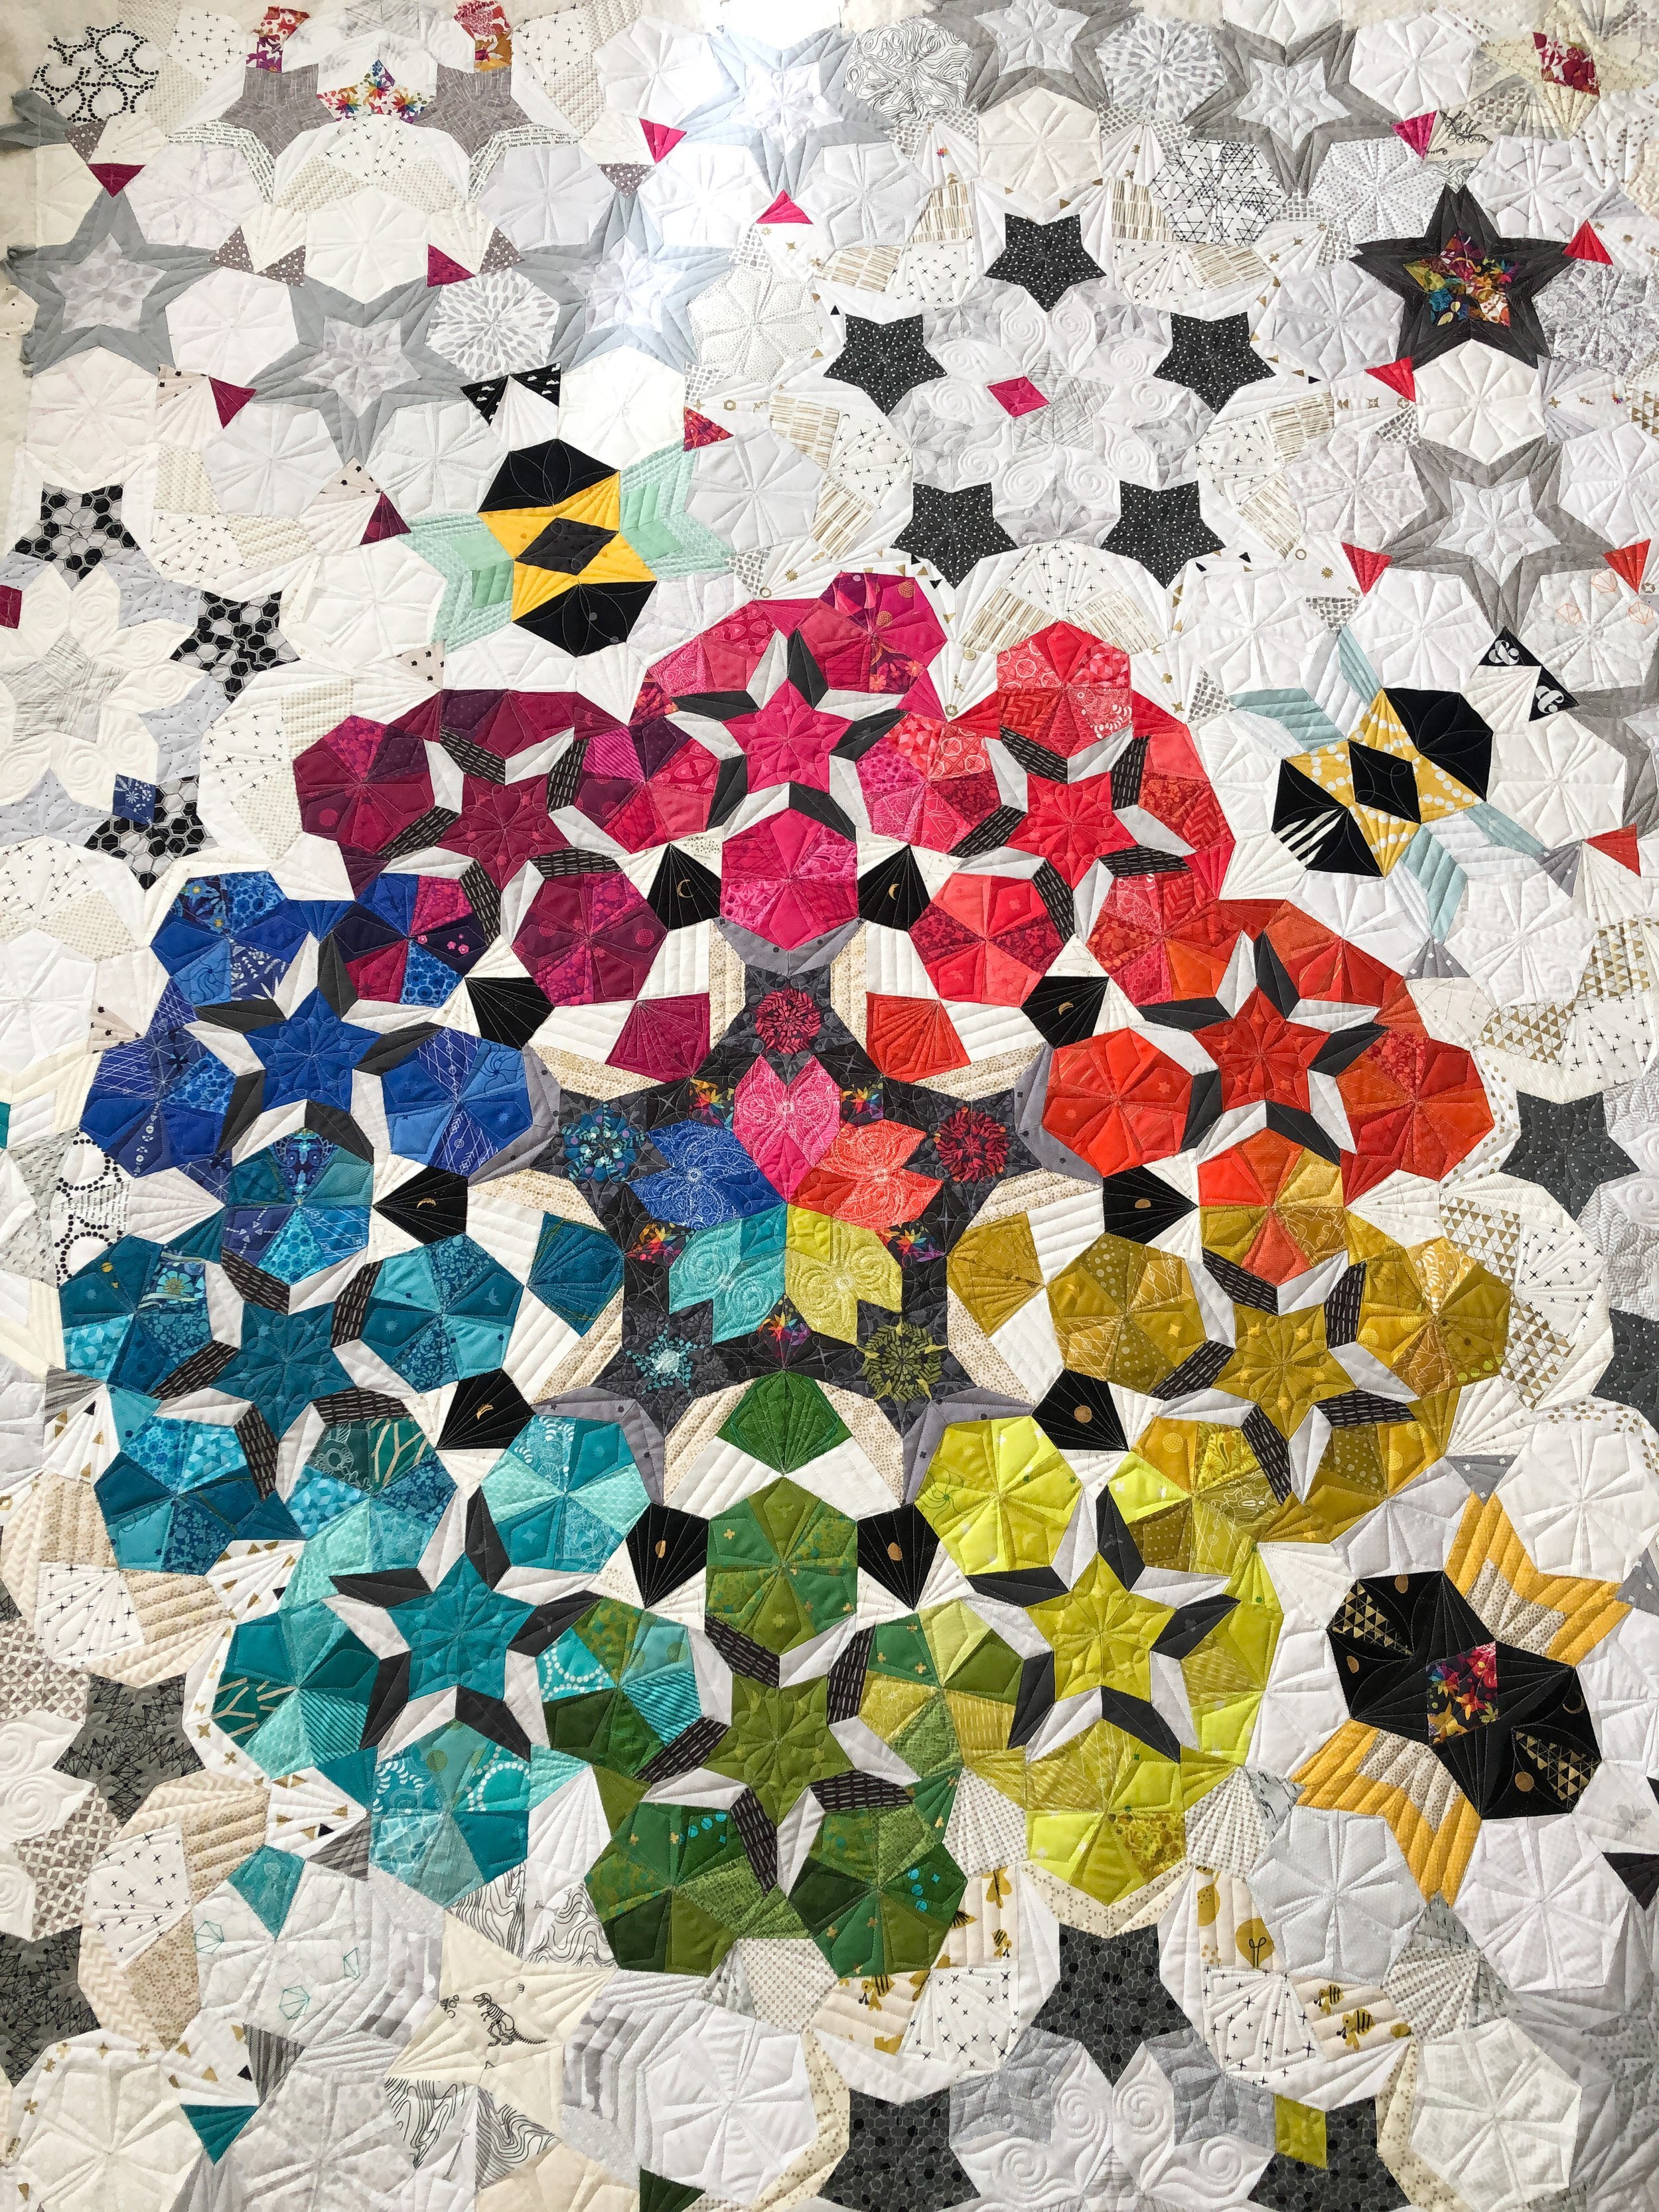
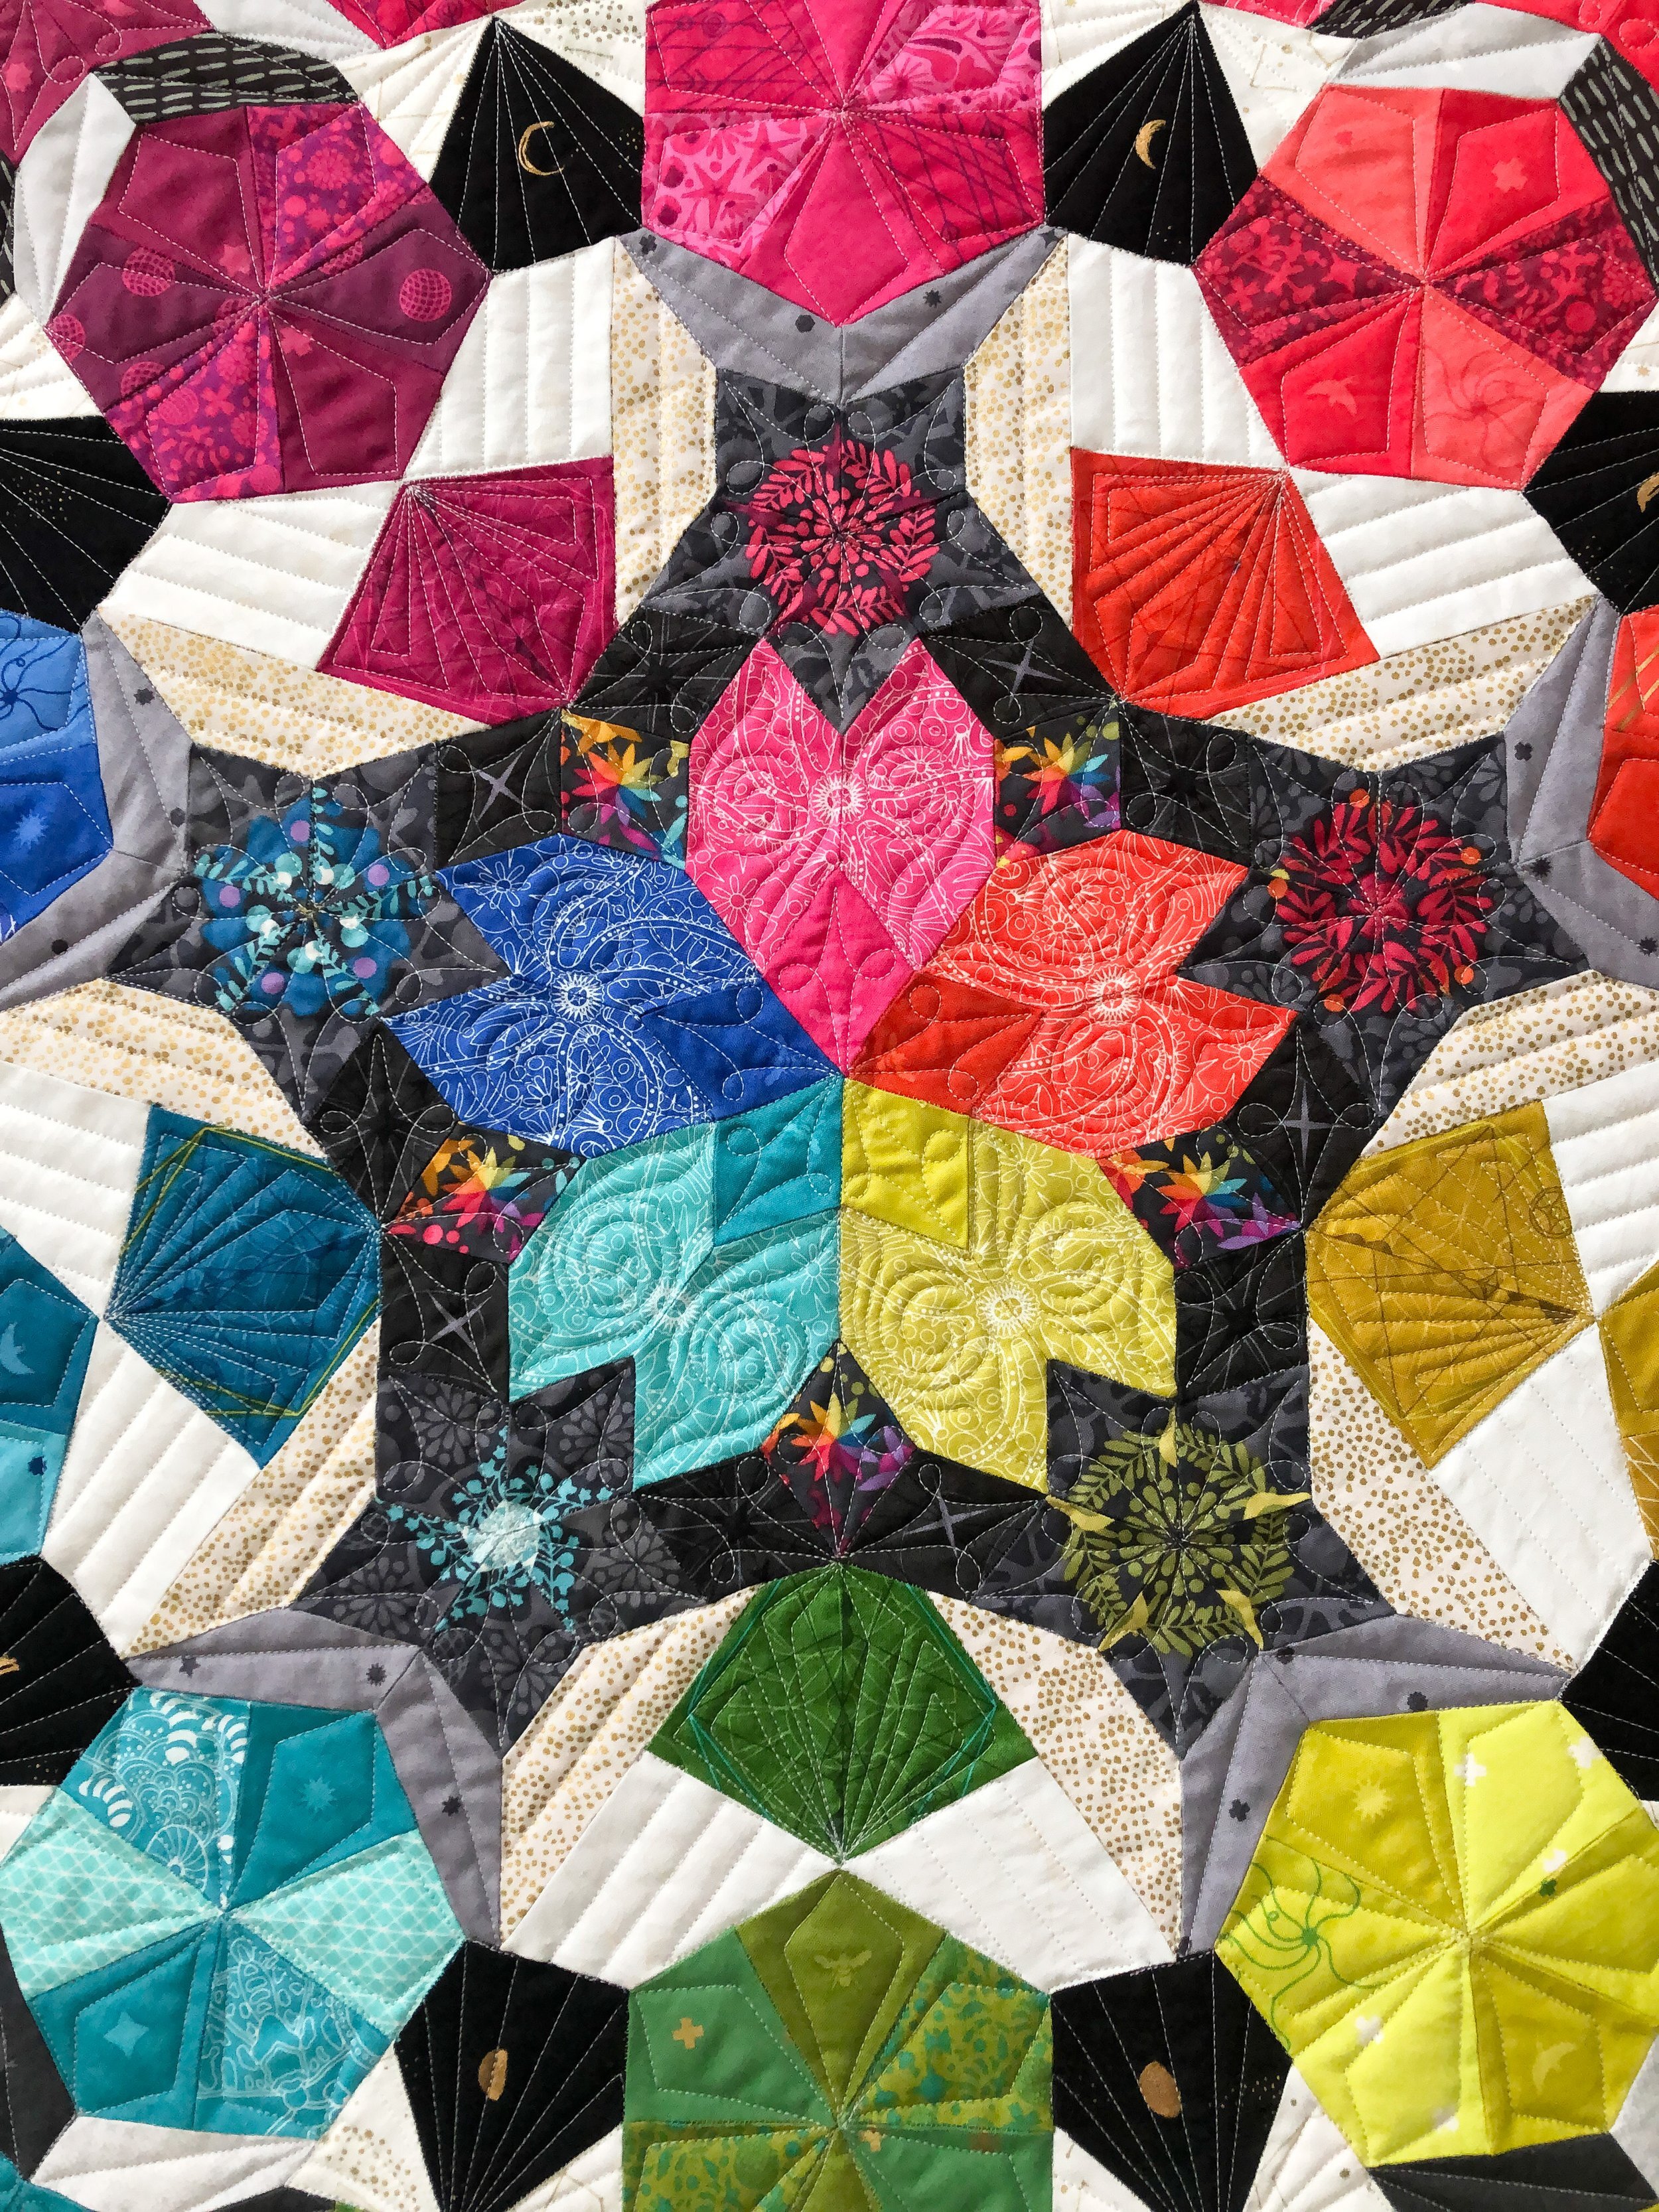
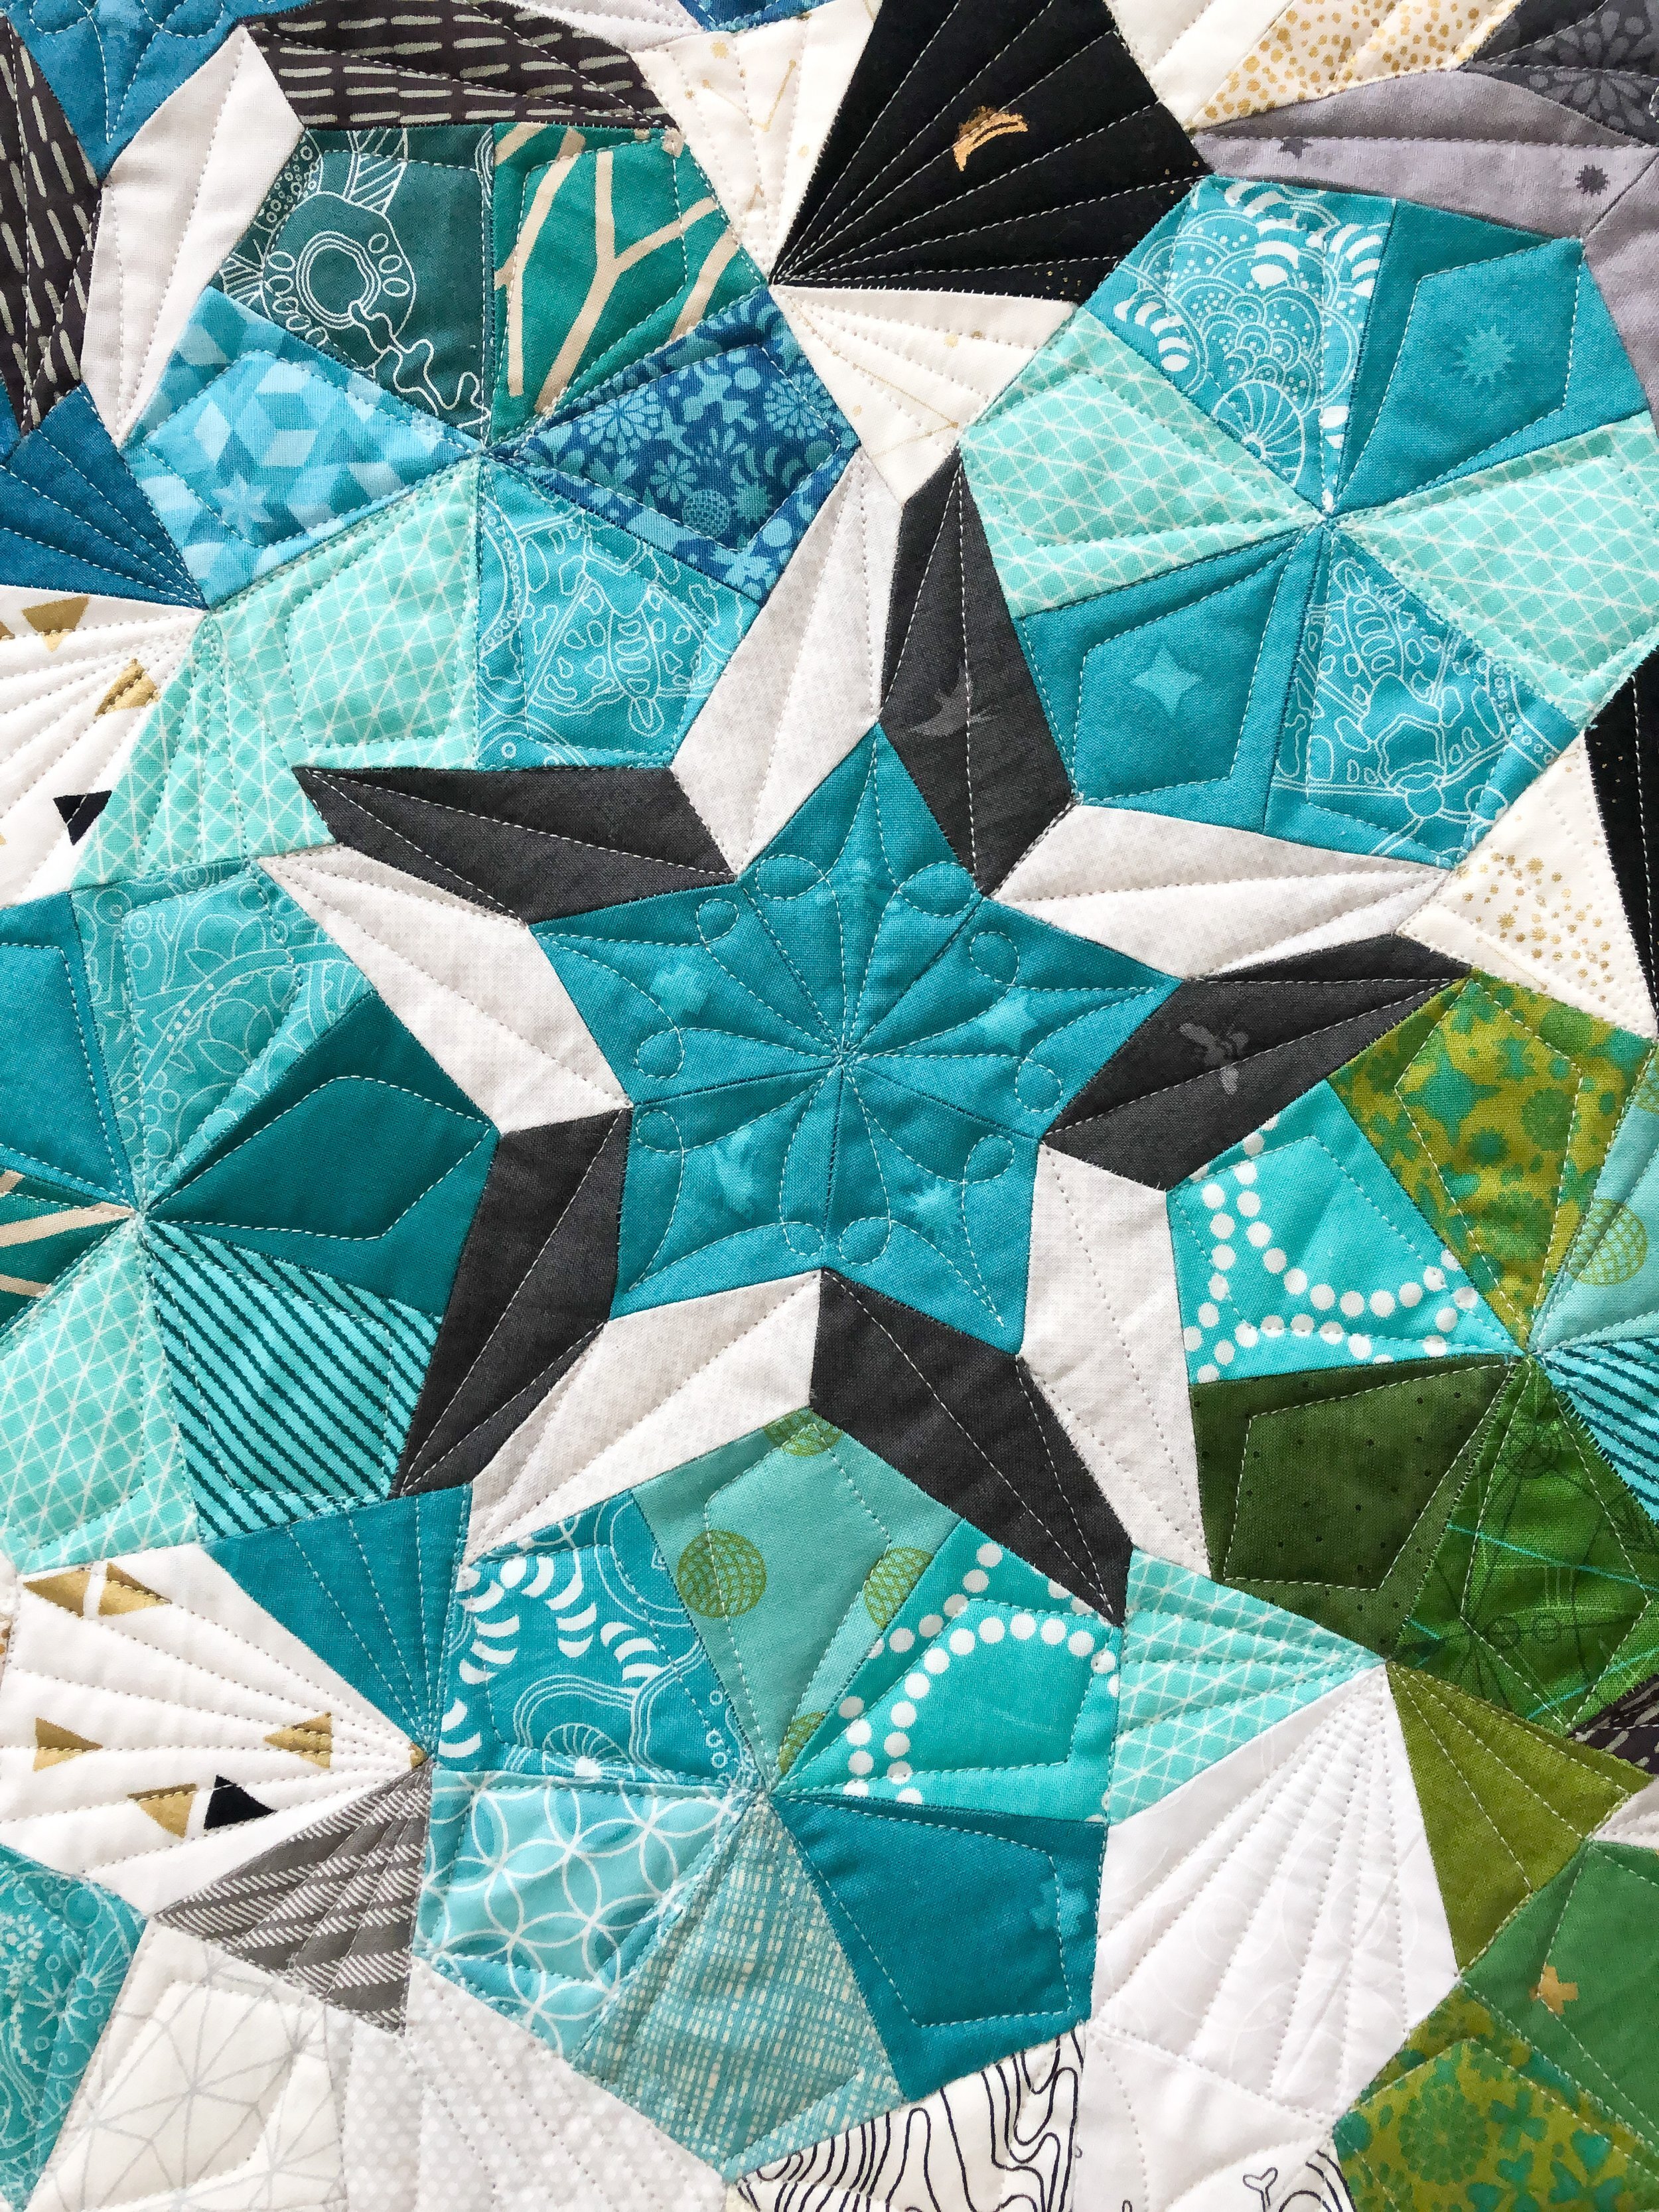
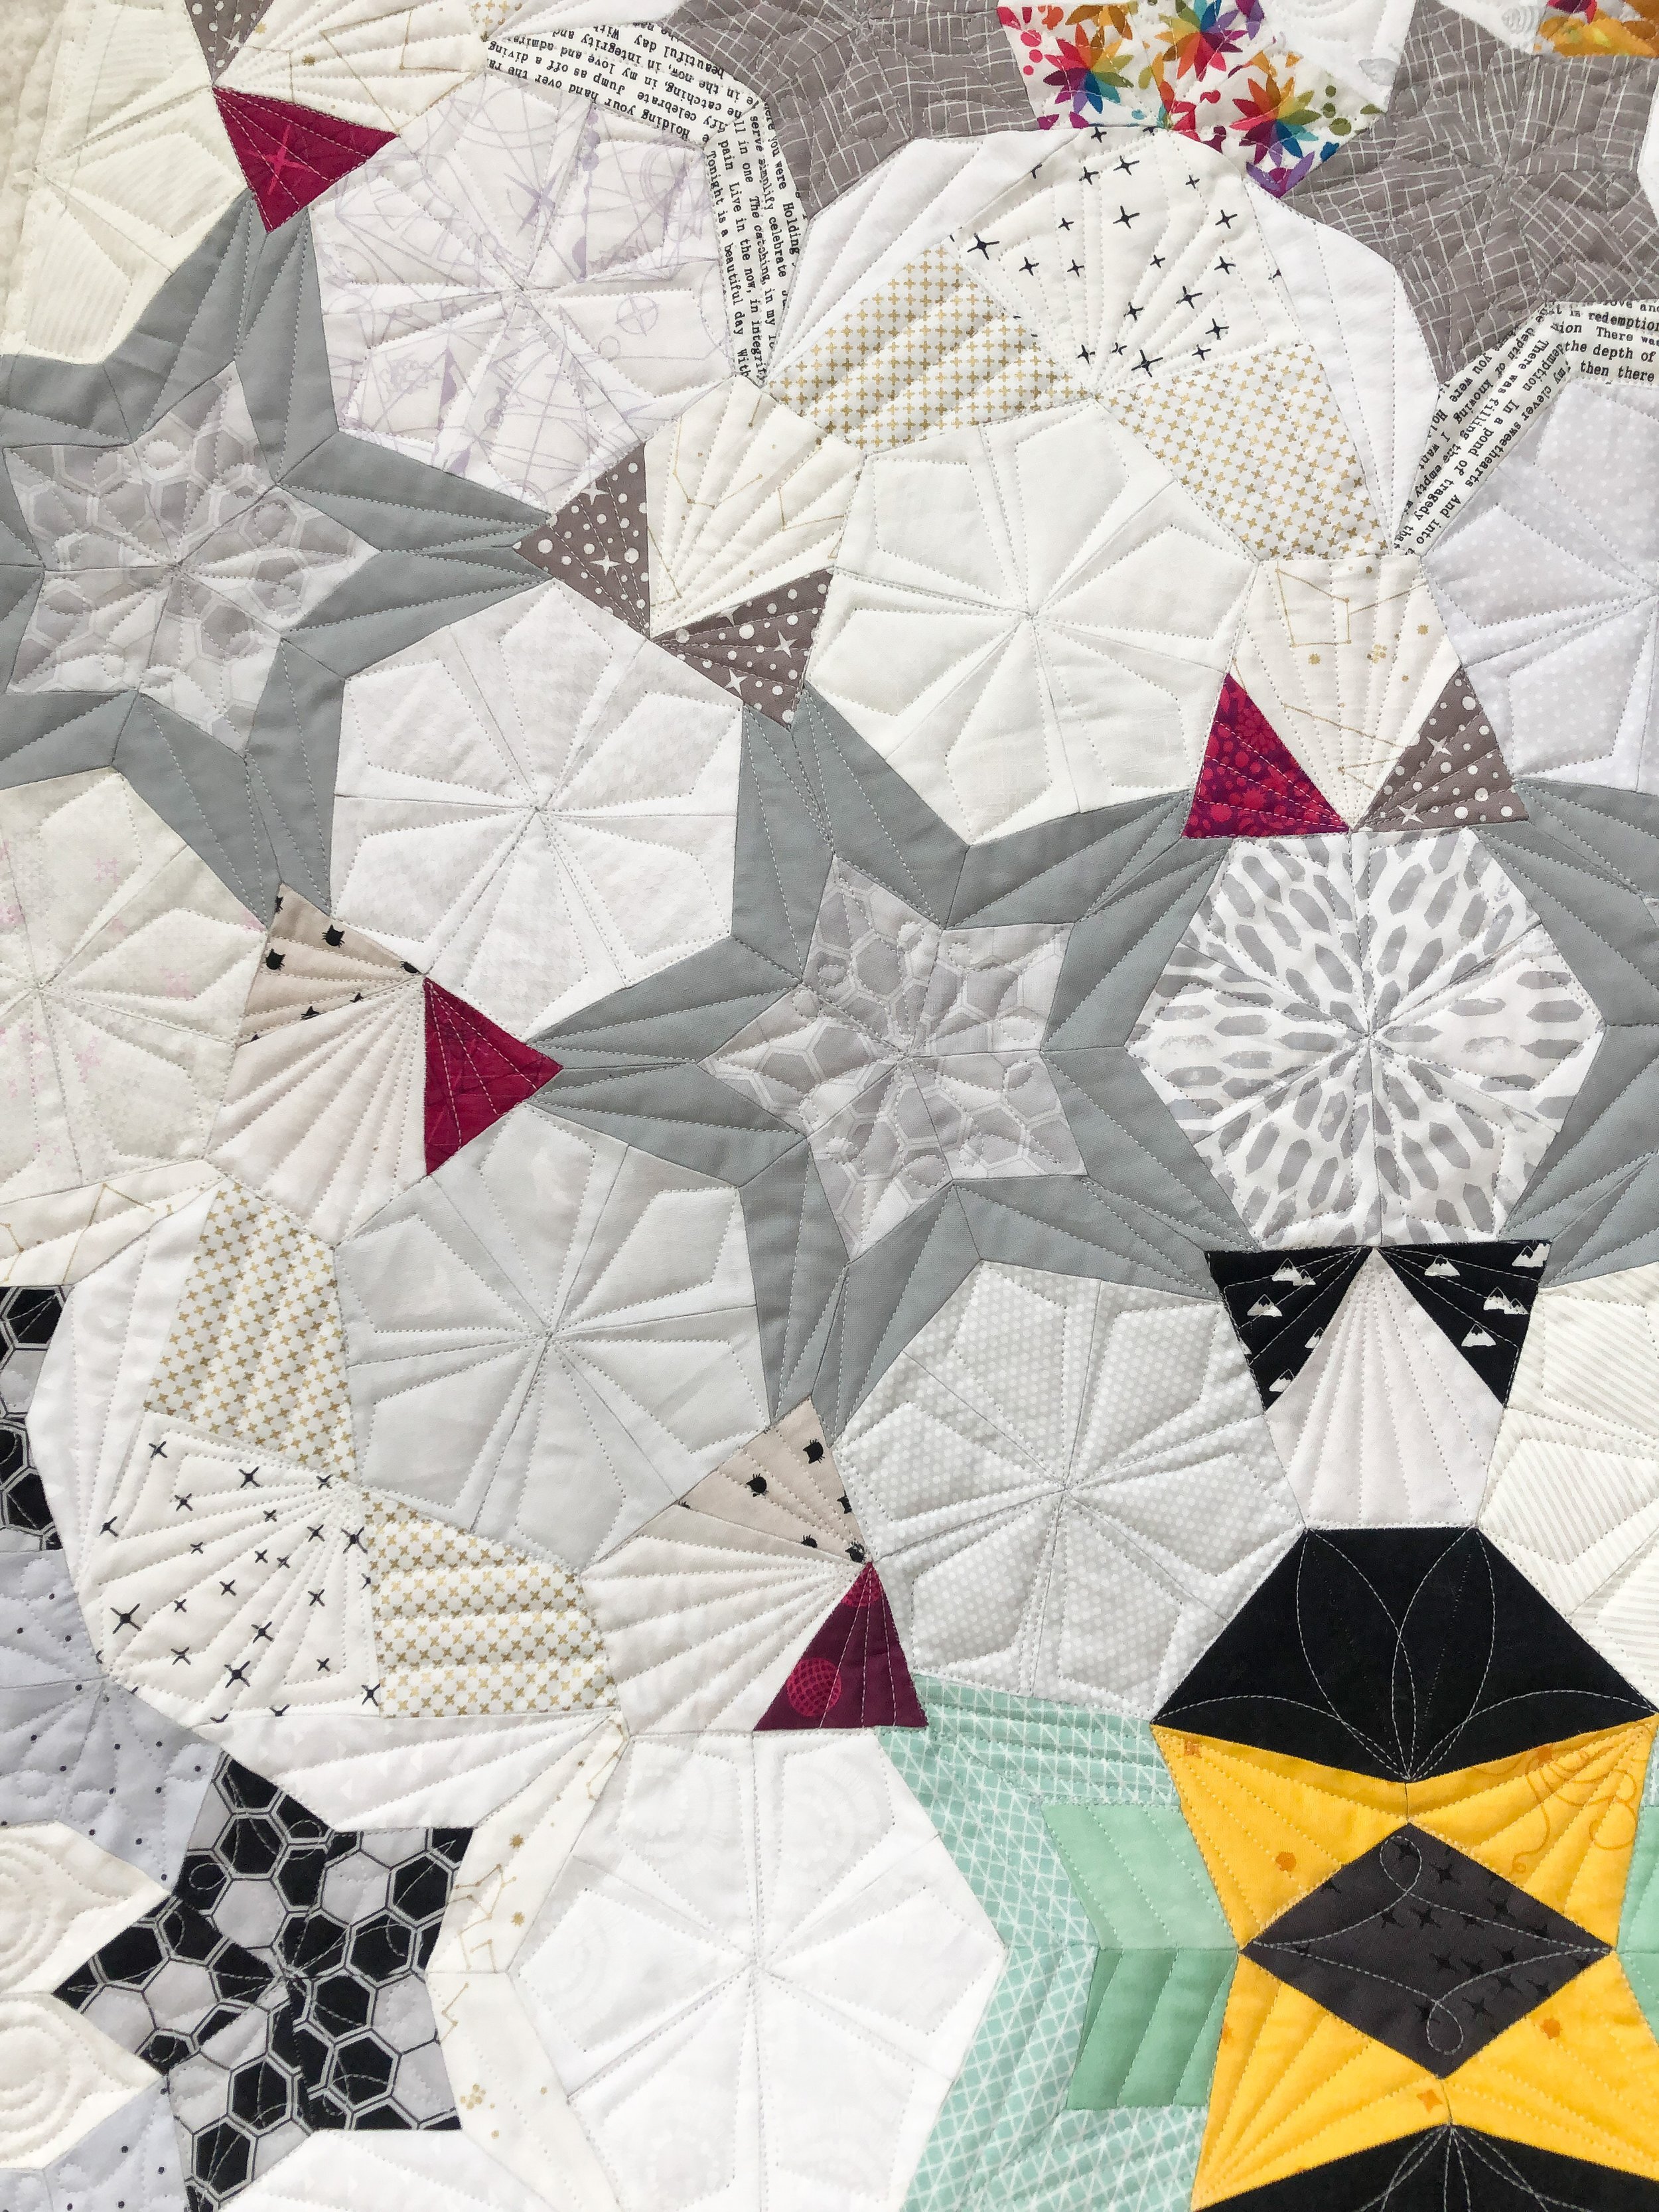
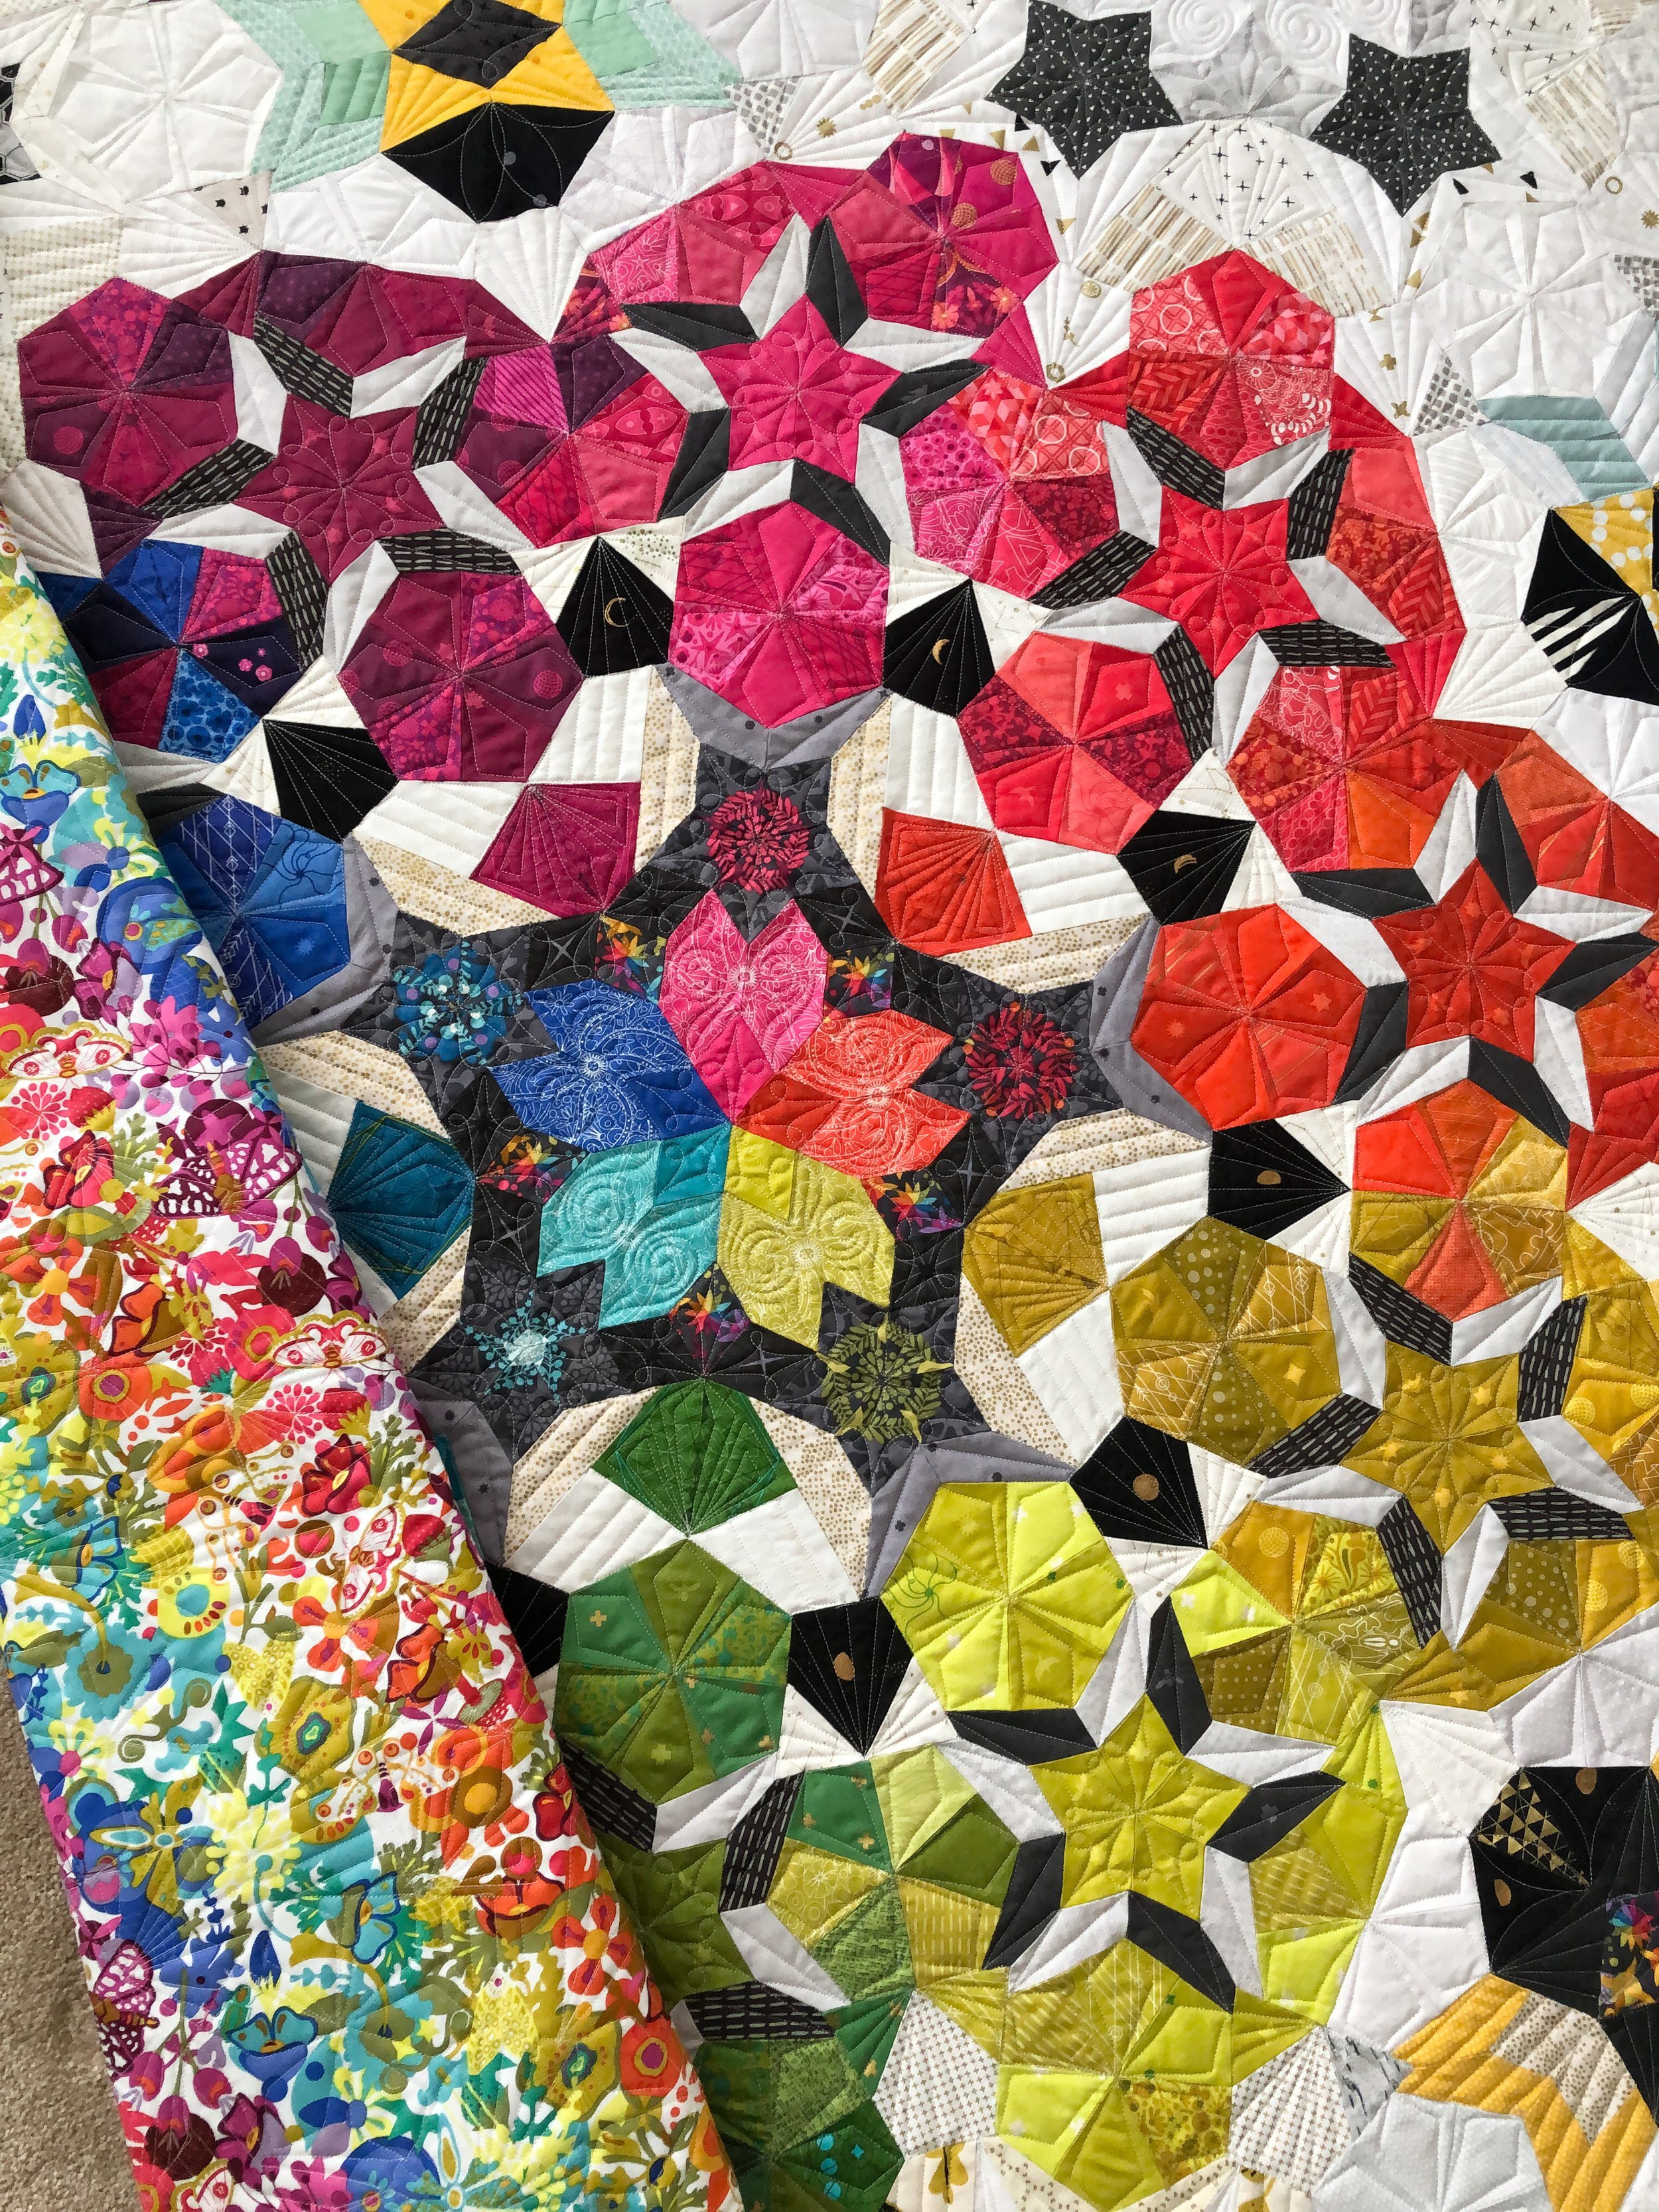
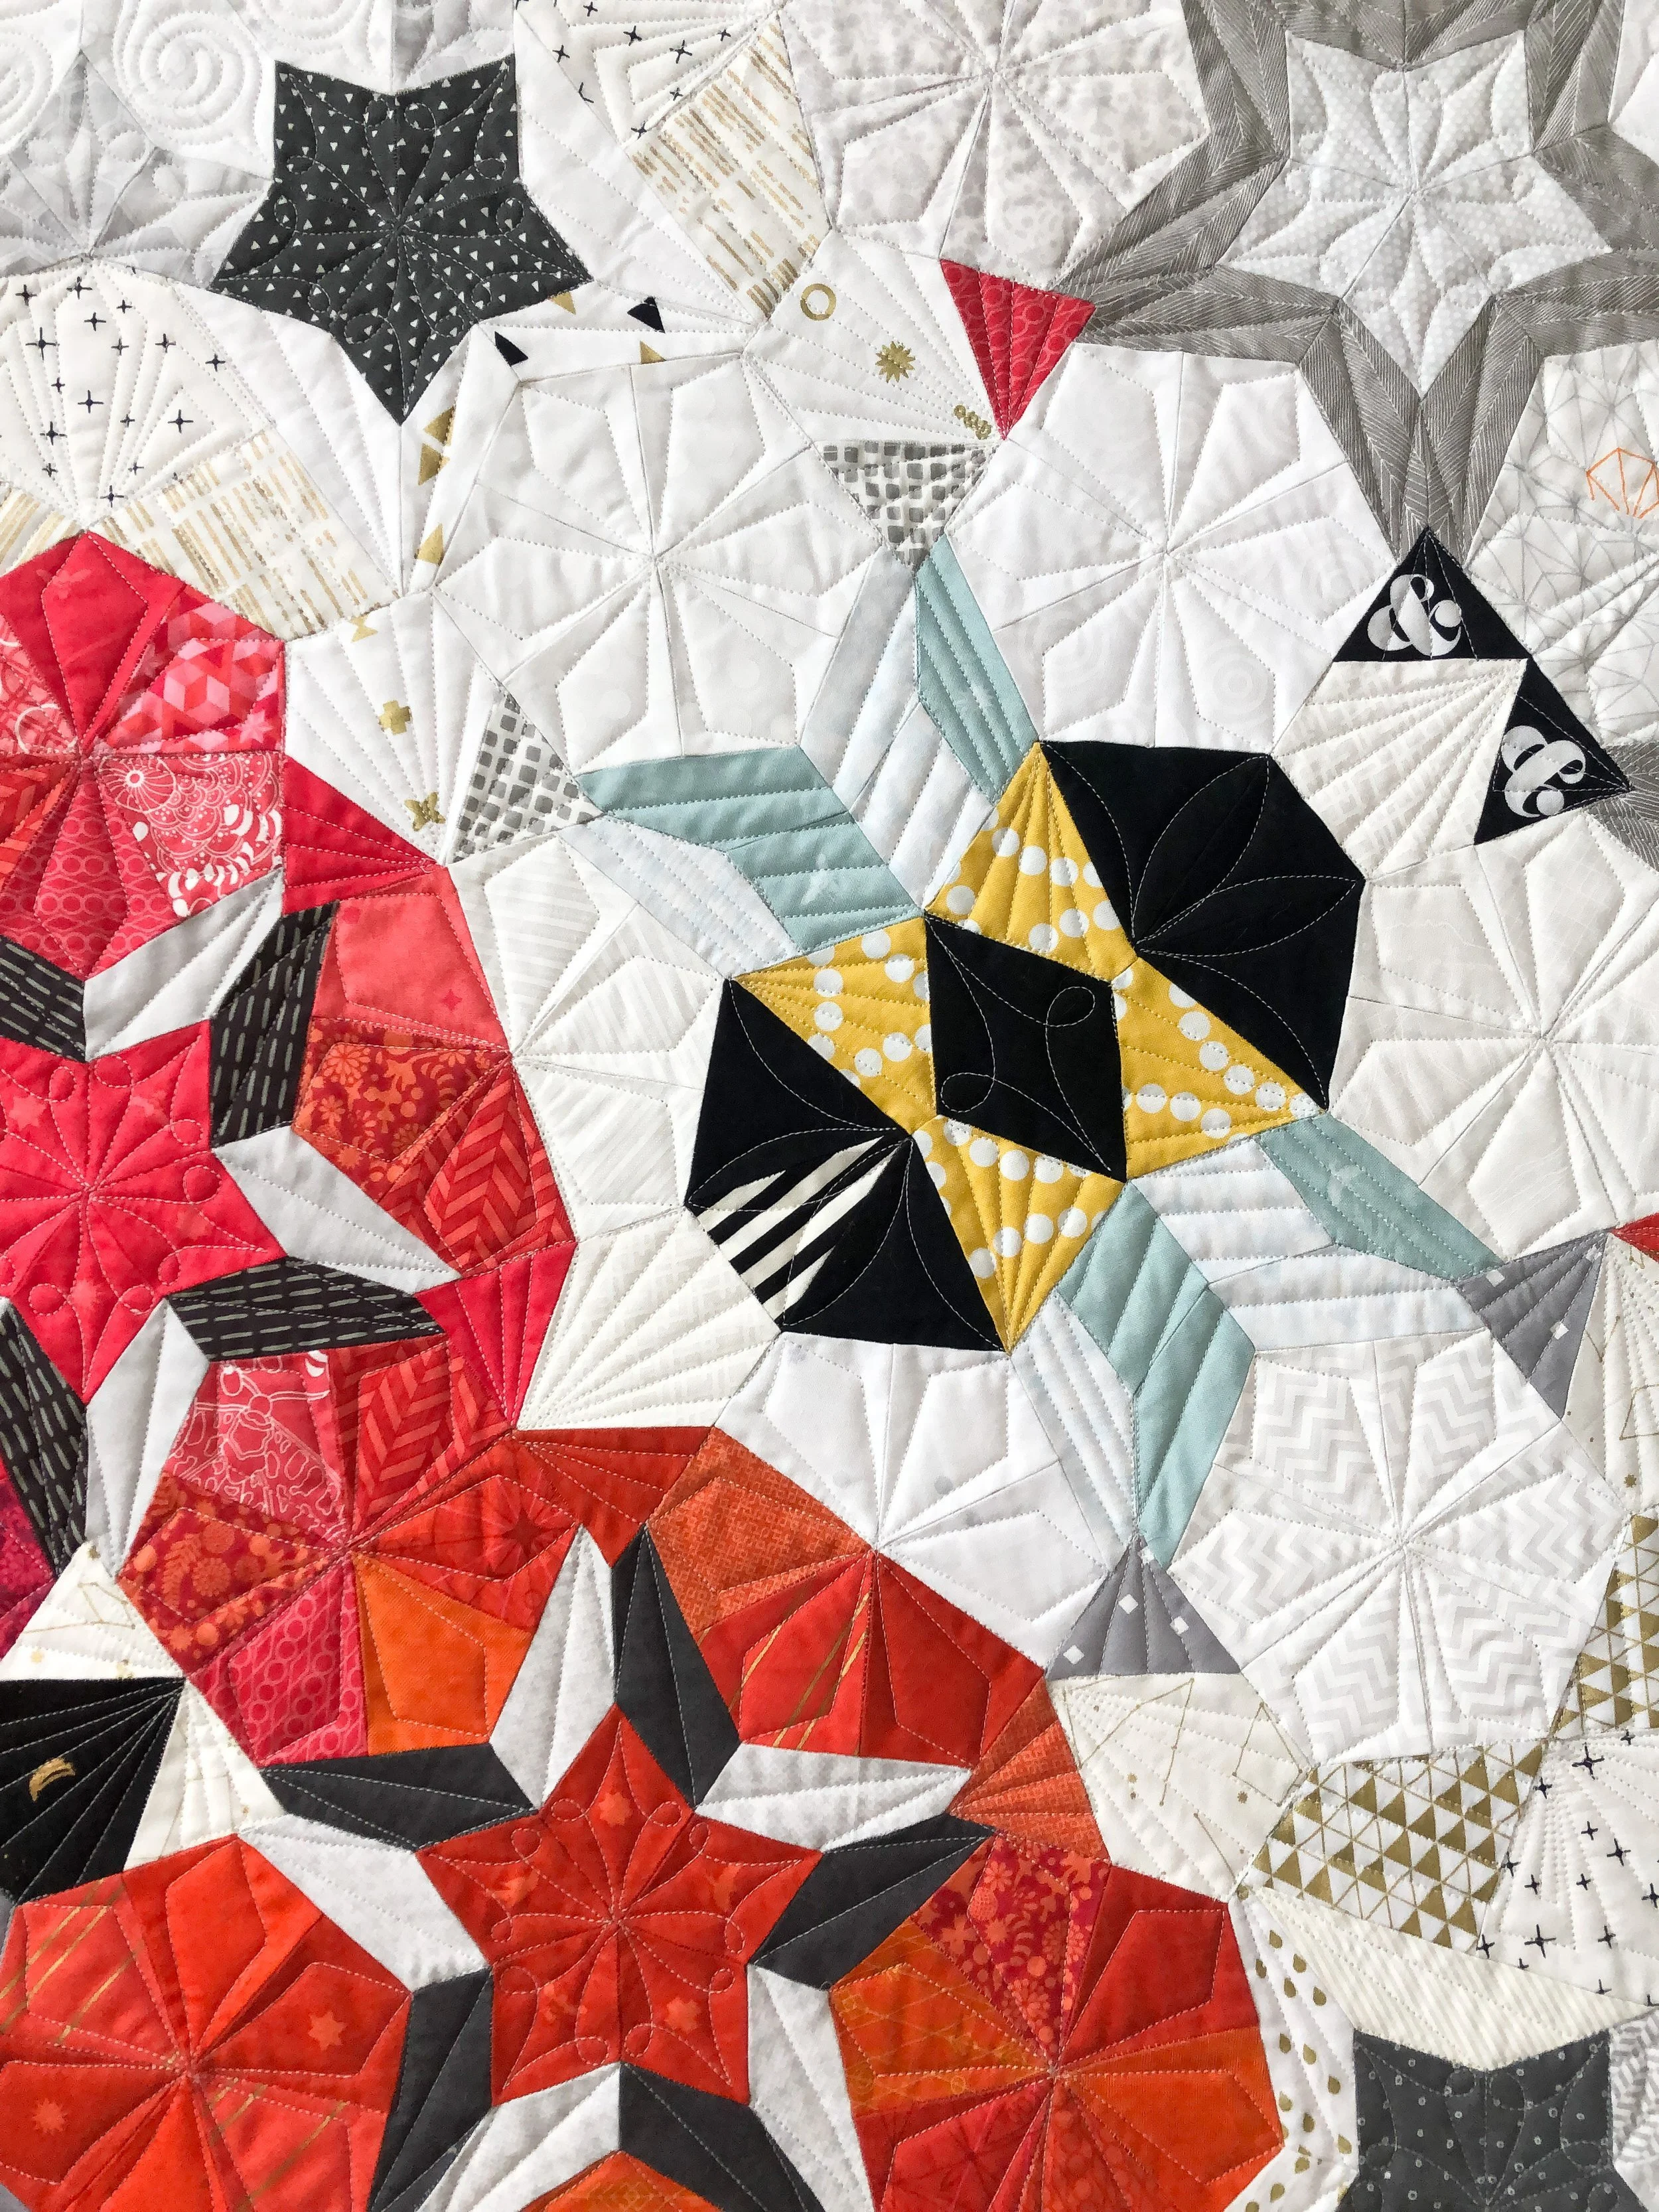
Now…let talk about this amazing quilt that Beth made. It’s the Smitten pattern by Lucy Carson Kingwell. It is done by hand using the English paper piecing method. Incredible huh?!?!!!! Beth said that she took 4 years to sew this together. Which I think is incredibly fast. I’m over 7 years on my hexie flower quilt. There are some Smitten patterns on Etsy that come with the papers.
This is Beth’s second Smitten quilt that I’ve quilted. Her first she gave to her daughter. She actually made up a few of the blocks herself, using some of the shapes. It’s also fun to see all the Tula Pink fabrics that she fussy cut to show the print so beautifully.
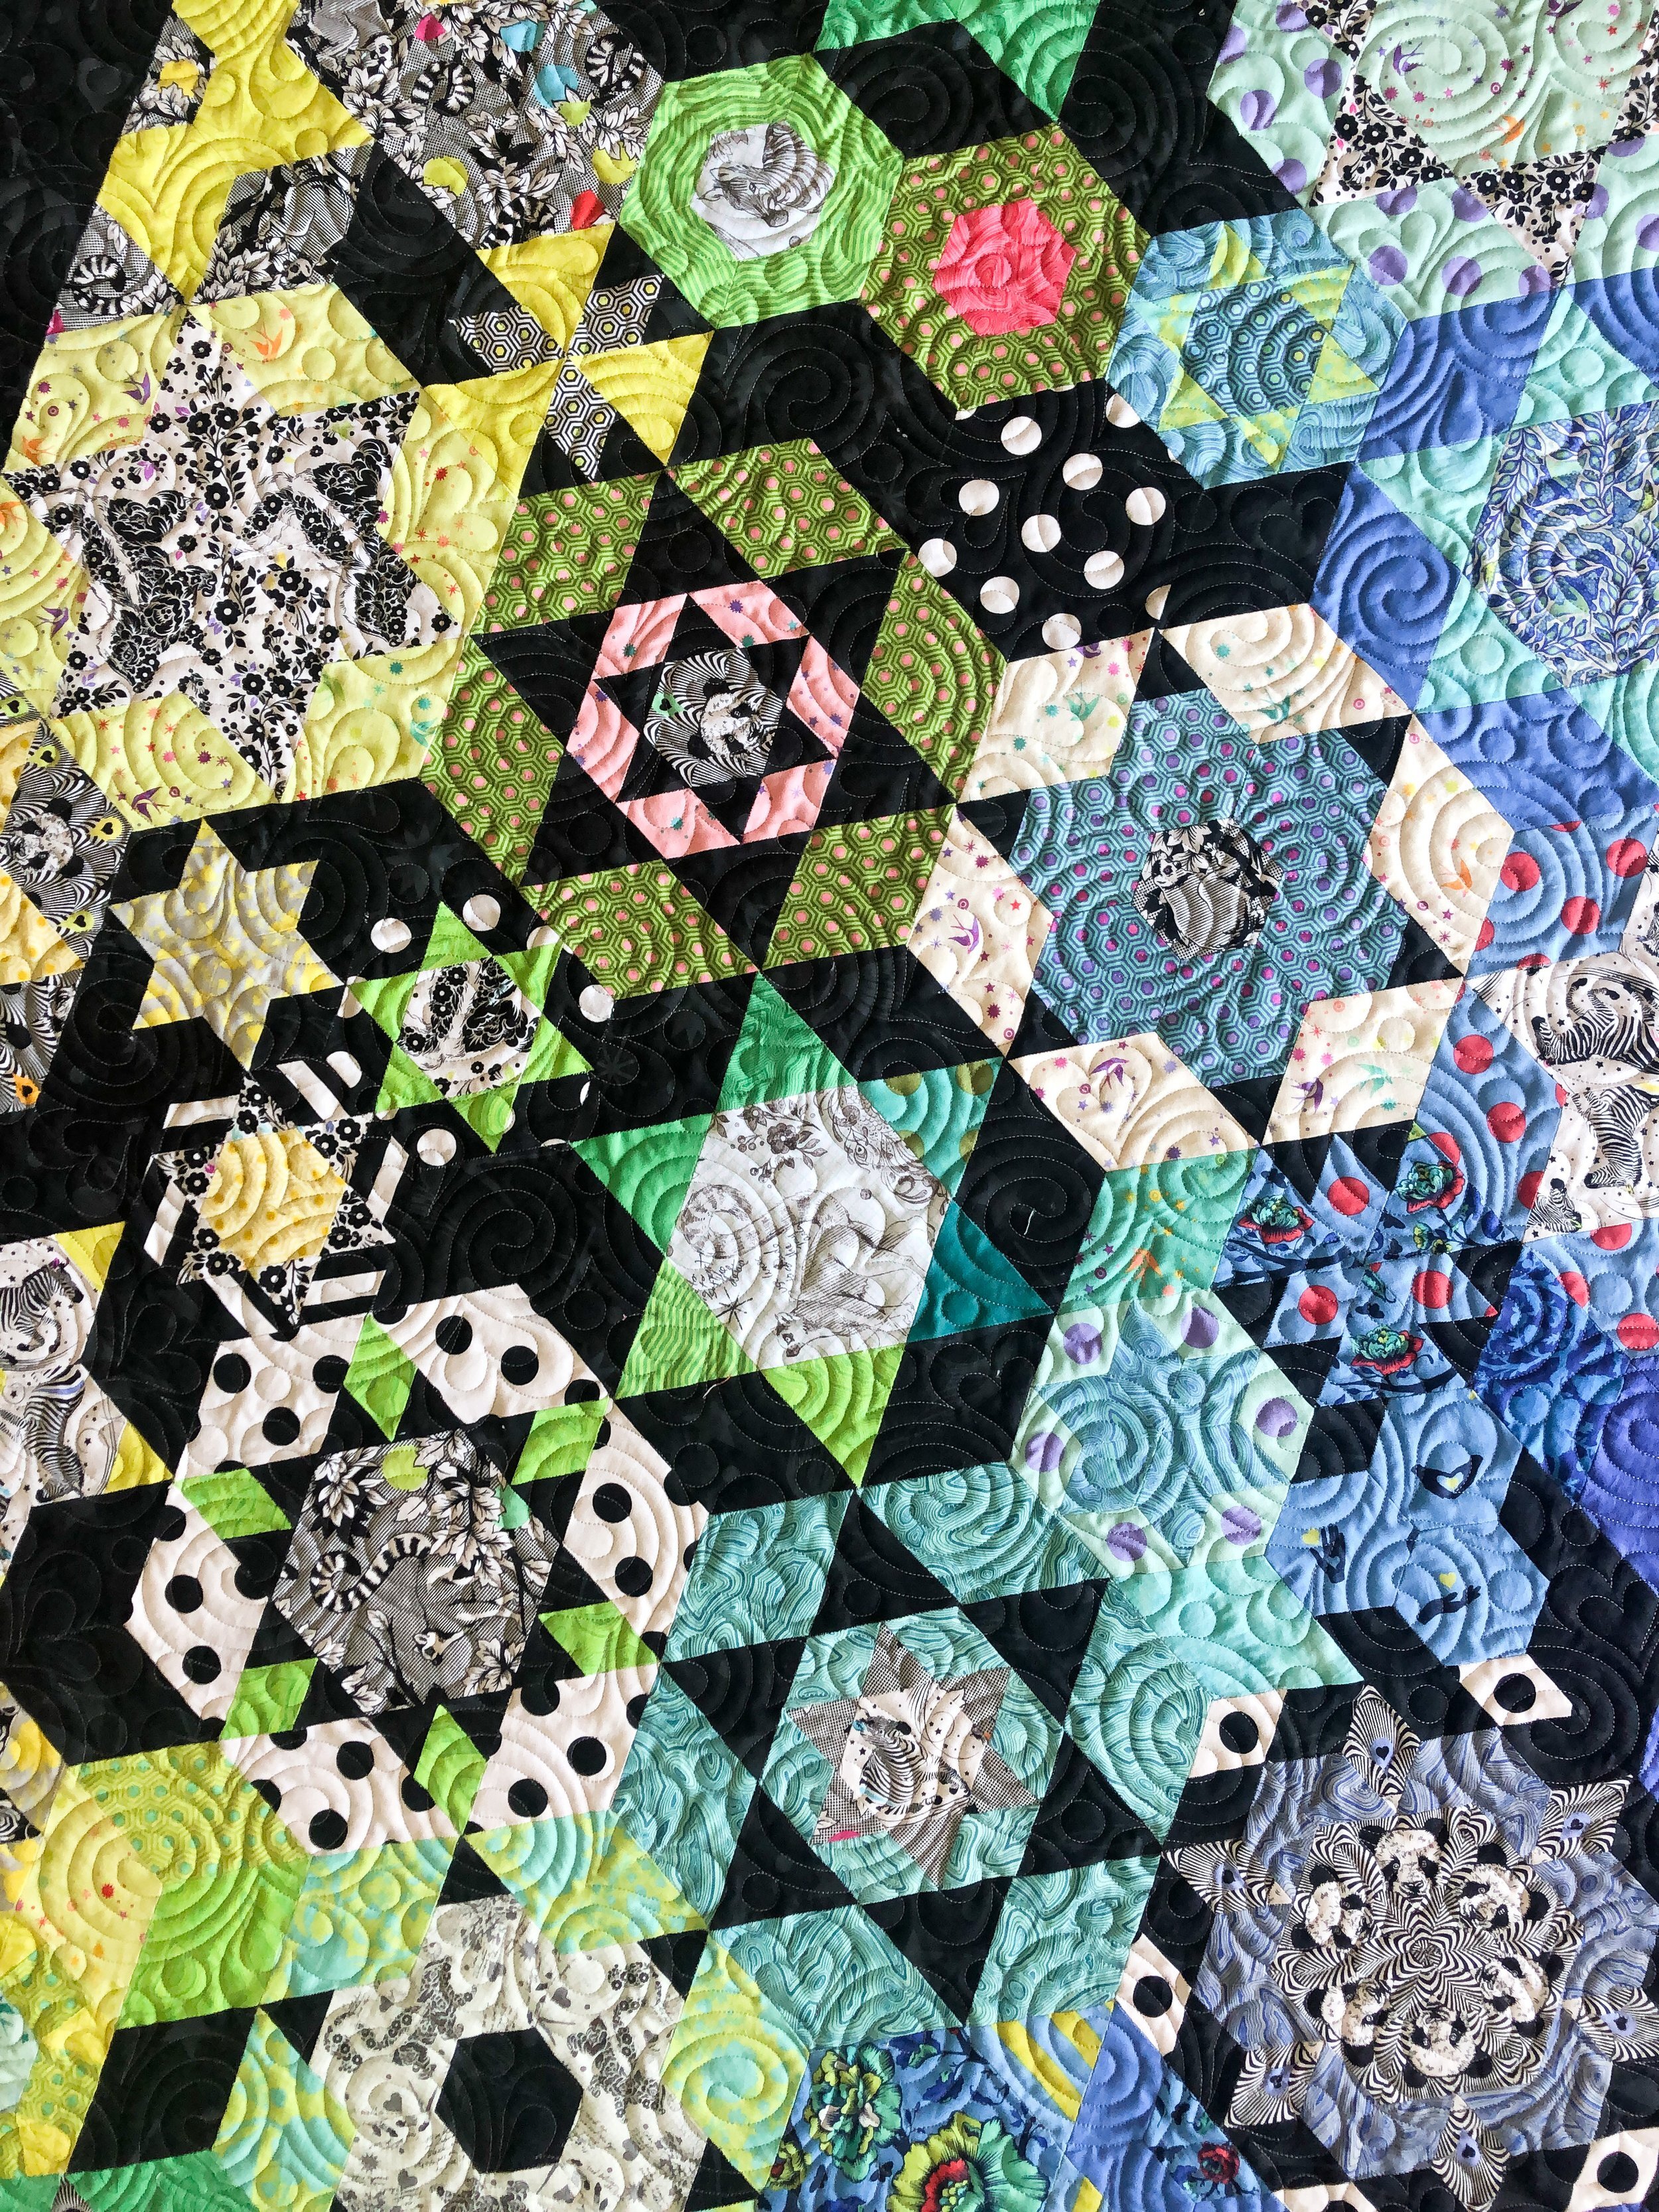
The black fabric certainly helps all the other fabrics pop!

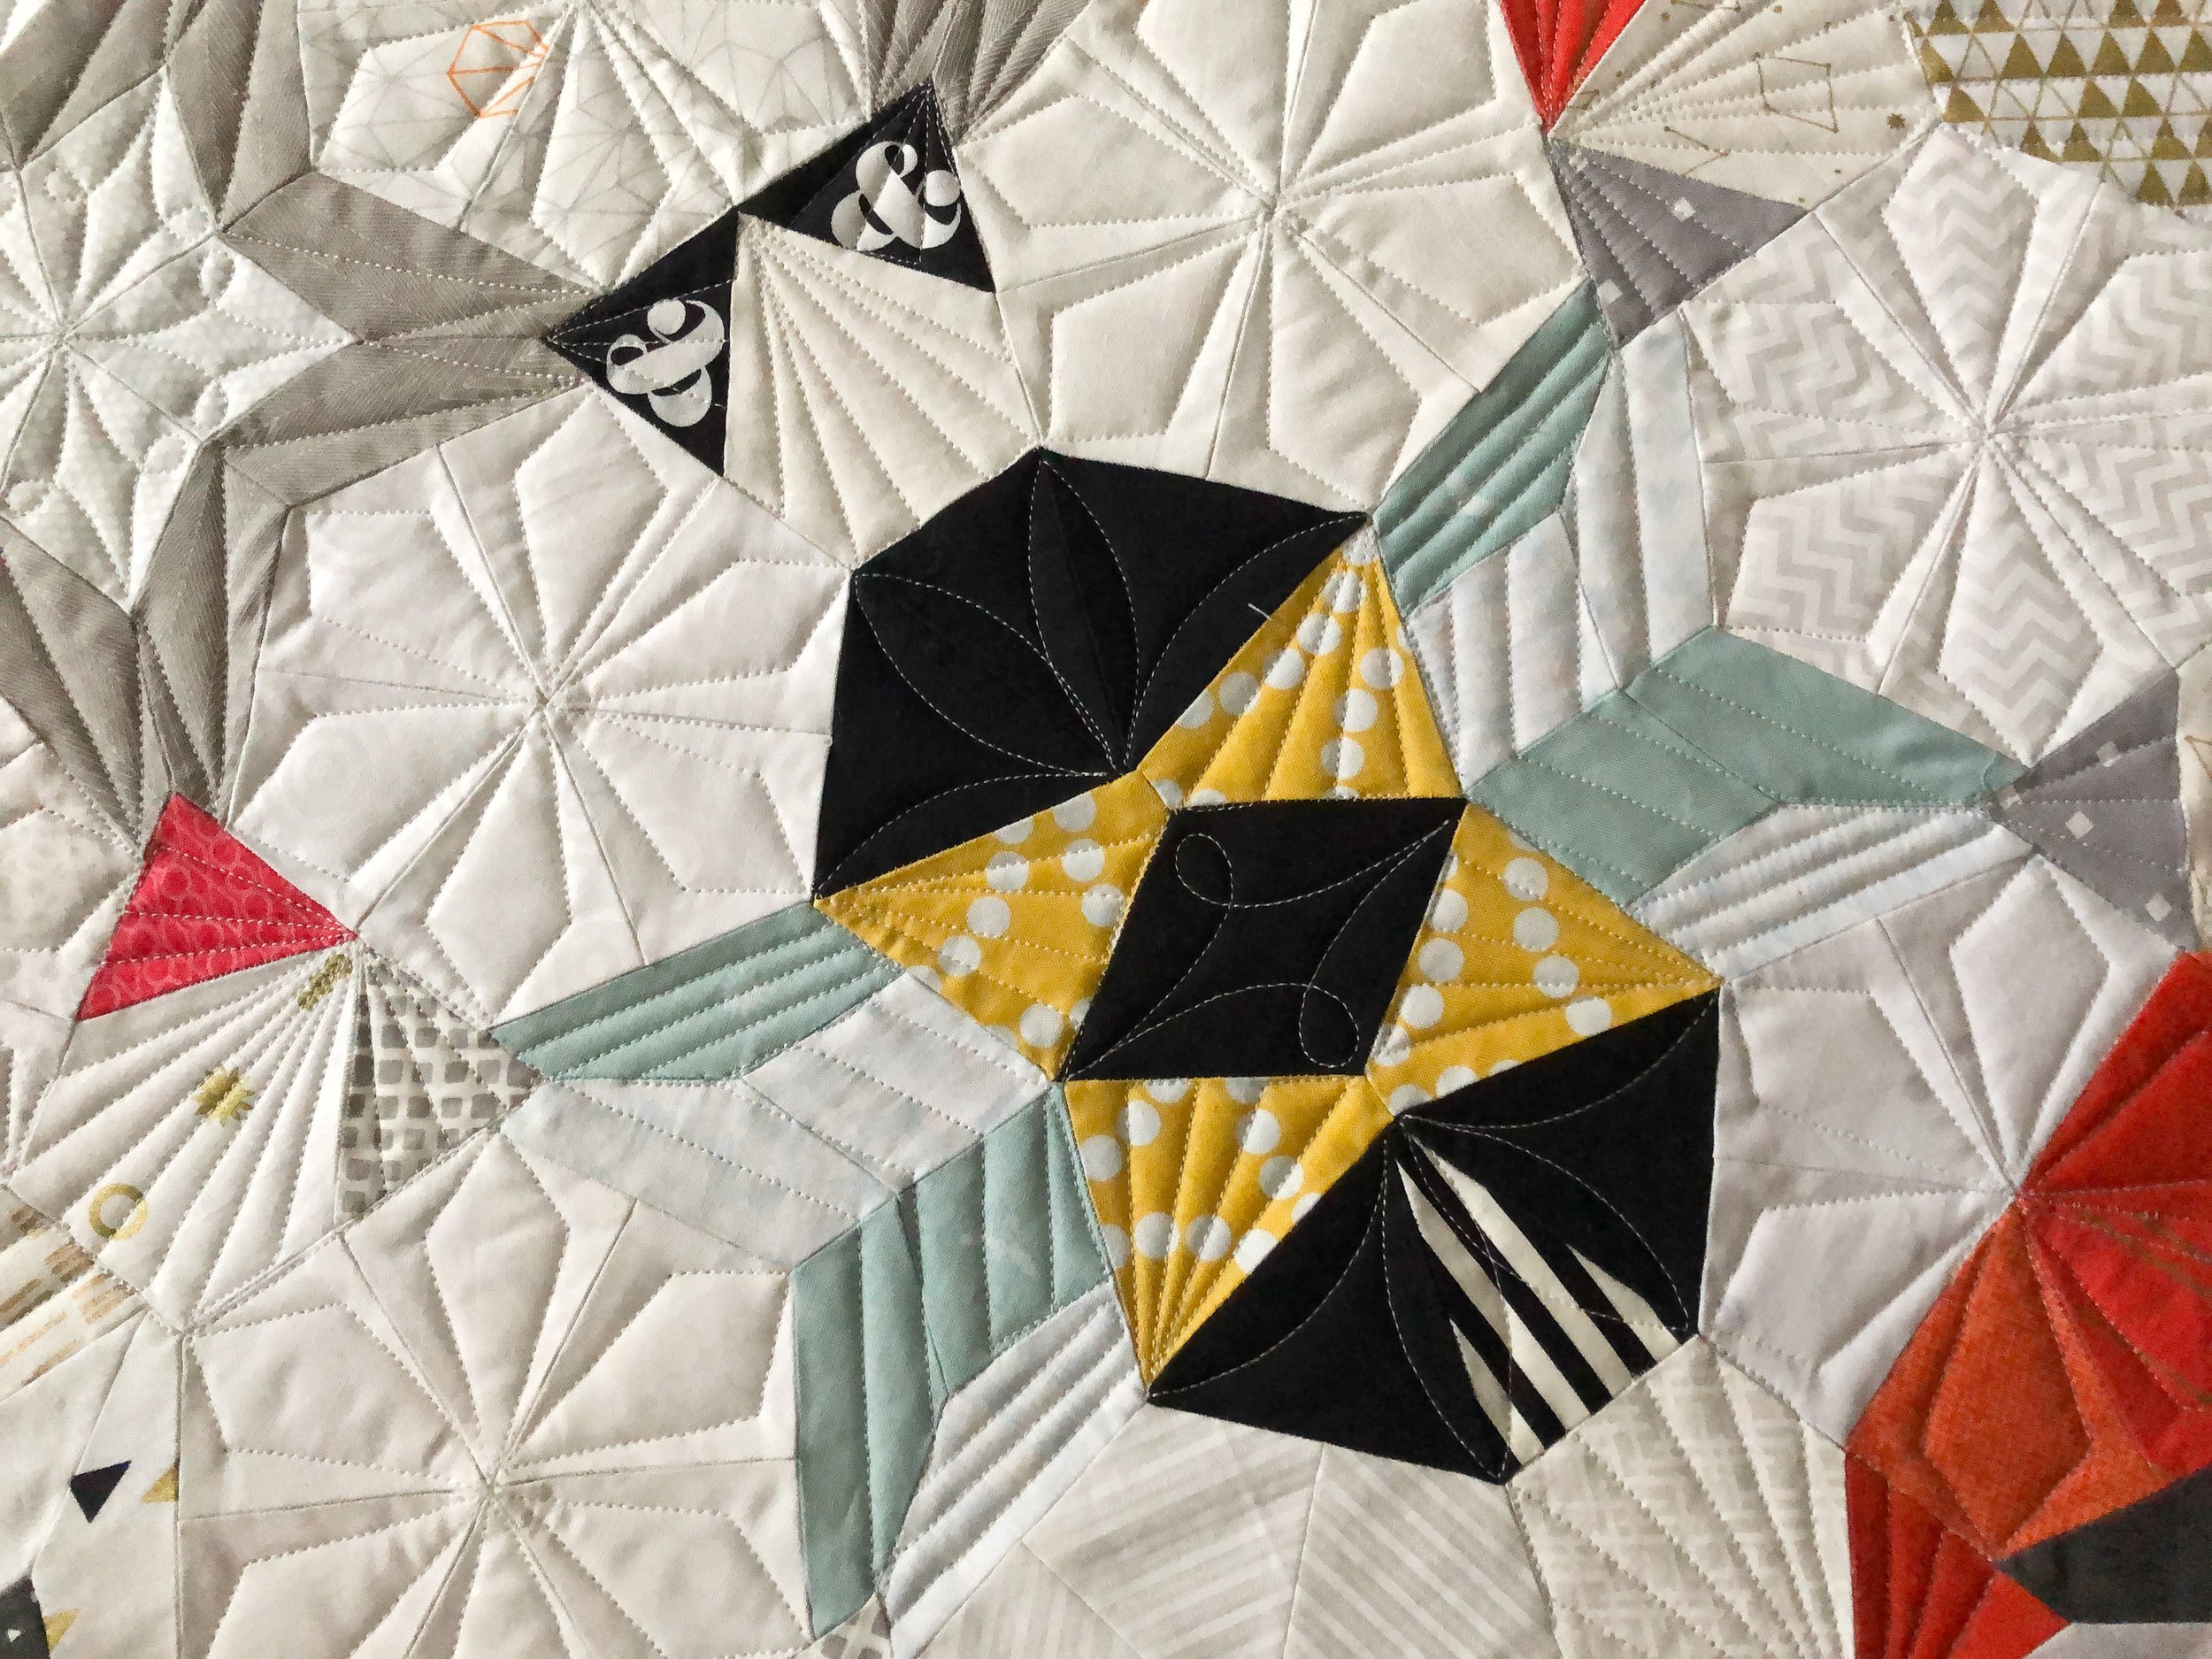
I used a Medium Grey Omni thread from Superior Threads to quilt it, and Beth brought a pieced batting from a bunch of leftover scraps. It worked great!

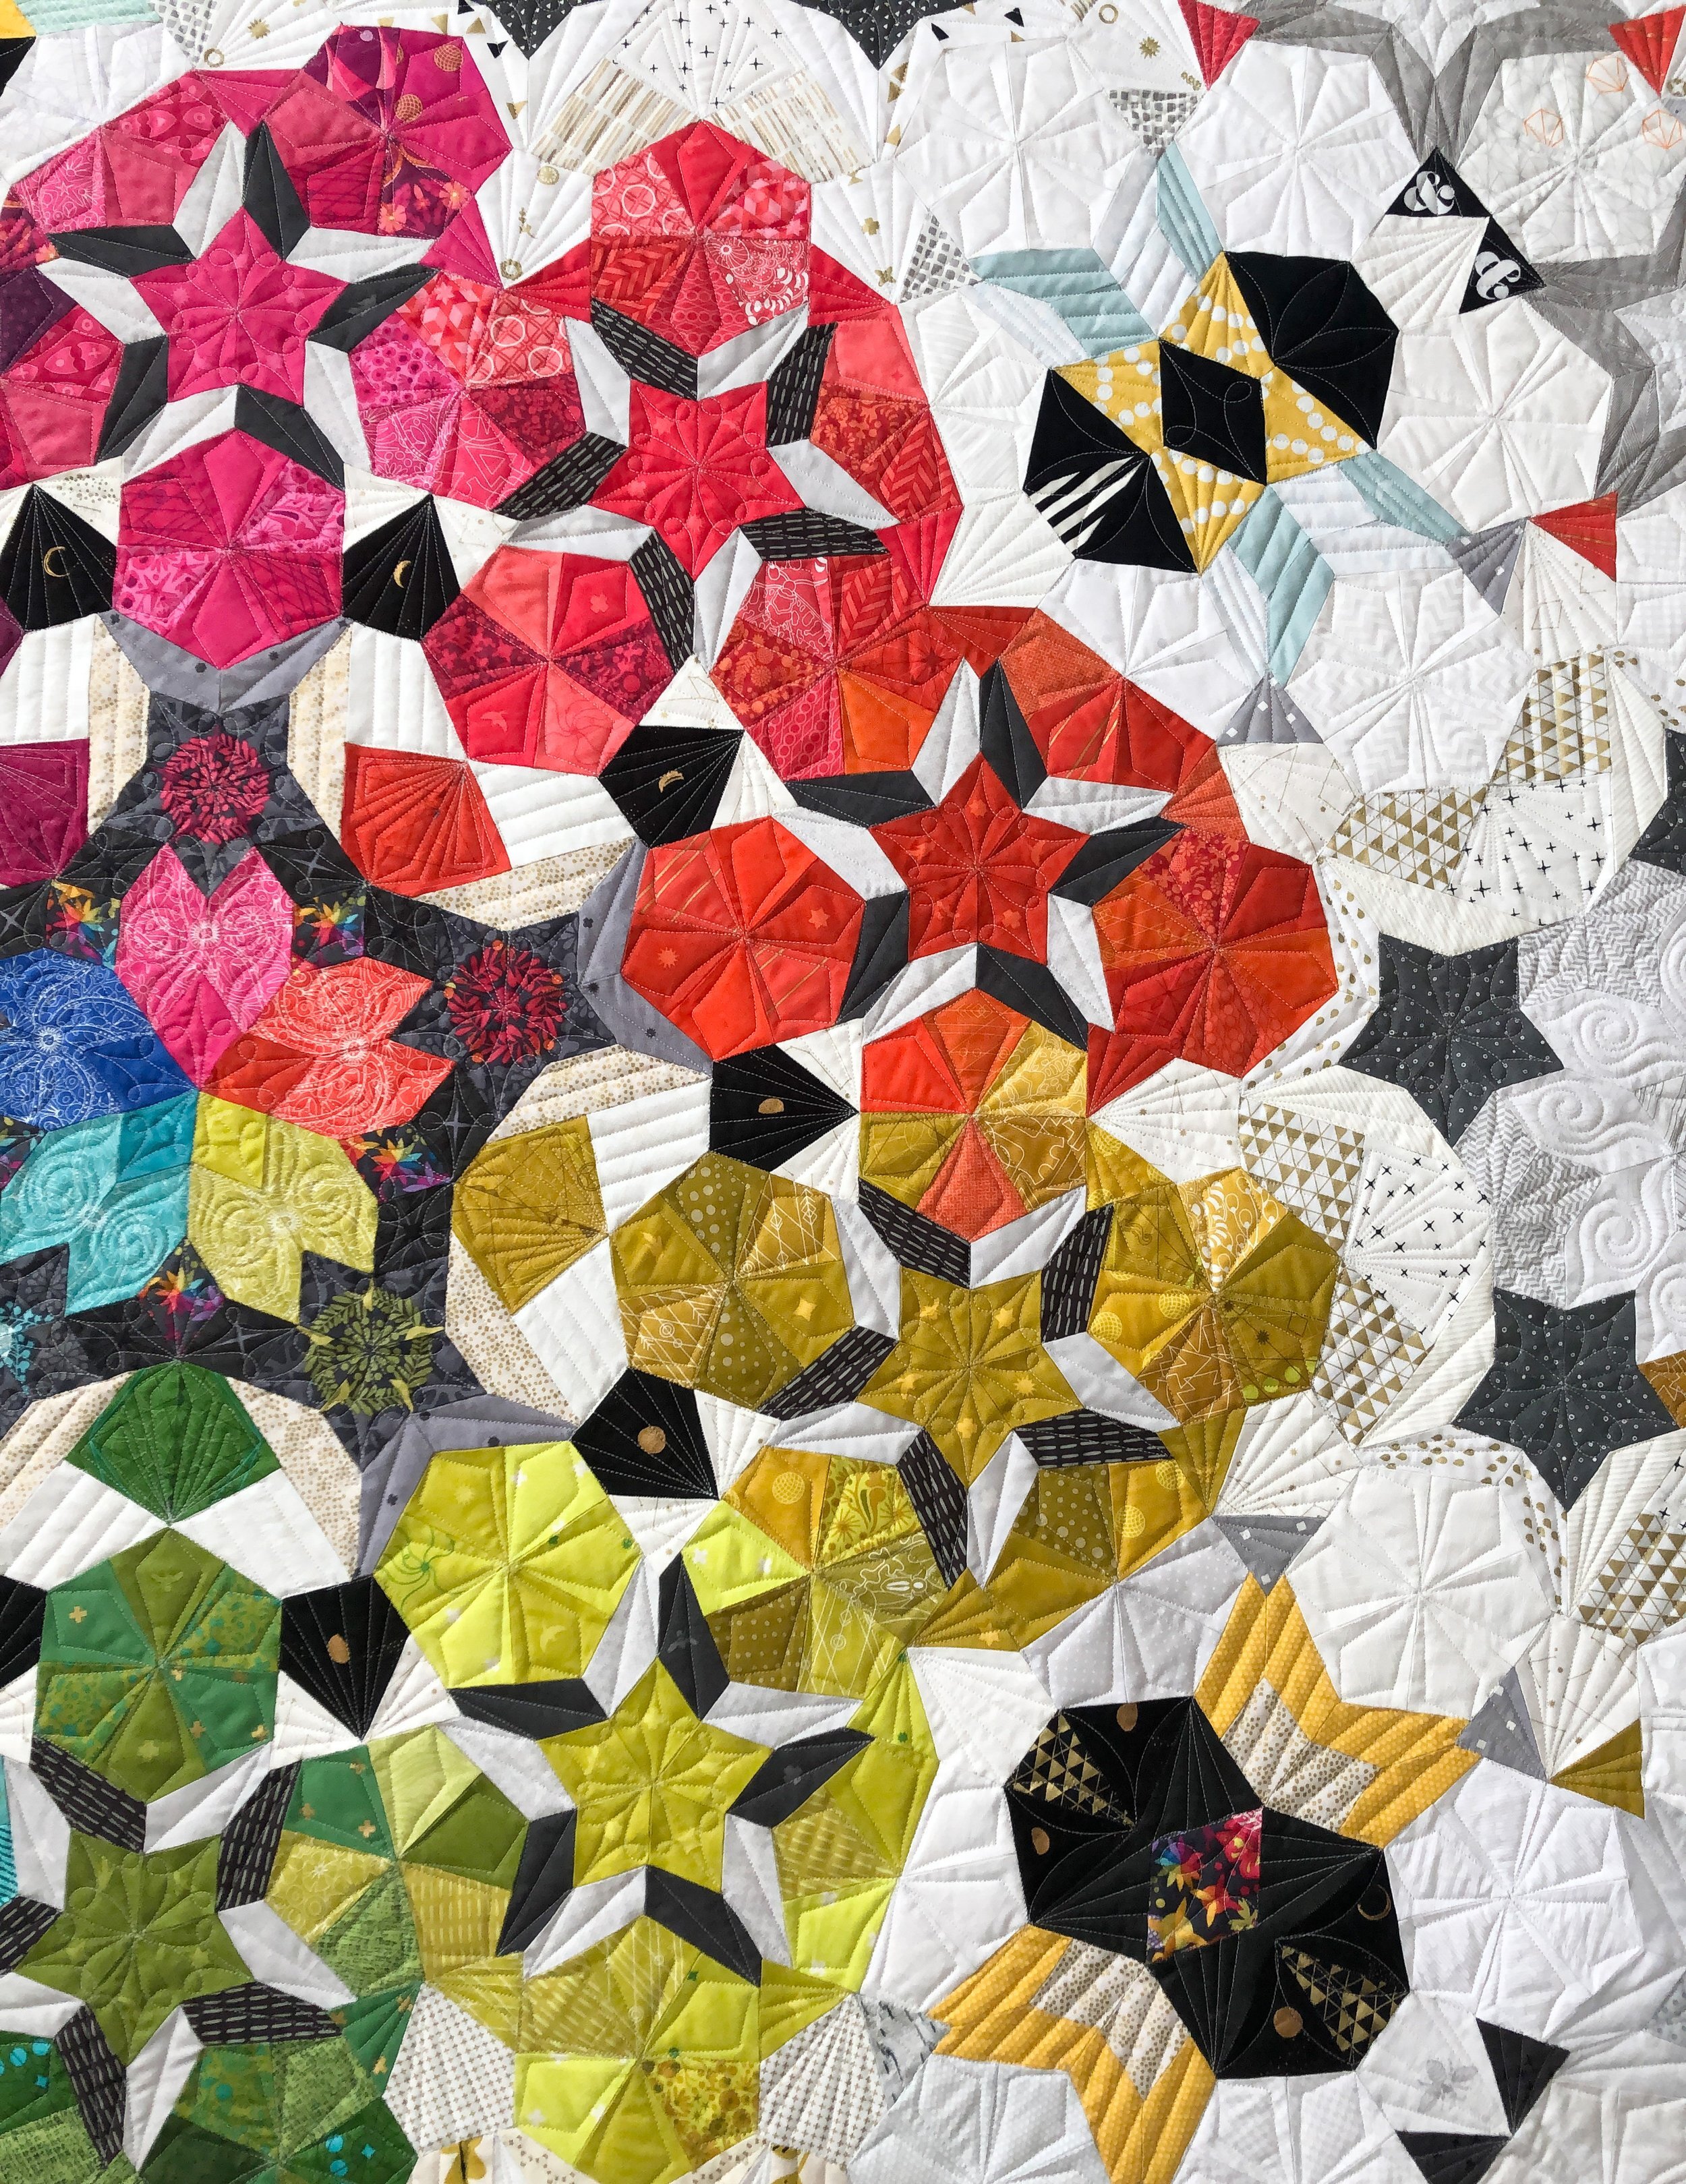
I quilted Patricia Ritter and my Sweet Marmalade design on it. I think the texture turned out beautifully on the fabrics and blocks. Sweet Marmalade is available at Urban Elementz.

I could quilt get a picture of the entire quilt, so hopefully you enjoy a few of these close ups.

Check out the fussy cutting on those blocks.
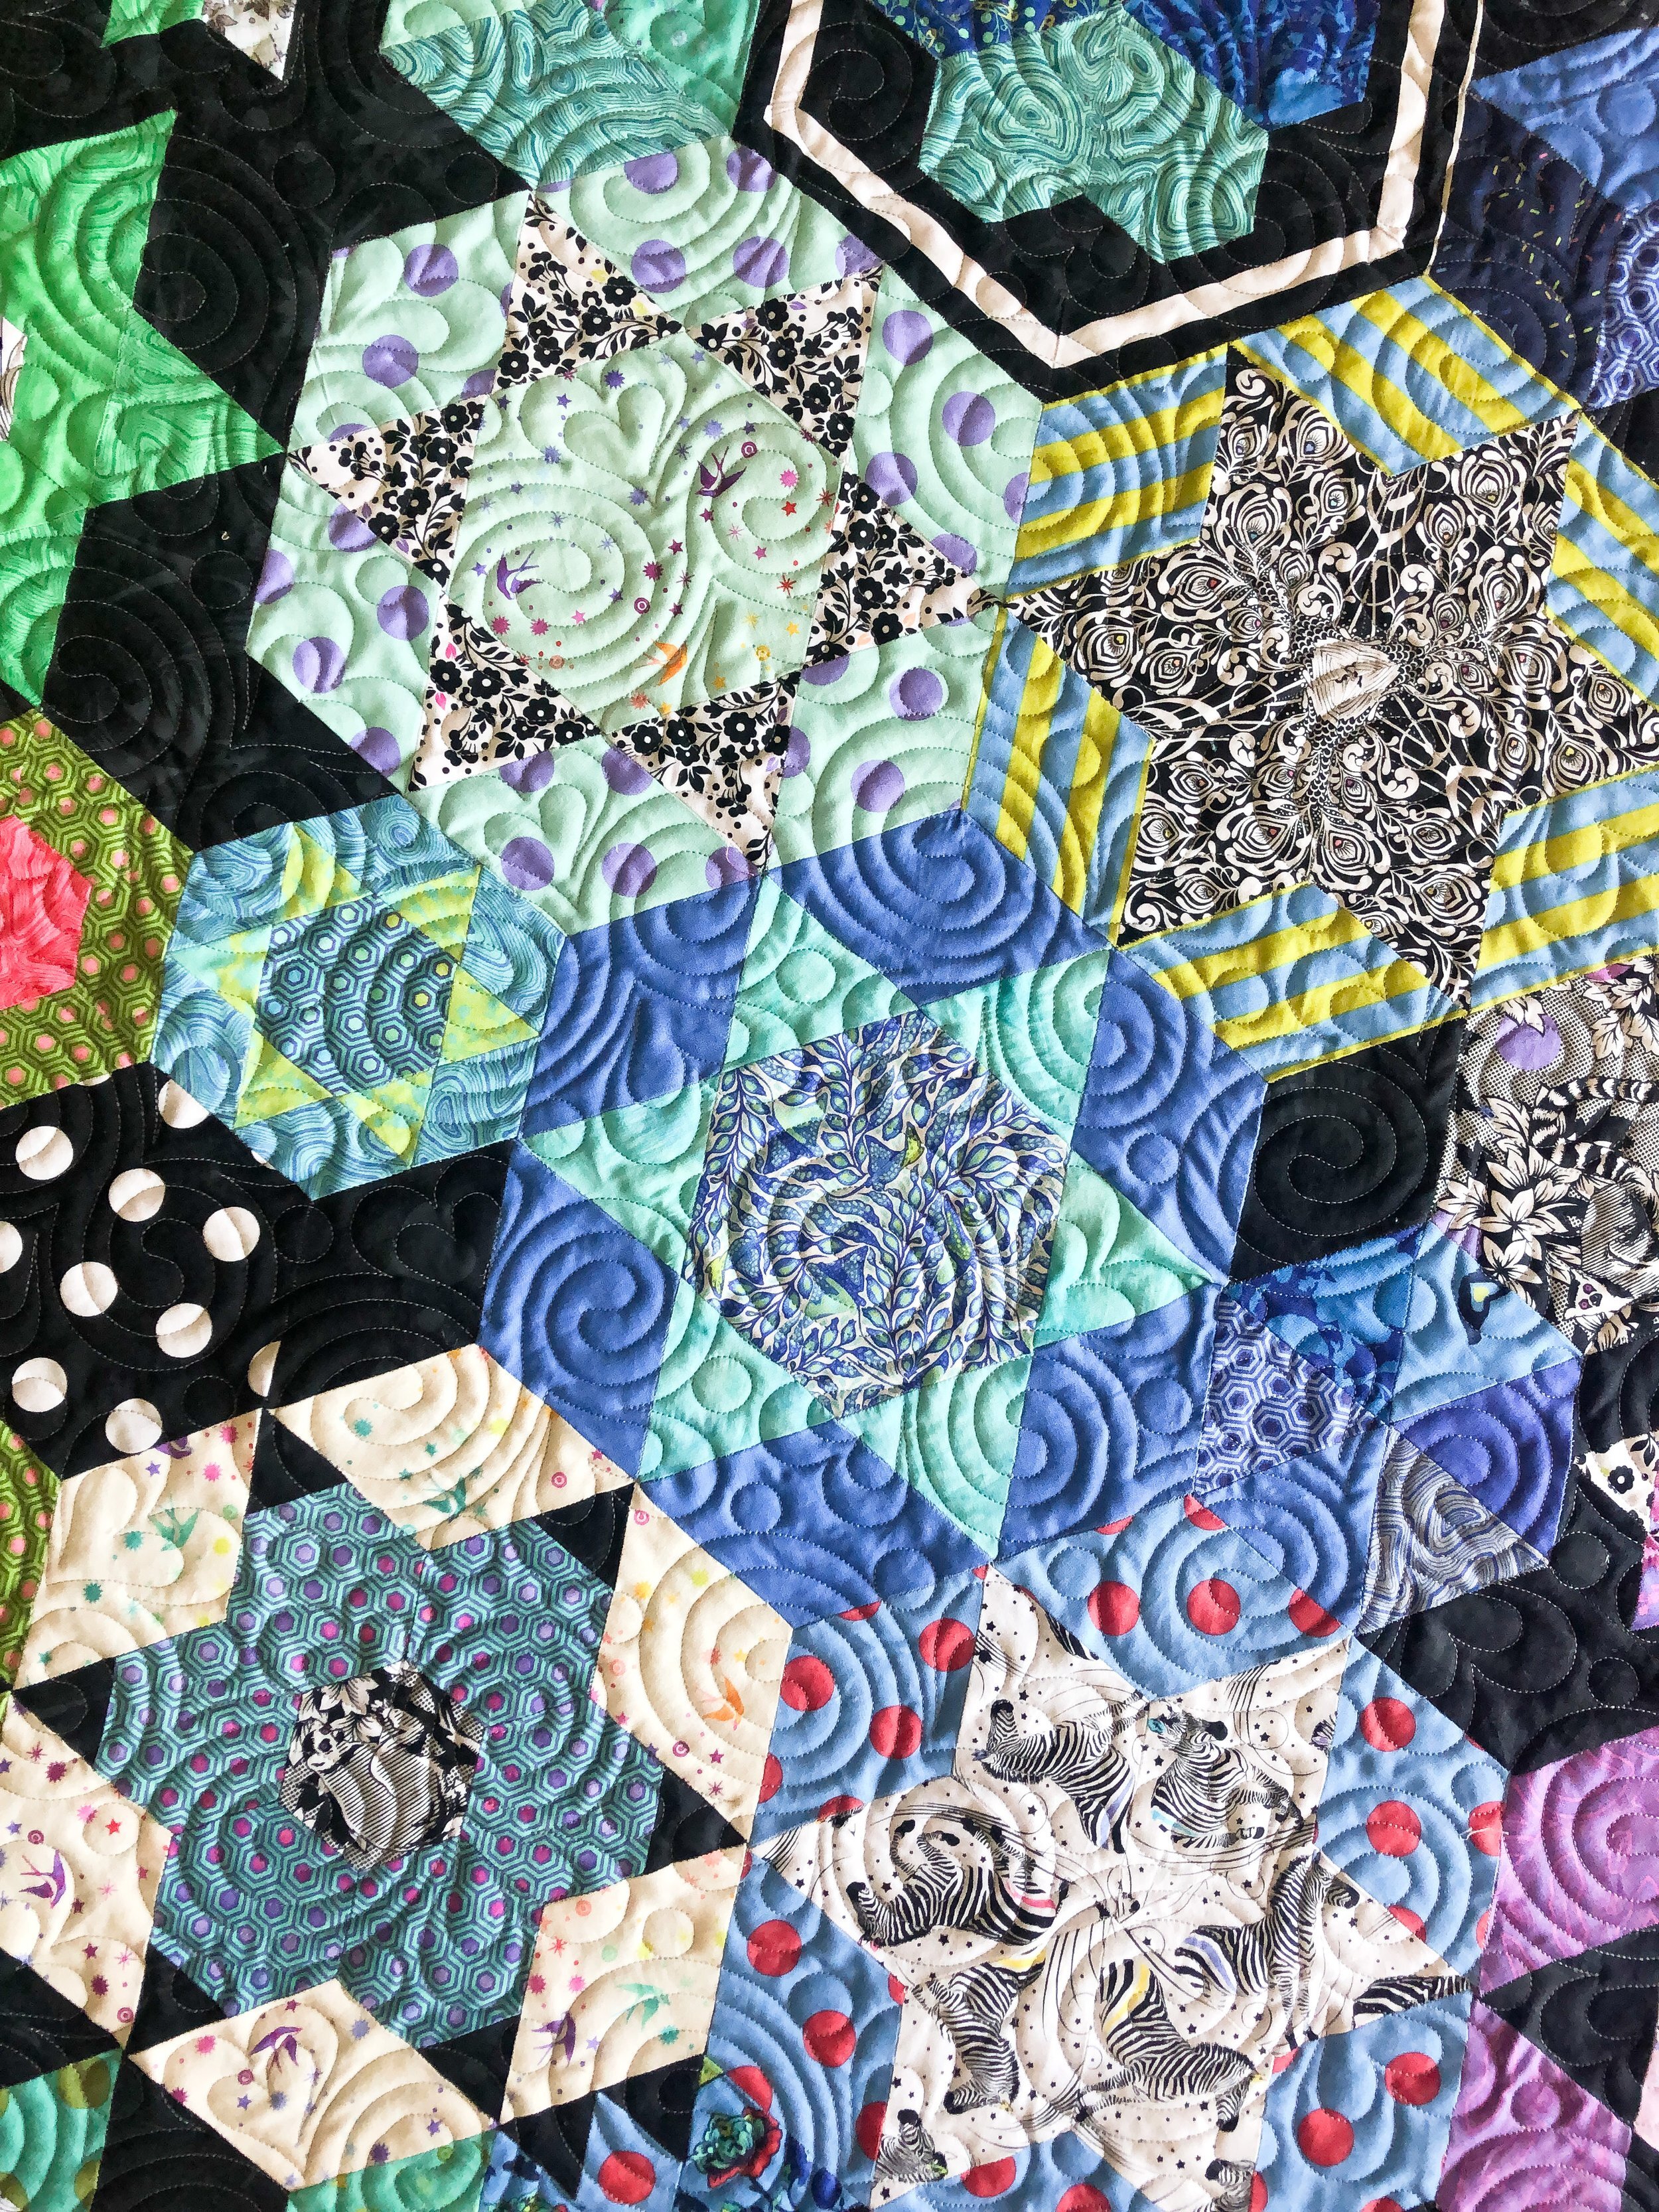
The block below is my favorite!! Tula Pink’s fabrics are perfect for quilts like these.

Another close up…
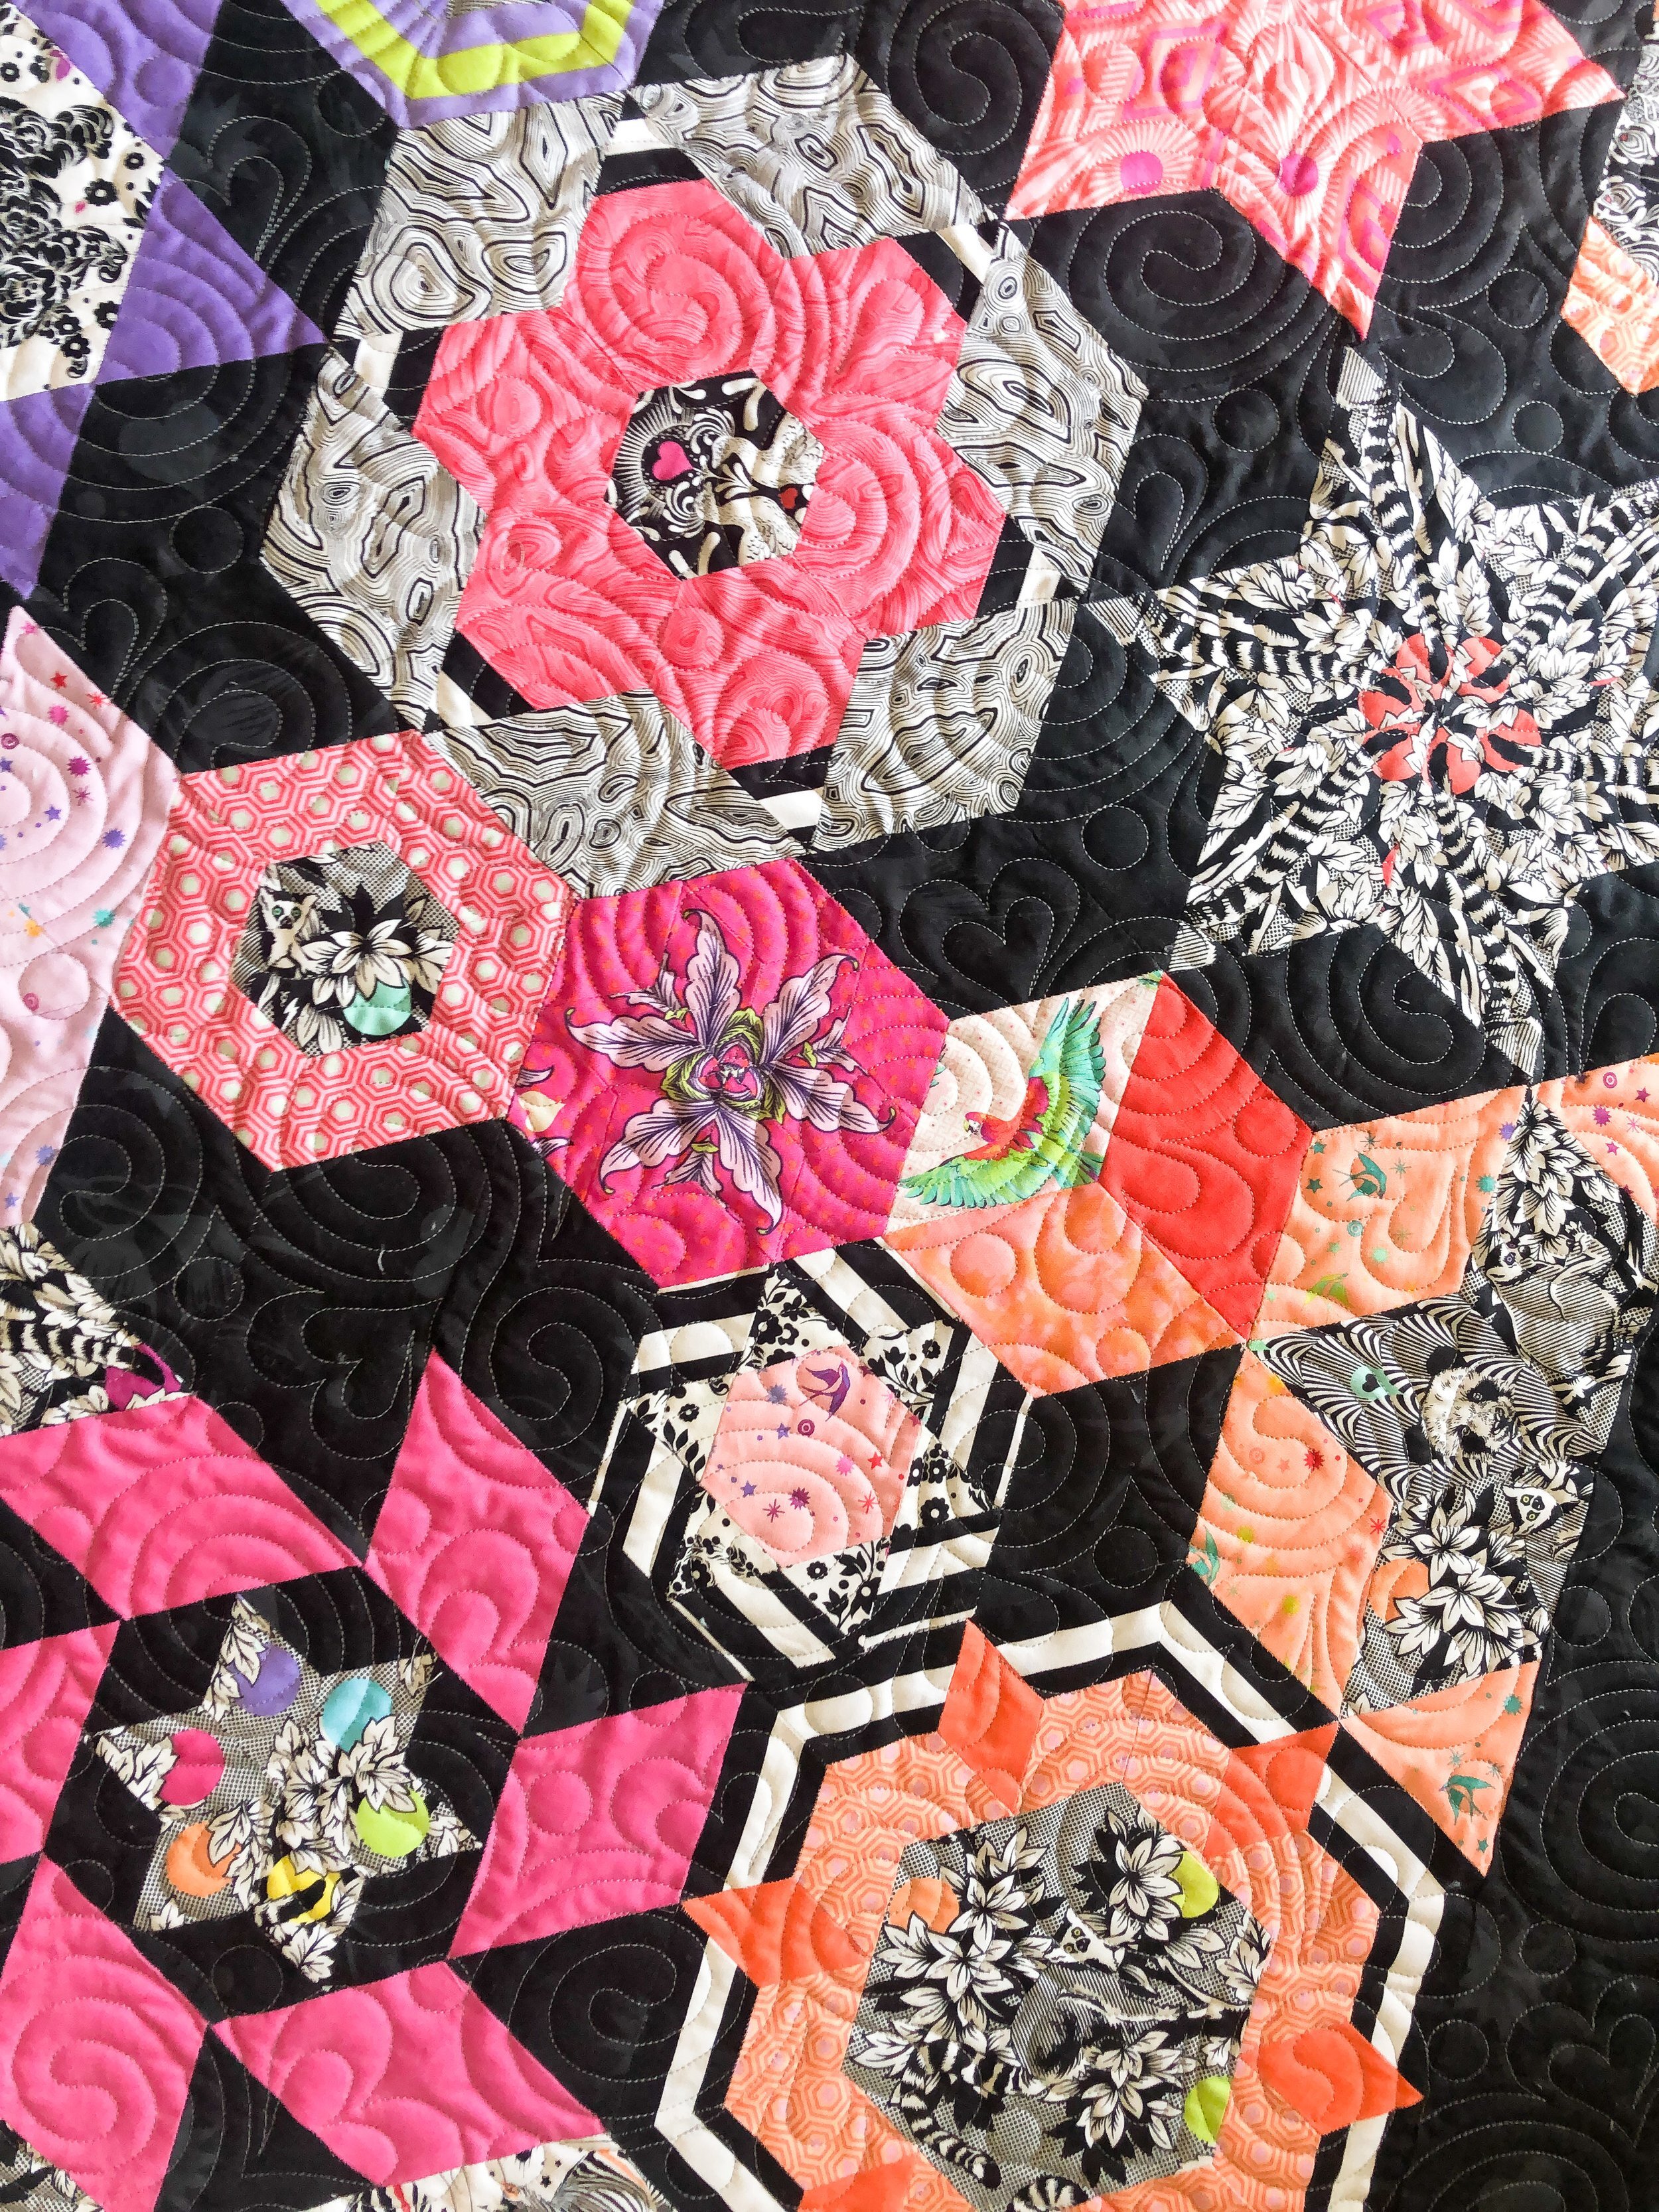
I love all those fabulous colors together.
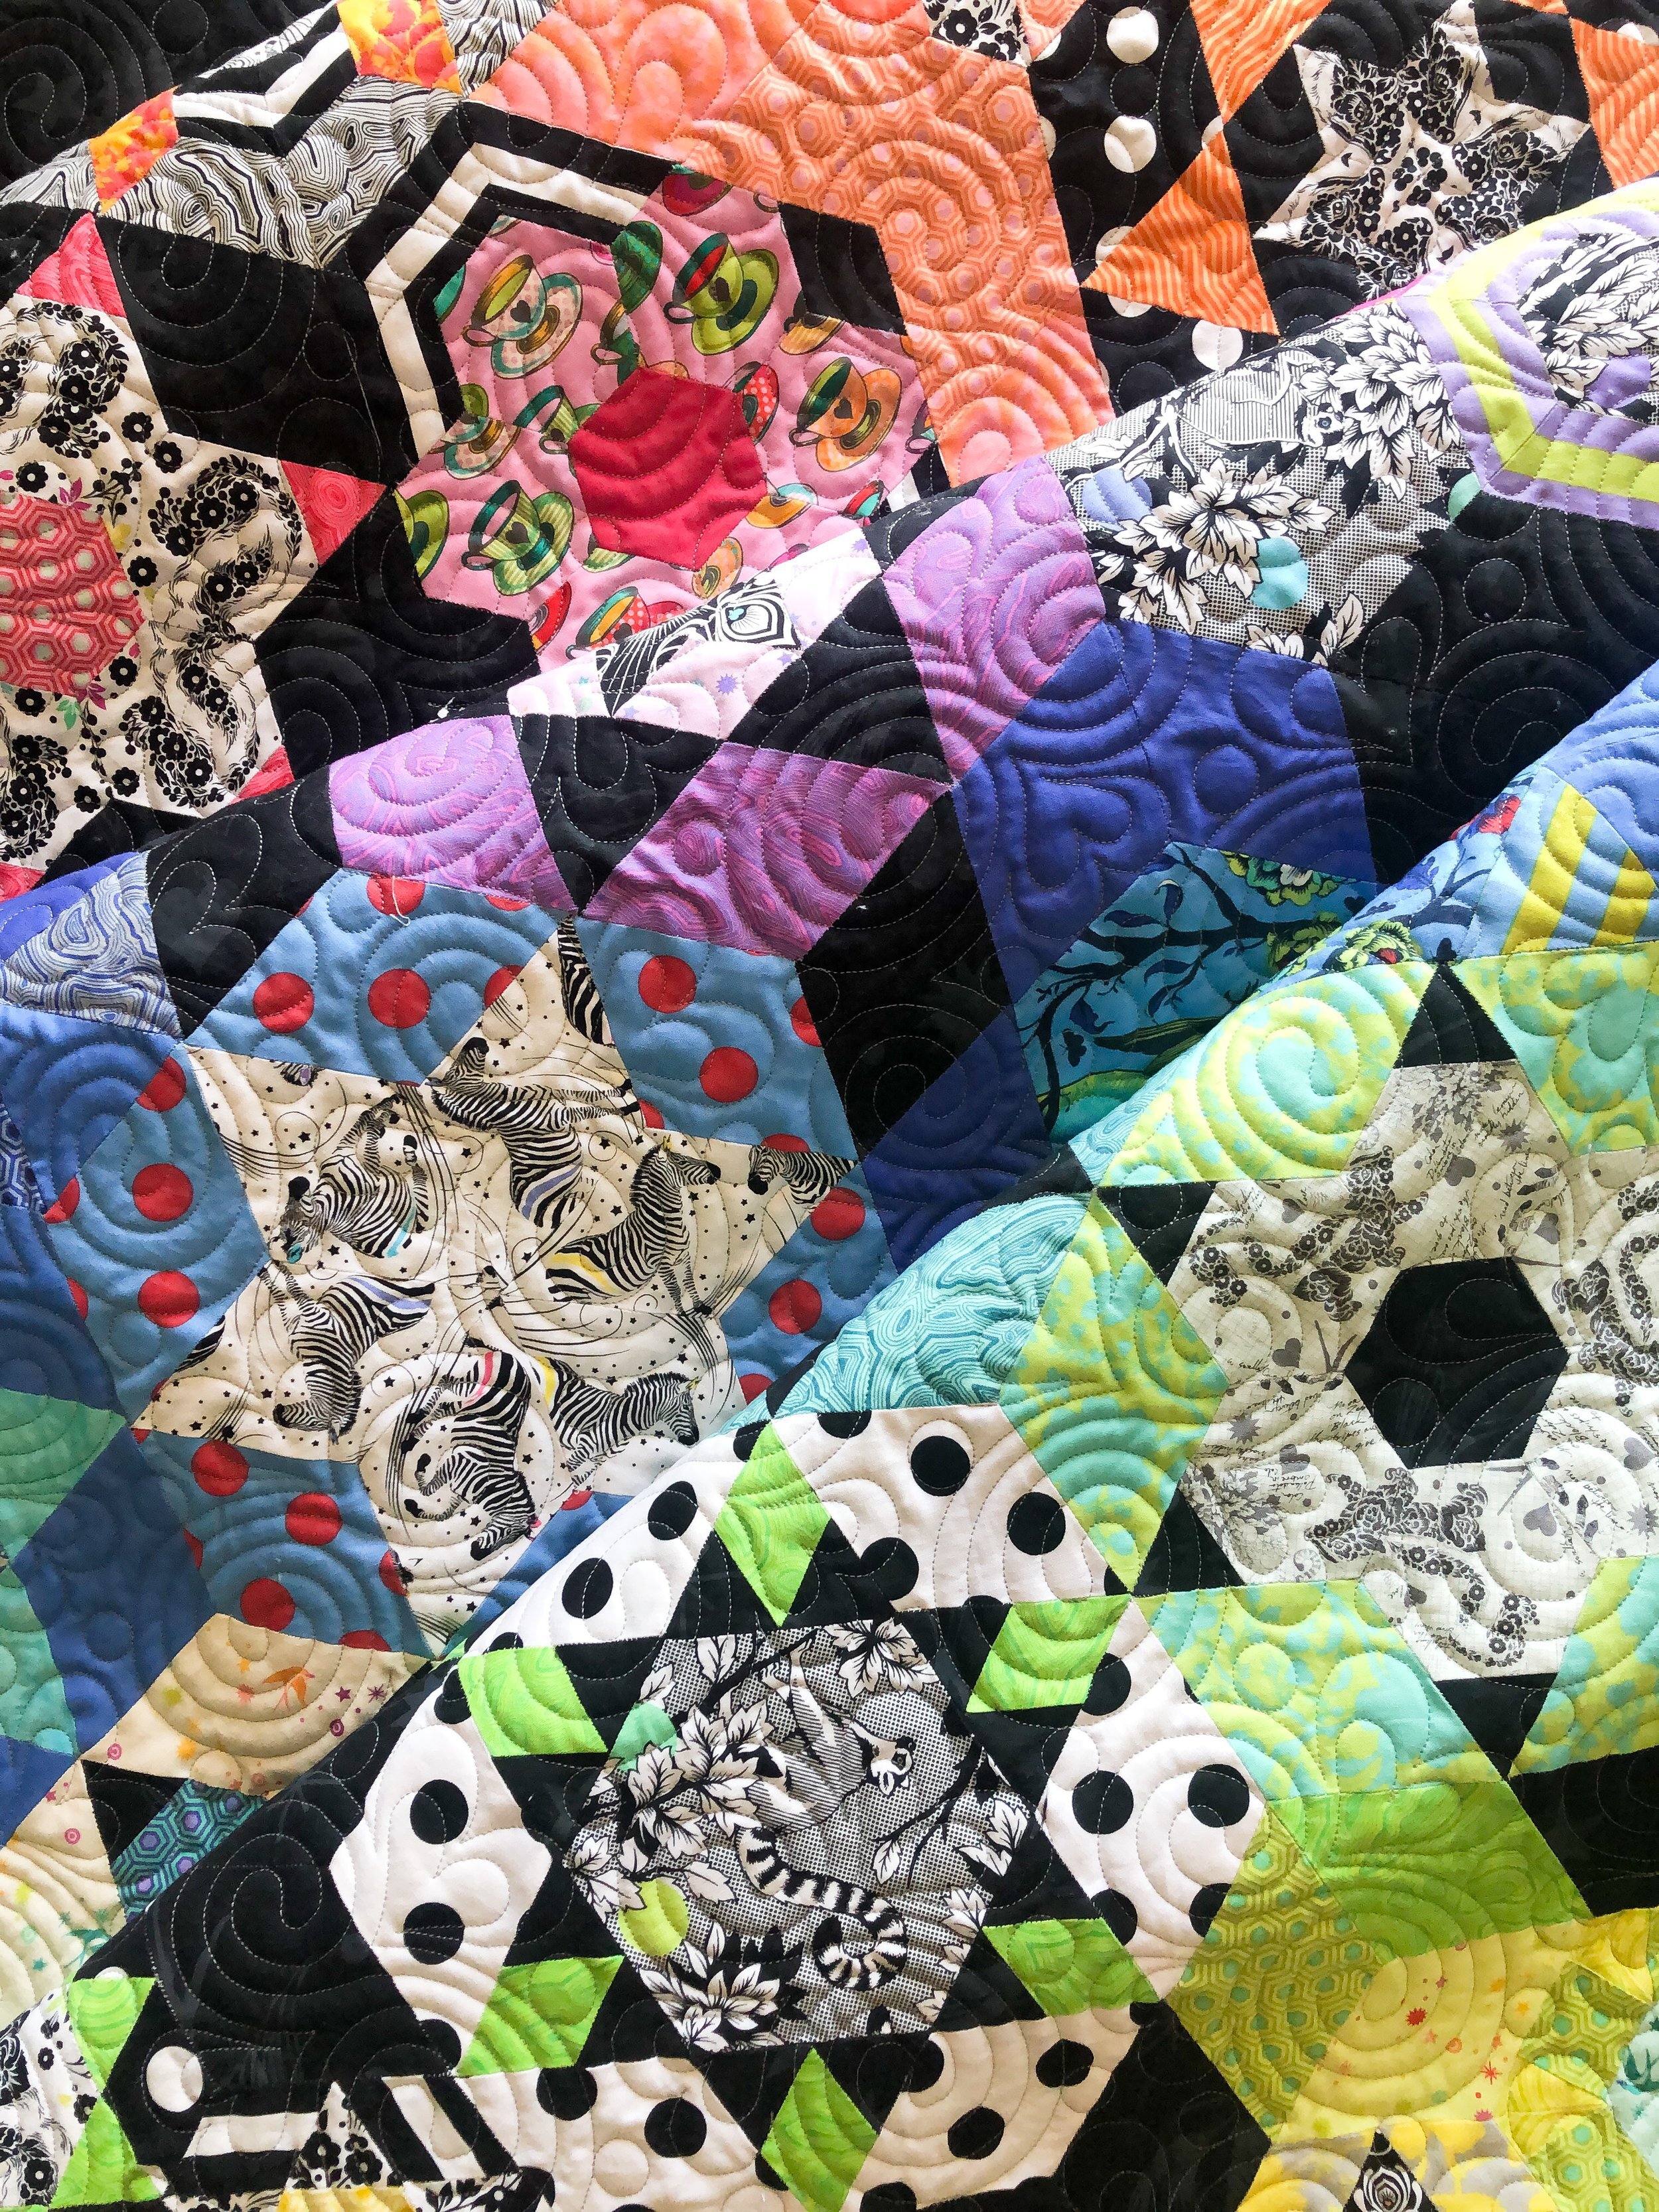
And, of course a quilt swirl is always a fun picture to show the texture and colors.

Check out this backing!! Solid minky does an excellent job showing off all the quilty texture!

I am almost caught up with quilting. If you have some quilts that you’d like quilted edge to edge, please let me know. Email me at quiltingit@gmail.com or contact me. I’m hoping to quilt about 20 quilts a month edge to edge, and 5 or so quilts custom. I would love to quilt for you!! For info about my quilting services go to my Longarm Quilting Services page. Thank you, and happy quilting! Leisha
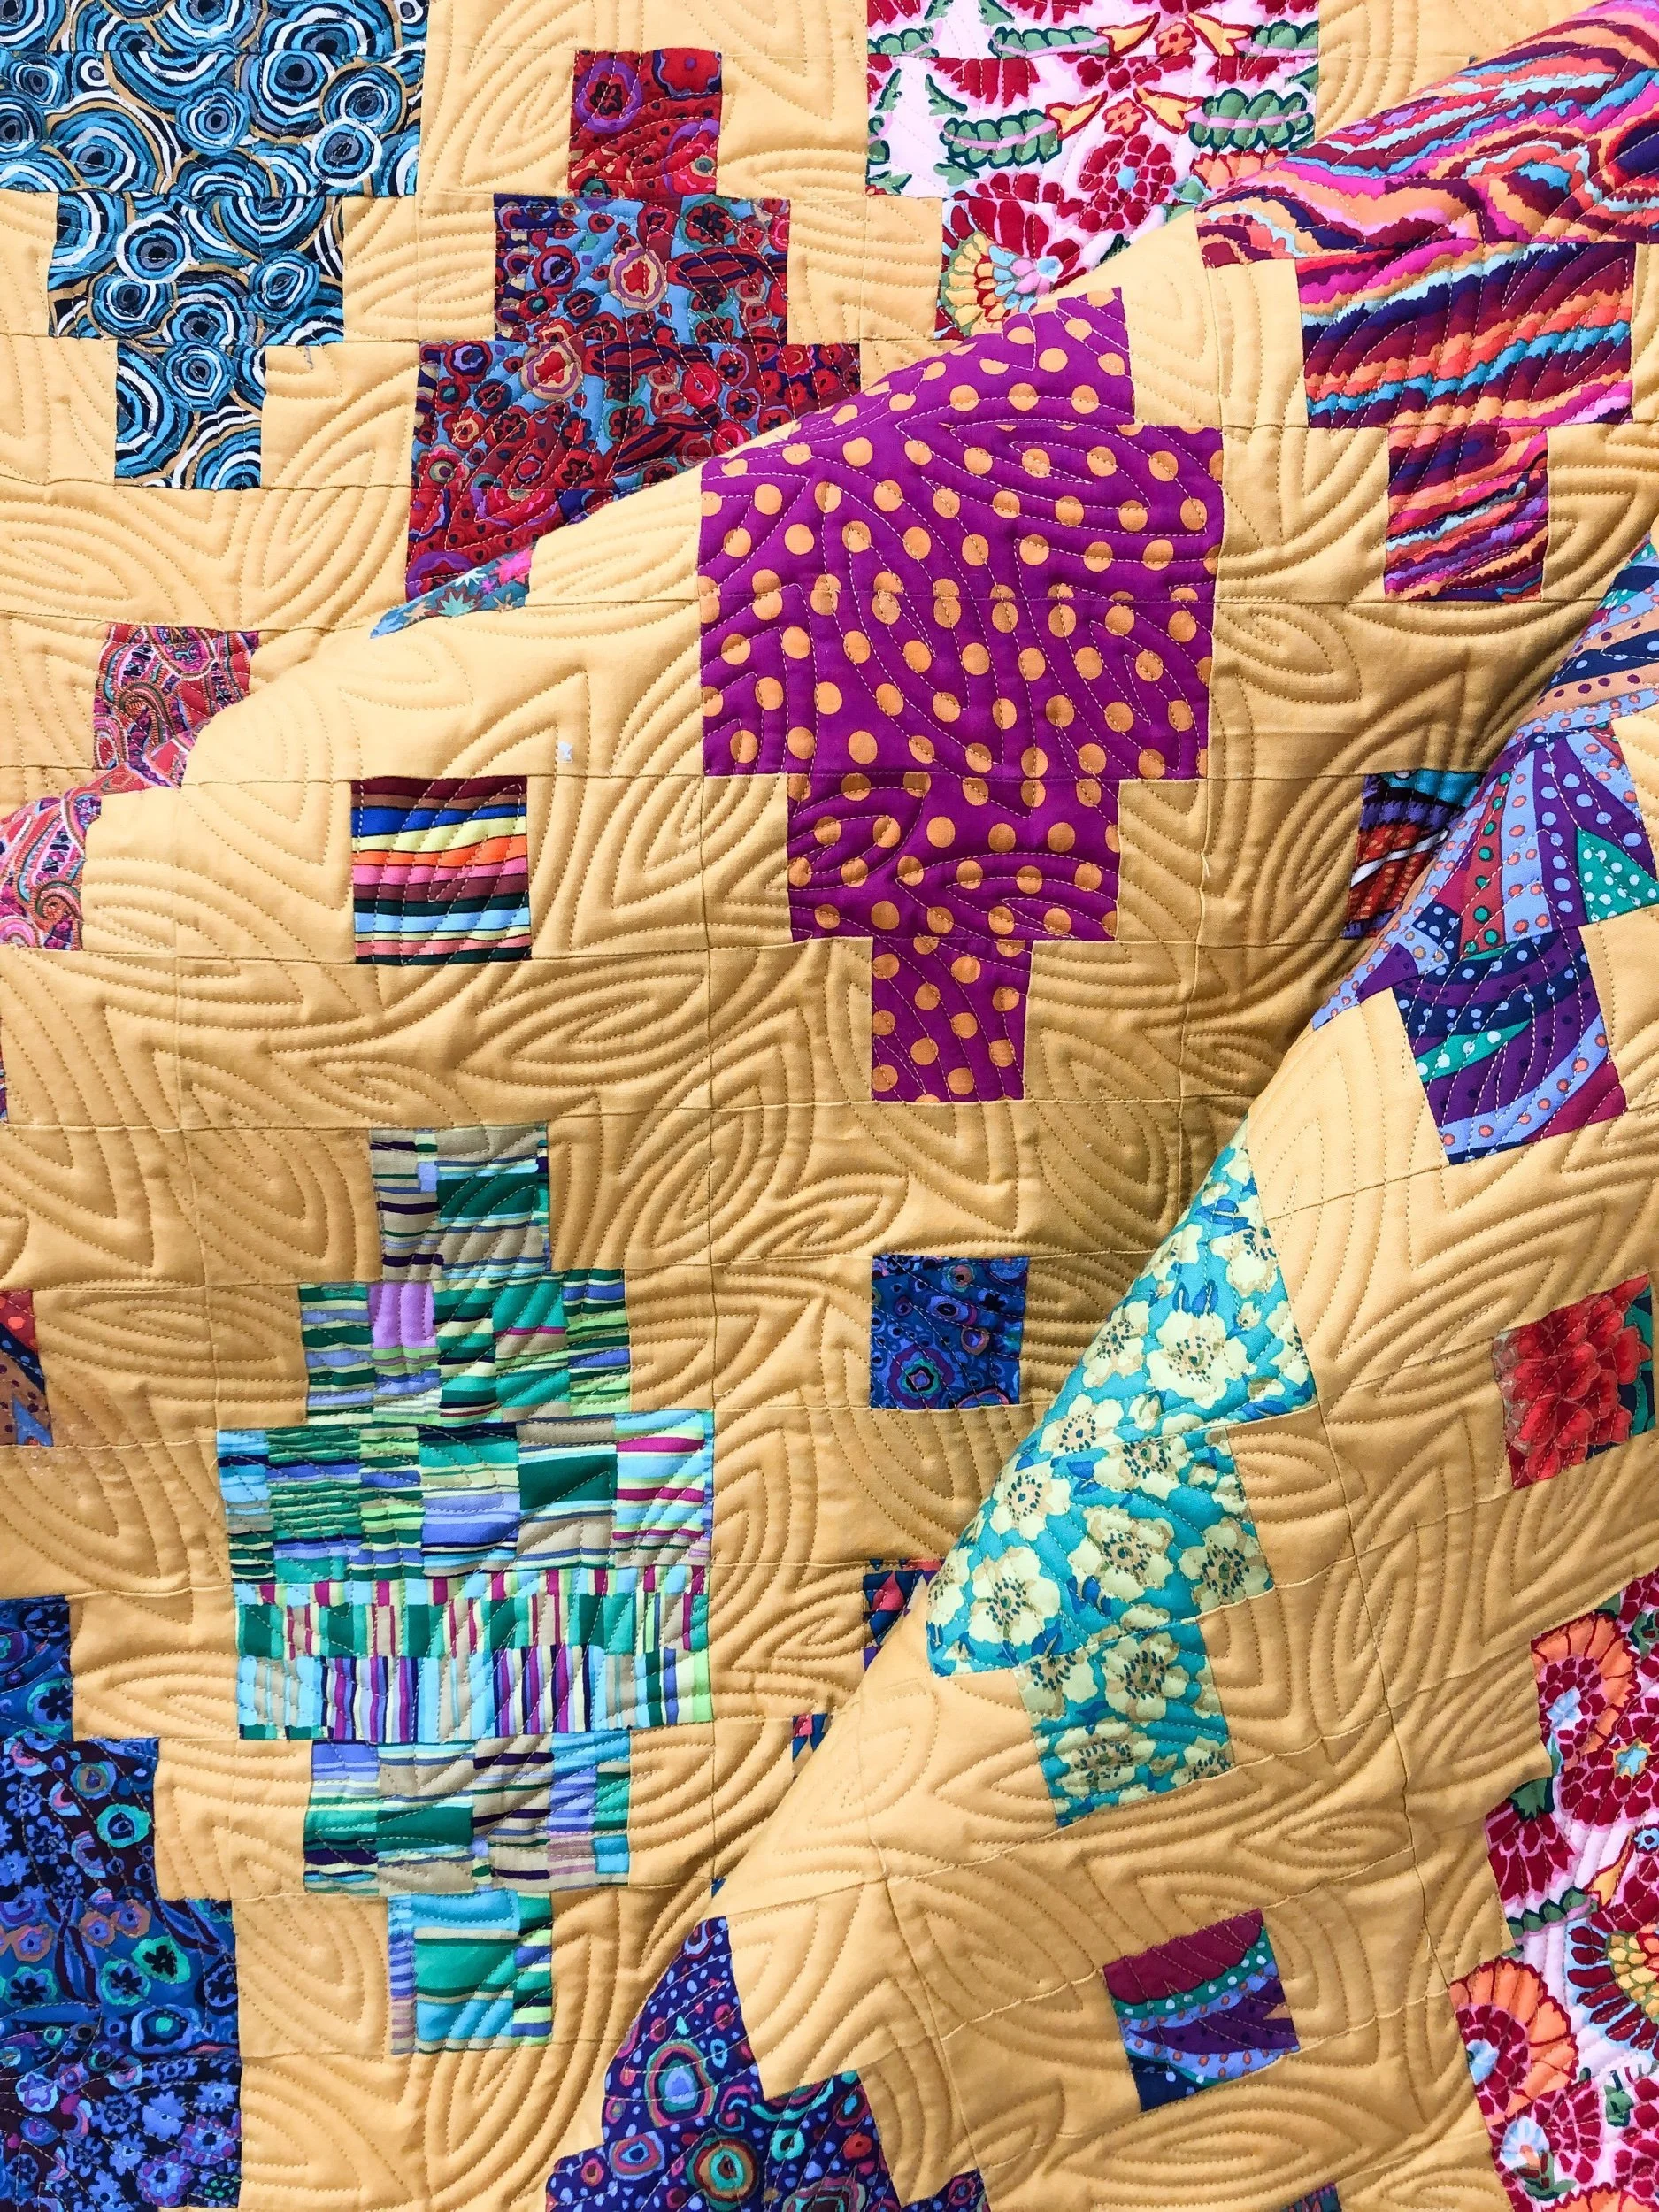
Loranne’s Beaded Lanterns Quilt
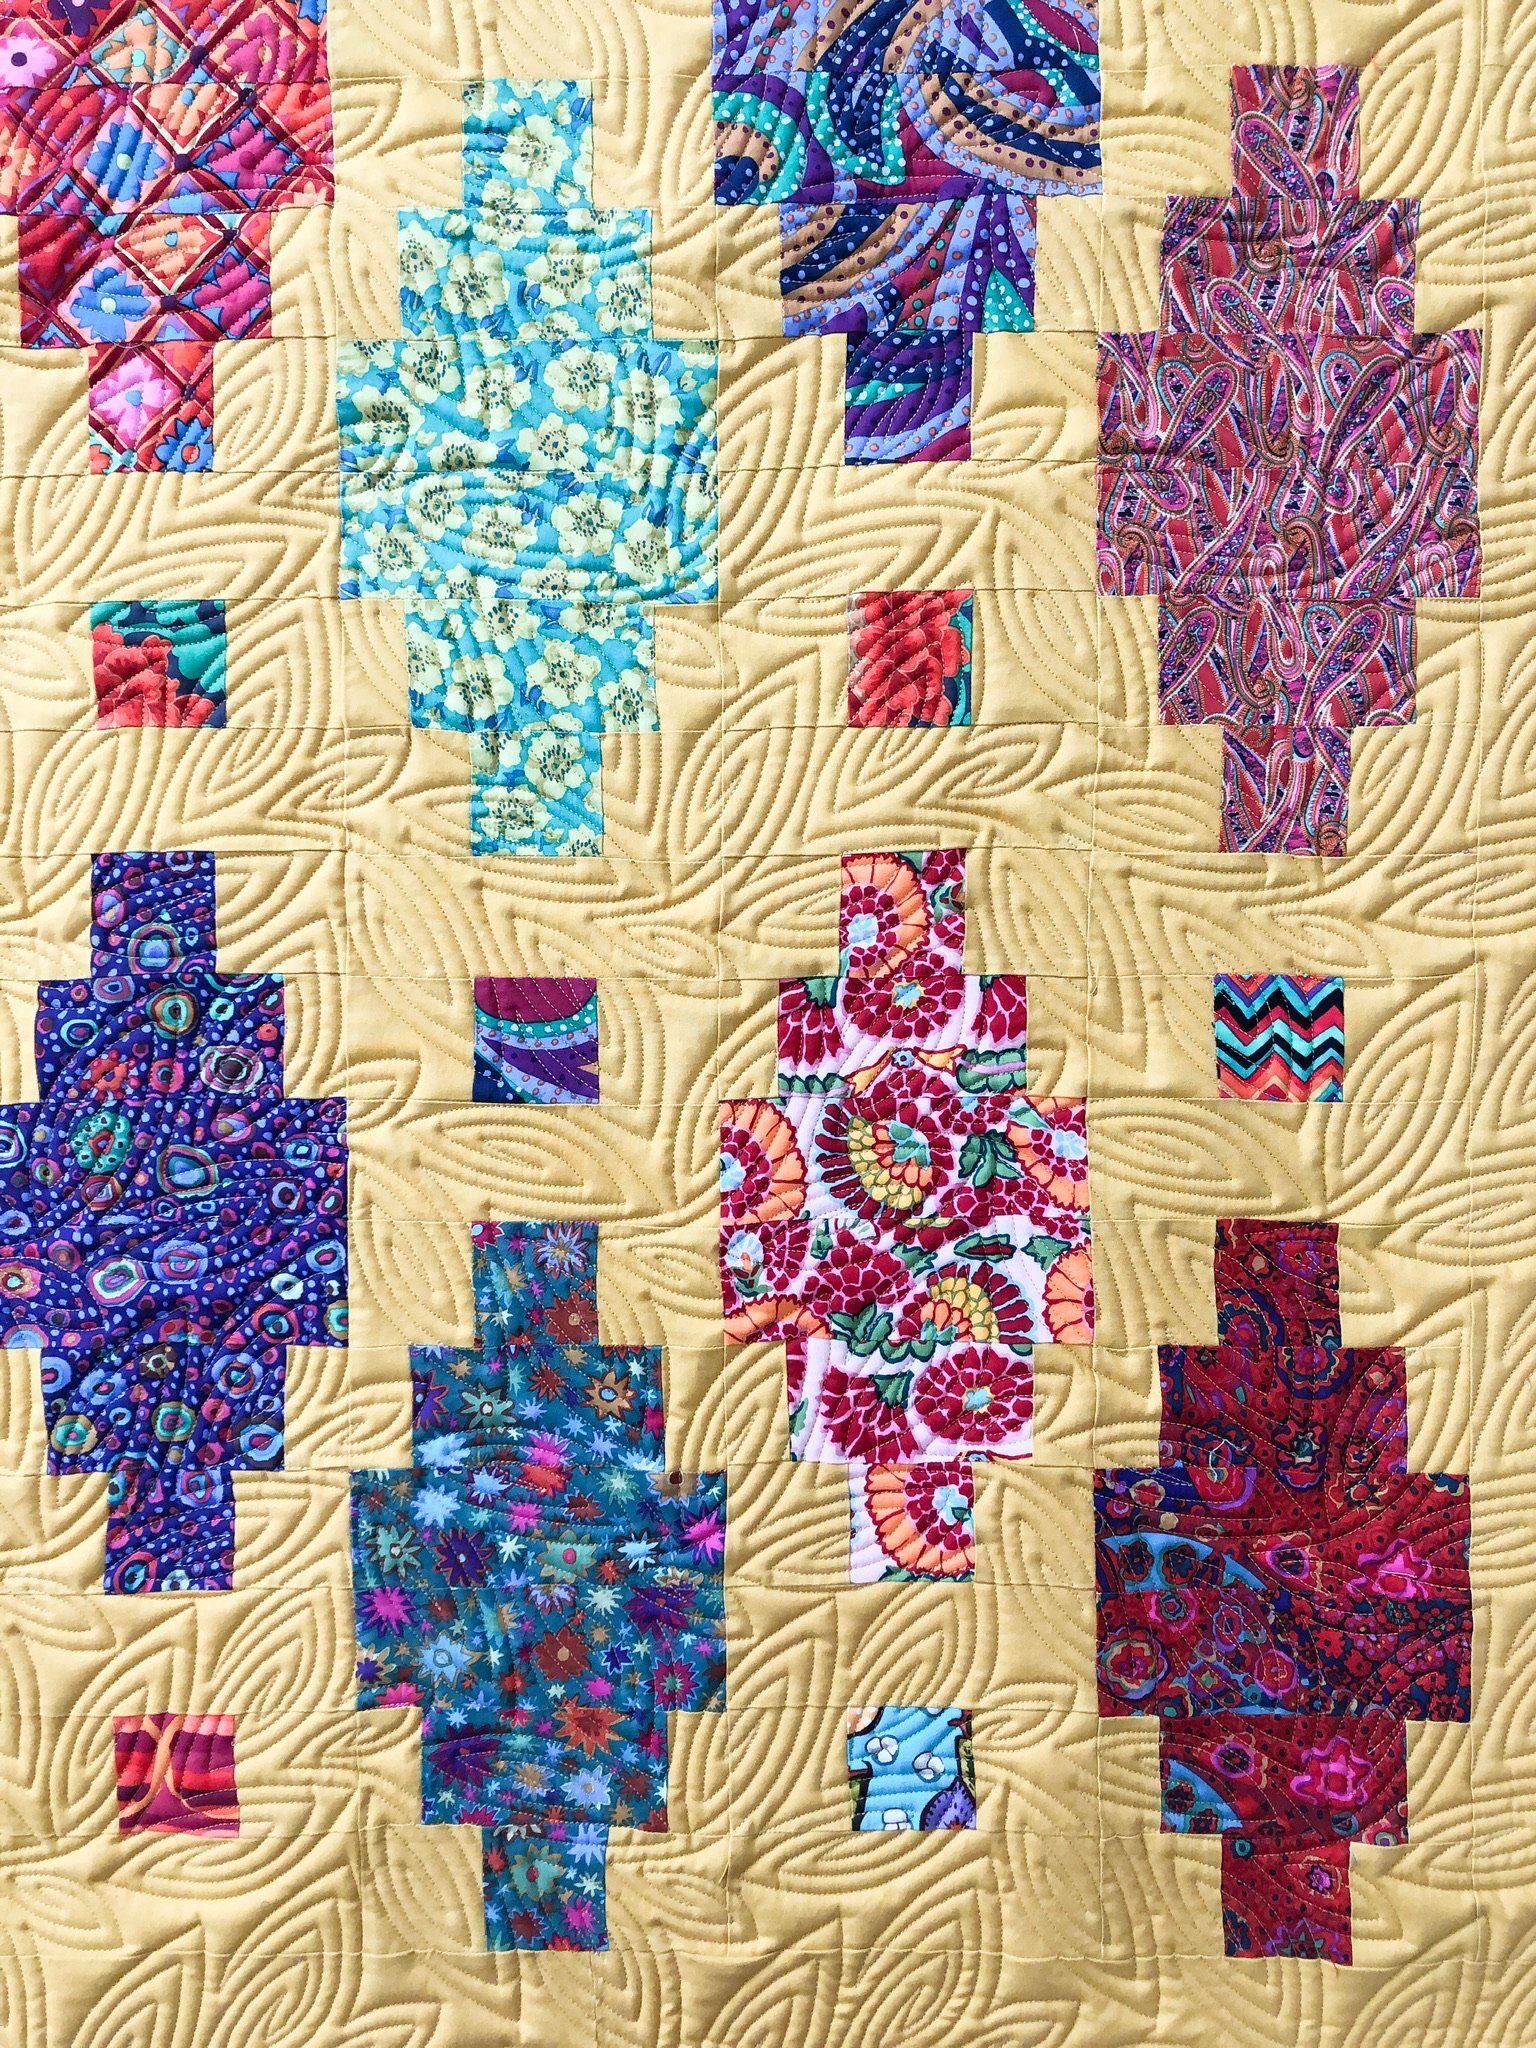
I’m excited to share this beautiful quilt with you, made by Loranne. The pattern is called Beaded Lanterns by Christa Watson, and it’s free on the Benartex website.
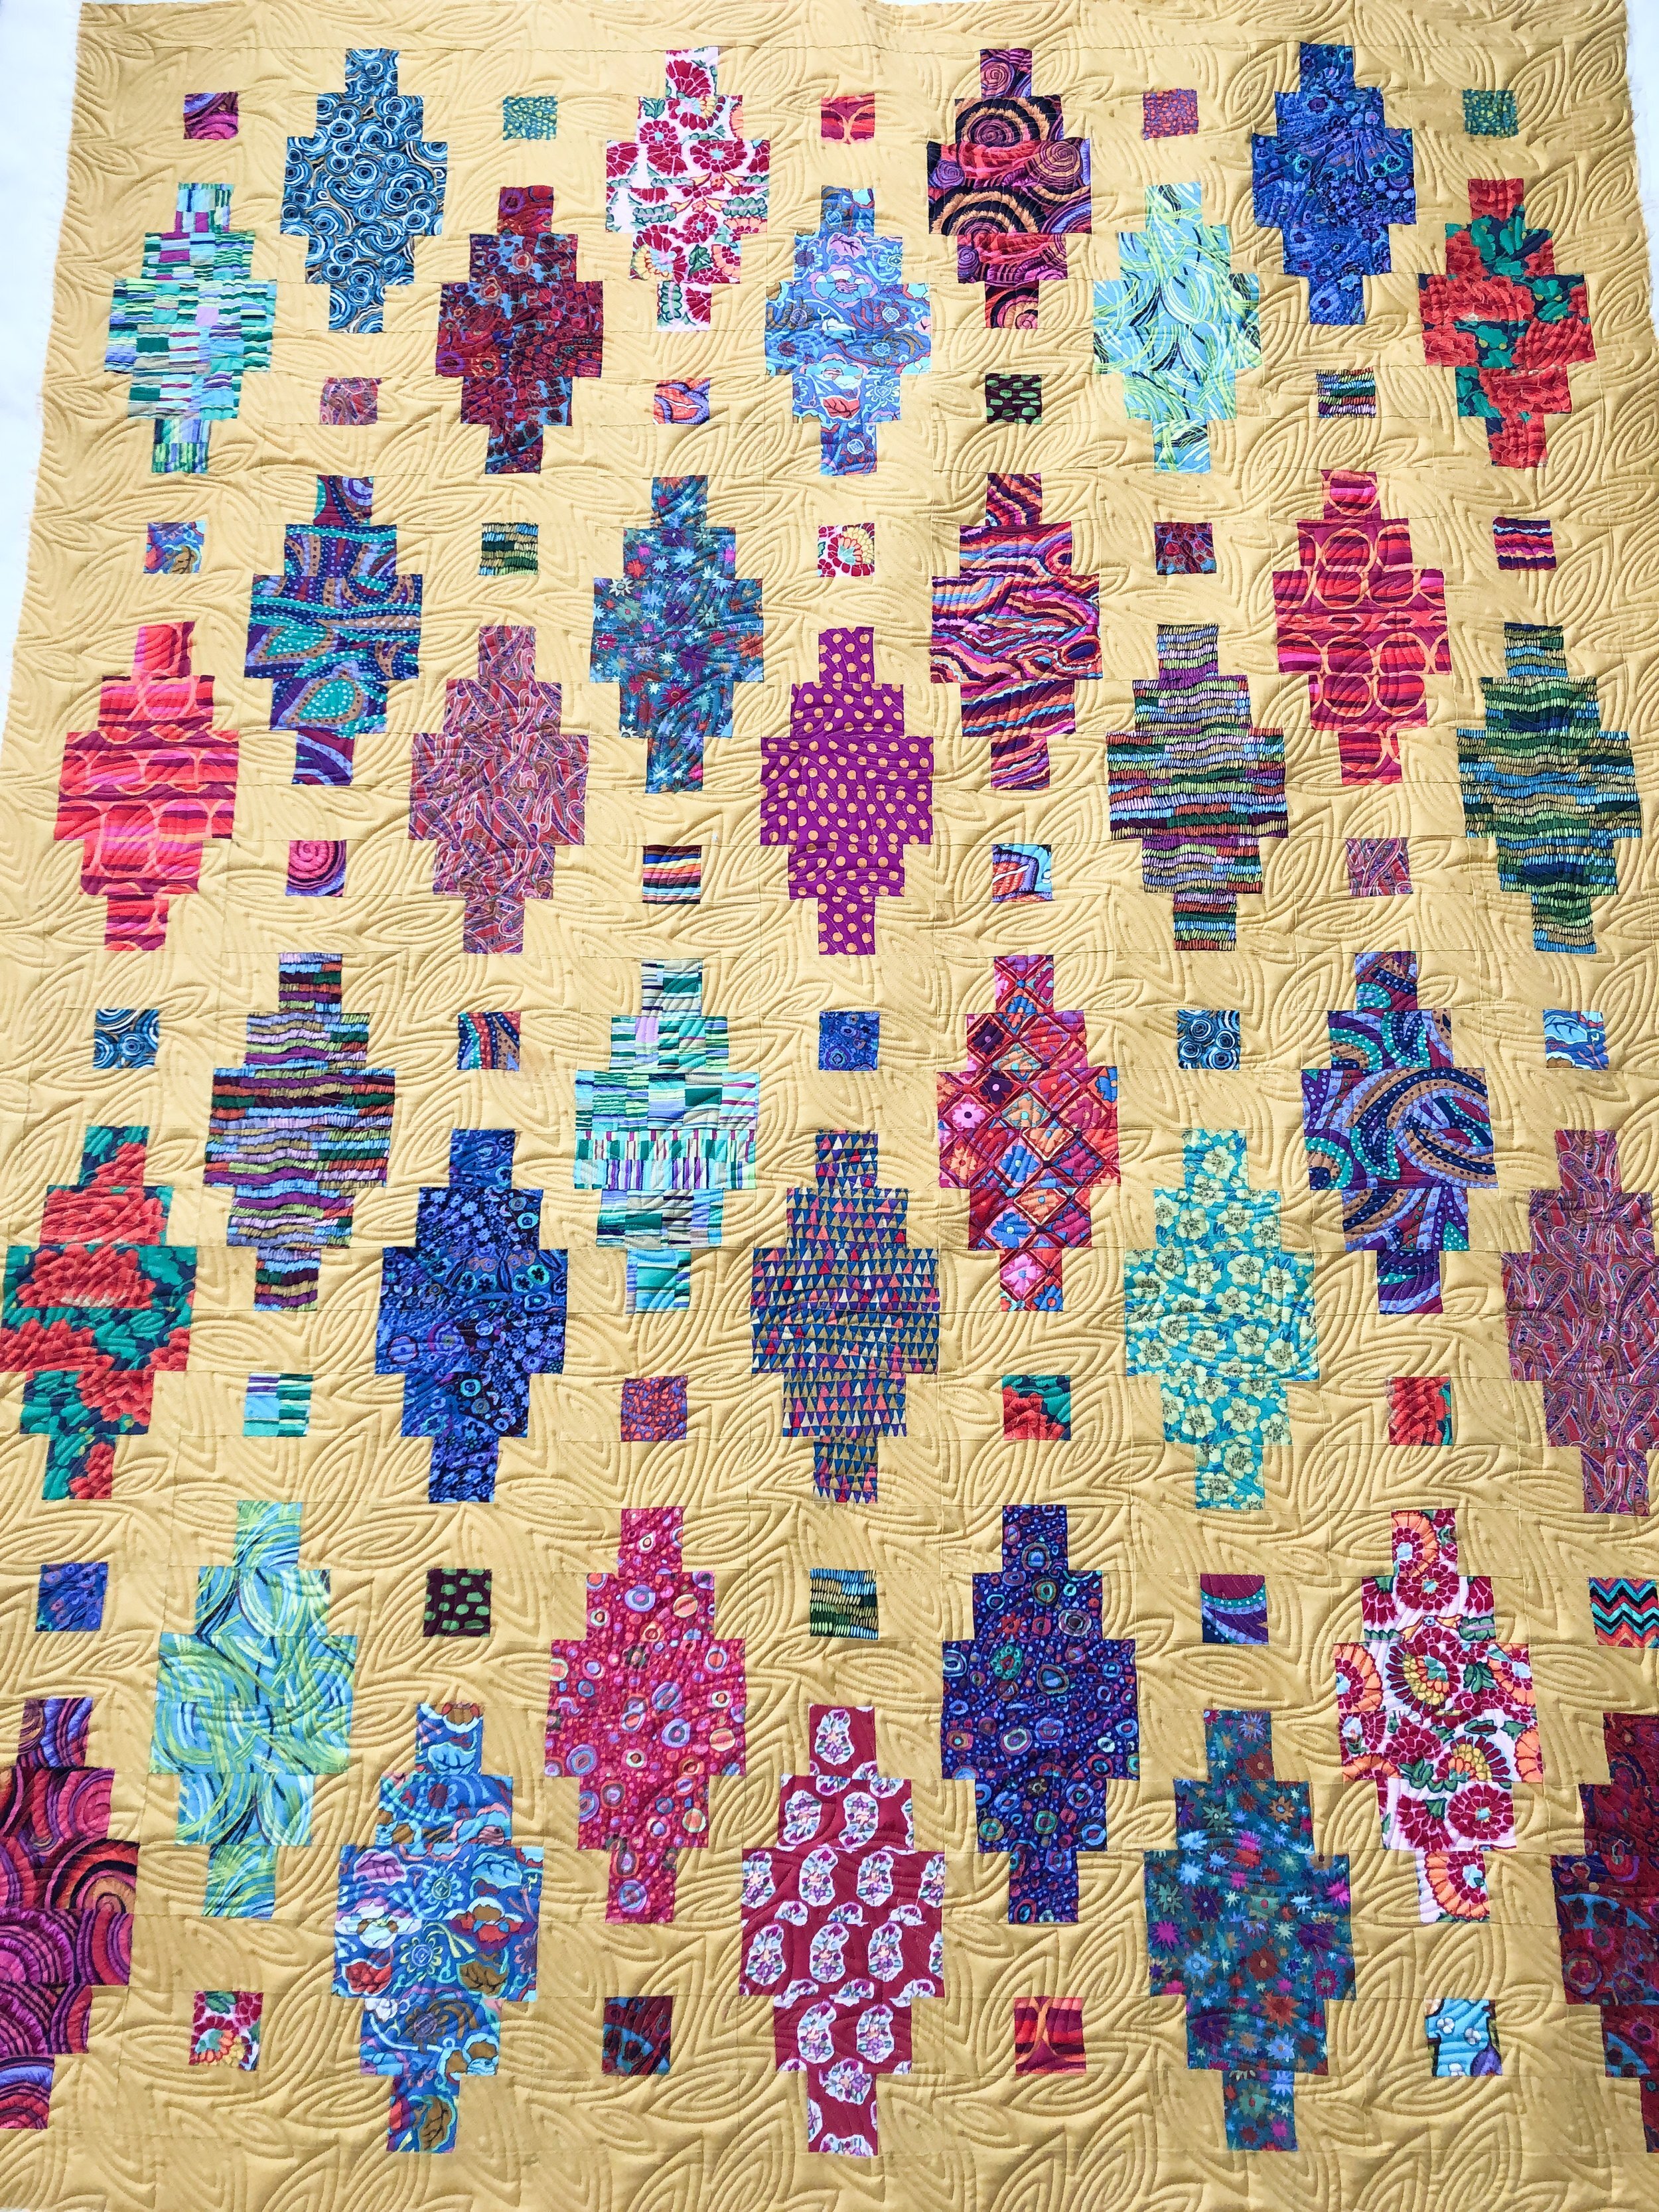
It appears to be a jelly roll friendly quilt. If you’re looking for a quilt pattern, check this one out!!
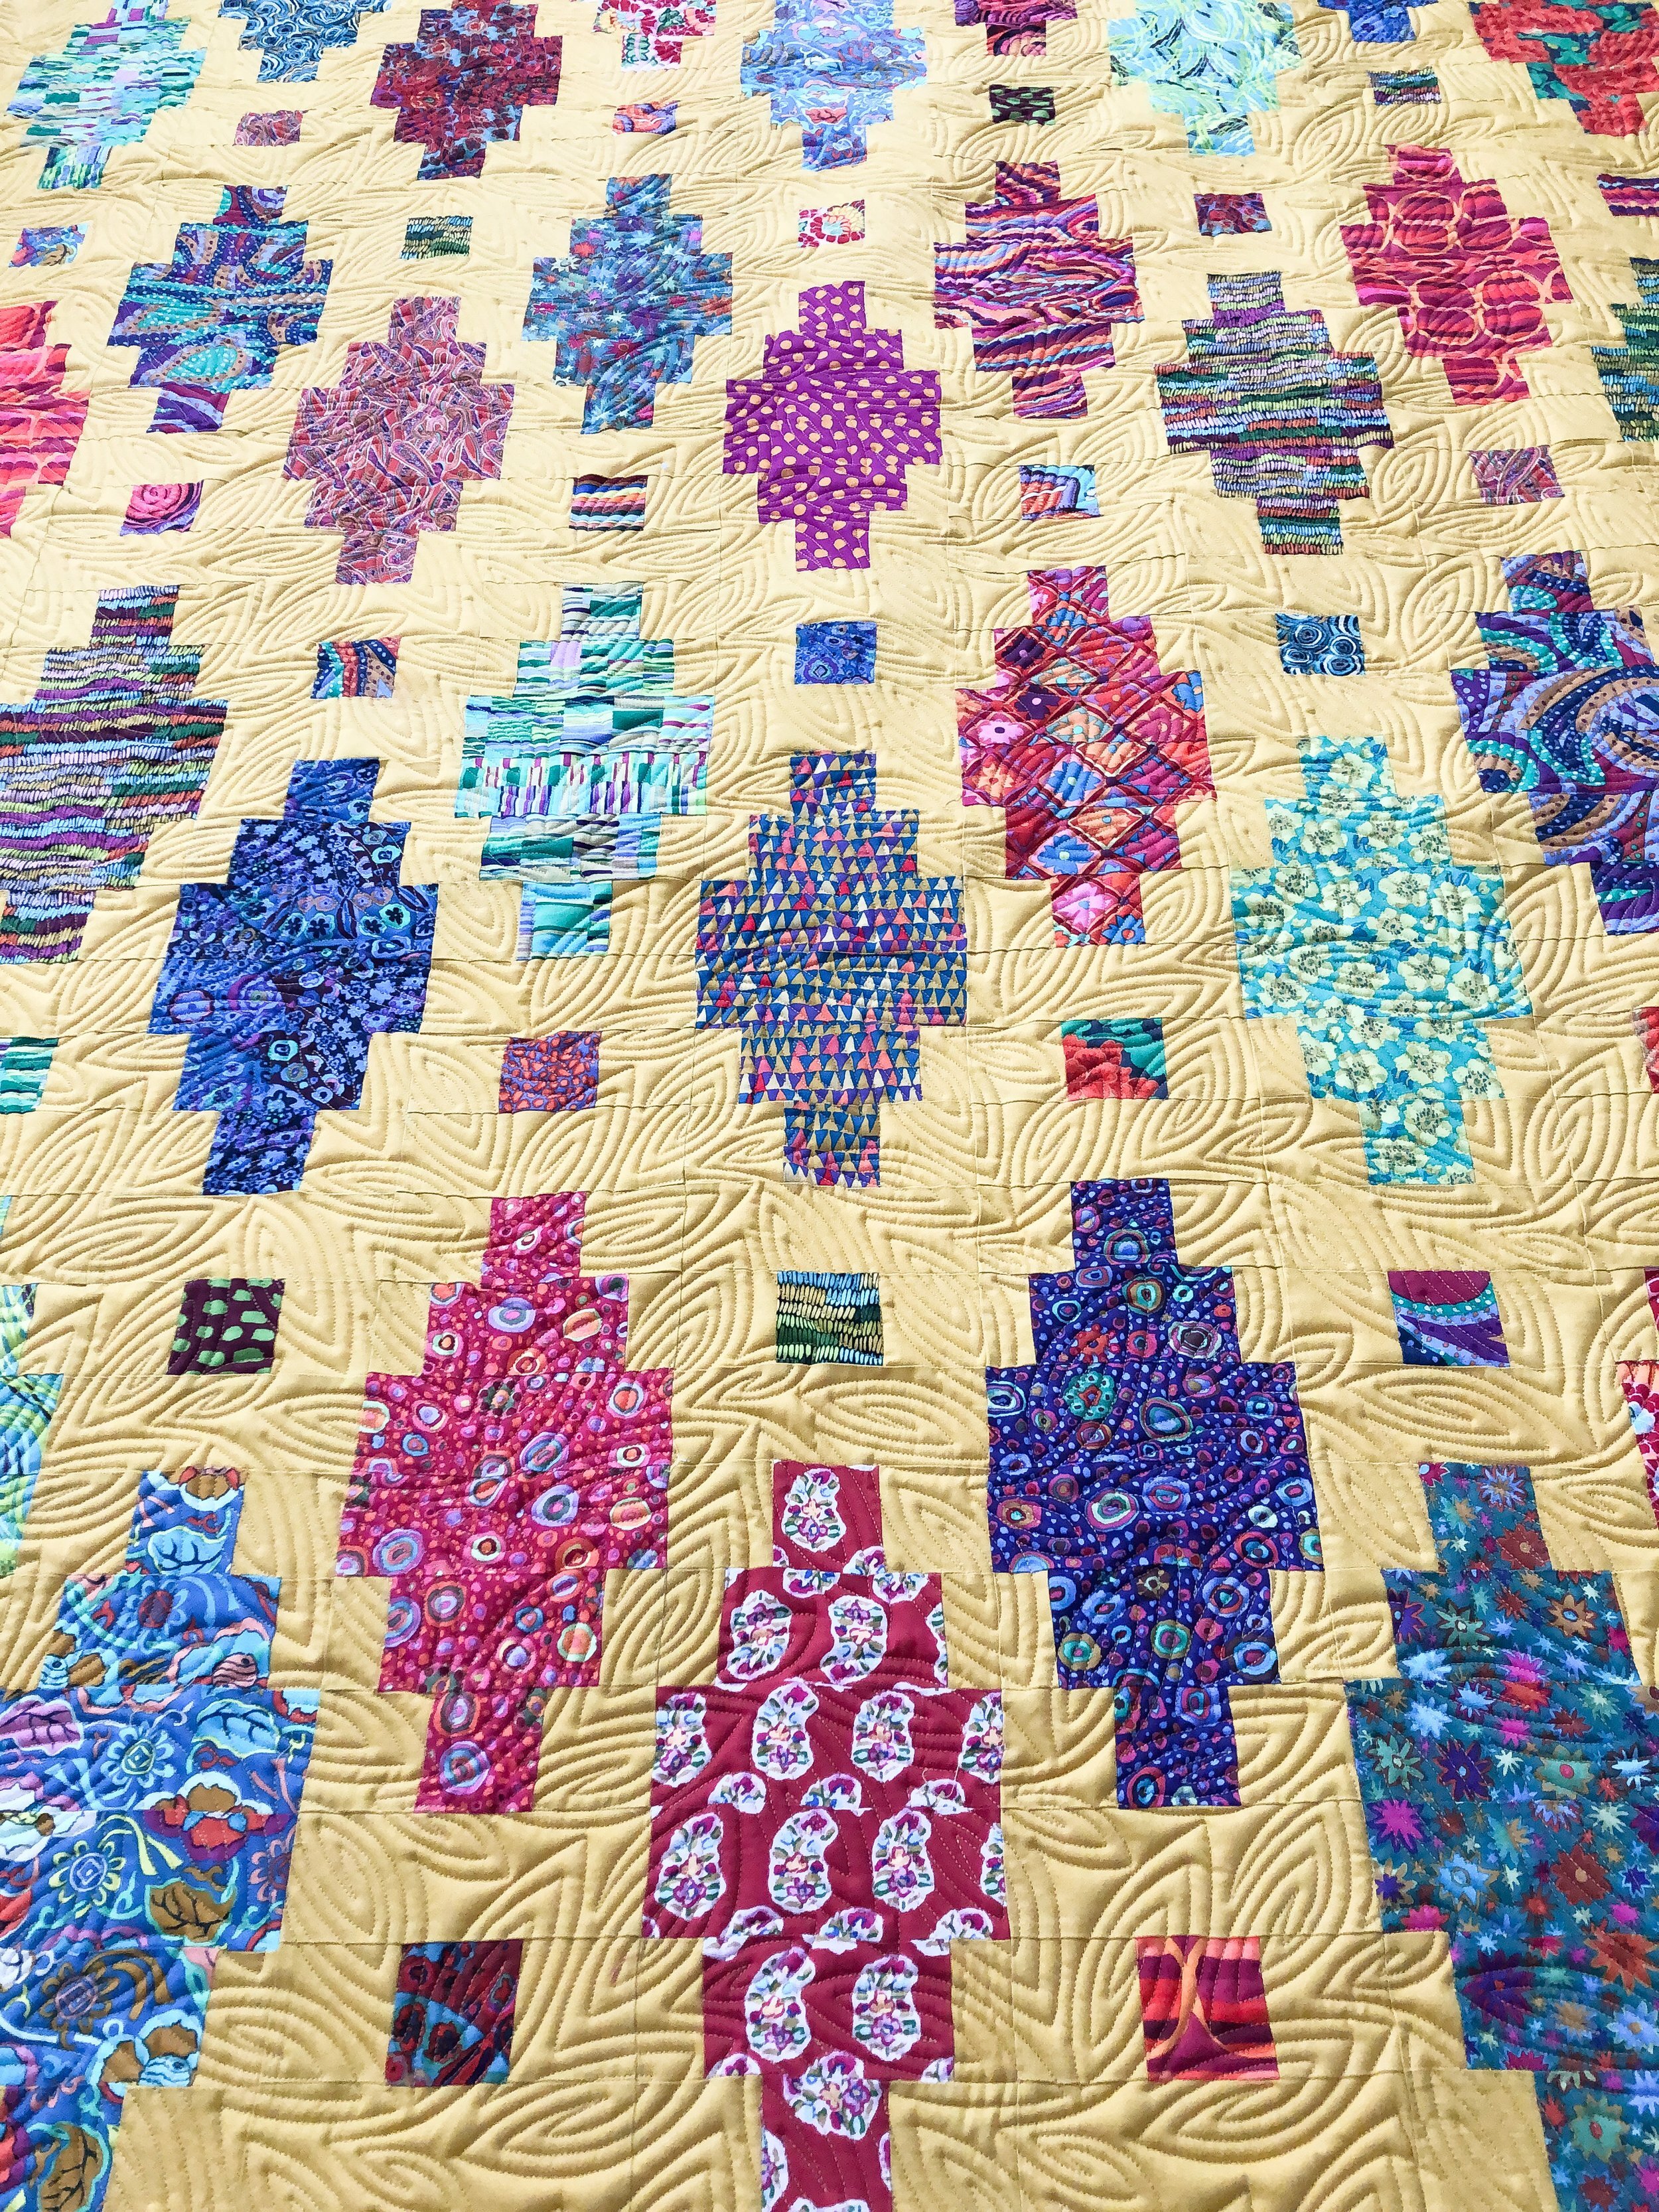
I don’t think I’ve ever seen a yellow background fabric on a quilt before, and isn’t it beautiful!! All of the beautiful jewel toned fabrics pop against it.
If I remember right, I used a yellow thread to blend with the background, and my favorite 8020 cotton poly blend batting from Winline Textiles out of Ogden Utah.

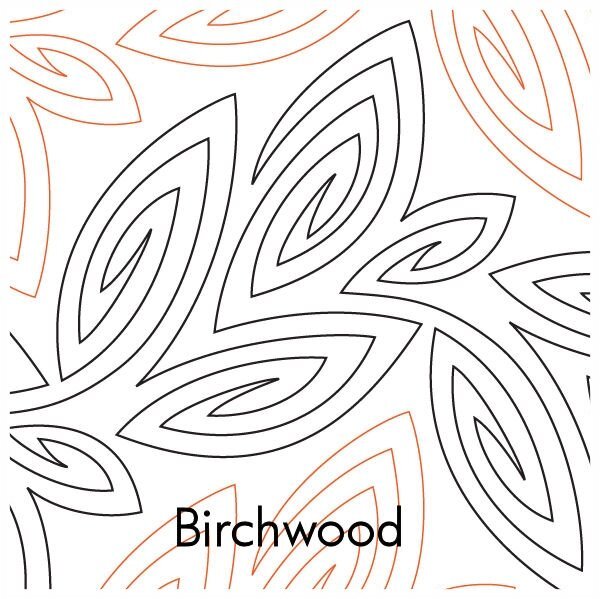
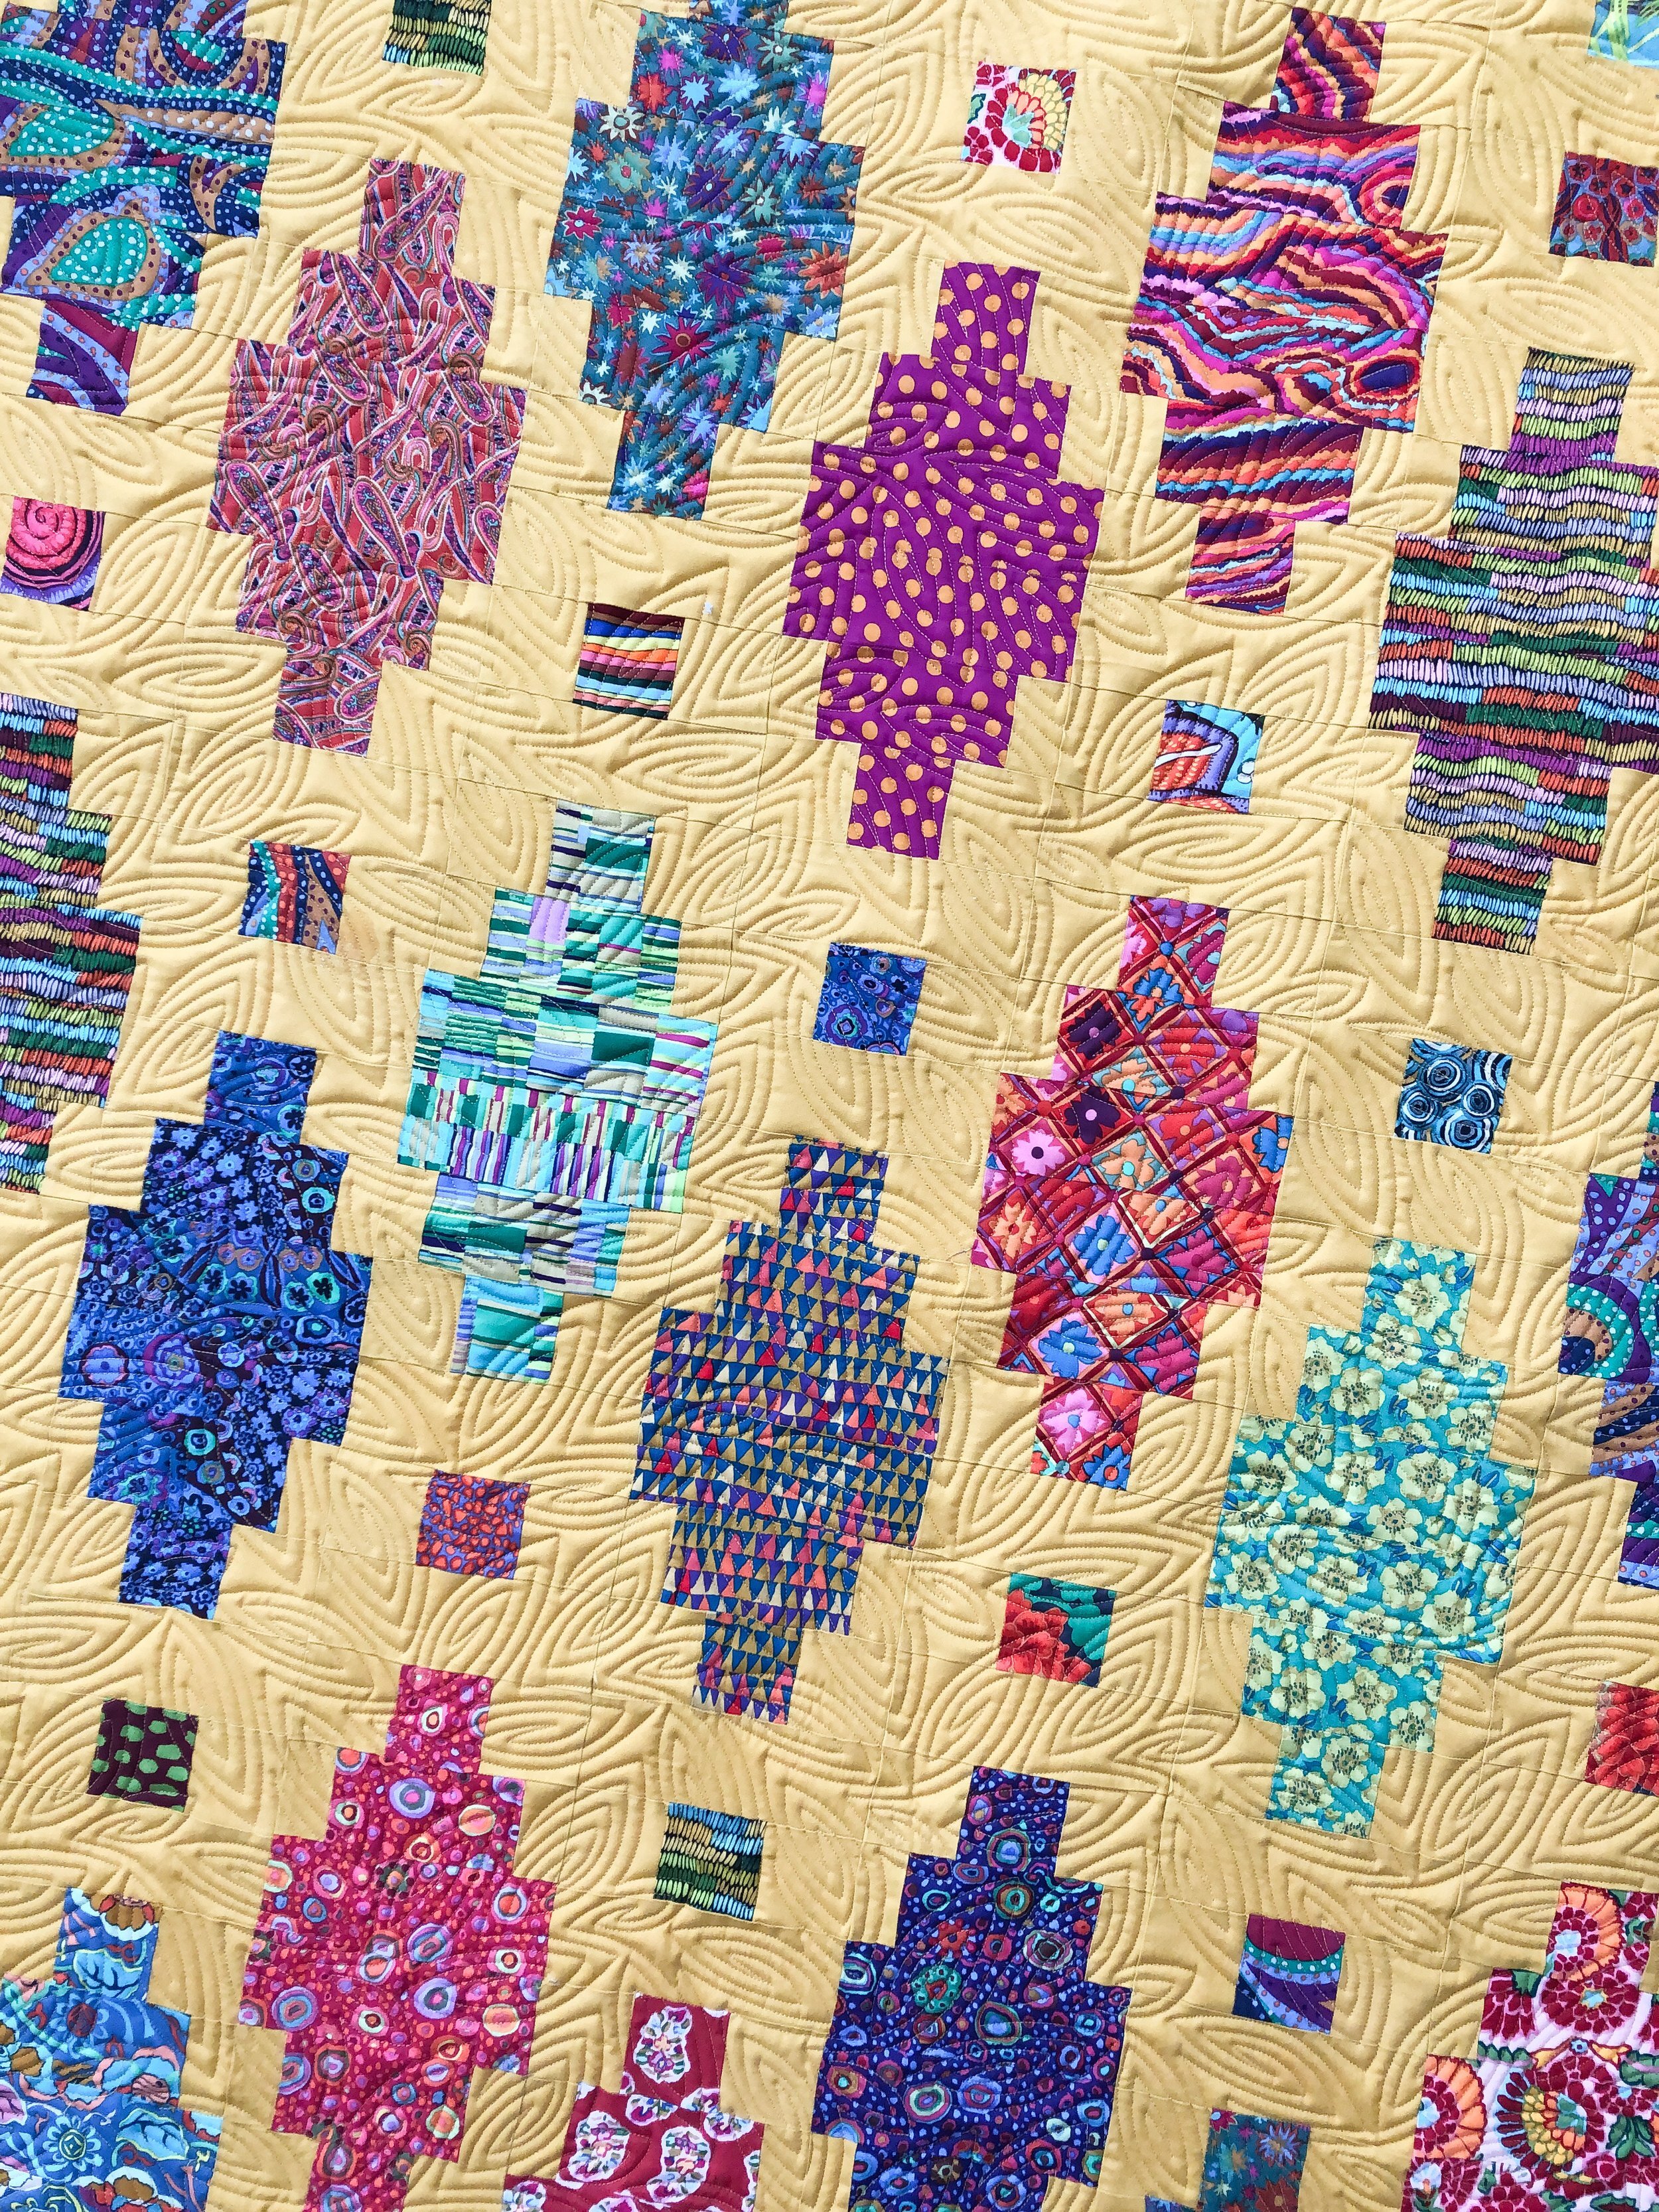
The great thing about picking a design like Birchwood, it adds some pretty amazing texture and it softens up all the hard lines in the quilt pattern. Birchwood is also a unique quilty texture…there is nothing out there like it.
A close up…

Thanks for stopping by!! If you’re looking to get some of your quilts machine quilted, I’d be happy to help you! I quilt edge to edge and custom. Send me an email at quiltingit@gmail.com and we can chat about how you’d like your quilt quilted. Thank you!! • Leisha
Caroline’s Baby Quilt
I have an extra sweet baby quilt for you!!! Grab your favorite charm pack and make one for the next new baby in your life.

Caroline has been sewing the stash of fabrics that she has, and this is one of the quilts that she made. Cute huh?!?!
I’m waiting to hear back from Caroline about the designer and pattern name. I will put that here when I know.
I used Patricia Ritter and my Villa design to quilt it. I love that the spine is a large stipple, with beautiful leaves meandering with the stipple. Villa is available at Urban Elementz.

I used a natural white Omni thread from Superior Threads, and my favorite 8020 cotton poly blend batting from Winline Textiles out of Ogden Utah.
This is just enough quilting to make it cozy to wrap up a little one, and also to give the quilt some beautiful texture.

Especially, with the soft minky on the backing!! Love it!
Do you have any quilts that you’d like to have quilted? I’m not very far out most of the time. I quilt edge to edge and custom. Send me an email, quiltingit@gmail.com, I’d love to quilt for you! -leisha
The Patchwork Duffle
Hello Friends,
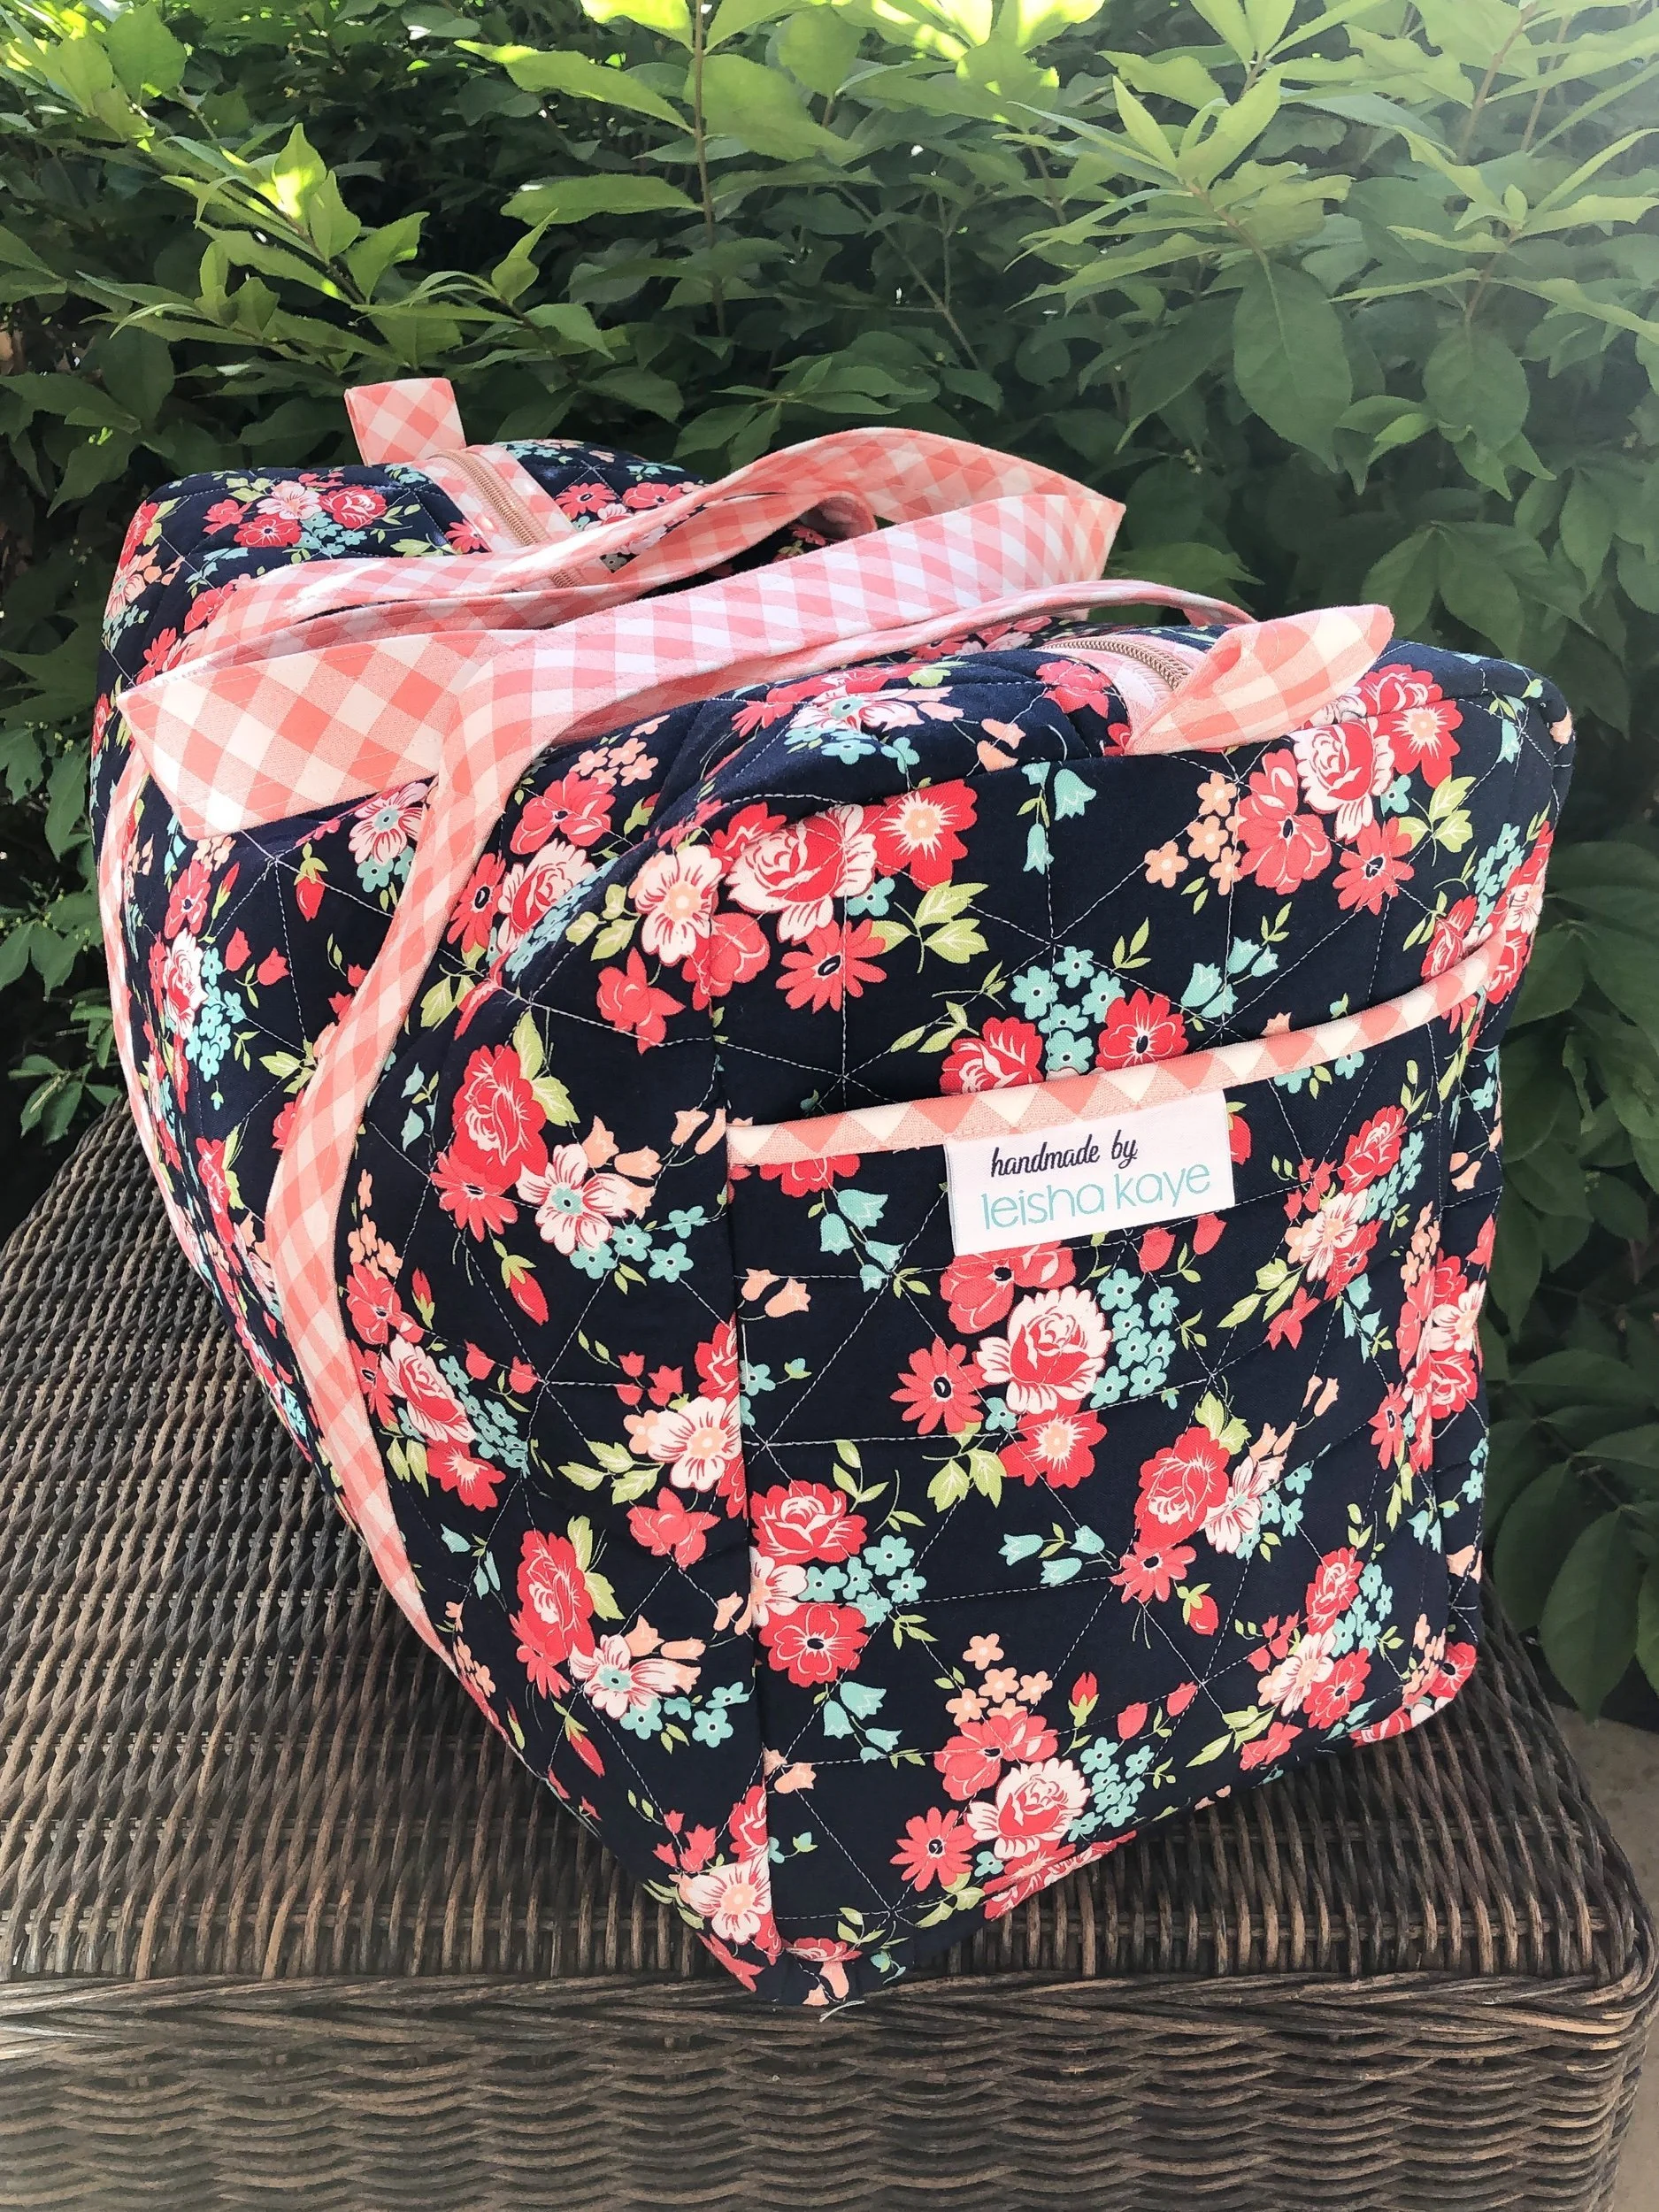
I have a super fun duffle to share with you that I made recently!! Have you seen The Patchwork Duffle from Kaitlyn at Knot and Thread? I’ve been so excited to make it since she told me about it! You may be wondering how complicated it is…it’s one of the easiest bags I’ve made. Her pattern is great!! She also has some bonus videos if you need to check them out. Head to her YouTube channel.
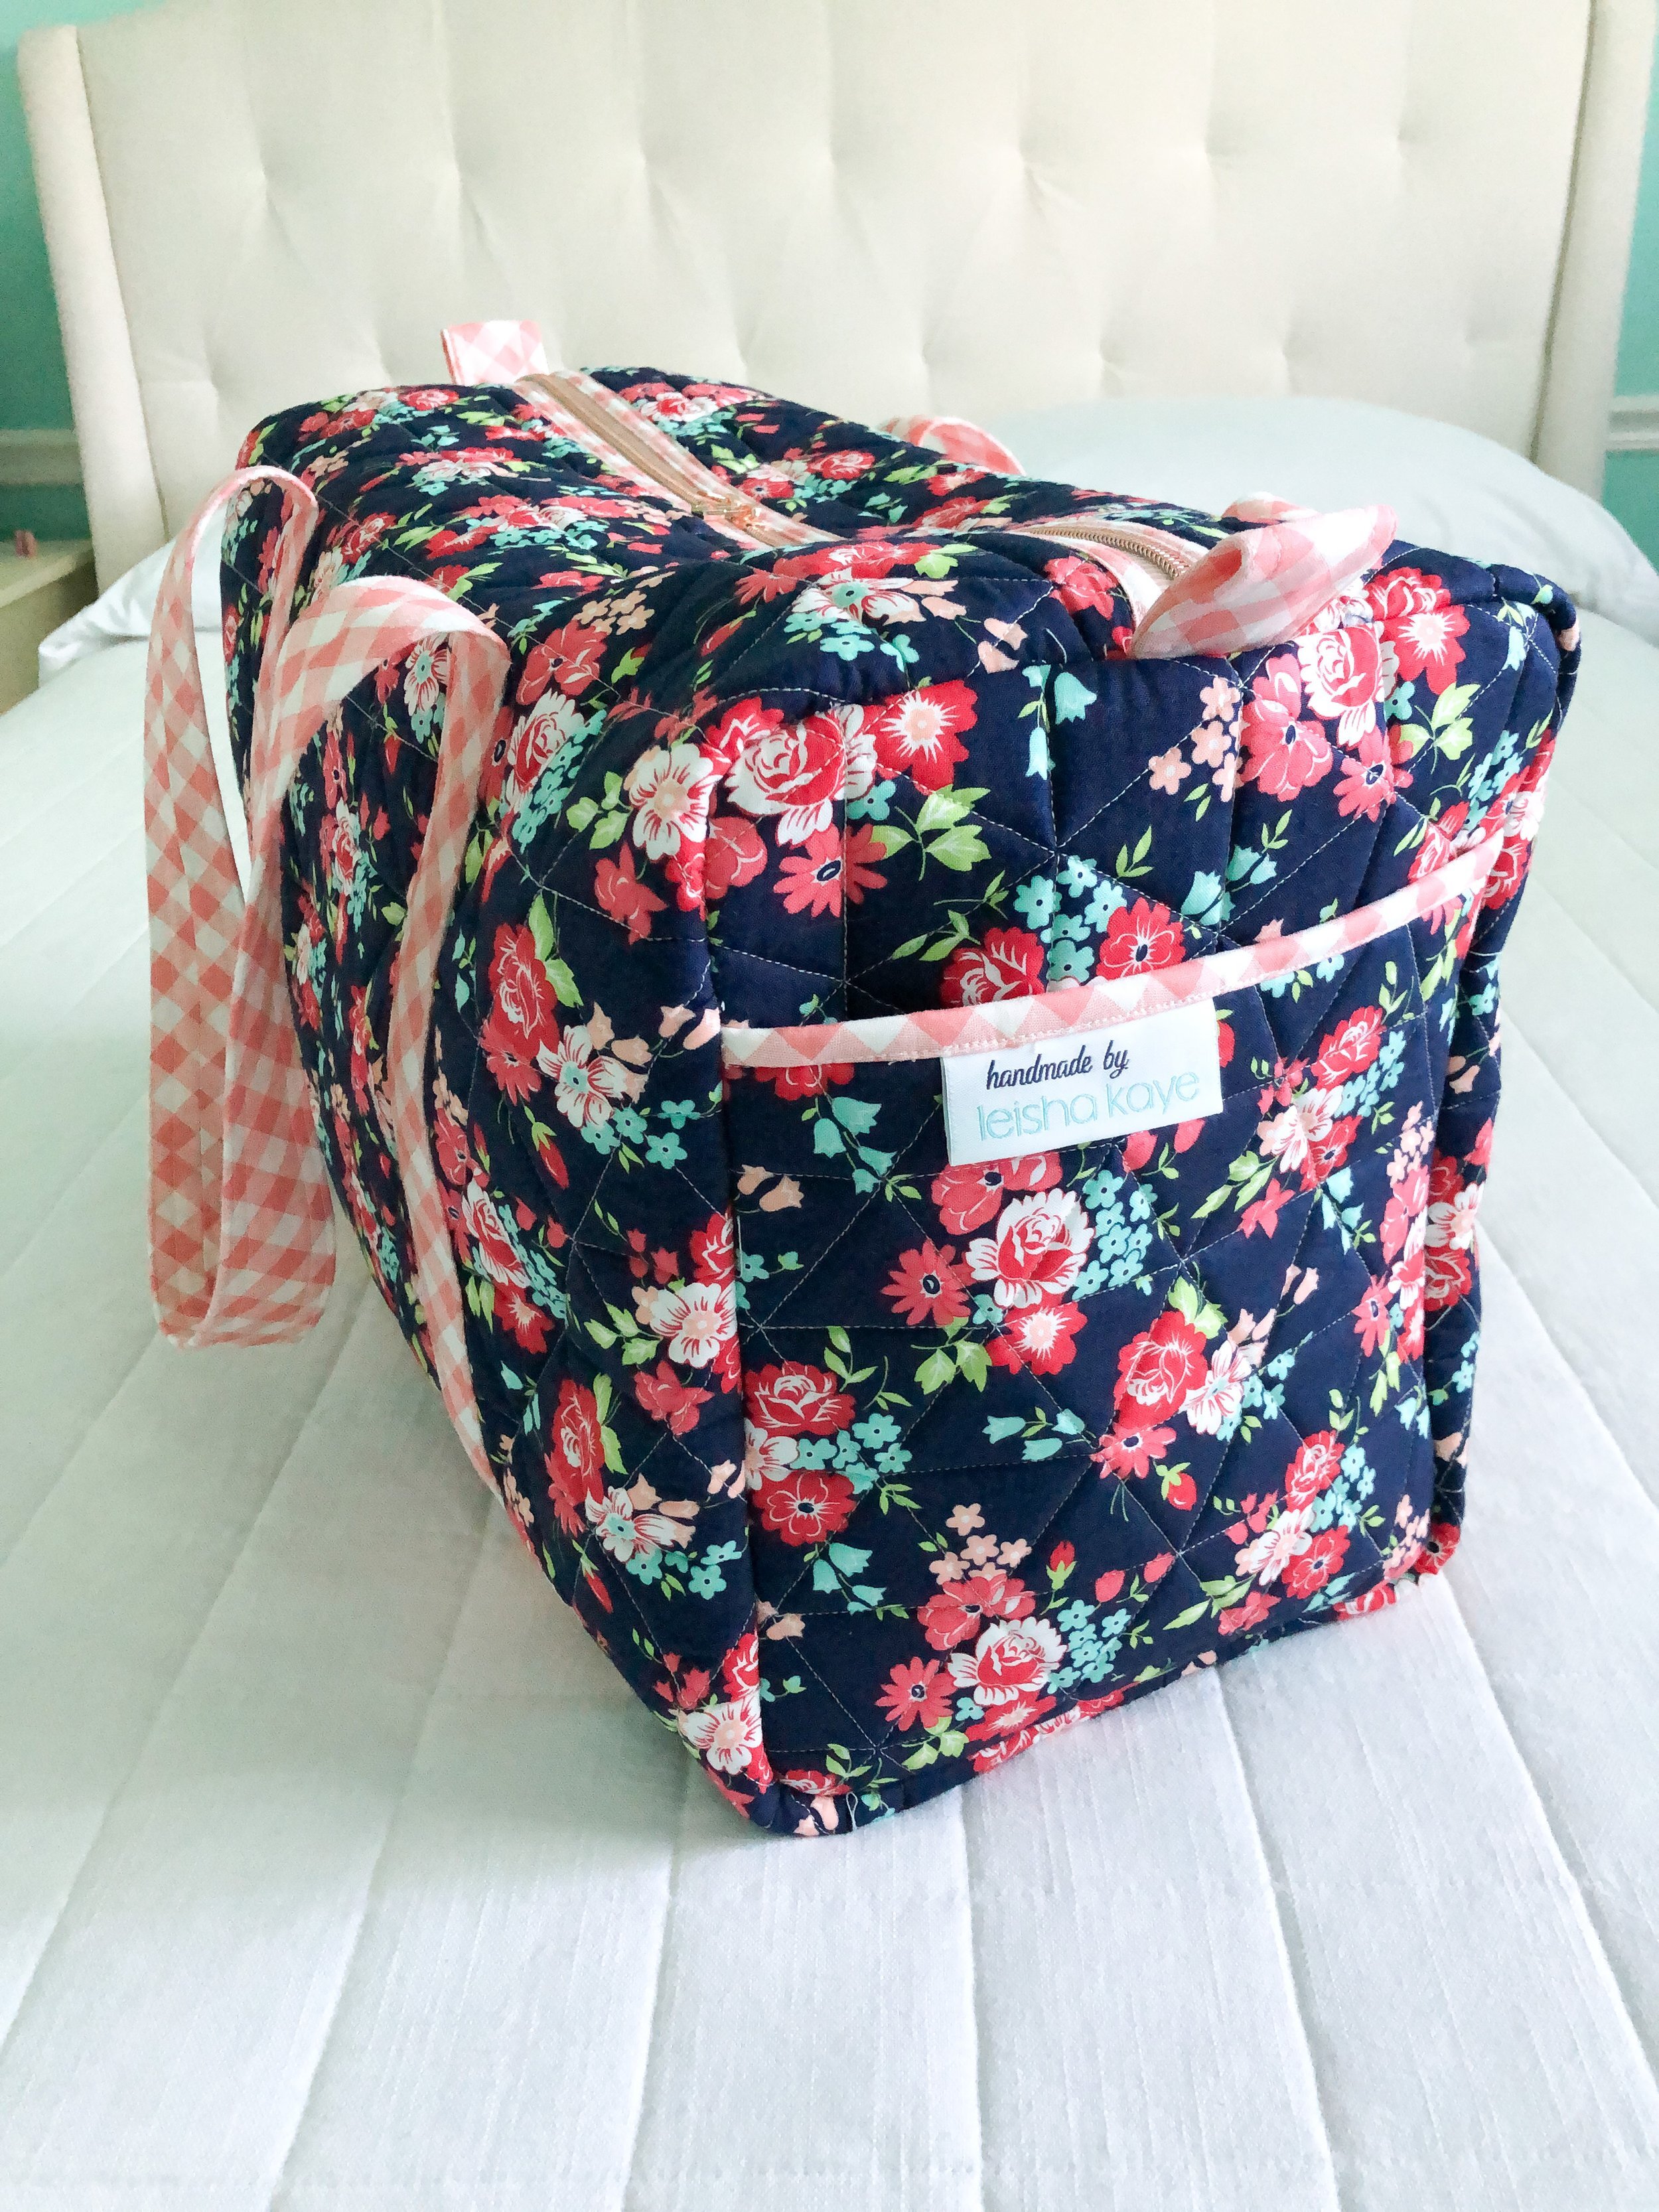
Kaitlyn wrote this pattern with the intention of helping us use our scraps. She does offer instructions in the pattern if you’d like to make the outside patchwork or a solid fabric, like I’ve done. You can use batting or Soft and Stable, like I did. Soft and Stable is foam with a fabric scrim on both sides. It’s a breeze to quilt and sew with, and it gives the bag a lot of great structure. My bag is empty and still keeping its shape. If you get it prepackaged, it may have fold lines in it, guess what…you can press those lines out with your iron. That’s what I did, and it worked great!

I added one of my quilt labels, that I had made by Custom Labels 4 u, to the binding on the pocket. Such a fun touch!!

Look at the sweet rose gold striped zipper, Kaitlyn has those on her website, too. They are zippers by the yard. I used the peaches and cream one. You do need to required length of zipper that the pattern lists, to help give you the extra room to sew the bag together. Don’t use a shorter zipper. I love that Kaitlyn thinks about all the details and the ease of sewing the duffle together.

I love the three Bonnie and Camille fabrics that I used. The pop of aqua is from their Hello Darling line, the pink diamond gingham is from Vintage Picnic, and the main floral is from their Smitten line. I also used my favorite natural white Omni thread from Superior Threads to quilt it.
I used my fun Domestic Stitches - Triangles for the quilting. Which is so much fun, seeing it on a bag!! Domestic Stitches - Triangles is available in my shop.

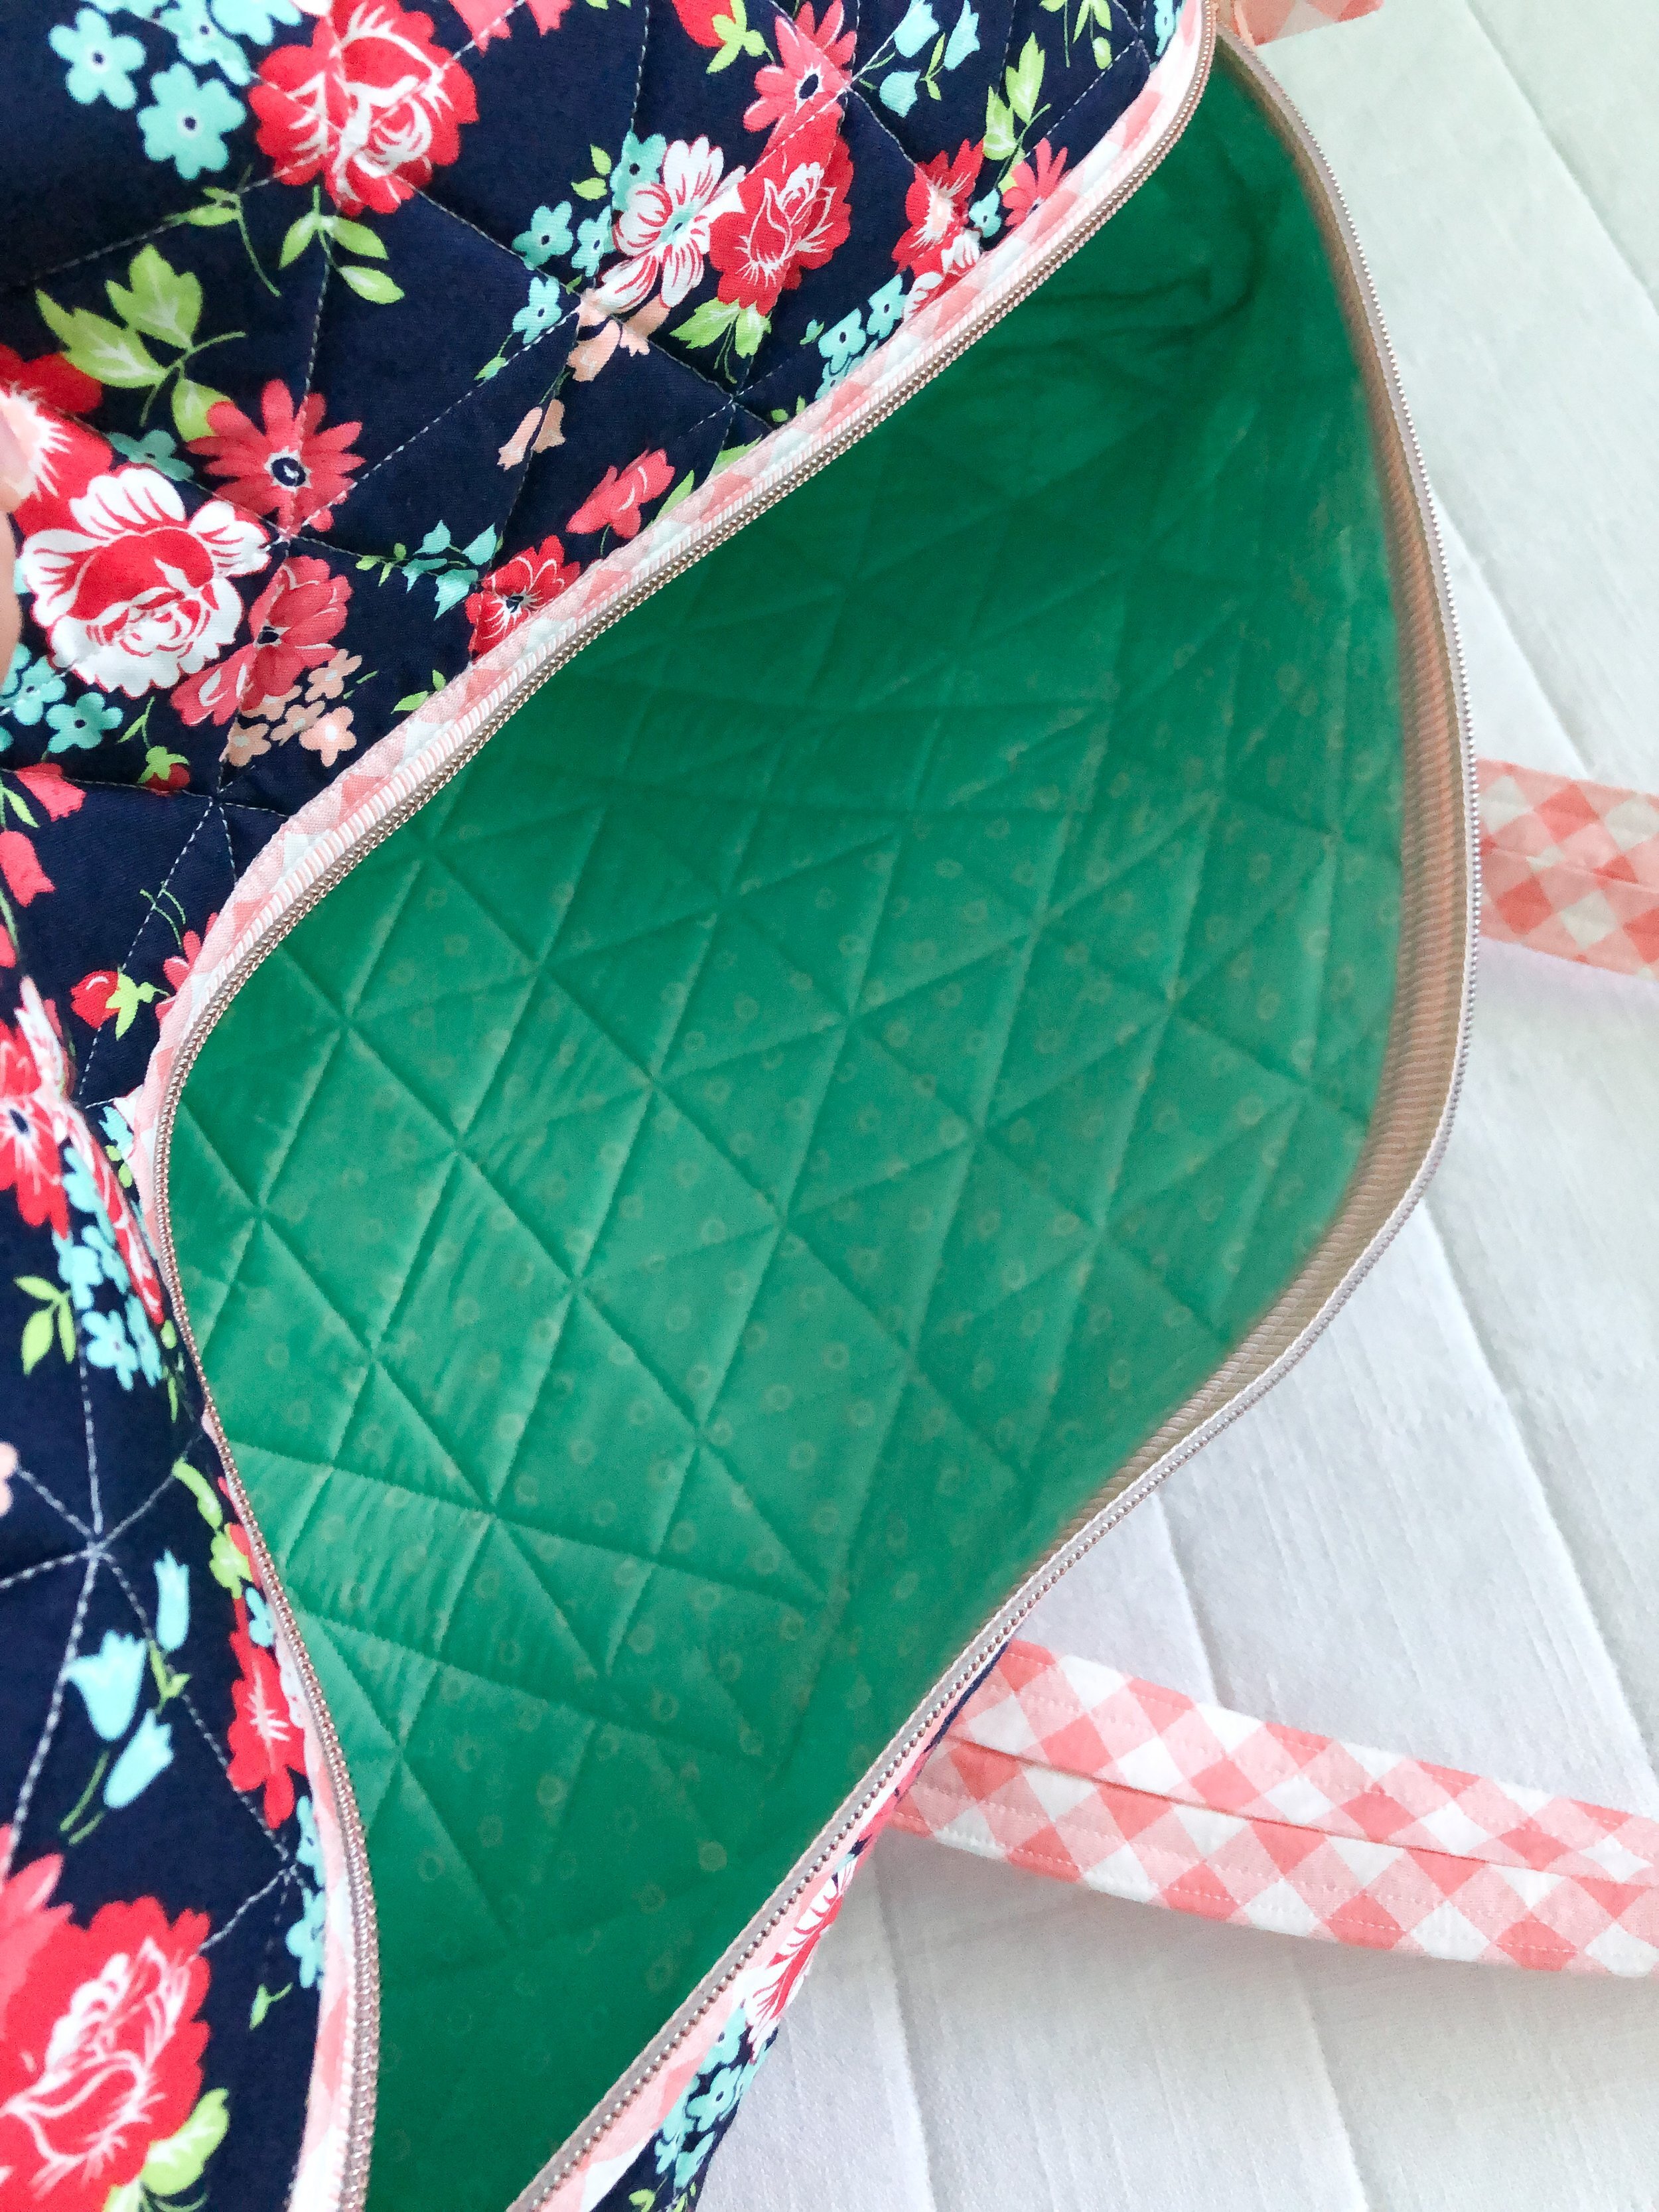
There aren’t pockets on the inside, but there are two large pockets on each end, which I LOVE!!!

I made this bag for a friend who is getting married. She loves to travel, and I’m hoping she will take this with her on lots of adventures.
Thanks for stopping by! - leisha
If you have any quilts that you’d like quilted, please reach out, I’d love to quilt for you.
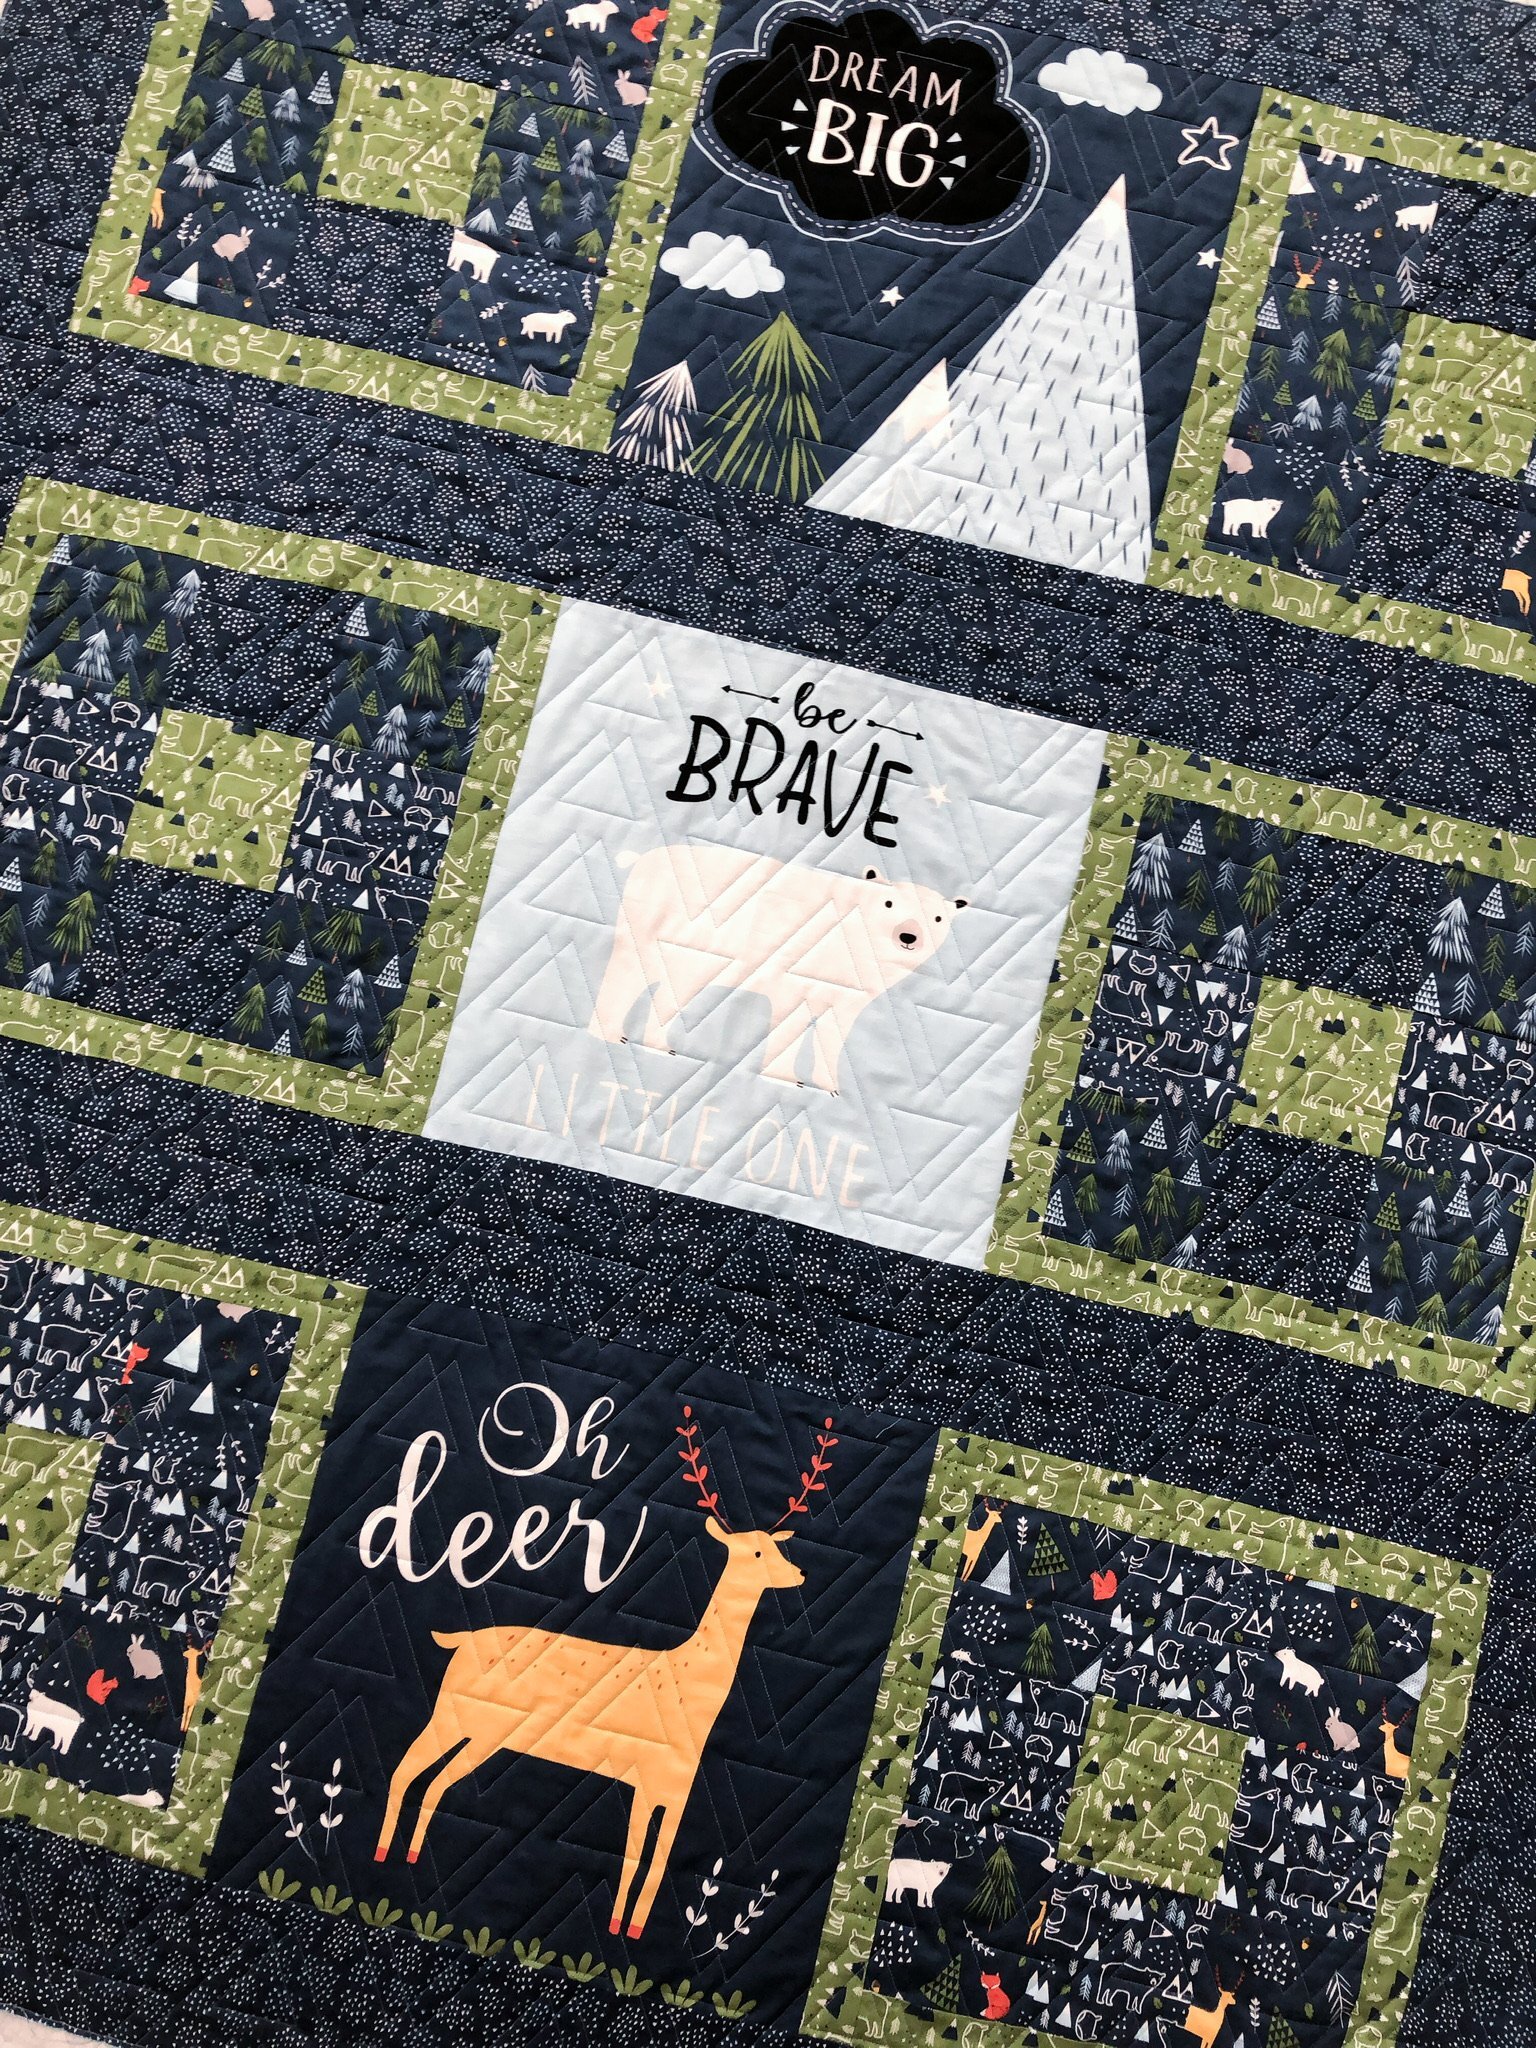
Noreen’s In The Forest baby quilt
Noreen made this adorable baby quilt for one of her new grandsons, so sweet huh?!?!?!
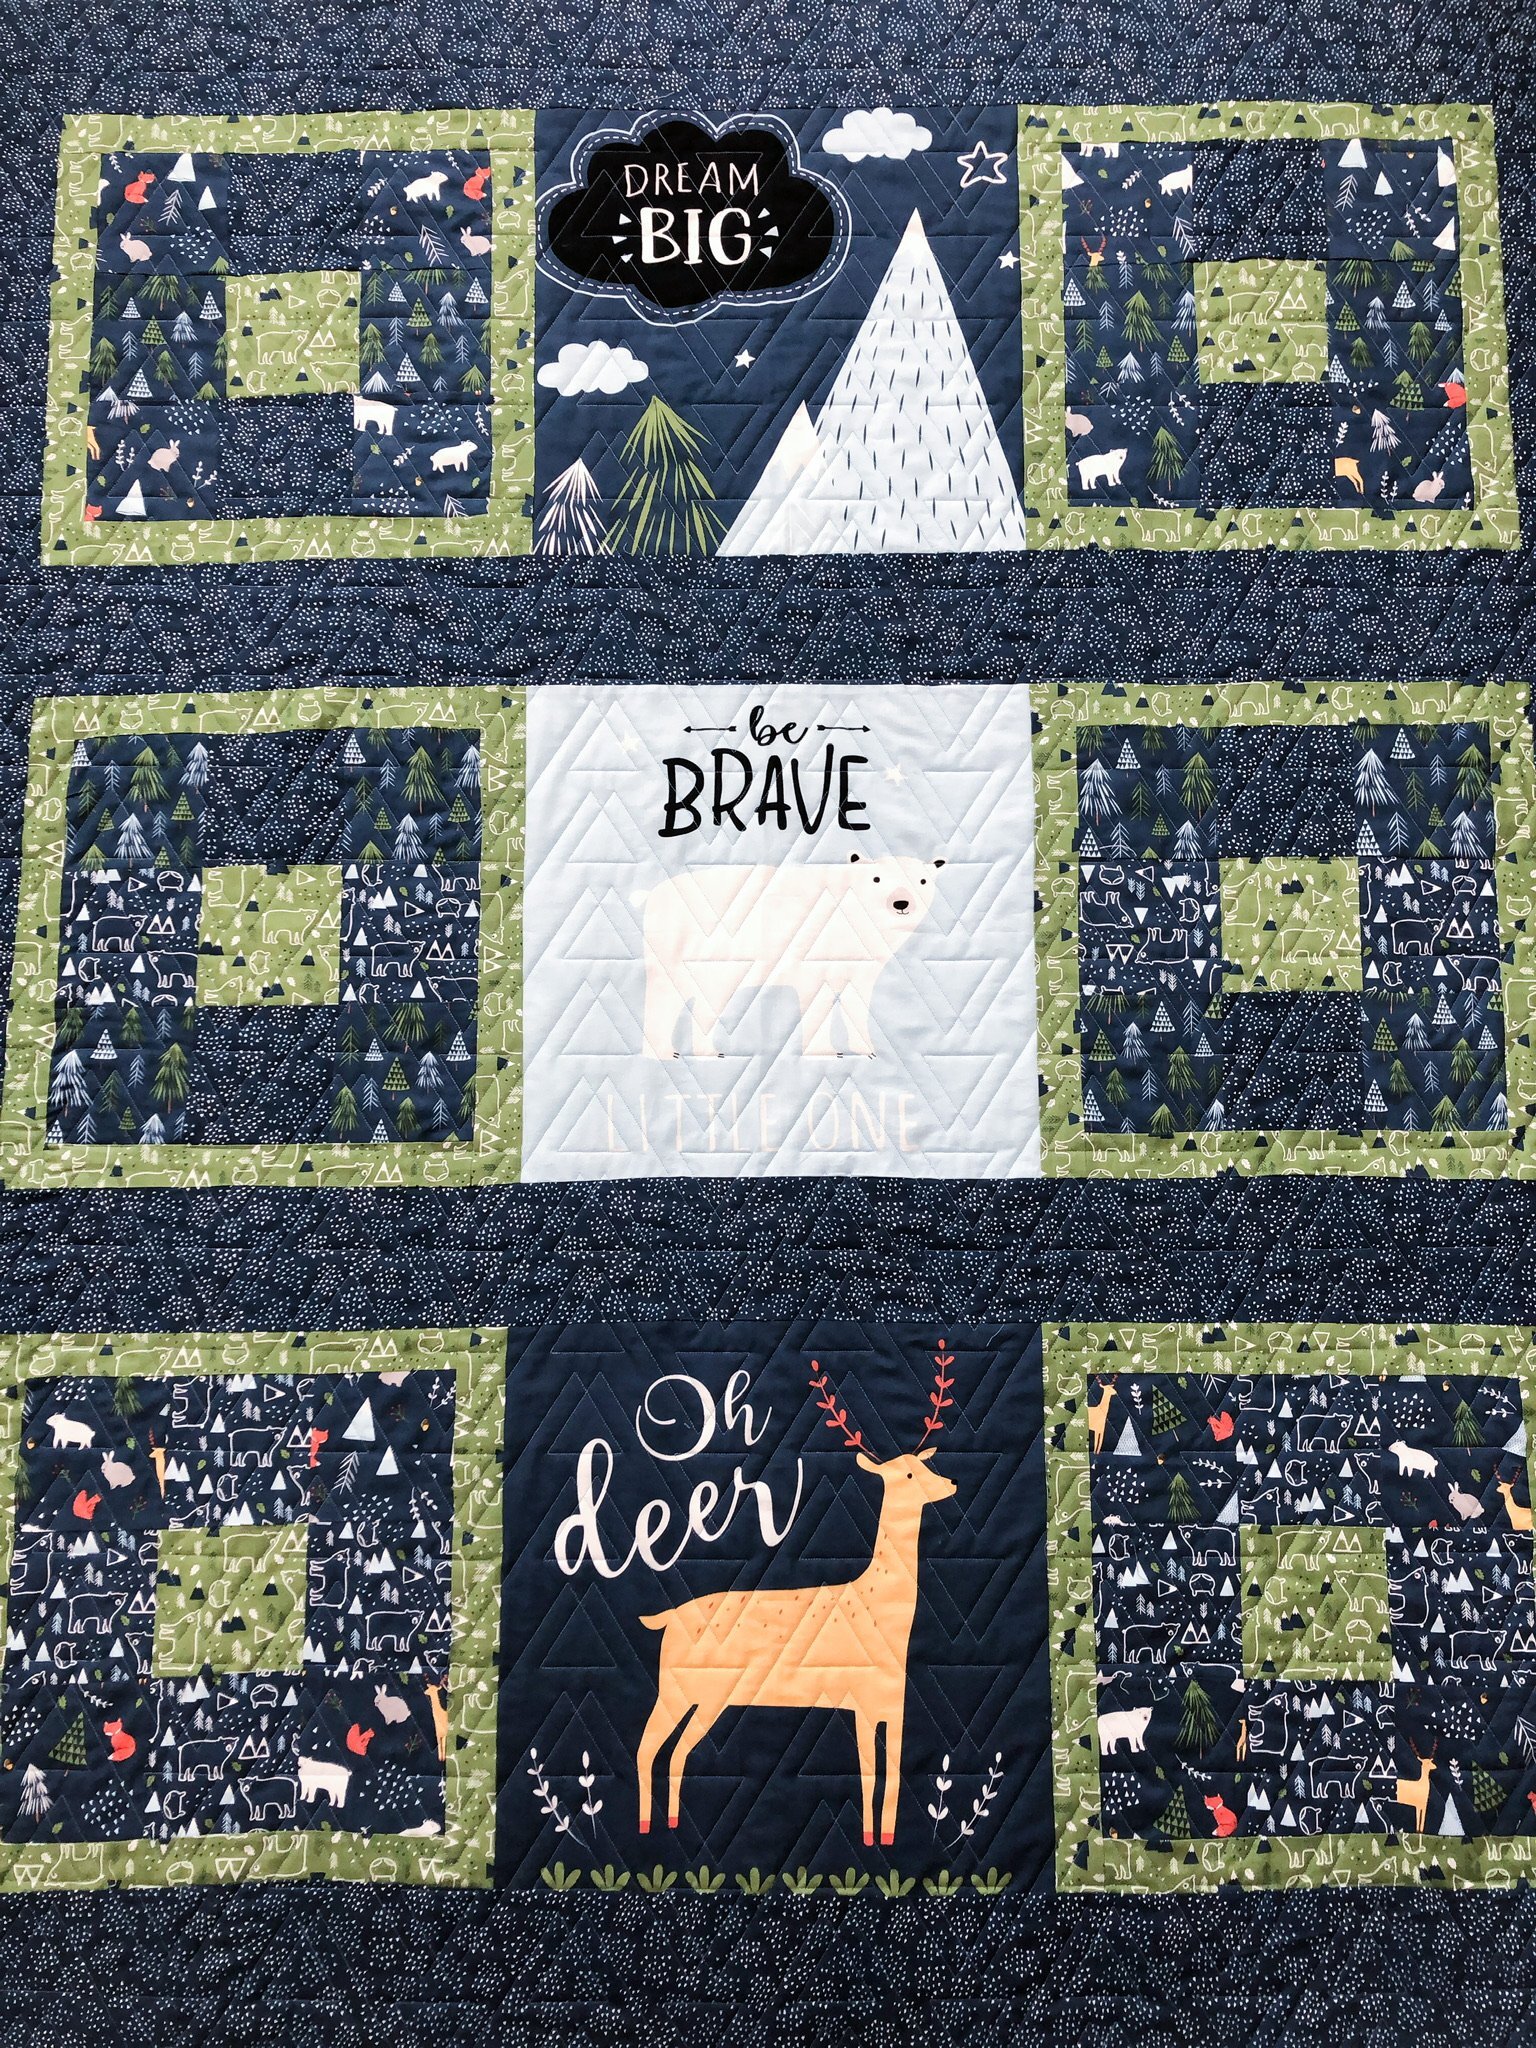
The panel is called In The Forest by Riley Blake. I don’t know if there is a pattern for it. I couldn’t find one when I searched.
I used my favorite natural white Omni thread from Superior Threads, and 8020 cotton poly blend batting from Winline Textiles in Ogden Utah.
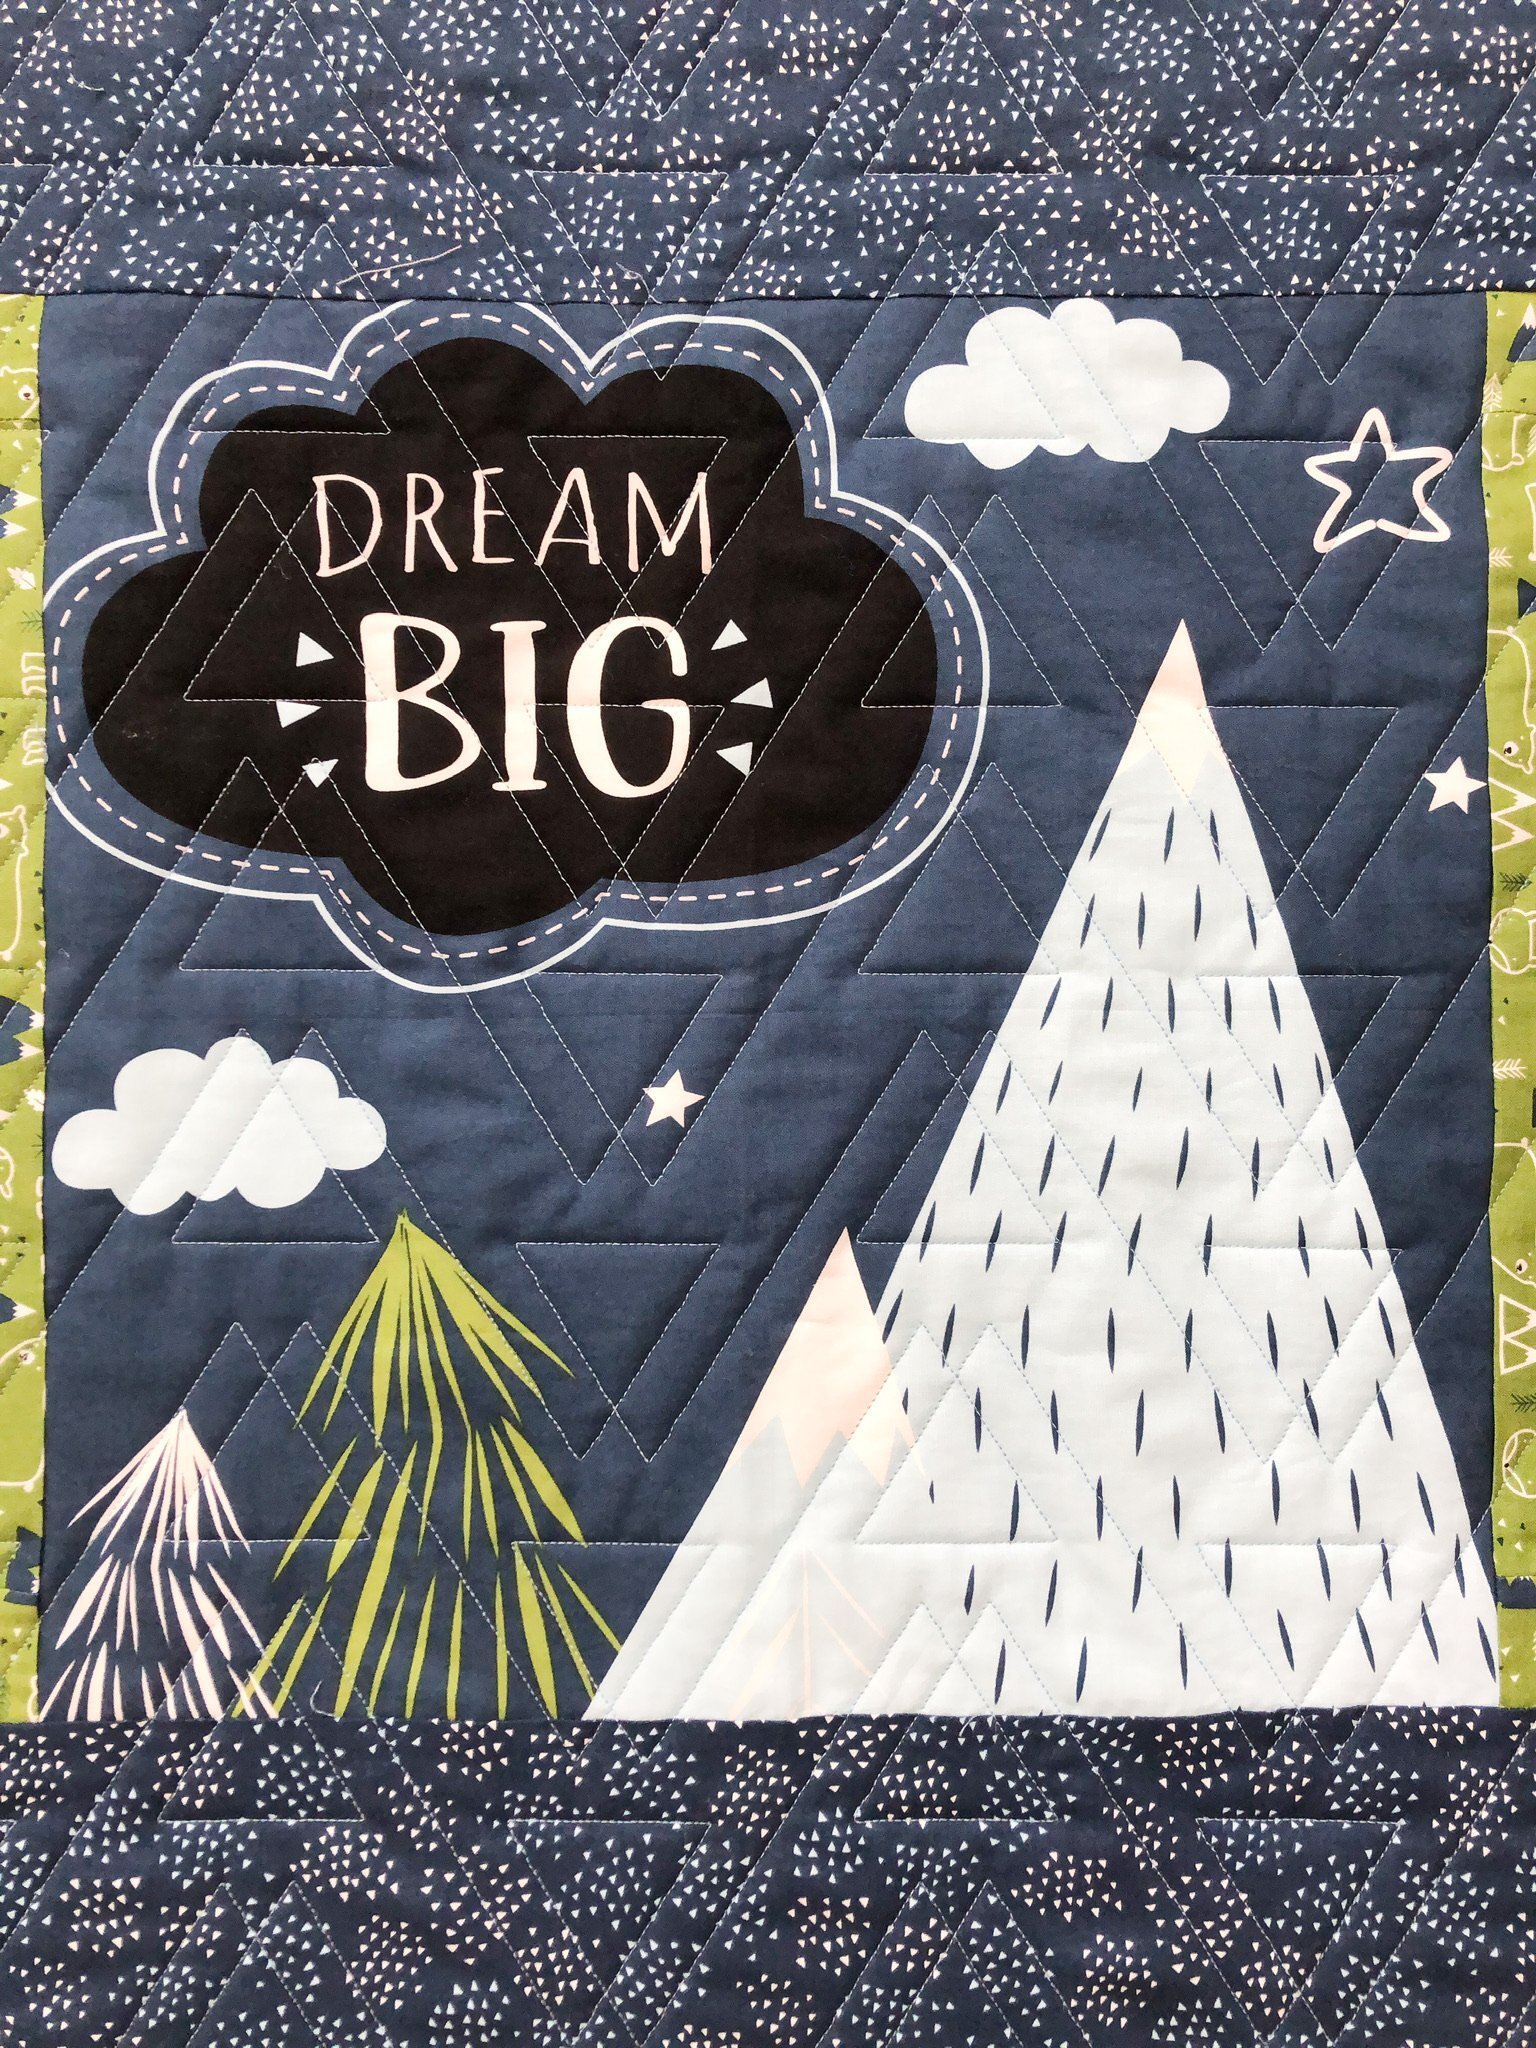
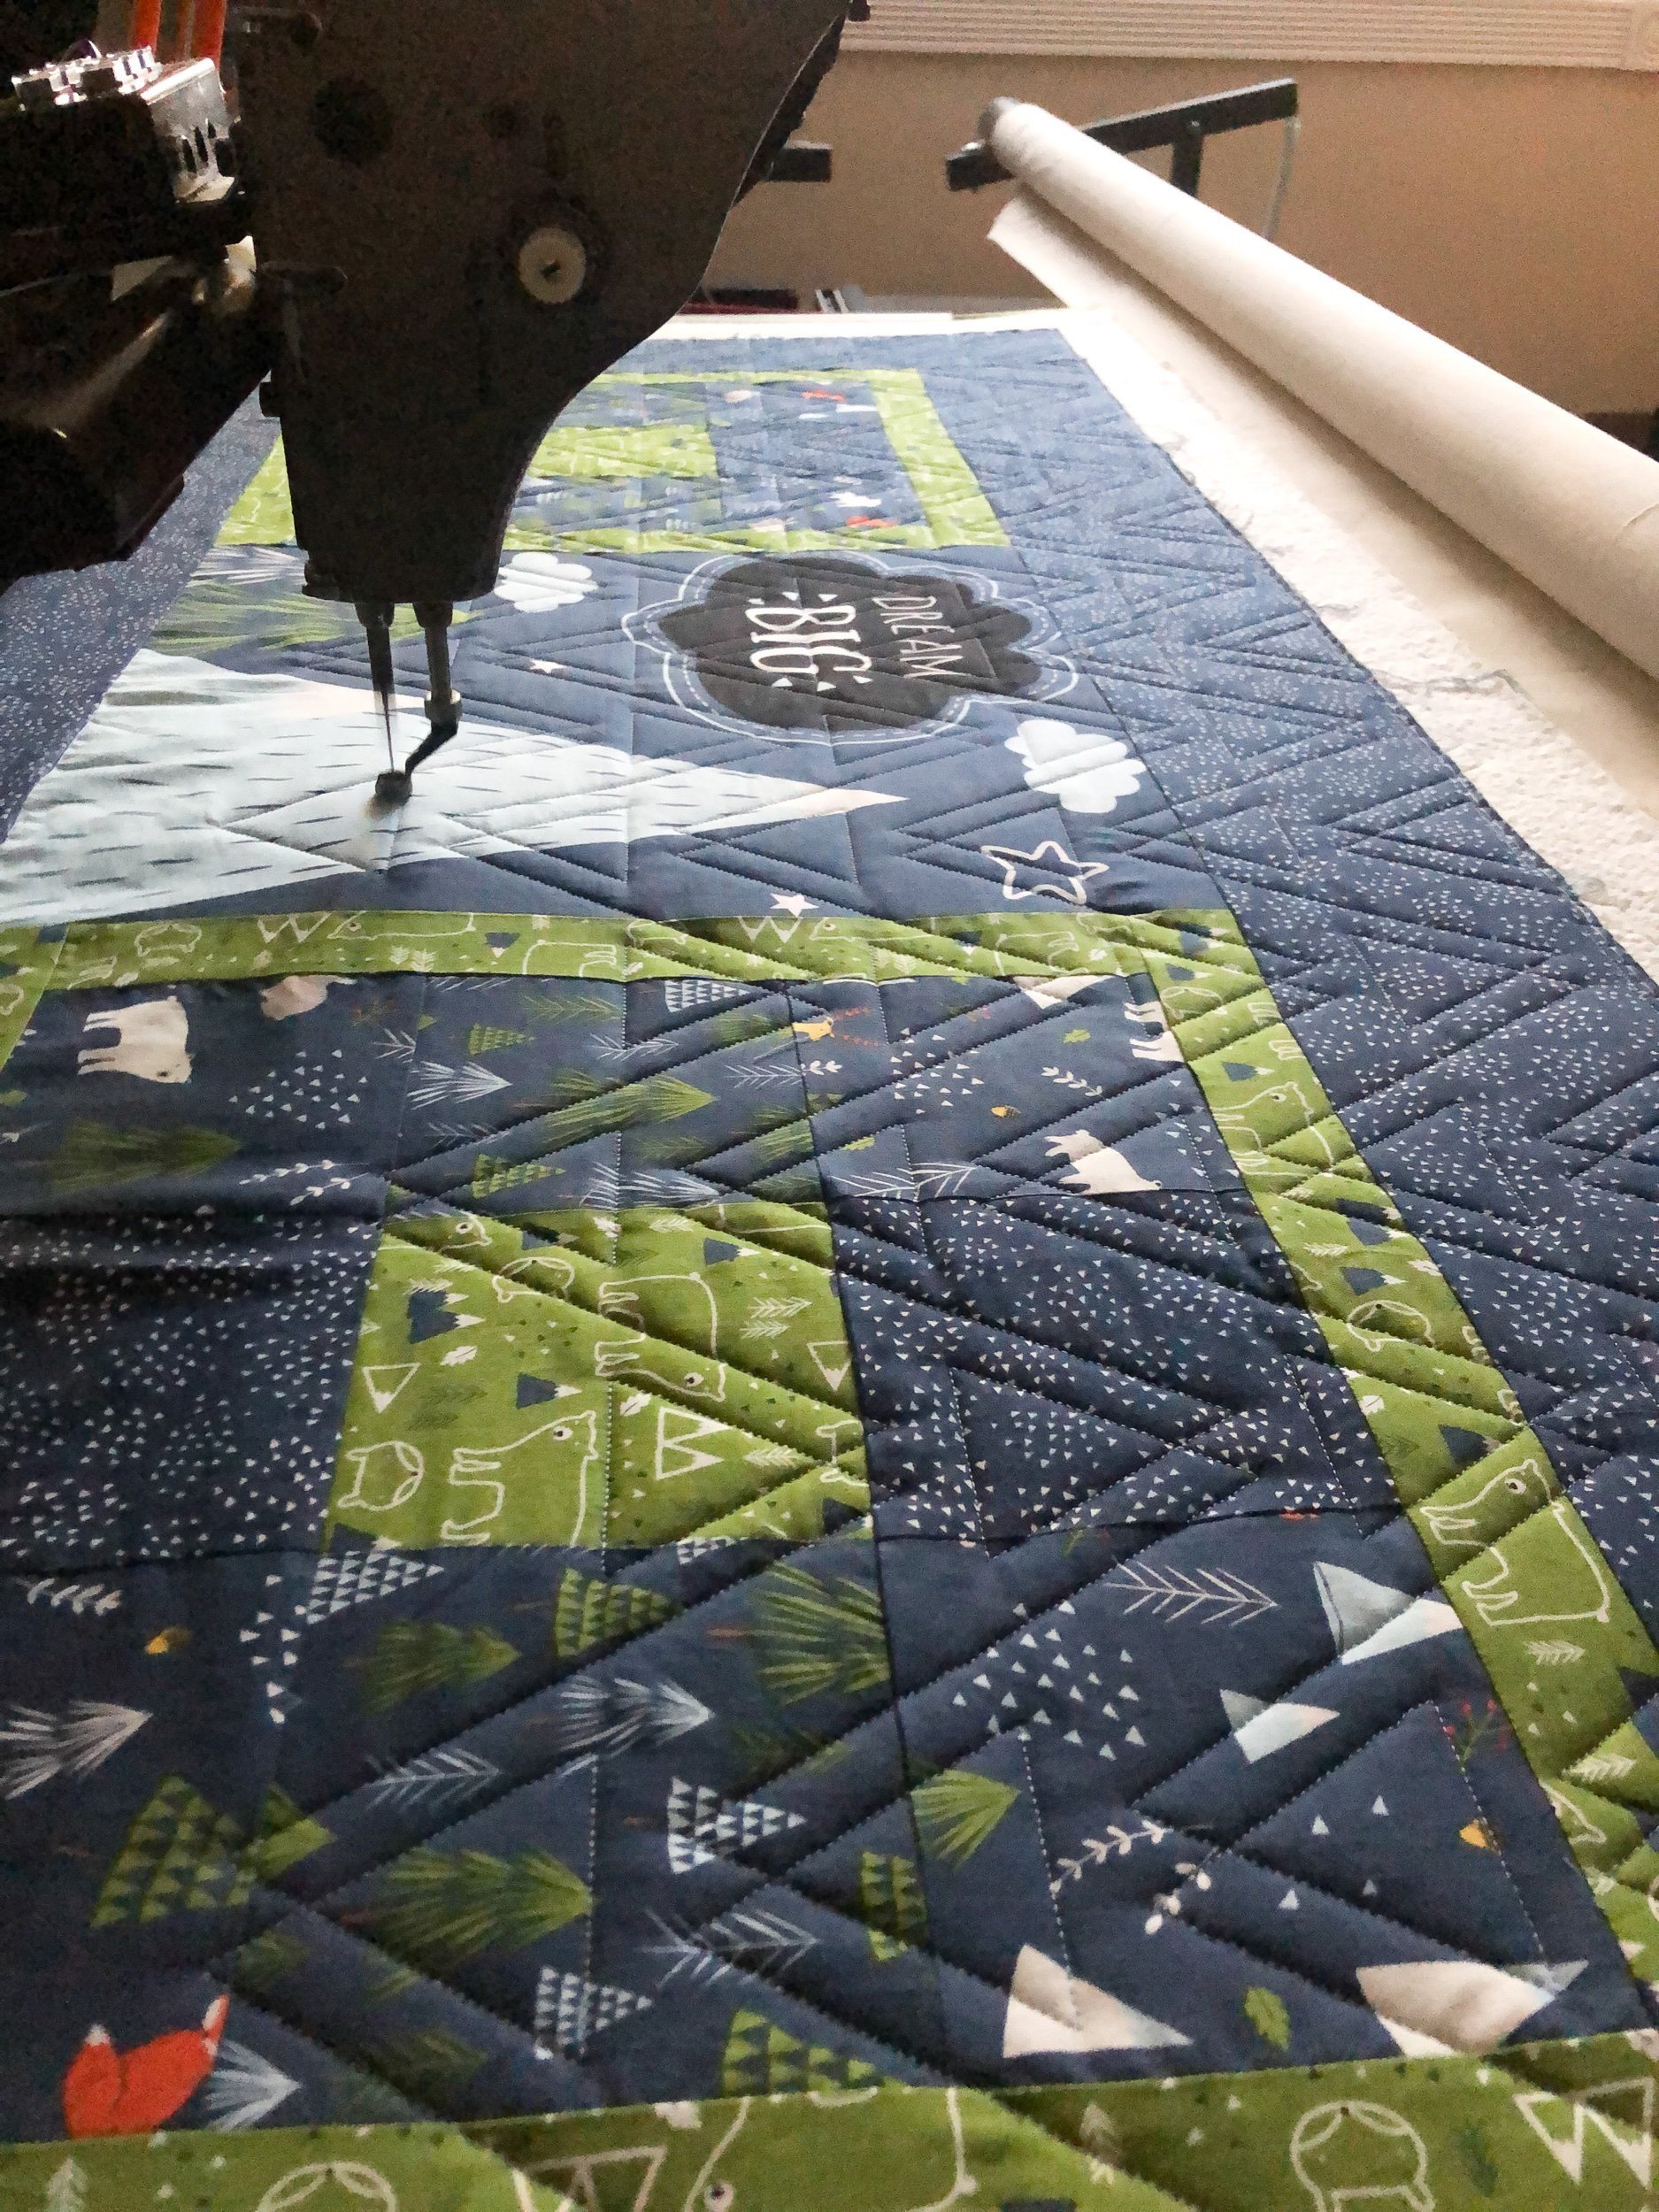
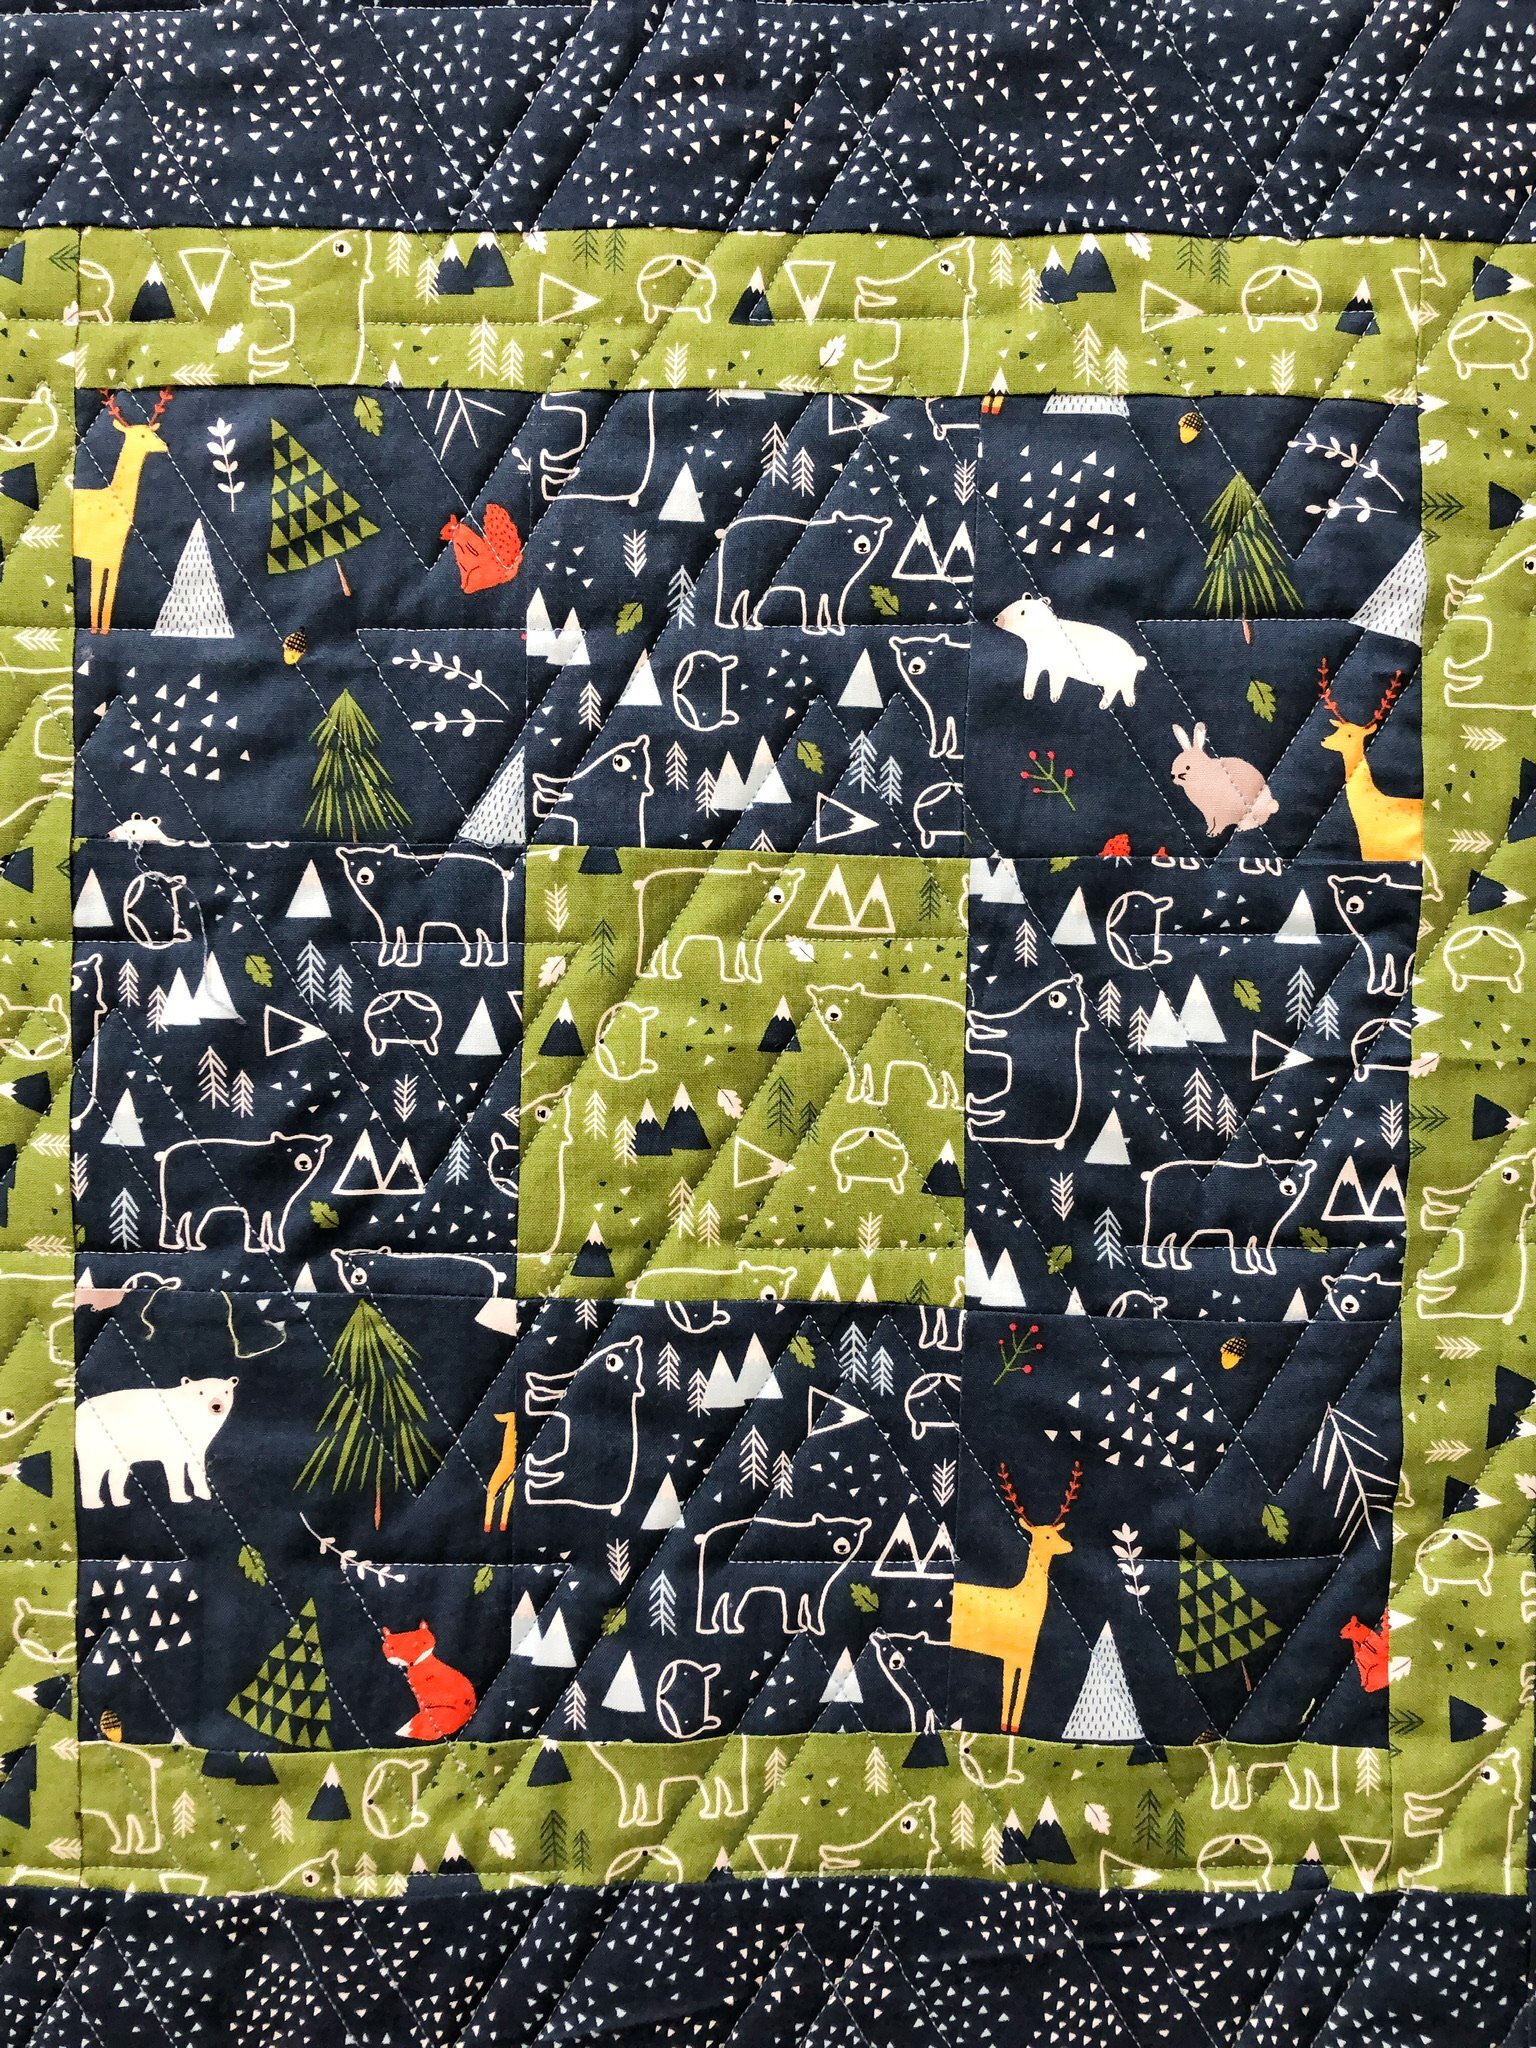
When I first saw this quilt, I wanted to quilt my Fort design on it!! It turned out so great!! I’ve seen this design on several quilts, and some of the quilter make it smaller than the suggested 4” height. Have fun with adjusting the height size when you set up the design on your machine. Fort©️ is available in my shop.

These blocks are a simple 9 patch with a border around them.
How cute is that little guy??? Panels are great! They add some fun designs to a quilt without having to do appliqué.
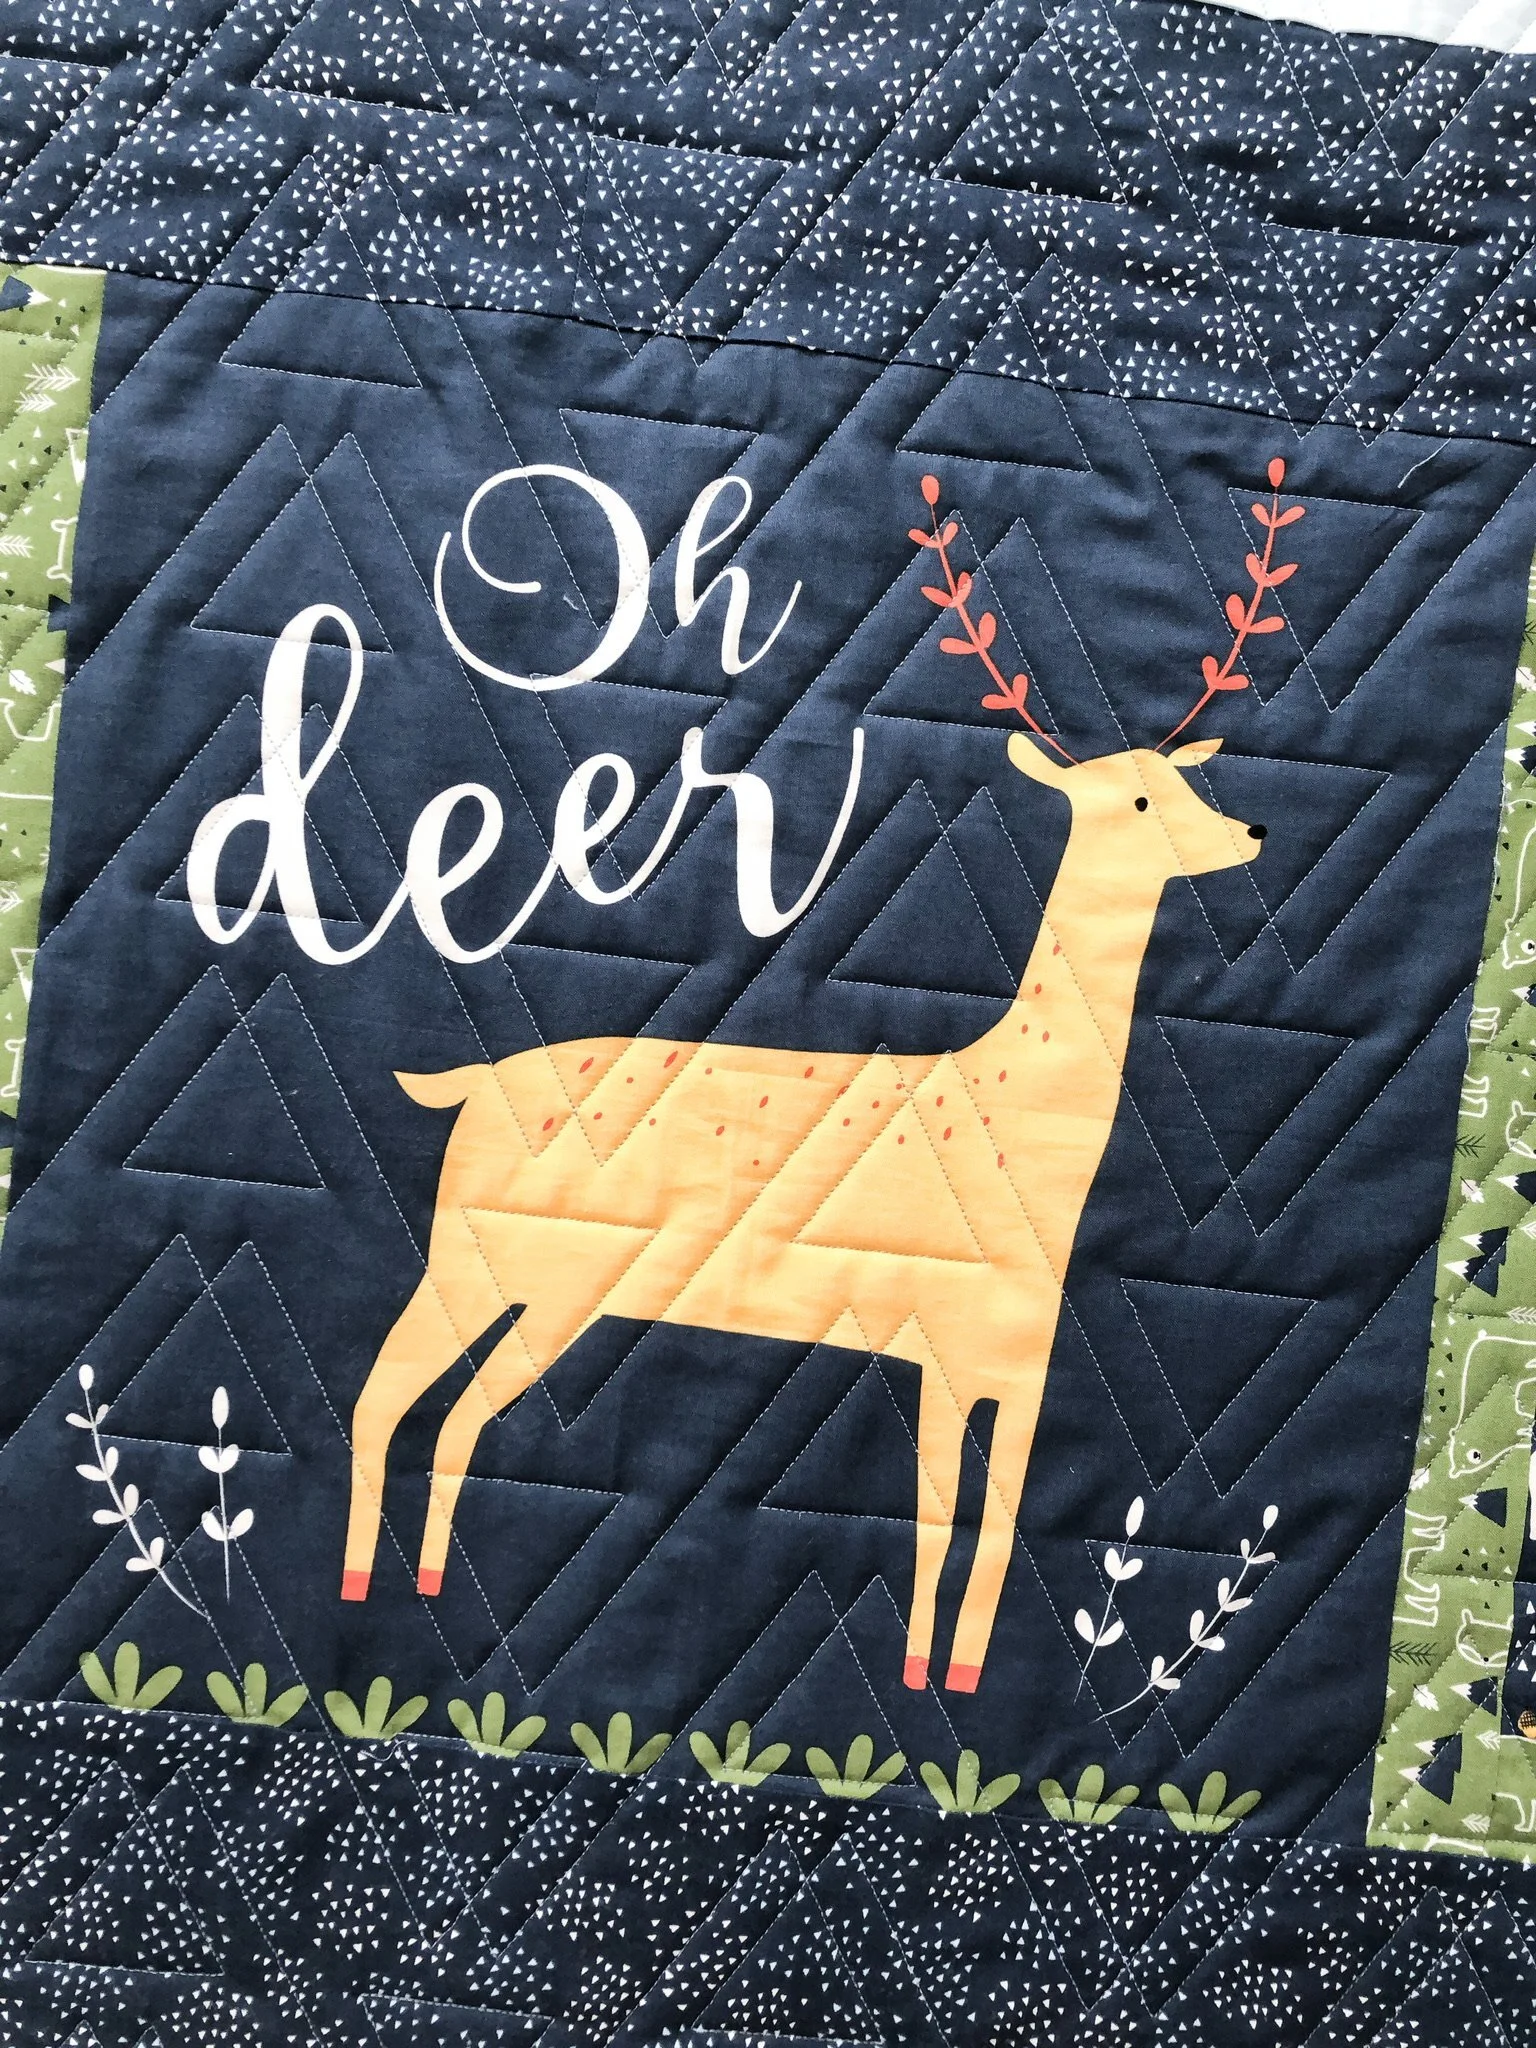
Fort adds so much fun texture!

I hope you’re having a great week and have gotten some sewing in.
If you’d like to have one of your quilts quilted, I have lots of edge to edge openings. Contact me or send me an email at: quiltingit@gmail.com
Thank you for stopping by! -leisha
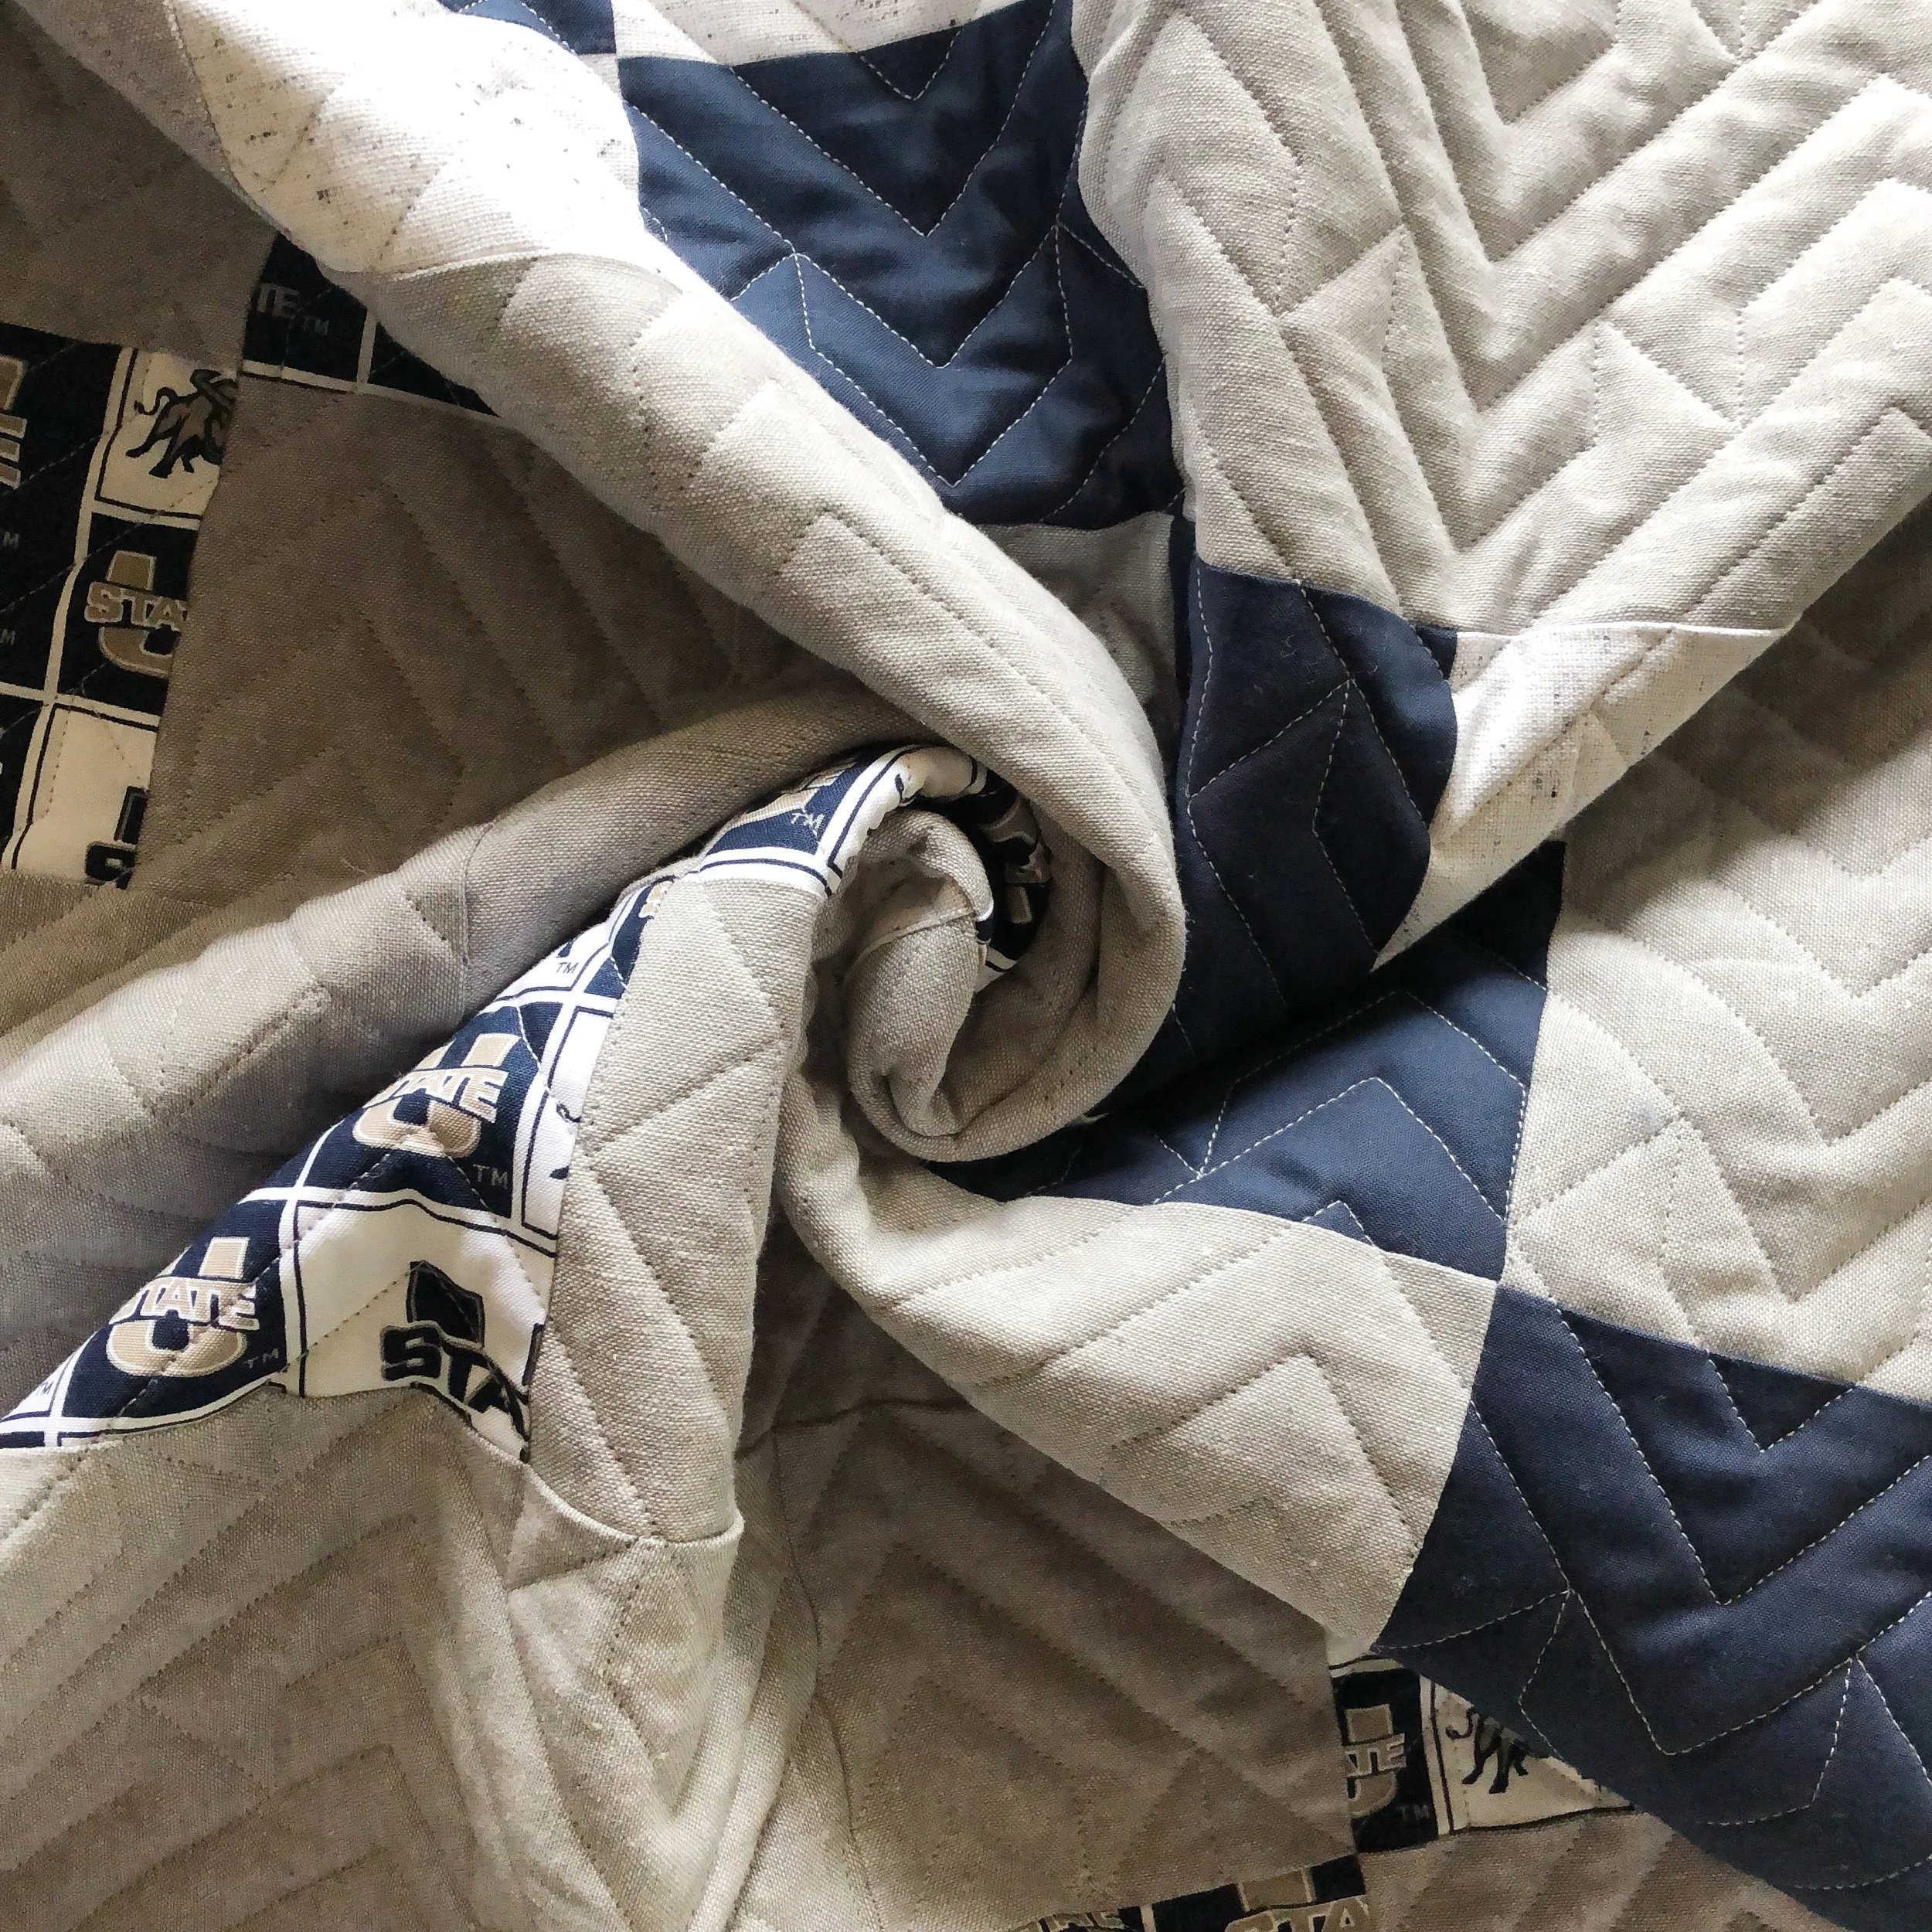
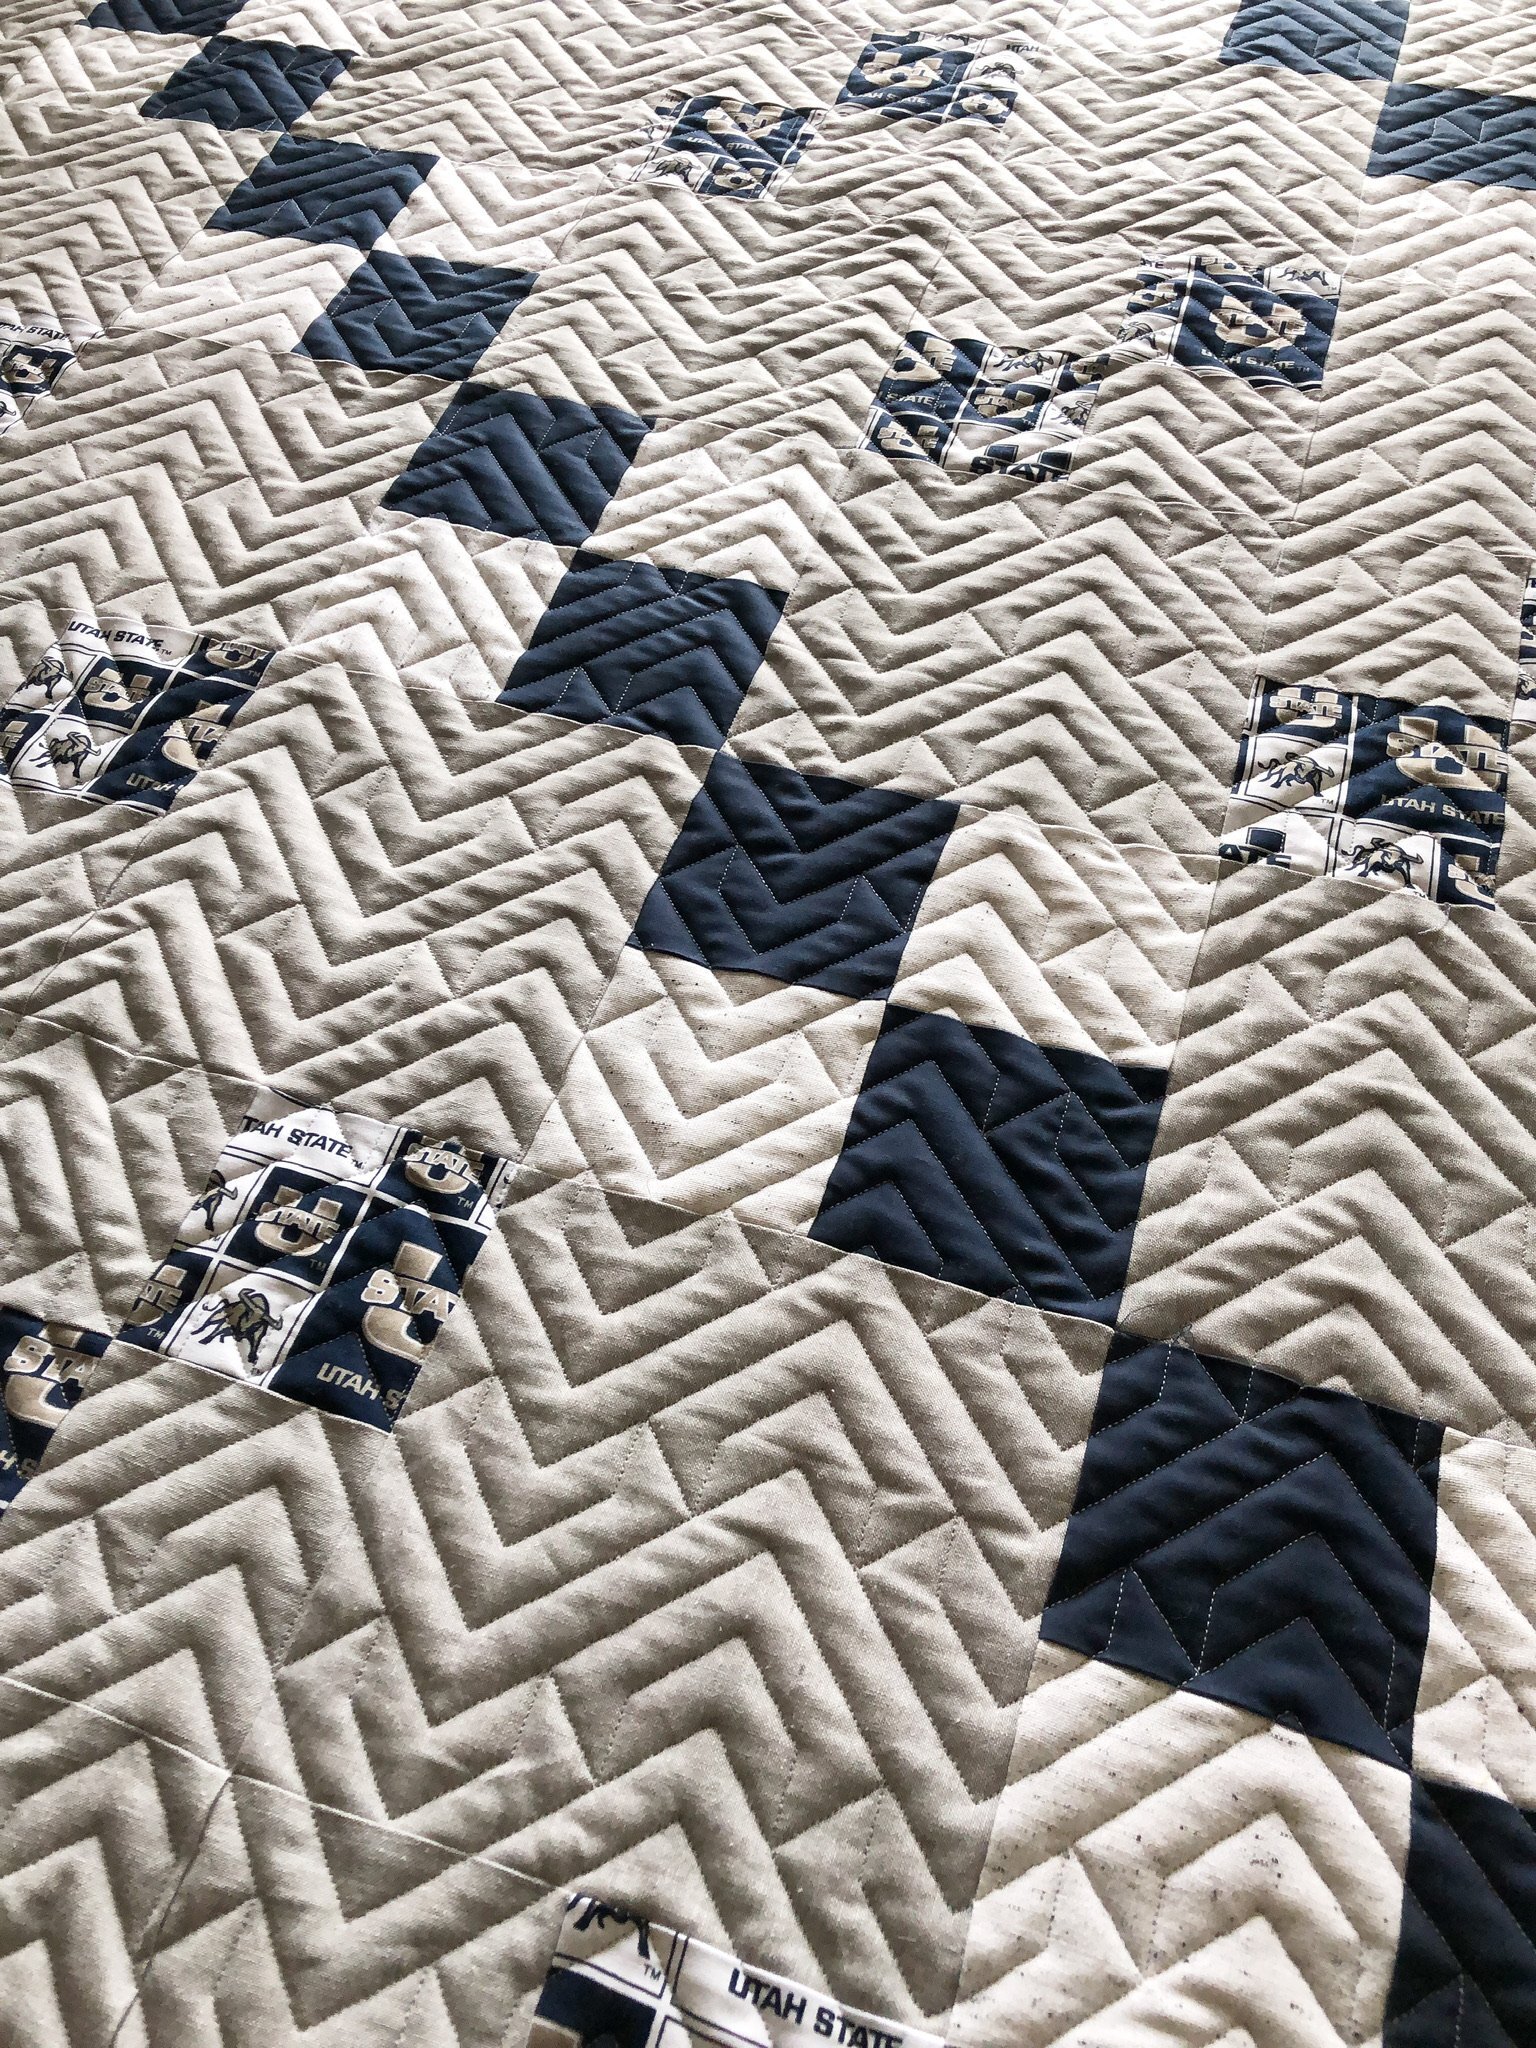
Abby’s Aggie Quilt
Hello there! I have a fun quilt to share with you. Awhile back a friend asked if I could make a quilt like this for her to give her mom. I had too much quilting to do, so I recommend a friend of both of ours, Abby from Orange Peel Sews. Abby whipped up this quilt, I quilted it, and Cami gave it to her mom…and I heard she loves it! Team work!!

There is no pattern to this quilt, that’s the amazing thing about Abby!! She just figures it all out, and it’s great. We all live near each other in a college town, and as you can imagine there are some pretty diehard sports fans, which makes this quilt perfect!!
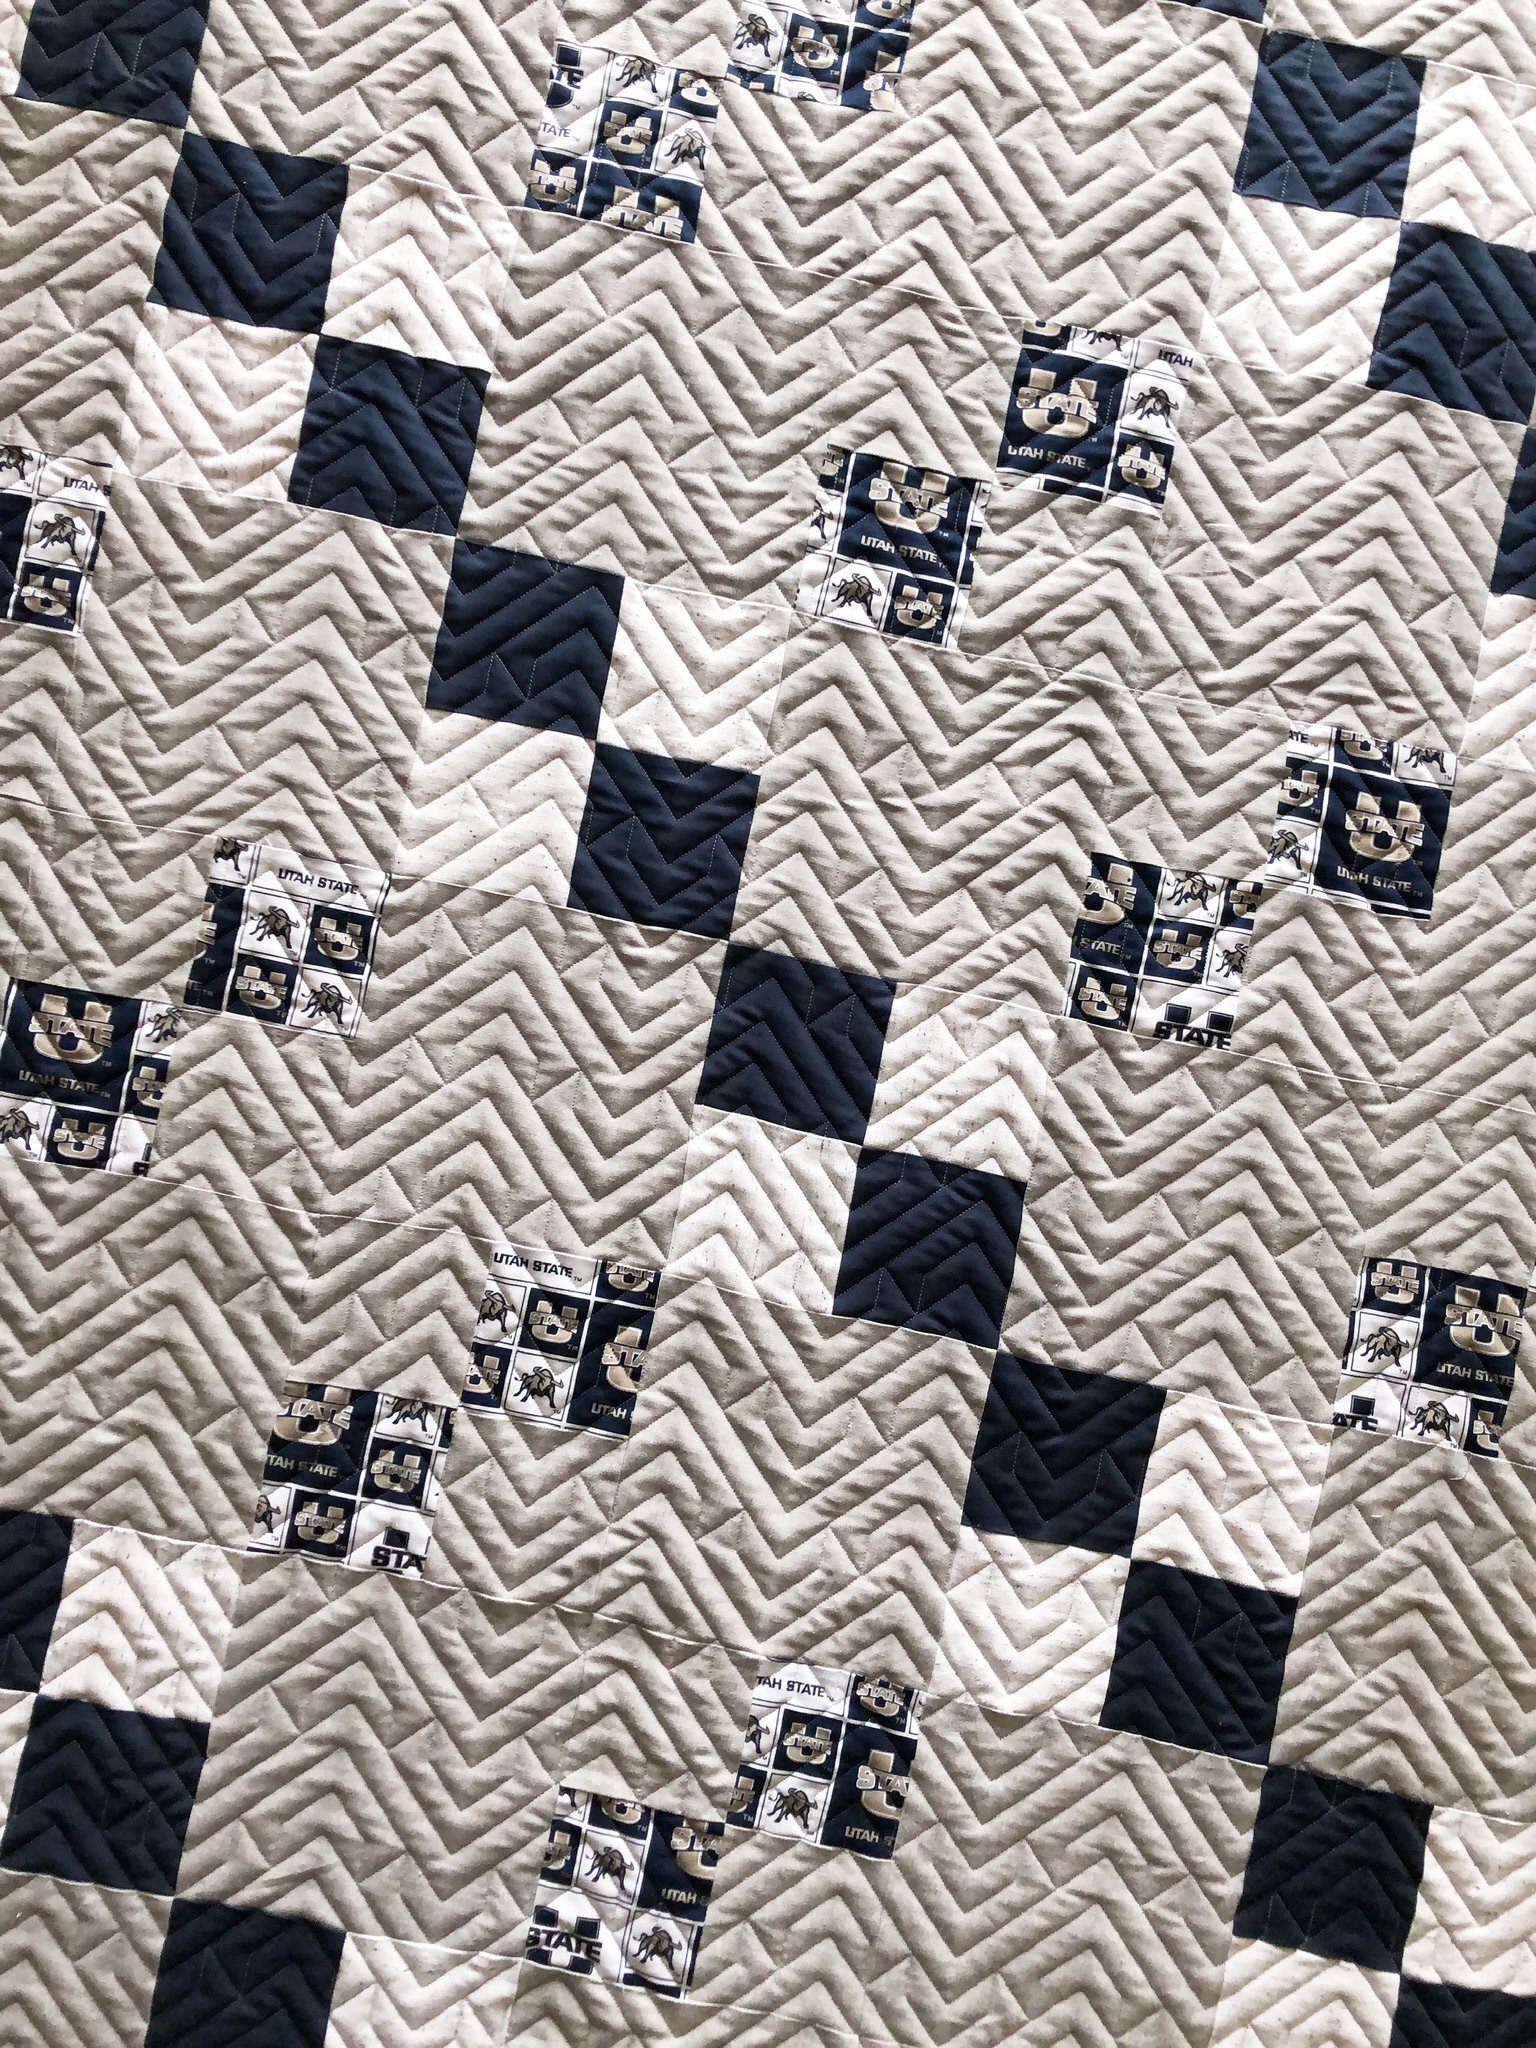
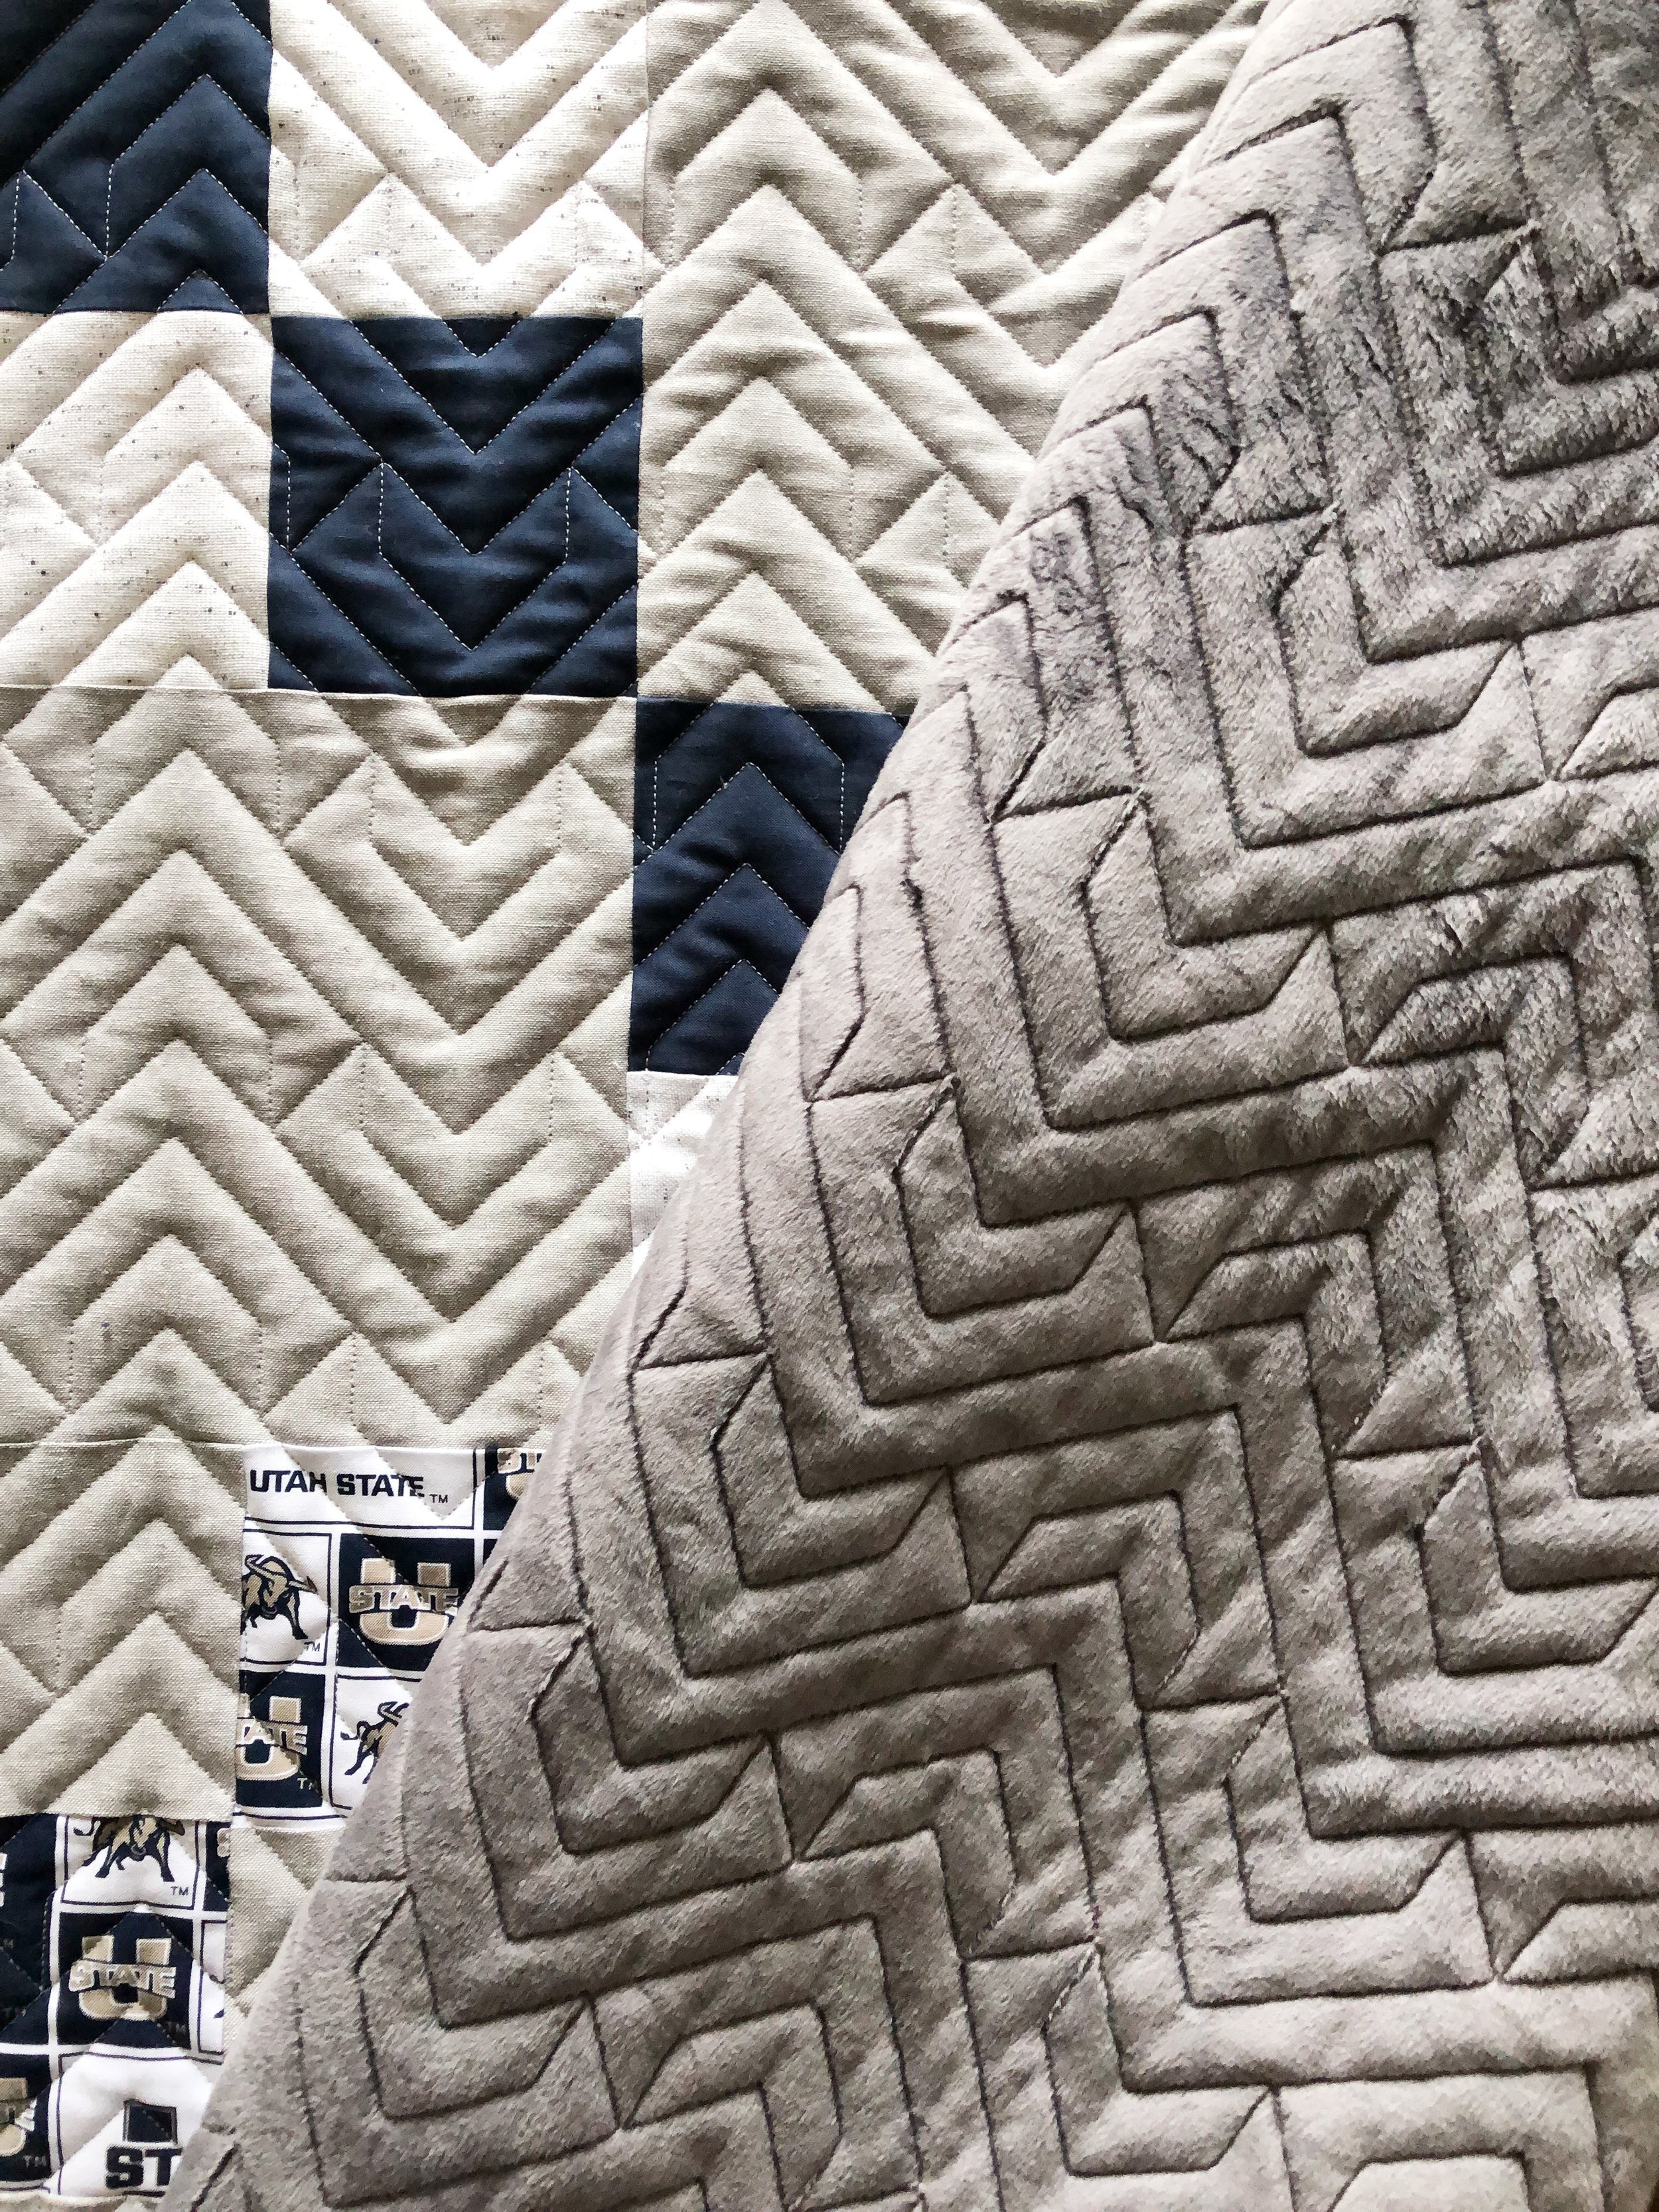
Abby was able to find some Utah State fabric and even a letterman A…for the Aggies! Which I think is a fun touch.
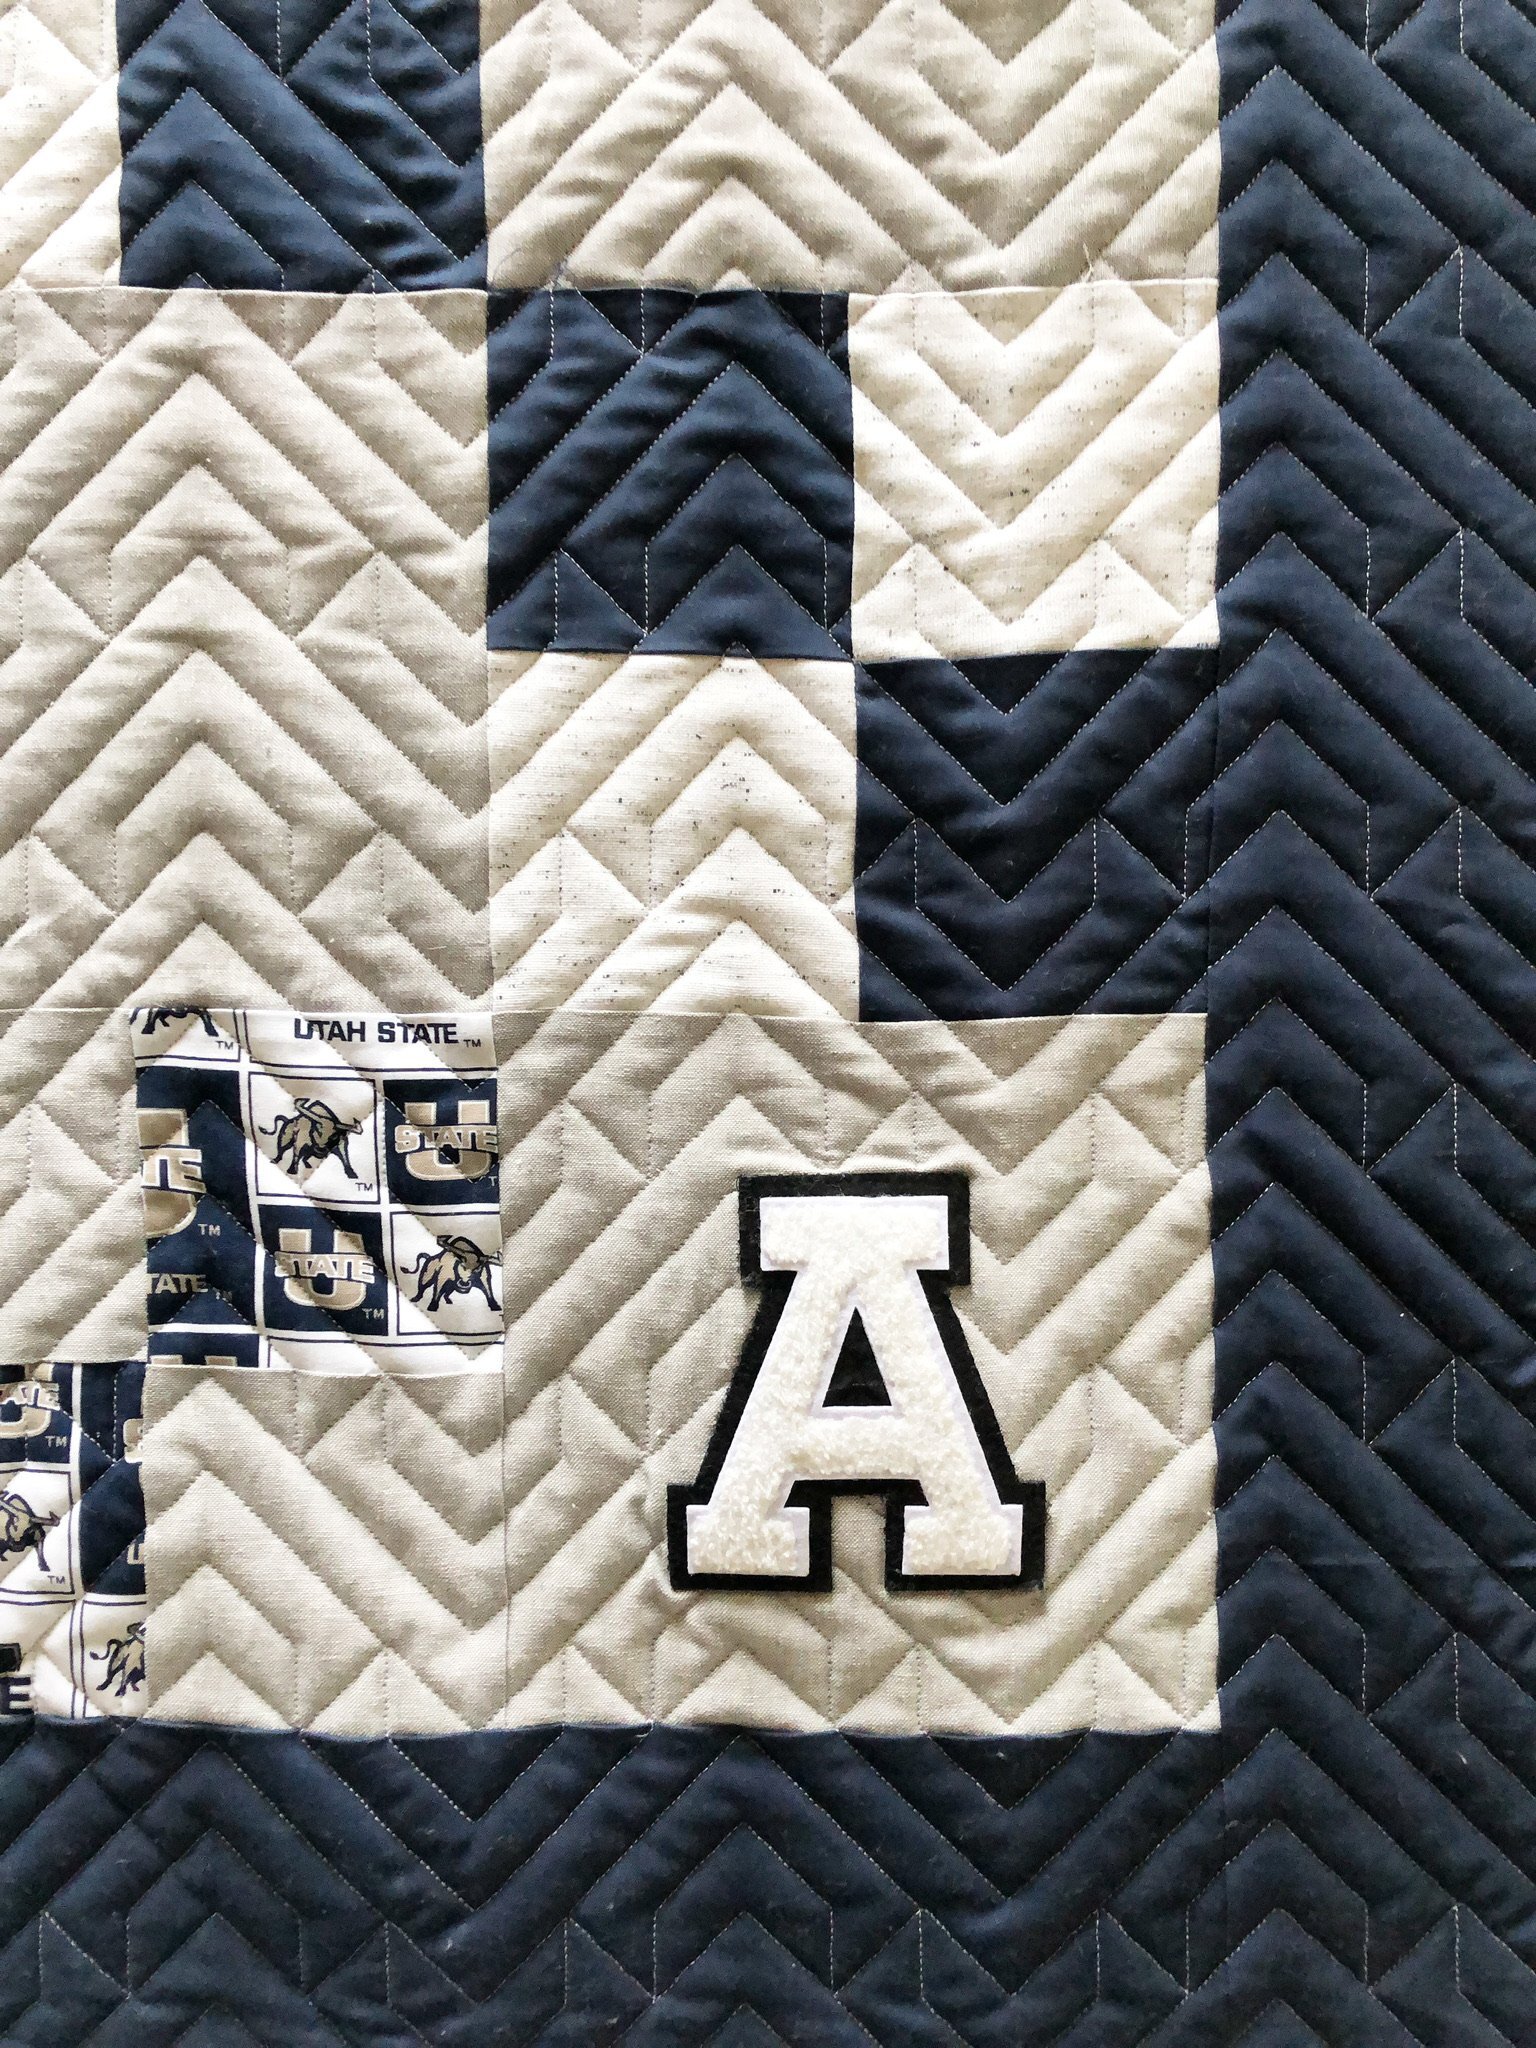
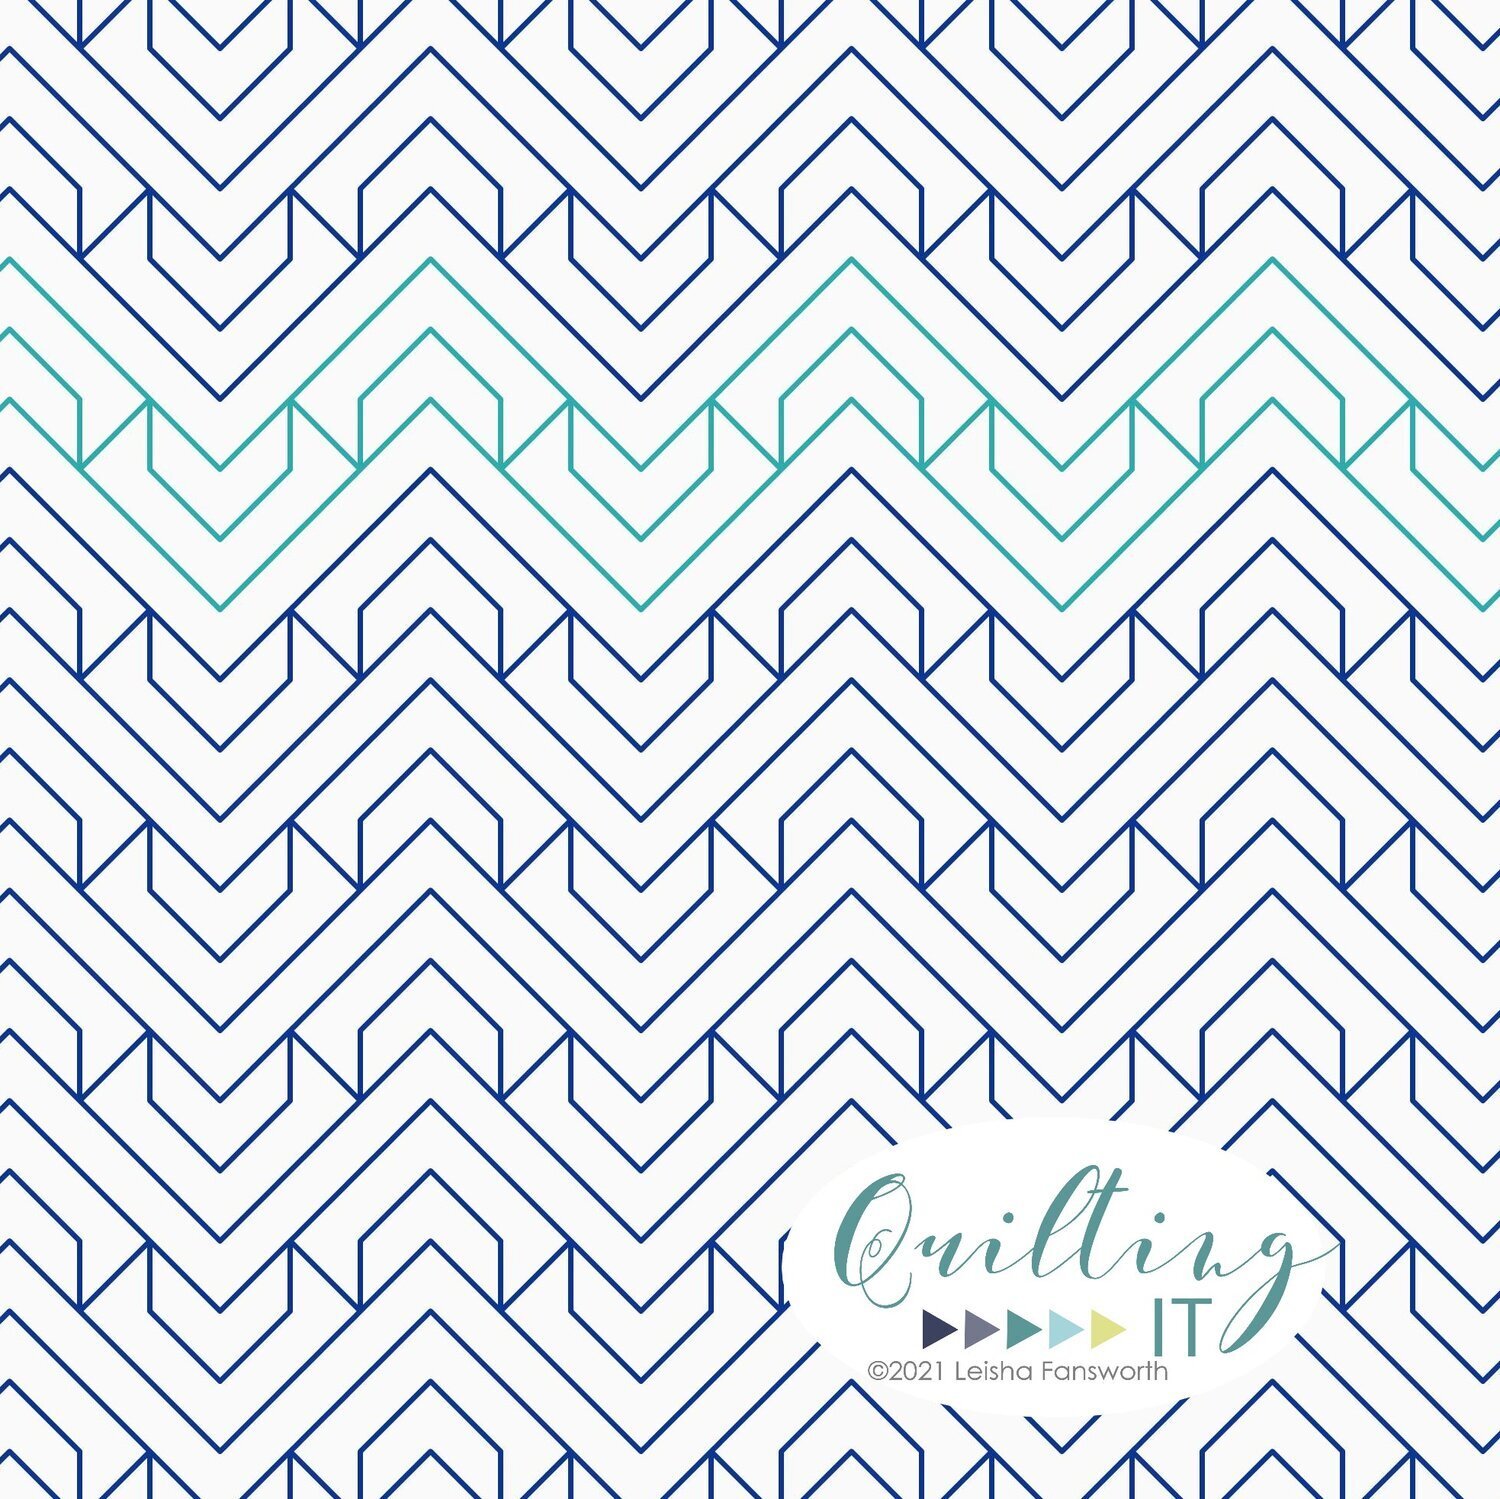
Cami requested my Southwest quilting design, for the quilting, which I think adds some pretty great texture.
I used my favorite Natural White Omni thread from Superior Threads and 8020 cotton poly blend batting from Winline Textiles out of Ogden Utah.
What is your favorite local sports team? Have you made a quilt to take with you to the games?

Check out that awesome texture on the minky backing!!!
If you have any quilts that are ready for quilting, send them my way. I’d love to quilt for you! Check out my Longarm Quilting Services page, and then email at quiltingit@gmail.com
Thank you!!! • leisha

Kathy’s Timber Quilt
Hi Friends,
Happy weekend!! I hope your having a wonderful day. I have another fun quilt to share with you, and this one is fresh off the longarm. Yes, it’s quilted. I’ll get to that in a moment.
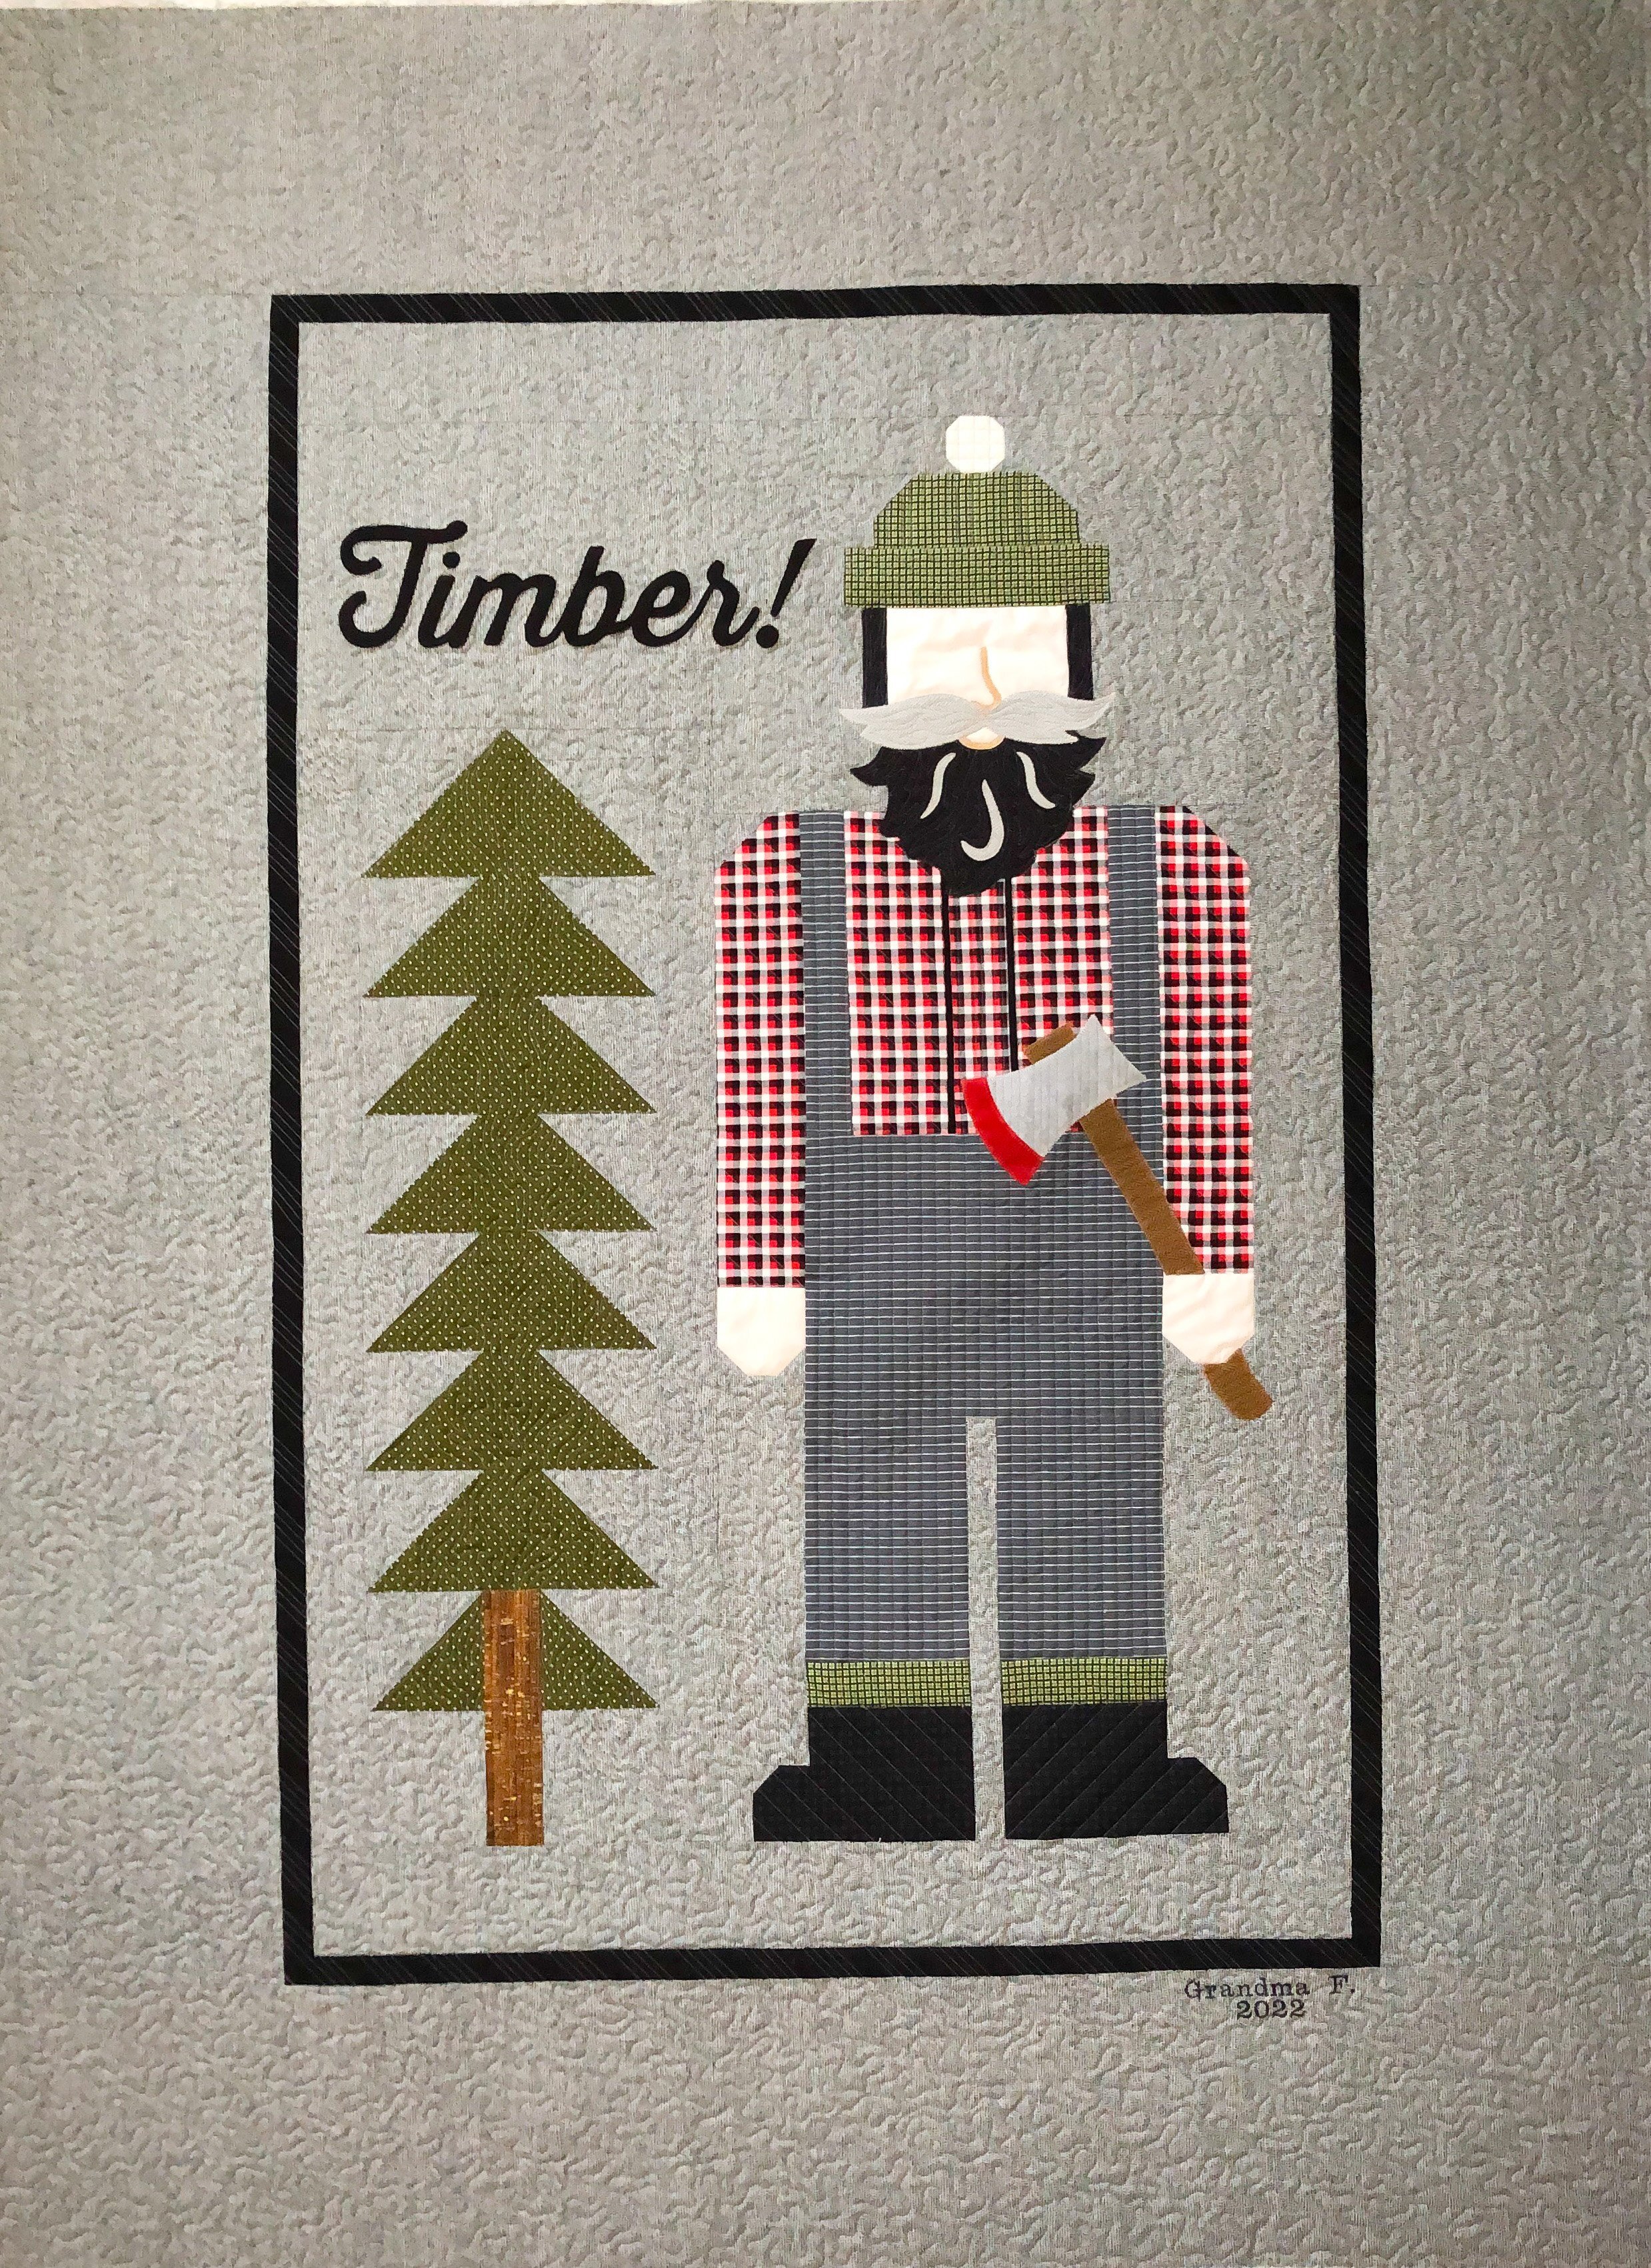
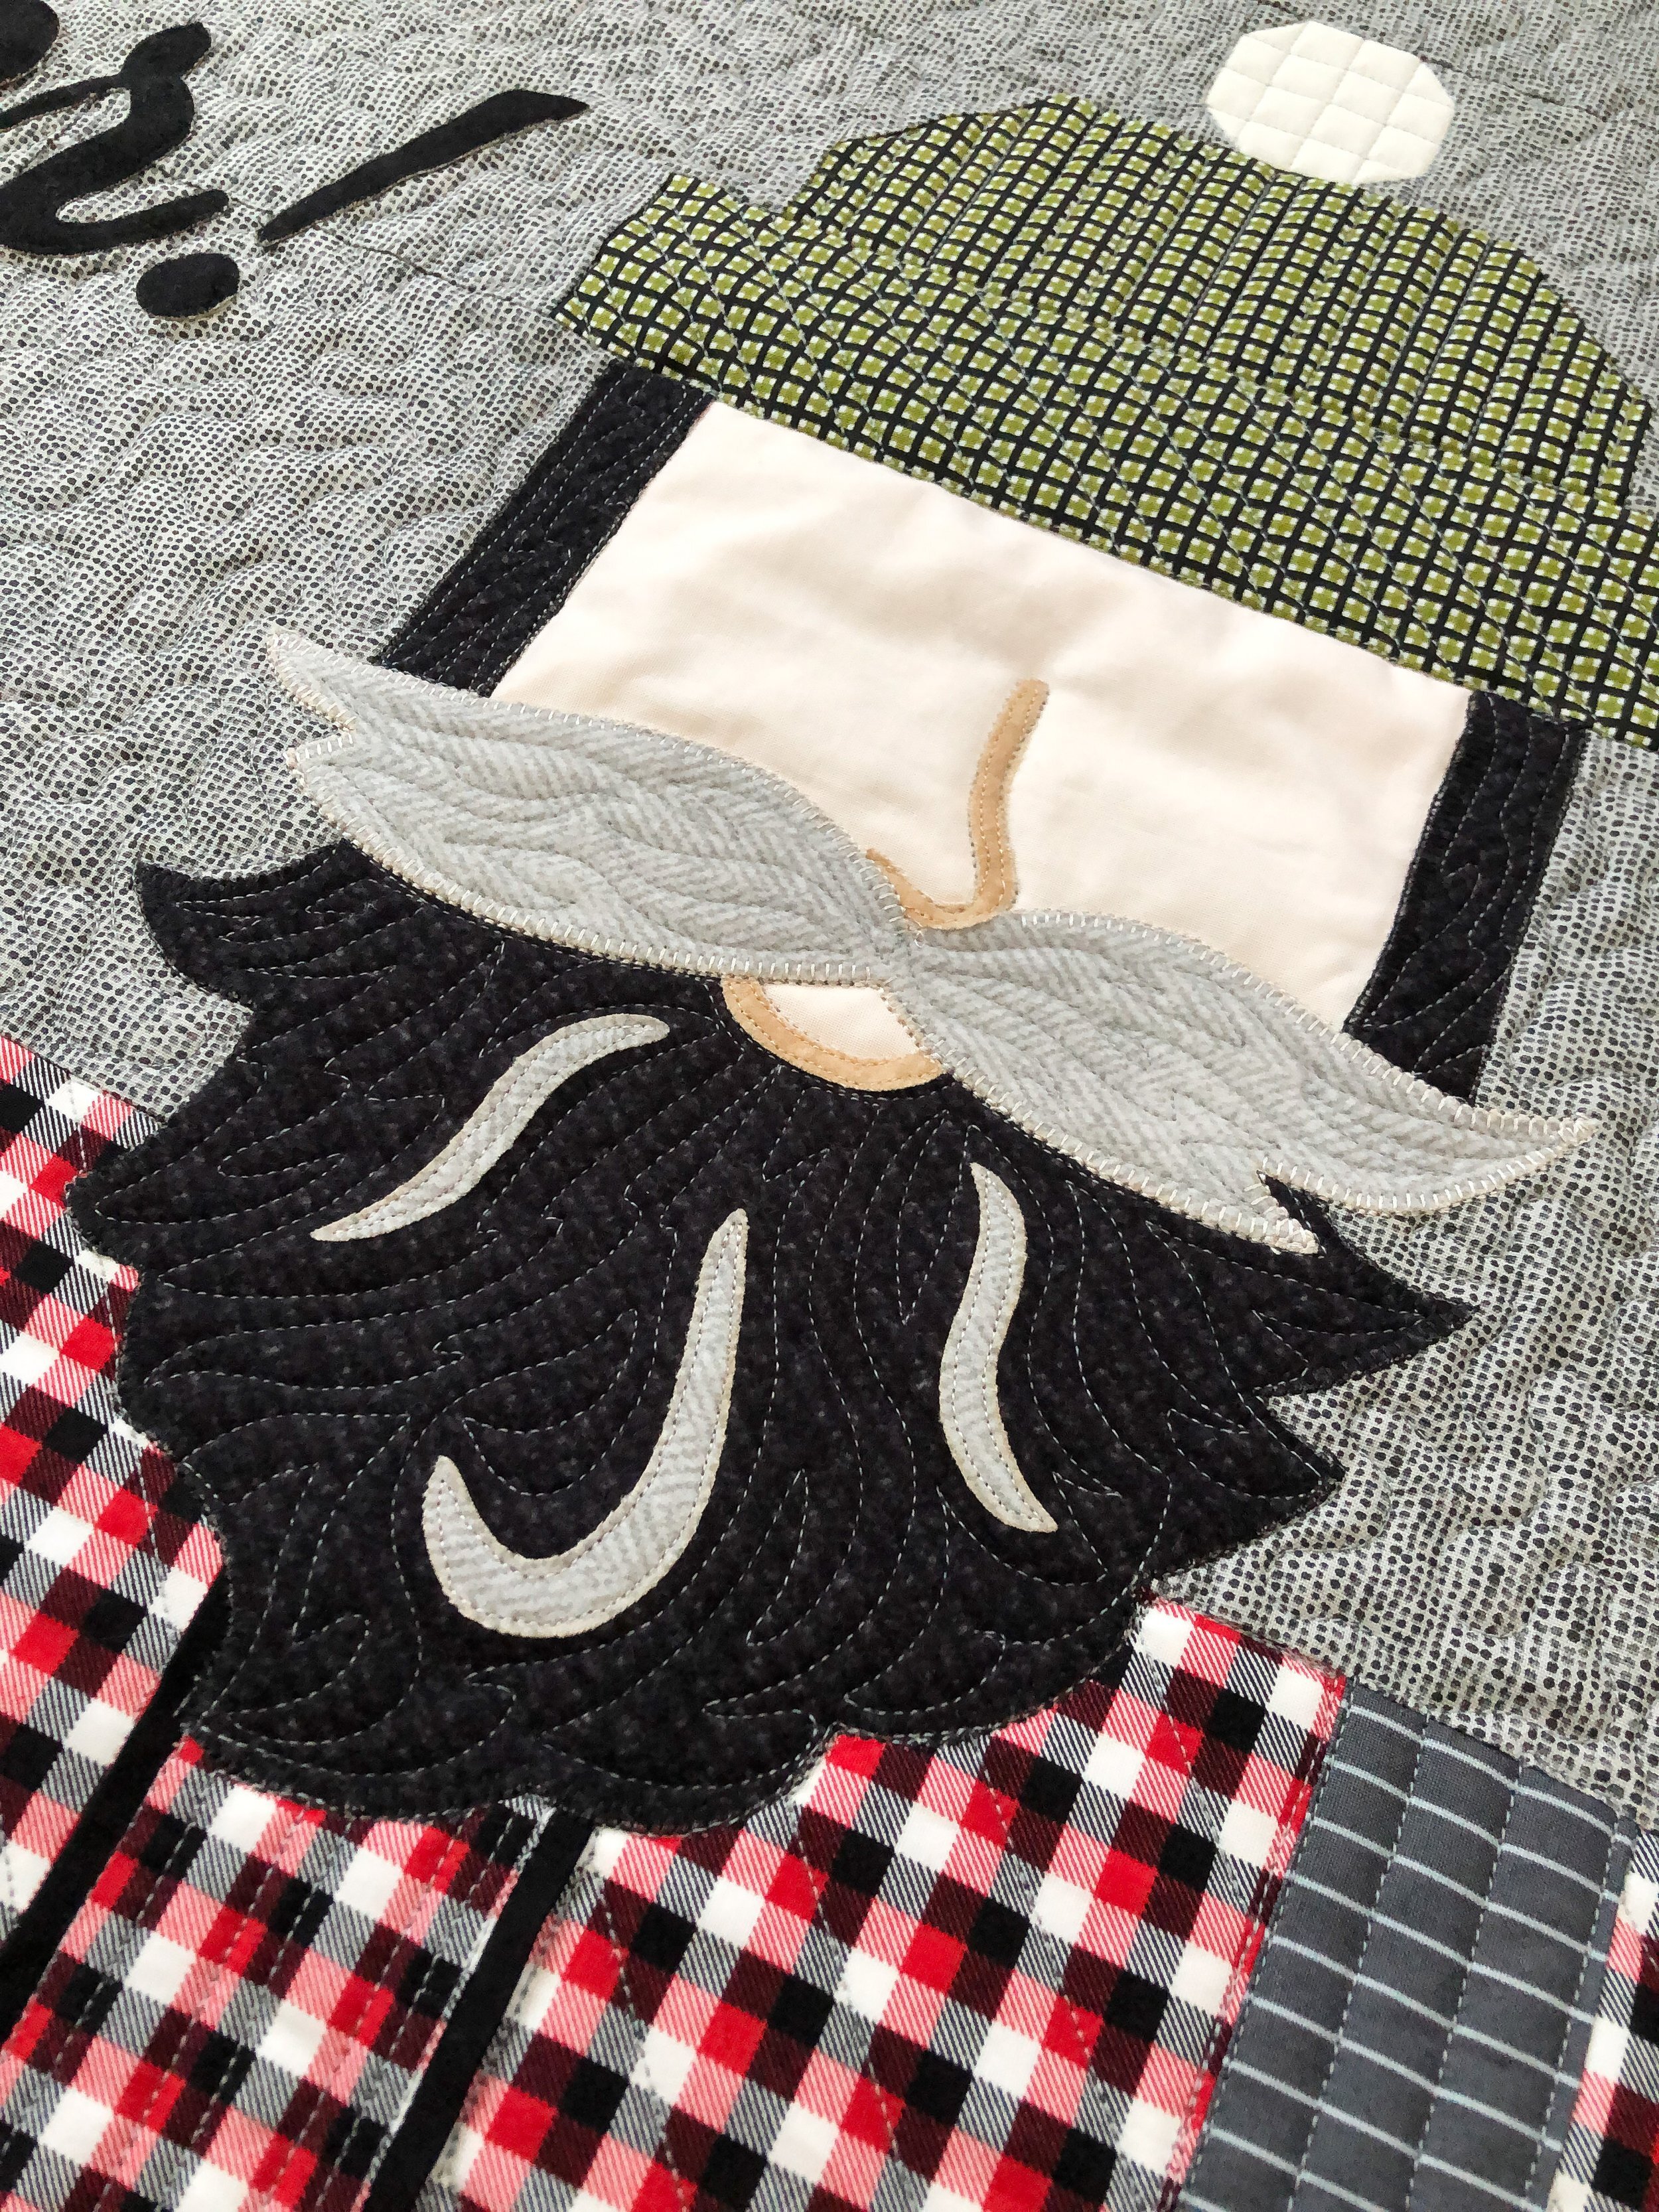
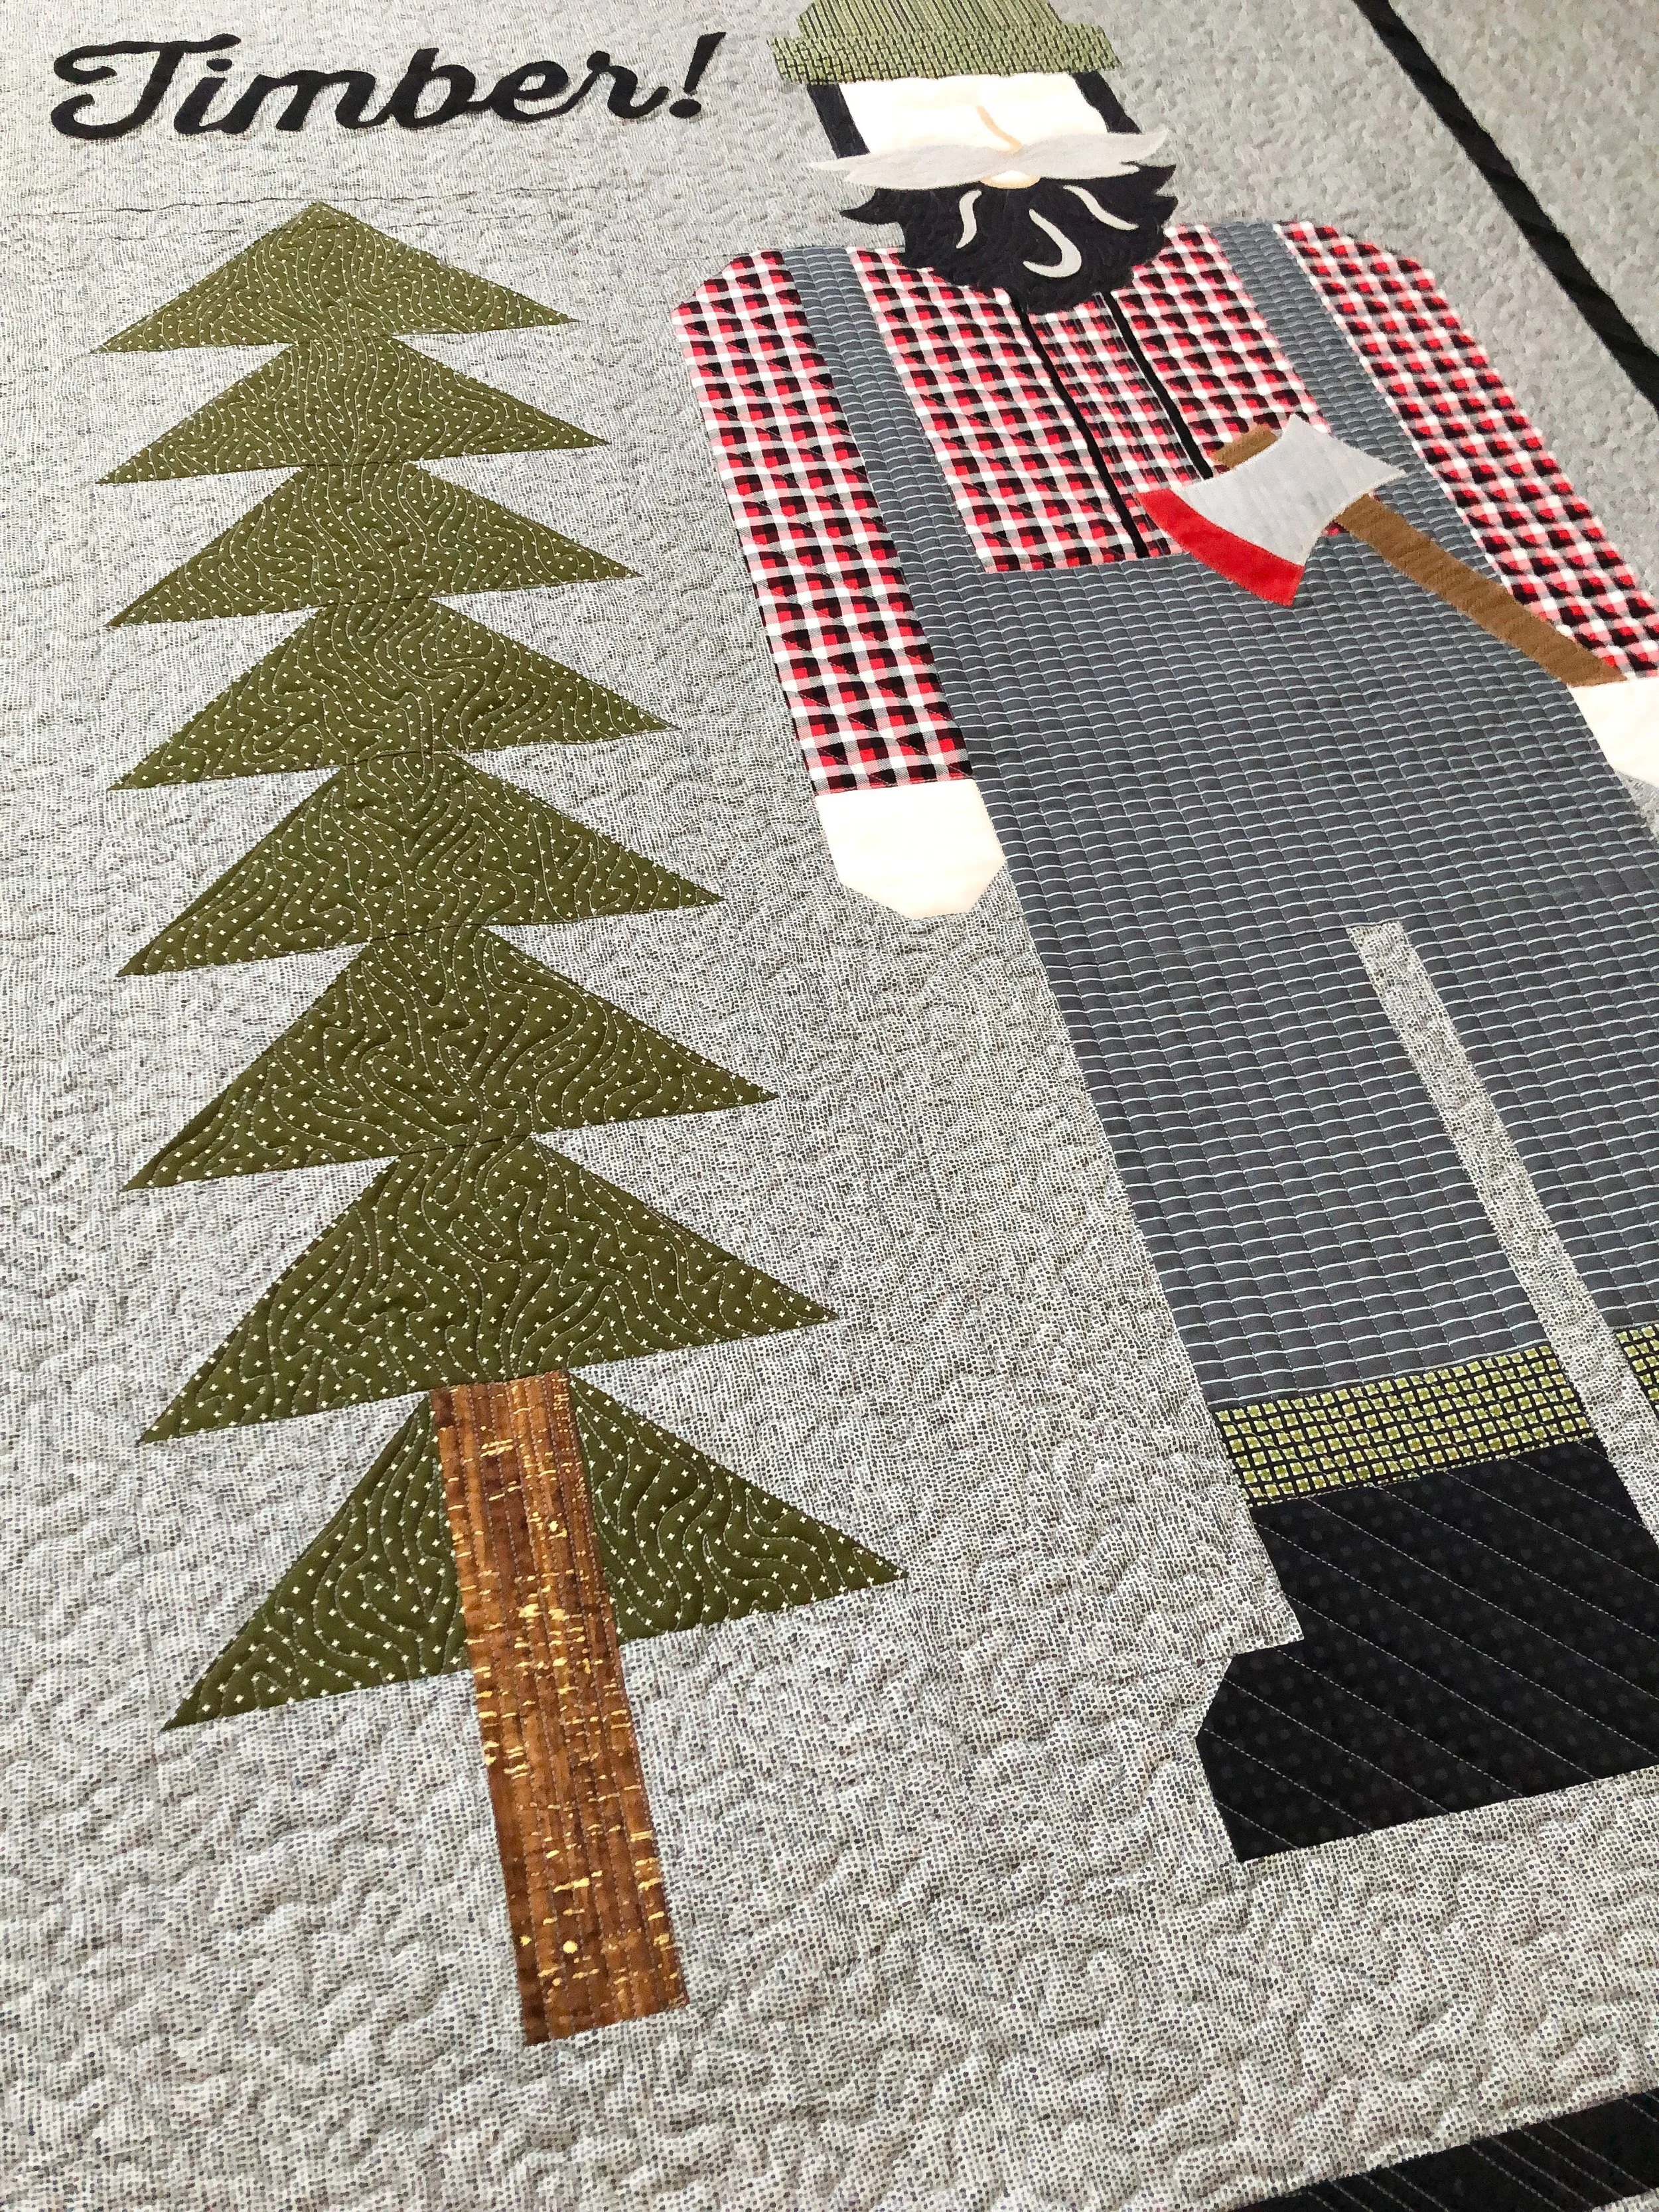
Kathy made this fun Timber lumberjack quilt for her grandson. The pattern is by Buttermilk Basin.
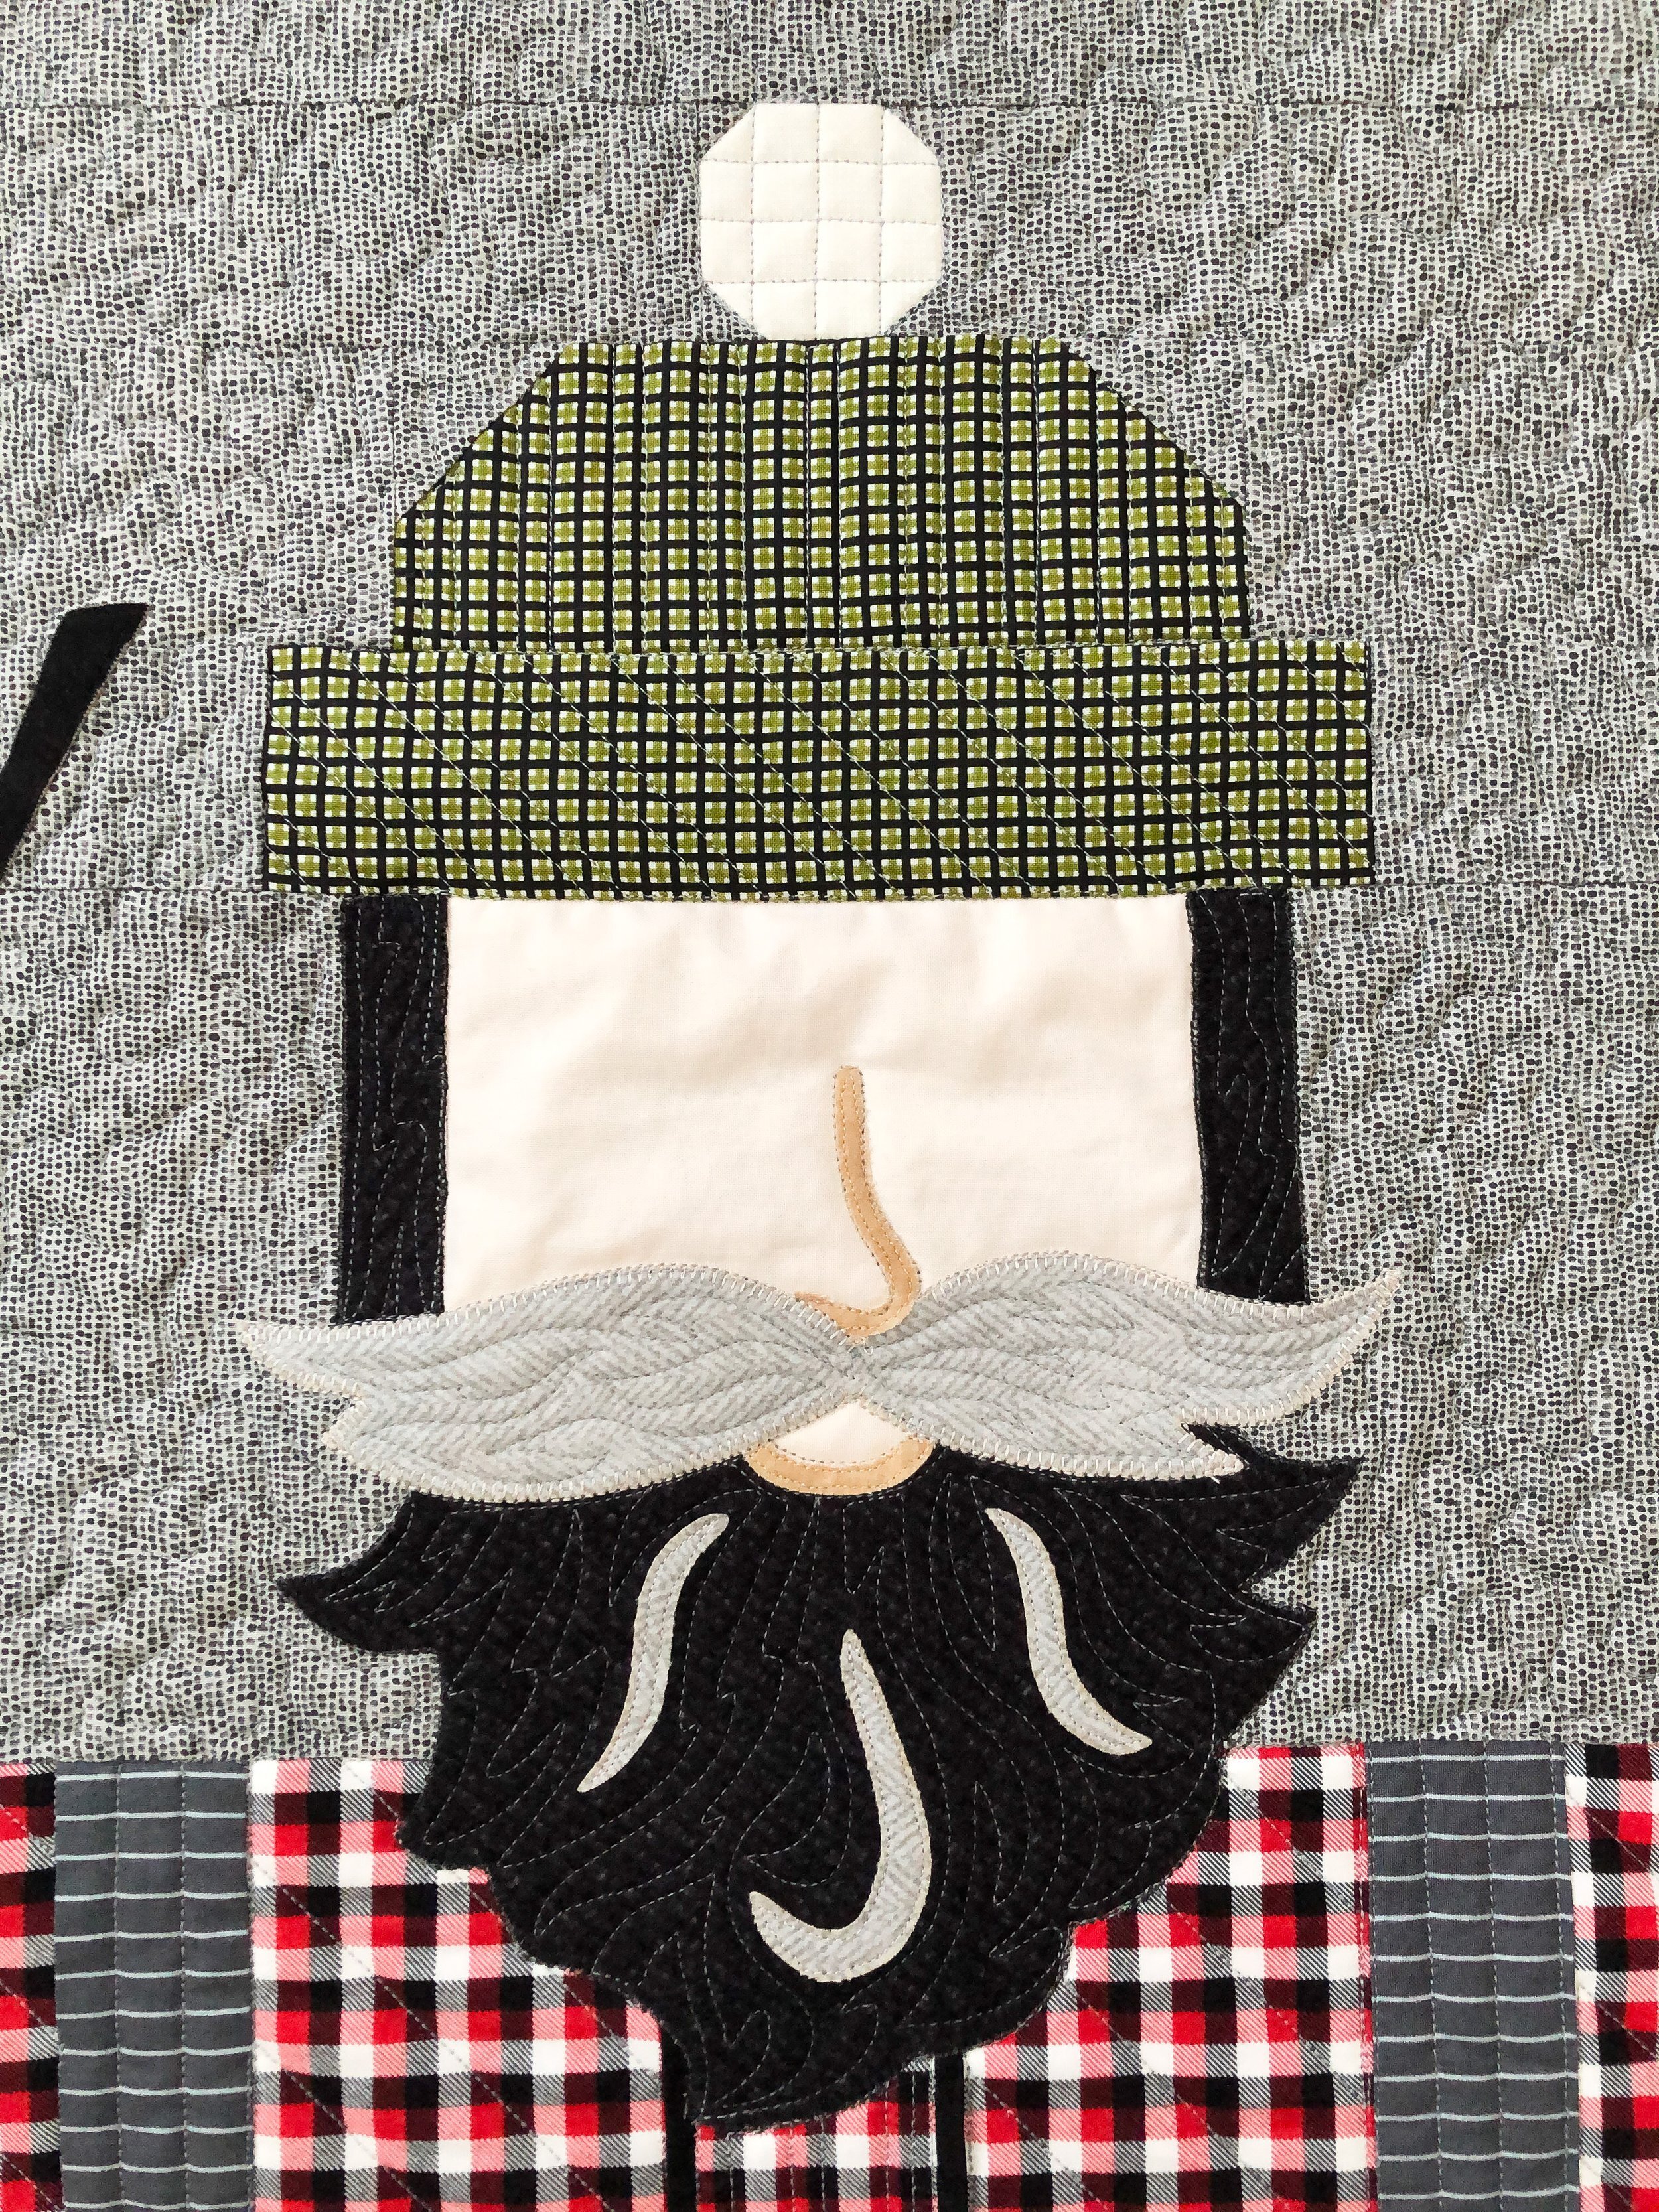
First close ups…that beard. I love quilting freehand texture in beards, hair, fur, or other things along those lines. I’ve quilted several Santa quilts or pillows over the years, so beards have become a fun thing for me to quilt. That mustache has some great textures, too. I did quilt around the nose piece. Kathy requested no quilting in the face or hands. She is putting buttons on the face for the eyes.
Why is it so hard the see the quilting, you may be thinking? I used an Omni Medium Gray thread, color number 3024, from Superior Threads. It was a perfect match, and blends great on all the fabrics. I used my favorite 8020 cotton poly blend batting from Winline Textiles.

Now let’s talk about the quilting. I quilted a freehand small stipple in the background, as well as a variety of different lines in the lumberjack.

As you can see here, I quilted 45° angled lines 1” apart in the shirt, with a vertical 1/2” line in the overalls.
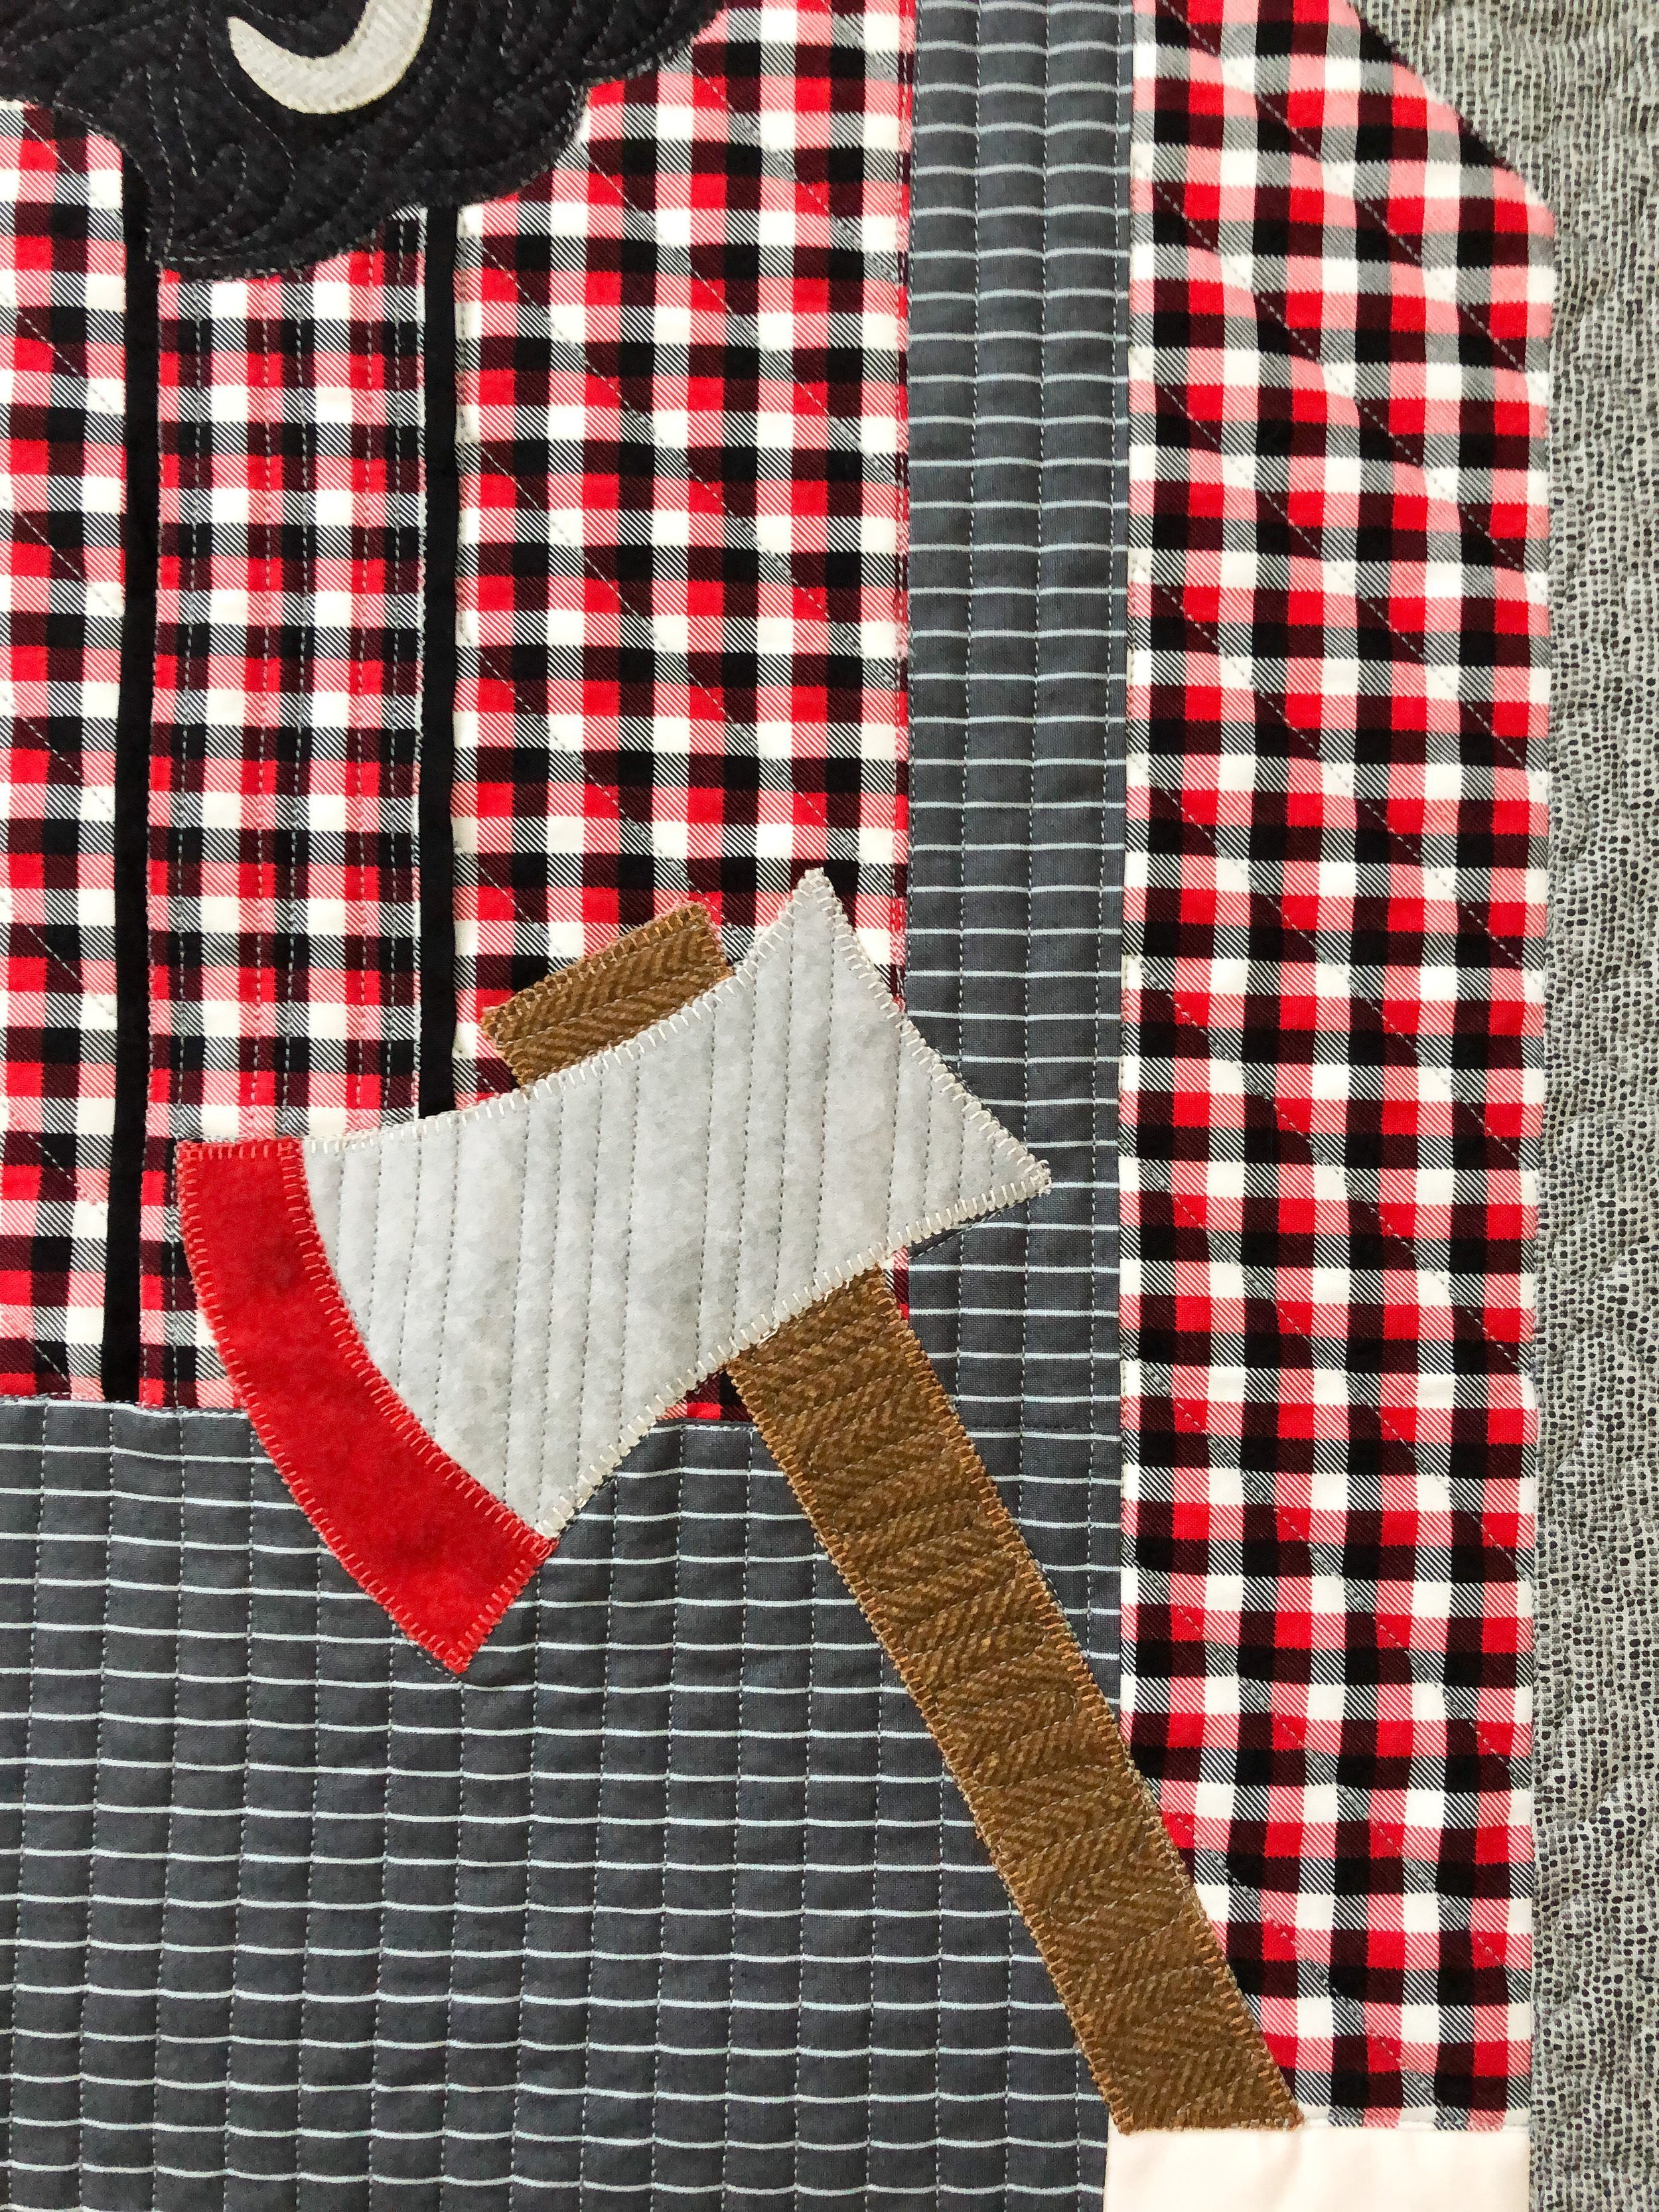
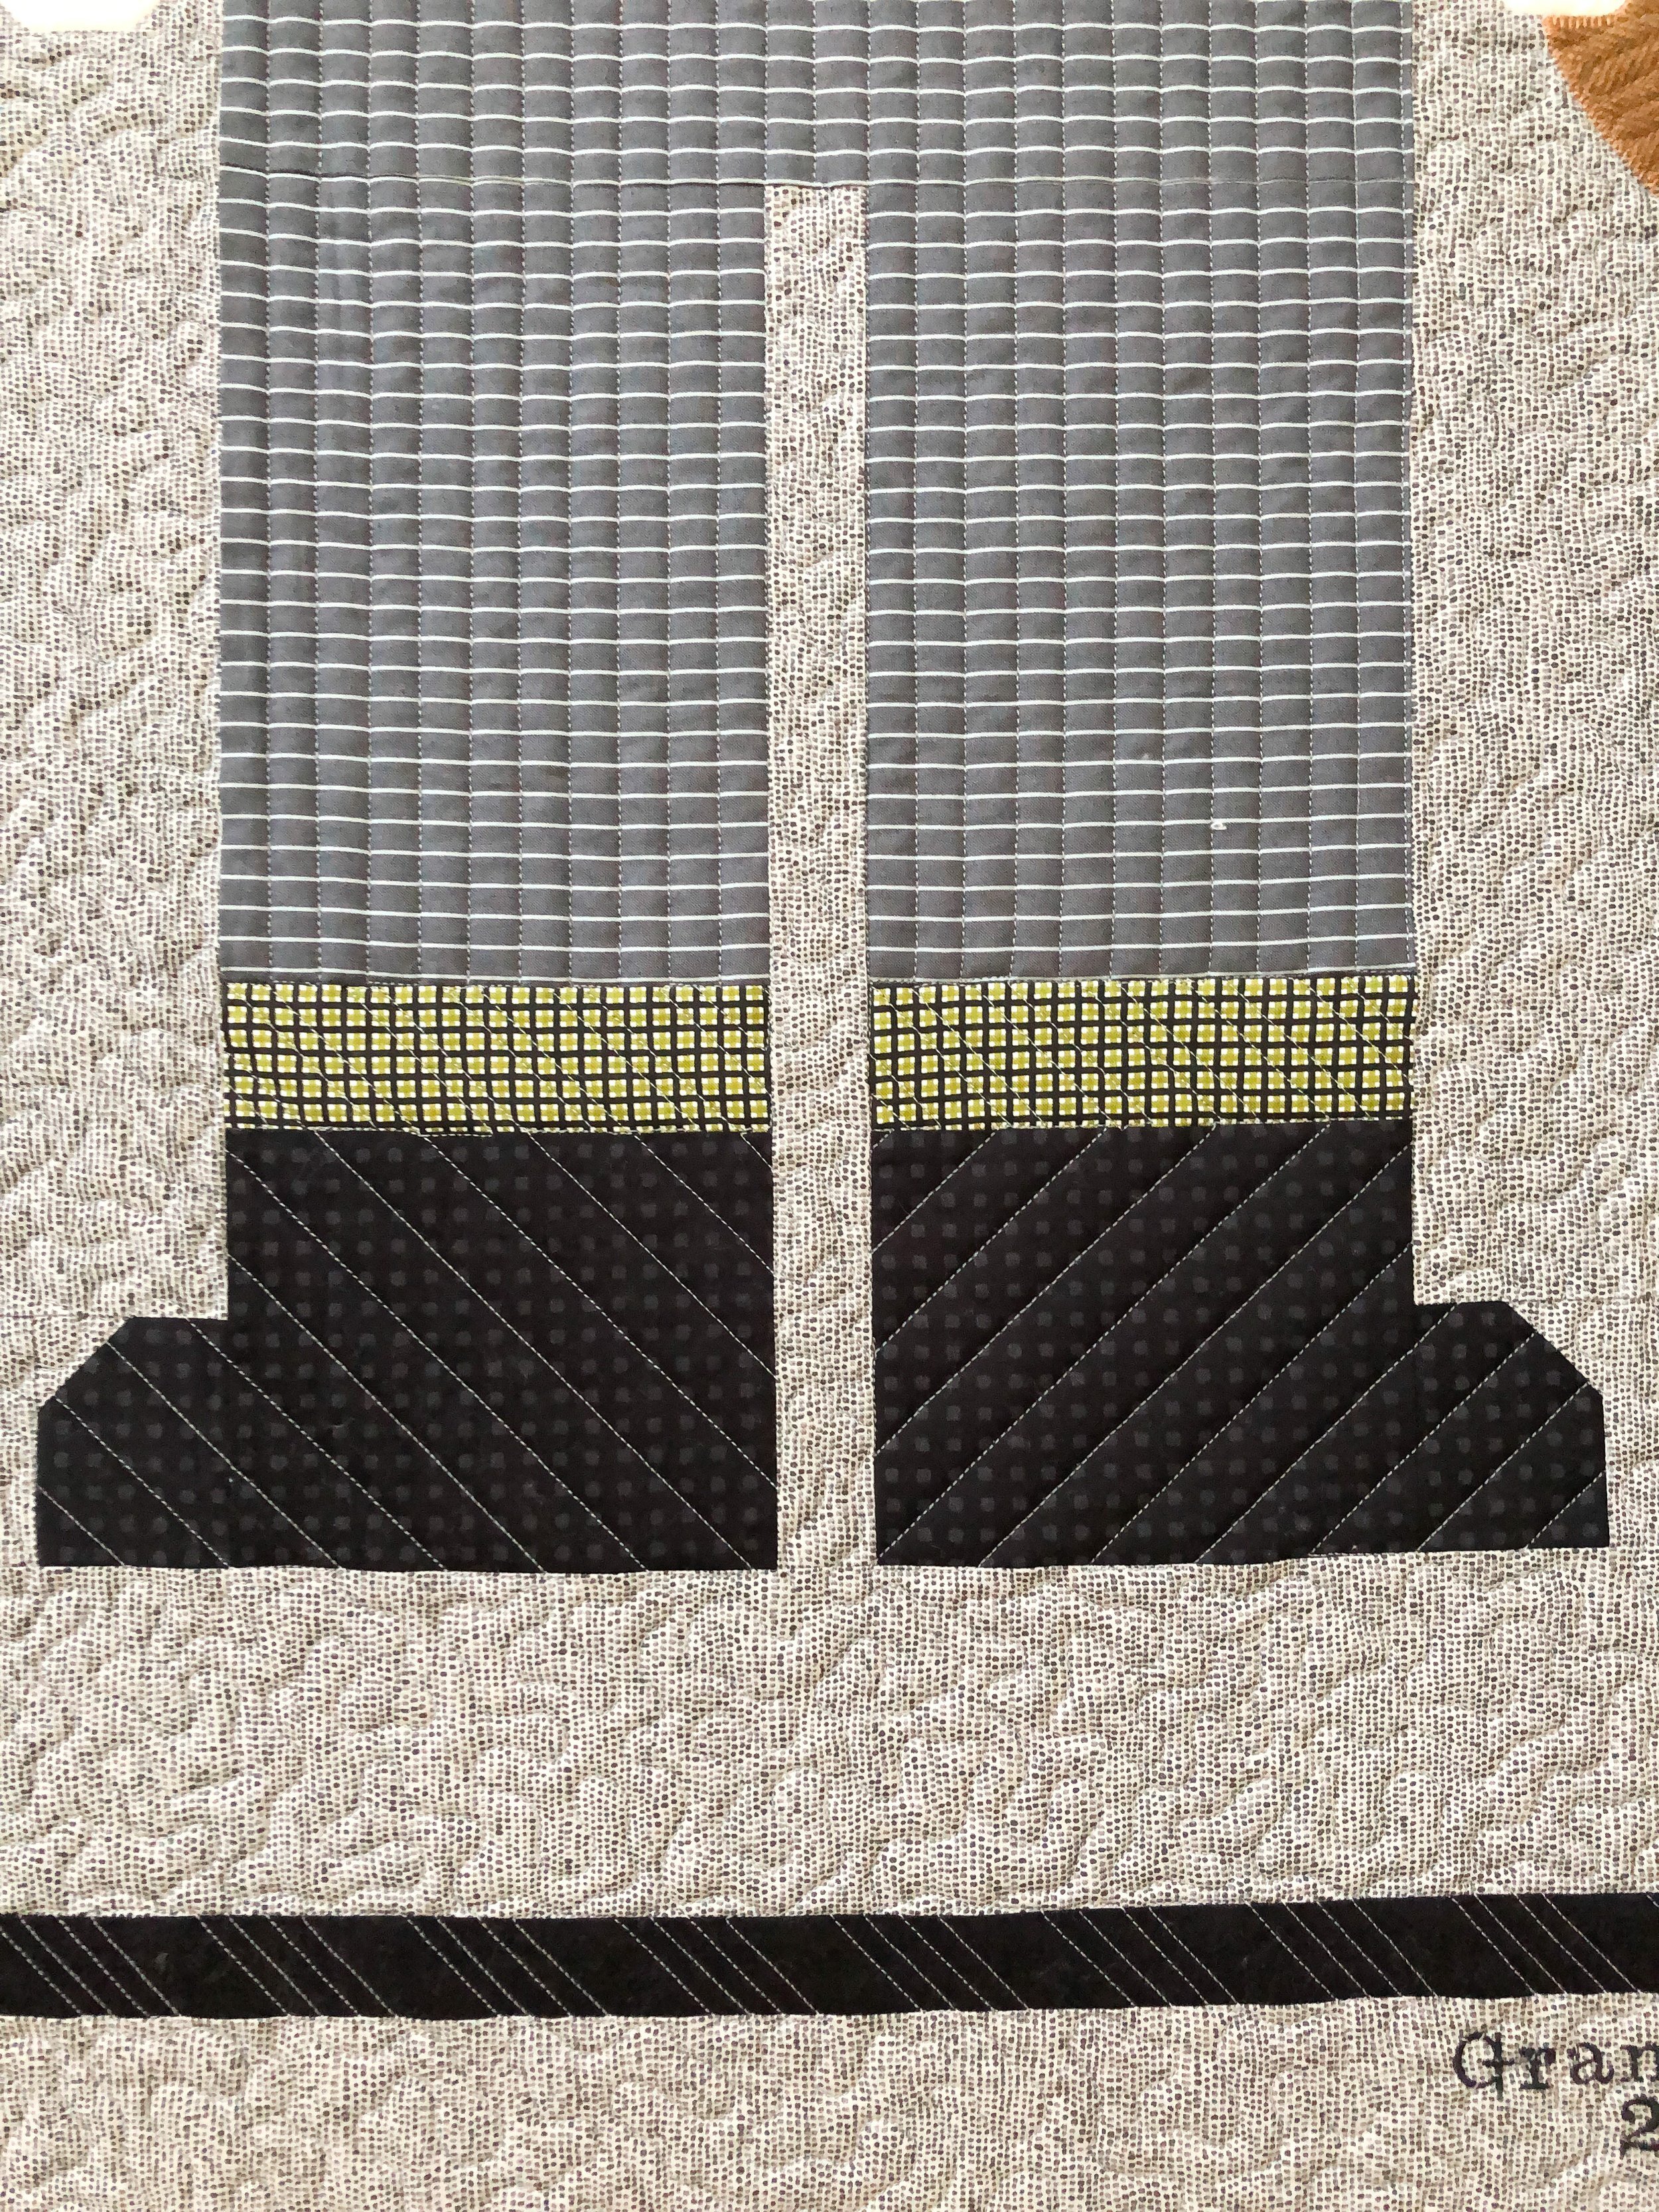
I quilted a triple pinstripe in the axe, with a softer line on the handle. The boots have angled quilted lines 3/4” apart, and the cuffs are pinstripes.
The tree has some fun freehand wood grain in the blocks, starting at the top and working it’s way to the bottom.

One of my favorite parts of the quilting, were the triple pinstripes in the inner border. Which I did with a Edge ruler from Linda at The Quilted Pineapple. If you’re interested in starting freehand or freemotion quilting with your longarm, check out my Quilting It Freemotion course in my shop. I teach 10 different freemotion quilting designs, starting with Stippling and going through the basics…loops, swirls, wood grain, and so on, including two of my personal designs Overlapping Circles and Overlapping Lines. Check them out!!
Such a fun quilt to quilt!! Hope you enjoyed being here, and seeing all the quilting details! Thanks for coming by. Happy quilting! • leisha
Denise’s Pollinate Quilt
Hello Friends, I hope your summer is off to a great start!! Mine has been great. A few days ago my niece was born…and I still need to share with you her baby quilt that my mom and I made. I’ve also been running a lot, which I’m grateful to be able to do again. I’ve challenged myself to run 100 miles in 3 months, in order to be more consistent. I was doing great with less than a 1/4th to go when I got a little injury from playing volleyball with friends. I’m hoping another week off, I’ll be ready to start back up. I’ve also been golfing with some friends a few times, which has been fun! I’m loving the warm weather and sunshine. You’ll have to comment below and tell me what you love to do during your summer months.
I’ve been talking with some quilty friends about life/work balance. It’s so important for me to have balance. To take care of me, and fill my life with a variety of different things. It fills my bucket. Which in turn helps me enjoy my job even more.
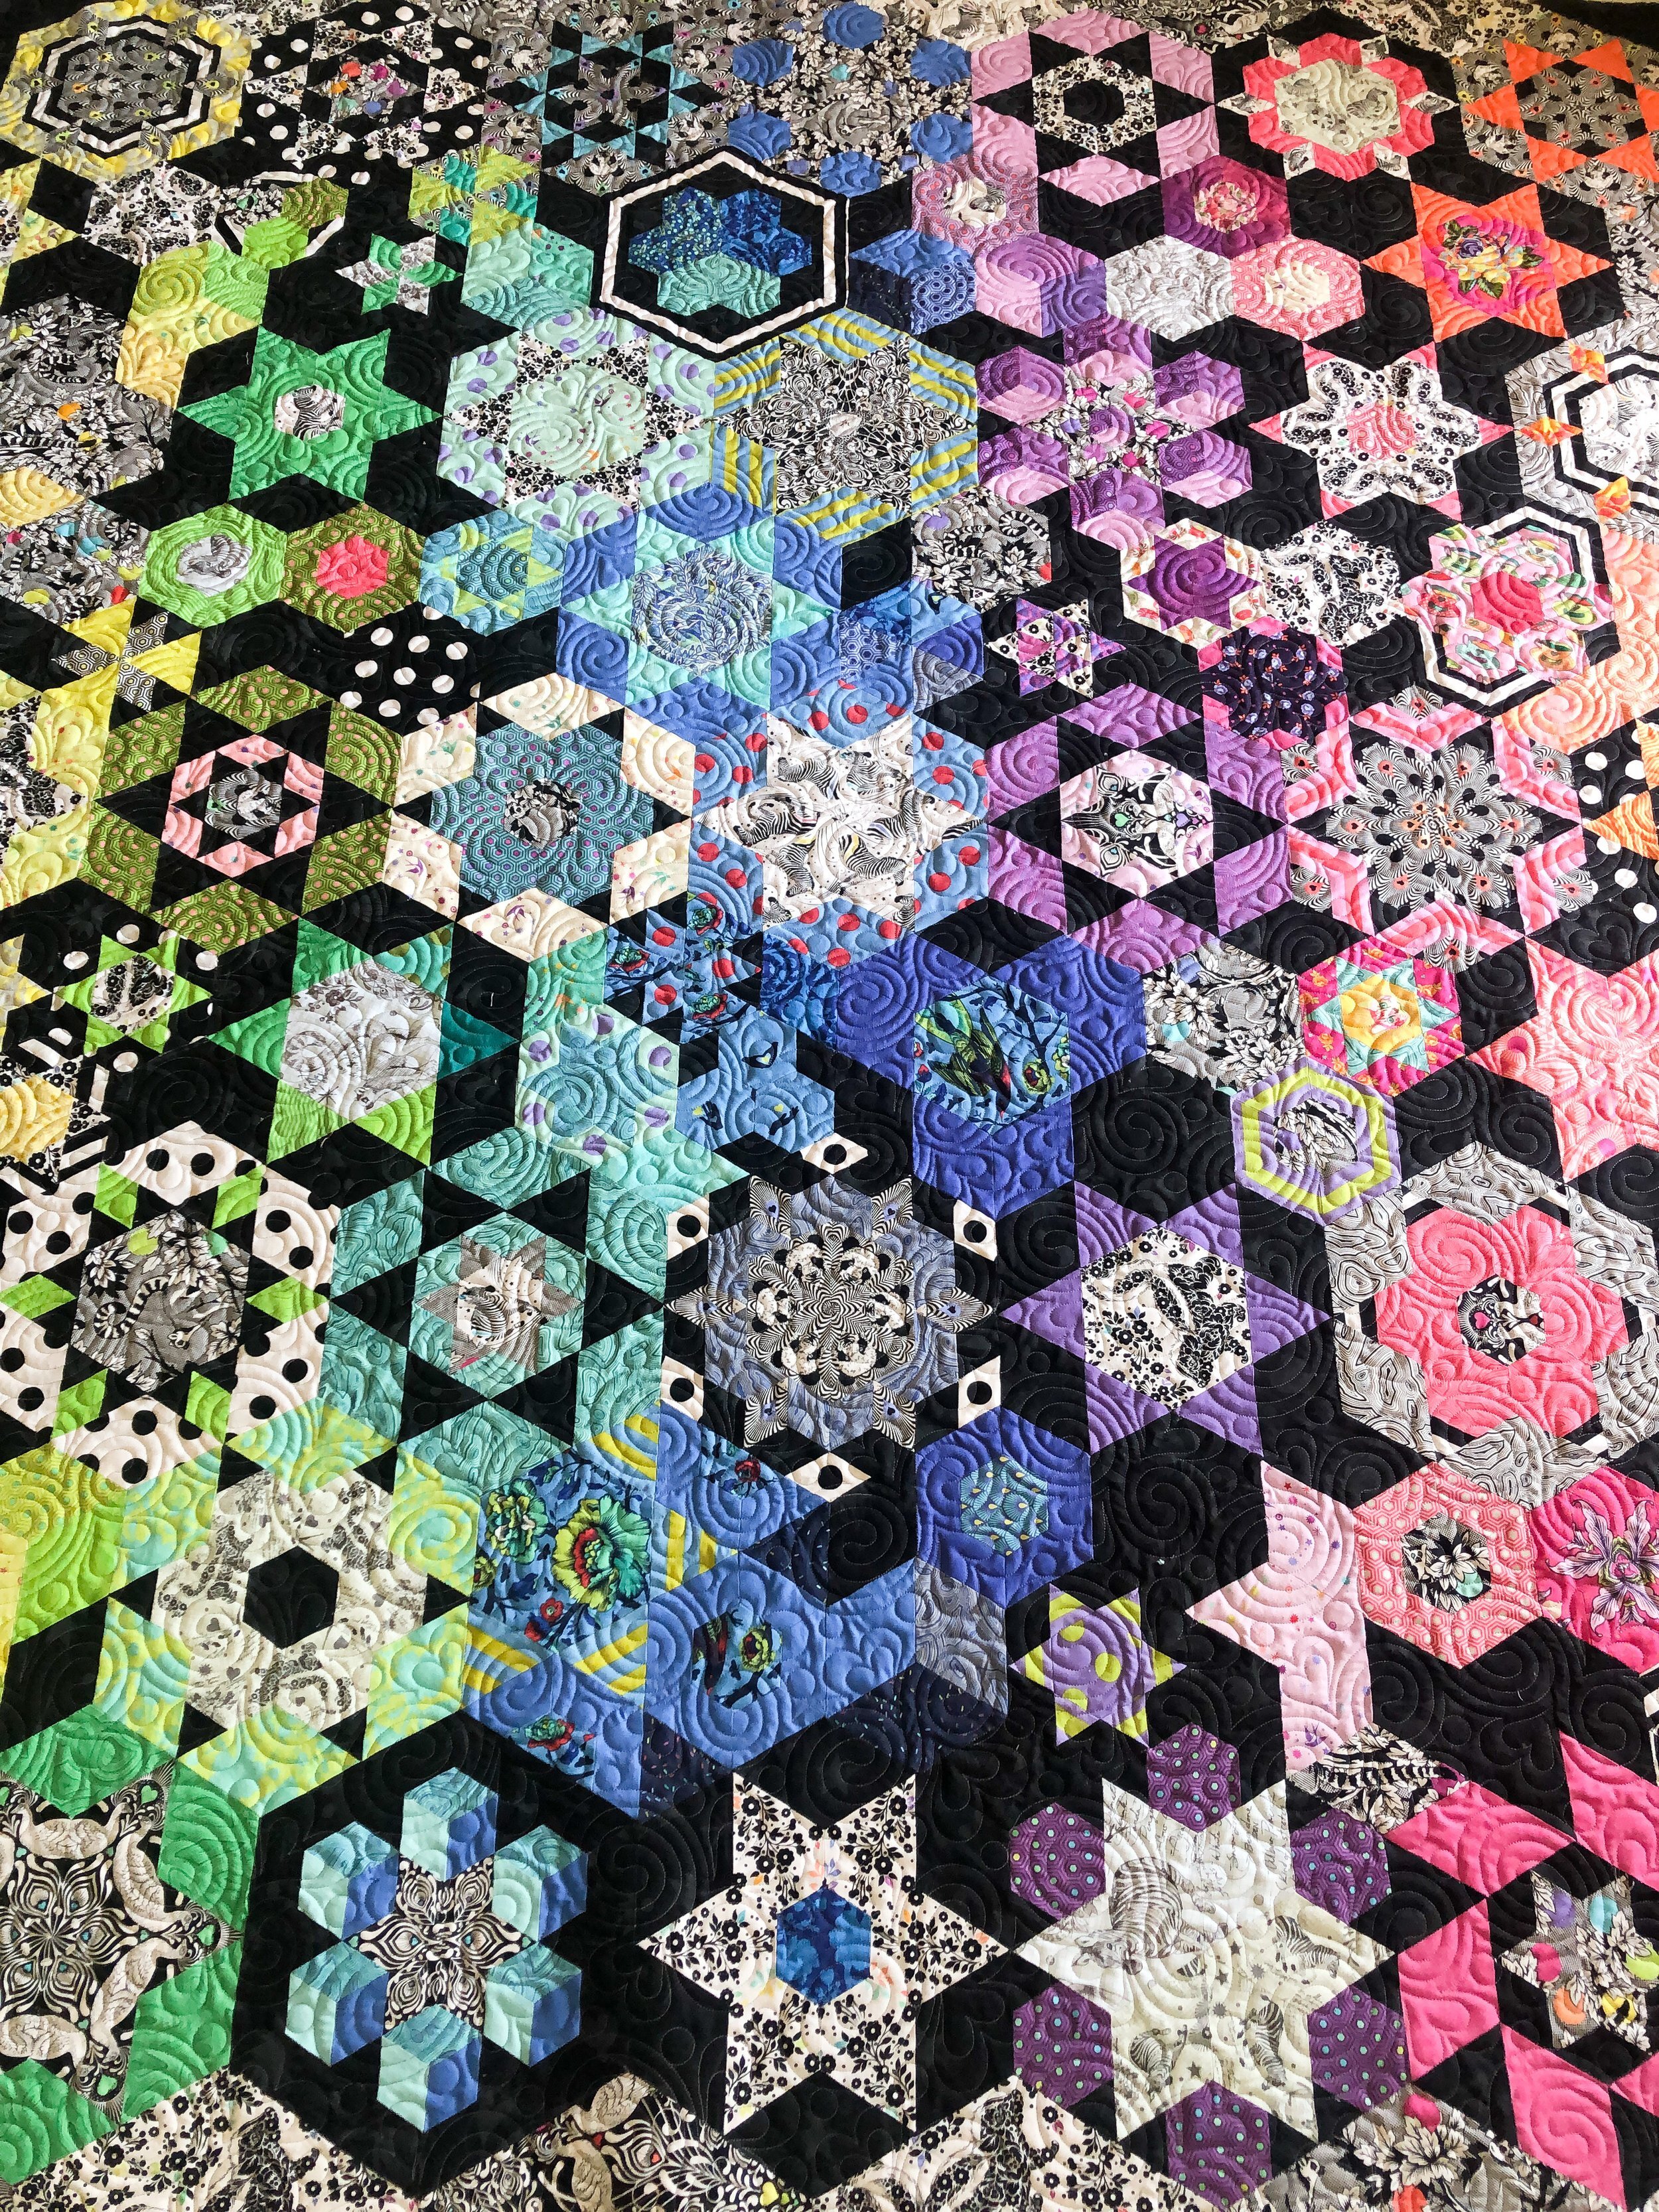
For instance…check out this amazing Pollinate quilt that Denise made!!! Yes, it was pieced with the english paper piecing method. Which means, it was pieced by hand. I’ve been working on a EPP quilt too, so I definitely appreciate all the work that went into this incredible quilt.
This amazing pattern is called Pollinate by Kitty Wilkin from Night Quilter. I loved the variety of fabrics Denise used!

Here are a couple of close up pics of the quilting when the quilt was still on the machine.
Another progress pic.

I love all the pops of color!! You may be surprised, but I used a Natural White Omni thread from Superior Threads on the entire quilt, and my favorite 8020 cotton poly blend batting from Winline Textiles out of Ogden Utah. The thread blends beautifully!
When I first saw this quilt, and she told me she wanted it quilted custom, I was so excited but unsure how I was going to quilt it. I found a couple pictures of one that my friend Teresa from Quilting is My Bliss quilted, and that gave me some great inspiration.
Because there are so many similar shapes, I couldn’t quilt everything the same. It was fun adding swirls with a hook to the center flower, and also my loopy diamonds to the very center star. I actually added the loopy diamonds to the 5 pointed stars throughout the quilt, as you can see below. That became my favorite design to quilt on this quilt. I quilt them freehand. I also love all the simple lines quilted throughout the quilt, like the lines in the star below.
I used my favorite Edge rulers from Linda at The Quilted Pineapple to quilt all the lines.
I love the texture that multiple lines give to a quilt. Simple beautiful texture!

When quilting a quilt like this, I like to stitch in the ditch ever so slightly to get to the next block or in this case the next epp piece, which is a huge time saver and I save a lot more thread that way as well.

Check out this incredible backing fabric. Perfect for this quilt!!
Such a fun quilt to quilt!!

Along with the Edge rulers, I also used my 4” Circle2 machine quilting circle ruler to quilt the bee body. My Circle2 rulers come in a set of 6, and the range in size from 2”-13”. They are made in America with 1/4” high quality acrylic, and come in green and clear.
What is your favorite part of this quilt? Thanks for stopping by!! I hope you have a delightful weekend. • Leisha
Abby’s Half Square Triangle Quilts
I always love Abby’s pattern and fabric selection, when it comes to her quilts! She’s a master at it.

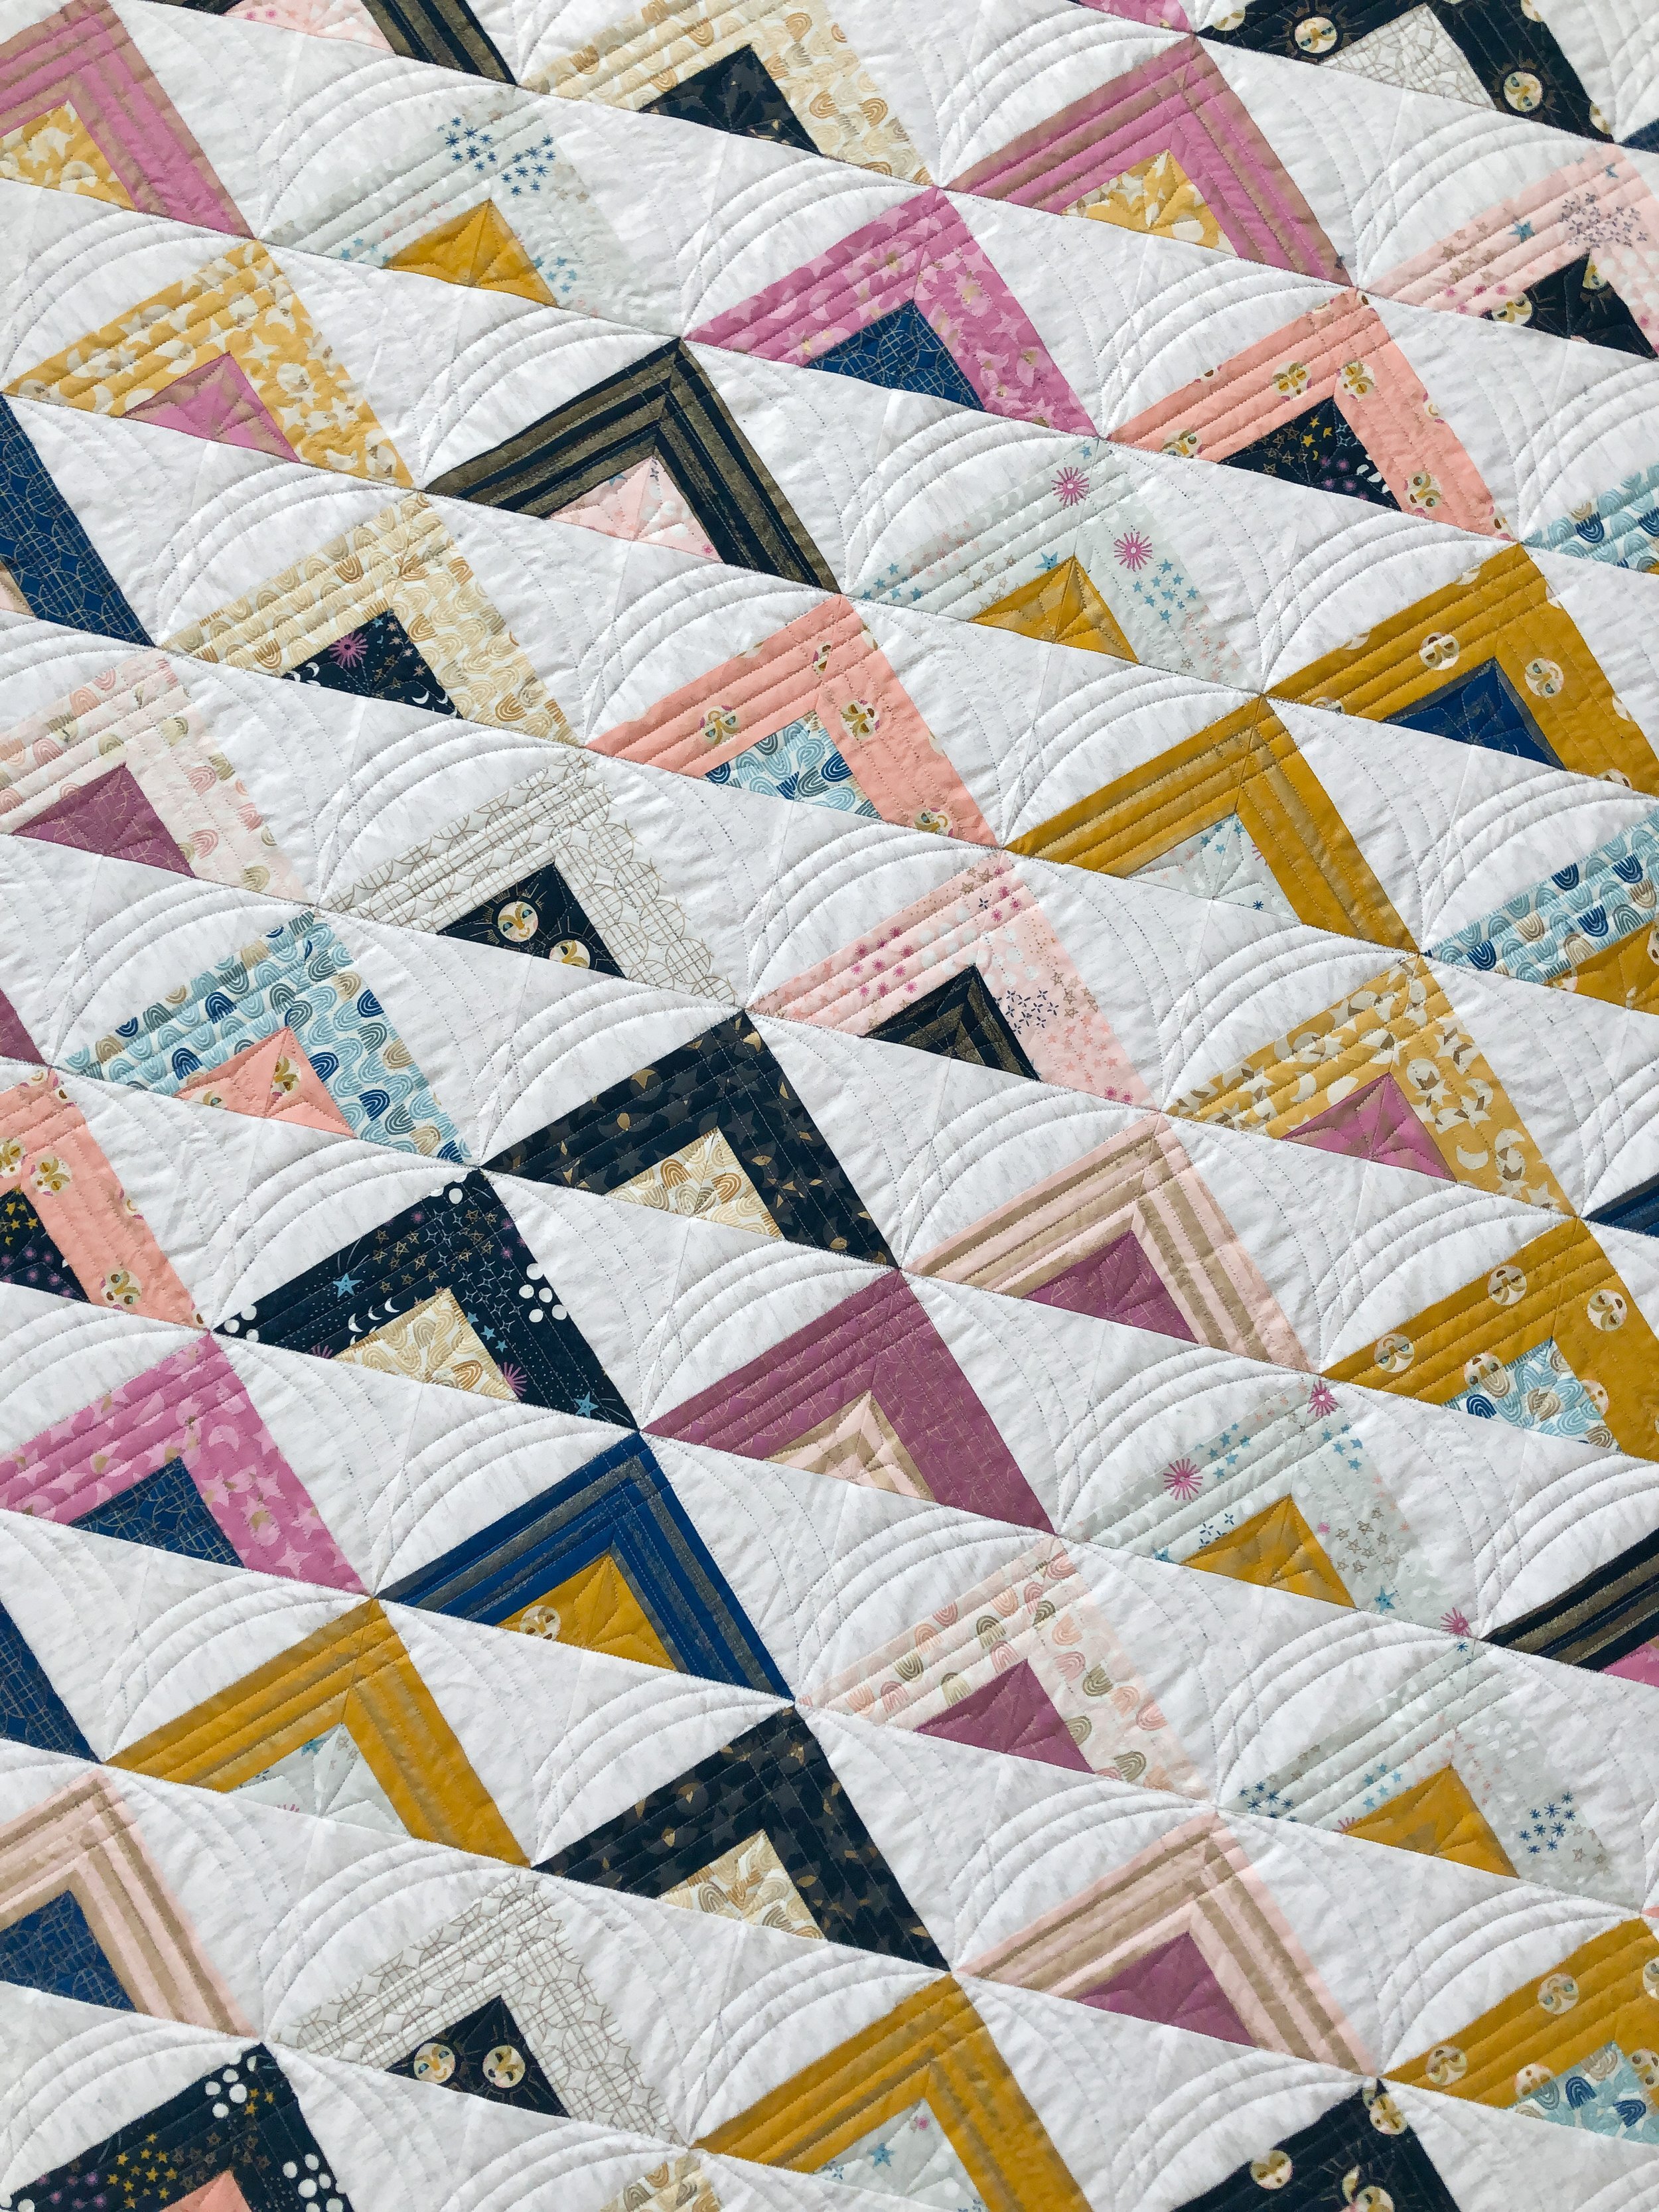
Abby made these two modern half square triangle quilts for her teen sons. I love everything about them.
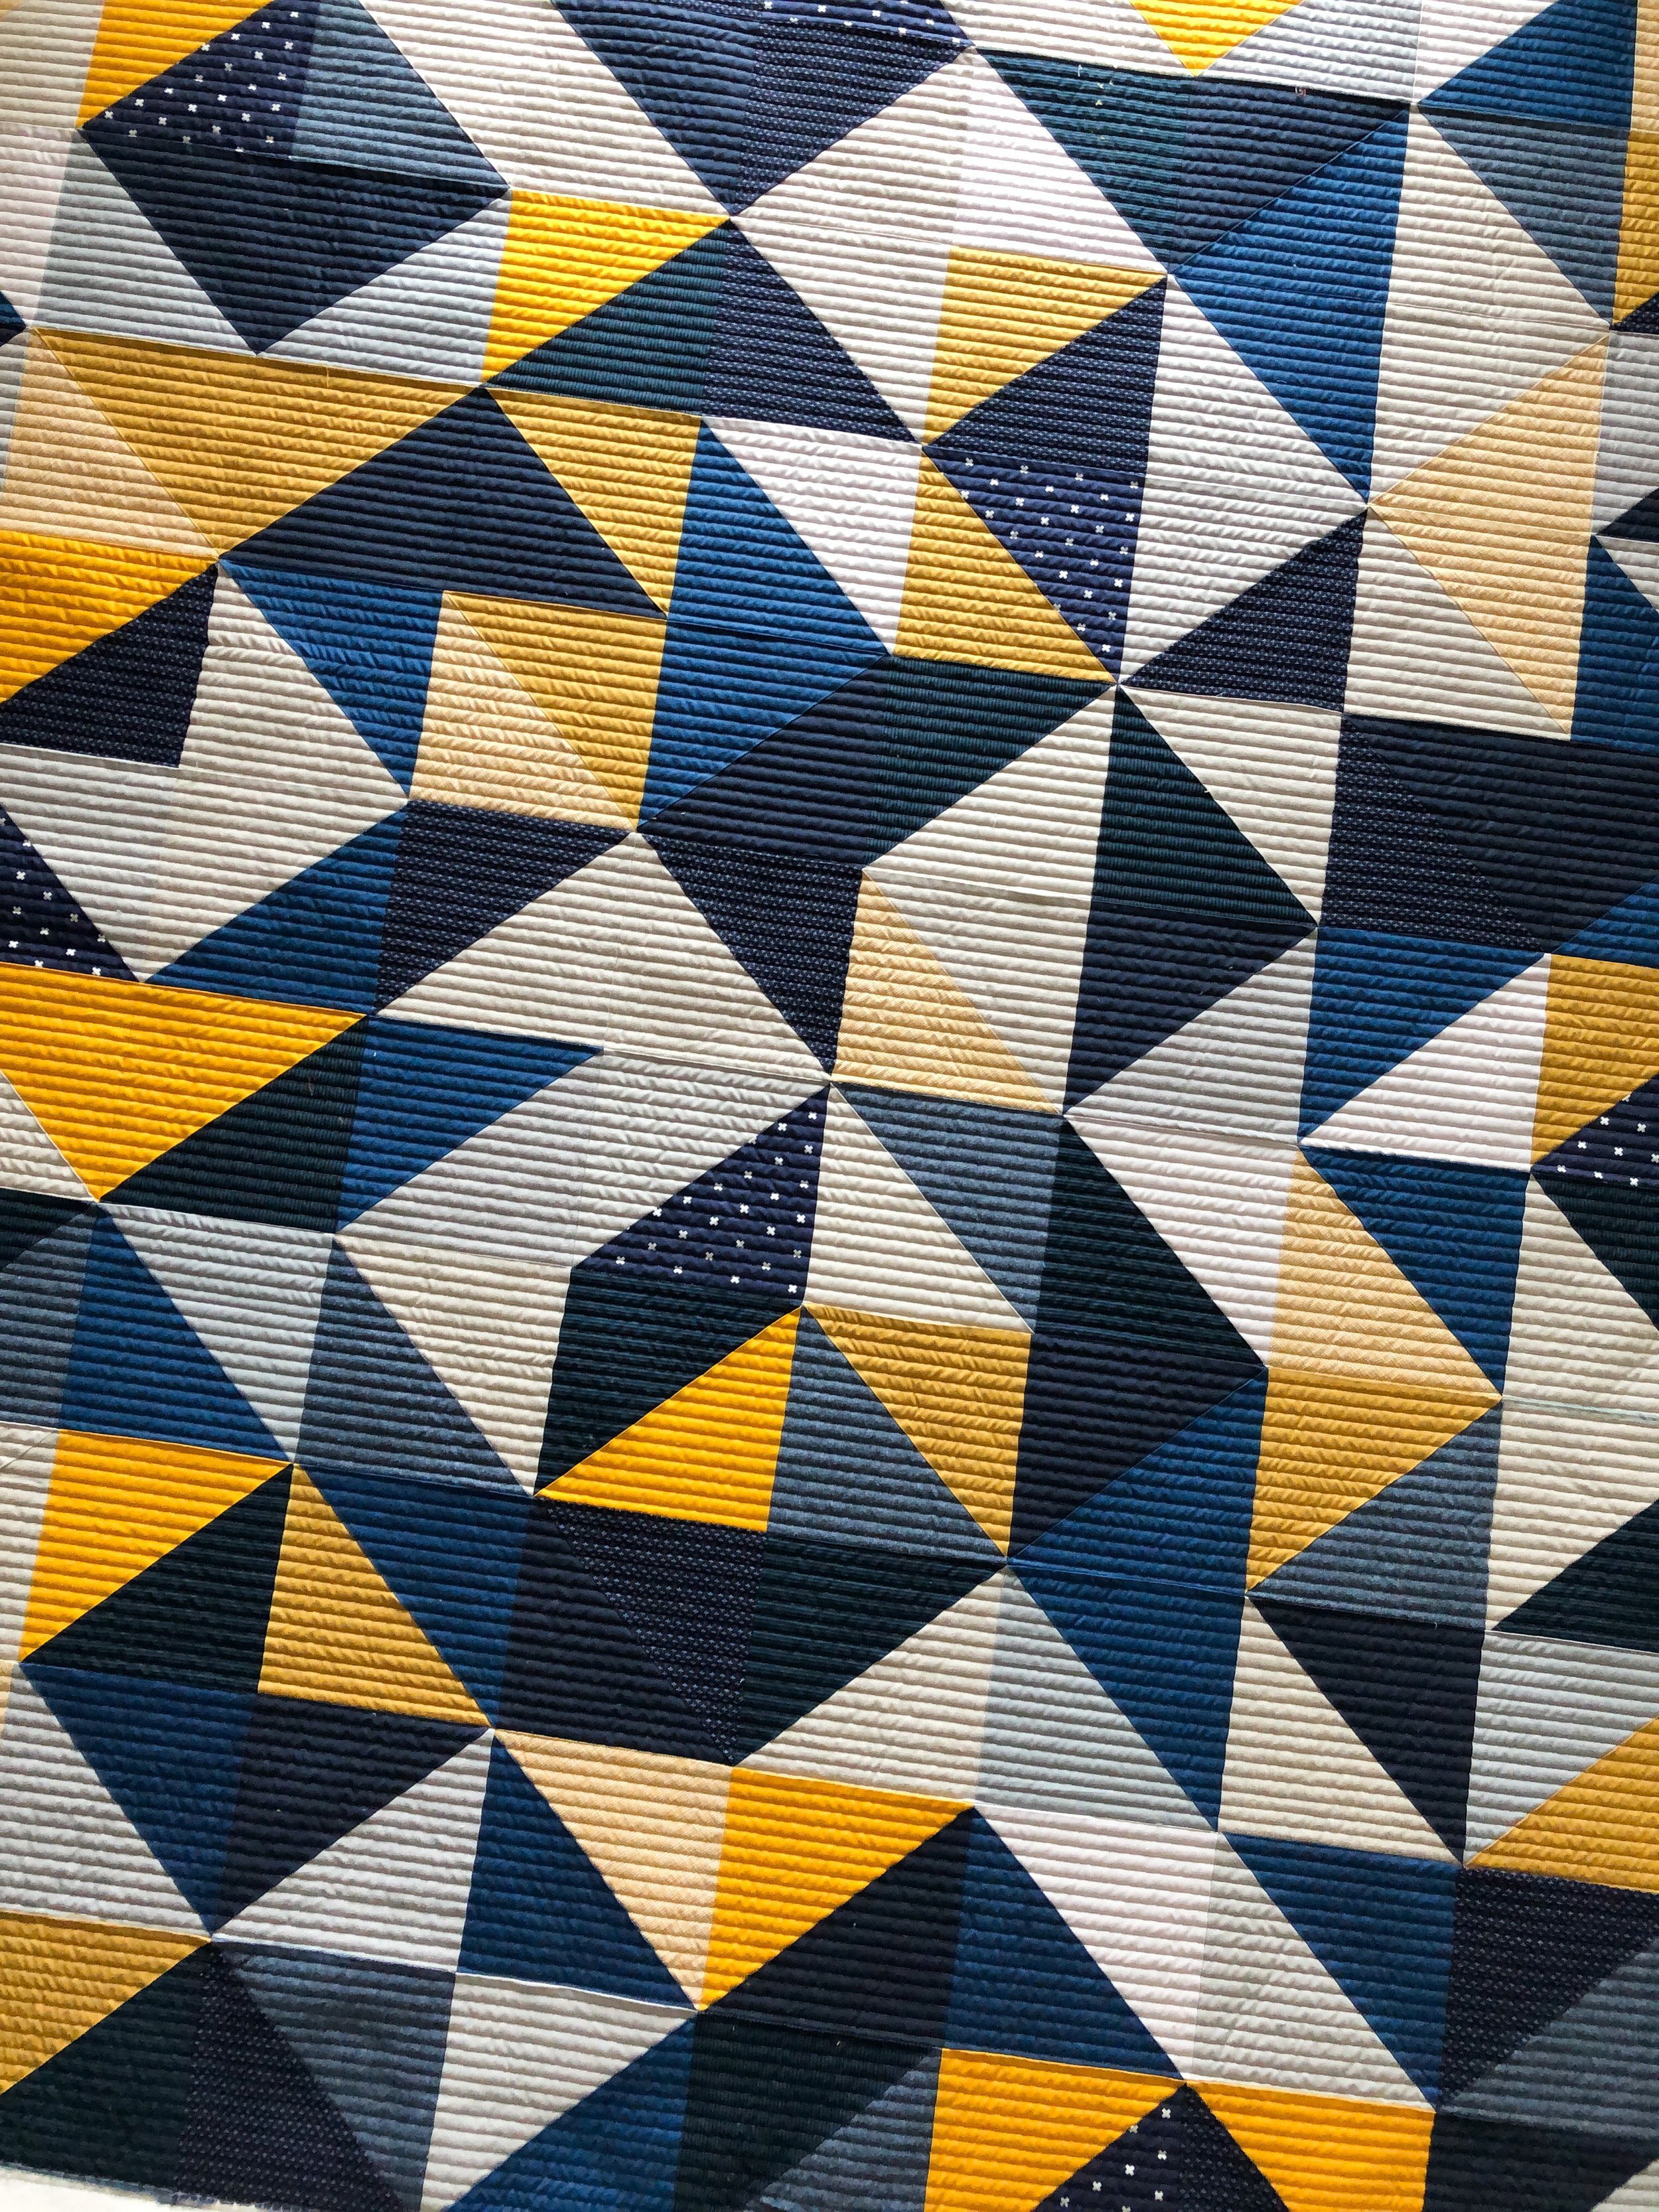
There is no pattern. If I remember right the half square triangles are about 7”or maybe even 8” big.

I used my favorite 8020 cotton poly blend batting on both quilts, and a tan thread on both as well.
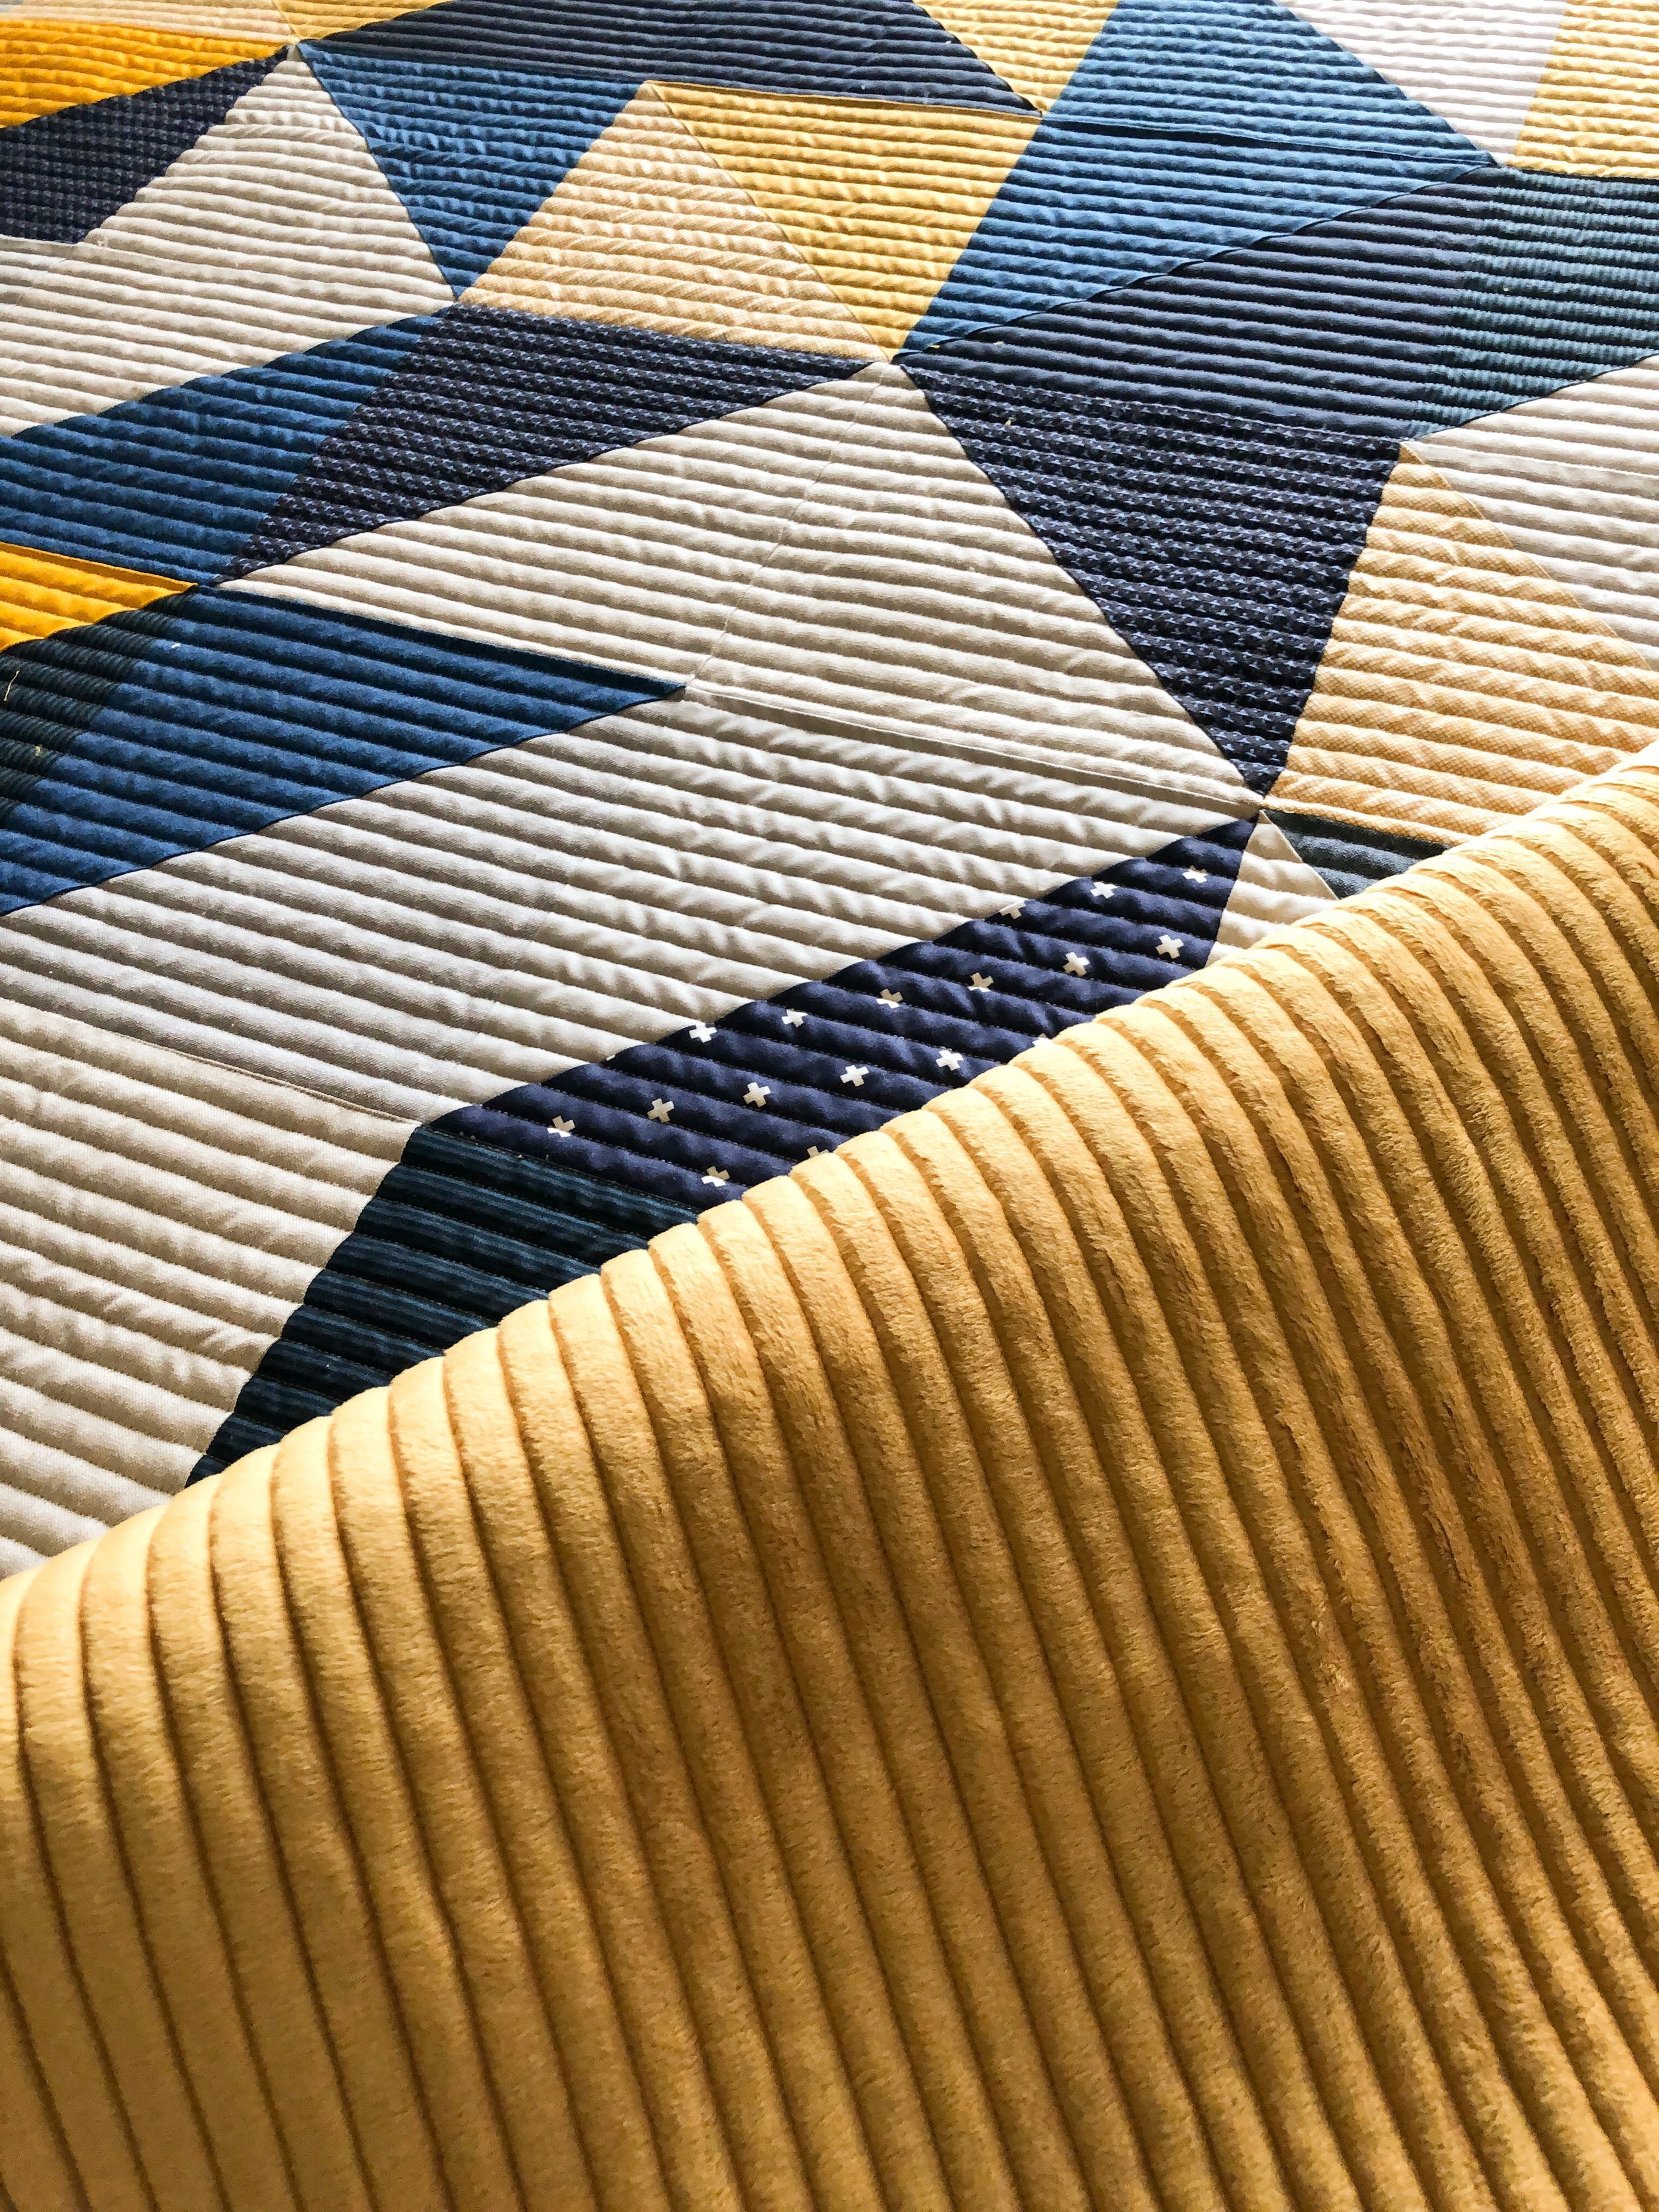
I used my Lined 1/2” quilting design on both of these quilts. They both turned out fabulous!! Lines like these are perfect on every quilt Abby brings. It’s what she loves, can you blame her? I can’t.

Next up, the orange and navy version. As you can see the layouts are a little different.

Have you made a large 1/2 squared triangle quilt? I haven’t, and I want to now!
The fun thing about doing large blocks like these, is seeing more the fabric prints vs when you cut the pieces of fabric so small you don’t get to see much of the print.
Adding this one to my list of future makes.

Quilting this design can be tricky, because of going back and forth and thread breaks. Watch this Instagram video and see if it helps.

Such awesome texture!
Thanks for coming by. Happy quilting!! • leisha
Laura Lee’s Hawaiian Quilt
This quilt has so pretty amazing color and texture!

Laura Lee was given these fabrics by a friend of hers…who fortunately is also a friend of mine. The fabrics were found in Hawaii by Chris. Chris made several quilts, which I quilted. Because Laura Lee sews, she was able to make herself one.
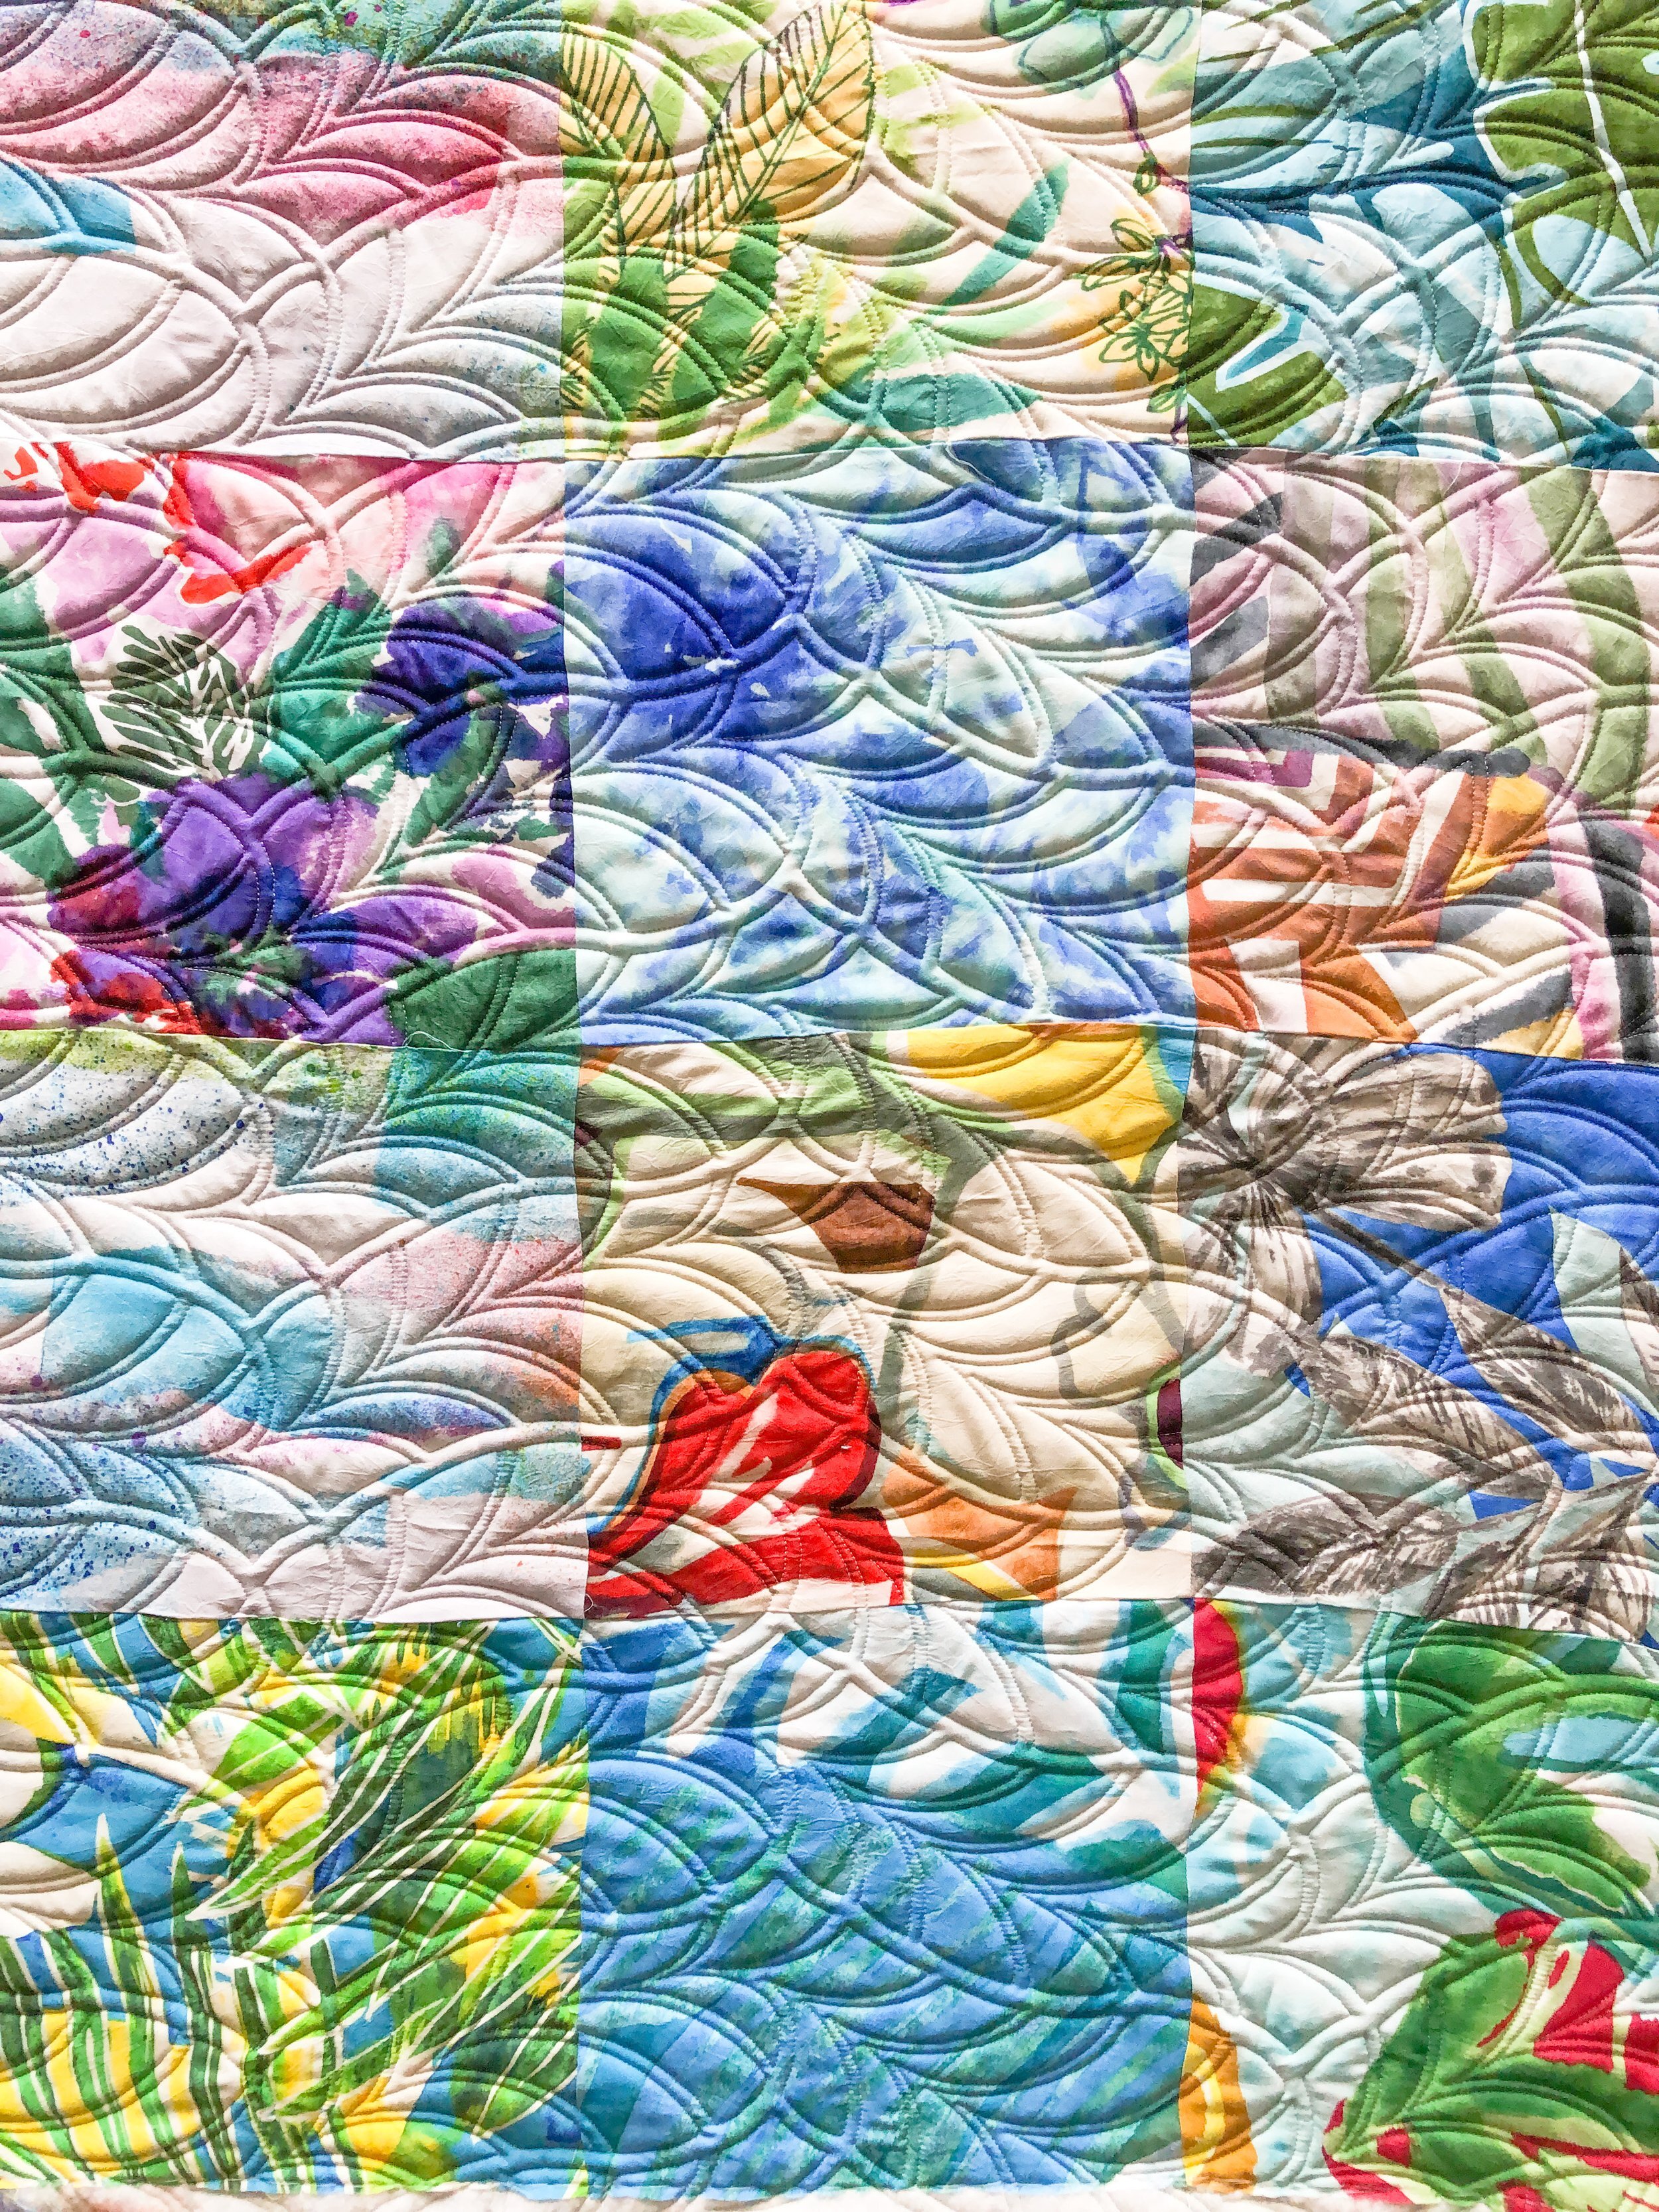
I used a bamboo batting, my favorite for sure, and a natural white Omni thread from Superior Threads.

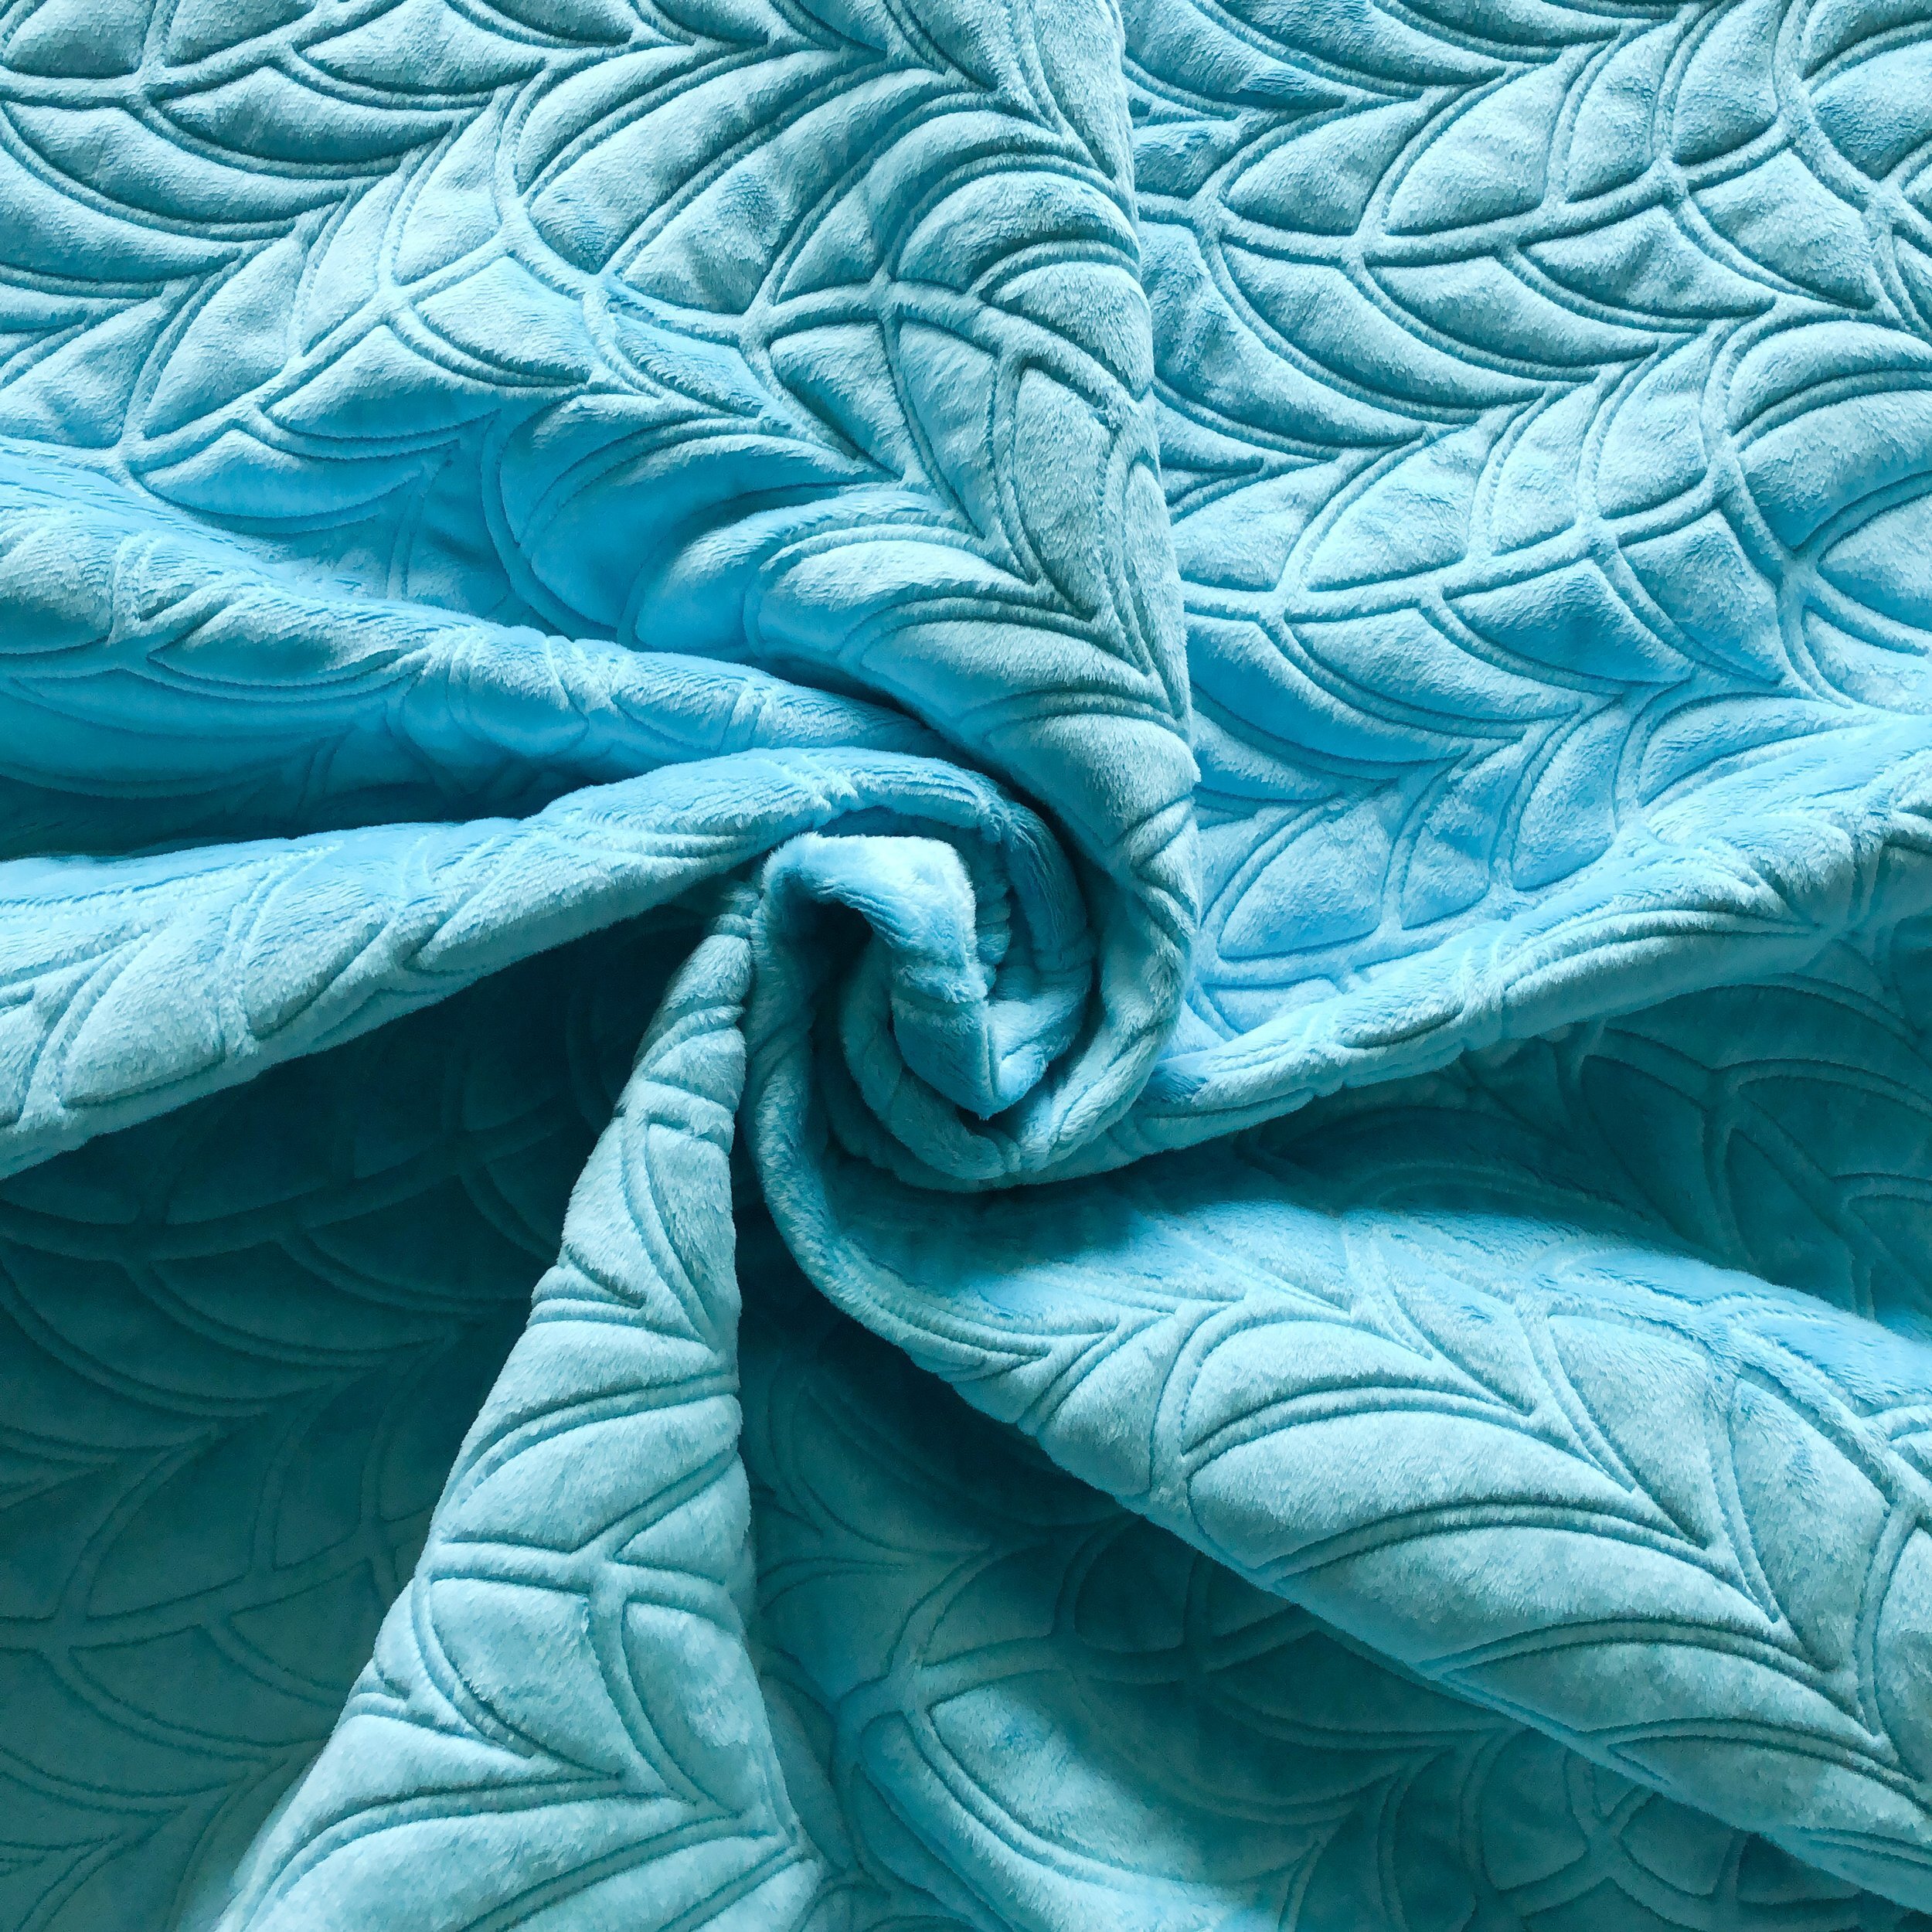
To make it even better, yes…there is aqua minky on the backing.
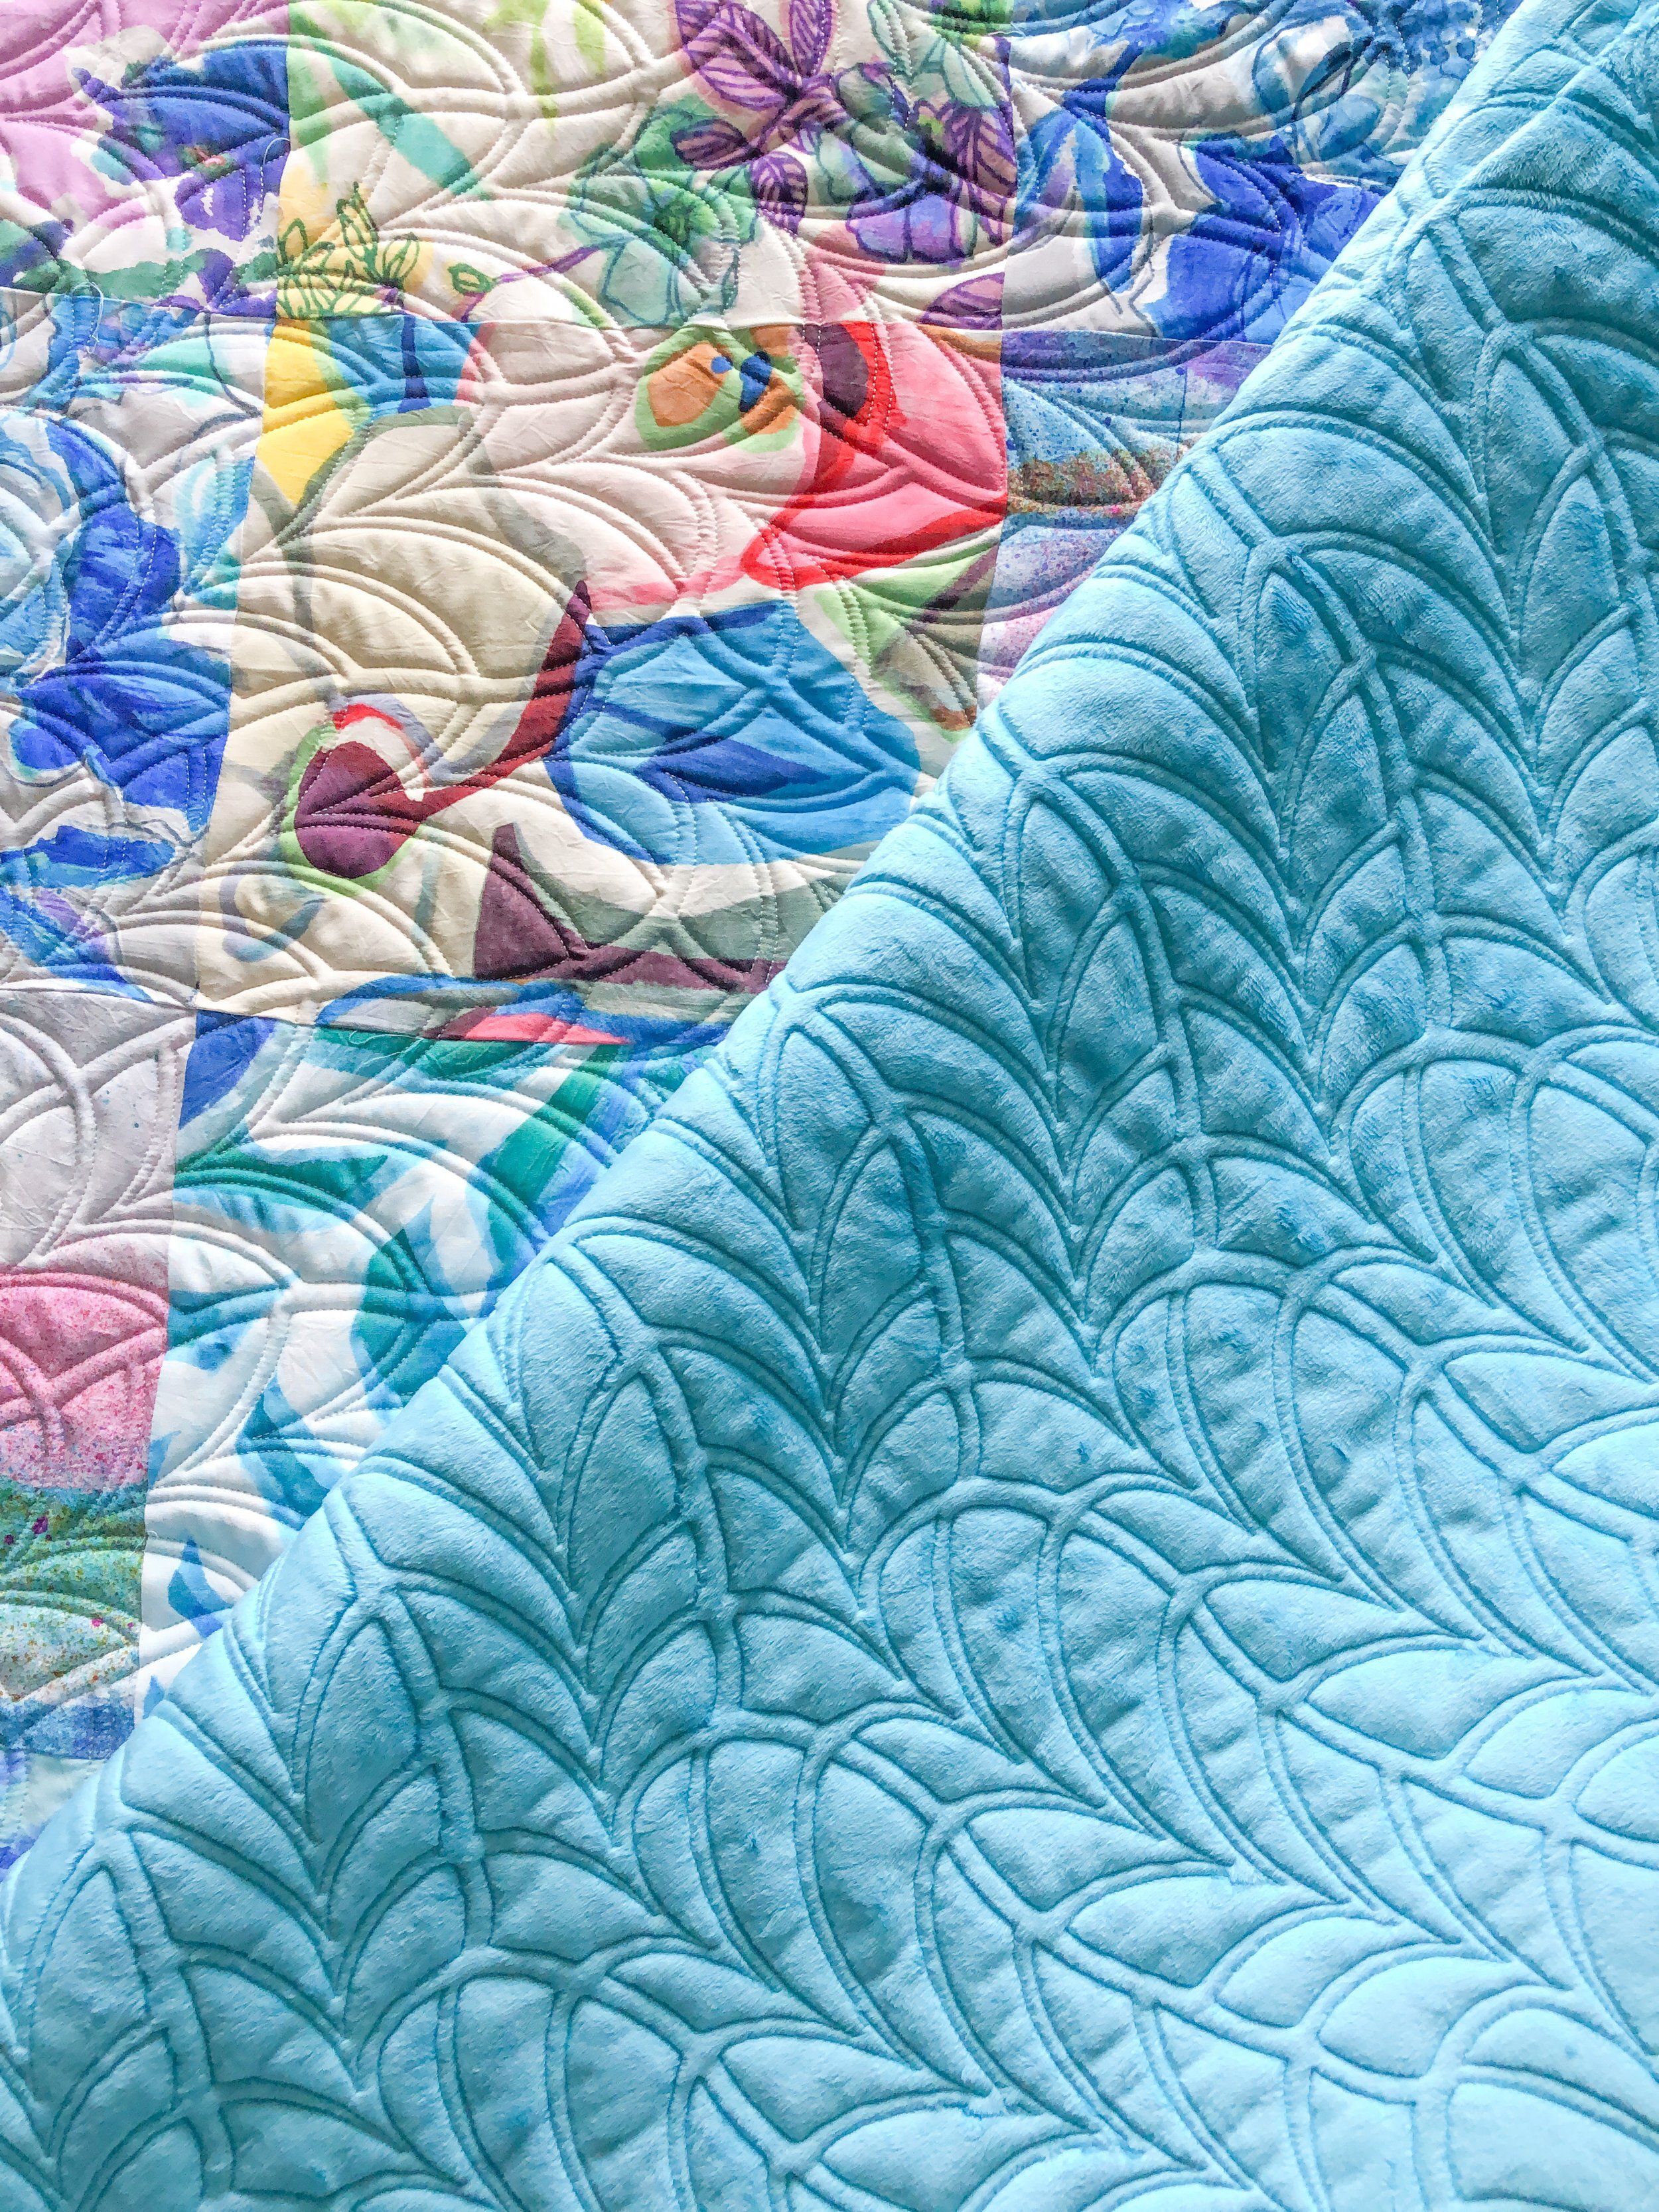
Now, look at that fun texture!
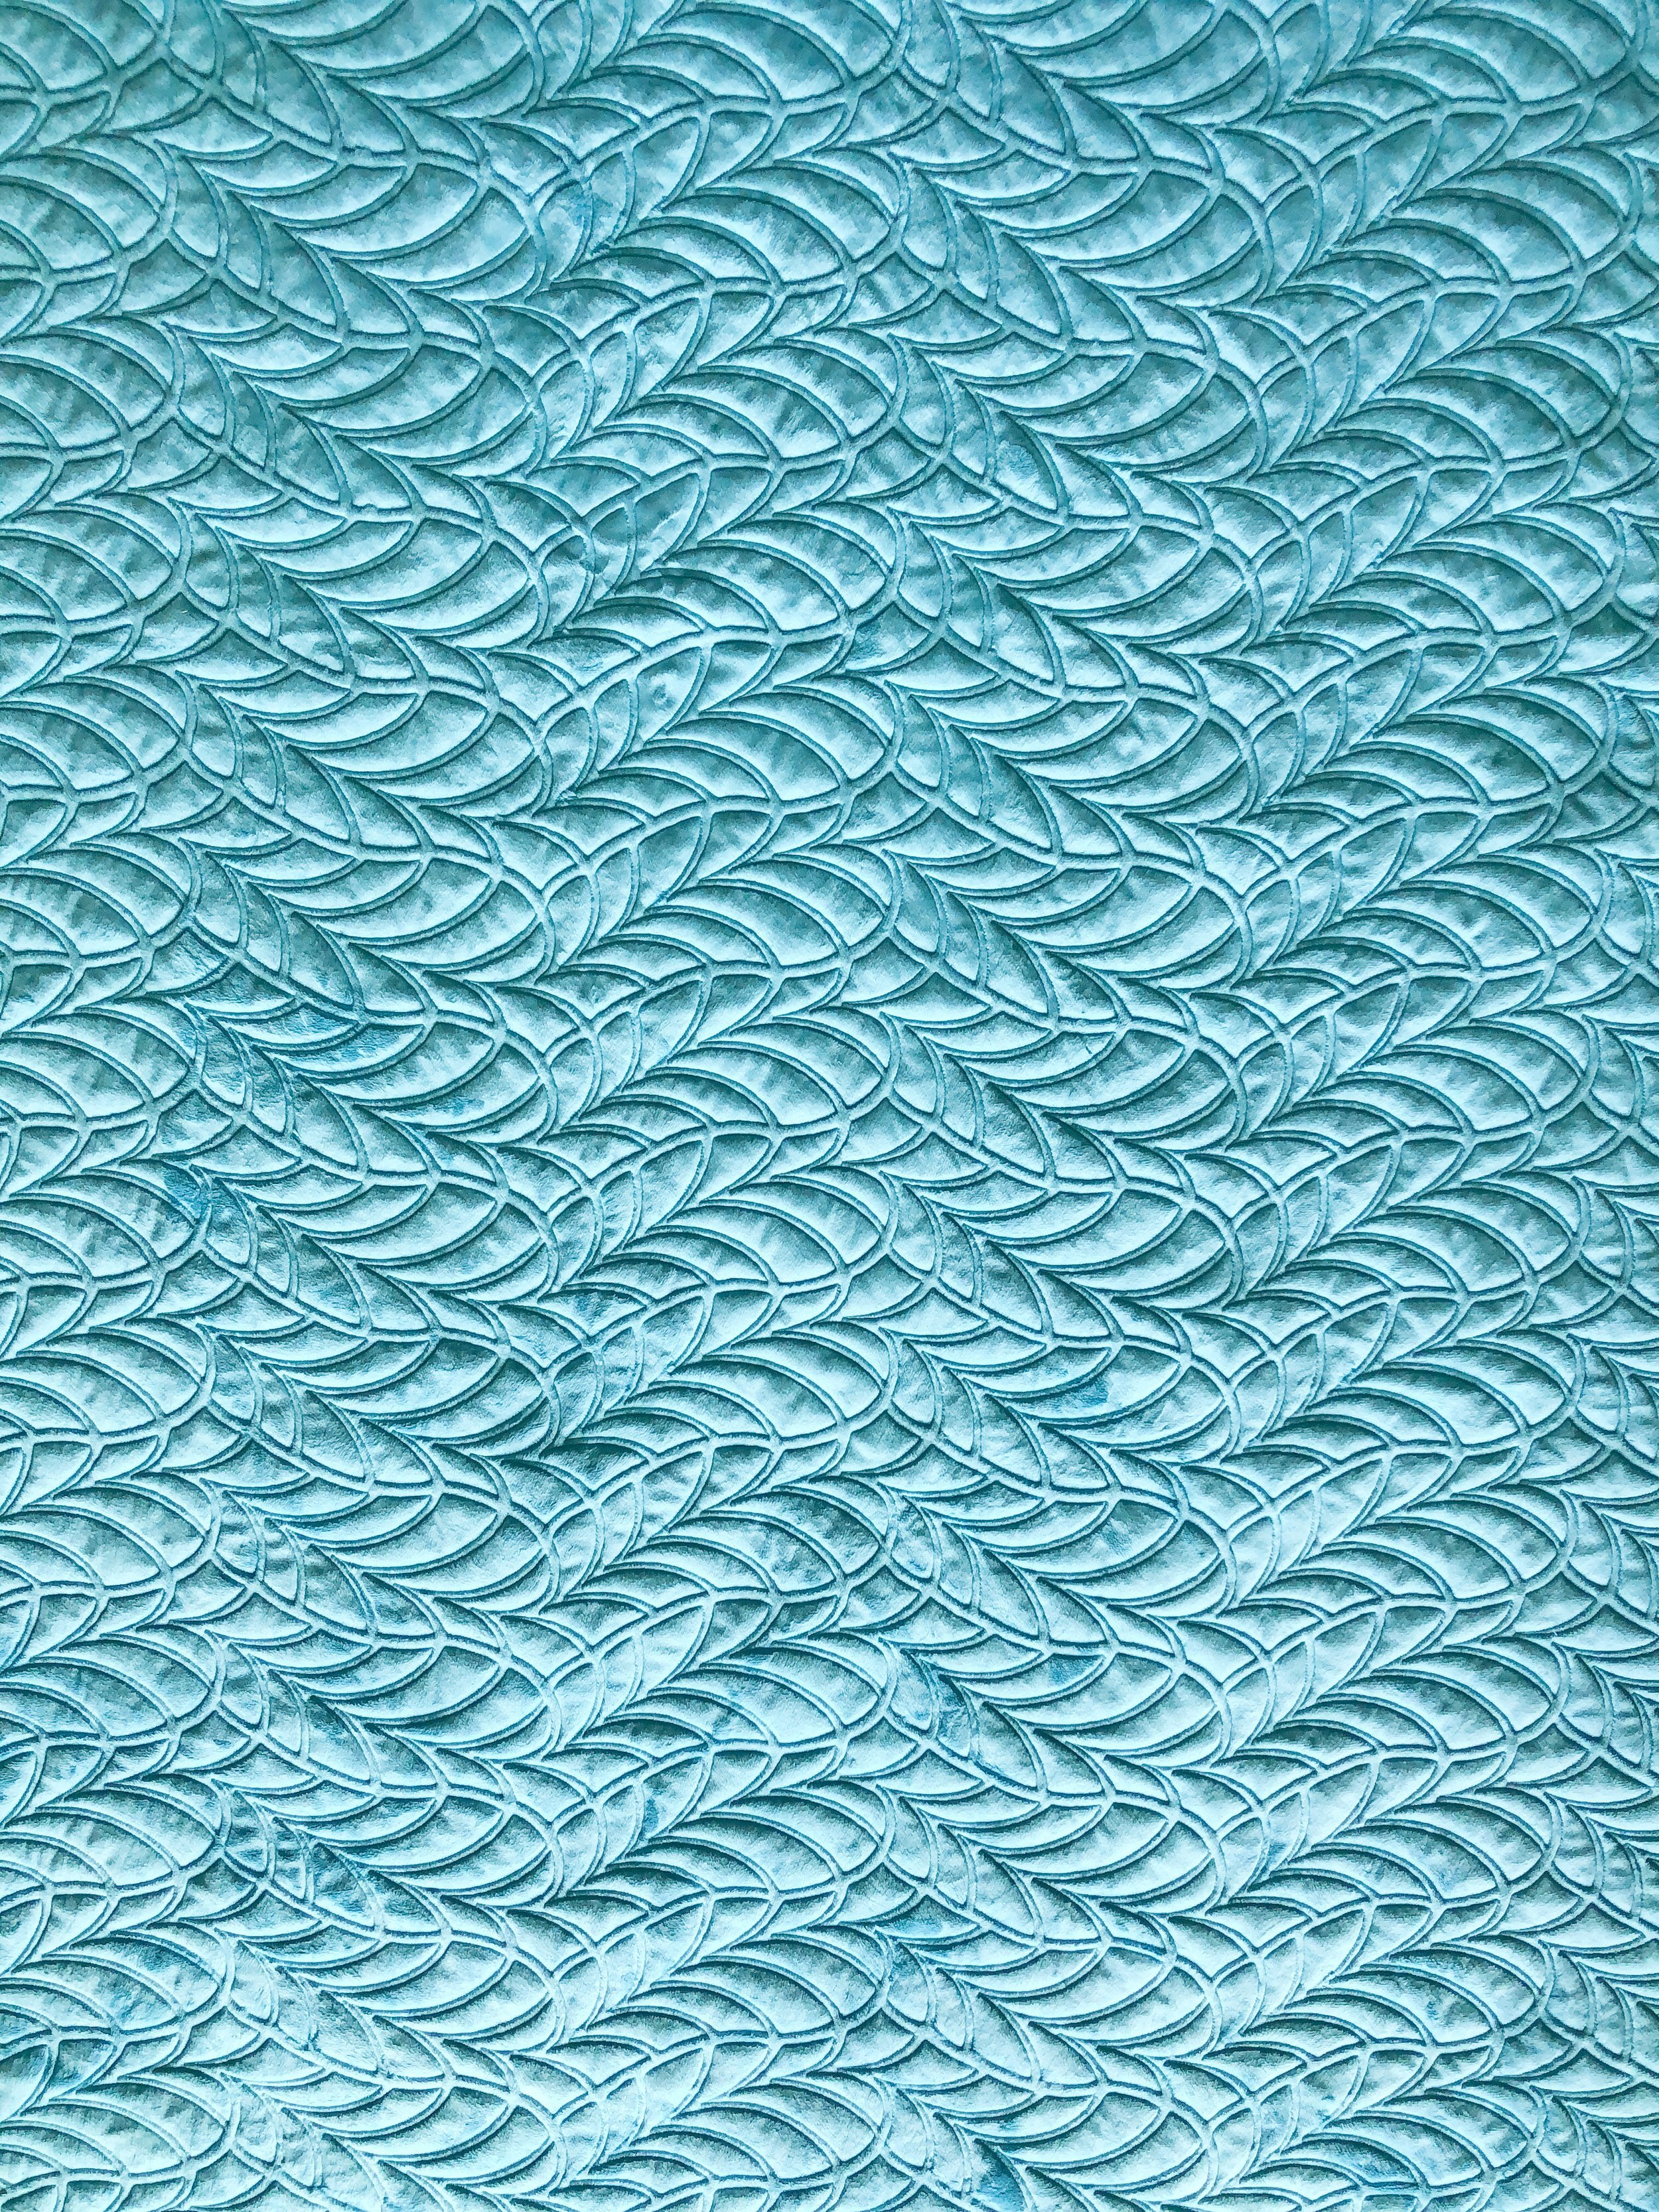
Do you love minky???
I also quilted this baby quilt for Susan. I used Patricia Ritter and my Soda Pop design to quilt it.
I also used cotton poly blend batting from Winline Textiles, and the natural white Omni thread from Superior Threads.
Thanks for coming by!! Happy sewing!