

Longarm Quilting Services
Hi there,
My name is Leisha, and I’m guessing that you’re here because you’re interested in getting a quilt machine quilted by me. Or maybe you’re just looking around. Either way, welcome!! I have been longarm machine quilting on a Gammill for over 20 years. I have a gallery with a wide variety of my quilting work, some of which were done freemotion or freehand, and the rest were done with my Gammill Statler (computer). I have also several blog posts with more of my updated work as well.
To schedule edge to edge quilting go to my Calendly and pick a day. Or you can text or email me at quiltingit@gmail.com and I can add you to my calendar. Let me know if you have any questions. If you’re interested in having me custom quilt for you, send me an email at quiltingit@gmail.com or text me and please include a picture so we can discuss the quilting.
• Pricing •
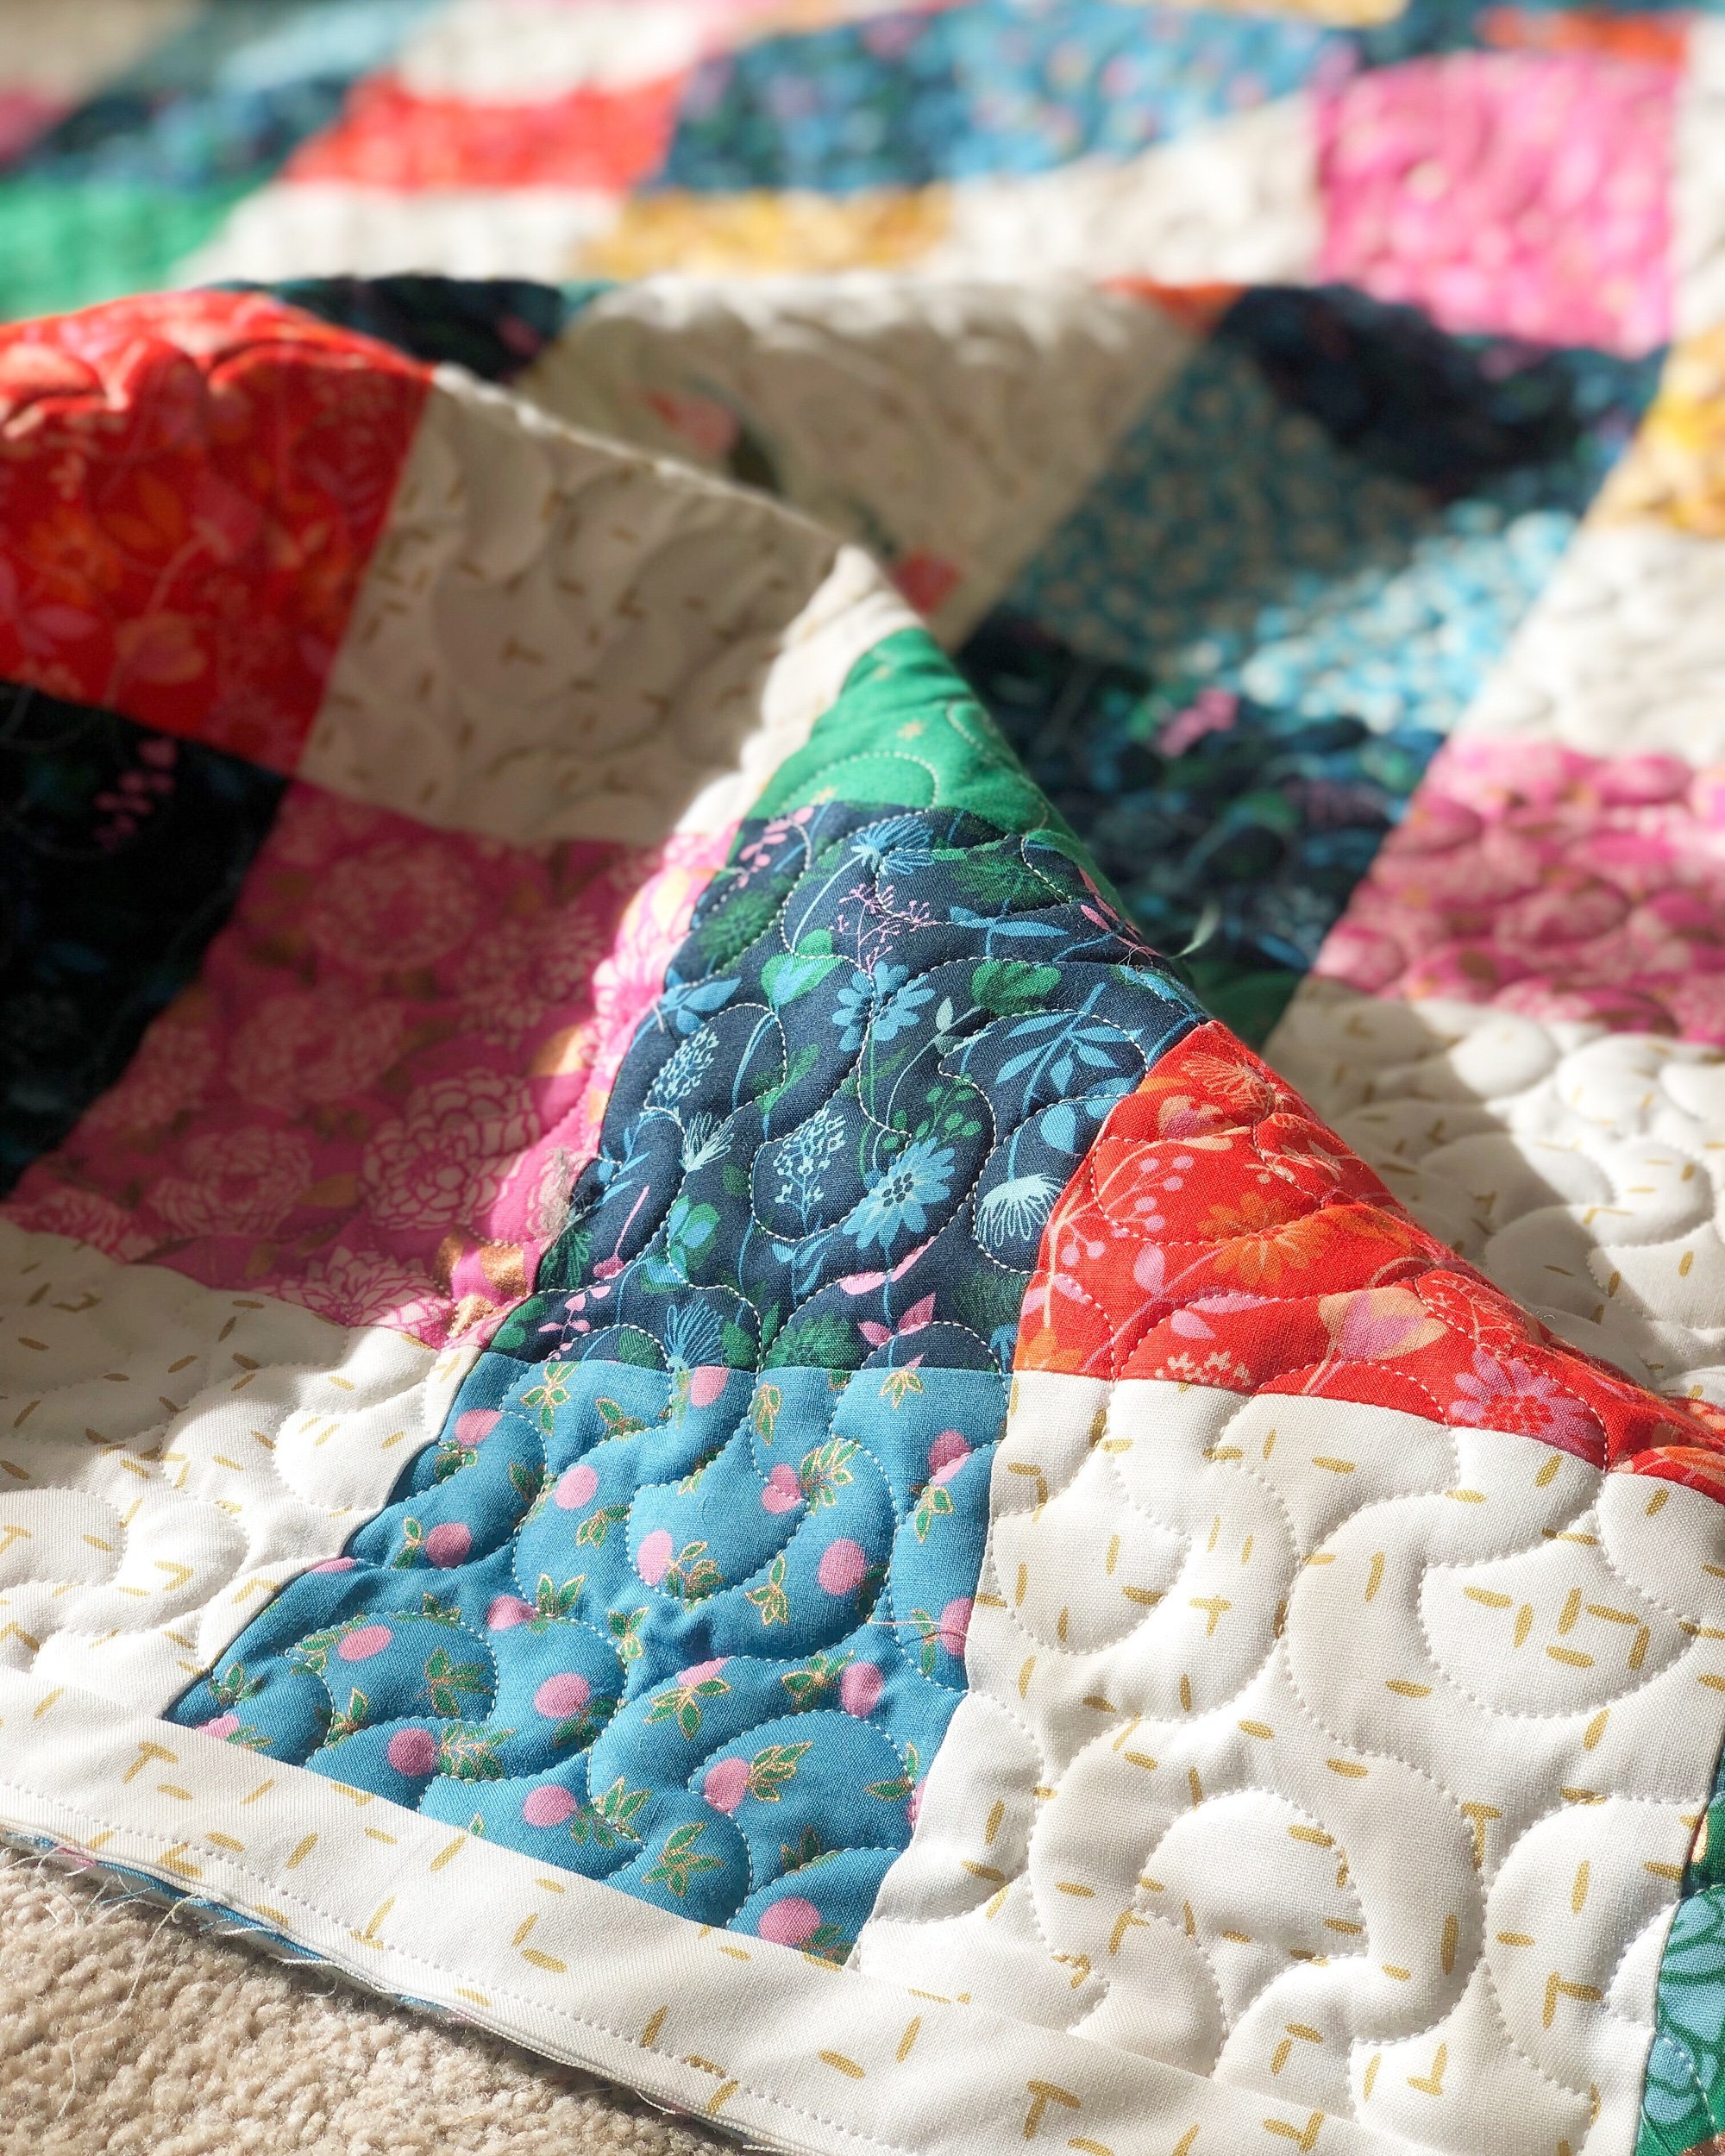
I offer a variety of Edge to Edge designs, which are quilted by my computer. Prices for edge to edge quilting start at $.03 a square inch, and go up to $.04 a square inch depending on the desired density of the design, with a $50 minimum per item quilted. I already quilt designs smaller than the suggested design size, to the appropriate scale for the quilt. However, upon request I am happy to quilt more densely which could increase the price up to $.04 a square inch. Thread is additional charge at $1 per bobbin, and variegated is $2 per bobbin. I charge extra for changing thread colors. I’m adding new quilting designs all the time, however if you have your eye on a design that I don’t have, let me know.
I charge $50 an hour for custom quilting.
I carry a few different kinds of batting. Batting prices are constantly changing, they currently range in price from $11.00 a yard to $18.50. I offer high quality 8020 cotton/poly blend, 4 oz and 6 oz 100% bamboo, and I’m happy to buy wool batting from a local shop, they are all natural color.
I use Omni thread on my machine. If you have a particular color you’d like, we need a little extra time to get that ordered.
I do accept rush quilting with an additional rush fee, which starts at $100 and goes up depending on the time, size of the quilt, and how extensive the quilting is.
Below is a button for you to print a PDF, called “Machine Quilting Request Form”, fill it out and send it with your quilt. Push the black button below and a window should open up, and then you can print it. Contact me at quiltingit@gmail.com for my address and to verify when would be a good time to send your quilt. I don’t want to be out of town when your quilt arrives, and have it sit on my front porch until I return. I also request that you email me the tracking information, so I can keep an eye out for it.
NOTE: for those of you shipping quilts, please let me know if you’d like insurance when your quilt is shipped back to you.
Let me know if you have any questions. I would love to quilt for you!!
Tips For Prepping Your Quilts Before Machine Quilting
I love what I do!! I am so grateful that I get to quilt so many incredible quilts!! Thanks for giving me that opportunity and supporting my small business. I want you to love the end result of your quilt after it arrives back home. There are some easy things that you can do as you make and then ready your quilt for quilting.
Quilt Tops
Please press your quilt top well. I prefer that seams are pressed to one side and pressed flat. If you have bulky seams I suggest pressing seams to opposite sides or pressed open when necessary to avoid the bulk. Seams that are pressed open actually expose the thread and weaken it. That is why I encourage quilters to press their seams to one side.
Please trim your threads. The hopper foot, the quilting machine’s sewing foot, can easily get caught on threads.
If your quilt top or backing is directional, please pin a note to the top.
Please fold your quilt top and backing separately, batting too…if you provide your own.
Embellishments are a fun addition to quilts, however they are quite difficult to work with. If it is possible, please add them after quilting is complete. The hopper foot is moving up and down with great power and could break or chip a button or another embellishment. I also can’t quilt within a 1/4th of an inch around the embellishment.
When attaching borders to a quilt, its much easier to get a long piece of fabric and sew it on, trim it by hand with scissors, and do the other sides. Unfortunately, that typically causes very wavy borders. I’ve done that myself. This also happens with sashing, too. Wavy borders means your quilt edges won’t be straight after it’s quilted. I try my best to work with every quilt that I quilt.
Backings
The most important quilt prep is to make sure that your backing is big enough. I request that backings are a minimum of 4” bigger on all sides. If your quilt is 50”x60”, your backing needs to be a minimum of 58”x68”. If it is bigger that’s okay. When backings are huge they tend to sag on the sides as they are being quilted, so don’t go too big. Backings need to be bigger to pin to the canvases, use side clamps, and allow for the quilts that don’t lay flat.
Minky is great!! If your quilt is too small to use the 60” wide, I highly recommend using the 90” wide. Piecing a minky backing can be frustrating. If you’d like to use minky and need to piece it, please contact me or watch this video that I did years ago: https://youtu.be/g2SDbAcL56g
There are lots of options out there for backings. I will list a few that are okay, and some that are not okay. Quilters cotton, minky, flannel, old sheets, and flannel sheets are great options for quilt backings. Terrycloth, fleece, new or high thread count sheets, silky fabrics, tricot, and other super stretchy fabrics are not the best idea.
Vertical seams in quilt backs are highly discouraged. I know that it sometimes saves a lot of fabric, but it can create major issues during quilting. When a backing with a vertical seam is pinned to the machine, it can be super tight along the seam itself and cause the sides to sag. It also creates extra bulk where the seam is as the quilt is rolled up, which can cause issues when trying to line up a quilting design. If you are going to do a vertical seam, trim the selvages in the seam after you sew the fabrics together. This can release some of the tension along the seam when it is pinned onto the machine table. Horizontal seams are always the way to go, unless you’re working with minky.
I highly recommend pressing the seams on your backing to one side. I’ve had some backings have a big stitch length when they are sewn together, and then the seam is pressed open, which allows the batting to show through.
When choosing a backing fabric, choose one that coordinates with the front nicely. I use the same thread in the bobbin as I do on top, and I try to make the thread blend nicely with the top…and I always love it when the thread blends nicely on the backing, too. If you choose minky for the backing, I highly suggest getting a color that will blend well with it. I can’t control how much the fibers pull through. Some designs work great, and you won’t see much pull through, and some just pull through the fibers.
Square backings!!! This is another extremely vital tip. I love it when my clients leave the selvages on their backings. Selvages are straight nearly 100% of the time. I need an exactly straight edge to pin to the canvas’ on my machine table. The selvages will not be visible on your quilt backing when your quilt is trimmed, because an inch of both the top and bottom of the quilt backing is pinned to the canvas. The sides also need to be cut straight. I like to use clamps on the sides to prevent puckering on the backing as I quilt, and it is difficult to use a clamp on a backing that has been cut roughly with scissors. Sometimes after backing pieces are sewn together, one piece grows and is longer than the other piece. It should be trimmed to line up with the shorter piece. It can be difficult to find the center of a backing when the edges are crooked. Please take the time to straighten up those edges. Here is a blog post that talks more about this, with pictures.
Pressing backings is so important, especially to get rid of that nice crease down the center from being on the bolt.
Batting
If you provide batting, that is fine. I typically cut batting a minimum of 6” wider and 6” longer than the quilt top. It’s okay if its bigger, or longer. Quilts stretch sometimes or aren’t always straight, so those extra inches come in handy.
If you have scraps of batting and want to stitch them together, that’s fine, but I suggest just doing that with smaller projects, nothing bigger than a baby quilt. You can use a needle and thread and whip stitch them together, which isn’t very secure, or you can butt the edges up together and use your sewing machine and zig zag it. That is what I have done. Its more secure to zig zag it, and it’s going to last longer in the long run…especially for quilts that are going to get washed a ton.
Double batting is such a fun way to enhance the quilting on your quilt. I’ve done that on several of my own quilts that I’ve custom quilted. I recommend doing a bamboo or 8020 cotton/poly blend on the bottom layer, and then wool on the top. It helps the quilting pop! I don’t recommend doing two layers of the 8020 cotton poly blend. I did so awhile back on a client’s quilt, and she said it was too stiff.
Polyester batting is notttt my favorite, unless of course it is bonded on the outside. If you can pull the batting apart, don’t use it. It will be lumpy, and you’ll hate it!! Remember the comforters that a lot of us grew up with, that were purchased at the big box stores??? Yeah, bad polyester batting! Lumpy after they are washed. I know there are some great polyester battings, just make sure it is bonded or has a skim to keep it from pulling apart.
Bagged or packaged battings aren’t my favorite either. They tend to have a lot more fold lines in them, and sometimes seem a bit stretched out. My battings come off of a roll. If you do get a bagged batting, let it out of the bag to see if it can relax some before its quilted.
Shipping Quilts
Please notify me when you are shipping a quilt, so I can watch for it and also to ensure that I will be in town when it arrives. I will ask for a tracking number as well.
Please ship your quilt in a bag inside of a box, this helps protect it if the box gets wet or damaged.
I return quilts using USPS, unless UPS or FedEx are requested. All shipping costs are paid by the client. Quilts are returned after the quilting is paid for.
If you’d like your quilt insured, let me know. I typically just use the insurance that comes with the cost of the shipping.
Payment
I accept checks, cash and apple pay at this time. You can easily mail me a check or pay through apple pay, and then I will ship your quilt back to you. Please don’t mail cash.
I’ve been asked over the years to use paypal or other credit card services, however the fees are too much.
There is no down payment required. Payment can be paid in full when the quilt is quilted.
Please pay for quilting within a week of me notifying you that your quilt is finished.
Quotes
Check under the pricing info, at the top of this page. You will see the edge to edge prices.
Jean Quilts
I am very selective when I quilt anything with denim in it, especially quilts made with jeans. Years ago, while quilting a denim quilt the motherboard on my machine was fried. My machine stopped working. We had to wait weeks for a part and then fix it ourselves. Jean quilts that have seams, pockets, or other bulky parts are too hard for the needle to easily go in and out of, then the machine tends to struggle. I will quilt thin denim that is mixed with other fabrics, so there are no bulky seams.
Please let me know if you have any questions. I would love to quilt for you!