

Client Quilts & Pillows
Good morning! Hope you had a great weekend. This week I’m going to share with you a couple of quilts and then 4 pillow fronts, that I had the pleasure of quilting. This post has lots of pictures, tons of info, videos, and links. I’m just trying to share with you all my tips and tricks. I hope you find them useful.
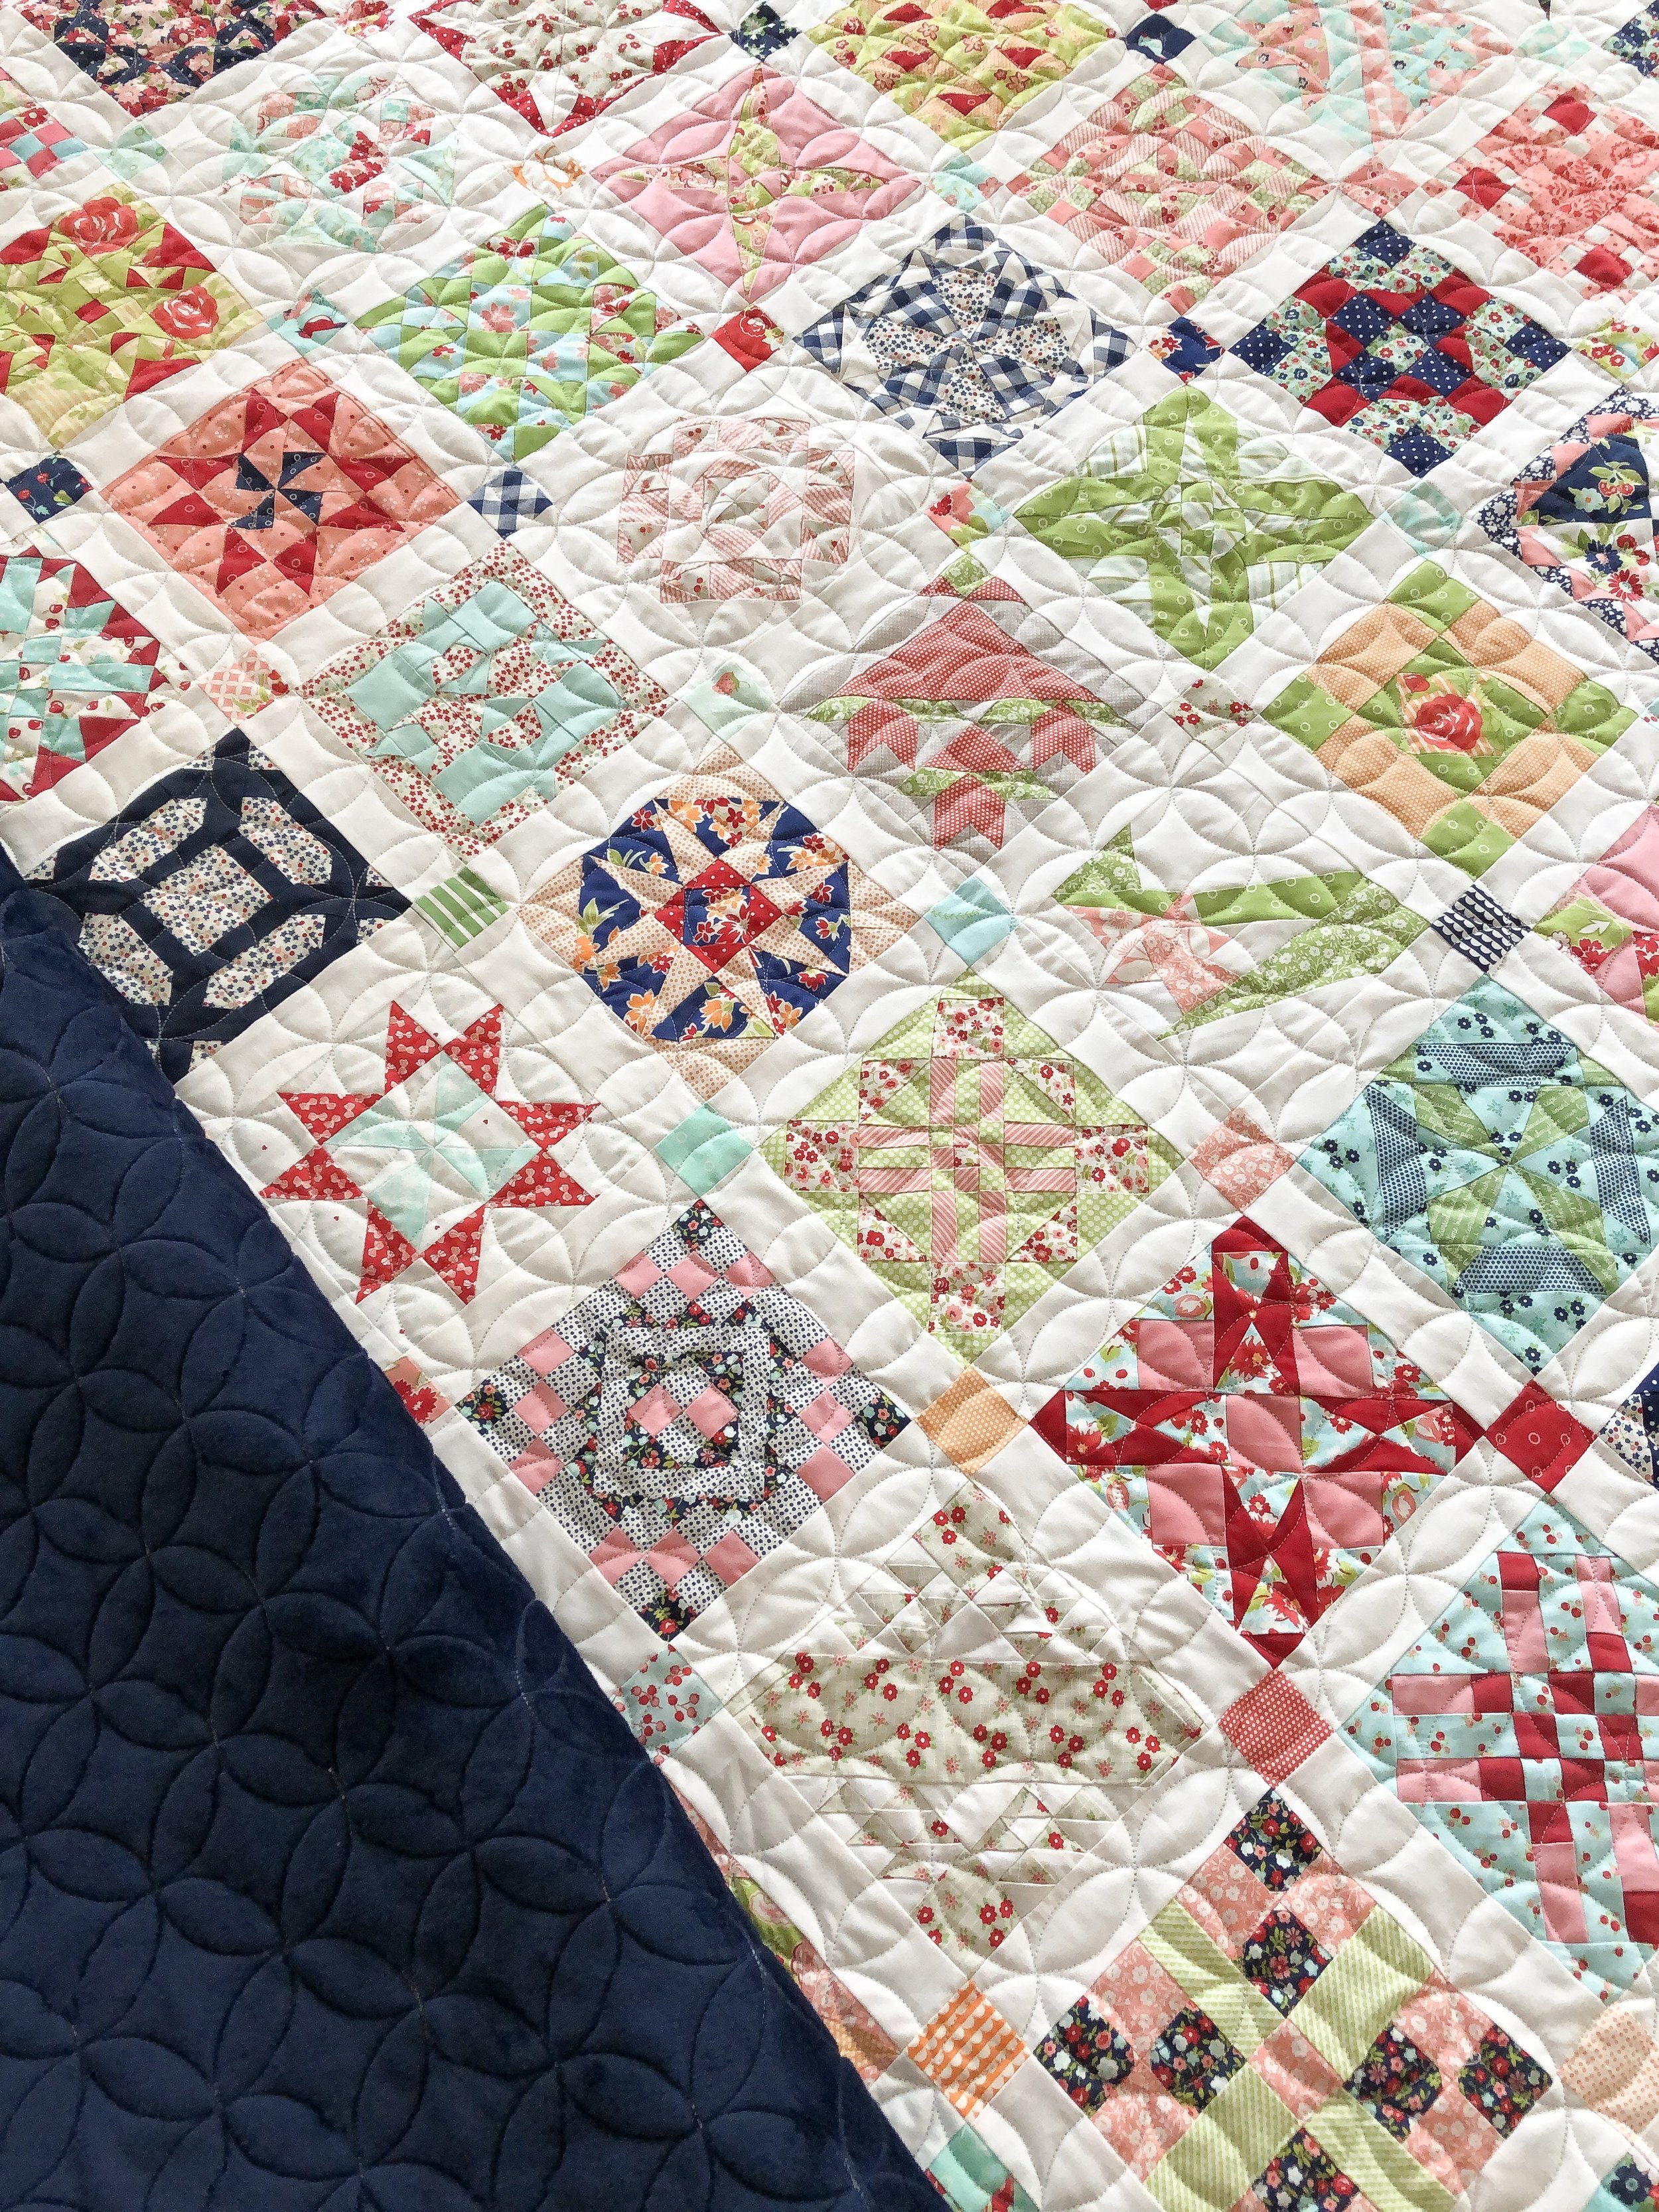
First up, Beth’s quilt!
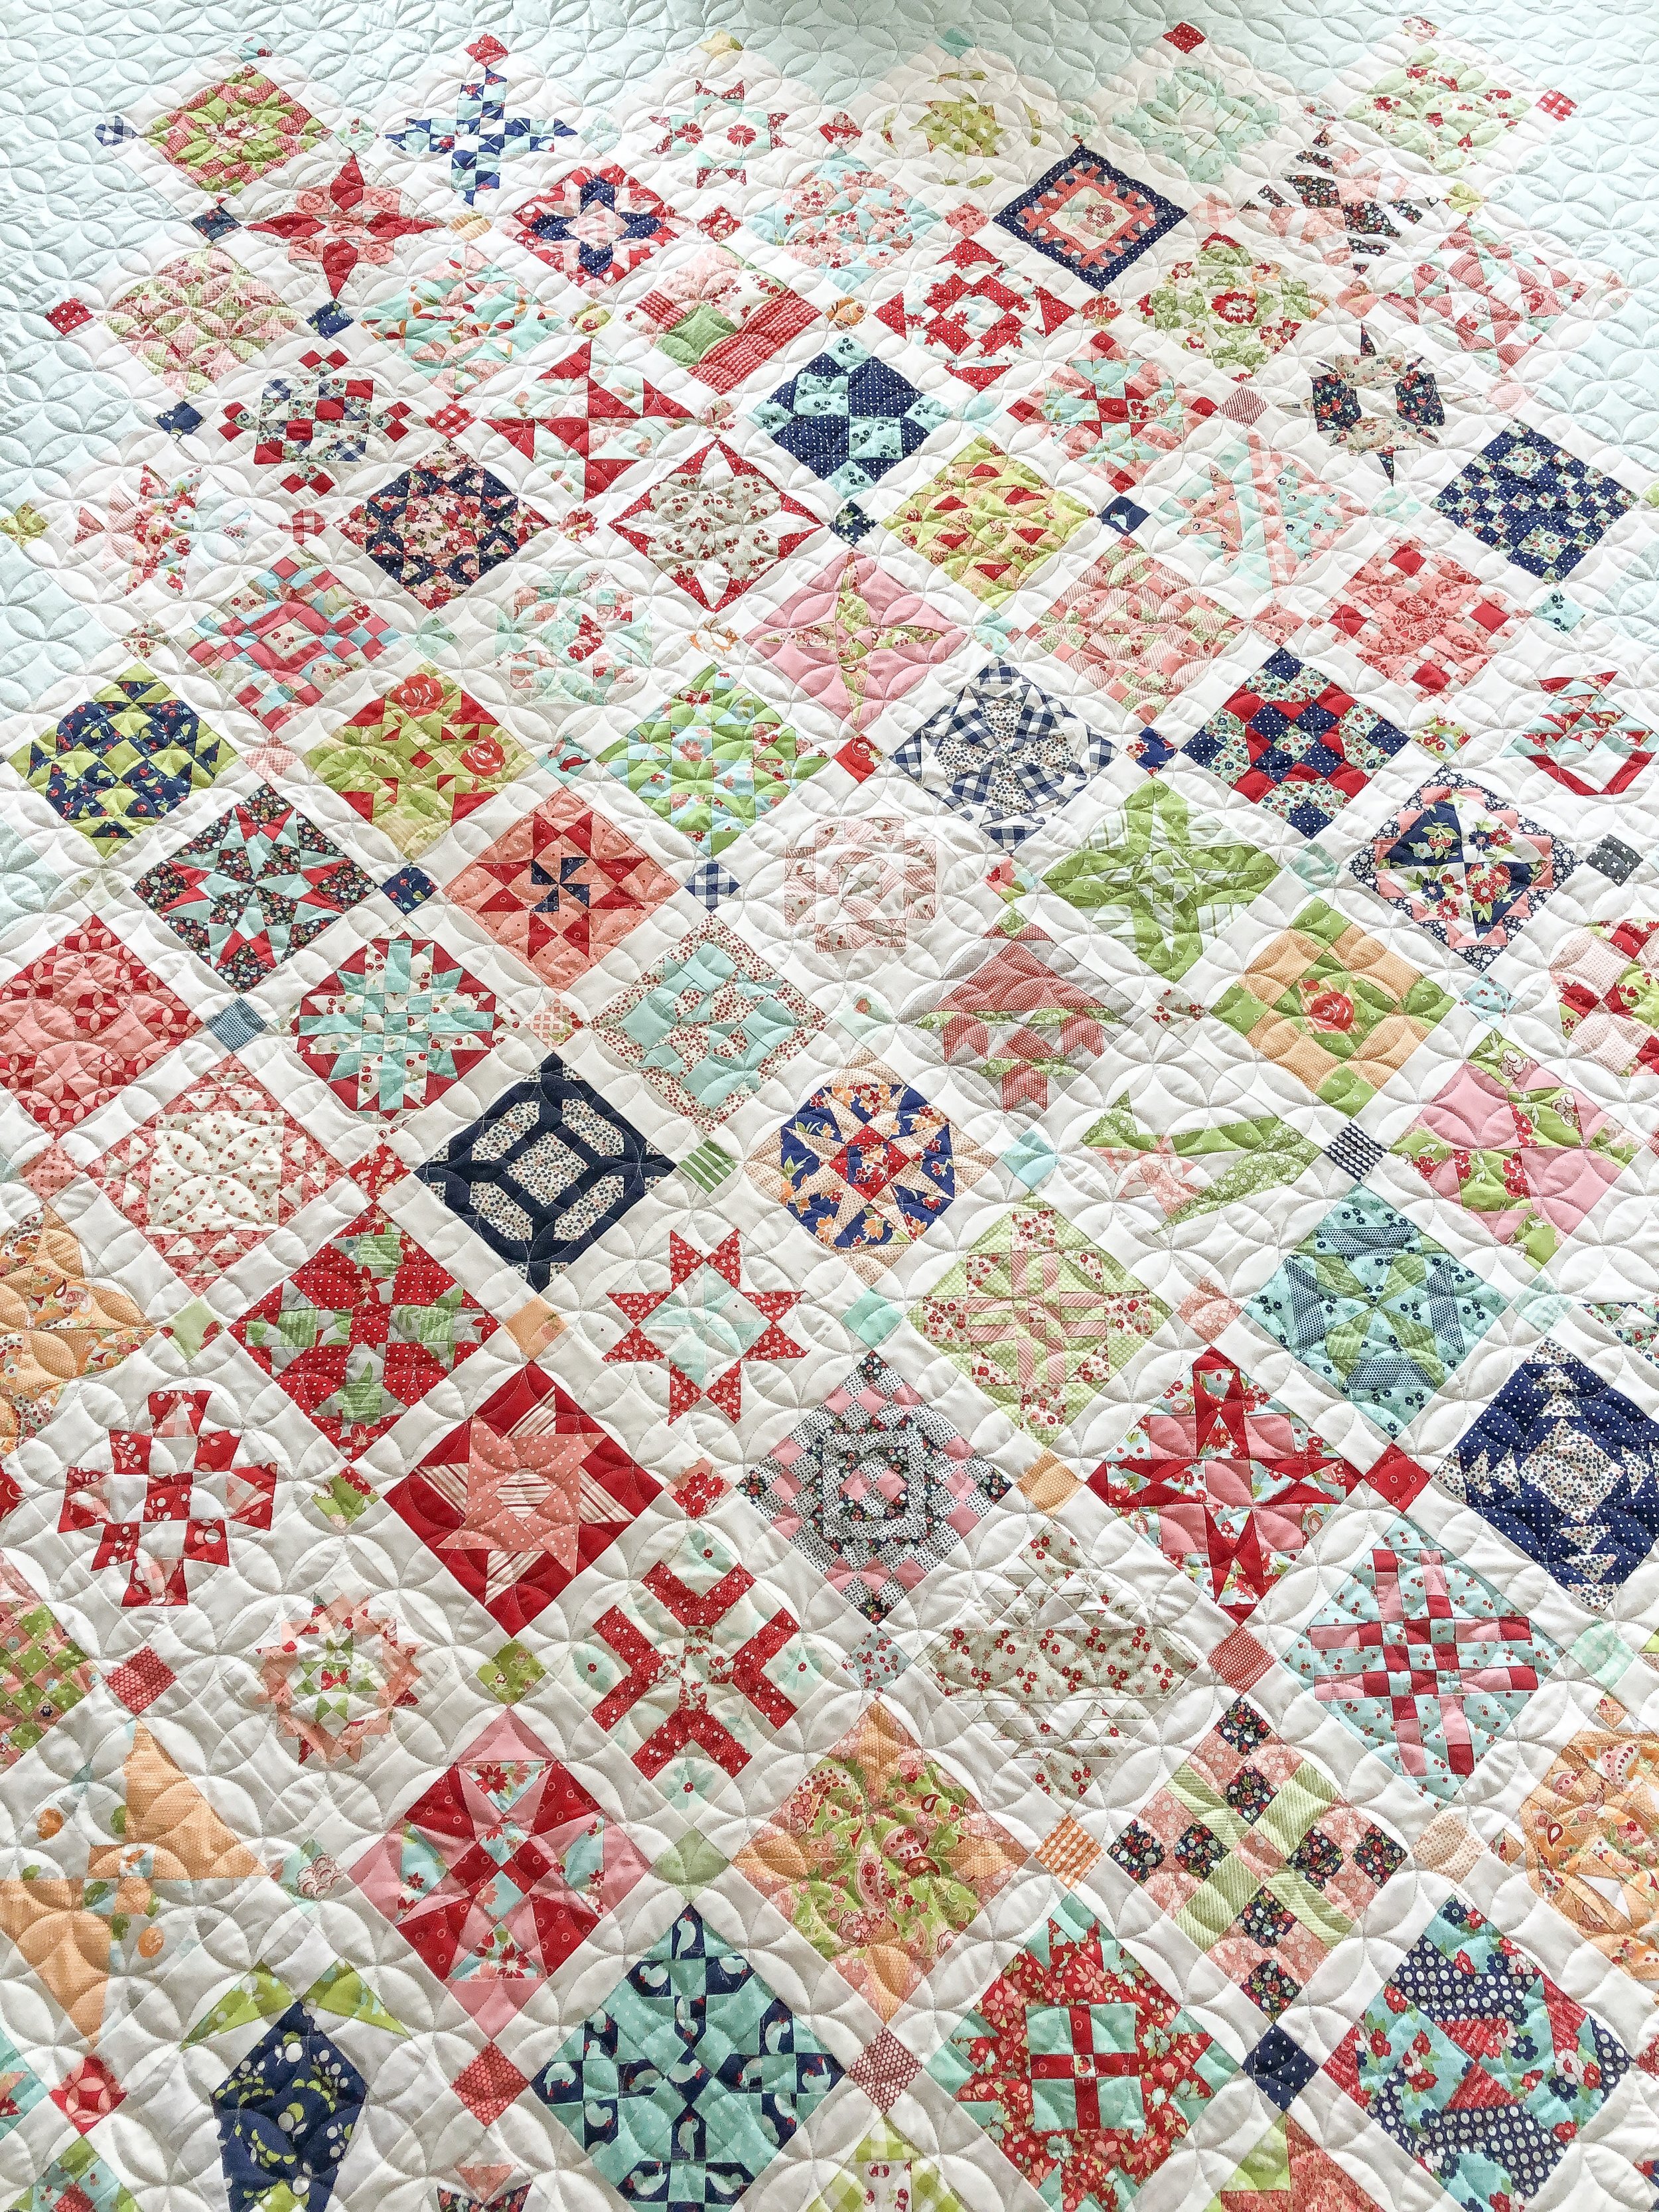
This quilt is amazing, and huge. So big, that I couldn’t get it all in the picture.

Beth used the Farmers Wife book to makes all these blocks. Such a labor of love!! She used all Bonnie and Camille fabrics from Moda. Which is my favorite!!
I sent Beth some options for quilting, and she chose Orange Peel. This design is by Marci Gore from Lily Street Quilts. Go here to check out her design: https://www.intelligentquilting.com/Orange-Peel-E2E-p/mg-orangepeele2e.htm
In the video above I share how I line up digital designs, using my Gammill Statler.
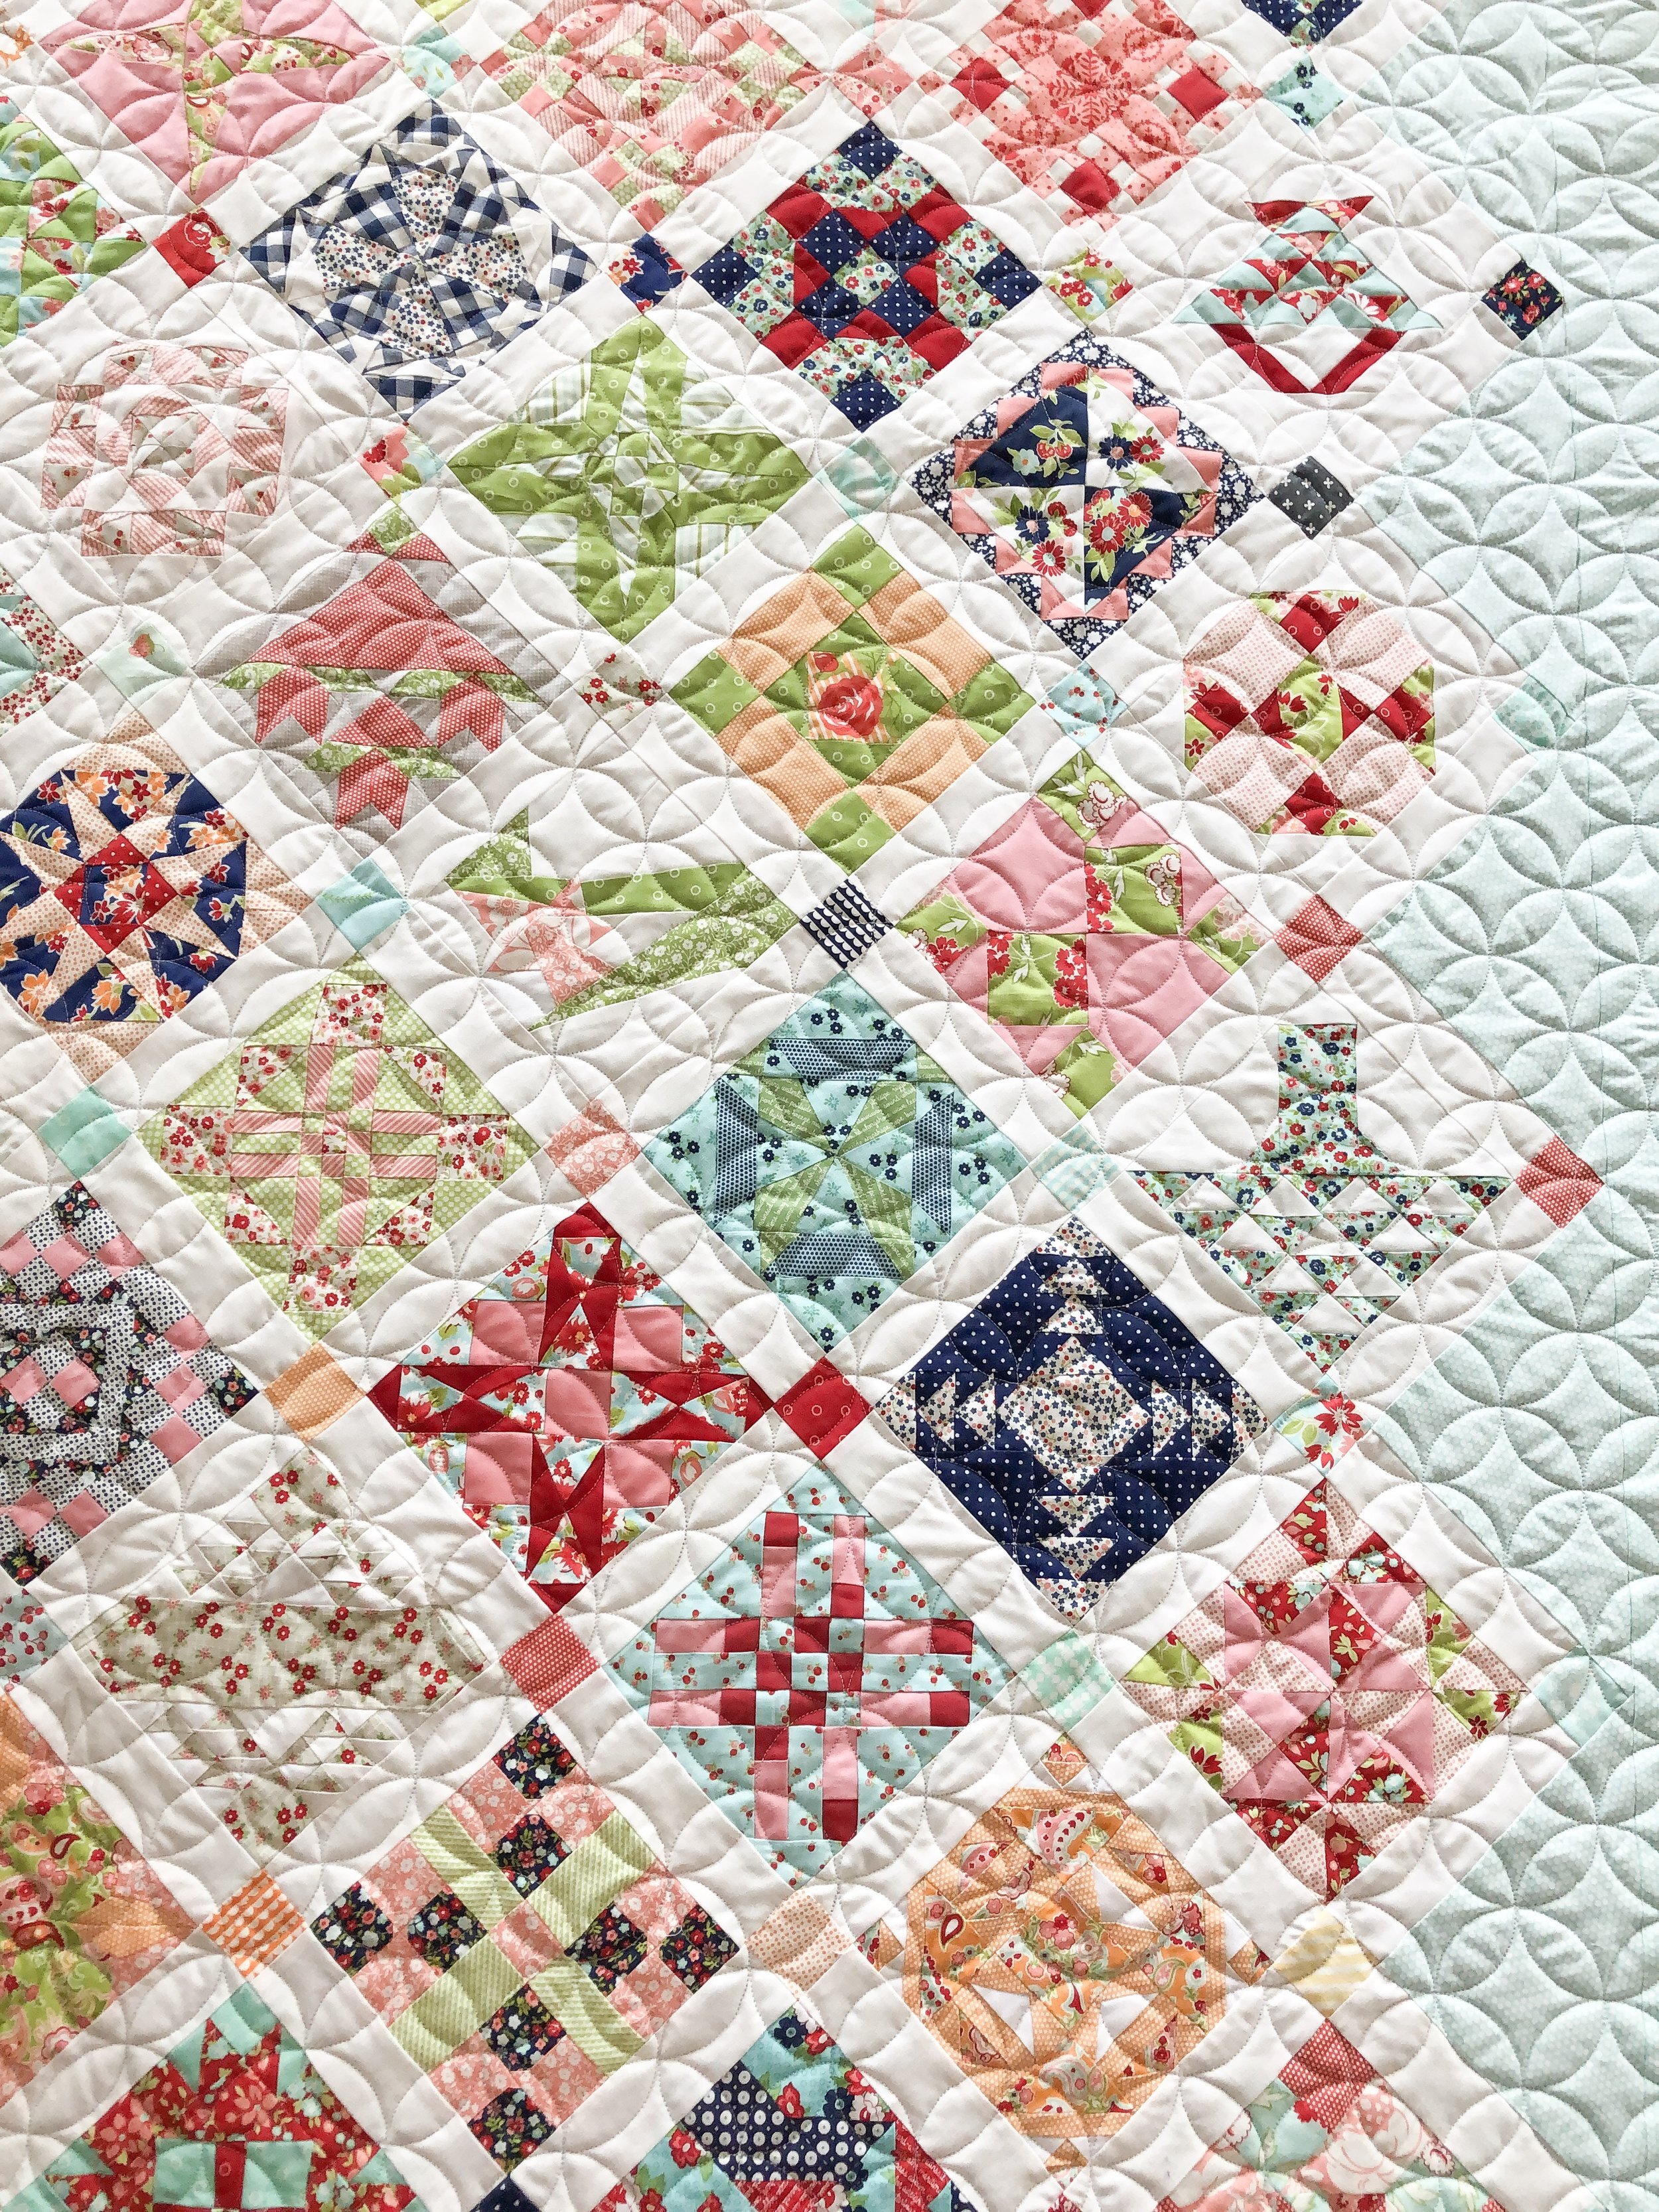
I love the orange peel design on this quilt, it compliments the blocks, instead of competing with them.

I used a white 30 tex Perma Core A&E thread and my favorite Winline 8020 cotton poly blend batting.

Loving this angled picture...and the texture on the minky backing below.
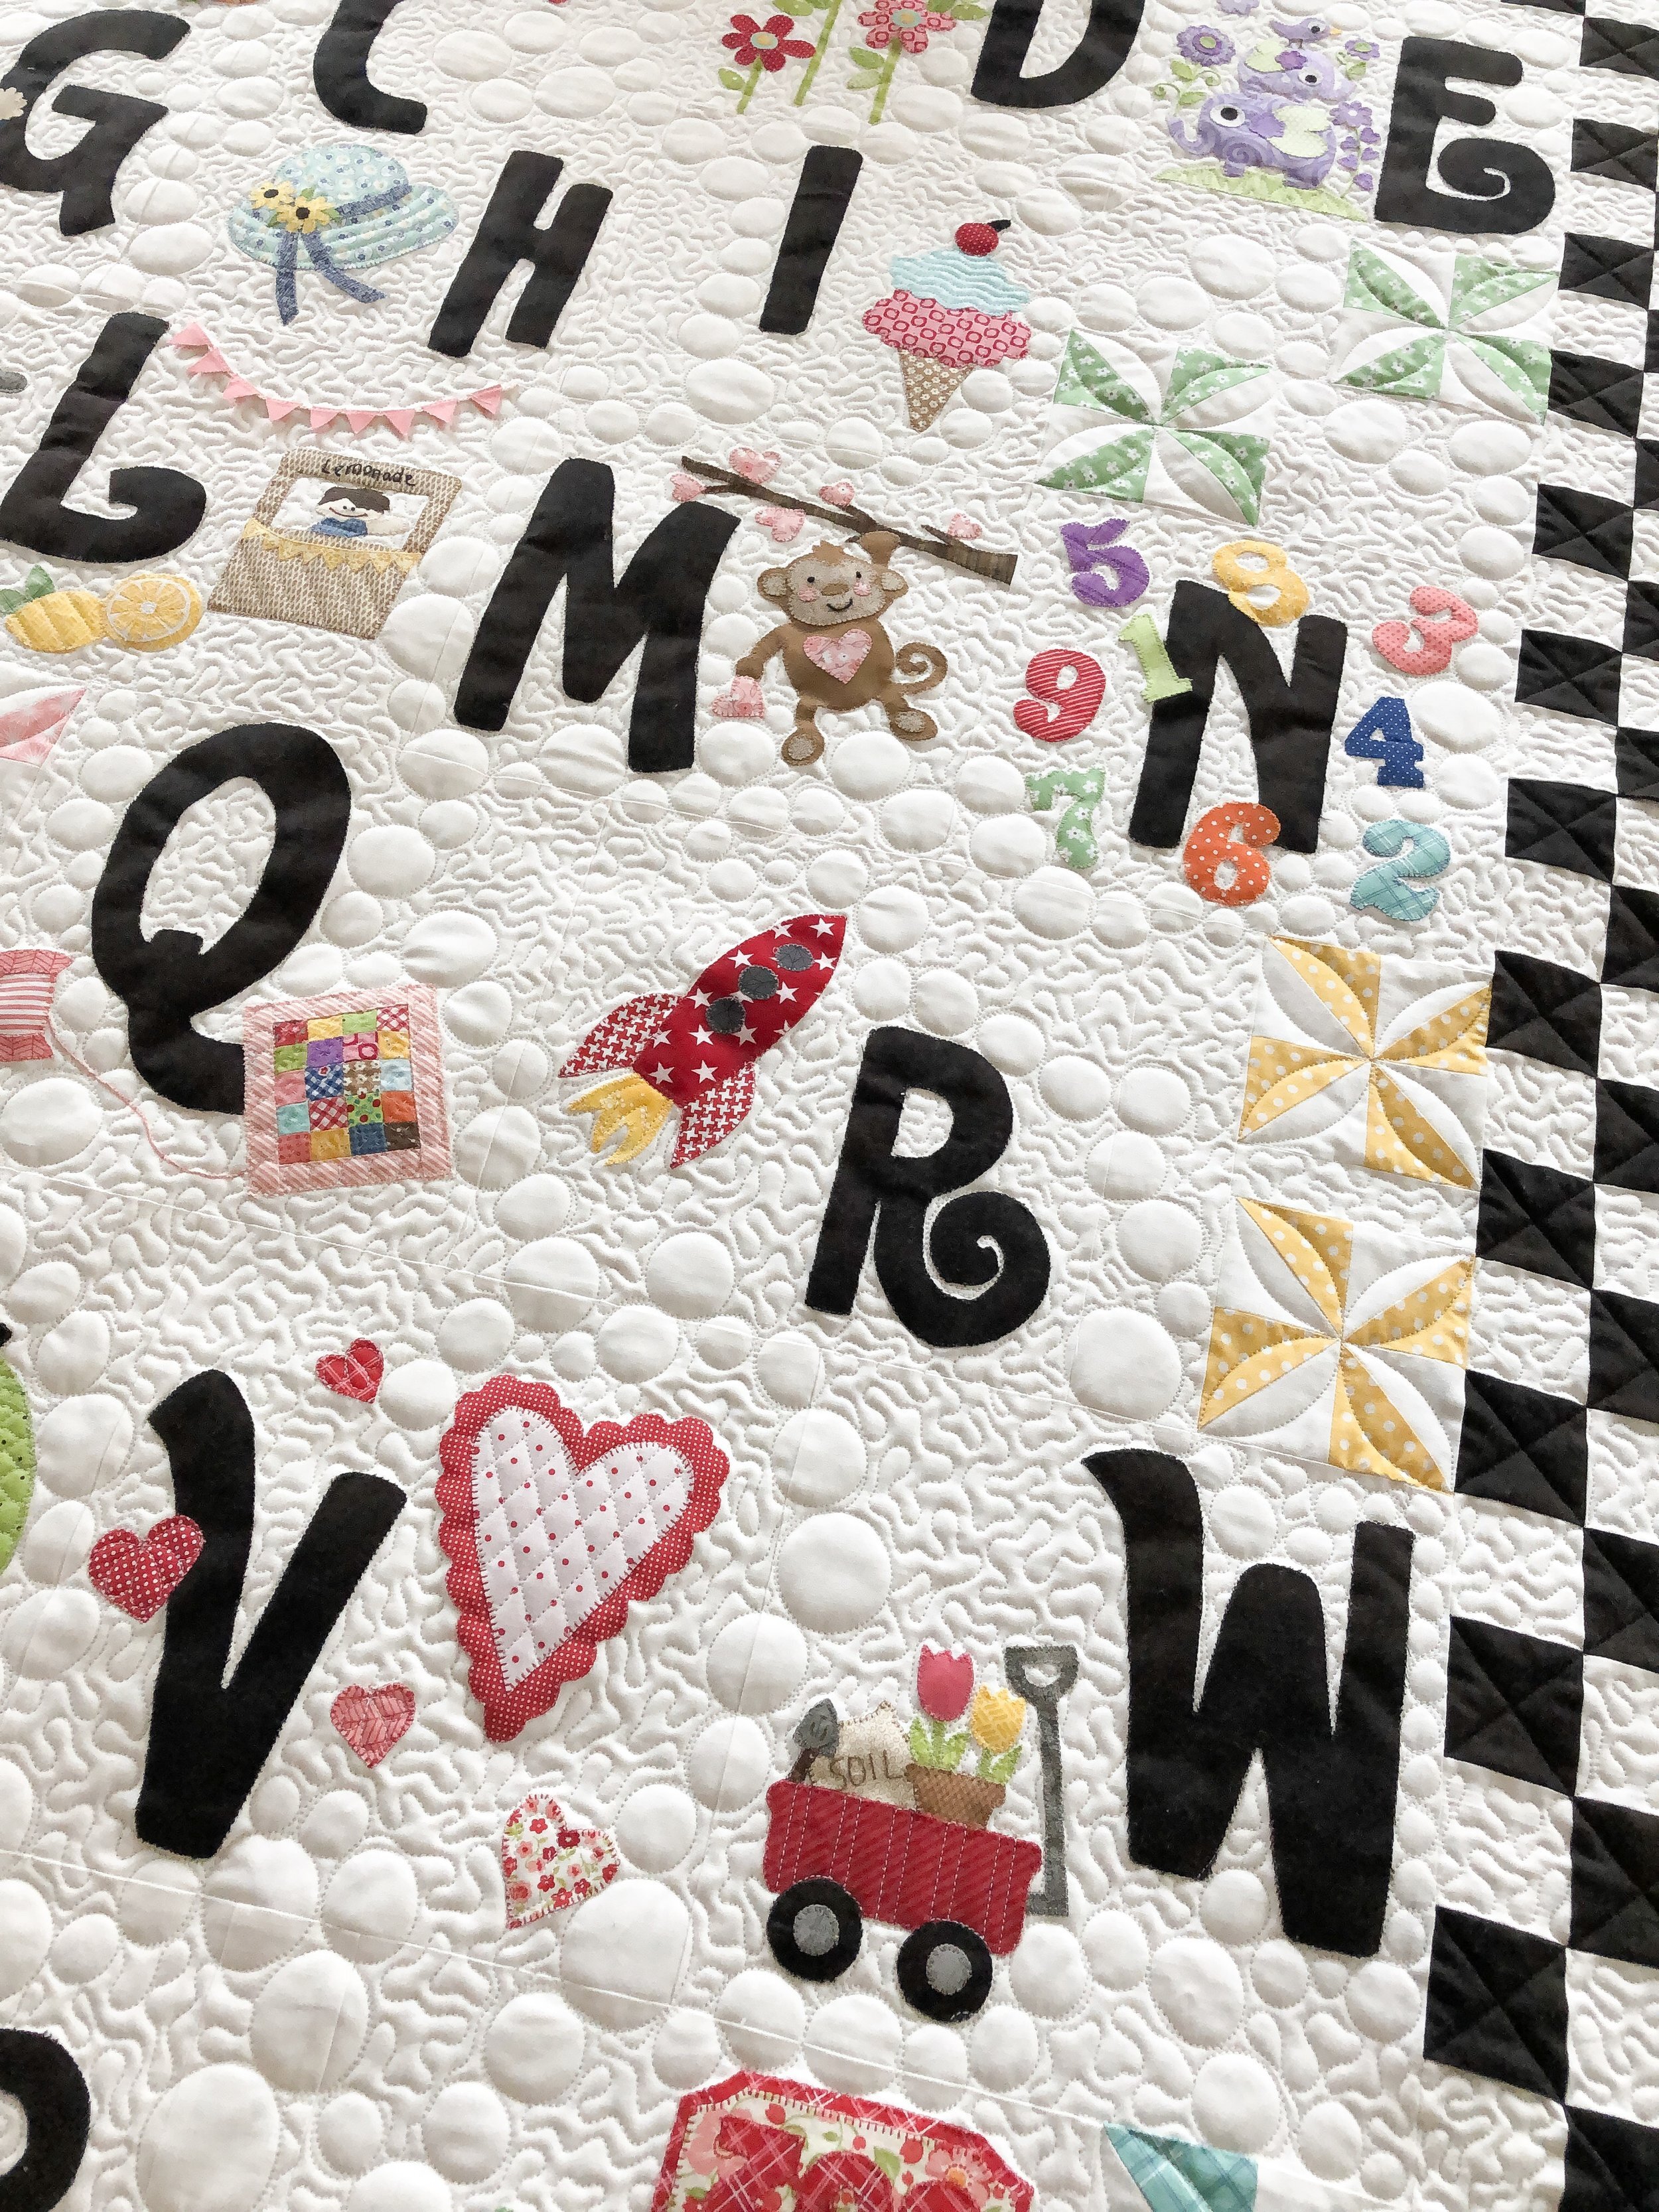
Next up...This incredibly fun quilt made by Joleen.

This pattern is by Angie Peterson, who is in Joleen’s quilt guild.

Joleen requested that I quilt her quilt, like Angie’s was quilted. Bubbles chaining throughout, with stippling in the background to make the bubbles pop. I think it turned out fun!! I also did some light quilting here and there in some of the appliqués, so they lay flat.

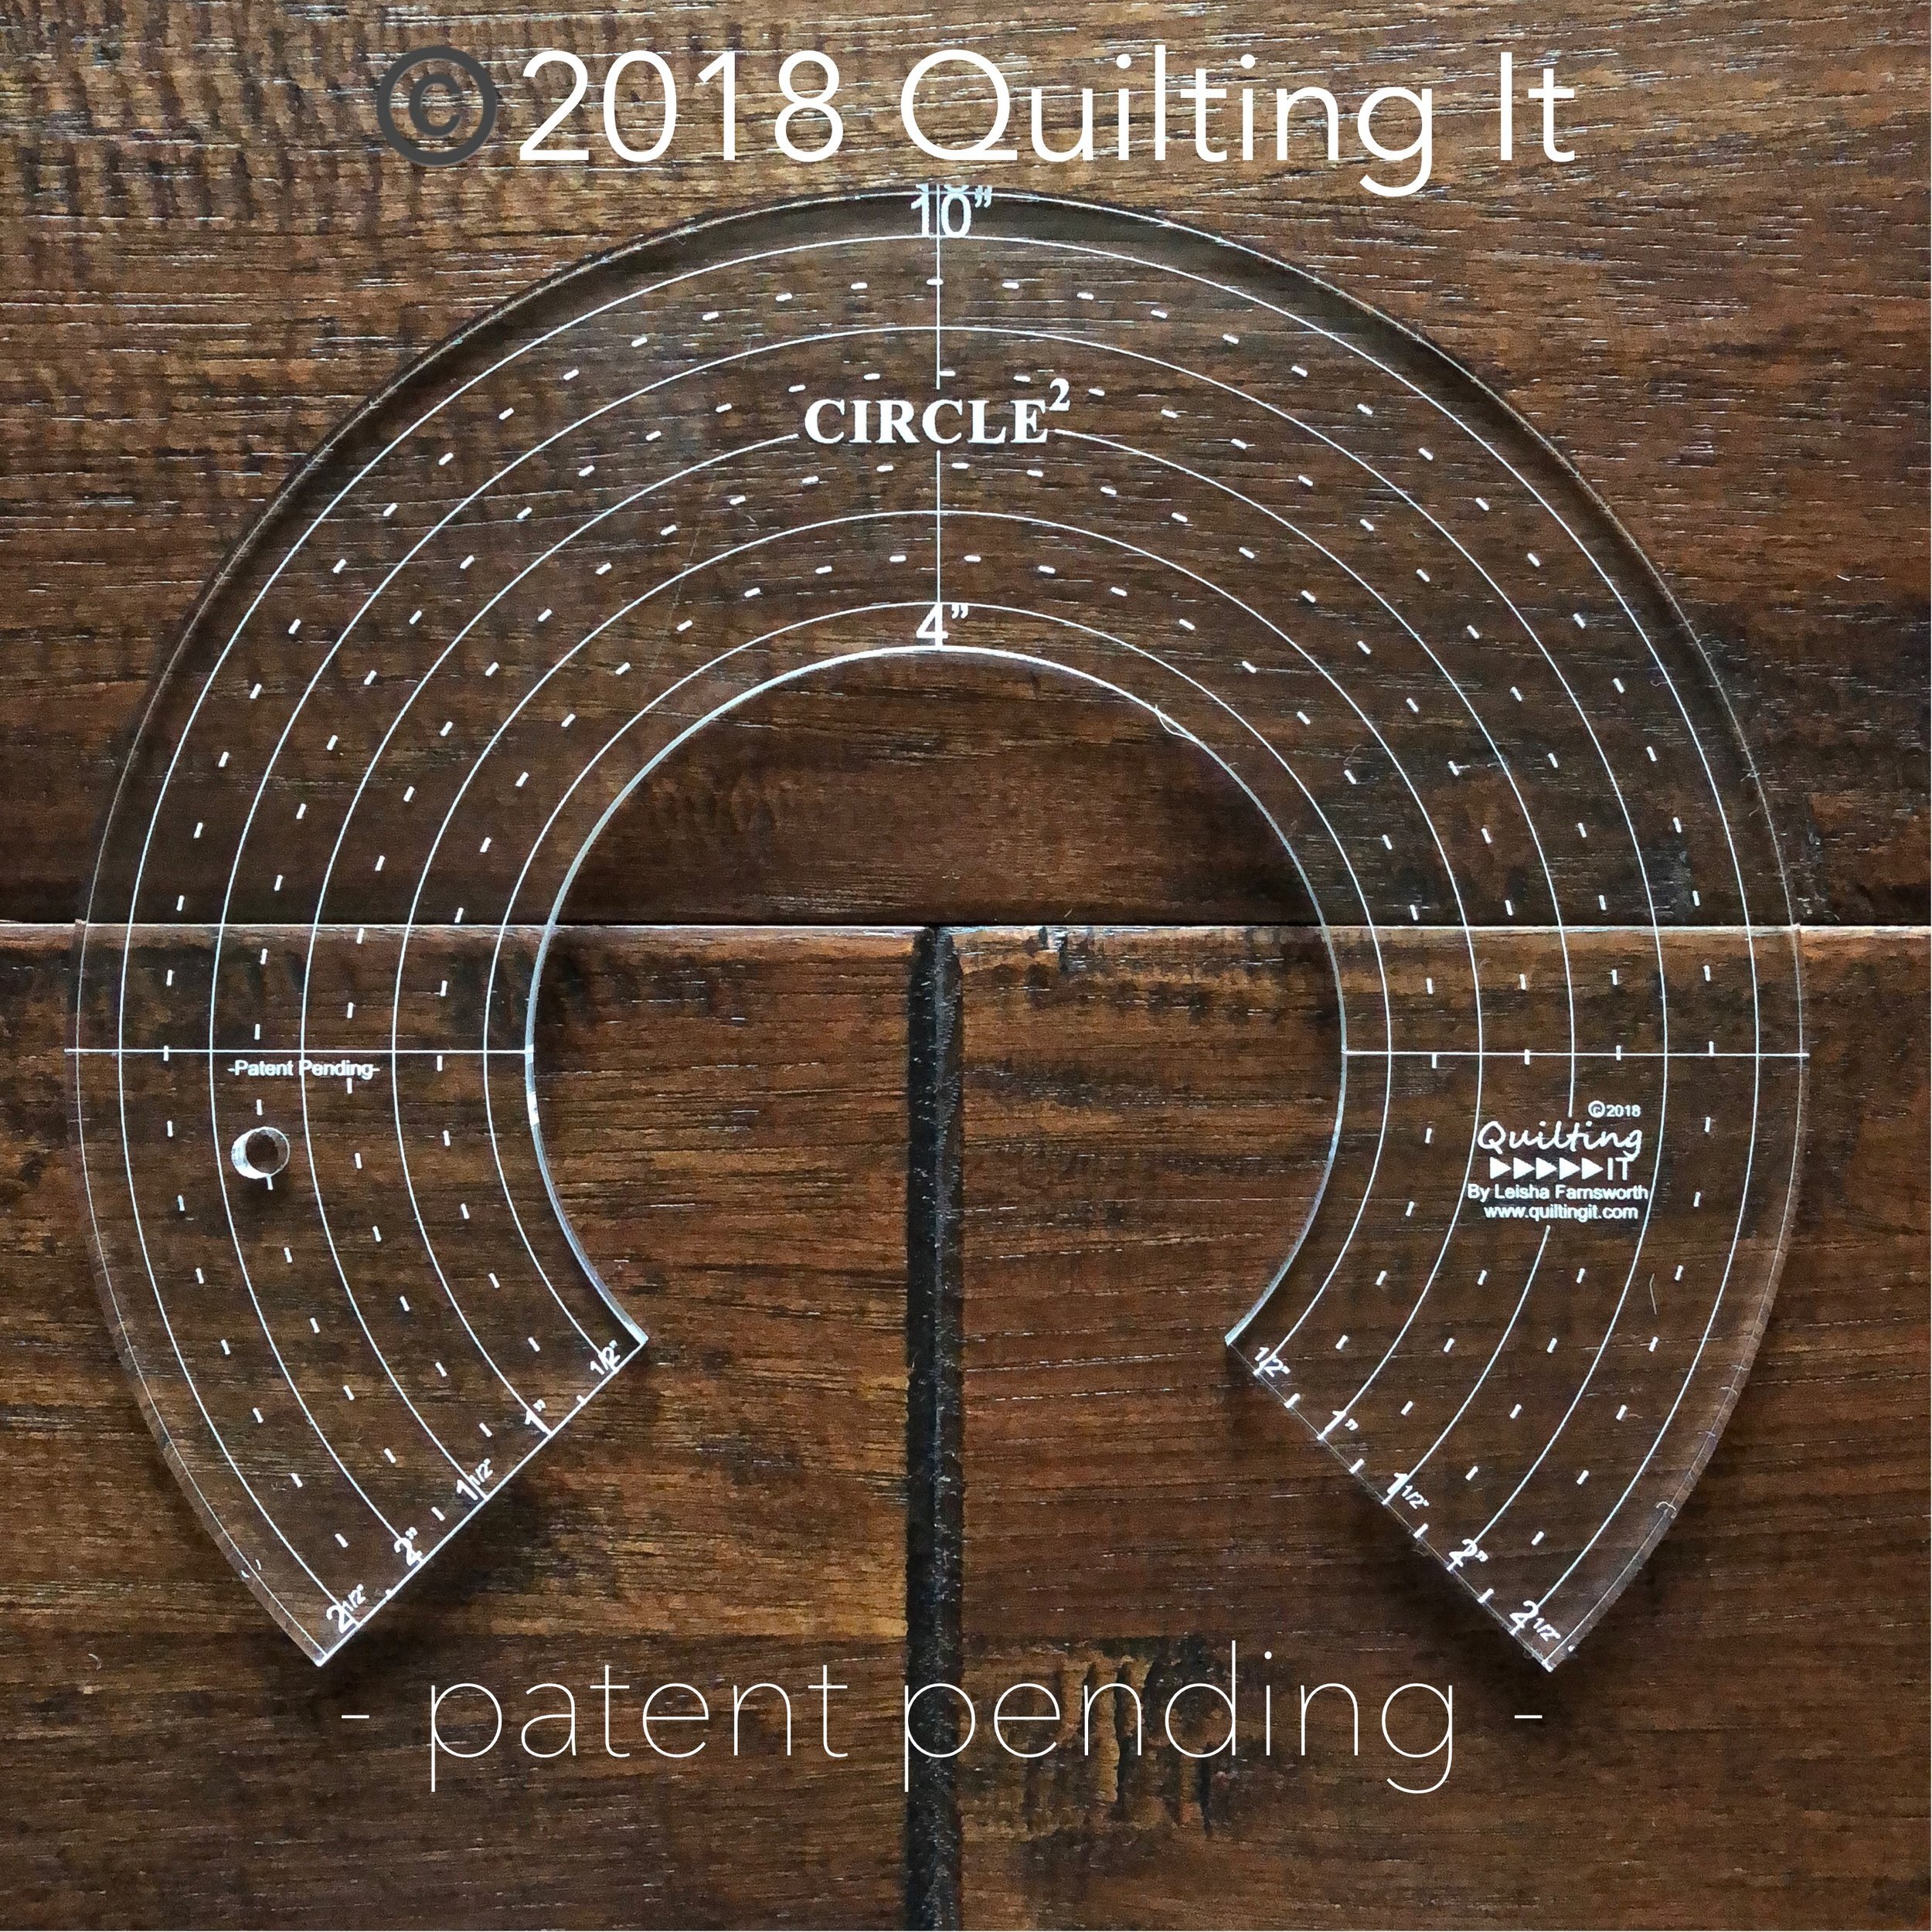
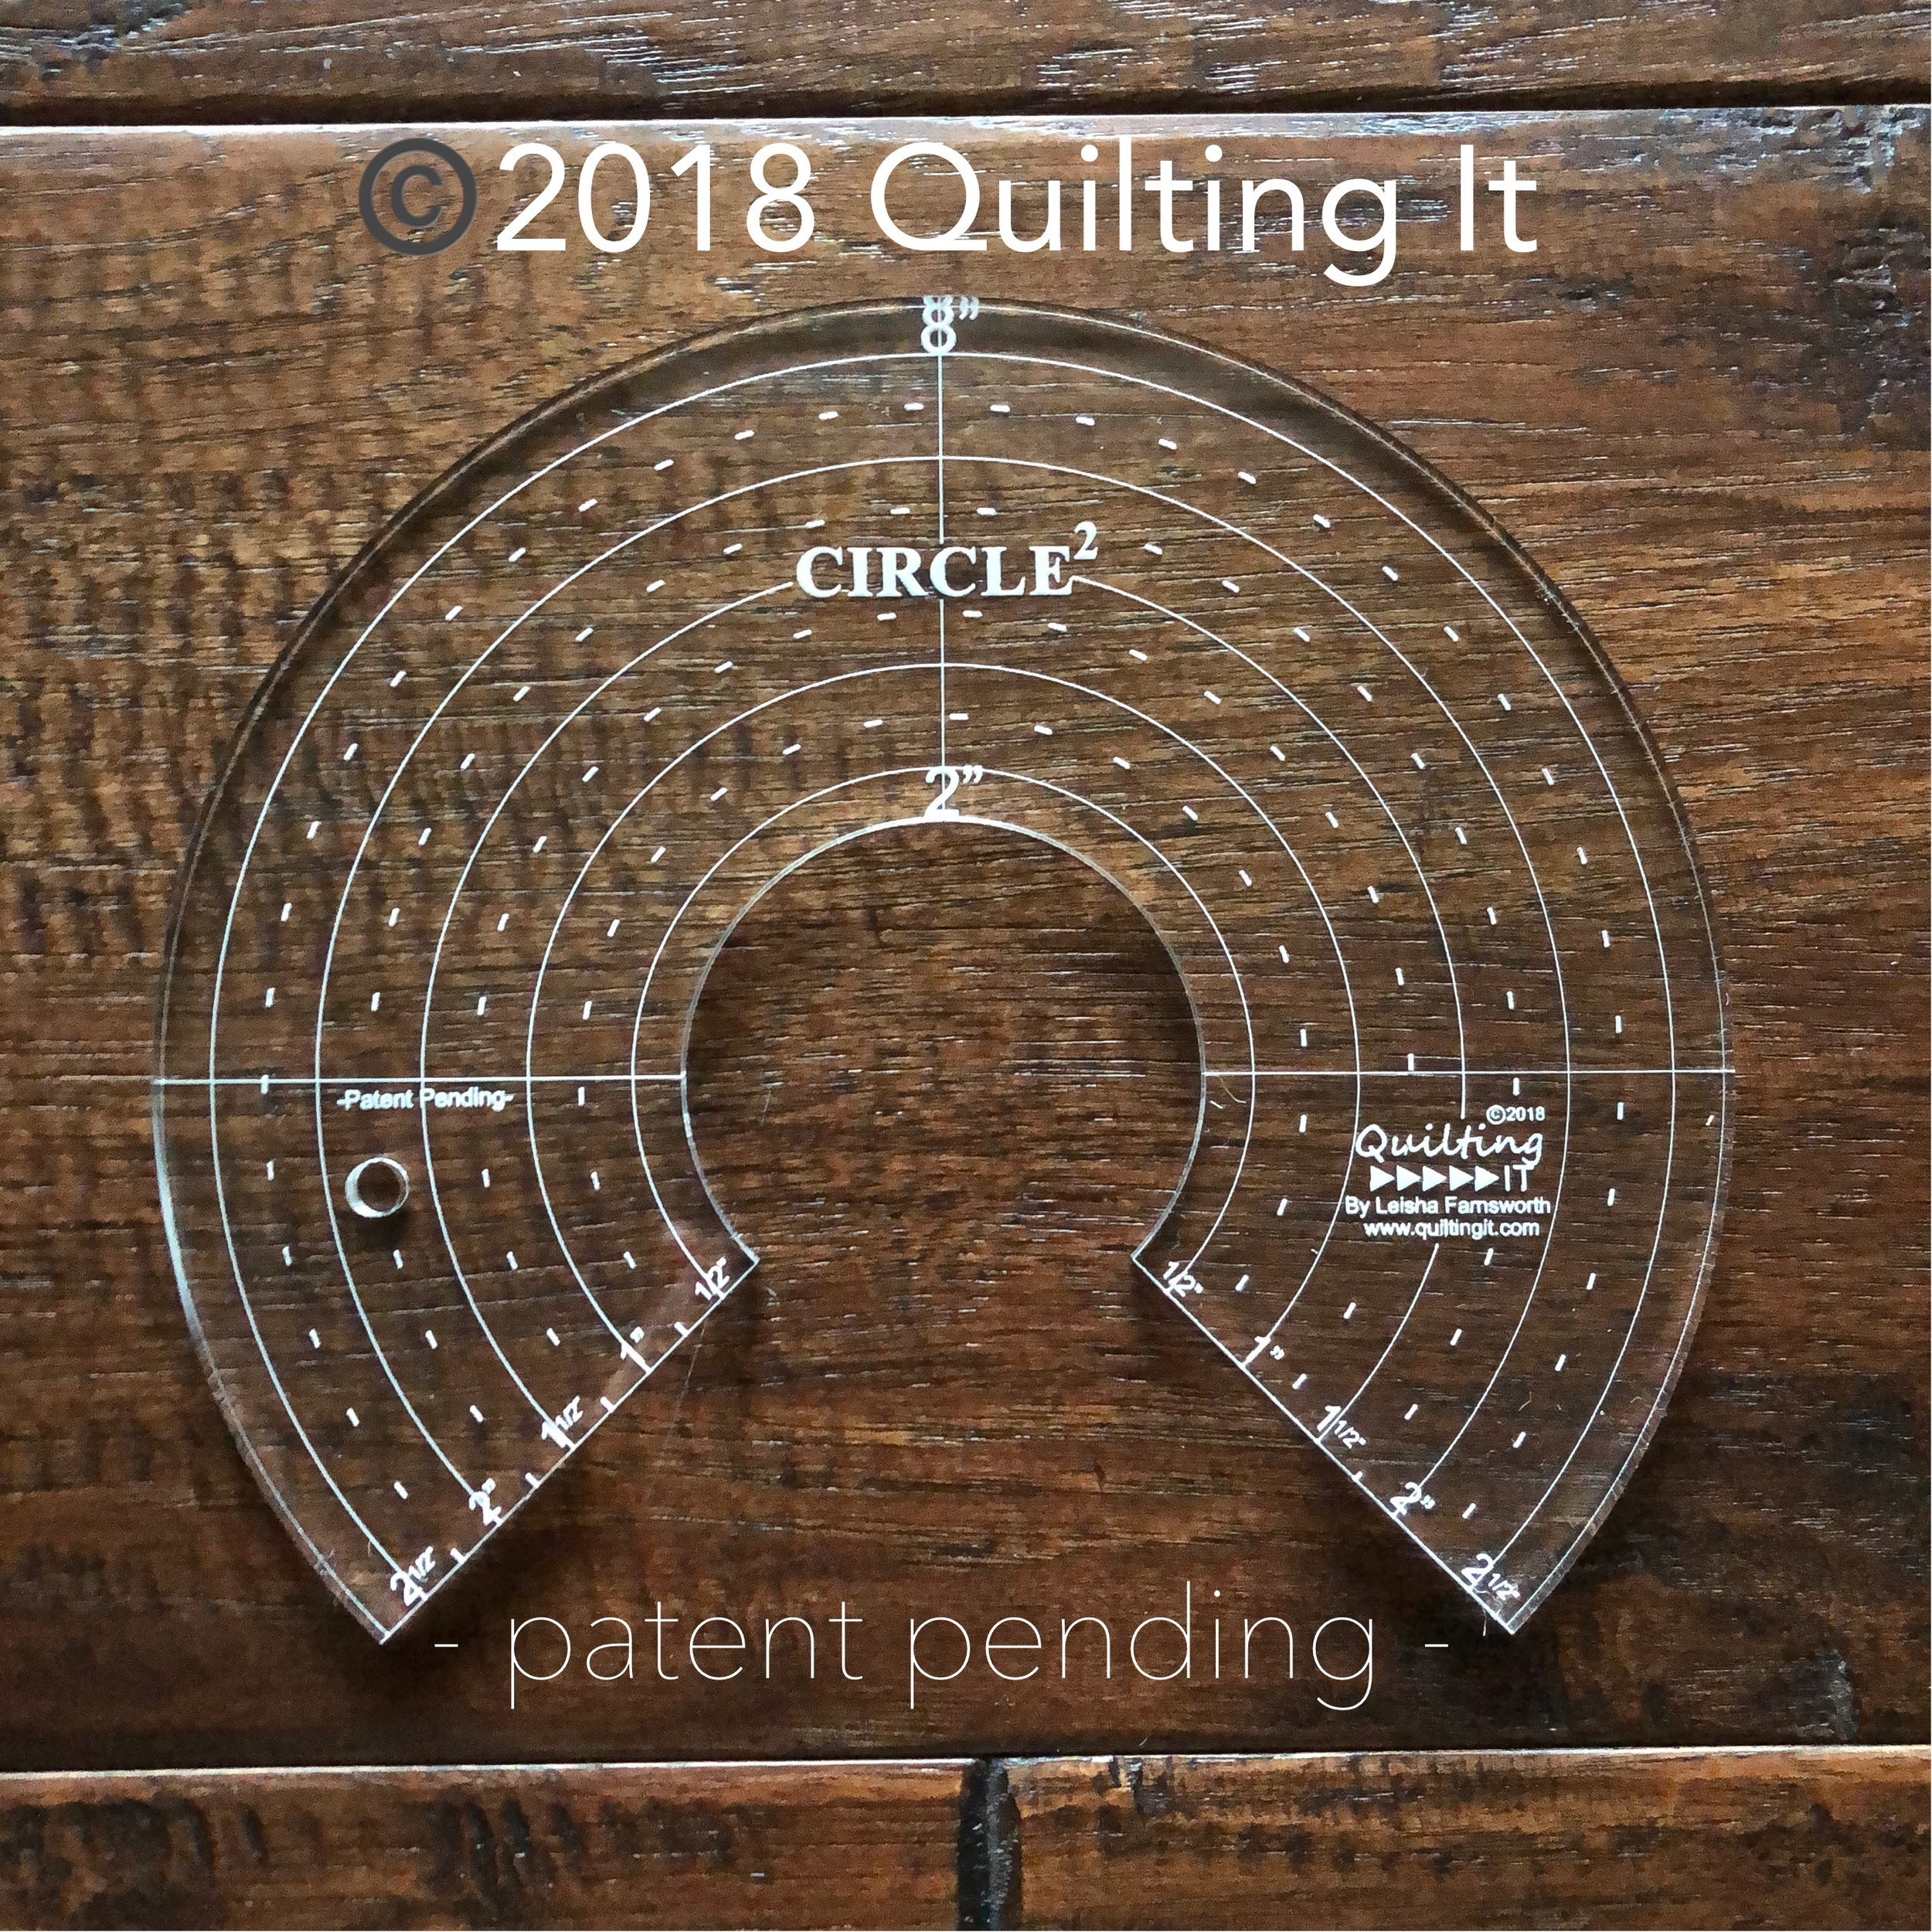
I used my 4” Circle2™ (Circle Squared) machine quilting circle ruler, to quilt the petals in the windmill blocks, as pictured to the right of the letter Z. My rulers are available here: https://www.quiltingit.com/shop?category=Rulers
This is the first of 4 different sizes of my Circle2™ rulers, that I used to quilt these client quilts or pillows.
I used a white and black 30 tex A&E Perma Core thread, in the white and black spots. I also used my favorite 8020 cotton poly blend batting from Winline. I used an Edge ruler from Linda at thequiltedpinapple.com to quilt the lines in the black squares, and in some of the appliqués.
I’m loving the circles dancing around the quilt!
Next up... Sherry made these 4 super cute pillows. My Girlfriends Quilt Shoppe, located here in Logan Utah, has a monthly pillow club. They are providing the patterns and fabrics. If you’d like to join, give them a call...435-213-3229 I’m not sure the cost or if they still have these available, but I’m sure they can help you out!
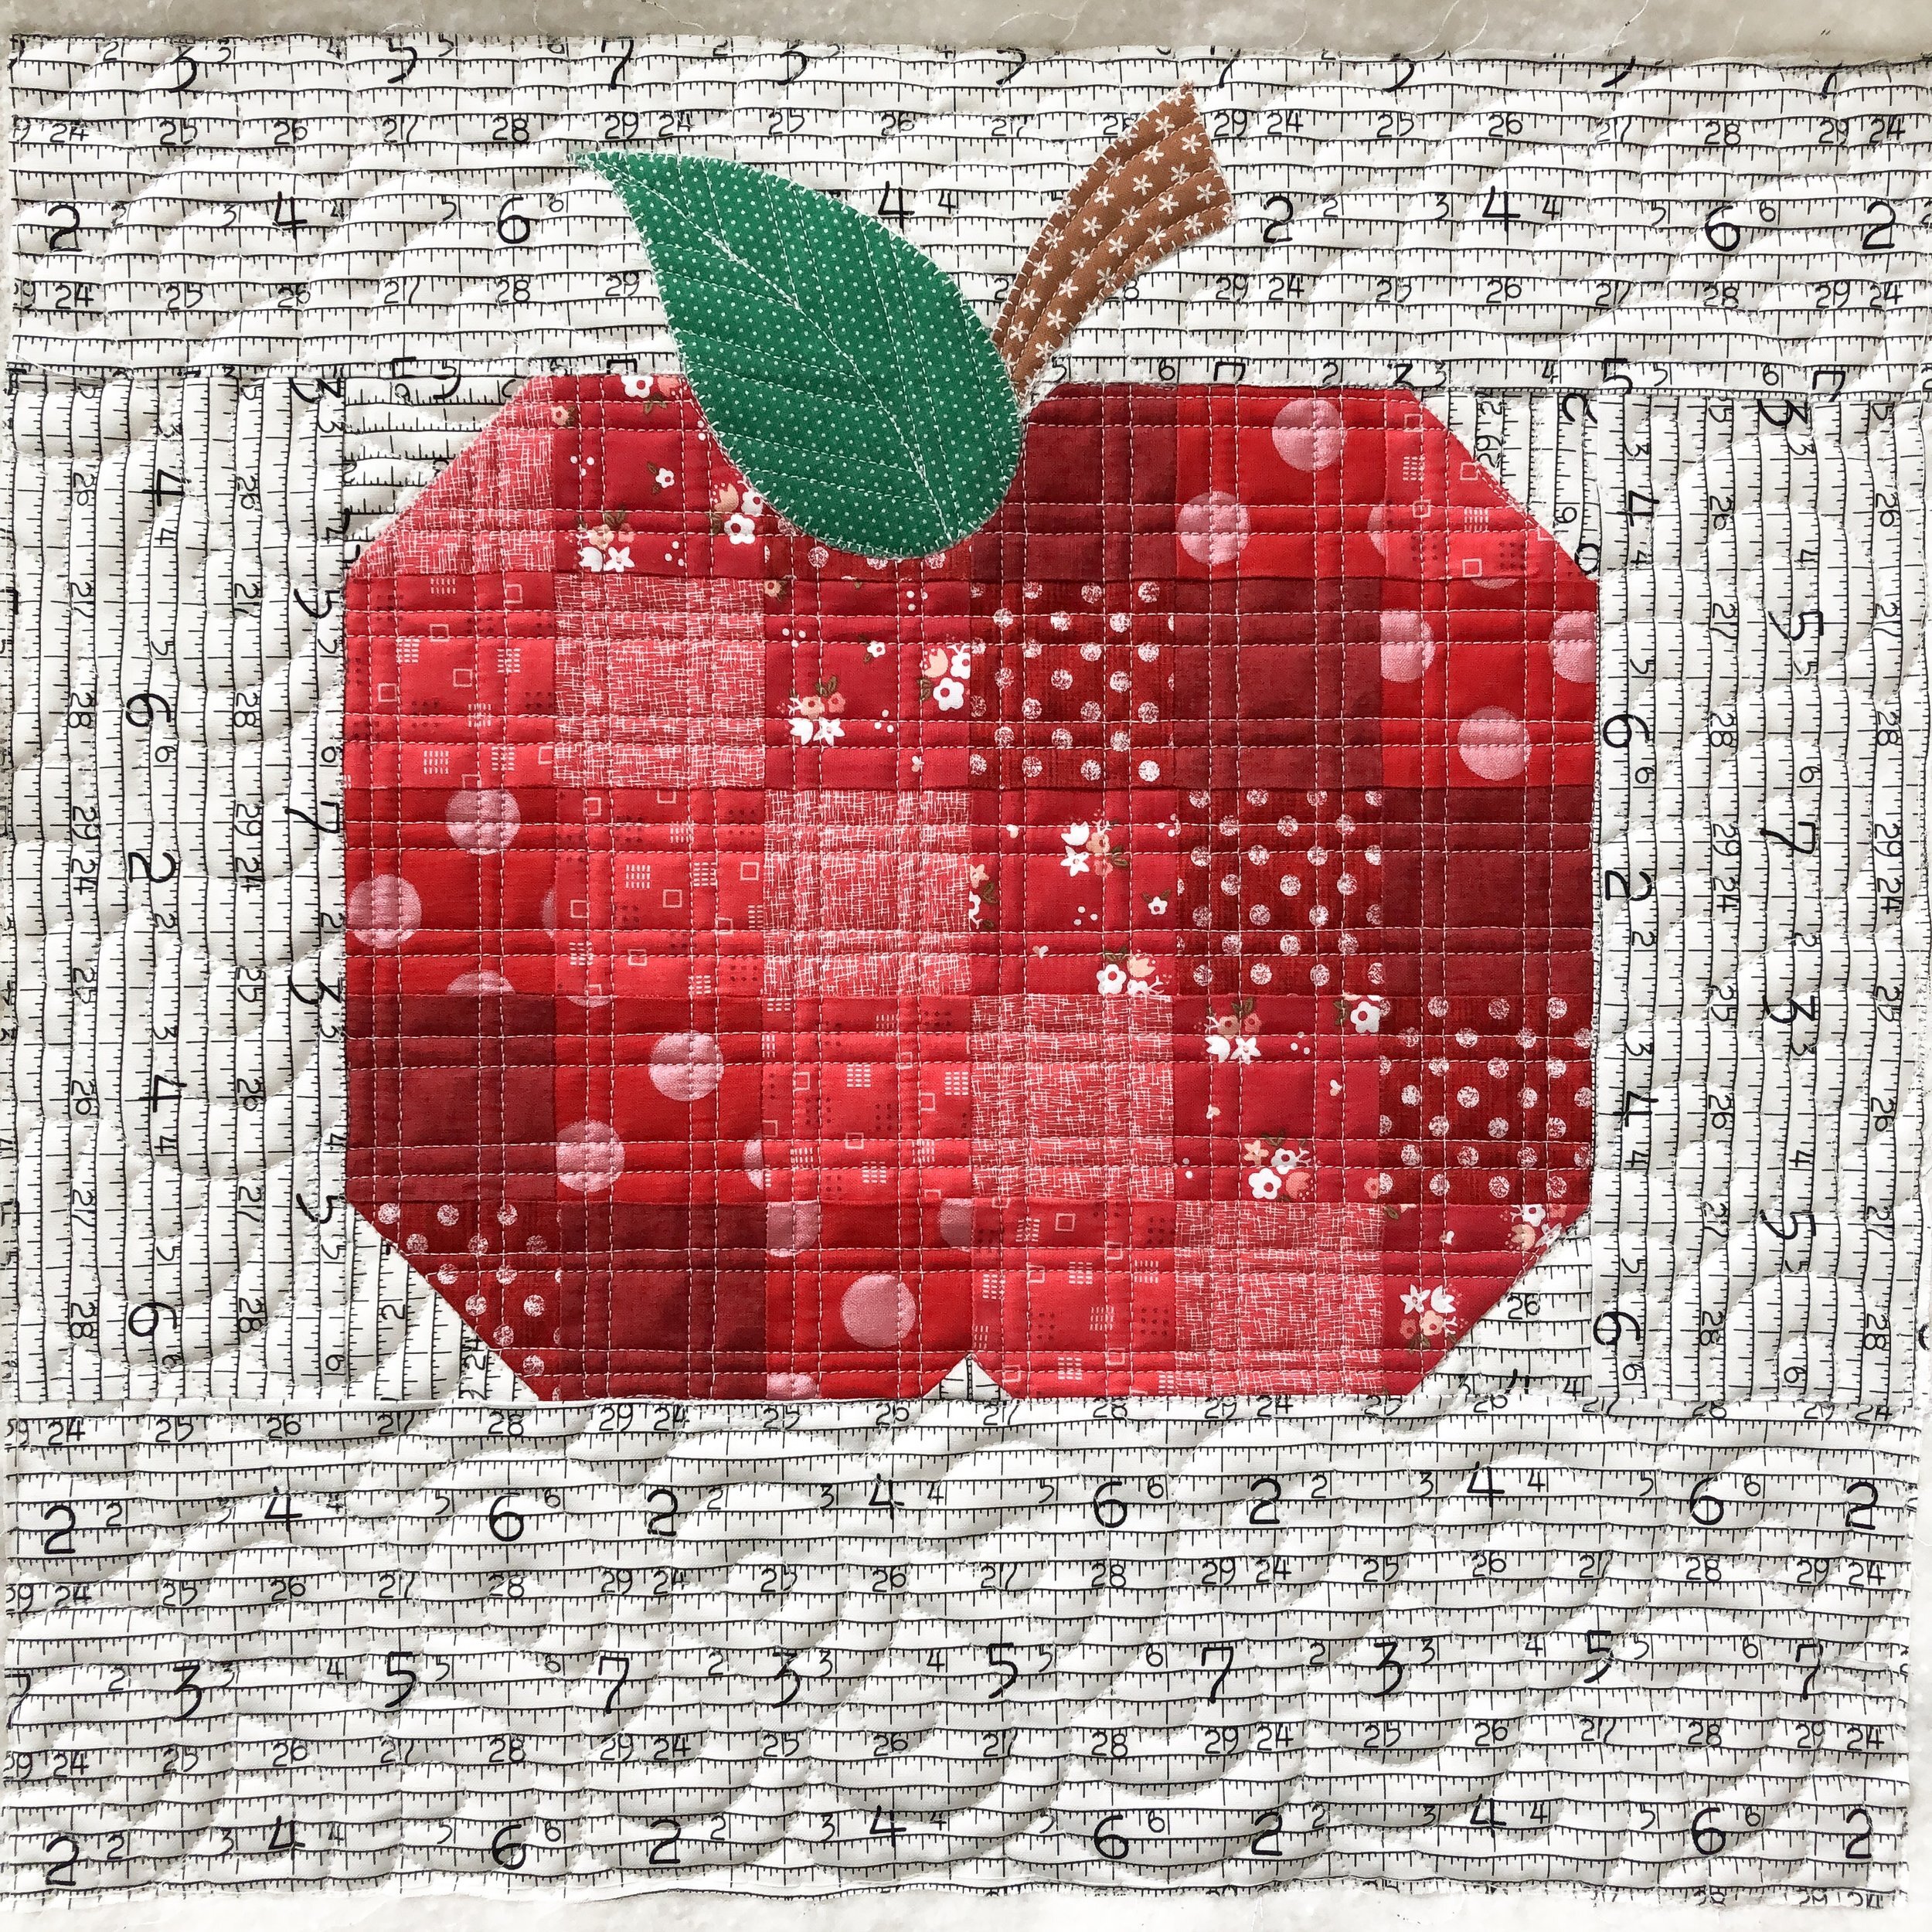
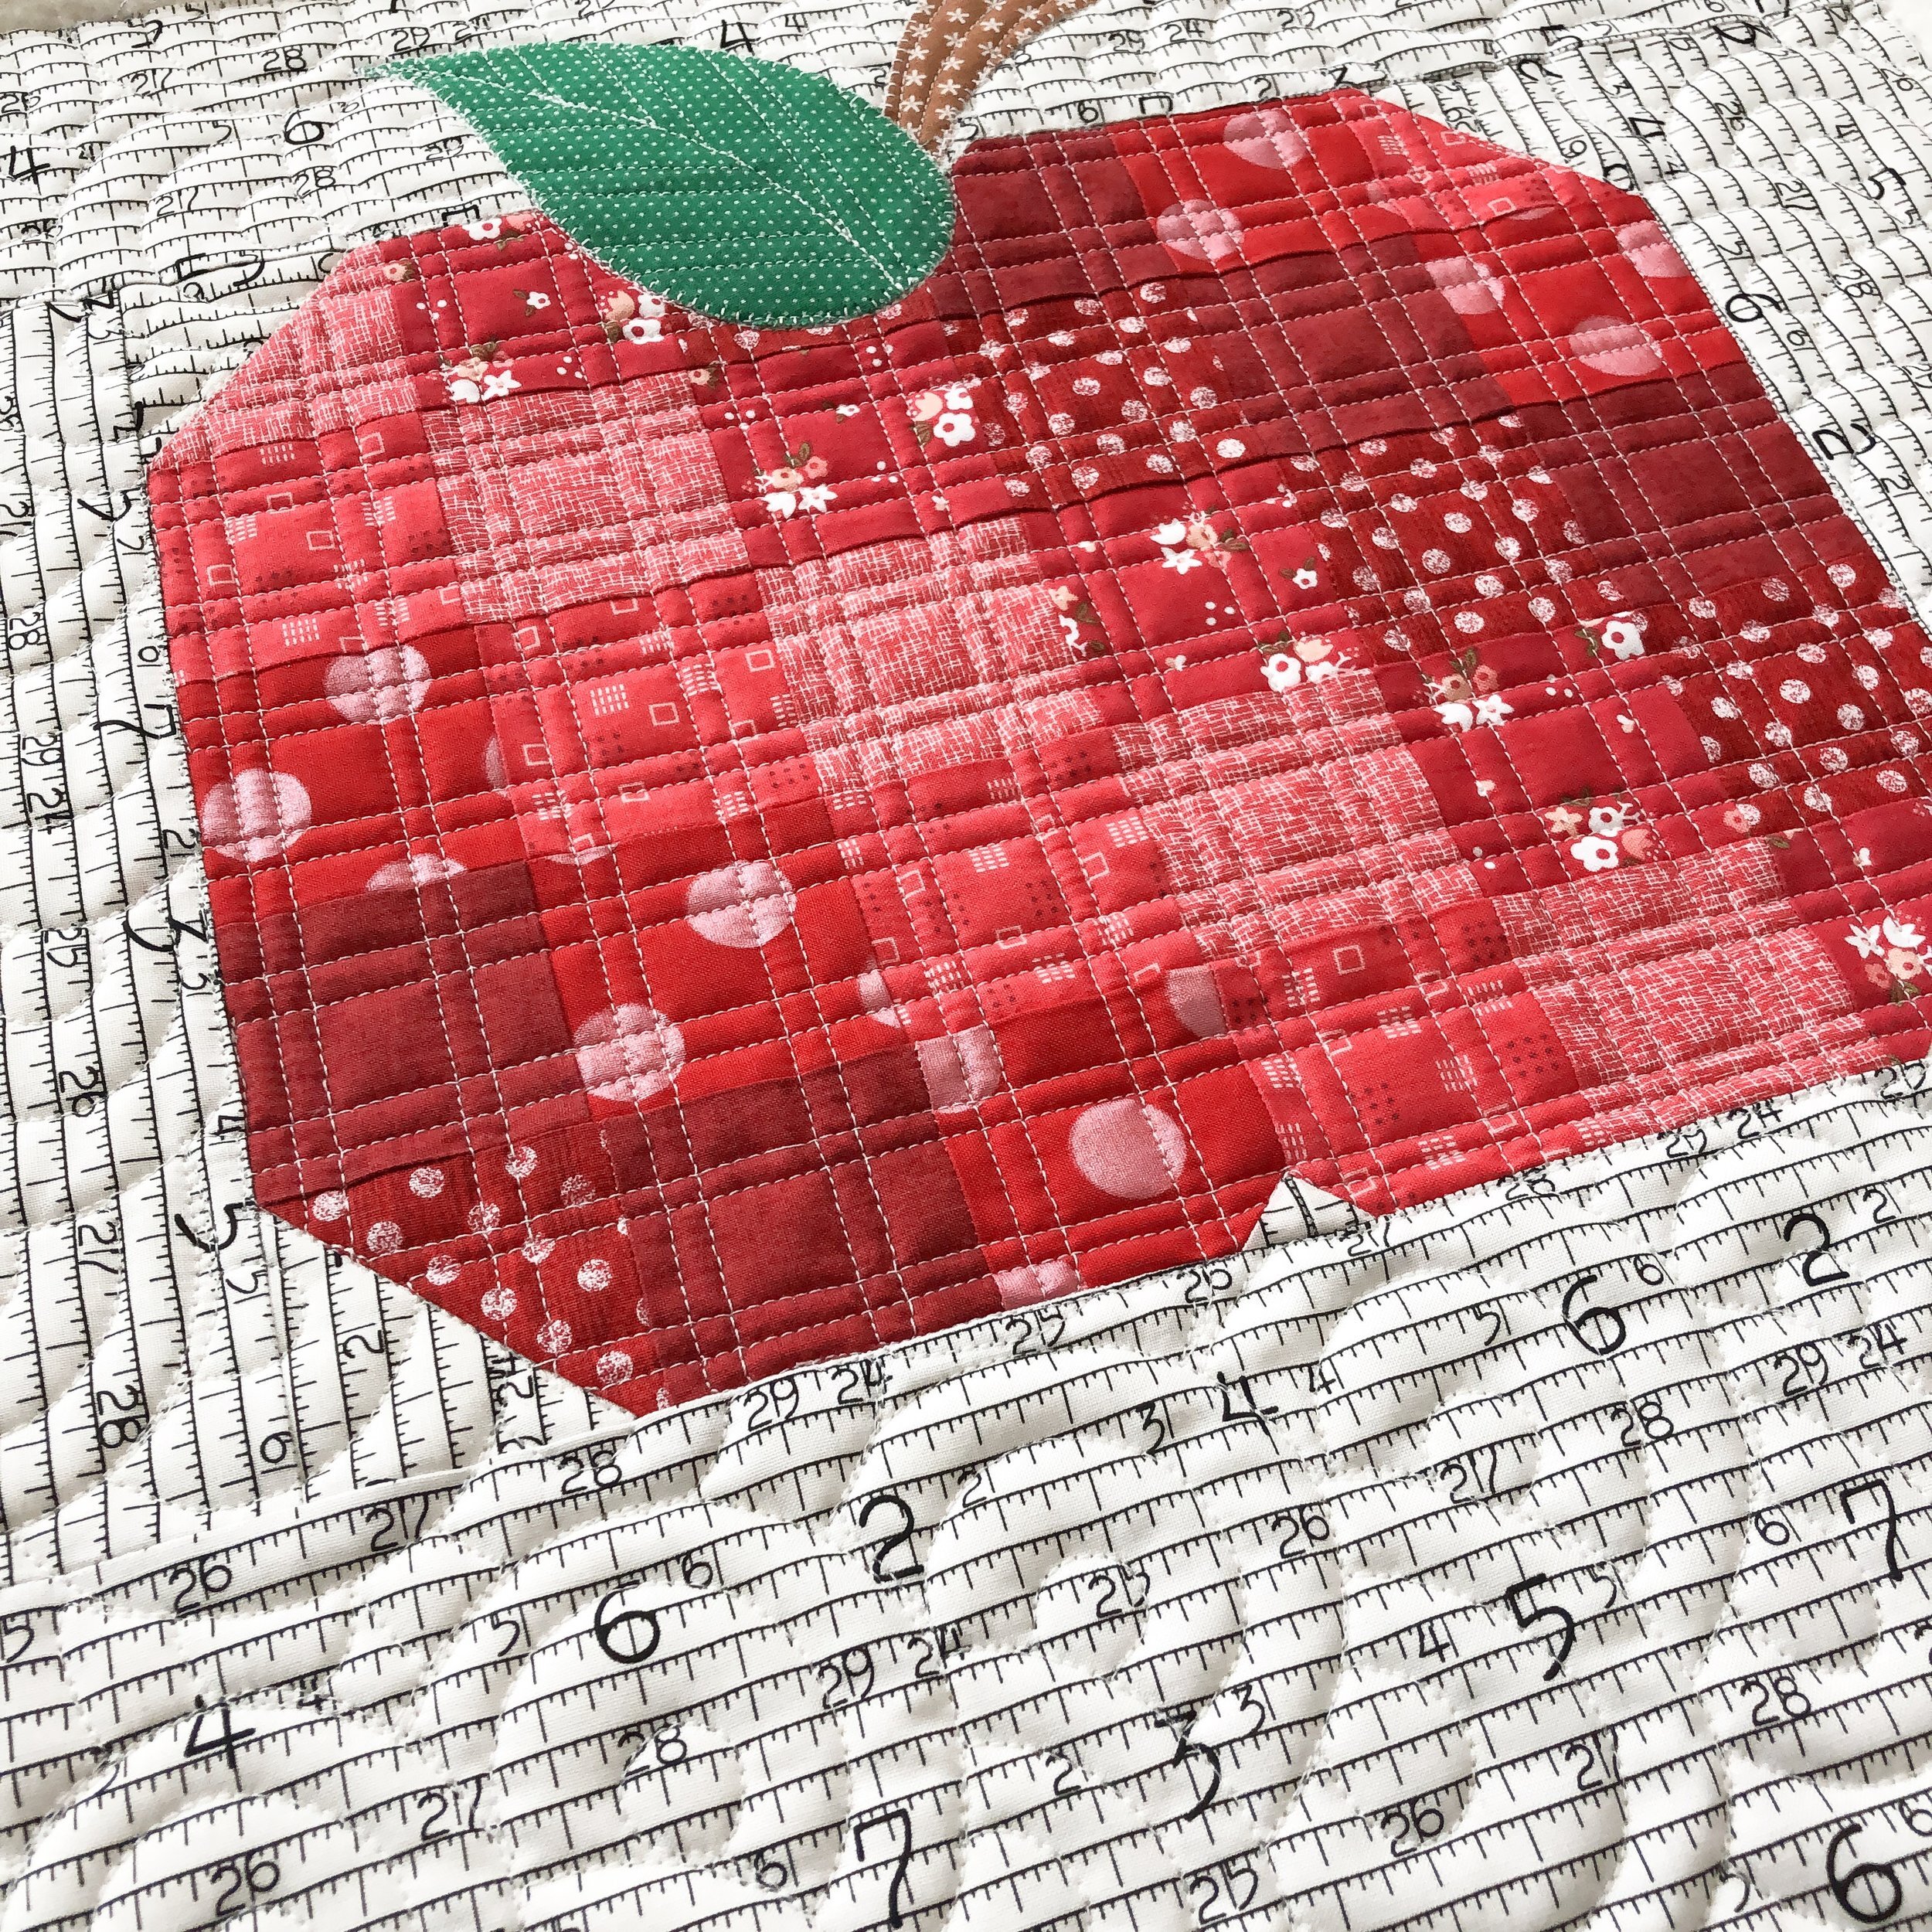
How cute is this apple?!?!?!!!! First the ruler fabric print on the background, love it!!
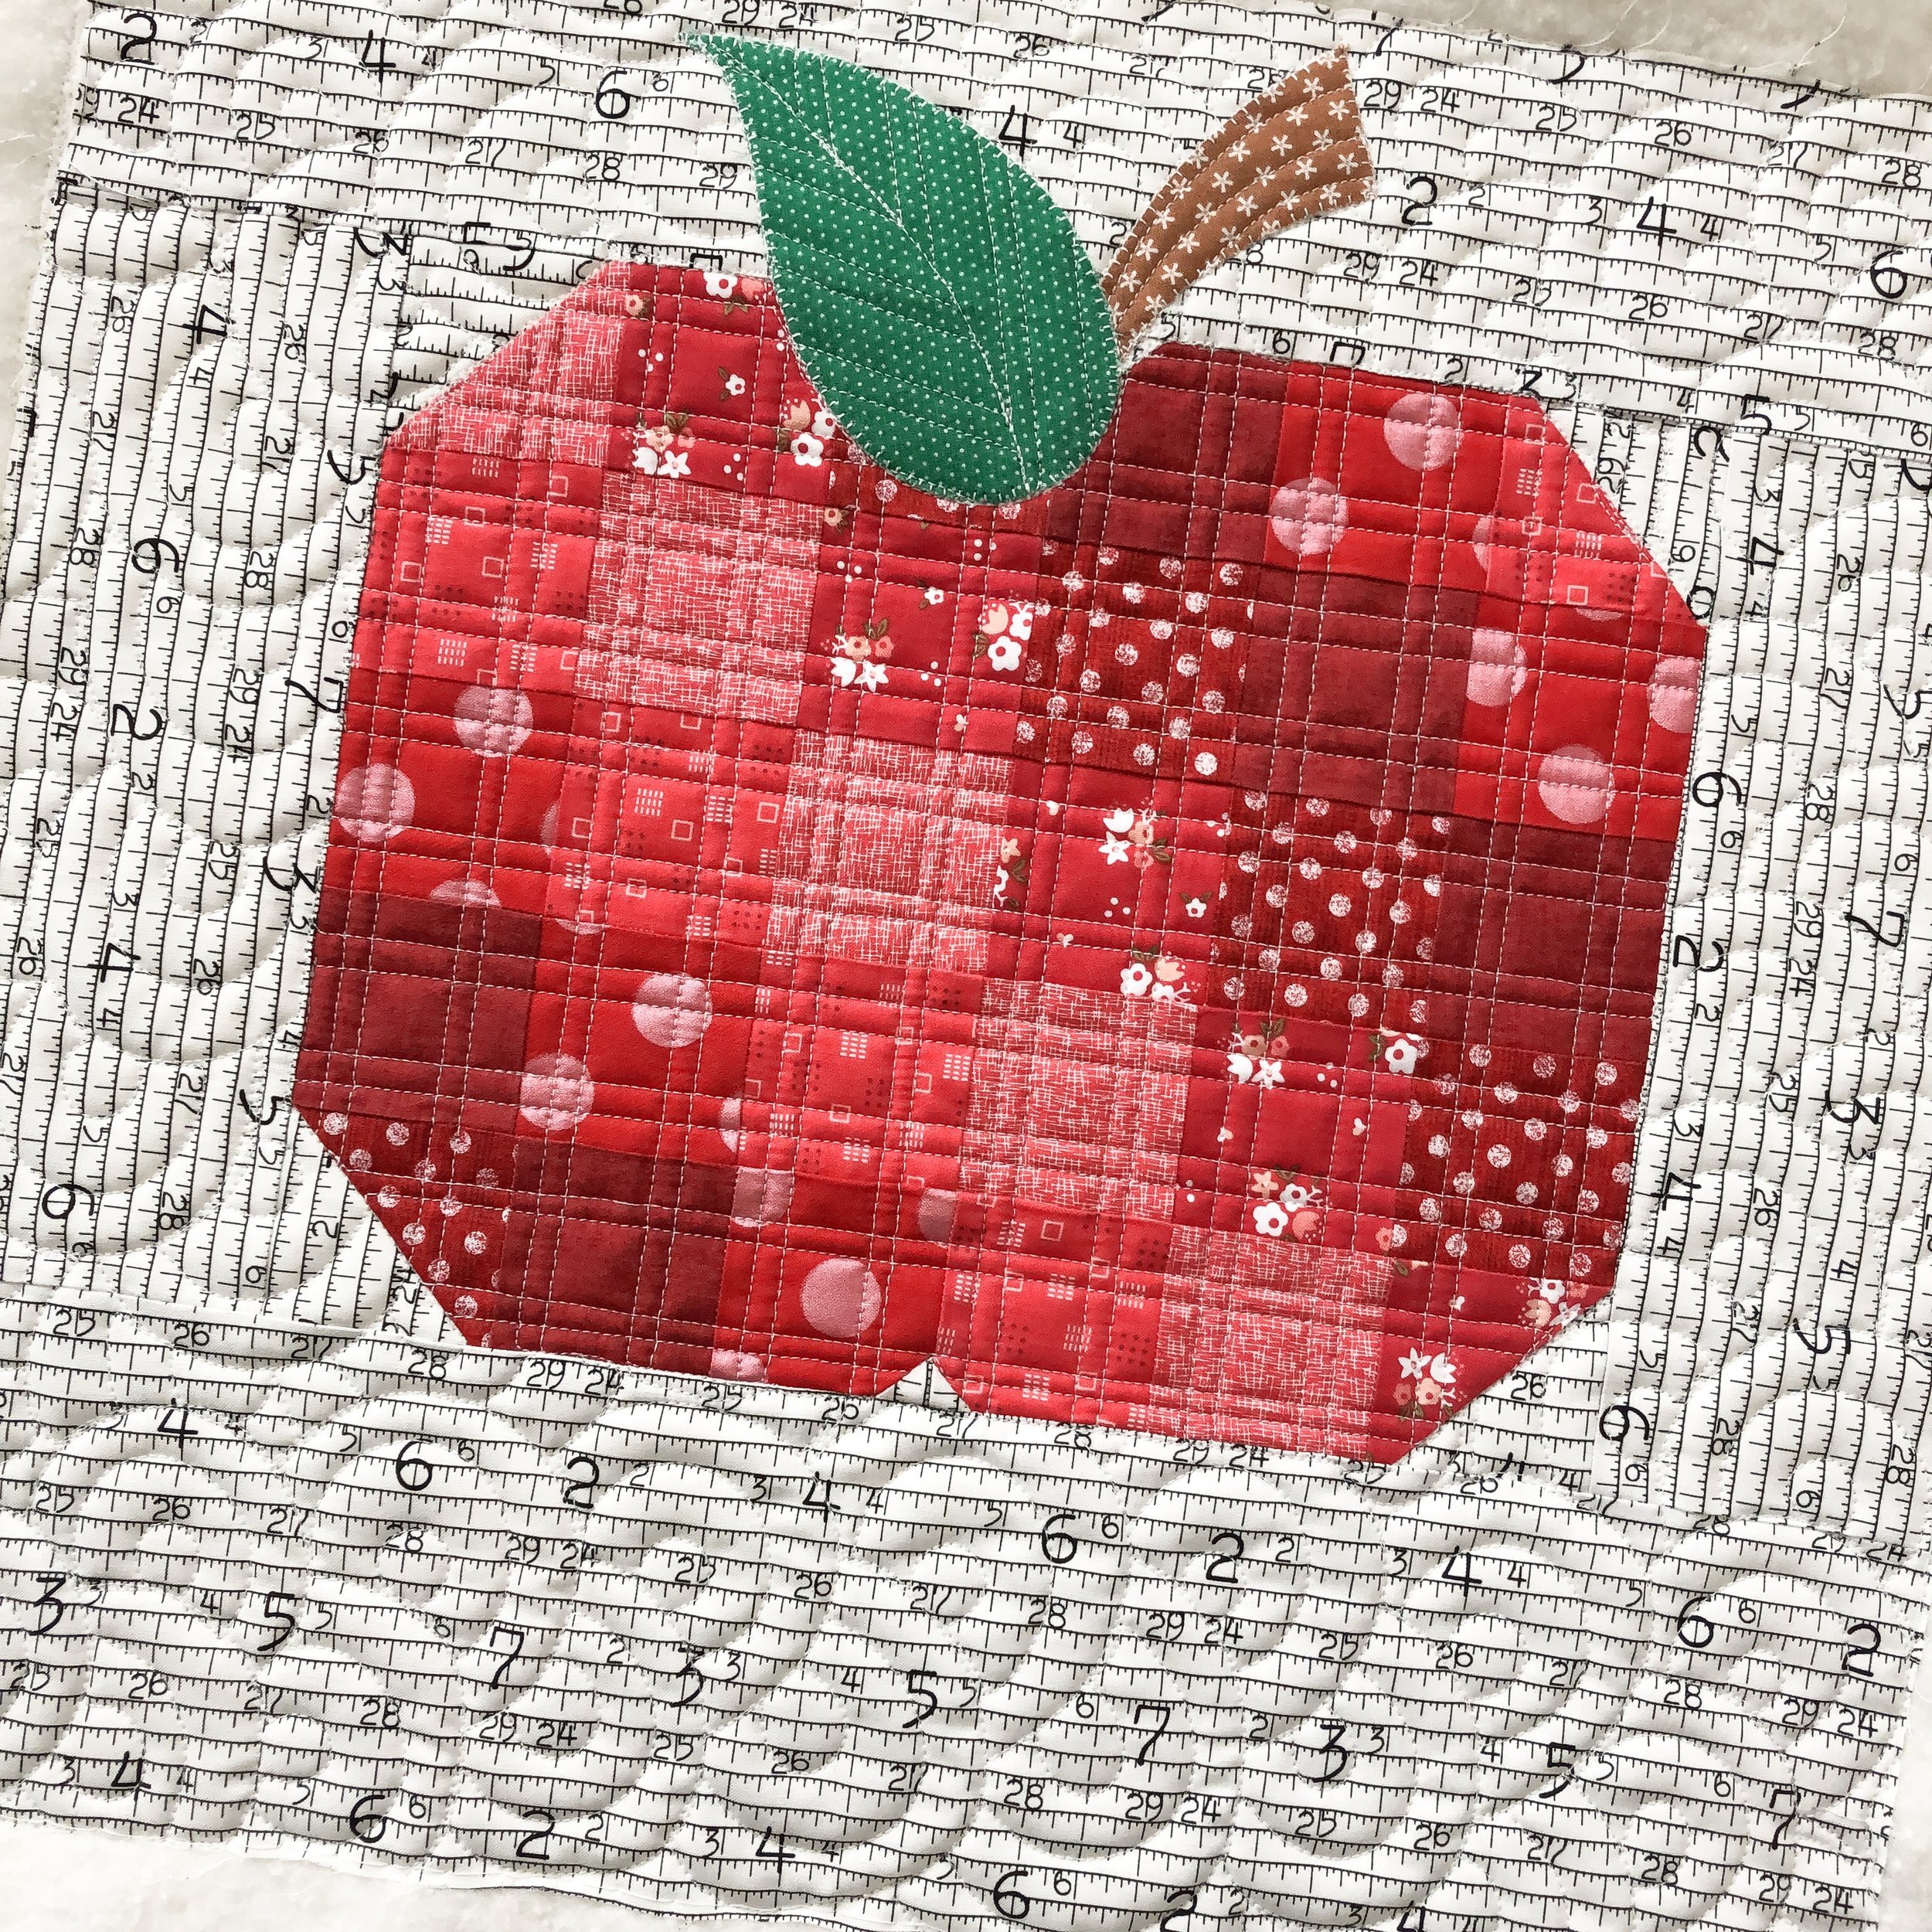
I wanted to have fun with the textures on this, something soft and curvy in the background with the pinstripe grid...that’s my kind of texture complimenting each other. I used a Edge ruler from Linda at thequiltedpinapple.com to quilt the lines. Her straight rulers are my favorite! I also did my favorite overlapping circle design in the background. I did a video a little while ago on how I freehand this design. Check it out here, if you haven’t seen it yet.
Overlapping circles is such a fun design to quilt...give it a try!
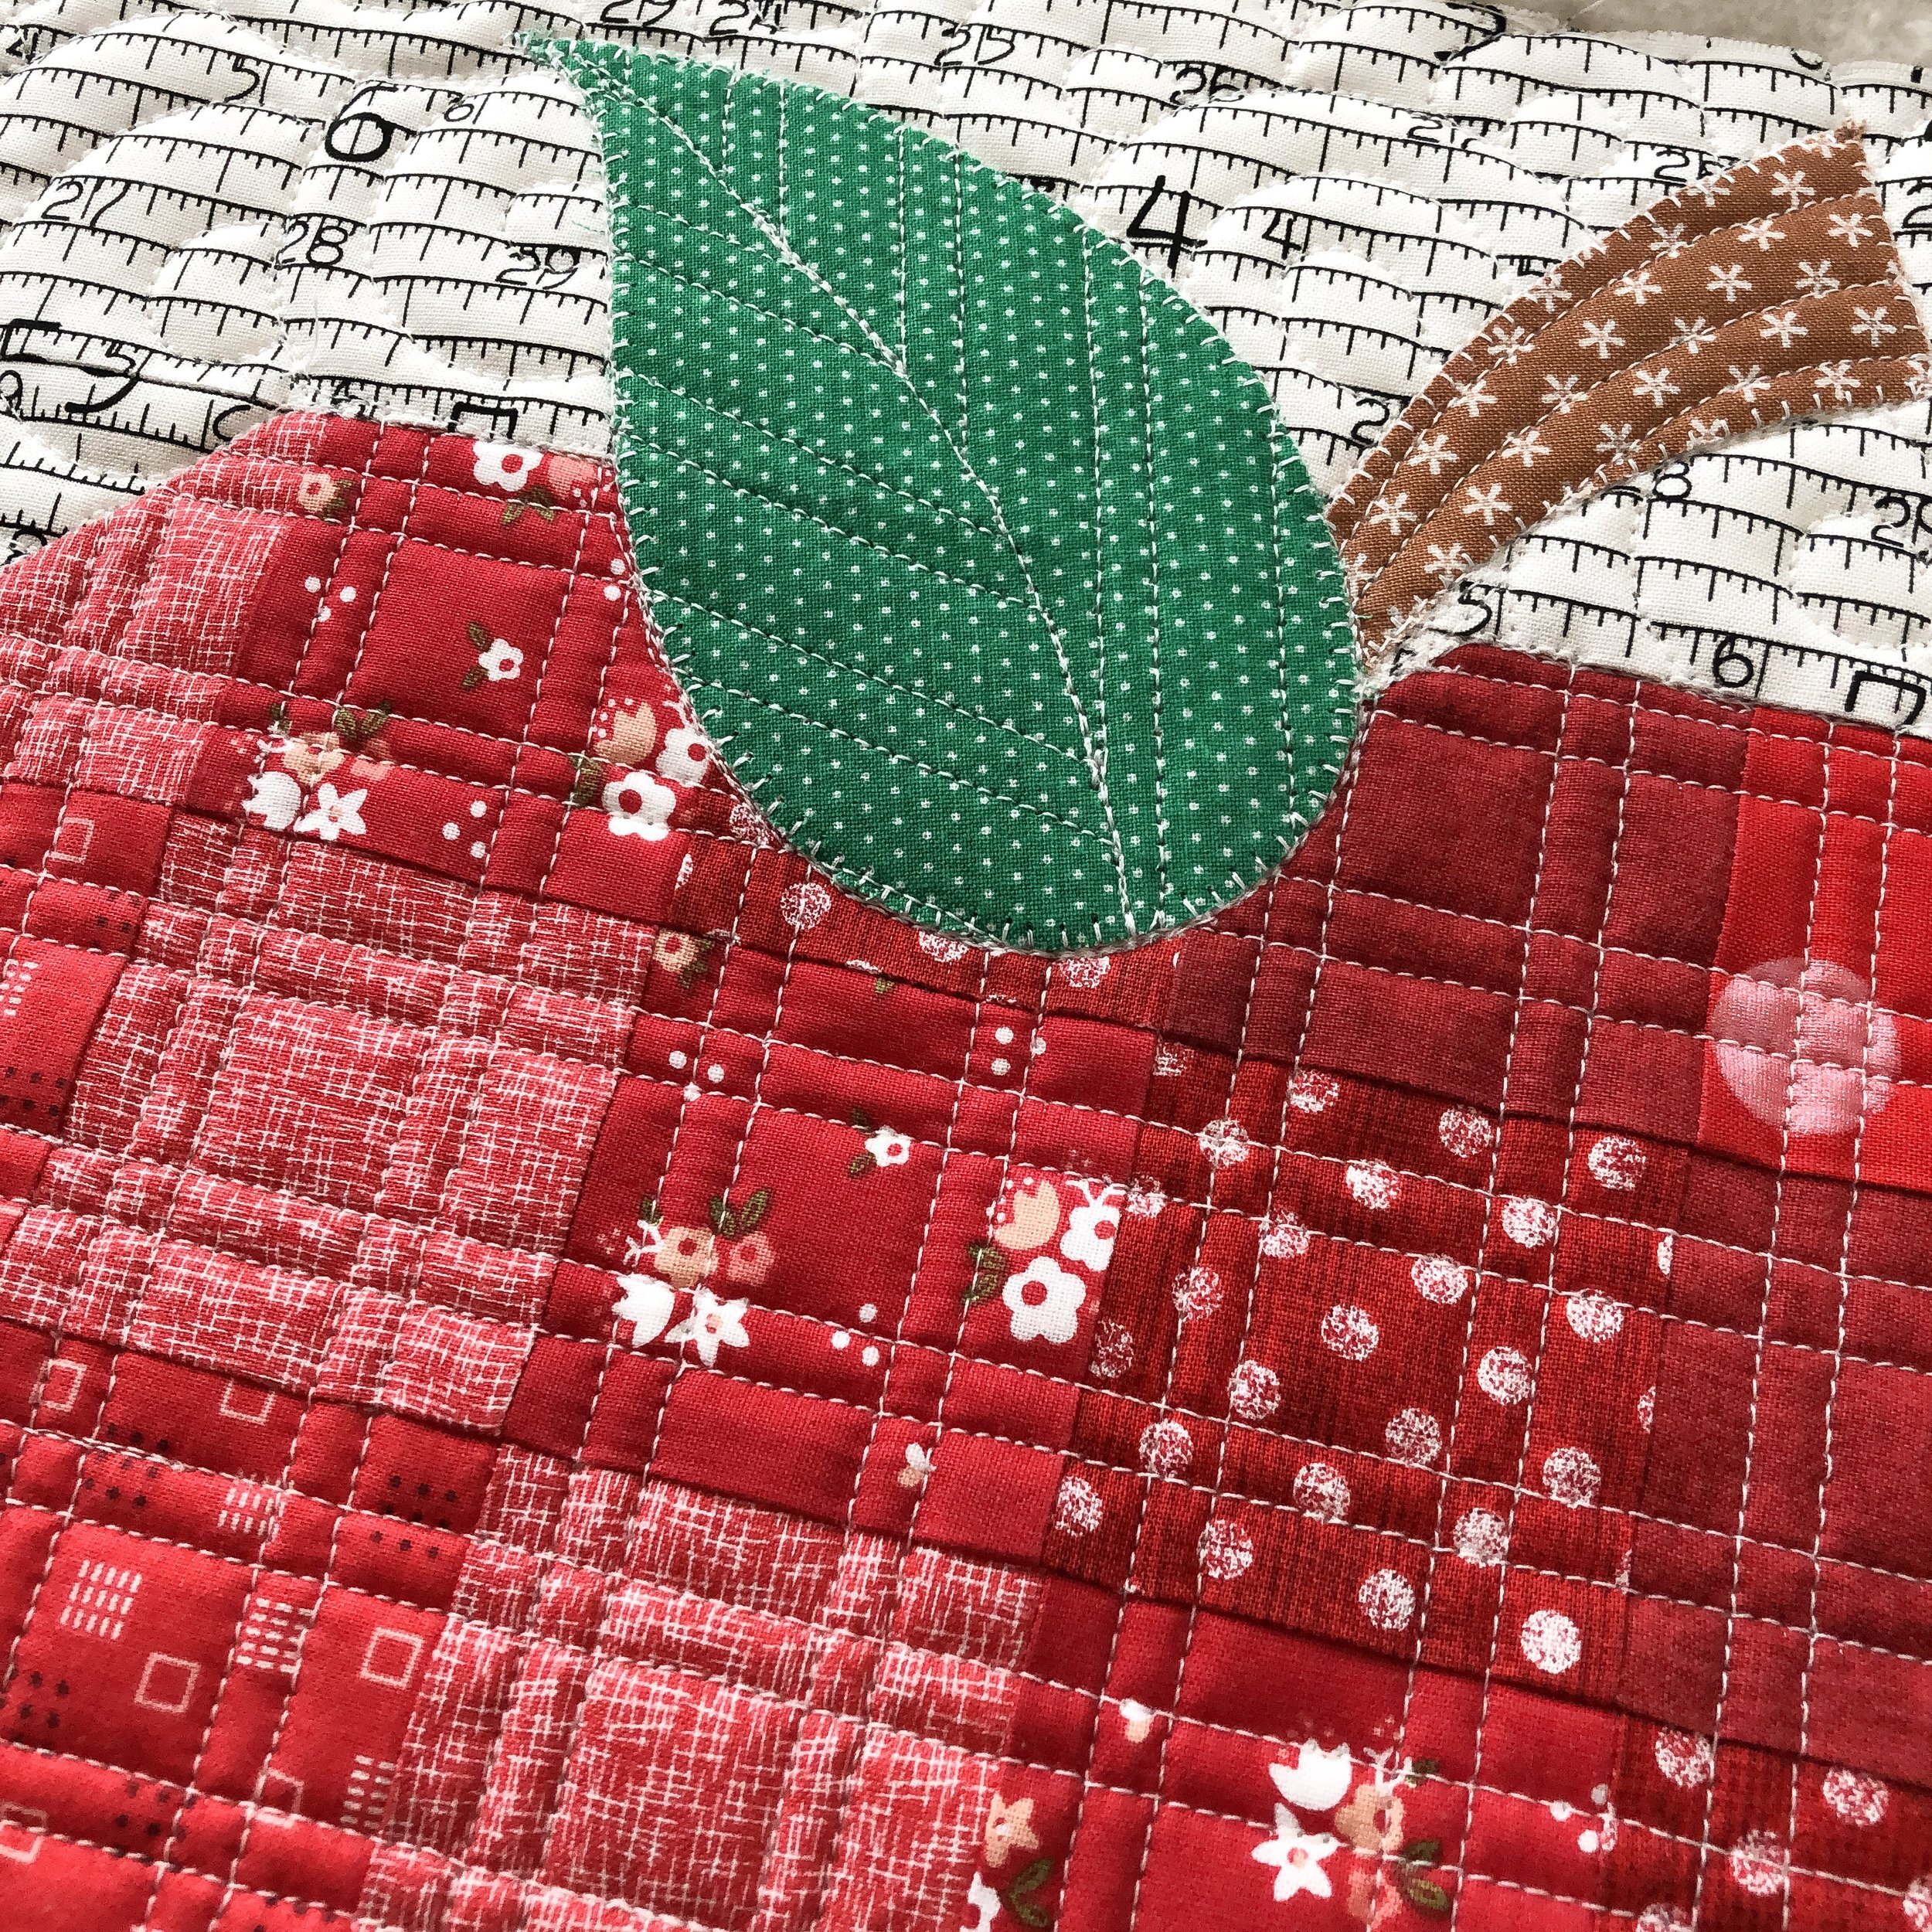
I used a white 30 tex A&E Perma Core thread and Sherry provided a 8020 batting on all the pillows. I do want to point out how nicely the white thread blends on each of these colors. It doesn’t distract from the pillow, and you can see the texture.
This snow pillow was fun to quilt!
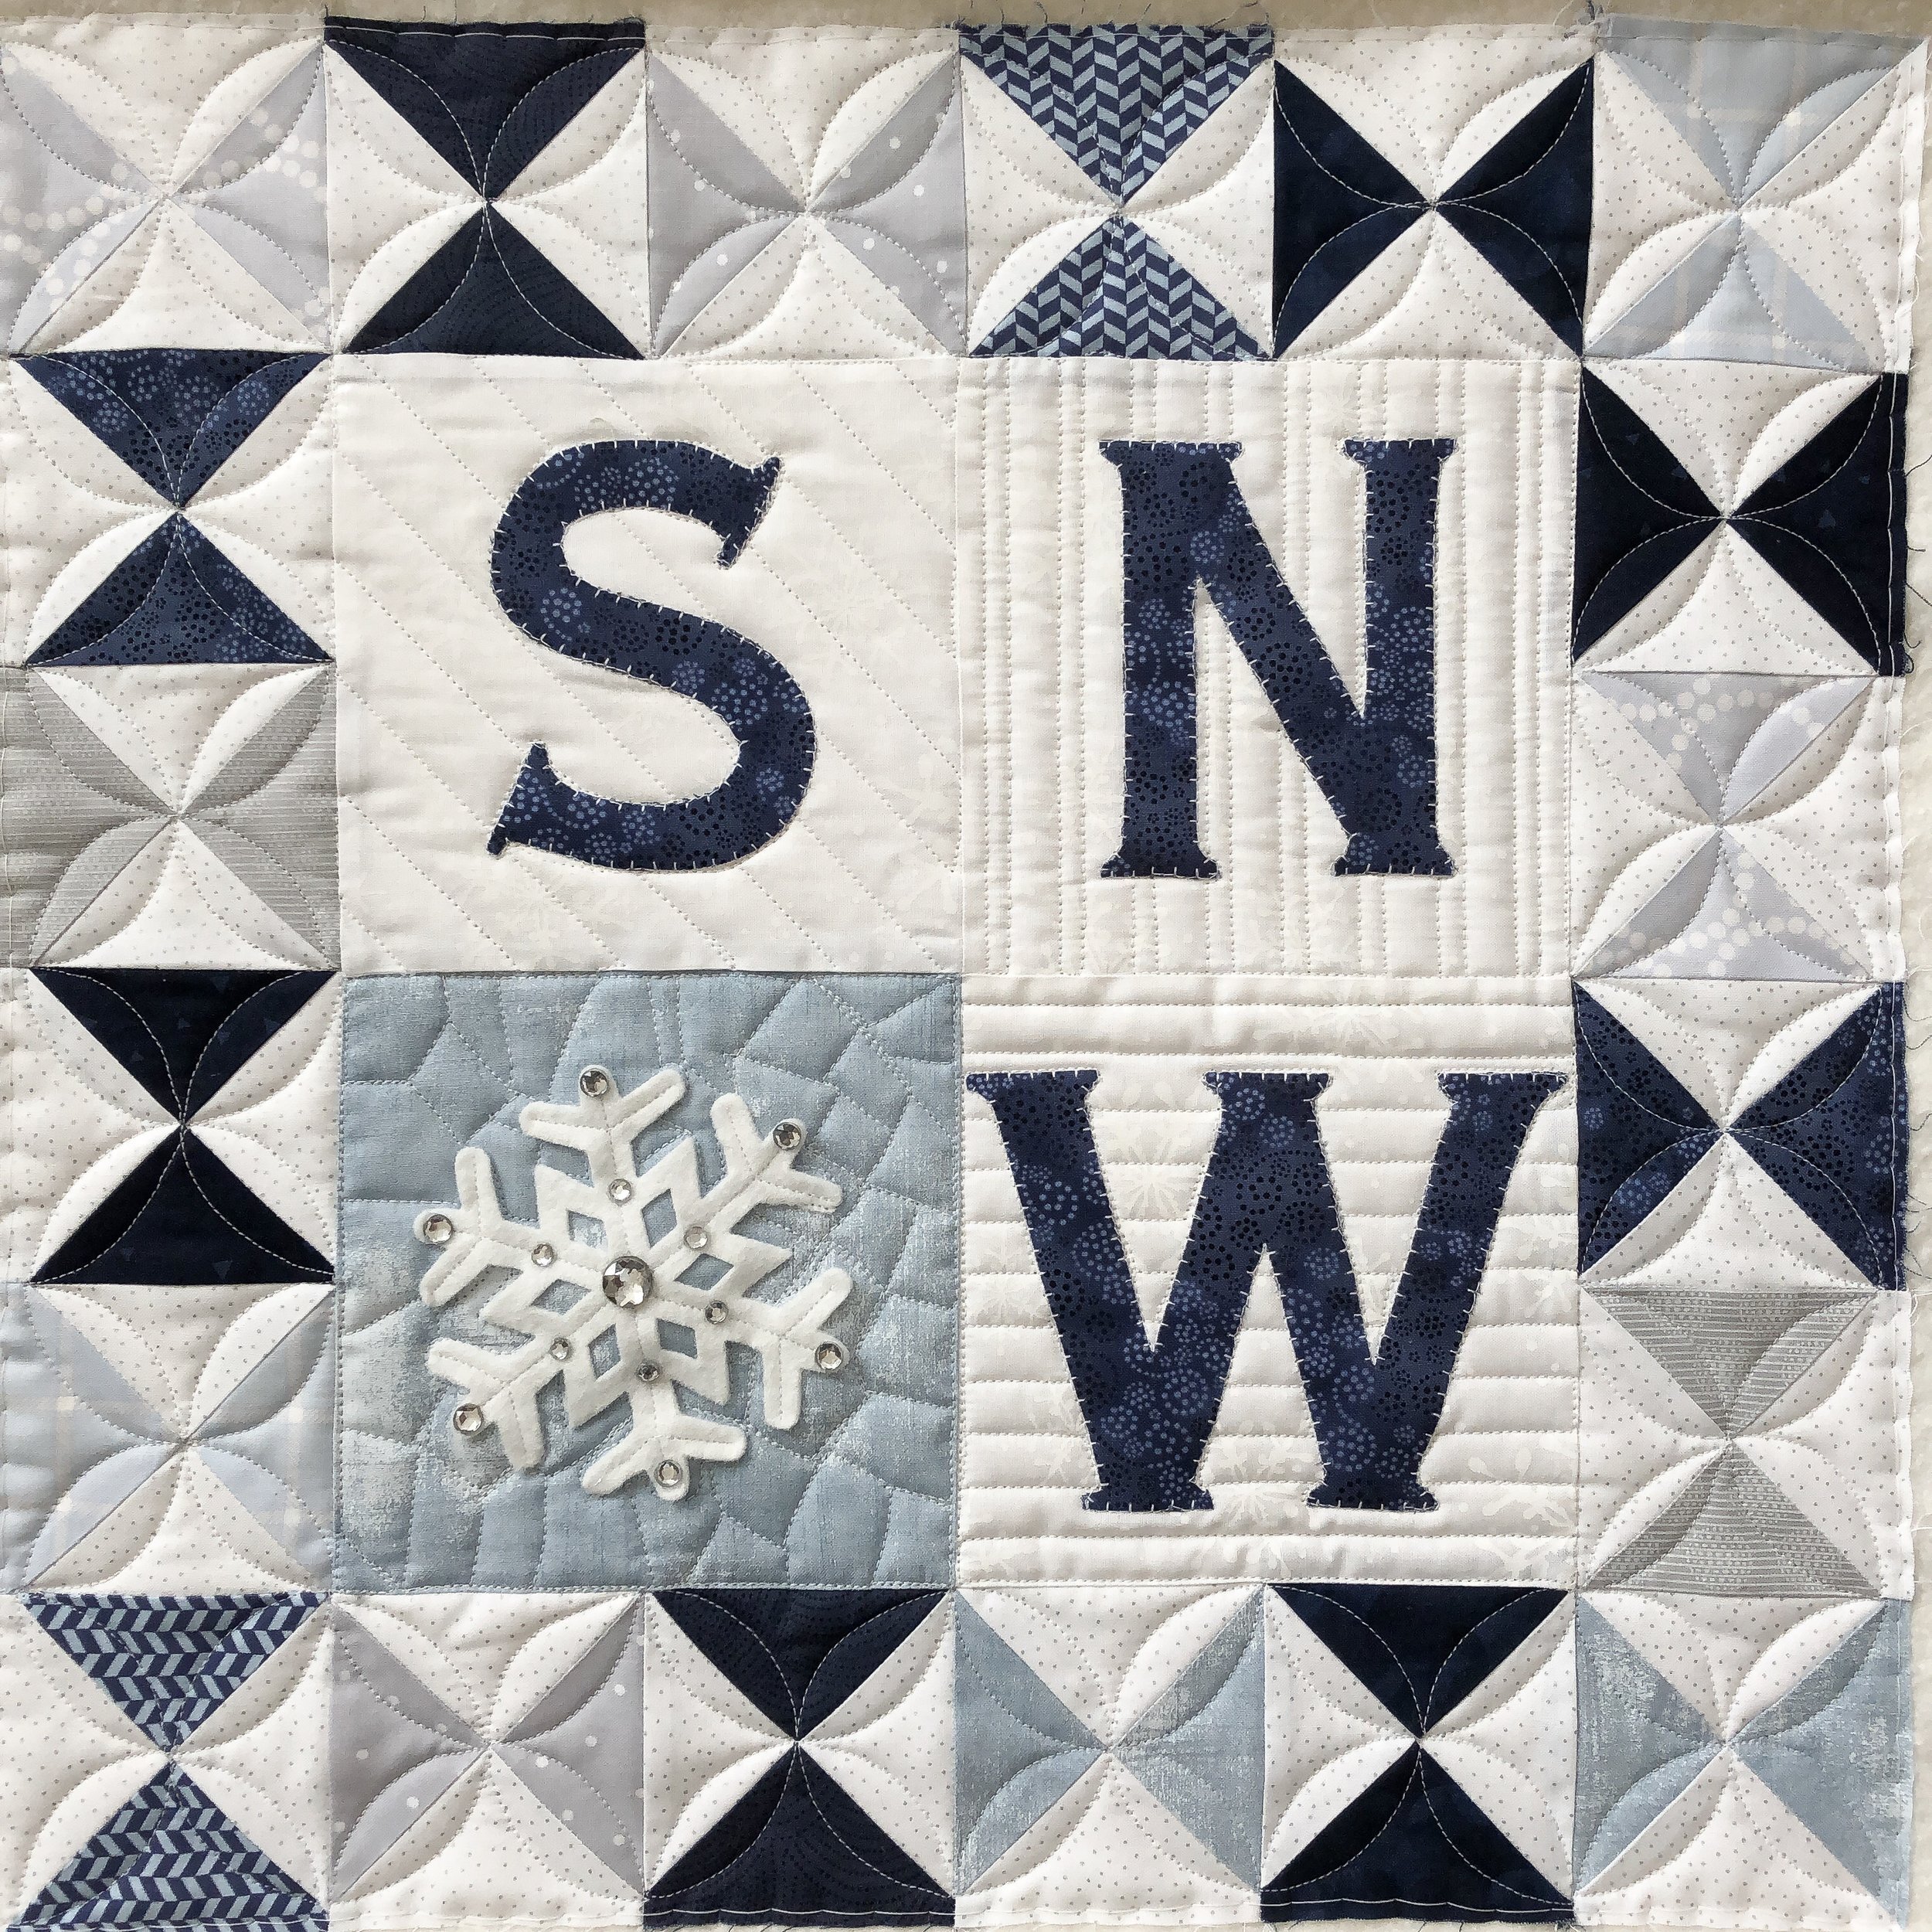
I wanted to do a variety of lines in the background of the blocks, rulered lines and crackle. Crackle is a great design to freehand. It’s forgiving, easy, and a great design to quilt in the background when the shapes are hard to figure out what to quilt.
Here is a quick video on how to do a freehand crackle. (Note: I have a soft voice, if you’re having a hard time hearing me please try using a speaker of some kind.)

I used Linda’s Edge ruler again!! Seriously a great tool to have in your quilting studio!

For the bow tie blocks along the edge of the pillow, I used my 3” Circle2™ (Circle Squared) machine quilting circle ruler, to quilt the curves. These rulers fit so nicely in my hand, and are super fun to quilt with because of how easily I can move them around as I quilt. They are available here: https://www.quiltingit.com/shop?category=Rulers
To see a video of me using one of my rulers to quilt a continuous orange peel design, click here: https://youtu.be/GWyDTymyzoE

I used white 30 tex A&E Perma Core thread. This thread is my favorite. Why? It’s thick, I get nice stitches and it doesn’t break, like the thinner threads do on me. My machine just loves it!!

How cute are these leaves?!?!

I wanted to leaves to pop, so I decided on a circle and swirl background. This is a fun background filler to freehand quilt. I have another video here, you’d just need to add some swirls inside some of the bigger circles: https://youtu.be/-NNbKsFFYPg

I used the same white 30 Tex A&E Perma Core thread. Once again, look how nicely the white blends on the vibrant colors.
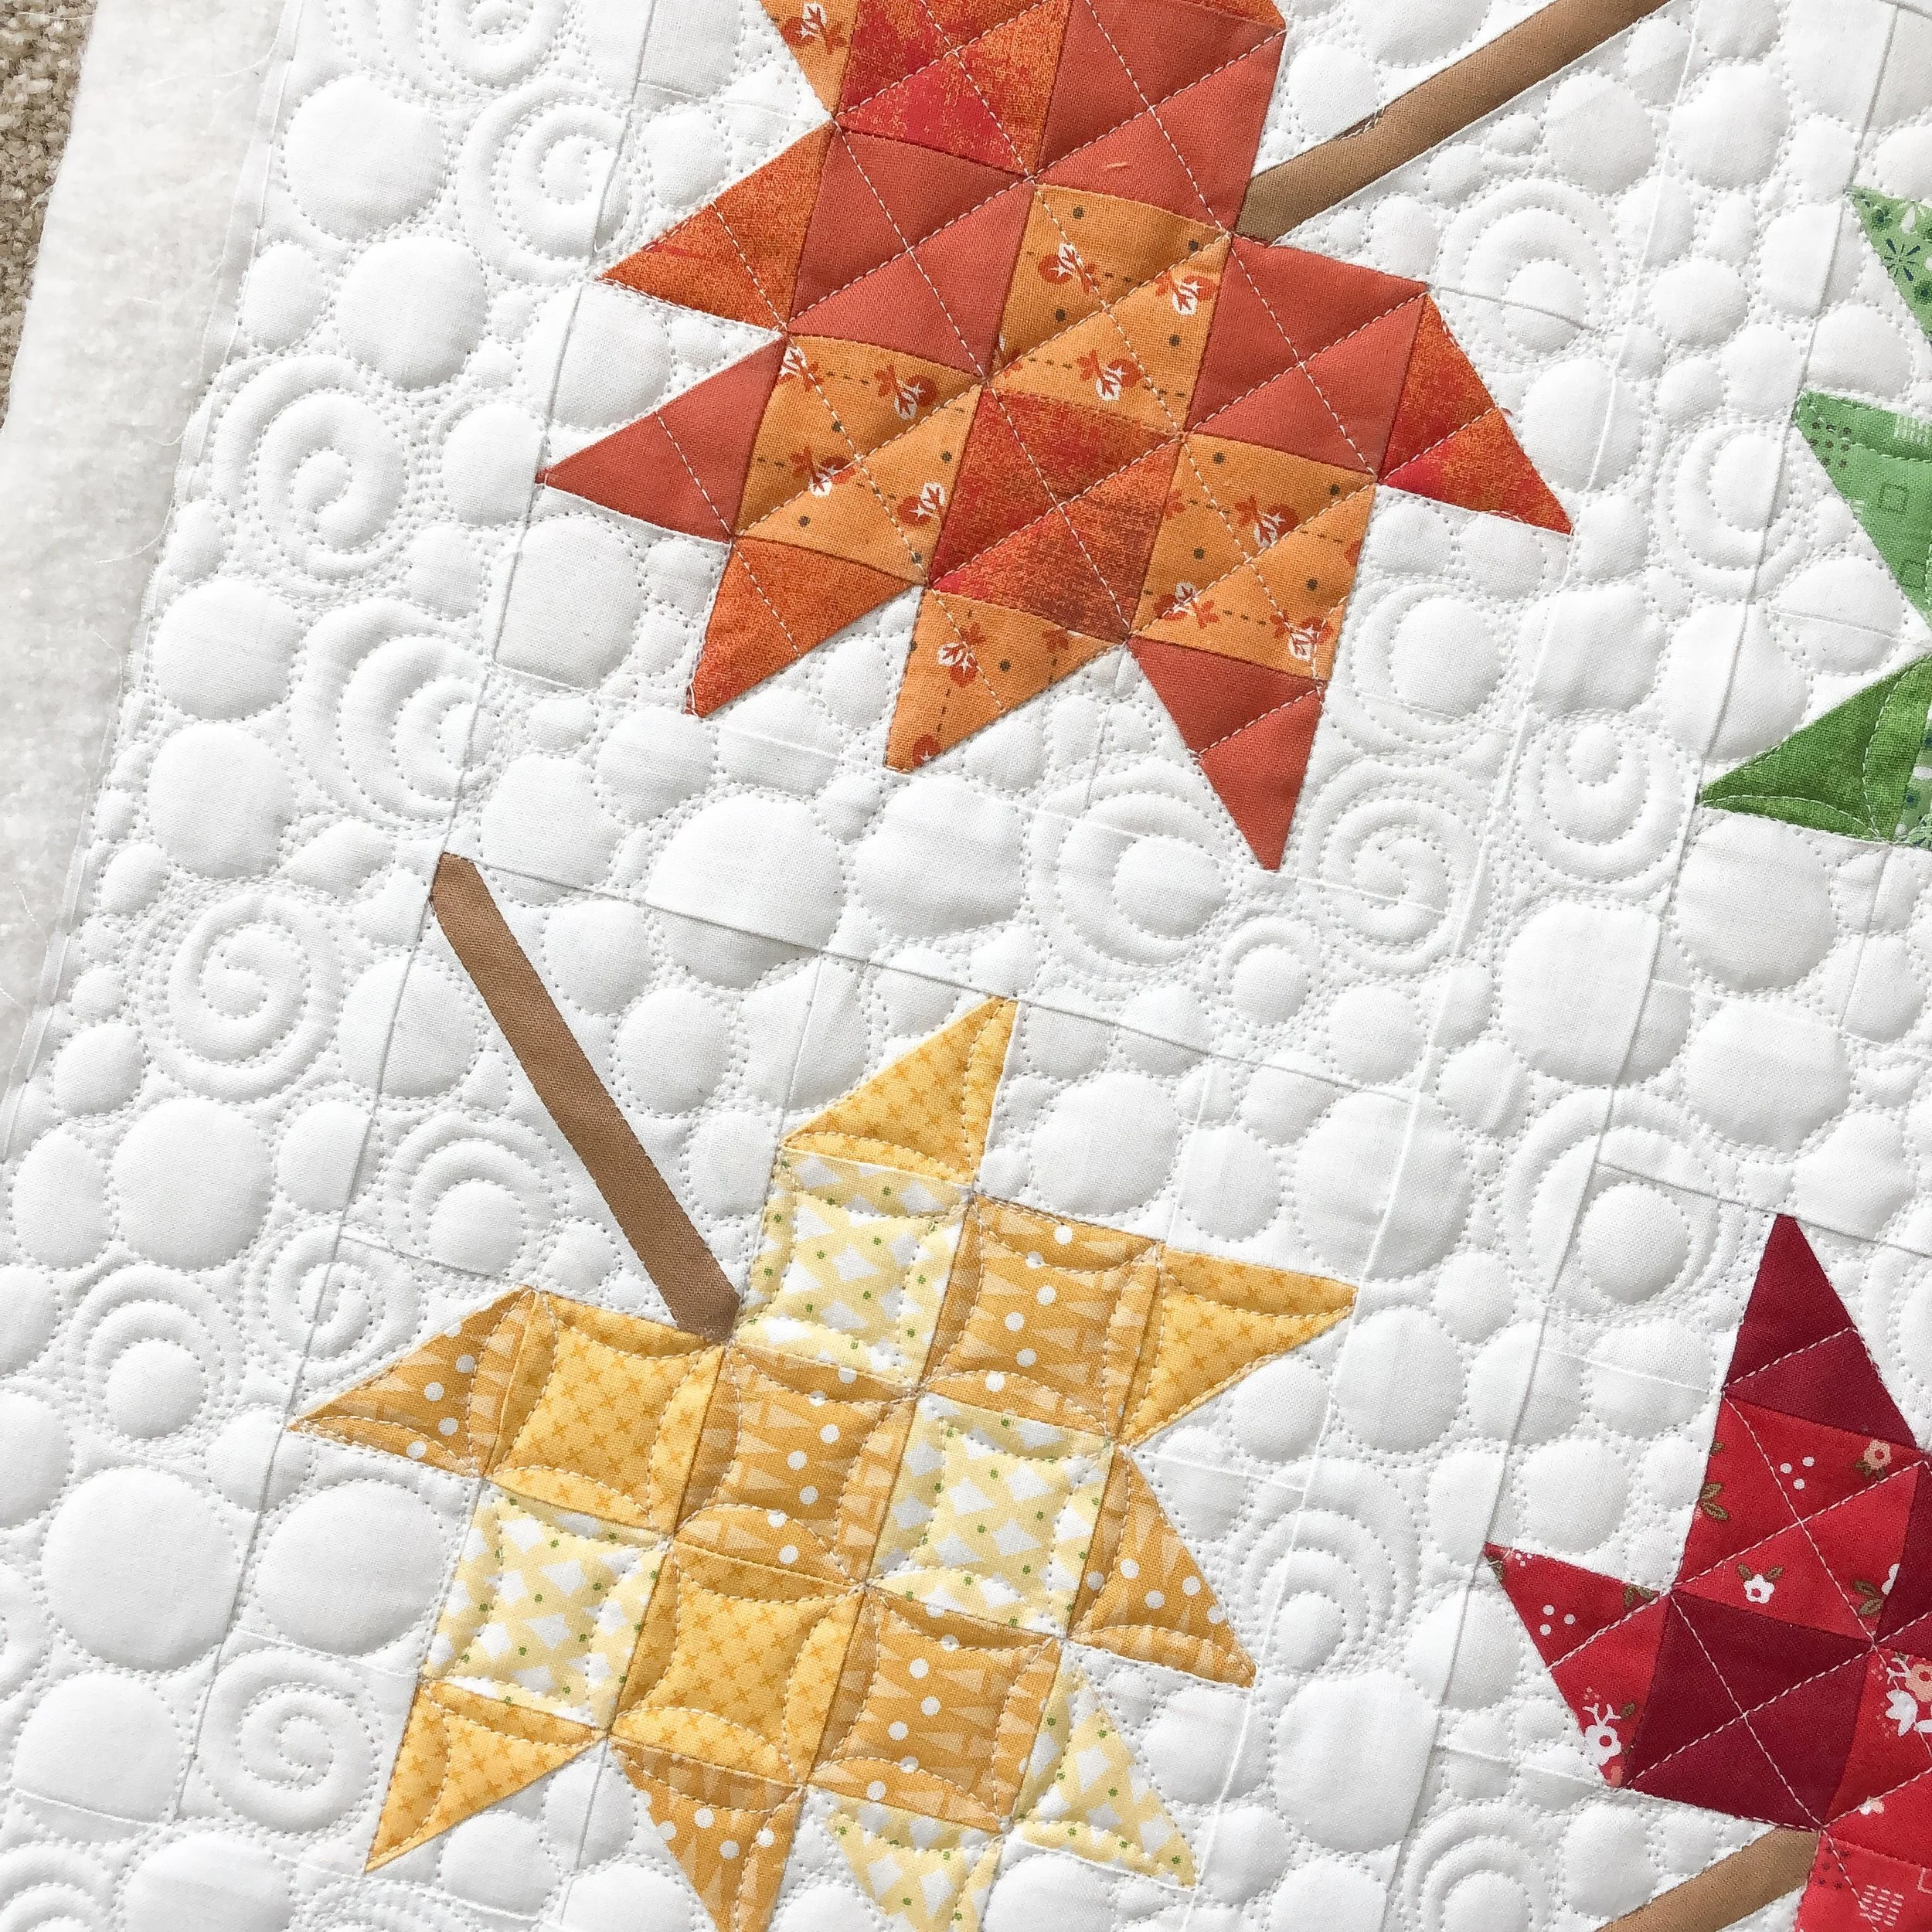
I used my 2” Circle2™ ruler to quilt the curves in two of the leaves. My rulers are available here: https://www.quiltingit.com/shop?category=Rulers
I used Linda’s Edge on this and the orange leaf. I just love this pop of red!

Lastly, my favorite pillow! Those bunnies, so cute!! Gets me more excited for spring to be here.
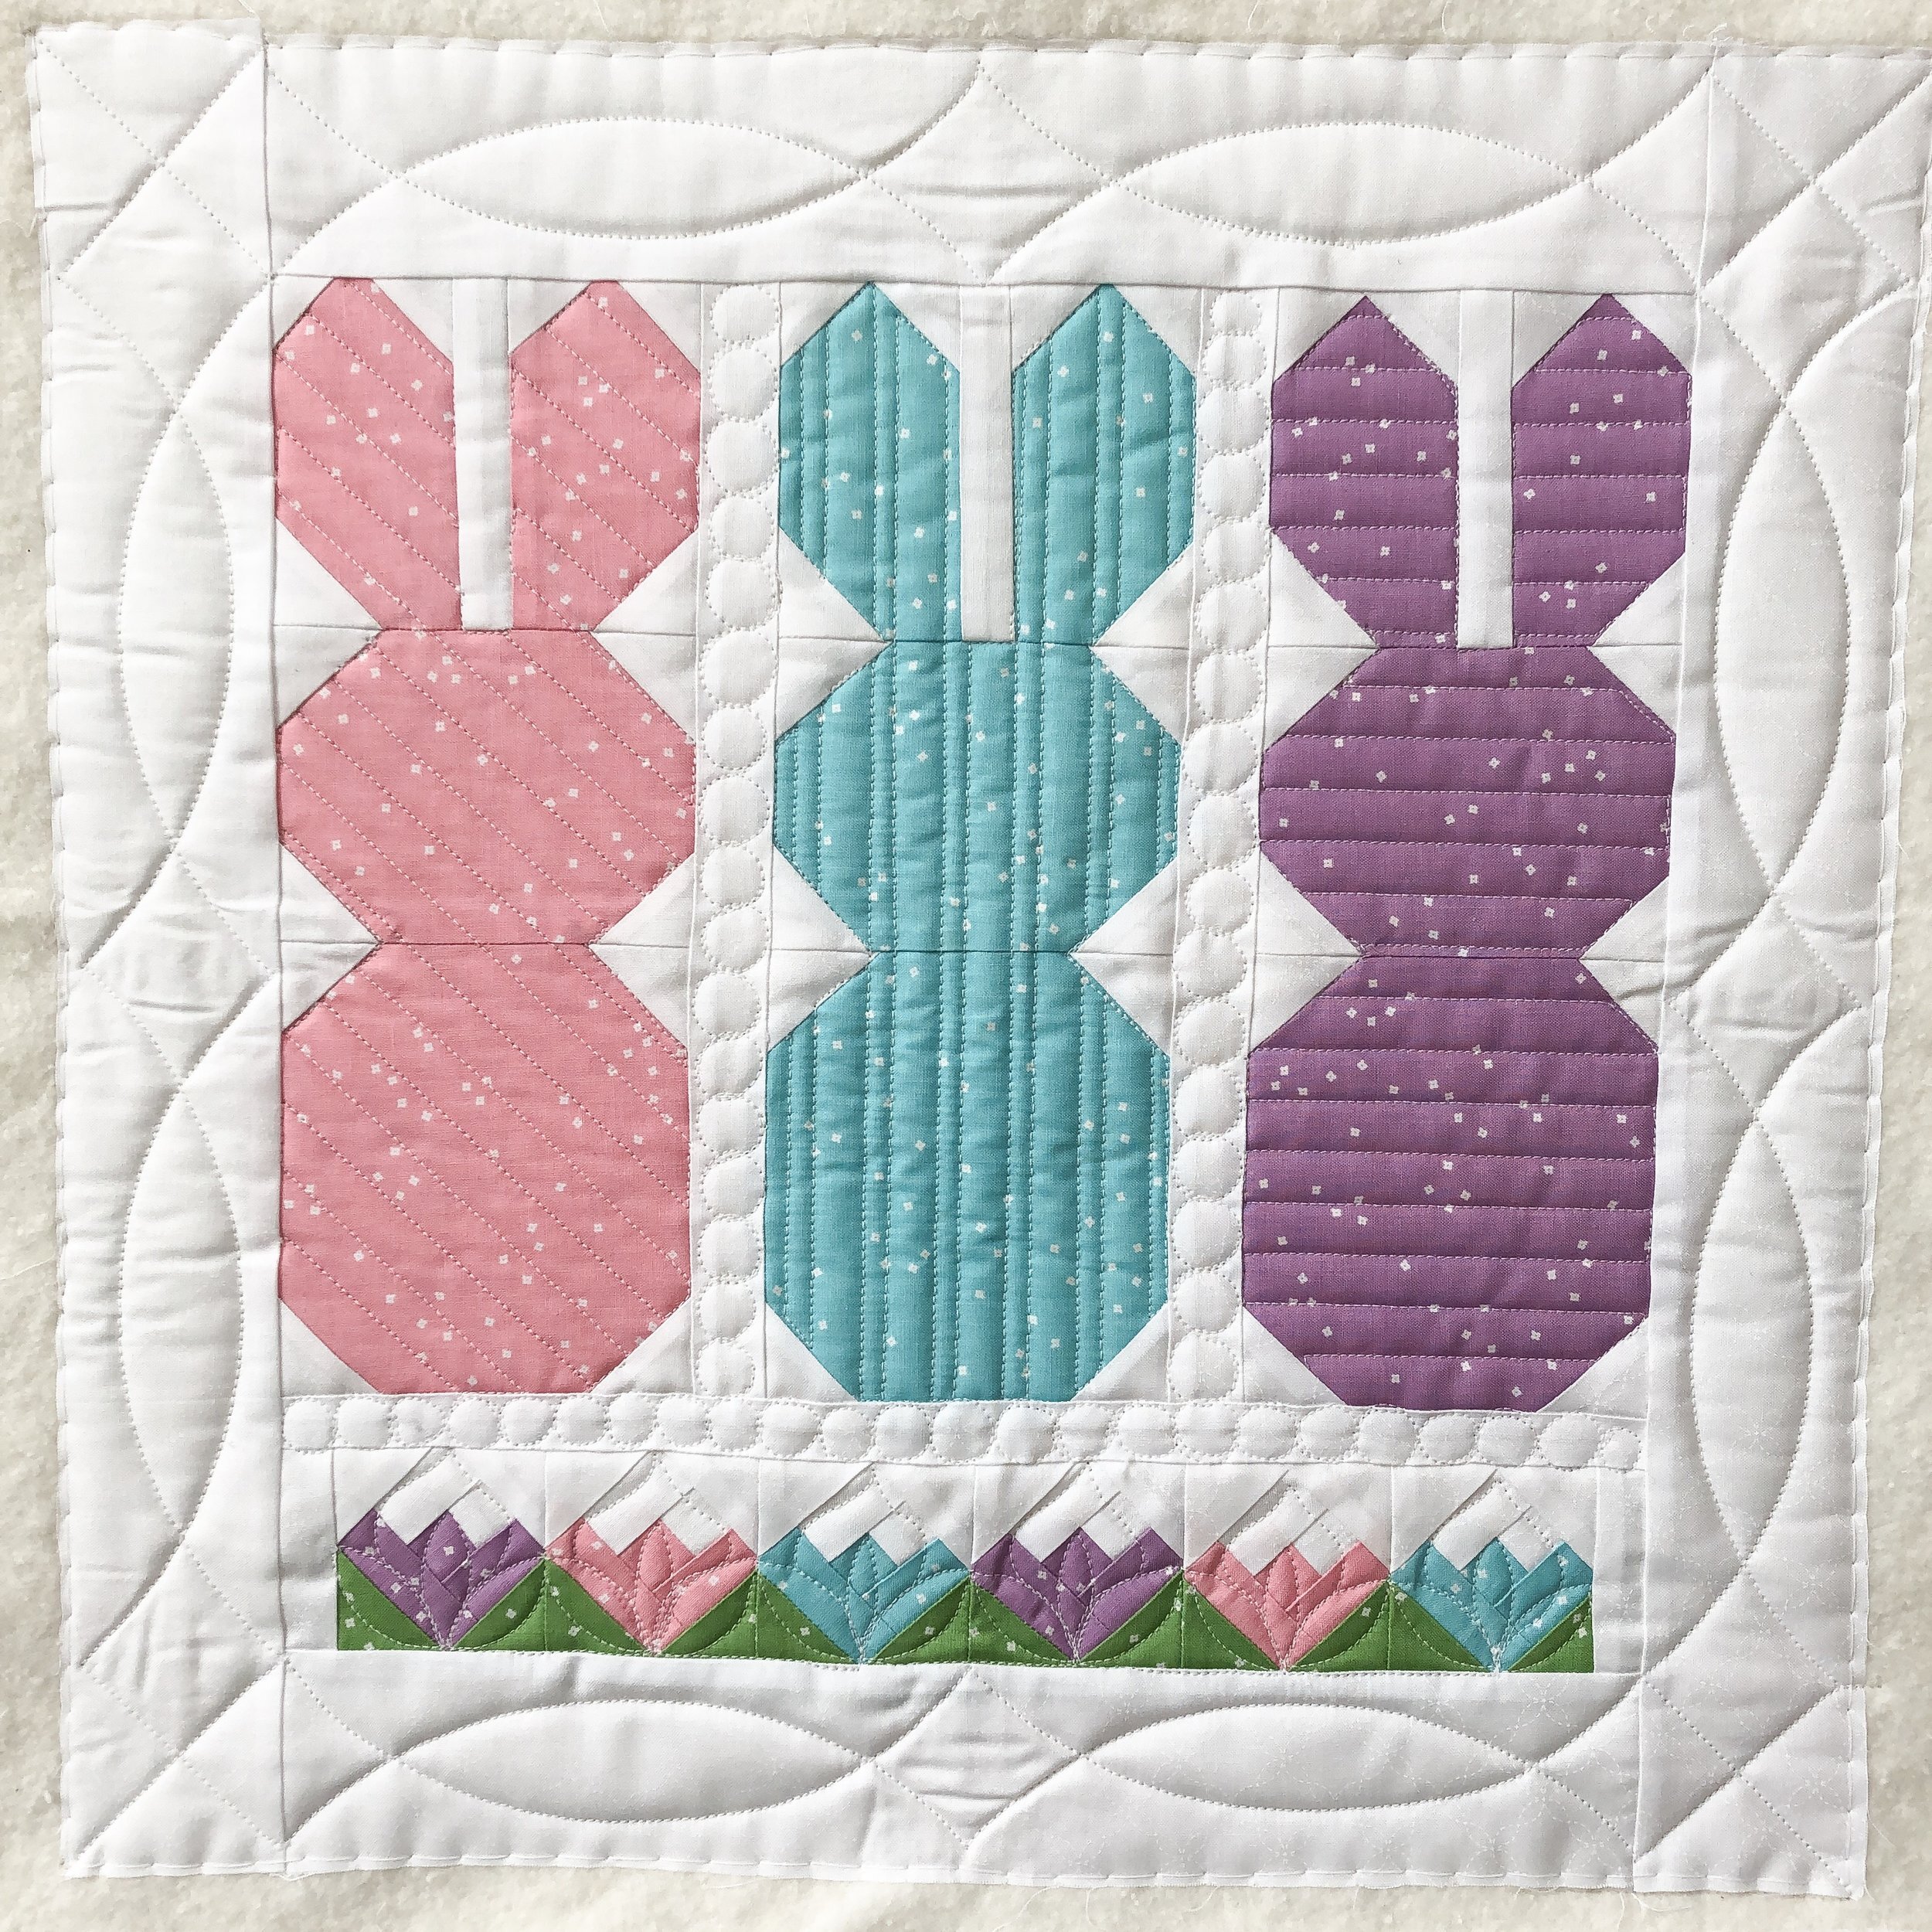
If you’ve followed along with my quilting for awhile, you may have noticed that I love to mix the curves with the hard lines. That’s what makes my quilty heart happy, and I think the combination is just beautiful.
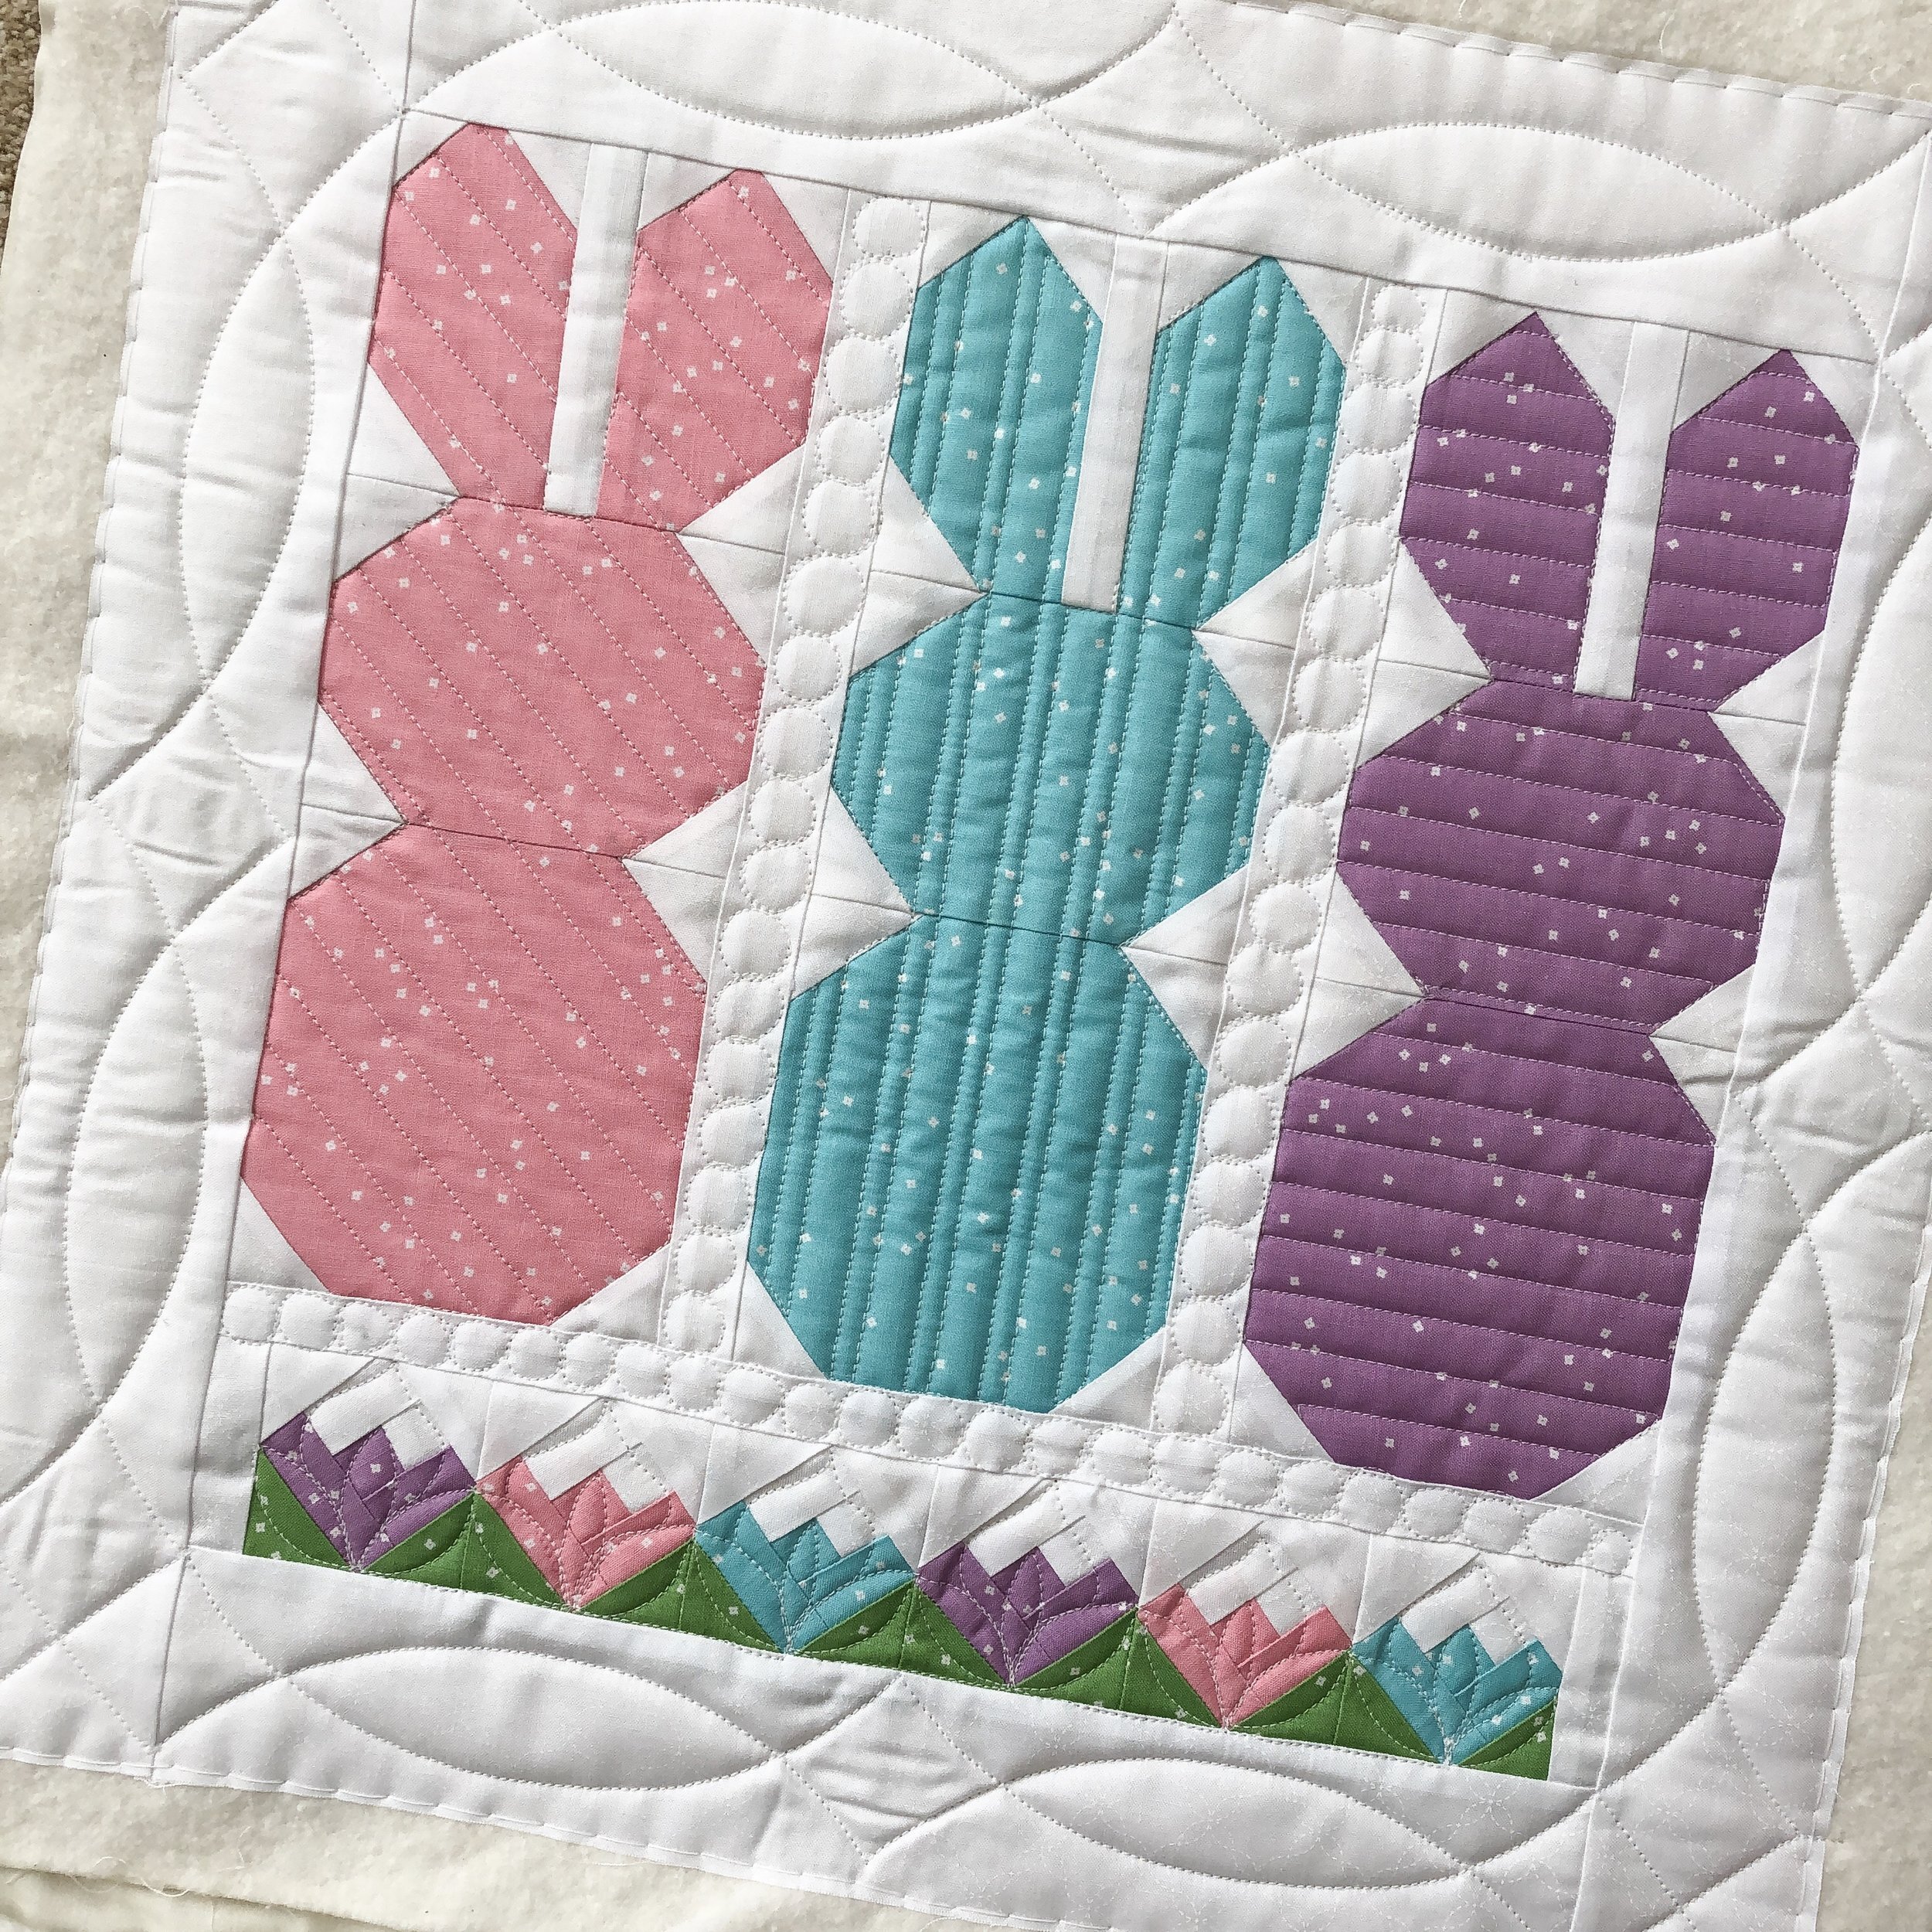
I used the Same white thread, and Edge ruler from Linda to get those lines. Angled, pinstripes, and horizontal...lines are a great way to quilt something that you are quite sure how to quilt.

My last of the 4 different rulers used in my Circle2™ set, is the 7” circle. It’s how I got those beautiful curves in the border. To figure out which ruler works best, I first divide up the border or sashing in 2 or 3 sections...then I try out a few rulers to see what is going to give me the best curve. I just hold the ruler up to the markings. You’ll see the curves cross, it creates that beautiful shape. I don’t want to be too close to the seams, but yet I want there to be a good space between the curves. If you’re interested in me doing a video on auditioning rulers for a design like this, let me know in the comments. My rulers are available here: https://www.quiltingit.com/shop?category=Rulers

I do want to point out, there are two sizes of circles in each of my Circle2™ rulers, which is why I named them Circle Squared.

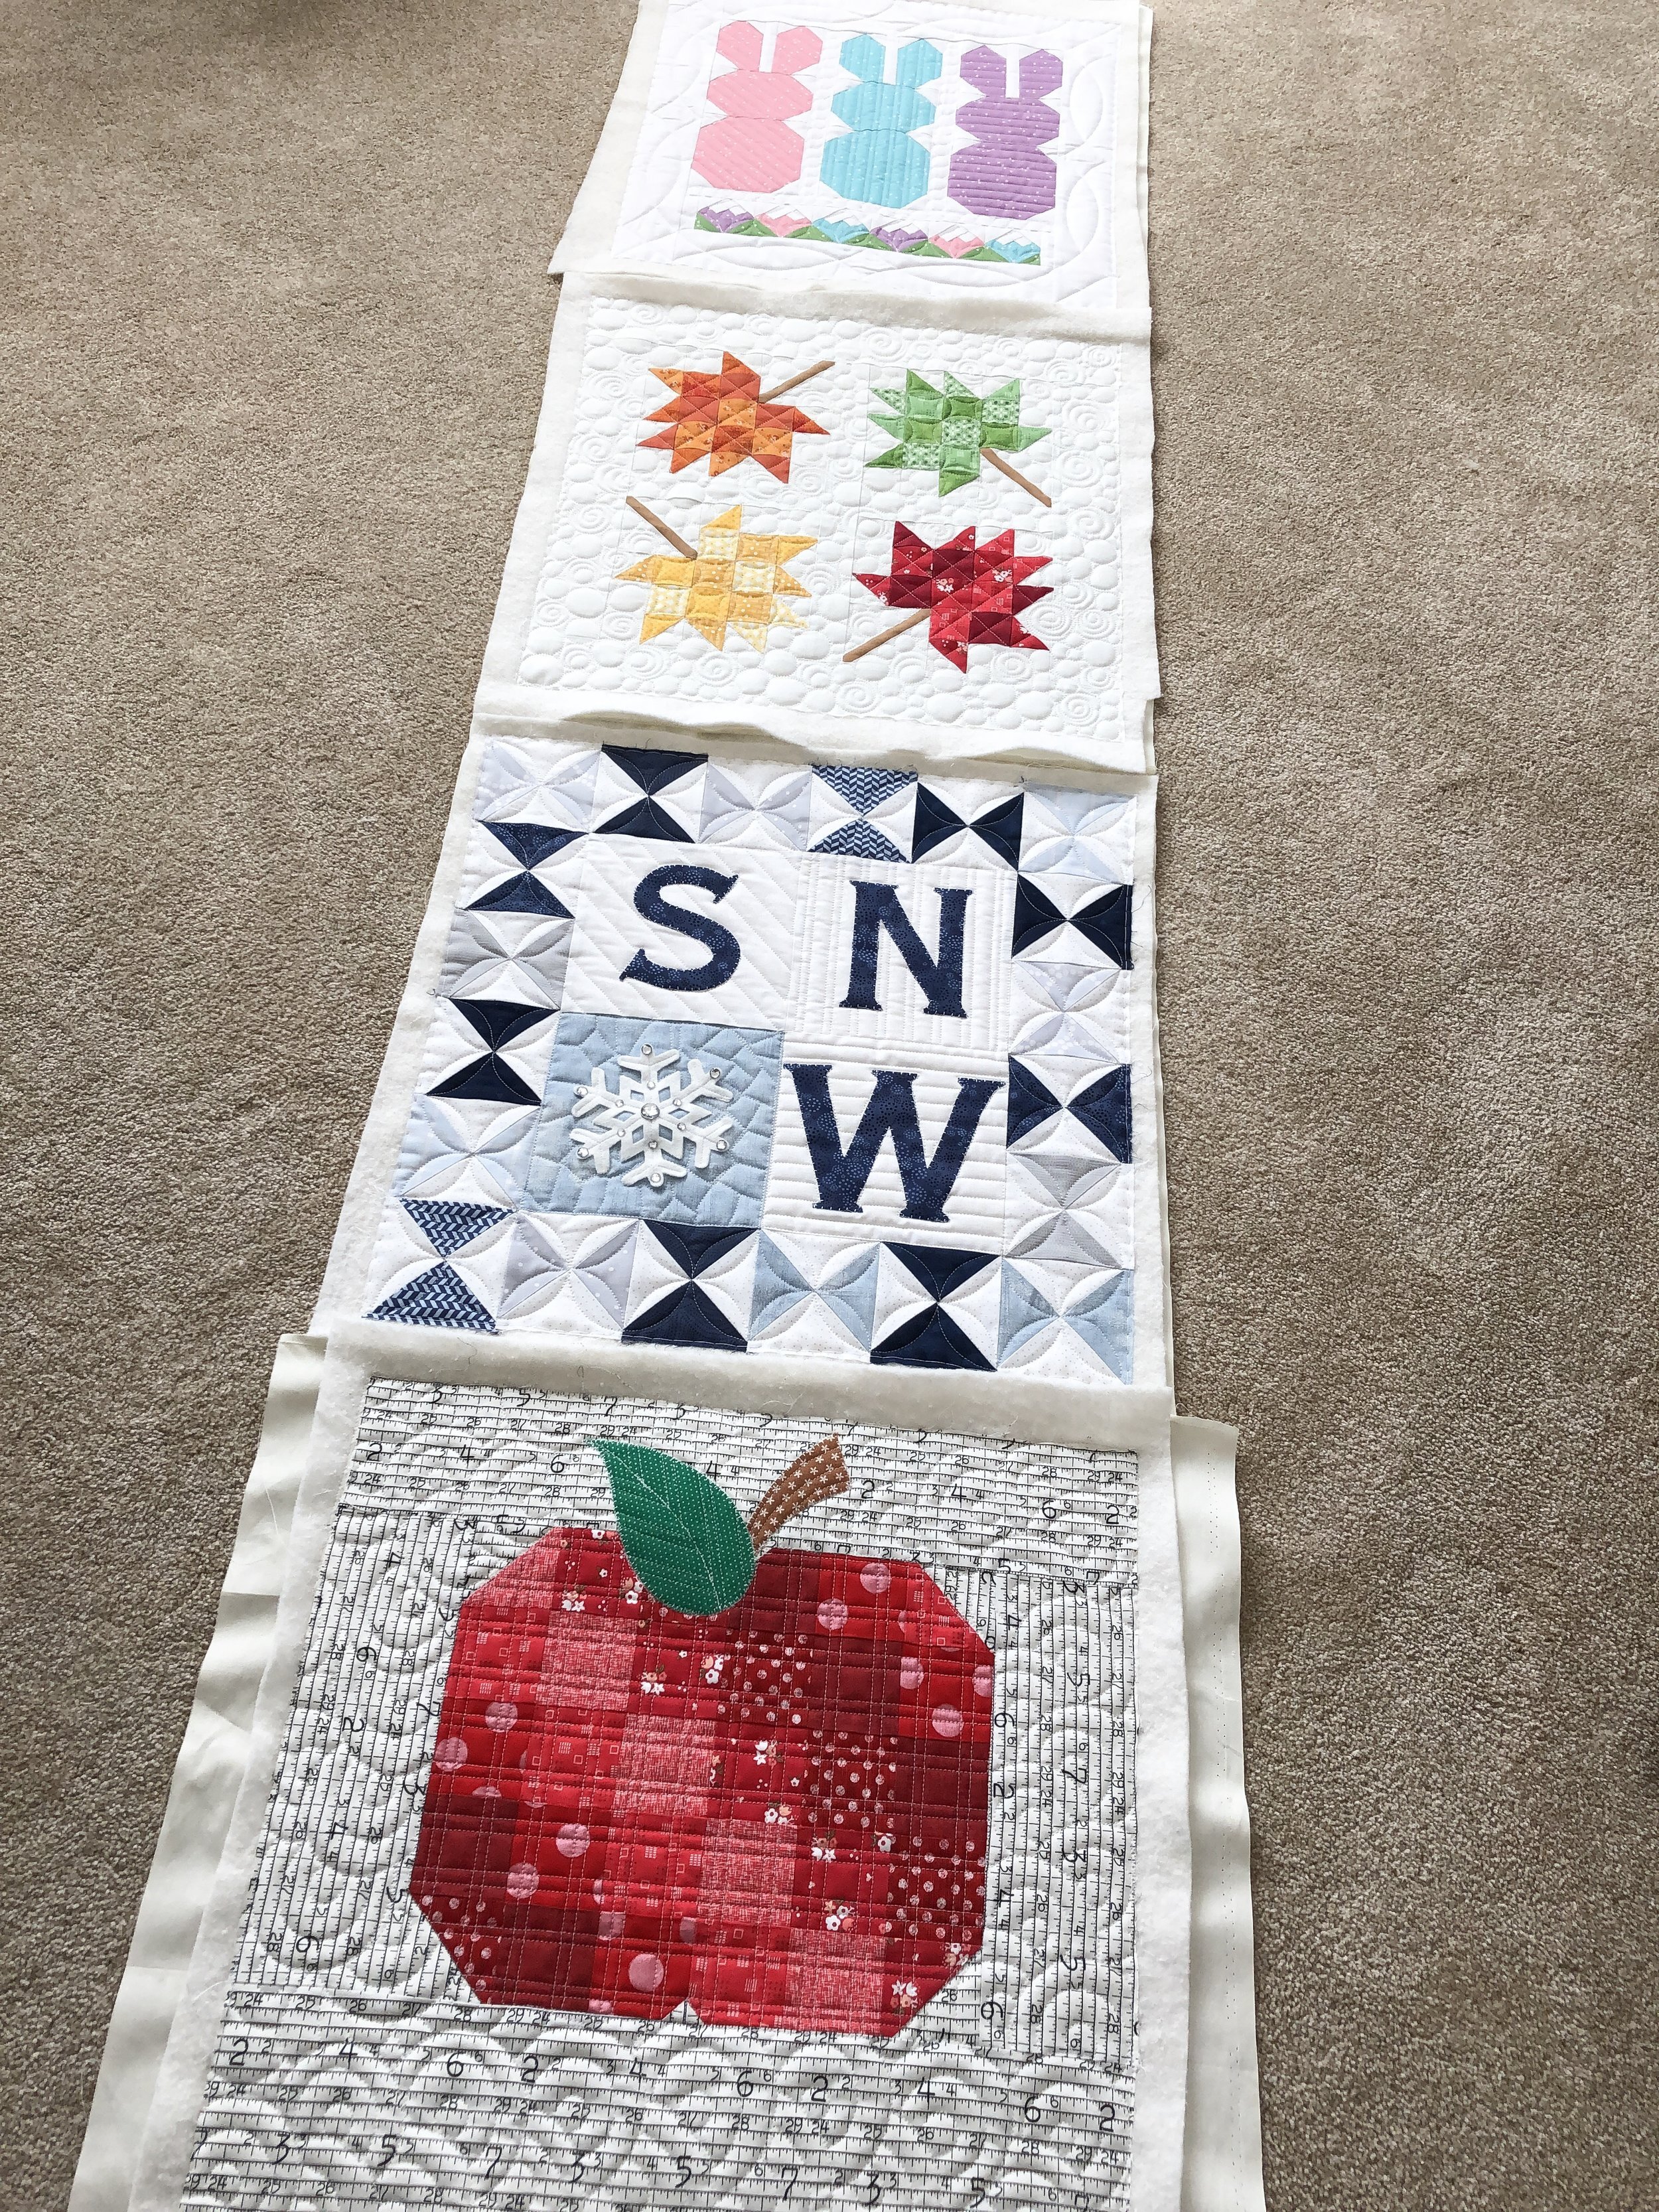
If I’m quilting several things the same size, then I like to sew the backings together. Pin on one backing, the best!! I quilt one, roll the backing ...baste on the next one, quilt...roll...repeat...until complete. Haha! Seriously though, so slick.
Here is a look at my set of clear rulers, for more info on these rulers go here: https://www.quiltingit.com/blog/2018/10/10/introducing-my-circle2-longarm-circle-ruler-set
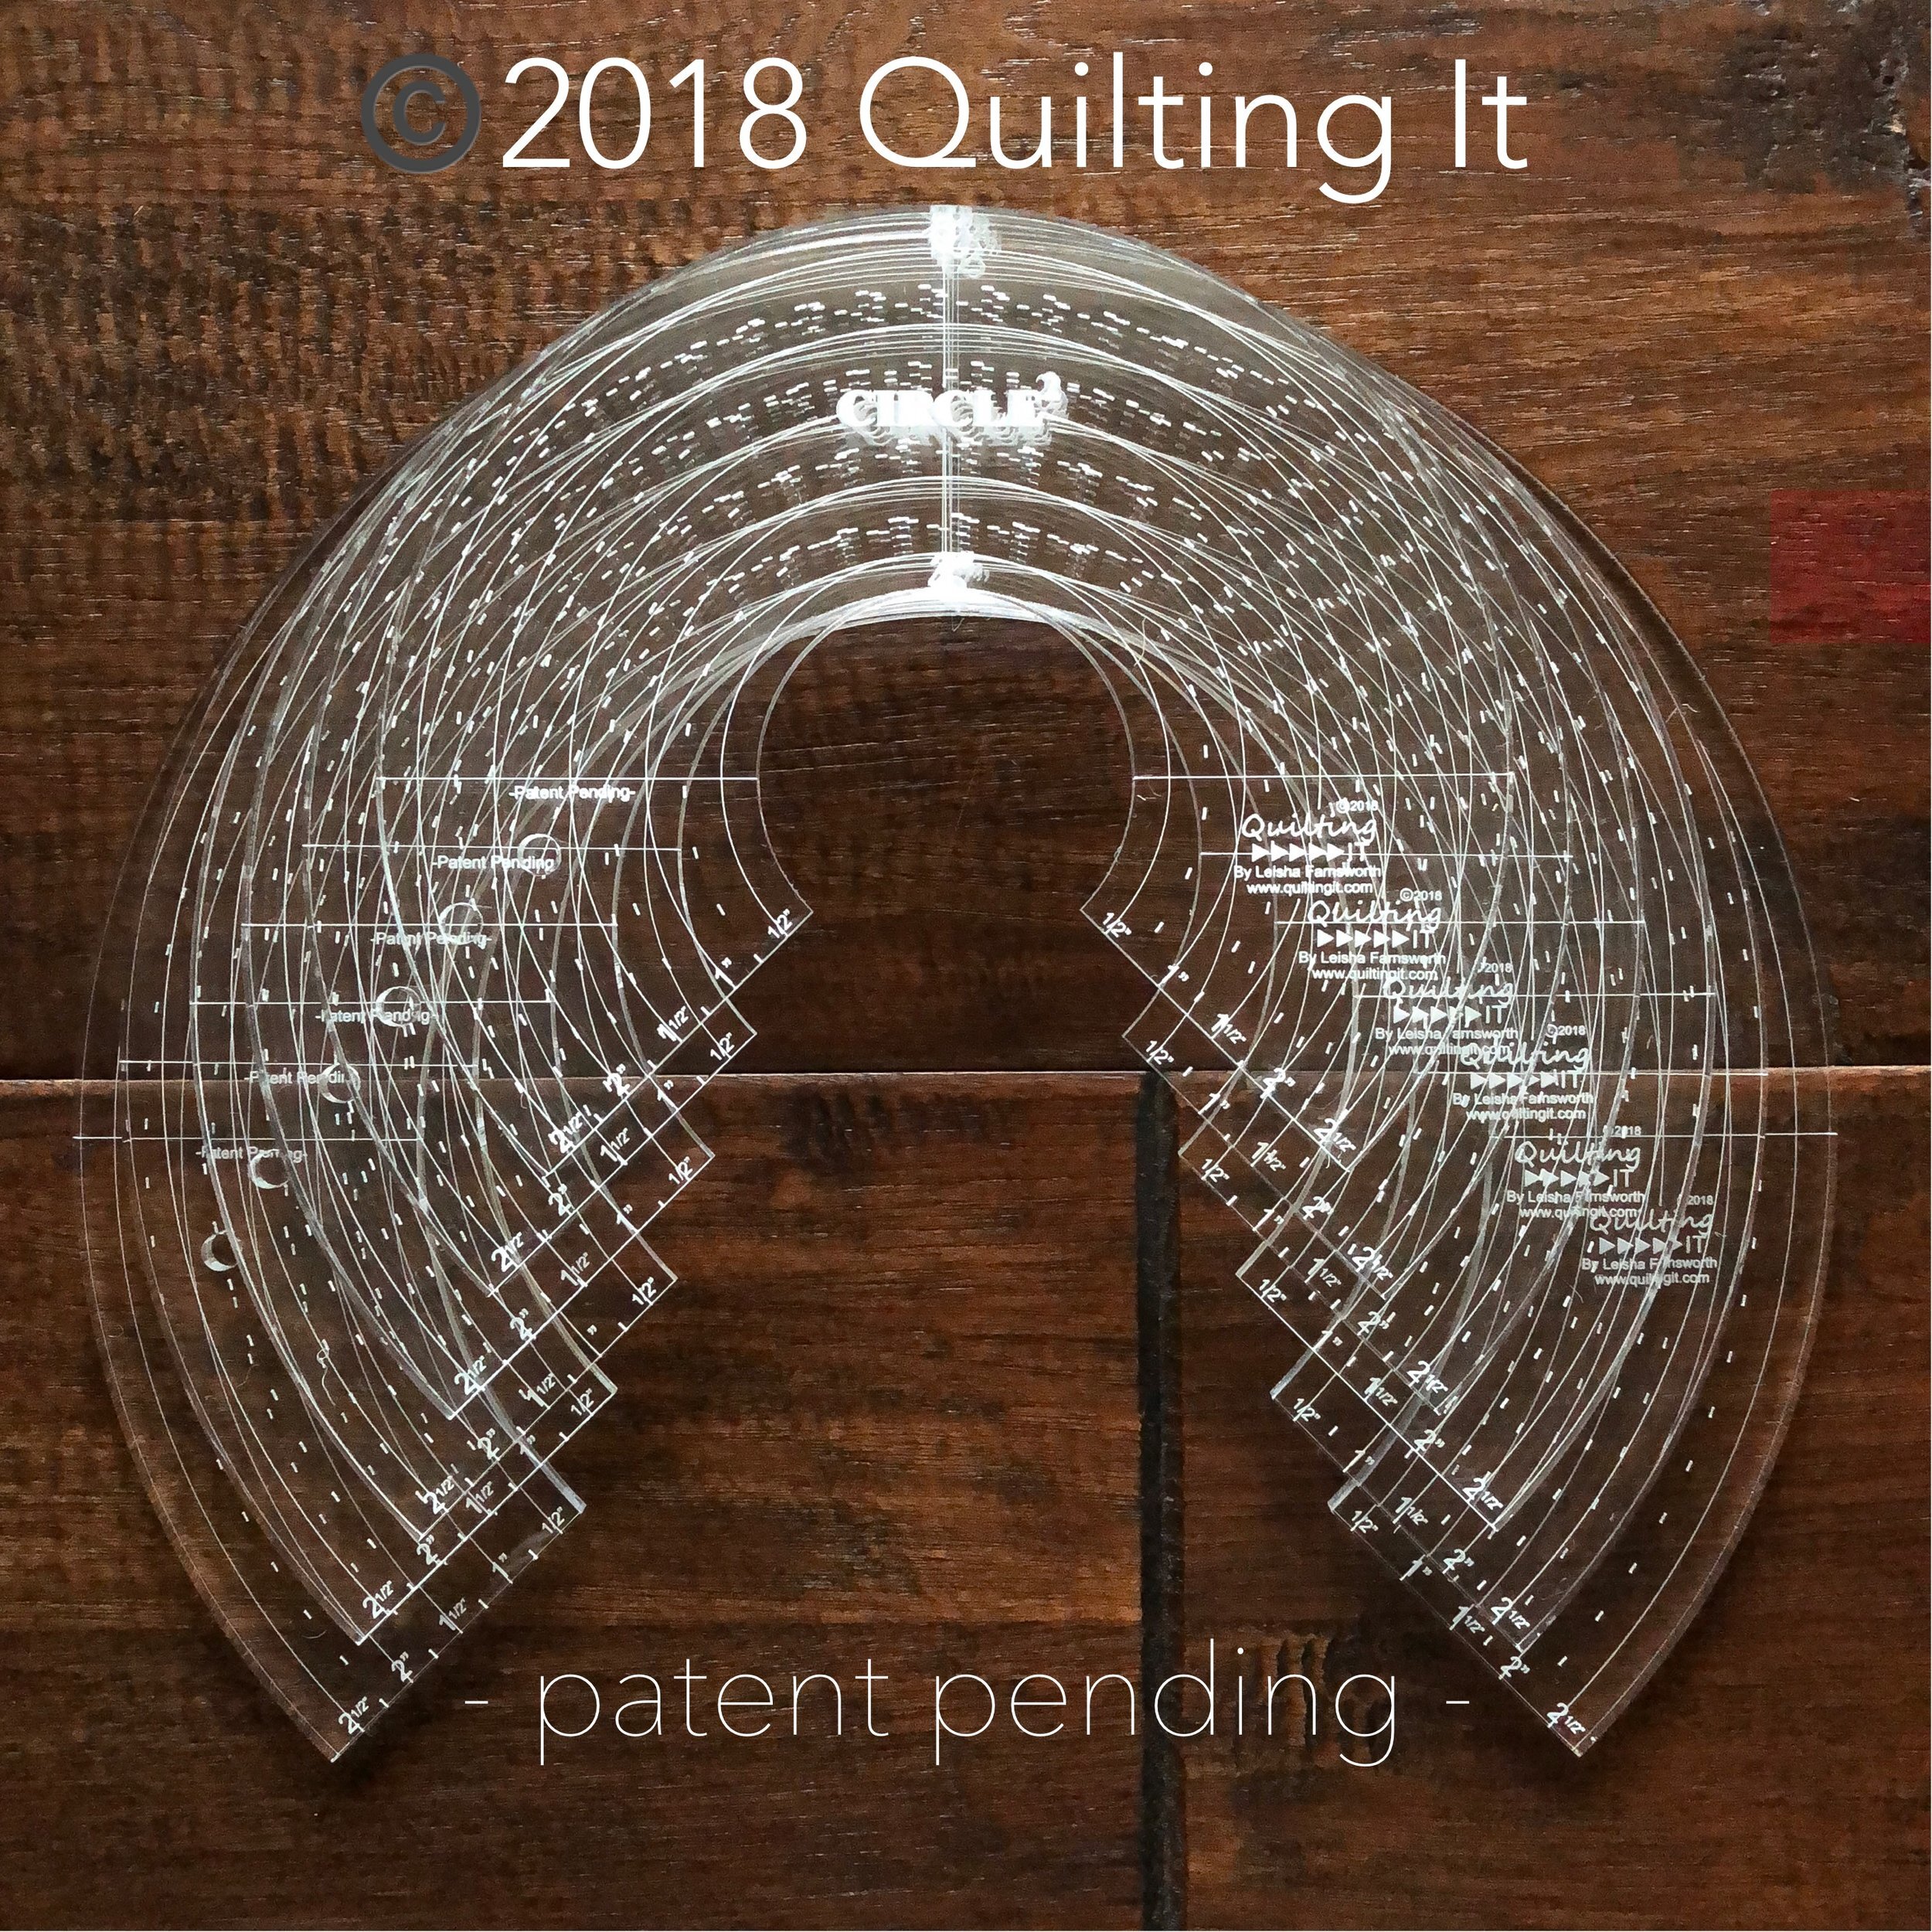
My rulers are available in green and clear, 1/4” high quality acrylic. Check them out here: https://www.quiltingit.com/shop?category=Rulers
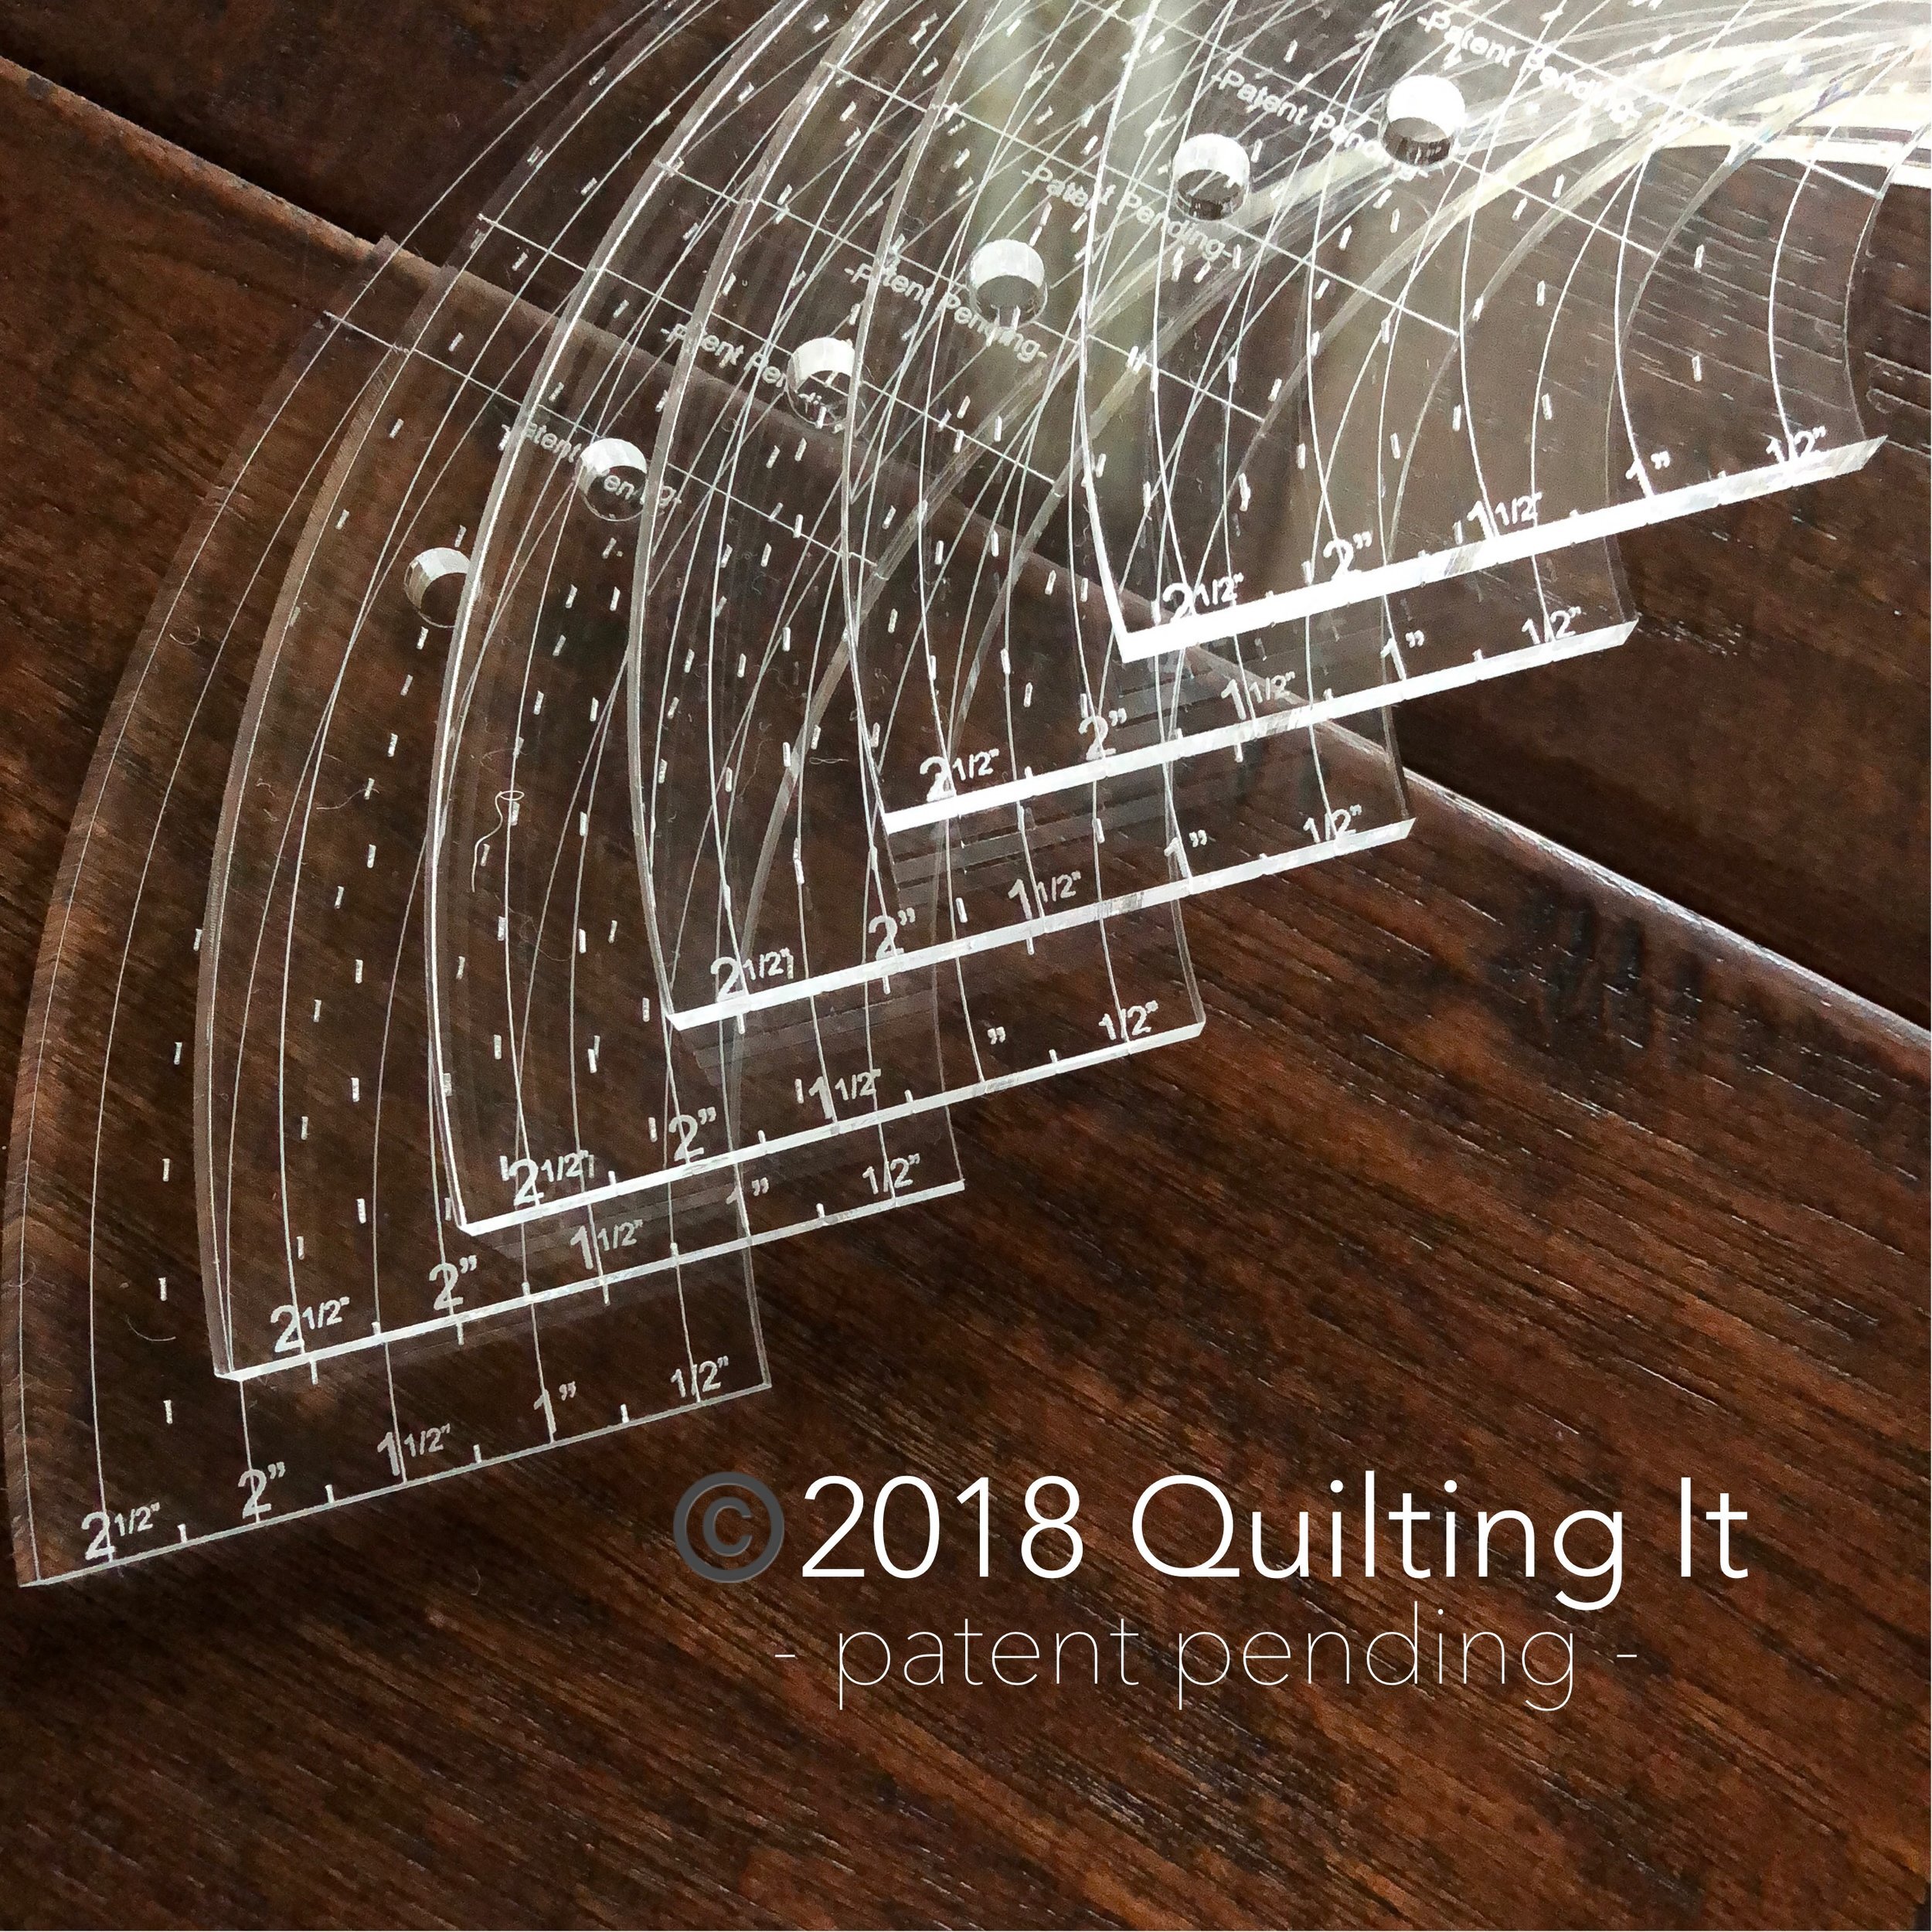
There are 1/2” measurements along the edges. Pictured below is the green set.

I mentioned these rulers quite a bit this post, because I wanted to share with you the need and versatility for each of the sizes in this set. If you’re a longarm or domestic machine quilter, this set will be a great asset to your quilting. You never know the size of curve that you’ll need. With 12 different sizes of circles, ranging from 2” to 13”, the possibilities are endless. If you kept track, then you know I used the 2”, 3”, 4”, and 7” circles. I get asked a lot about the difference between the clear and green, the only difference is the color. The green set is a little easier to see the lines on the ruler, when quilting on lighter fabrics. If you’re used to using clear ruler, the clear set may be a great option for you. Please let me know if you have any questions.
Thanks for following along. Have a great week! - Leisha